Lightning Fast Animation in Element 3D (2014)
Chapter 5. Preparing Your Scene
Now that you've learned how to model for Element and get the objects into Element 3D, let's start setting things up. This chapter is the precursor to animating with Element. Here, you will learn how to set up your scene, light it, and get a camera ready.
Element scenes in After Effects
Element 3D scenes, unfortunately, are currently limited to five object groups. An object group is a collection of geometrical objects that is animated together. Under some circumstances, you may have multiple objects in a group, but not in this example. As a result, much of this chapter is devoted to tricks to overcome the limitations in Element 3D.
We're going to cover the following topics:
· Saving your objects to your library so that they may be used in other instances of the Element plugin
· Setting up your objects in the After Effects interface and generating null objects to animate them easily
· Setting up your camera and lights in the scene and creating a new null object to create a focal point for the depth of field
Let's get started!
Saving your objects
First things first:
1. Let's create a folder in your Model Browser window.
2. Navigate to your default objects directory for Element 3D (Documents/VideoCopilot/Models).
3. Create a folder called BookModels inside that directory.
4. Now, open your AEX project and go into the Scene Setup window in Element 3D.
Your folder won't show up in the Model Browser (because there are no objects in that folder just yet). Let's save the lampshade glass to the presets now. The following screenshot shows the interface for saving your objects:
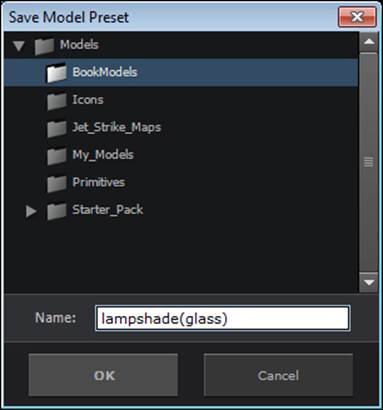
5. Right-click on the lampshade glass object and select Save Model Preset. Now, you will see the directory we created. Unfortunately, there is no way to create a new folder from within this window yet. (Hence the need to navigate to the directory using your Windows Explorer (or Finder on Mac) to create the directory first.) Save all of your objects to this directory. Save them as shown in the following list:
· lampshade(glass)
· Lamp(base)
· Table
· WineBottle
· PepperShaker
· SaltShaker
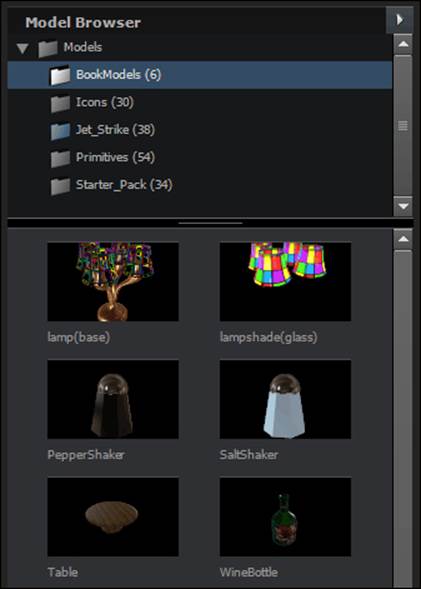
Note that we created a pepper shaker (in addition to our salt shaker). This was done by saving the salt shaker, then changing the texture do something darker, and saving it again as a pepper shaker. This can be great help when creating slight variants in your objects. The following screenshot shows how your Model Browser window should look:
Preparing our scene
Now that we have all our objects saved as presets, we can start populating our scene. Start off by deleting all your objects from the scene (click on the small X on the right side of the object bar in the Scene window). Don't worry. This is why we set them up as presets. Now we can bring them back in the right order.
Setting up the lamp
Let's start with the lamp. We'll be putting the lamp back in its lampshade and adding bulbs to the sockets. To do this, let's execute the following steps:
1. In your Model Browser window, click on your lamp, then your lampshade, navigate to your starter pack, and click on bulb_on.
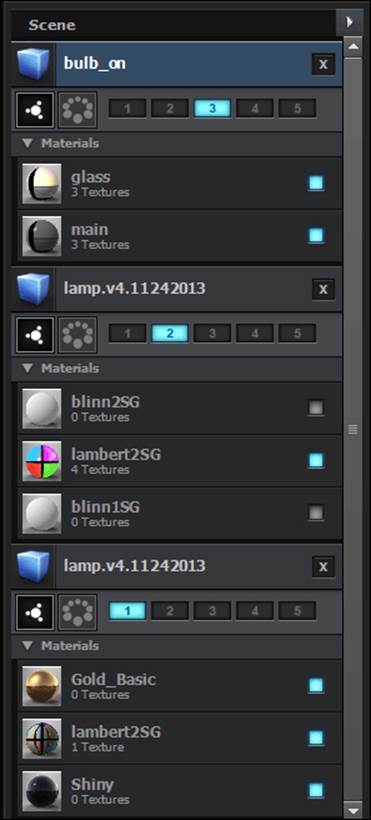
2. Then in your Scene window, put the lamp in group 1, the shade in group 2, and the bulbs in group 3, as shown in the following screenshot:
But wait. There's more! We have one bulb for four light sockets (it's a pretty huge bulb). That's okay! Element 3D wasn't really designed as a full 3D animation package. This is probably why it still has some of the limitations it does. Instead, it was designed as a way to use 3D objects as particles and replicate them in interesting ways. We'll get more into these features in the advanced sections, but it's time to get your feet wet by replicating the bulbs.
Replicating the bulbs
The shade and lamp should appear perfectly together (as if they were modeled together). The bulb is a stock asset of Element 3D, so it must be adjusted using the following steps:
1. First, let's create a camera (so that we can accurately look around). Create a camera layer called Camera 1 using the stock's 50 mm preset. Remember, you can move your camera around using the camera tool (press C on your keyboard, then the mouse buttons will let you move your view around).
2. Position your camera over the lamp so that we can see through the lampshades.
3. Now, open the effect controls again for the ElementWineAndLamp layer. We don't need to touch anything in group 1 or 2 (that is, our lampshade and lamp).
4. Since we created a symmetrical lamp, all we need to do is position one bulb and replicate it (like an array).
Positioning and replicating an object
Open Group 3 and then the Particle Replicator option.
If we set the replicator shape to a plane, we will be able to replicate them all symmetrically on a plane. Pretty self explanatory, right? Let's set that first, as setting it later will change the coordinate system for our object, and as a result, it will look like it rests.
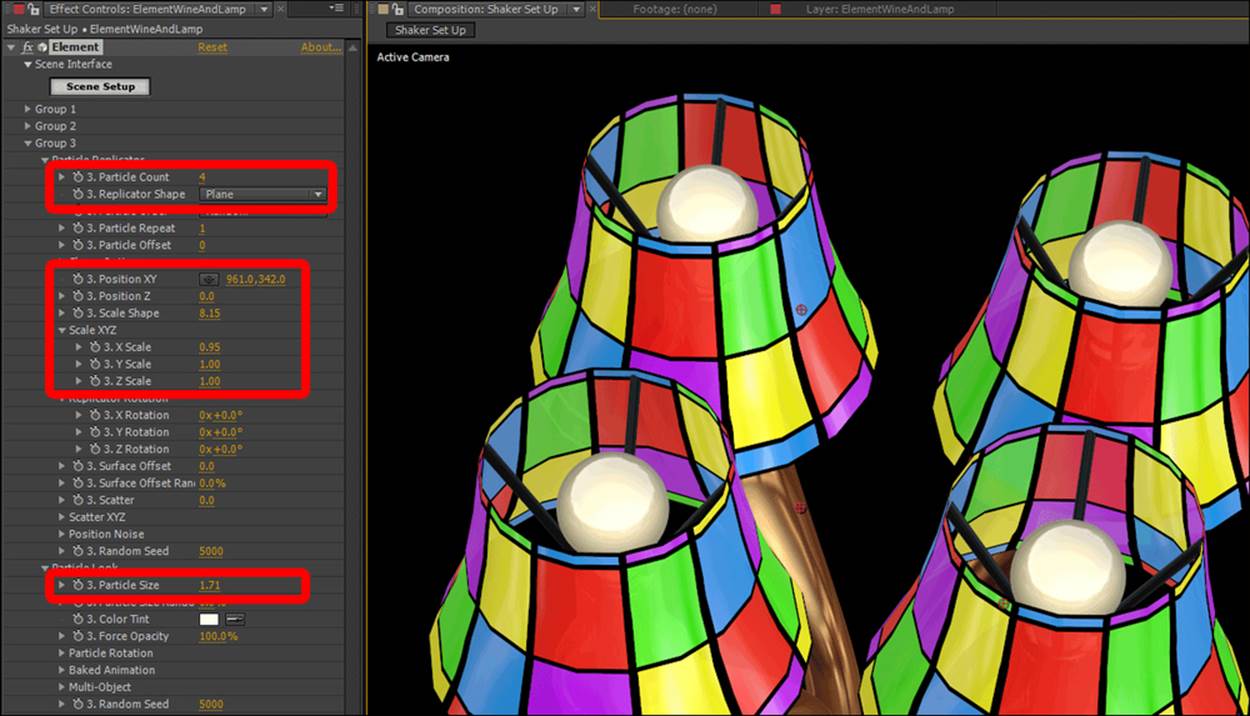
Down the list, a little away from the Replicator Shape parameter are our Position XY, Position Z, and Scale Shape parameters. Mess with these to get your bulb directly in one of the bulb sockets. Then, you can turn the Particle Count parameter up to 4, and you'll end up with four bulbs positioned directly in the sockets.
If they're not lined up, you're not out of luck! Directly under the Scale Shape parameter is Scale XYZ. It's important to note that Scale XYZ does not scale the object. Instead, it scales the replicator shape. There is no way in Element 3D to scale objects on their individual axis as of yet. Just remember, Scale Shape scales the geometry and Scale XYZ scales the replicator. You can also use the Particle Size parameter inside Particle Look to adjust object sizes.
If you used your own lamp for this exercise, play around; you'll get it. If you downloaded the sample lamp, this screenshot shows the correct settings to get the bulbs into place. Don't worry if they're not exact. They aren't the hero objects in this animation. They're just there in case we see them either through the lampshades, or catch a glimpse. The result and setting should look similar to what is shown in the following screenshot:
Lighting the lamp
Luckily, lighting our scene is relatively easy, there's a lamp! Let's create an ambient light first. If our scene is going to be believable, we're going to need a blue light for ambient lighting. Create a new light with the type as Ambient, a light blue color, and an intensity of10 %. Why so low? We want dramatic lighting in this scene. We'll keep the details without losing contrast with a very low ambient light. Call this light Ambient Light. The settings should look similar to what is shown in the following screenshot:
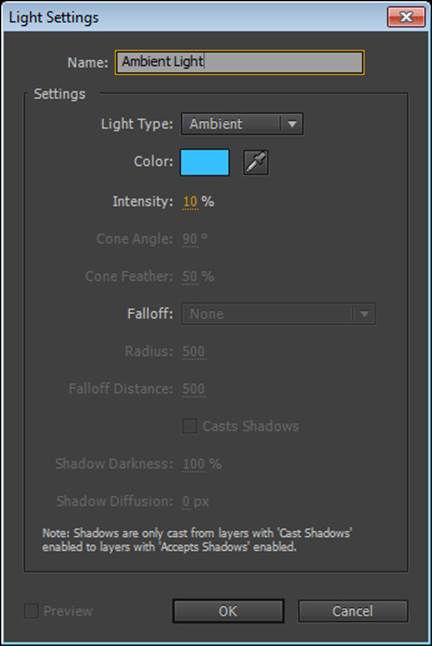
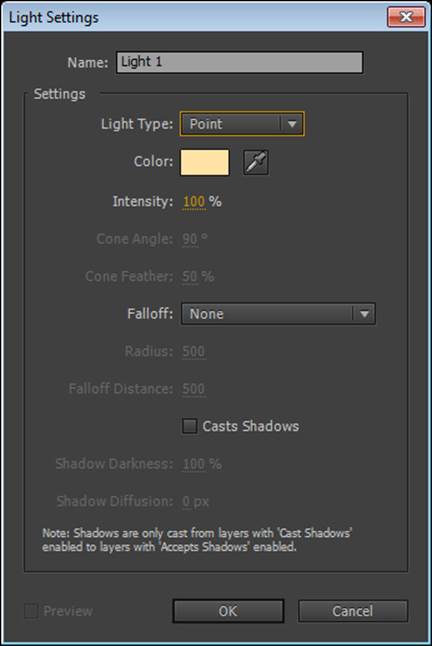
So, why did we make it blue? Well, for a lamp to be on, it's probably night. If you look at any film footage, night is really denoted by shades of blue. Therefore, the light of night is blue. The same reason our lamp bulbs will have a bit of orangey-yellow to them. They're incandescent bulbs, which have a very warm look (also called color temperature). If you're going to be an animation god, you have to pay attention to everything around you: timings, lighting, and colors (actual colors and not just perceived colors). With all this in mind, let's create our first (of four) bulb lights by performing the following steps:
1. Create a point light that is slightly orangey-yellow (be subtle) with an intensity of 100 percent. Don't worry just yet about any shadows or falloffs. These will actually be controlled within Element 3D. Name this light Light 1. The settings should look similar to what is shown in the following screenshot:
2. Now, position this light directly on your first light bulb. Make sure you rotate your camera to ensure that it's placed properly.
3. Once that's done, you can simply duplicate the light (Ctrl + D) and position the next on another bulb, either on the x or the z axis, and eventually have four lights (one on each bulb) in addition to your ambient light.
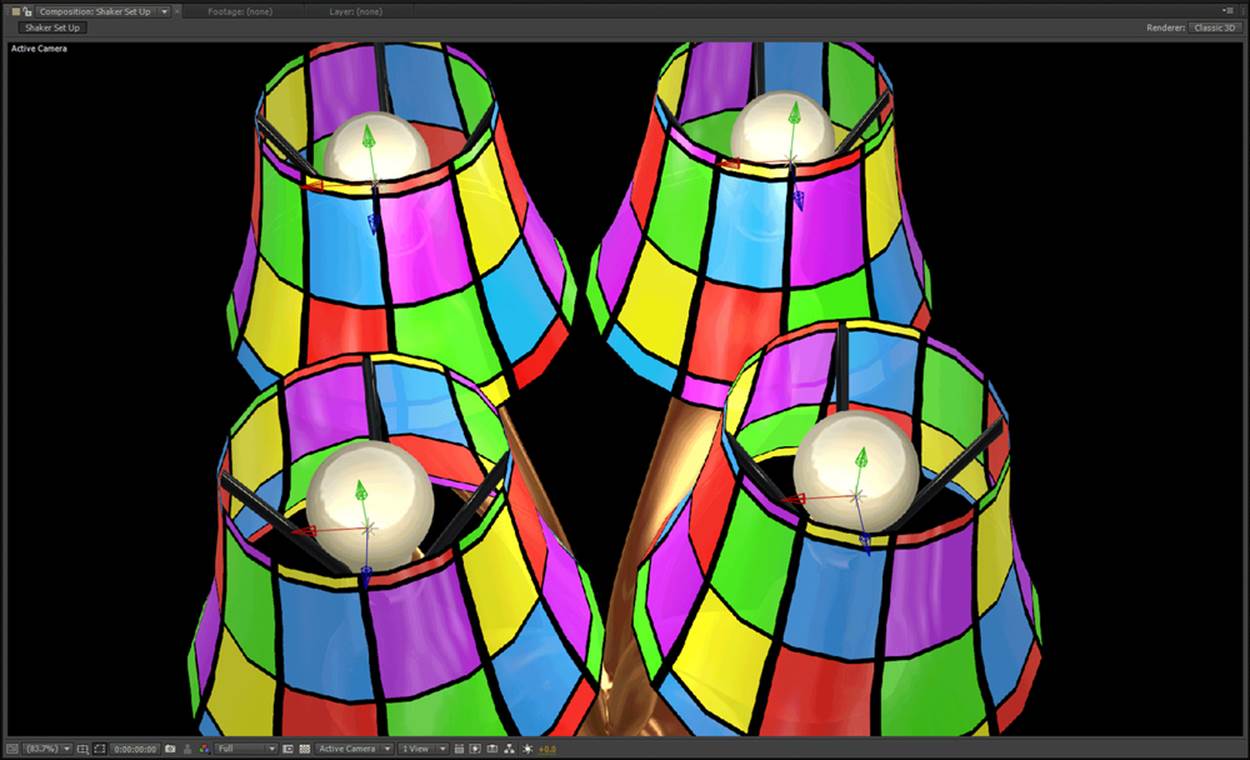
The result should look like the following screenshot. Remember, lighting is the key to stunning looks. Always take the time to light your scenes well. The following screenshot shows the location of the lights directly on the bulbs:
We'll finalize our lighting's falloff and the illusion of shadows in a bit. For now, let's move on.
Adding the table and wine bottle
Obviously, we're not going to be able to add the wine bottle, salt and pepper shakers, and the table to one layer of Element in AEX. Hence, we have the naming convention calling out the lamp and the bottle. We're going to break up our other objects across other layers within AEX. We'll get to that, but don't worry, there's a trick to do this. First, let's set up this layer.
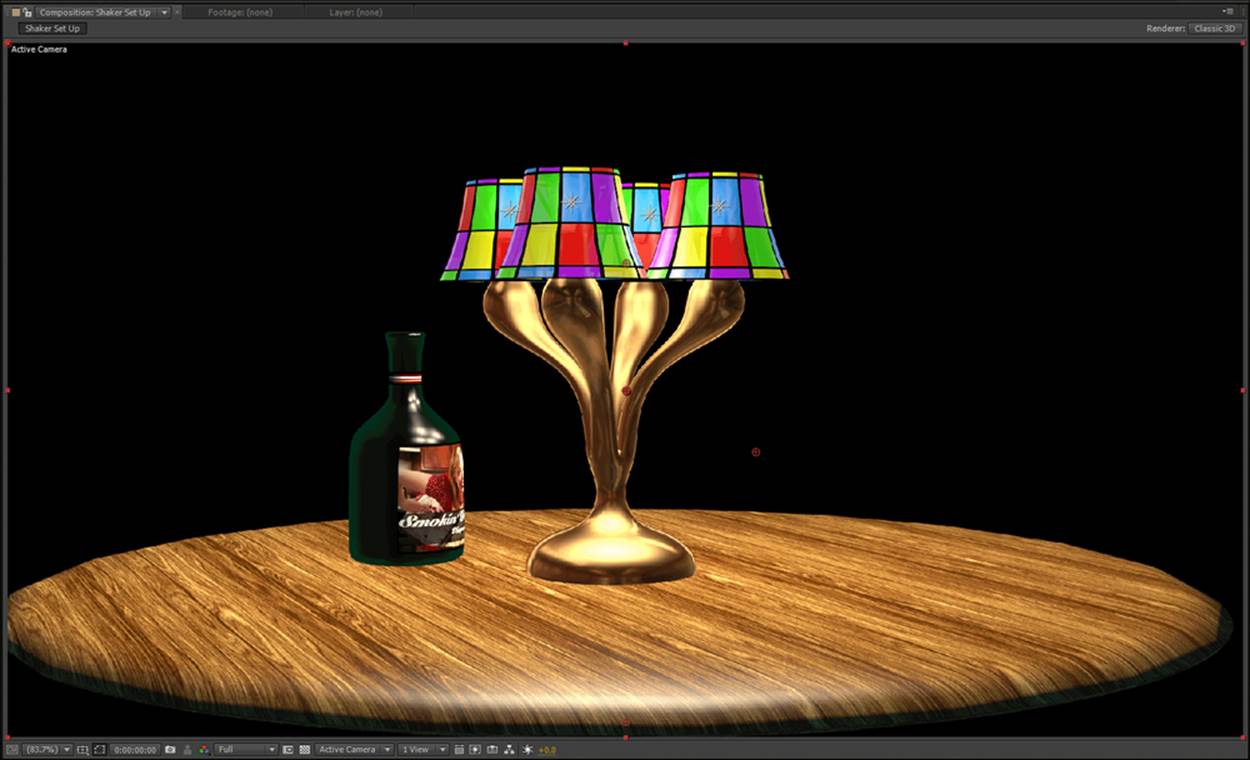
Place the table and move it (and scale it) using the techniques you already learned for positioning the first lamp. Position this table under the lamp. Do not move the lamp. Then, do the same with the wine bottle, placing it on top of the table. Use group 4 for the table and group 5 for the bottle. So far, your scene should look similar to what is shown in the following screenshot:
Finishing the initial setup
Now we have all of the five groups used up, but before we can add more objects (in other layers), we want to finalize our render settings (so we don't have to remember them and keep adjusting more Element layers). This will make all our layers look the same for rendering and give the illusion they were all on the same layer.
Faking shadows
Again, there is no ray tracing in Element 3D, and because the lights are native to AEX and they only project shadows on objects, AEX can see for itself that using AEX's shadow engine isn't an option. So we have to fake them. This can be done with something called ambient occlusion (AO).
When the light goes into a corner, it has a hard time bouncing out again. This means that by nature, corners are darker than non-corners. This principal is called ambient occlusion. Element 3D does have this feature. So, by turning the AO way up, we can fake shadows. Some surfaces receive shadows better than others, so we'll have to play around a bit.
1. Start by going into your E3D effect controls.
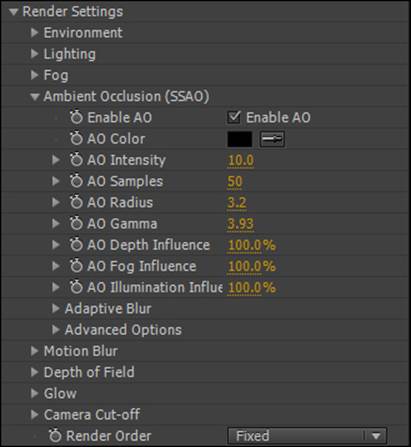
2. Under Render Settings, you'll see Ambient Occlusion. Tick the Enable AO checkbox.
3. Also, turn the intensity up to 10 and crank up the samples to 50. The sample amount is simple: the larger the number, the smoother the AO. However, the smoother the AO, the longer the render time.
4. Crank up the AO Radius option to 3.2 and the AO Gamma option to 3.2. Watch what happens on your Preview window while you do this. Your settings should look similar to what is shown in the following screenshot:
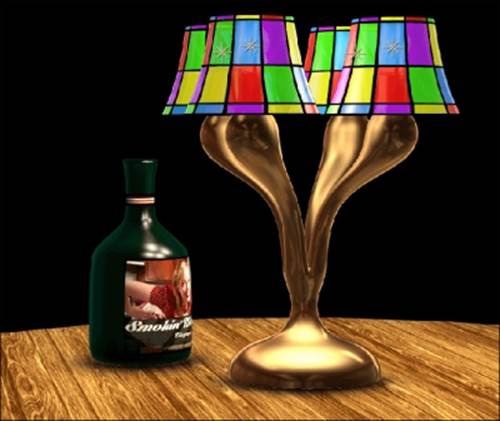
Metals don't receive shadows very well, so let's go turn it down on the gold. Go back into your scene settings, and on the gold shader (down in the advanced section), turn down your AO Amount option to 0.42. The final result should look similar to what is shown in the following screenshot:
Light falloff
When a candle is very bright at its flame but against a far wall, the wall is lit dimly. This effect is true with light bulbs as well. This principle is called Light Falloff. To add some realism and dramatic lighting to our scene, let's adjust this setting.
Inside Render Settings in the Element effect controls, you'll see Lighting. Turn the Light Falloff setting up to 2.49. The larger this number, the more severe the falloff. The result should look similar to what is shown in the following screenshot:

The shakers
Now that we have all of our Environment settings, let's get the shakers in there and prepare the camera by executing the following steps:
1. First, duplicate your Element layer (Ctrl + D) and rename the new layer ElementShakers.
2. Now, go into your Scene setup and remove everything except for the table (leave the table in group 4).
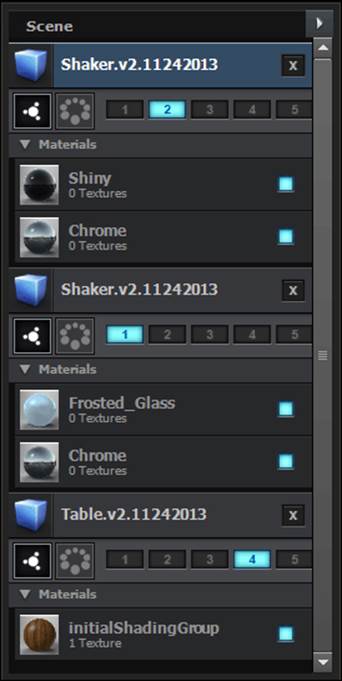
3. Load your salt shaker to group 1 and your pepper shaker to group 2. Your Scene setup should look similar to the following screenshot:
4. Go back to your effect controls. I know now that the wine bottle and lamp look like they're under the table. Don't worry, we'll fix that in a bit. First, all of the settings are still set for the lamp and shades in group 1 and 2. We need to reset these.
5. At the bottom of group 1 and 2 are the Group Utilities settings. Open Copy/Paste Group. This setting doesn't copy objects. It copies the group settings or resets them. Reset the settings for group 1. Then, using what you learned earlier, position and scale the salt shaker on the table.
6. Now, copy the group settings from group 1, and in the settings for group 2, paste the copied settings. You can just move the pepper shaker a little and have it in the right spot. The result so far should look similar to what is shown in the following screenshot:
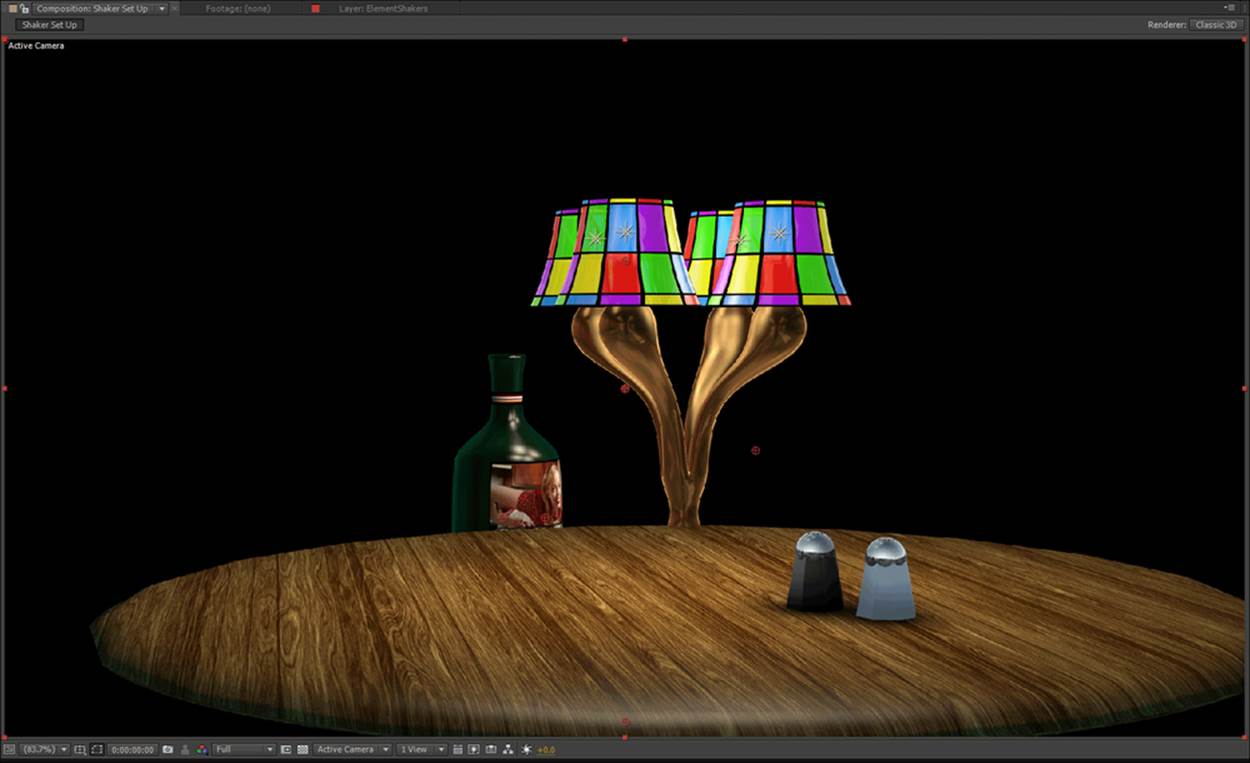
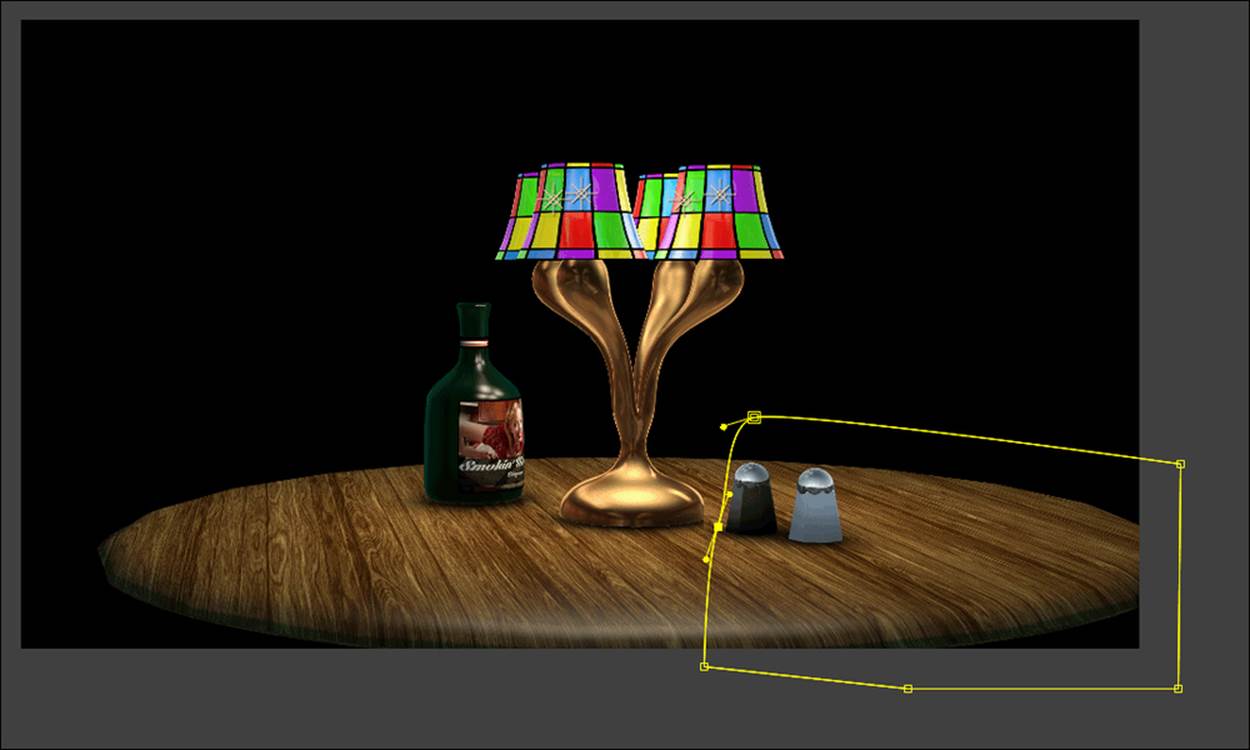
Mask it off
Draw a mask around the area that needs to be visible of the ElementShakers layer, leaving the area of the lamp and bottle out of the mask. It should look similar to what is shown in the following screenshot:
Final touches
We just need an easy way to control our camera, some depth of field, and an easy way to control our objects. Welcome to the wonderful world of null objects!
Adding a camera and controls
First, create a null object and call it focus. This will be our camera's point of interest and the control for our depth of field. Open the Transform and Camera Settings sections of your camera layer. Add an expression to Point of Interest and Focus Distanceproperties, and pin the point of interest to the position of the focus null.
Now, enter the following code into the expression for Depth of Field:
Length(position,thisComp.layer("focus").position)
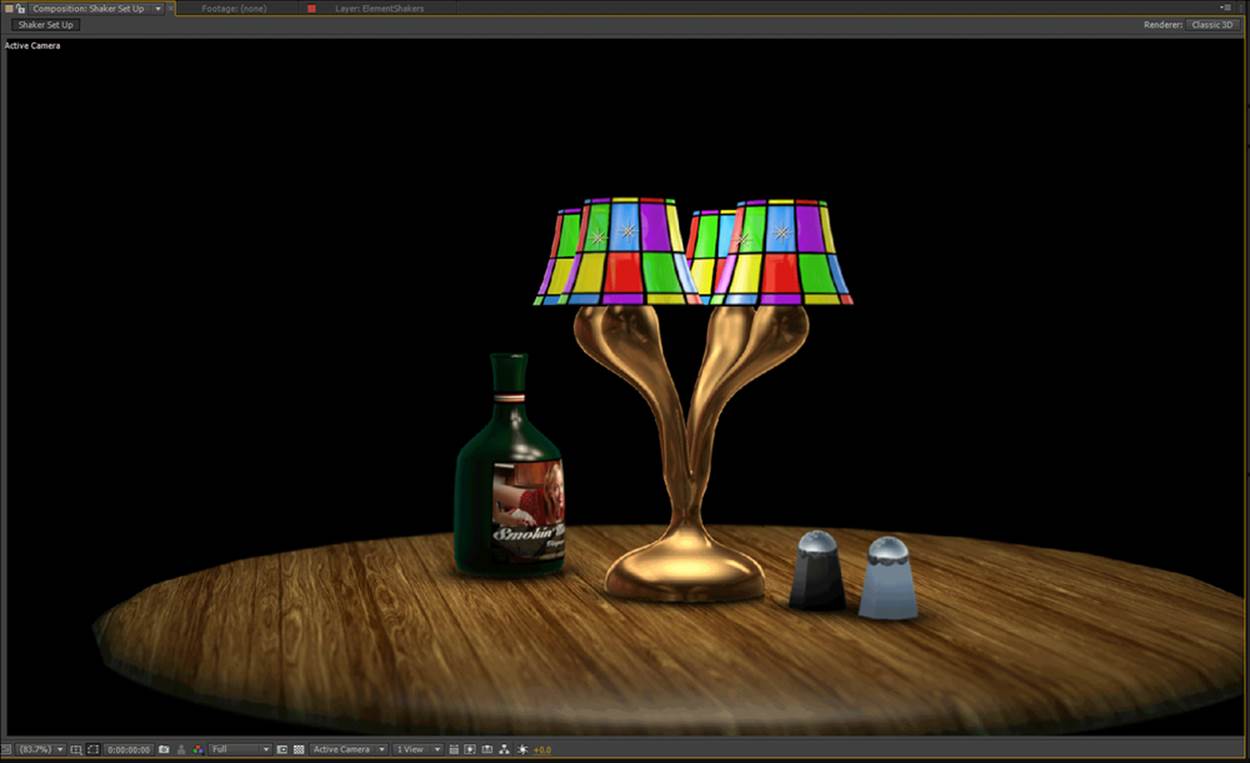
This code calculates the distance from the camera to the focus null and places that value in the focus distance of the camera. Turn on the Depth of Field parameter and you should see your scene change. Set your aperture to 100 pixels, and this will give you a nice dramatic depth of field effect.
The following screenshot is what you can expect to see with these settings:
Controlling objects with null objects
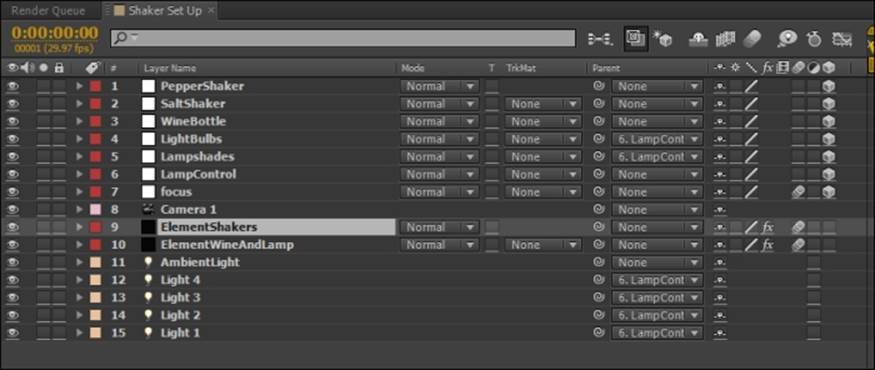
Inside the effect controls for Element 3D, go to the Group Utilities setting for the lamp, lampshades, bulbs, wine bottle, and both the shakers, and click on Create under Create Group Null. As you create each null object, rename it in your layer window so that you can keep track of the objects (as shown in the following screenshot). Then, parent the null objects of your Lampshades and LightBulbs to the LampControl null object. Your computer screen should look similar to the following screenshot:
Now, all you have to do is move the LampControl null object around in your scene and your entire lamp (shades, bulbs, and so on) will move around the scene. Null objects are a very handy way of moving objects around. You may note the World Transform section in Element and wonder why we don't use this because this changes the orientation and position of all of our groups simultaneously. It would not only move the lamp but every other object in the scene.
Summary
In this chapter, we learned how to set up a scene with Element 3D. We learned how to position, replicate, and scale objects. We also learned to set up our render settings for lights, faking shadows as well as assign AEX null objects to control our objects during the animation process. Finally, we learned how to overcome a major shortcoming of Element 3D (limitation of groups) to allow more objects to be in our scene.
In the next chapter, we're going to see the consequences of setting up our scene in this manner, overcome many of these, and avoid the others. Most importantly, we're going to start animating our objects!
All materials on the site are licensed Creative Commons Attribution-Sharealike 3.0 Unported CC BY-SA 3.0 & GNU Free Documentation License (GFDL)
If you are the copyright holder of any material contained on our site and intend to remove it, please contact our site administrator for approval.
© 2016-2026 All site design rights belong to S.Y.A.