Lightning Fast Animation in Element 3D (2014)
Chapter 8. Optimizing Performance
So you've learned the basics. You've even learned some advanced techniques. However, before you can be a master of all things 3D, you need to know how to get the ideas that you've thought of rendered before your great grandchildren are born!
What affects render times?
The answer is simple: everything! From the specifications of your computer to your texture sizes to how fragmented your disk drives are, and so on, the list of what affects render times is long, very long. An entire book could be written on just this question; however, we'll keep it simple and the most relevant for Element.
If you keep what this chapter covers in mind, you'll be able to prioritize the facets of your animation so you can effectively optimize your time. Getting a perfect render time is futile; it's about balancing. After all, what's the biggest cause of render time? Hitting the render button!
Your system needs to run… fast!
I know we already covered specifications, but let's take a moment to reiterate the importance of a good machine and use some tricks to help renders. First, shut down every program you have running (except the rendering program; in this case, AEX). You don't want to be browsing the web or watching the Masters tournament when rendering (I actually know an editor who did this and didn't understand why things took so long and kept crashing).
Keep your memory clear. Make sure you don't have a ton of memory-resident programs (Logmein, iTunes, and so on). Memory is the key to rendering. Have a lot, have it fast, and have it available!
Don't use your boot drive for your projects/renders. Your computer will be hammering on the boot drive to use it as a temporary memory when it is running short of physical memory. You don't want your OS and AEX competing for this resource. For that matter, if possible, keep the AEX temp file directory off the boot drive! (Set it to Available in the AEX preferences menus.)
Don't use USB drives for your projects/rendering. USB is too slow. eSATA is better if you need to use an external hard drive, and if you're on a Mac, FW800/thunderbolt is fine. Just don't ever use USB drives. USB2 is too slow, and USB3 is still unreliable on most systems (on most systems, the drive will suddenly unplug and then re-plug, causing a render crash).
Turn off the power saving features. You don't want your drives to go to sleep and then have to wake back up to write/read a frame of video. Also, on some video cards (and AEX uses the GPU to help with renders), the GPU will go to sleep when the monitor turns off. Turn off all your screensavers, and if you want to save your screens, turn them off physically! (Although, I like to watch things render so I can see that every frame is good.)
Finally, if you have any stability issues with your system, render to frames not video, and put the image sequence back together in your editing software. Then, if you have a crash mid-way through, you don't have to re-render the entire scene!
Polygon counts/points
When a rendering engine renders your object, it has to do a lot of calculations. Part of these calculations is building the geometry in virtual space. Every frame that is rendered requires a rebuild of all of the geometry. Say, you have a square that is 10 units high, 10 units wide, and the bottom-left corner is at (0,0). This is how it looks to the computer:
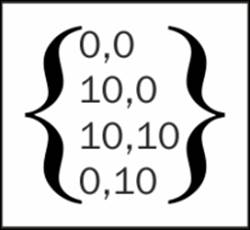
This is what's known as a matrix in math. Each point of the square is defined as the coordinates on each line. The order of the points drawn to create the square goes from top to bottom. So, we start at (0,0), draw a line to (10,0), then a line to (10,10), and then (0,10). Some programs recognize that (0,0) was the starting point, so they close the shape while others would require a fifth line in the matrix, that is (0,0). Complex, right? This is two dimensional, so no z axis is on this matrix. This is only one polygon; however, a cube that is 10 x 10 x 10 would look like the following screenshot:

And this is only a cube! You can see how things can get very complex very quickly. So, keeping your polygon count low is extremely important. Let's take a look at an example. The following figure shows you two footballs. Can you tell the difference?
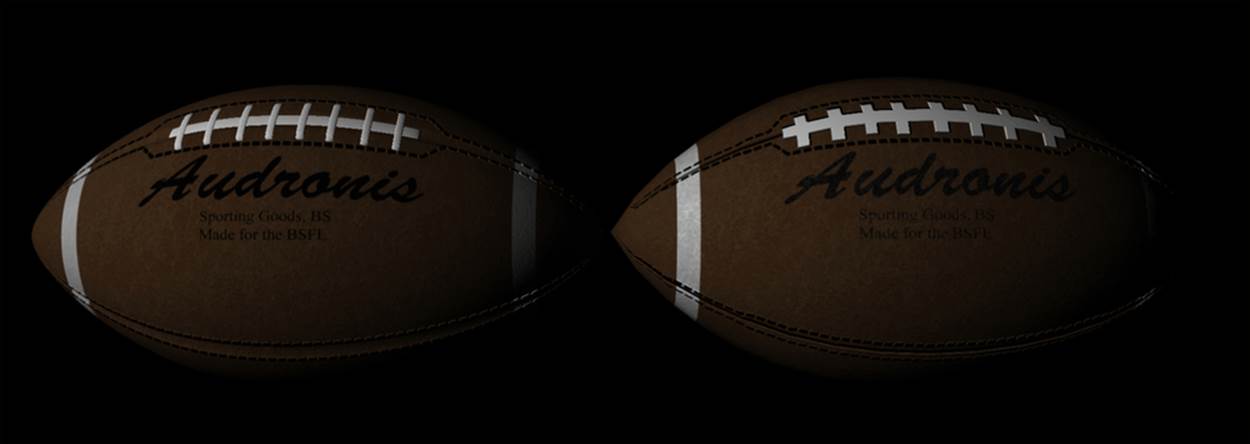
Sure, the laces on the football on the left look better. So does the stitching, and the creases where the leather meets up are different. (I actually think the creases look better on the right, but not the stitching.) However, unless you're doing extreme close-ups of the football, the laces on the right ball would more than suffice.
Now, let's take a look at the geometry of the two balls in the following screenshot:
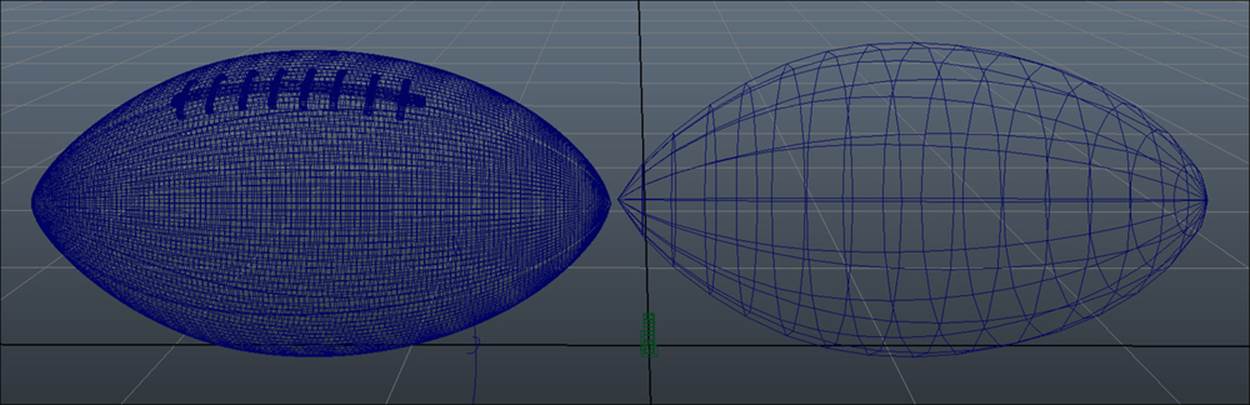
Now we can see that the football on the left has much more defined geometry. The laces are actual geometry (as are the creases) while the football on the right had them included in its texture maps.
We can also see another interesting thing; even though the texture is the same exact resolution in both the balls (in fact, other than the one on the right that includes laces, they are the exact same texture). Because the geometry is smoother on the left ball, the stitching maps are smoother (no jagged stitches). But really, if this were a shot of a football flying across a field, do we really need to put the computer through the enormous task of calculating all those polygons? (52,048 polygons on the left ball, and 256 on the right). Big difference, right?
So, the lesson here is to keep the polygons as low as you can to keep the detail you need! There can be uses for high polygons, but certainly not for performance in rendering.
Appropriate image map size
Just as with polygons, you can imagine that having to hold giant texture maps in the memory can add to the render times as well. If we use images that are appropriate only for our scenes (no need for a 4K image map on a rock that is sitting far from camera), our memory's access times to load the images decrease (decreasing our render times significantly). Remember, every frame is a complete reload and redrawing of the scene. Tiny time differences can really compound over the length of a video!
Samples and how they affect render times
This mostly has to do with the AEX rendering engine, but there are some settings in Element that have a "Samples" parameter. Each sample represents a potential re-rendering of the entire frame. For instance, motion-blur samples require a render of a sub-frame for every frame of the video, and then they are all blended together before the system can move on to the next frame.
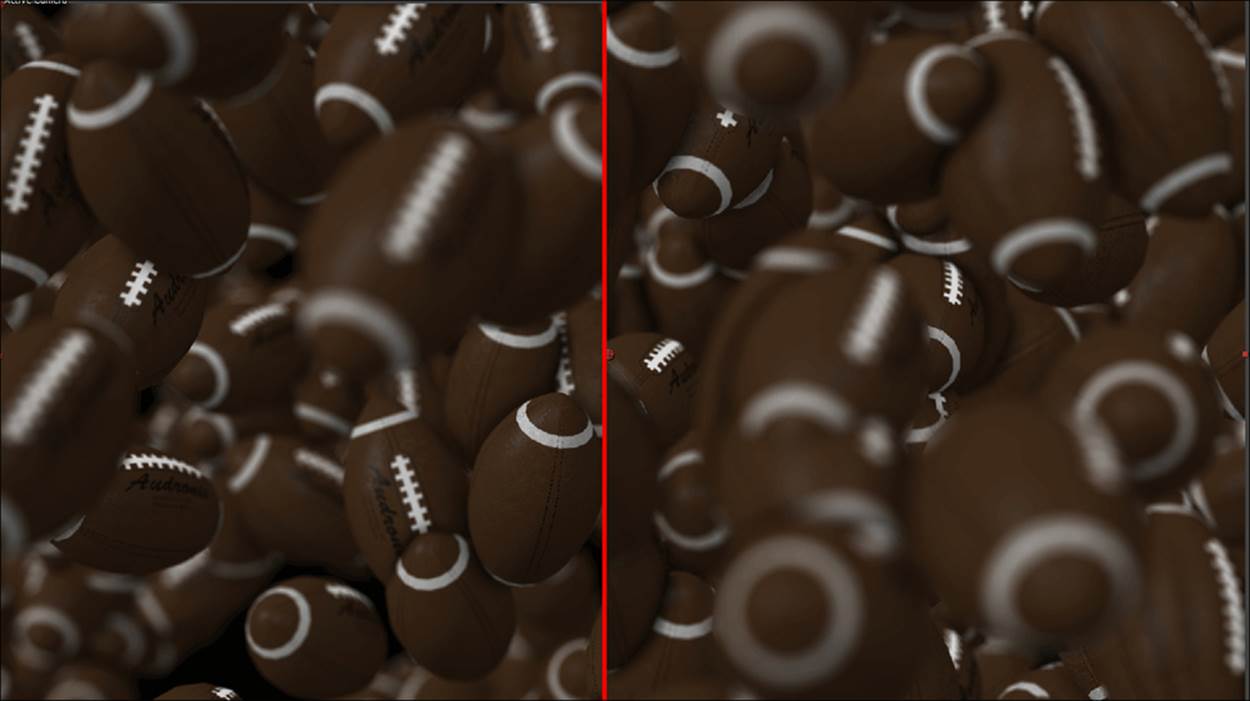
Samples are used in the ambient occlusion, depth of field, motion blur, frame blending, and the list goes on and on. If there are samples, turn them down enough to where they look good, but run them efficiently. The extra few minutes of tweaking the sample settings on all your element layers and AEX parameters can literally save you hours of rendering. Let's take a look at an example in the following screenshot:
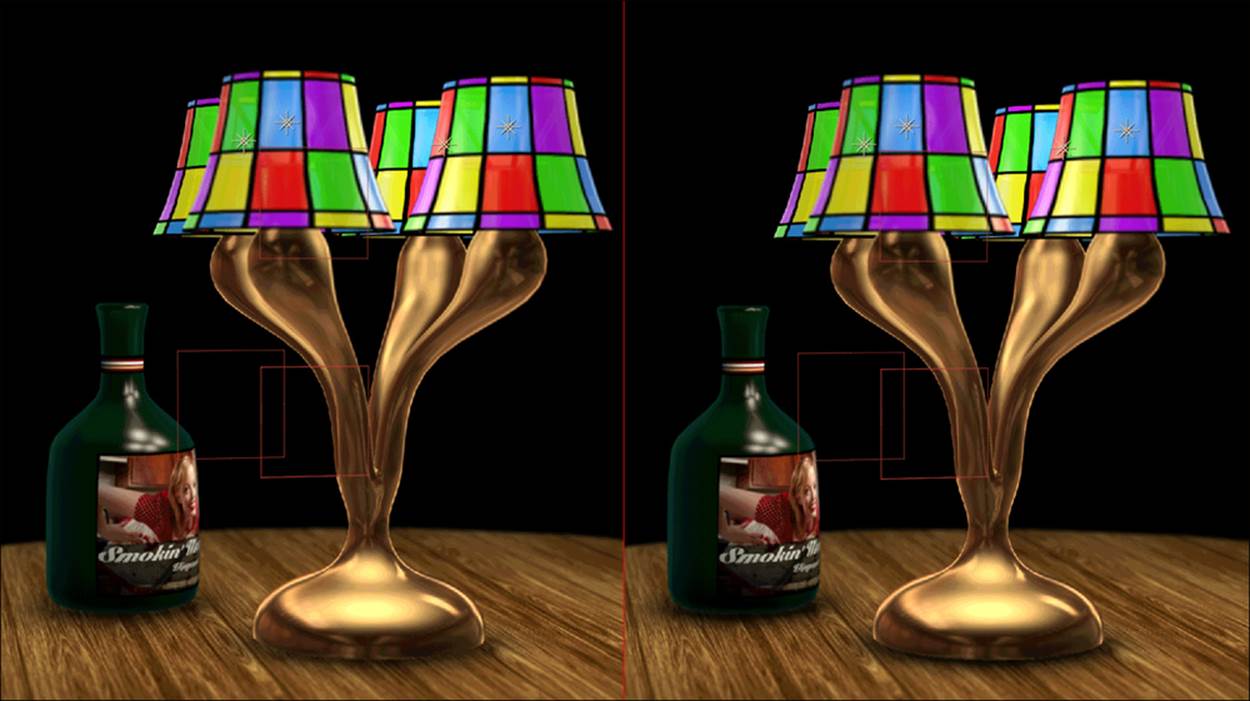
Can you guess which one has an optimized setting? The image on the left has an ambient occlusion sample setting of 10 while the one on the right has a sample size of 50. Sure, the one on the right does look somewhat better. However, would you really notice it when the video is in motion? The render time difference for 900 frames of video is significant (even with only this one setting changed). The image on the left is of 21 minutes. The image on the right is of 49 minutes. (This is the time taken to render the entire 900 frame video.) That's less than half the time with only one setting changed! Now, imagine if we optimized the depth of field and motion blur as well? You get the point. Samples can make things look lush, but they come at a significant cost.
Particle array count
The number of objects you replicate can have a drastic difference on your render times. This mostly speaks back to the polygon count (as the number of objects affects the overall polygon count of the scene). Spend the time tweaking particles. Why have 1,000 footballs when you can get the job done with 500? Let's use the following screenshot as an example:
On the left-hand side of the preceding screenshot, there is a scene with 500 footballs. On the right-hand side, there is an identical scene with 1,000 footballs. They don't look all that different. However, for only one second of the video (30 frames), the render on the right-hand side took 1:56 while the render on the left-hand side took 1:33. This means that to render one second of a finished video, it will take you more 23 seconds. Now, what if this was a 30 second scene? That would be an extremely significant render time difference!
Summary
We learned about optimizing your system for renders, polygon counts, samples, and particle array counts. This is one area where we're actually kind of lucky that Element 3D doesn't have physics or ray tracing. These are areas that can really impact rendering (even more than what we've seen here).
As you can see, the difference between making a deadline and missing one can be as simple as some optimizing. A good friend of mine (Fon Davis, a top-tier miniature maker in the high-end film industry) once said, "I get these guys showing me amazing models and boasting that it took them two years to make! I always reply saying yeah, but what can you do for us in two weeks?". That says it all right there.
In the next chapter, we're going to learn some more techniques in Element 3D. These will include 3D text and flying logos, interacting with live action footage, and playing around a bit with some other features of Element 3D. You're well on your way to being an Elemental Deity!