The Mikado Method (2014)
Part 1. The basics of the Mikado Method
Chapter 2. Hello, Mikado Method!
This chapter covers
· Two tiny Mikado Method examples
· Baby steps and safe refactorings
· How to soften a hard dependency
You probably picked up this book because you’re in a tricky situation. Maybe you’re facing a mess, a legacy system, or a big ball of mud. No matter what you call it, it’s time to put the Mikado Method to the test and see what it can do for your code. After you’ve finished this chapter, you’ll have a basic idea about how to improve code without breaking your system while doing so.
As a first example, we’ve chosen a small system so you won’t have to wade through pages of code while learning the method. Our goal is to keep the amount of code to a minimum throughout this book so you can focus on the method, not on reading code.
You’ll see two examples in this chapter. The first is a tiny example that will show you the mechanics of a change done the Mikado way. Then we’ll get into a slightly more complicated example where we’ll iterate and apply what you learned in the first example several times over, changing a bigger chunk of code, but still in a careful way.
For the rest of the book, we’ll assume that you have a basic level of Java knowledge or are familiar with a C-like language and object-oriented programming. You’ll need to know basic refactoring techniques like rename and move method, and basic version control concepts for reverting code to a previous state. If you need to refresh your memory about refactoring, we recommend picking up Refactoring by Martin Fowler (Addison-Wesley Professional, 1999). Now, let’s get started!
2.1. Your first Mikado Graph
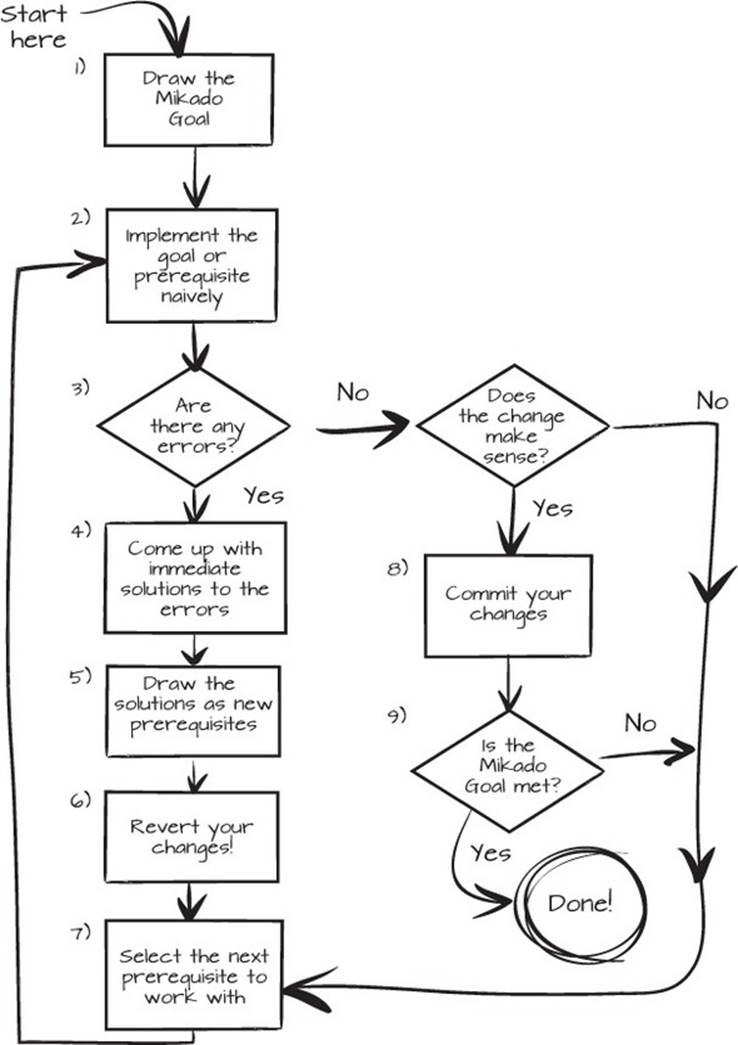
In this section, you’ll get acquainted with a small part of a larger codebase. We’ll revisit the process diagram from chapter 1, shown in figure 2.1, and apply it to the first example, step by step.
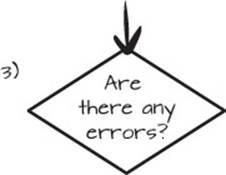
Figure 2.1. The Mikado Method process
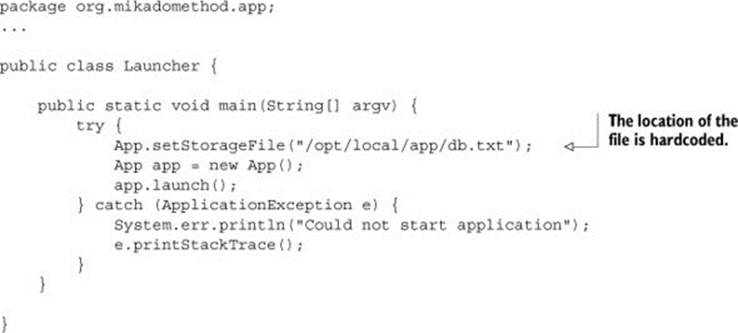
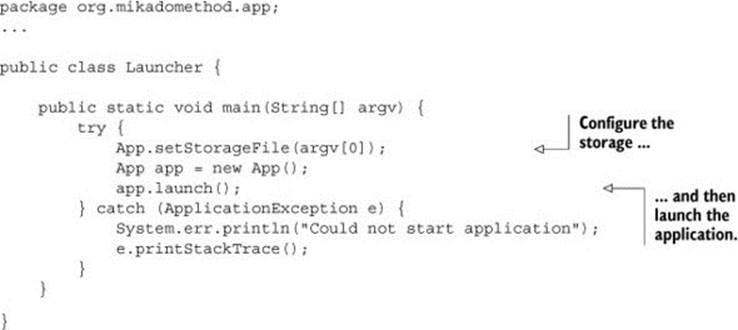
In this example, we want to change the way an application is launched. Right now, the application uses a hardcoded path to a user data file. That makes the system inflexible; for example, we can’t change the path when we need to test our application. We want to change how the application is launched and make it more flexible. But before we do this, let’s take a look and see what the launcher looks like now. run.sh is the script that launches the application:
#!/bin/sh
java -cp app.jar org.mikadomethod.app.Launcher
As you can see, we have a shell script that launches a Java application, and the class responsible for the application launch is called Launcher, shown in the following listing.
Listing 2.1. Launcher.java
We want to avoid the hardcoded path, and to get this result without breaking the code, we’ll use the Mikado Method.
2.1.1. Making changes without breaking code
Our goal is to change the way the application is launched. Maybe you’ve seen this kind of situation before and know that there’s more than one way to solve the problem. You could configure the application via settings that are read from a file, or you could pass a parameter to the program at runtime, or something else. We try to avoid over-analyzing any change; we just try an idea and see what happens. When we have several ideas, we try the simplest first.
Let’s try using command-line arguments passed to the main method. This is the starting point of the Mikado Method, so let’s show it as a goal in a Mikado Graph.
Figure 2.2. Drawing the Mikado Goal will help us focus on the task at hand.
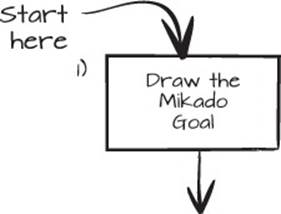
Draw the Goal
Our goal is, “Use command-line arguments argv in Launcher.java to configure database file.” In the Mikado Graph, it looks like figure 2.3.
Figure 2.3. A clearly written goal makes it easy to know when it’s accomplished.
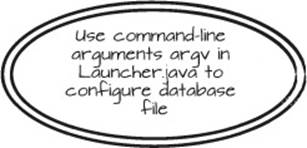
Figure 2.4. Trying things can provide more feedback than hours of analysis.
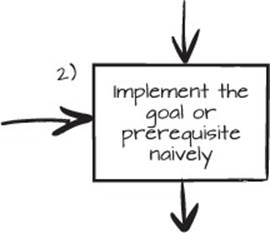
Implement the Goal Naively
We have a clearly stated goal, and because it’s possible to simply implement the goal, we can just do it, like in the next listing.
Figure 2.5. The compiler, tests, or running the system will help us find the errors quickly.
Listing 2.2. Launcher.java with parameterized setStorageFile(..)

Find any errors
Now we try to find any errors. One of the fastest ways to find errors is to execute the application. Launching run.sh will result in an error:
Exception in thread "main" java.lang.ArrayIndexOutOfBoundsException: 0
at org.mikadomethod.app.Launcher.main(Launcher.java:10)
The error is an ArrayIndexOutOfBoundsException, meaning that String[] argv doesn’t contain even a single element, and especially not the database file path. This example is pretty small, and anticipating this result beforehand isn’t that hard, but when you get into more complex examples, executing parts or all of the program is a good way to find errors.
Figure 2.6. Don’t think too hard about the consequences; just pick a solution that will pull the system in a good direction.
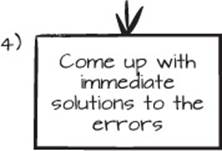
Come up with immediate solutions
Now we need to come up with a solution that will prevent the previous error from occurring. The first option that springs to mind is editing the shell script, run.sh, and adding a file path there.
Figure 2.7. We add the solutions to the graph as we come up with them.
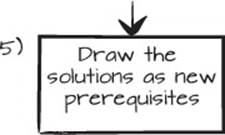
Draw the solution as a prerequisite
We can now go to our graph and add our solution as a prerequisite: “Add file path to arguments in run.sh” (see figure 2.8). A prerequisite at the outer edge of the graph is called a leaf. At this stage, it’s easy to succumb to the temptation to just hack the next step from this broken state, and then the next, and the next..., but we won’t do that, we’ll just add the next step to the graph. Remember that what the Mikado Method helps you do is fix what needs to be changed without breaking the codebase; if you were to hack the next step, you’d be building on assumptions and guesswork.
Figure 2.8. Prerequisite added
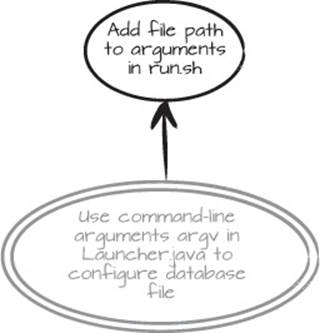
Figure 2.9. The most important, and yet unintuitive, step of the process: fix the broken system by reverting
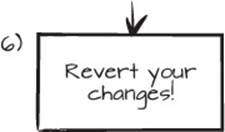
Revert the code
Before we go any further, we revert our changes, in this case the line App.setStorageFile(argv[0]);, because we don’t know how much of the application we’ve affected. Remember, we don’t want to build on assumptions. In this small example, it was only one line of code and we can see the impact of our change. For a larger, or more complex, change, stacking uncontrolled changes on top of each other is a big no-no. After reverting, the only visible trace from our change is some ink on a piece of paper.
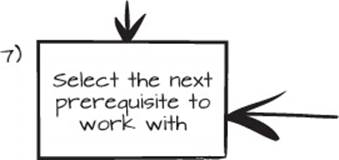
Select the next leaf prerequisite to work with
Figure 2.10. Zoom out and look at the graph. What’s the next sensible prerequisite, or leaf, to work on?
After reverting, we now take a look at the graph where we can see that our only leaf is the update of run.sh. A leaf is the only place where a change can be performed without possibly breaking code. The Mikado Goal isn’t a leaf because it depends on “Add file path...,” but “Add file path...” is a leaf because it has no further prerequisites. When implemented, you can see the slight change to run.sh:
#!/bin/sh
java -cp app.jar org.mikadomethod.app.Launcher 'db.txt'
After adding the file path to run.sh, we make sure that the application still works, and it does!
Figure 2.11. Checking in cohesive changes will make coworkers much happier.
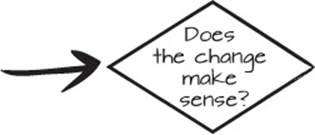
Does the change make sense?
The small change we made didn’t actually do anything to our app; the added parameter isn’t used in the application, so the change just prepared us for the next step. In that way, it doesn’t make sense. In fact, adding an unused argument to a command will probably confuse anyone reading that piece of code. We have to add more to the solution before we check it in, and we should pick the next leaf prerequisite to work on.
Because the “Add file path...” prerequisite is implemented, the only leaf now is the actual Mikado Goal. Once again we can make the simple change we initially tried—changing the line back to App.setStorageFile(argv[0]);. We compile and run the application with run.sh again to find any errors. This time it all works, and we’re satisfied with our changes. They make sense!
Figure 2.12. Add the changes to the repository and have a small celebration.
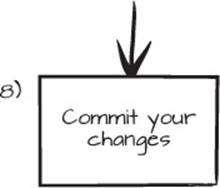
Check in!
Let’s add the changes we made to our versioning system. When changes make sense, you want to share them with your teammates as quickly as possible. This is also a good time to check off the completed work in the Mikado Graph, as shown in figure 2.13.
Figure 2.13. Marking the completed work with check marks provides a sense of progress and closure.
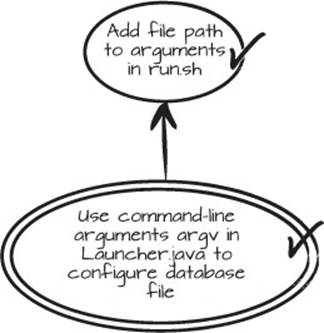
Figure 2.14. Are all the chart nodes taken care of? Is the goal met?

Is the goal met? Are we done?
Our goal is met; we can change the database location from the start script. We’re done!
When problems are this simple, you don’t really need to use this much process. But when the problems are more complex, they’re harder to analyze. In the next section, we’ll continue with a slightly more complicated example that you might or might not be able to fit in your head. Don’t worry though; we’ve tried to make it easy to follow.
The Mikado Method is canned divide-and-conquer
The examples in this book are tiny compared to any real system, but one of the real perks of the Mikado Method is that it’s a divide-and-conquer approach. If you follow the method, most problems will, in the end, be rather small and manageable.
2.2. A slightly more complicated change
In the previous example, all we did was change the launcher so it locates the database file by using a parameter at runtime. We still have a hardcoded dependency on a specific type of database: the file-based database. This is cumbersome, because it puts constraints on the runtime and development environments. We want even more flexibility, so our aim is to replace the file-based database with something better, like a database that supports concurrency so that more than one person can use the system at the same time.
Figure 2.15 describes the system as it looks now. You can see that App is launched by Launcher, which in turn creates a UI that fetches login information from the FileDB. The “database” is a simple key-value store that uses a single file for persistence. If we were able to somehow configure where we store our data, we’d have more options. We could choose between different database vendors or have separate configurations for development, test, and production environments.
Figure 2.15. A schematic of the current system
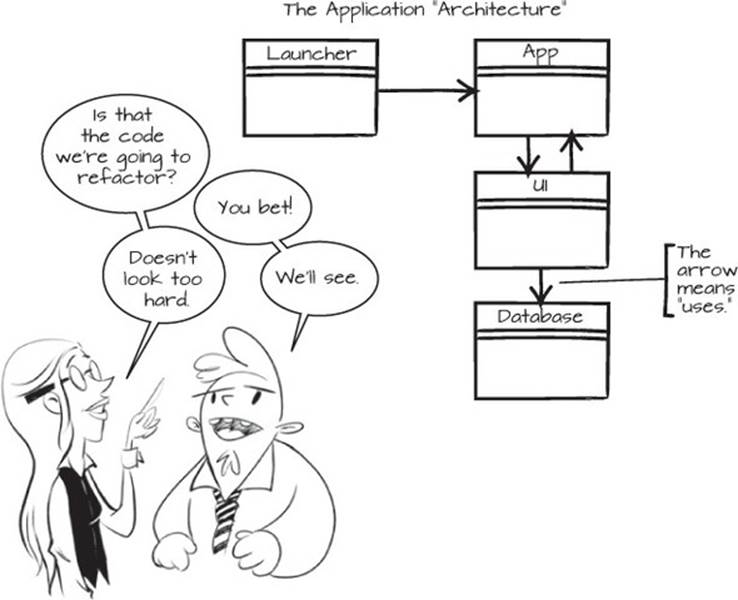
Our aim is to be able to replace that database with something better. Something better can mean a lot of things, but in this case we’re considering introducing a database abstraction to achieve more flexibility. By encapsulating the file-centered code, we hope to achieve enough flexibility to vary the database implementation at runtime. But before we make any changes, we’ll get to know the code a bit better.
2.2.1. Getting to know the code
Let’s browse the code for a while. Here are the three most important classes, one after the other.
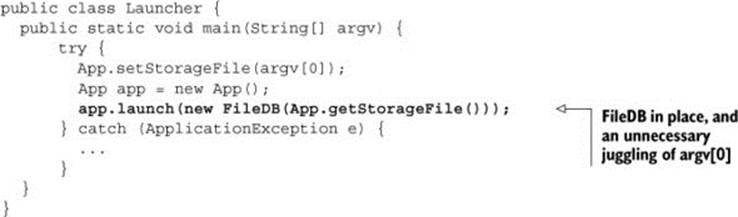
Listing 2.3. Launcher.java
The Launcher sets up the system by configuring the storage, creating an App instance, and then launching the app.
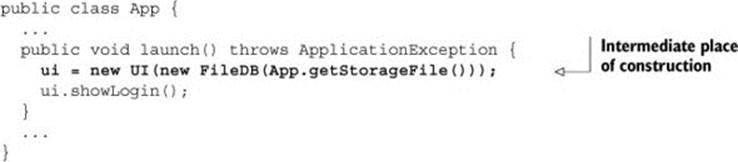
Listing 2.4. App.java
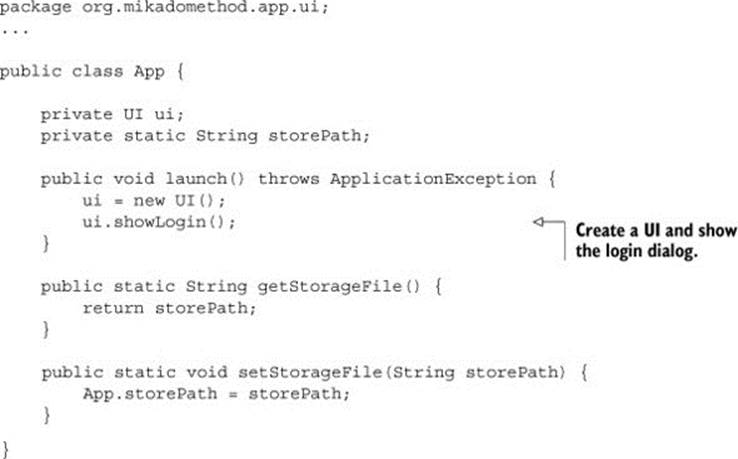
The job of the App is to create a UI and then show a login dialog. App also has methods for configuring the path to the storage file.
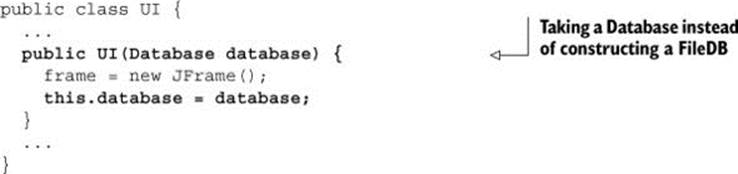
Listing 2.5. The UI.java code, somewhat reduced
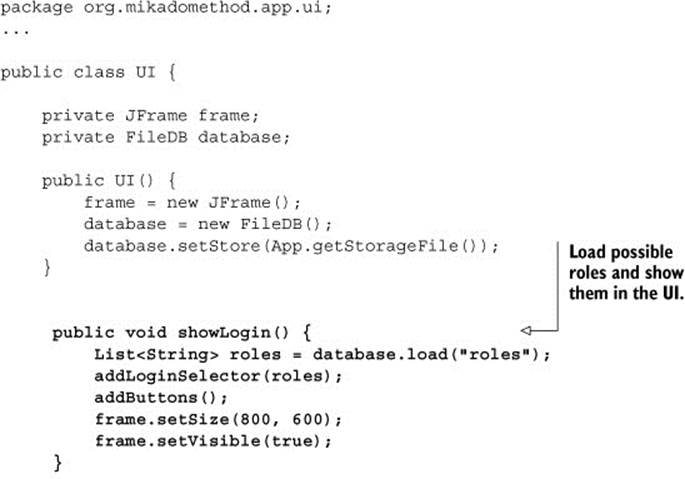
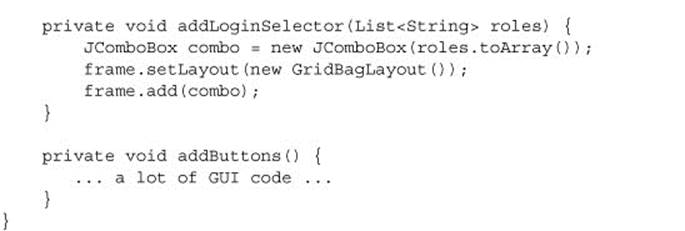
The meat of the system is found in UI, and it has a lot of code. It’s responsible for setting up the whole login dialog, complete with buttons, listeners, and all. We’ve spared you the details of all that and focused on the showLogin method, which does two important things:
1. Load roles from the database
2. Add roles to the login selector
The code here fetches the different roles that can be used with the system from a form of FileDB, which we know little about, via the load(..) method. Then it adds these roles to the GUI in the form of a login selector, addLoginSelector(..).
Now that we’ve prepared ourselves by getting to know the code, another important task needs to be completed. We need to make sure we can return the code to a known, unaltered state.
2.2.2. Reverting code
Before we make any changes to our code, we must know that we can restore the code to our starting point. This is important for two reasons. One: if anything goes wrong or we lose track of what we’re trying to achieve, we need to be able to start over to reduce the risk of messing things up. Two: we’re going to experiment a lot, and starting from a known state is a must when you experiment.
If we’re going to succeed, some sort of version control system (VCS) is a must. All VCSs we know of have a way to fetch a certain version of the code, which we’ll make use of when we revert our changes.
Revert, restore, or undo
We’ll use the word revert for restoring the code to a previously untouched state. You may be used to using some other term, like undo checkout or reset.
Choosing a VCS
All version control systems (VCSs) can revert your code. Get one that’s easy to use and that can revert code within a matter of seconds. If it can create branches cheaply and handle merges without much hassle, that’s a big bonus too. Sometimes you’ll need to do some additional preparations in order to easily get back to your starting point, and in those cases a tag or a short-lived branch based on a specific version can help significantly. Our personal preference is Git.
Here’s how you can revert in three different VCSs:
· Git: git reset --hard
· Mercurial: hg revert
· SVN: svn revert
We’ve now familiarized ourselves with the code so it doesn’t feel totally new. Keep in mind that you can always return to the code if something is unclear.
It’s now time to tackle the problem and put the Mikado Method to use.
2.3. Making the code configurable
Our objective with this code is to get rid of the hardcoded dependency to the database so we can enjoy the benefits of a more flexible design. We want to be able to configure, or at least easily change, the FileDB to something else, like a normal relational database. To do that, any code related to that file-based database will also need to be dealt with. Our plan is to introduce a database wrapper, or an abstraction, that we can use instead of the file-based database.
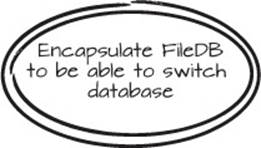
A common way to solve this type of problem is to encapsulate the class you want to change. We’ll start by writing our goal on a piece of paper and circling it twice. Although it seems obvious at the moment, it’s important to write it down so that you can remember what you’re working toward. Here our goal is “Encapsulate FileDB to be able to switch database,” as shown in figure 2.16.
Figure 2.16. After we figure out what our goal is, we write it down as our Mikado Goal.
Hard to decide on a goal?
If you find it hard to select a goal, this might be a hint that you don’t have all the information you need to make that decision. Talk to people involved to see if you’re missing something. If you need more input, spend a few minutes, hours, or days if it’s a large change, and try a few different goals to see where they lead you.
2.3.1. Get going with the Naive Approach
By using the VCS, we know we can revert to a known initial state. This means that instead of worrying about keeping the system intact, we can focus on the problem at hand. Because the goal is open-ended, like a decision node (see section 3.2.3), we need to narrow down how we can achieve it with a few more specific prerequisites.
We might already have some ideas as to how the goal could be achieved, but instead of speculating too much, we’ll try one of our ideas: “Replace FileDB with Database interface for load(..)/store(..)” ends up on our piece of paper, as shown in figure 2.17.
Figure 2.17. Adding a prerequisite that’s a bit more explicit in its implementation details than the goal
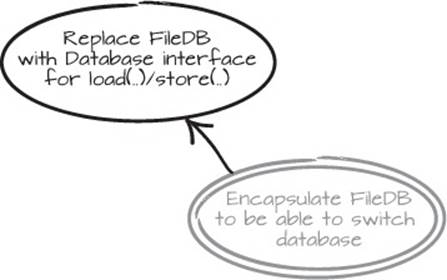
These two actions have a relationship, so we connect them with a simple arrow, meaning that “Encapsulate FileDB to be able to switch database” depends on us having completed “Replace FileDB with Database interface for load(..)/store(..)” first.
Now, in the name of the Naive Approach, let’s try something based on this. FileDB isn’t used in a lot of places, so let’s just type Database in all the places where the FileDB is declared and see what happens. No, there is no such class or interface in the codebase yet, but it’s a good way to get feedback. And relax, this is only temporary. We do know how to revert the code.
Scratch refactorings
Play around, muck around, break things! Watch what happens, and then revert. Michael Feathers called this scratch refactoring in his book Working Effectively with Legacy Code (Prentice Hall, 2004). The Mikado Method uses that approach in a systematic way.
Listing 2.6. Changing FileDB to Database, with compilation errors in bold
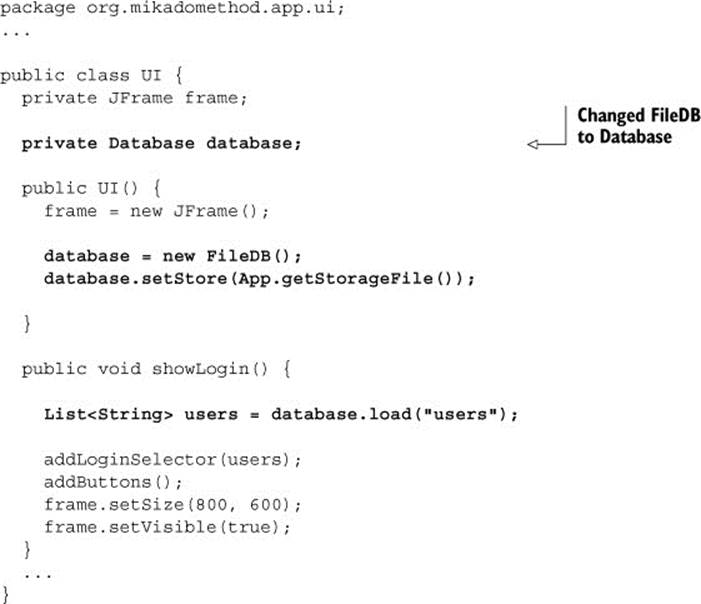
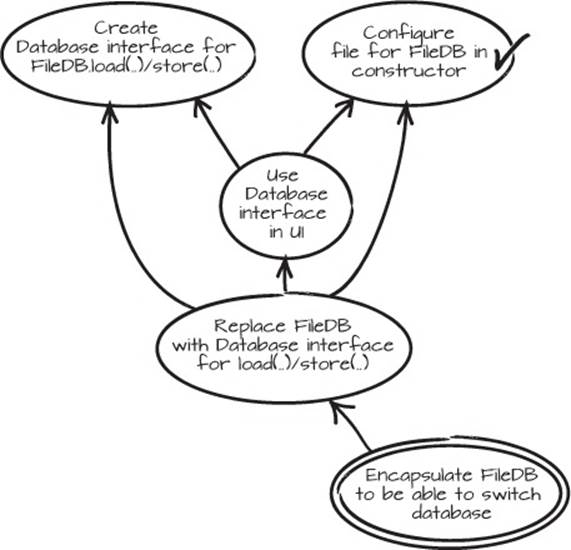
Now the code and the compiler are talking to us. Clearly the Database edit doesn’t compile, so we can add “Create Database interface for FileDB.load(..)/store(..)” to the graph.
The business methods load(..) and store(..) should be in the interface, but the configuration method setStore(..) must be dealt with in another way. It would be best if we could initialize it in the constructor, so we can add “Configure file for FileDB in constructor” to the graph. Another prerequisite we can add is, “Use Database interface in UI.” This results in the Mikado Graph in figure 2.18.
Figure 2.18. The information we’ve gathered from a naive edit
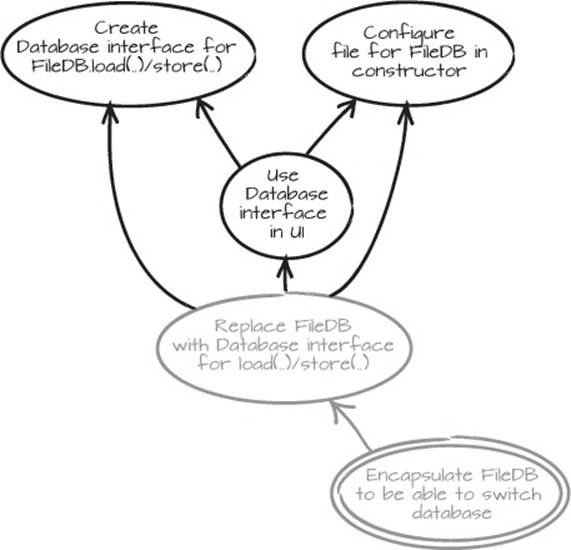
We got all of this information from just editing some code and quickly analyzing the errors. If you can’t lean on a compiler, such as if you’re working in a nonstatically typed language, you’ll need to execute the code or the system, or go a bit further to analyze what your changes can reasonably affect, to get the feedback you need.
Lean on the compiler
Michael Feathers coined the phrase “lean on the compiler,” meaning that you can make edits and see what, if anything, happens to the compilation results. This is one important source of feedback for the Mikado Method when using a statically typed language.
2.3.2. Revert when there are errors
We’ve tried some things, and we learned some important things about the code by breaking it. You might argue that you could forge ahead and continue the journey without reverting the code, and with a system of this size, chances are that you could pull it off. But you need to remember that this could be part of a bigger system. A central change like this usually ripples through large parts of the codebase, which means that if this piece is broken, it’s going to affect several areas of the code.
The most important aspect of changing code the Mikado way is to reduce the side effects, mistakes, and unpleasant surprises, so it’s imperative that you keep the code in working condition all the time. This means it should compile and all the tests should pass. If you don’t have a test suite, we’ll show you in chapter 5 how to add tests as a part of the Mikado Method. For now, you only need to remember that revert is a dear friend, and that you’re learning about the system. Let’s revert.
Tests and TDD
We strongly encourage the use of tests and test-driven development (TDD). We’re also aware that when you work with structural changes, or you’re trying to wrestle code into submission, you usually don’t have the luxury of existing tests, nor are you likely to have suitable APIs to code against when testing. We suggest that you turn to Feathers’ book Working Effectively with Legacy Code for more detailed advice on adding tests to a difficult-to-test codebase.
2.3.3. Select the next prerequisite
After we revert, we’re now back where we started, except that we have a whole lot of new information in the form of the graph. When you have a graph, you can choose to take a depth-first approach, trying to implement one of the branches in the graph before taking on the next. You can alternatively take a breadth-first approach, meaning that you try to find all the prerequisites of the Mikado Goal first, and then take them on one after the other, building most of the graph before starting to implement parts of it. We have one branch in the graph now, so let’s try the depth-first approach and implement our latest findings.
When we intend to implement things, we always start from a leaf. In this case, we have two leaves, and we can start from either one. Sometimes you can tell that a leaf will have further prerequisites just by looking at it, and in that situation it’s usually a good idea to keep expanding the graph. In this case, both leaves look like leaves that we can implement without further leaves, so we’ll just pick one of them: “Configure file for FileDB in constructor.”
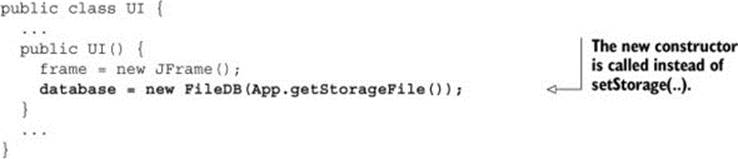
In this small example, we can just change the code by hand. But when you have a large codebase, and you’re using a modern IDE, there’s a neat trick you can use. First, create the default constructor in FileDB. Then you can use the IDE’s Change Method Signature refactoring on that constructor. Add a String named storageFile, and give it the default value App.getStorageFile(). The IDE will then change the constructor and all calls to the original constructor to add App.getStorageFile() as a parameter. The changed call in this example is the call in theUI constructor, as can be seen in listings 2.7 and 2.8. This is often an extremely powerful way of changing code, but it changes all of the calls in the codebase, so you have to make sure that that’s the outcome you want.
Automated refactorings
In the book Refactoring, Martin Fowler presents a catalog of refactorings—changes you can make to code that alter its internal structure without changing the observable behavior. These are usually fairly small changes, like extracting a method, renaming a method, or extracting an interface.
Modern IDEs can perform these refactorings, and often more, on your code. You don’t have to use them; you can make the same changes manually, but the automation can speed up development a lot, and we use them heavily when we write and change code. We recommend getting to know your development environment and its automated refactorings.
We also have to start using the new parameter, so we’ll assign the field in the constructor. Then we use another trick when we delete the call to the old setStore(..) method: First, we make it an empty method. Then we remove it by using the IDE’s Inline (method) refactoring and selecting something along the lines of Inline All Invocations—Delete Original Method. The refactoring replaces all calls to the method with the body of the method, which in this case is nothing, and then deletes the method.
Listing 2.7. The call to the FileDB constructor is changed.

Listing 2.8. The call to the FileDB constructor is changed in UI.
Now, does this change make sense? Should we check it in? We could probably argue about this, getting all philosophical, but let’s just say that it’s an improvement, it can be understood, and it works, so there’s really no good reason not to.
After we’ve checked it in, or committed the code, we can update the graph and check off that prerequisite, as shown in figure 2.19.
Figure 2.19. One leaf, or prerequisite, checked off and checked in
2.3.4. Create an interface
The next leaf in the graph is “Create Database interface for FileDB.load(..)/store(..).” Often, when we use the Mikado Method, the things we implement are fairly simple. When they’re not, there’s usually a prerequisite that we still need to identify.
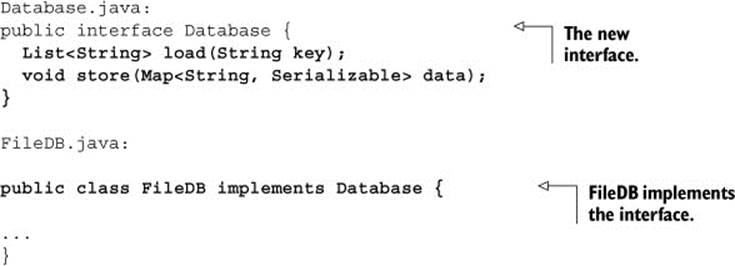
Let’s create the interface Database, declare the methods in it, and let FileDB implement the interface.
Listing 2.9. Database interface
This is a change that makes some sense to check in, but we’d like to continue with the next small leaf as well: “Use Database interface in UI.” This is also a very easy change: just change the declared type from FileDB to Database.
Listing 2.10. Use the interface in UI

The IDE’s automated refactoring, called Extract Interface, can usually replace the original type with the new interface in all places where such a change is possible, such as in the UI member declaration. If we had made the change using that automated refactoring, the process would have simply meant selecting the FileDB class, selecting Extract Interface from the refactoring menu, selecting load(..) and store(..) to be part of the interface, and selecting the option to replace all declarations where the new interface can be used instead of FileDB.
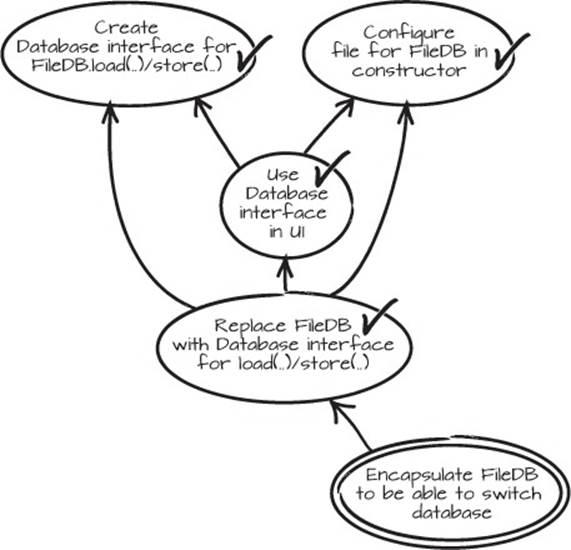
Now we definitely have a sensible change that we should check in. The “Replace FileDB with Database interface for load(..)/store(..)” prerequisite can also be checked off, because it’s been implemented already. The graph now looks like figure 2.20.
Figure 2.20. Database interface in use
2.3.5. Restart from the goal
Now that we’ve implemented a few things, the starting point of our refactoring has changed slightly, so the next time we have to revert, we’ll end up with the current situation rather than the state the code was in originally. But we’re still reaching for the same goal of encapsulating theFileDB and putting the related code in one place.
And we’re not done yet. We can see that it doesn’t make sense to keep the FileDB-specific methods App.setStorageFile(..) and getStorageFile(). Let’s remove them and see what we get. We’ll add “Remove App.setStorageFile(..)/getStorageFile() methods” to the graph, and then remove the methods in the code to see if we get a few pointers to our next prerequisites.
Listing 2.11. Error in Launcher

Listing 2.12. Error in UI

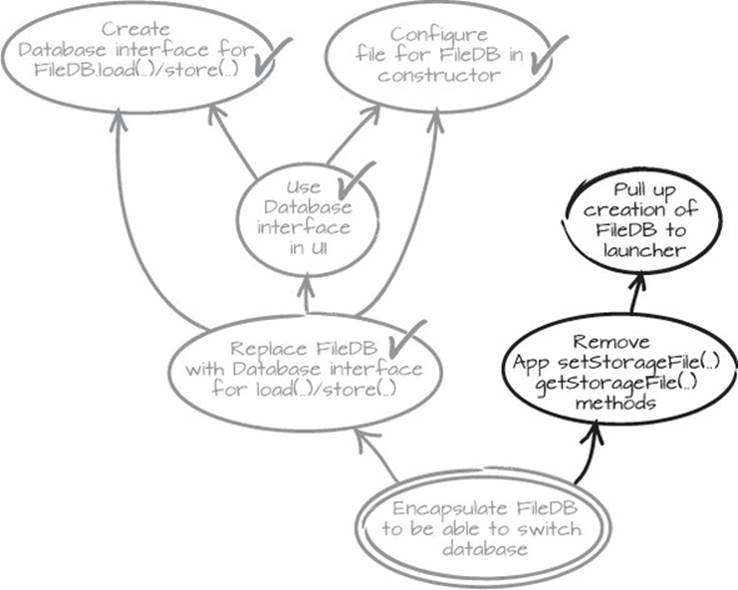
We get two compiler errors, marked in bold in listings 2.11 and 2.12. From that information, and a look at the code, we can see two options: we can pull up the creation of the FileDB to Launcher, or we can push down the argv[0] string to the FileDB instantiation in UI. In general, it’s better to keep the primitives at the edges of the application, and the object types further in, so we’ll choose to pull up the creation of the FileDB to Launcher.
This decision also goes into the graph as “Pull up creation of FileDB to Launcher,” so it looks like figure 2.21. With this information added to the graph, we can safely revert our broken changes and go for the new leaf from a working state.
Figure 2.21. More prerequisites for our goal
OK, we have a clean slate once again. Pulling up an object through a call hierarchy is often a fairly straightforward task. We need to start in the UI constructor and then pull it via the launch(..) method of App. To implement this, we simply need to introduce a parameter of type Databaseto the constructor in UI as in listing 2.13, and all the callers have to create the FileDB object. The caller, in this case, is the launch(..) method of App, as in listing 2.14.
Listing 2.13. The UI is done
Listing 2.14. Pulled construction to App
This process is then repeated in the launch(..) method to get the construction of FileDB to the Launcher.
For this type of task, there’s also an automated refactoring in most IDEs called Introduce Parameter. Like the Inline Method and Change Method Signature refactorings, it will change all the places in the code where the method is called.
Whether the changes are made manually or are automated, the resulting code will look like the next listing
Listing 2.15. FileDB pulled all the way up to Launcher
Now the construction of FileDB is pulled up the call stack to Launcher. As you can see in the preceding listing, the argv[0] is set and then retrieved a couple of lines later. Let’s simplify this and set the file directly in the FileDB constructor.
The prerequisite for deleting the file methods from App is now in place, but this isn’t really a good time to commit any code because there are two now-unused methods in App. We can delete setStorageFile(..) and getStorageFile() from App, along with the field that holds the file parameter. The results can be seen in the following listings.
Listing 2.16. Launcher in final shape
public class Launcher {
public static void main(String[] argv) {
try {
App app = new App();
app.launch(new FileDB(argv[0]));
} catch (ApplicationException e) {
System.err.println("Could not start application");
e.printStackTrace();
}
}
}
Listing 2.17. App in final shape
public class App {
private UI ui;
public void launch(Database database) throws ApplicationException {
ui = new UI(database);
ui.showLogin();
}
}
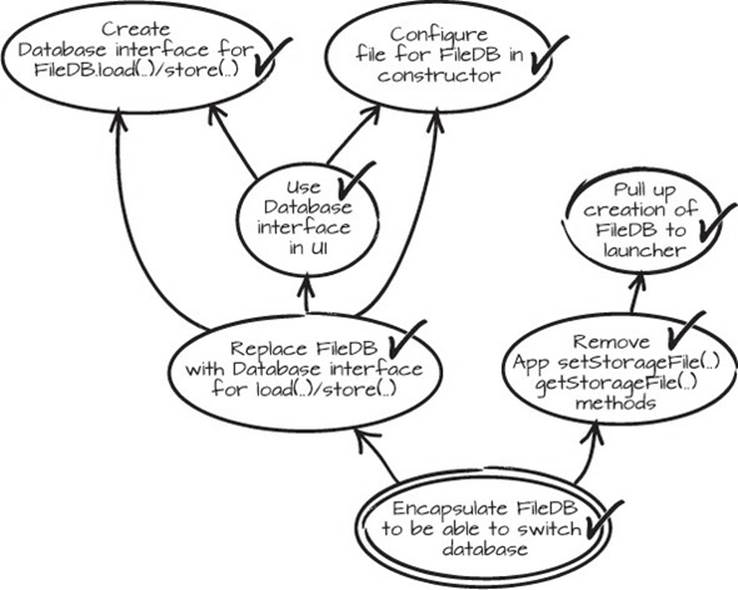
Now when you look at the code, you can see that the Database, in the shape of a FileDB, is configured in one place with the command-line variable. All the other code is using the Database interface, and we’ve met our goal. We can check it in, and check it all off the graph (see figure 2.22). We’re done!!
Figure 2.22. We’re done!!
2.4. Summary
This is a small example of how to change code. We tried some rather straightforward edits that some would probably say were trivial, but what we learned from them was essential for solving the problem in a controlled way.
Now that you’ve seen a somewhat realistic example, we hope you’ve begun to grasp how to perform changes the Mikado way. This hands-on, empirical technique mixes small, safe experiments with note-taking, visualization, and reverts. By taking notes, you create your refactoring map, the Mikado Graph, as you go.
The biggest take-away from this chapter should be the process of trying things, learning, and then reverting the code to a working condition.
In the next chapter, we’ll begin to introduce terminology for the Mikado Method and the code changes we make. In addition to that, we’ll touch on some of the philosophy and the underlying processes that make the Mikado Method so effective.
Try this
· Perform a small restructuring using the Mikado Method. Draw the graph using pen and paper.
· Perform the same restructuring as above, but this time use a computer-based tool, like FreeMind, Visio, or maybe even a presentation application like Power-Point, to draw your graph. Notice what feels different this time.
· Compare two different VCSs in terms of speed when it comes to creating branches, reverting changes, and removing branches.
All materials on the site are licensed Creative Commons Attribution-Sharealike 3.0 Unported CC BY-SA 3.0 & GNU Free Documentation License (GFDL)
If you are the copyright holder of any material contained on our site and intend to remove it, please contact our site administrator for approval.
© 2016-2026 All site design rights belong to S.Y.A.