Learn Ruby on Rails For Web Development (2015)
Chapter 6. AUTHENTICATING USERS
In the last chapter we laid down the foundation of our pins scaffold. Now people have the ability to upload basic pins and describe them.
But there's a problem. Right now, anyone can create a pin. Not only that, but anyone can edit a pin or delete a pin...even if they didn't create that pin themselves!
That's definitely not going to fly. We need to set things up so that only people who have signed-up and signed-in can create pins, and only people who created a specific pin should have the ability to edit it or delete it.
How do we do this? The first part is easy (only giving people who have signed-in the ability to create pins). The second part is a little trickier; we need to "associate" a user with a pin.
RAILS ASSOCIATIONS
Right now our app has two models (in the database)...one for 'users' and one for 'pins'. When we looked at our database schema in the last chapter, you saw how each of those is a separate table in our database.
The thing is; we now want to associate those two models. We want to be able to keep track of which pins belong to which user. Luckily Rails makes this pretty easy with something called "Associations".
In Rails, there are a few basic types of associations available to you:
- belongs_to
- has_one
- has_many
- has_many :through
- has_one :through
- has_and_belongs_to_many
Each of these associations can refer to a model in our app (in our case, let's look at our pins model). We mainly want to focus on the first three:
A pin can "belong to" a user.
A user can "have one" pin.
A user can "have many" pins.
The other three listed above are for more complicated associations that we don't really need to understand for our simple app. But you can read a great rails guide about each of these associations at:
http://guides.rubyonrails.org/association_basics.html
USING ASSOCIATIONS
Setting up associations is fairly easy. In our app we need to use the "belongs_to" and the "has_many" associations. We don't need to use the "has_one" association because we want our users to be able to have as many pins as they want, and the has_many allows one or more than one.
WARNING - WARNING - WARNING!
Before we go forward, it's important to delete any pins you've already created; both on the development version and the Heroku version of your app. Why? Because we're going to start associating pins with users, and any pins you've already created have not been associated with a user and will throw up errors after we set our associations.
So delete all the pins that are currently listed on your pins index page. There's a way to associate our old pins with users later using the Rails Console, but it's easier to just delete them now.
It's also probably a good idea to close your user account on the site. Log in, click the 'edit profile' link at the top of the screen, and click the "cancel my account" button at the bottom of the page.
CREATING ASSOCIATIONS
Using associations is a two-step process. We need to specify the associations in each of our models at /app/models/pin.rb and /app/models/user.rb but we also need to add a new column to our pins table (in our database) to keep track of what pins belong to what user.
Let's do that first.
We can edit a table by creating a migration and pushing that migration to the database with the rake db:migrate command. In this case, we want to add a user_id column to our pins table and make it an integer data type.
To do that we issue this command:
1 $ rails generate migration add_user_id_to_pins user_id:integer:index
2
This command looks familiar but seems a little different. The different part is the add_user_id_to_pins bit. It looks a little weird but that's how you tell Rails to add a column to a table (in this case, we're adding a user_id to the pins table).
The last bit looks similar to when we designated description:string for our original pins table, but in this case we're creating a user_id and making it an integer (number).
But we've also tacked on an :index to the end. An index in database-world just makes a thing easier and faster to look up. It speeds up the lookup process and you don't really need to know more than that for now.
So run that command, and then rake the database:
1 $ rake db:migrate
2
(be sure to remember to run 'heroku run rake db:migrate' later when you push all these changes up to Heroku).
If you take a look at our database schema file now, you'll notice that our pins table now has a user_id with integer data type.
The next thing to do is actually specify our associations. We do that in our two /app/models/ files (pin.rb and user.rb).
/app/models/pin.rb
1 class Pin < ActiveRecord::Base
2 belongs_to :user
3 end
4
/app/models/user.rb
1 class User < ActiveRecord::Base
2 # Include default devise modules. Others available are:
3 # :confirmable, :lockable, :timeoutable and :omniauthable
4 devise :database_authenticatable, :registerable,
5 :recoverable, :rememberable, :trackable, :validatable
6 has_many :pins
7 end
8
You see that adding associations is as simple as adding one line to each model. Piece of cake!
MUST BE SIGNED IN TO CREATE PINS
Finally, we mentioned at the beginning of this chapter that we only want people who are signed in to be able to create pins.
This is easily accomplished by tweaking our pins controller file, and adding a couple of lines to the top of it:
/app/controllers/pins_controller.rb
1 class PinsController < ApplicationController
2 before_action :set_pin, only: [:show, :edit, :update, :destroy]
3 before_action :authenticate_user!, except: [:index, :show]
4 before_action :correct_user, only: [:edit, :update, :destroy]
5 .
6 .
7
Lines 3 and 4 are what we're looking at...
Line three authenticates a user for every page of our app (relating to pins) except the index and show pages. So a user doesn't have to be logged in to view our pins index page or an individual pin.
Line four makes sure that only the correct user can edit, update, or destroy a pin. But we need to specify what is a correct user. We'll do that at the very bottom of this same file, before the final end statement:
/app/controllers/pins_controller.rb
1 .
2 .
3 def correct_user
4 @pin = current_user.pins.find_by(id: params[:id])
5 redirect_to pins_path, notice: "Not authorized to edit this pin" if @pin.nil?
6 end
7
Notice line four mentions current_user; that is something called a 'Devise Helper' (something that Devise handles for us). Basically it allows us to reference who the current logged in user is.
Whenever someone creates a new pin, we need to be able to let our database know that specific pin belongs to that specific user, and we'll use the current_user bit we just saw to do that.
So basically we need to update the 'def new' section and the 'def create' section of our pins controller and replace Pin.new with current_user.pins.build in each of them.
So here's what our new pins controller looks like:
/app/controllers/pins_controller.rb
1 class PinsController < ApplicationController
2 before_action :set_pin, only: [:show, :edit, :update, :destroy]
3 before_action :authenticate_user!, except: [:index, :show]
4 before_action :correct_user, only: [:edit, :update, :destroy]
5
6 respond_to :html
7
8 def index
9 @pins = Pin.all
10 end
11
12 def show
13 end
14
15 def new
16 @pin = current_user.pins.build
17 end
18
19 def edit
20 end
21
22 def create
23 @pin = current_user.pins.build(pin_params)
24 if @pin.save
25 redirect_to @pin, notice: 'Pin was successfully created.'
26 else
27 render action: 'new'
28 end
29 end
30
31 def update
32 if @pin.update(pin_params)
33 redirect_to @pin, notice: 'Pin was successfully updated.'
34 else
35 render action: 'edit'
36 end
37 end
38
39 def destroy
40 @pin.destroy
41 redirect_to pins_url
42 end
43
44 private
45 def set_pin
46 @pin = Pin.find(params[:id])
47 end
48
49 def pin_params
50 params.require(:pin).permit(:description)
51 end
52
53 def correct_user
54 @pin = current_user.pins.find_by(id: params[:id])
55 redirect_to pins_path, notice: "Not authorized to edit this pin" if @pin.nil?
56 end
57
58 end
59
You'll see that I also added a couple of lines to output a flash message notice when a pin is updated or created.
We're almost done. The heavy lifting is over, but we still need to make a cosmetic change or two to our website.
Before we continue be sure to close your web server and restart your app. Otherwise you'll probably get an error.
Once you've done that, create a new user account (since you deleted yours at the beginning of this chapter), and log back in. Then check out our pins index page:
https://pinterested-codemy.c9.io/pins (or whatever your URL is)
That page should be blank since we deleted all of our pins, but go ahead and add another pin. Notice next to the pin we still have the "show, edit, destroy" links.
That's fine because you are currently logged in and those pins are yours...but we don't really want the edit and destroy links to show up if a person isn't logged in or doesn't own that particular pin.
It's sort of a moot point right now. To see what I mean, log out and then check out the pins page. Try to click the edit or destroy link and you'll get a message saying that you need to log in to perform those operations.
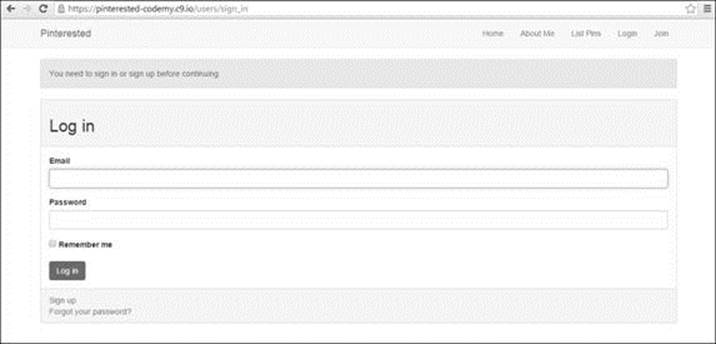
(After clicking on 'add new', 'edit', or 'destroy' pin link while logged out)
So strictly speaking, our app is locked down now and authenticating users appropriately. But still...it's kind of silly to show those links to people who can't actually use them.
Luckily we can change that pretty easily by adding a simple Ruby 'If Statement':
/app/views/pins/index.html.erb
1 .
2 .
3 <% @pins.each do |pin| %>
4 <tr>
5 <td><%= pin.description %></td>
6 <td><%= link_to 'Show', pin %></td>
7 <% if pin.user == current_user %>
8 <td><%= link_to 'Edit', edit_pin_path(pin) %></td>
9 <td><%= link_to 'Destroy', pin, method: :delete, data: { confirm: 'Are you
10 sure?' } %></td>
11 <% end %>
11 </tr>
12 <% end %>
13
And you can do the same thing to the show.html.erb file with a slight variation:
/app/views/pins/show.html.erb
1 .
2 .
3 <% if @pin.user == current_user %>
4 <%= link_to 'Edit', edit_pin_path(@pin) %>
5 <% end %>
6 <%= link_to 'Back', pins_path %>
7
Those 'If' statements say that 'if' the user that created that pin is the same as our current user, show the edit links, otherwise don't.
That will make sure that only the appropriate people can see the links to edit the pin and will generally make our app less cluttered. There's no reason to add links to a page that a person doesn't have the ability to use anyway.
The reason we slapped an @ sign in fron of pin.user in our show.html.erb file and not in our index.html.erb file is because the index.html.erb file had already called @pin on line 3 (for the loop). The show.html.erb file hadn't called @pins anywhere so we need to do that in order to access the database table.
SUMMING UP
This was a pretty intense chapter, probably the most intense chapter of the entire book. It's ok if you didn't quite understand everything that we did...you'll understand it eventually.
The goal at this point is to know that we did these things, and to be aware of the basic concepts that accompany each thing. Messing with the controller is always tricky when you're first learning Rails, and Associations are an even more advanced topic.
Don't worry; it all gets easier from here!
In the next chapter we'll start adding images to the mix. It should be much more fun!
Before we go on though, be sure to save your work:
1 $ git add .
2 $ git commit -am "Associated pins with users and authenticated users"
3 $ git push
4 $ git push heroku master
5 $ heroku run rake db:migrate
6
And you should probably delete any pins that have been created as well because we're going to be changing them to show images in the next chapter.