Creating E-Learning Games with Unity (2014)
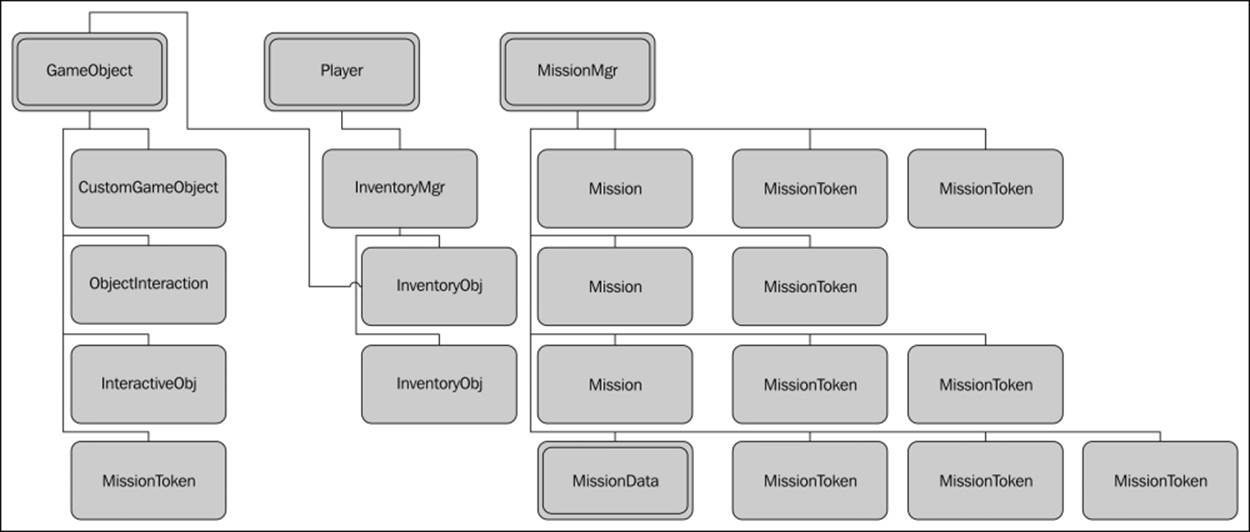
Chapter 2. Interactive Objects and MissionMgr
A well-designed and engaging e-learning game will challenge the user, track his or her progress, and reward his or her performance appropriately. To do this, a series of classes will be required that will separate what we are tracking with the way in which we interact with it.
We will develop a system to implement a generic object that the user can interact with and collect. We will also develop another system that lets us build an abstract learning objective for the user to accomplish. We will then develop a system to collect objects into an inventory that can be used by the player. Lastly, we will develop software that tracks the user's progress towards these objectives and rewards him or her appropriately for success.
In this chapter, we will cover the following topics:
· Understanding the base scripts
· Building an interactive object
· Putting it all together
· Try it out!
· Summary
Understanding the base scripts
The interactive Object class is the base script that enables a player in our game to have meaningful gameplay interactions. To meet the design needs of our game, this script provides an interface with which the game designer can specify how the player will interact with an object as it is picked up. In addition to this, it also permits subtle rotation on the object for a nice effect. The CustomGameObj and ObjectInteraction helper classes are used by the object class to define the specific nature of the interactions and how the object behaves in the inventory when collected.
The MissionMgr class is the system that tracks the user's progress through the game and rewards him or her on achieving success. When a user interacts with an interactive object, MissionToken attached to it (if any) is collected and tracked by MissionMgr. TheMissionMgr class has a template of all missions, the tokens that each mission is composed of, and the reward that should be given when a mission is satisfied. When the MissionMgr class determines that a mission is complete and that all of the tokens from that mission have been collected, it gives a reward to the user.
Lastly, InventoryMgr is the system that handles the display of the interactive objects that have been collected. If an object is permitted to be collected, it will be added to the inventory according to its CustomGameObj and then displayed in the inventory at the bottom of the screen.
The following list outlines the classes that we will develop in this chapter:
· CustomGameObj: This class contains the basic data about an object in our game. It holds the object's name and type. This information will be used when we interact with this object.
· InteractiveObj: This class controls the behavior of an object that the user will physically interact with in the game world. It makes the object rotate and also detects when the player gets close enough to it to start an interaction.
· InventoryMgr: This class tracks which interactive objects the user has collected. It will also display them in the inventory at the bottom of the screen. Objects can be either unique or can accumulate based on their type.
· ObjectInteraction: This class describes how an interactive object should behave and what will be the nature of interaction when the user interacts with it. To start, we will use the OnCloseEnough event to dispatch a collect and put into inventory interaction.
· SimpleLifespanScript: This class is used by the reward objects that are spawned when a mission is complete. This makes them disappear after a predetermined amount of time.
· MissionToken: This class represents an abstract logical component of a mission or an objective. These will be collected in ways similar to inventory objects.
· Mission: This class represents a collection of mission tokens. When the player obtains all of the tokens, the learning objective will be deemed satisfied.
· MissionMgr: This class stores all of the missions currently accessible to the user. It will validate each mission to determine if the player has acquired all of the tokens. If so, it will handle the task of giving the user an appropriate reward for their performance.
The CustomGameObj and InteractiveObj systems will interact with one another because our game's collecting mechanism is based on how the user primarily acquires and interacts with mission objectives. Once we have this core mechanism coded, with a couple of simple collection missions, we will illustrate how it works:
Building an interactive object
With these requirements in mind, let's build the framework for an interactive object that can be collected by the player.
Implementing the CustomGameObj script
We will begin with the CustomGameObj class. This class allows us to specify how an interactive object will behave when placed in the inventory, by giving it a unique type that is relevant for our game. Create the script by performing the following steps:
1. Start from the codebase built in Chapter 1, Introduction to E-Learning and the Three Cs of 3D Games, to create a new subfolder in the assets folder named Chapter 2.
2. Using the new script wizard, right-click on it and create a new C# script named CustomGameObject.
3. We will also add a public enumerated type to this class called CustomObjectType. If you recall, an enumeration is just a list of identifiers of the integer type that share a common logical relationship with one another, such as the types of an object! Not only will this make discerning the type of this object easy to read in the code, but it also serves as an interface to describe the classification of this object. We will use this information to determine some custom rules while adding GameObjects to the inventory. To begin, we will start with a few different types of objects, where an object of the Coin type will accumulate in the same slot in the inventory. This holds true for objects of the type Ruby, Diamond, and so on as well. Unique objects will be added in their own slot in InventoryMgras follows:
4. Public enum CustomObjectType
5. {
6. Invalid = -1,
7. Unique = 0,
8. Coin = 1,
9. Ruby = 2,
10. Emerald = 3,
11. Diamond = 4
12.
}
13. A variable of the CustomObject type is added to this class to store the current type from the set discussed in the previous step. We use the public keyword so that a user can directly set the value of this variable inside the Unity Editor on an instance of the object:
public CustomObjectTypeobjectType CustomObjectType objectType;
14. A public variable of the string type is added so that Unity users can add some descriptive text to the object while designing them, as shown in the following code; this can be very helpful while debugging or trying to identify the objects inside the editor:
public string displayName;
15. Declare a method named validate(), which will be used to assign the unnamed_object string to the displayName field if one has not been assigned in the editor, as shown in the following code:
16.public void validate()
17.{
18. if (displayName == "")
19. displayName = "unnamed_object";
}
Congratulations! We now have a container for the CustomGameObject information that our inventory system will use. To continue, let's create the InteractiveObj script.
Implementing the InteractiveObj script
The InteractiveObj script declares a class that enables simple animation and permits player interactions. Perform the following steps to create the script:
1. To use the new script wizard, right-click inside the Chapter2 folder of the Project tab and add a C# script named InteractiveObj.
2. To enable our interactive object to rotate about its own axis at a user specified rate, we need to add two parameters: a rotation axis and a rotation speed, as shown in the following code:
3. public Vector3 rotAxis;
public float rotSpeed;
4. We will add a private reference to the customGameObject component for this GameObject so that we don't have to look it up at runtime. This can be done with the following line of code:
private customGameObject gameObjectInfo;
5. We will also add an ObjectInteraction member variable. This will be the code that specifies what will happen to our gameObject when the player interacts with it. There may be many interactions that an interactive object can implement; we will start our example with OnCloseEnough and will complete this in the OnTriggerEnter method, as shown in the following code:
public objectInteraction OnCloseEnough;
6. In the Start() method, we will search for the CustomGameObject component attached to gameObject. If it is found, we will store the reference in the gameObjectInfo private variable. Remember to always check that gameObjectInfo is not null so that debugging the code is a straightforward process, as shown in the following code:
7. gameObjectInfo = this.gameObject.GetComponent<customGameObject>();
8. if (gameObjectInfo)
gameObjectInfo.validate();
9. In the Update() method, we will apply a simple rotation to the object around the specified rotAxis parameter. We will rotate the object with the speed given in rotSpeed multiplied by Time.deltaTime so that the number of rotations is a function of the elapsed time rather than the frame time, as shown in the following code:
transform.Rotate(rotAxis, rotSpeed * Time.deltaTime);
10. The OnTriggerEnter() method will be invoked whenever the collider of this object collides with another collider in the world; incidentally, if we set IsTrigger=false on our gameObject, the OnCollisionEnter() method will be dispatched instead of OnTriggerEnter(). Note, for Unity to dispatch either of these callbacks, we must remember to add a Rigidbody component to the GameObject of InteractiveObj at the design time in the editor.
11. Note, when Unity dispatches this callback, it passes in another parameter of the collider type. This collider is the collider of the object that entered the trigger volume. Convenient! The signature looks as follows:
12.OnTriggerEnter(other collider)
13.{
}
14. In this method, we check that the other object (the gameObject that has just entered this collider) has a tag equal to Player, as shown in the next line of code. This is how we ensure that our trigger only responds to entities that we specify (we must remember to set the tag on the player gameObject to Player):
if (other.gameObject.tag == "Player")
15. If the OnCloseEnough object interaction is not null, we dereference it and invoke the handleInteraction() method. In our example, this method does the work of inserting objects into the inventory as shown in the following code:
16.if (OnCloseEnough != null)
17.{
18. OnCloseEnough.handleInteraction();
}
Congratulations! We now have a class that implements an interactive object. Let's continue further with an ObjectInteraction script that this class can utilize.
Implementing the ObjectInteraction script
The ObjectInteraction class defines how the interactive object will be manipulated when an interaction occurs between the object and the player. Perform the following steps to implement this:
1. Two enumerations are required to specify the action and the type of action. The action will be what we do with the item (put in inventory and use) initially, as shown in the following code:
2. public enum InteractionAction
3. {
4. Invalid = -1,
5. PutInInventory = 0,
6. Use = 1,
}
7. The corresponding type specializes this behavior by determining if the object is unique or can be accumulated with other interactive objects of the similar type. A unique interaction specifies that ObjectIneraction will insert this interactive object in a unique slot inInventoryMgr, while an accumulate interaction specifies that ObjectInteraction will insert this item (and increase the quantity) in the first available slot that matches the type set in CustomGameObj, as shown in the following code:
8. public enum InteractionType
9. {
10. Invalid = -1,
11. Unique = 0,
12. Accumulate = 1,
}
13. We keep the following two public variables to store the two enumerations discussed in the previous step:
14.public InteractionAction interaction;
public InteractionType interactionType;
15. We also keep a Texture variable to store the icon that will be displayed in the inventory for this GameObject as follows:
public Texture tex;
16. The HandleInteraction() method of this class works on the interactive object that this script is attached to. To begin, we get the InventoryMgr component off the player if it can be found. Don't worry that we haven't created the InventoryMgr yet; we will!
17.if (player)
iMgr = player.GetComponent<InventoryMgr>();
18. As we extend the number of interaction types that our game supports, this method will grow. For now, if PutIninventory is the type, we will delegate i=InventoryMgr to add this InteractiveObj to its collection as follows:
19.if (interaction == InteractionAction.PutInInventory)
20.{
21. if (iMgr)
22. iMgr.Add(this.gameObject.GetComponent<interactiveObj ();
}
Congratulations! You have implemented an ObjectInteraction class that operates on the InteractiveObj class. Let's continue by implementing the InventoryItem class.
Implementing the InventoryItem script
The InventoryItem class is the base item container that the InventoryMgr collection is built from. It contains a reference to GameObject that has been inserted in the inventory (via the ObjectInteraction class). It also has a copy of the texture to display in the inventory as well as the number of objects that a particular InventoryItem represents, as shown in the following code:
public Texture displayTexture;
public GameObject item;
public int quantity;
Note
Scripts that inherit from monobehavior can be fully manipulated by the Unity3D Editor; they can be attached to GameObjects, have the property values saved, among other things. This class does not inherit from monobehavior; as it is an internal helper class forInventoryMgr. It never has to be attached to GameObject (a programmer or designer would not normally want to attach one of these to a 3D object because it doesn't need a Transform component to do its work). This class only acts as the glue between the interactive objects that have been collected and the UI button that InventoryMgr displays for these objects' custom type. Hence, this class does not derive from any base class. This allows us to declare a list of these objects directly inside InventoryMgr.
To make the class show up in the inspector (in InventoryMgr), we need to add back some of the functionality that would have been included, had we inherited from monobehavior; namely, the serialization of its properties. Hence, we add the following code decoration before the class declaration:
[System.Serializable]
Implementing the InventoryMgr script
The InventoryMgr class contains the system that manages the InteractiveObj classes that the player collects. It displays inventory items in an inventory panel at the bottom of the screen. It has a method for adding inventory items and displaying inventory at the bottom of the screen. Perform the following steps to implement the InventoryMgr script:
1. To begin, recall that the class declaration for this system follows the same pattern as the others that were created with the new script wizard. Until this point, however, we haven't included any other namespaces than the default two: UnityEngine andSystem.Collections. For this class, note that we add using System.Collections.Generic in the code. Doing this gives us access to the List<> datatype in our scripts, which we will need to store the collection of inventory objects, as shown in the following code:
2. using UnityEngine;
3. using System.Collections;
4. using System.Collections.Generic;
5.
6. public class InventoryMgr : MonoBehaviour {
7.
public List<InventoryItem> inventoryObjects = new List<InventoryItem>();
8. The InventoryMgr class also has parameters that describe the way in which the constraints on the UI will be displayed, along with a reference to the MissionMgr script, as shown in the following code:
9. public int numCells;
10.public float height;
11.public float width;
12.public float yPosition;
private MissionMgr missionMgr;
13. In the Start() method, when this class is first created, we will find the object in the scene named Game, and store a reference to the MissionMgr script that is attached to it, as shown in the following code:
14.void Start () {
15. GameObject go = GameObject.Find ("Game");
16. if (go)
17. missionMgr = go.GetComponent<MissionMgr>();
}
18. The Add() method is used by ObjectInteraction.handleInteraction() to insert an InteractiveObj in the inventory (when it is picked up). Recall that the signature looks as follows:
19.public void Add(InteractiveObj iObj)
20.{
ObjectInteraction oi = iObj.OnCloseEnough;
21. Based on the ObjectInteraction type specified in the interaction, the Add() method will behave in specialized ways, and a switch statement is used to select which specific behavior to use. If the ObjectInteraction type is Unique, then InventoryMgr inserts thisInteractiveObj in the first available slot, as shown in the following code:
22.switch(oi.interactionType)
23.{
24. case(ObjectInteraction.interactionType.Unique):
25. {
26. // slot into first available spot
27. Insert(iObj);
28. }
break;
29. If the ObjectInteraction type is Accumulate, then InventoryMgr will insert this in the first slot that matches the CustomGameObject type on the interactive object. To determine this matching, we first store a reference to the CustomGameObject script on the interactive object that is being inserted. If this object does not have a CustomGameObject script, we assume the type is Invalid, as shown in the following code:
30.case(ObjectInteraction.InteractionType.Accumulate):
31.{
32. bool inserted = false;
33.
34. // find object of same type, and increase
35. CustomGameObject cgo = iObj.gameObject.GetComponent<CustomGameObject>();
36.
37. CustomGameObject.CustomObjectType ot = CustomGameObject.CustomObjectType.Invalid;
38.
39. if (cgo != null)
ot = cgo.objectType;
40. The InventoryMgr class then loops over all inventory objects in the list. If it finds an object that has a matching CustomGameObject type to the interactive object that is being inserted, it increases the quantity property on that InventoryObj. If a match is not found, thenInventoryObj is permitted to be inserted in the list as if it were a unique item, as shown in the following code:
41.for (int i = 0; i < inventoryObjects.Count; i++)
42.{
43.CustomGameObject cgoi = inventoryObjects[i].item.GetComponent
44.<CustomGameObject>();
45.CustomGameObject.CustomObjectType io = CustomGameObject.CustomObjectType.Invalid;
46. if (cgoi != null)
47. io = cgoi.objectType;
48.
49. if (ot == io)
50. {
51. inventoryObjects[i].quantity++;
52. // add token from this object to missionMgr
53. // to track, if this obj as a token
54. MissionToken mt = iObj.gameObject.GetComponent<MissionToken>();
55.
56. if (mt != null)
57. missionMgr.Add(mt);
58.
59. iObj.gameObject.SetActive(false);
60. inserted = true;
61. break;
62. }
}
63. Note, if the types of the object match any existing object on the list, we do some book keeping. We increase its number as well as copy the texture reference that we will display in the inventory. We will also disable the object (to stop it from rendering and interacting with the world) by setting its active flag to false and then we leave the loop, as shown in the following code. We will declare the MissionToken script later in this chapter:
64. if (ot == io)
65. {
66. inventoryObjects[i].quantity++;
67.missionTokenmt = iObj.gameObject.GetComponent<MissionToken>(); iObj.gameObject.SetActive (false);
68. inserted = true;
}
69. An important aspect to note here is that we need to check if there is a MissionToken script attached to this InteractiveObj. If there is one, then we will add it to MissionMgr. In this way, we will complete the communication between the two management systems in this chapter. Later, we will see how MissionMgr searches for complete missions and rewards the player using mechanics similar to those discussed earlier:
70. if (mt != null)
missionMgr.Add(mt);
71. The Insert() method of InventoryMgr is used to perform the actual insertion work in the list of inventory objects. It is declared with the following signature:
72.void Insert(InteractiveObj iObj){
}
73. This method first allocates a new InventoryItem with the new operator. We have to use new instead of Object.Instantiate to create a new instance of this class because this class does not inherit from Object. With a new instance of InventoryItem available for use, we will populate its properties with the data from InteractiveObj, as shown in the following code:
74.InventoryItem ii = new InventoryItem();
75. ii.item = iObj.gameObject;
ii.quantity = 1;
76. Then, we will disable GameObject of InteractiveObj (just in case it is still enabled), and finally add the InventoryItem to the list with a direct call to inventoryObjects.add, as shown in the following code:
77. ii.item.SetActive (false);
inventoryObjects.Add (ii);
78. Lastly, just in case there is MissionToken attached to this GameObject from some other code path, we will extract the token and add it to MissionMgr for tracking, as shown in the following code:
79. MissionToken mt = ii.item.GetComponent<MissionToken>();
80. if (mt != null)
missionMgr.Add(mt);
And this completes the work on the Insert() method.
Implementing the DisplayInventory method
Let's continue our work by developing InventoryMgr as we program the method that will display all of the inventory objects on screen by performing the following steps:
1. The DisplayInventory() method is declared with the following signature:
2. void DisplayInventory() {
}
3. This method also walks through the collection, but instead of checking the type of object, it will display a series of GUI buttons on the screen. It will also show displayTexture for the item in each inventory. As the position of the inventory cells are relative to the screen, we need to calculate the button positions based on the screen width and height, as shown in the following code:
4. float sw = Screen.width;
float sh = Screen.height;
5. We will also store a reference to the texture we will display in each cell, as shown in the following code:
Texture buttonTexture = null;
6. Then, for clarity, we will store the number of cells in a local integer to display as shown in the following code:
int totalCellsToDisplay = inventoryObjects.Count;
7. We will loop over all the cells and extract the texture and quantity in each InventoryItem in the collection, as shown in the following code:
8. for (int i = 0; i<totalCellsToDisplay; i++)
9. {
10. InventoryItem ii = InventoryObjects[i];
11. t = ii.displayTexture;
int quantity = ii.quantity;
The result of this code is shown as follows:

12. We will compute the total length of all the cells that we want to display. This is used in the code to render the cells centered in the middle of the screen horizontally. Recall that the width and height hold the individual cell width and height:
float totalCellLength = sw – (numcells * width);
As InventoryMgr loops over all InventoryObjects, we draw a new rectangle for each item to be displayed on the screen. To do this, we need to know the x, y coordinates of the upper-left corner of the rectangle, the height and width of an individual rectangle, and the texture. The y height doesn't vary since the inventory is a horizontal row on screen, and the cell height and width don't vary since the cells are uniform by design. The texture will change, but we can use the cached value. So, we need to focus our attention on the x coordinate for a centered array of varying length.
13. It turns out that we can use this formula. The totalCellLength parameter is the amount of white space horizontally when all the cells are aligned on one side. If we subtract half of this, we get the starting coordinate that will be positioned half on the right and half on the left equally. Considering that width and height are the dimensions of the individual buttons for display and that i is the loop index for the loop we are discussing, then adding (width*i) ensures that the subsequent x coordinates vary horizontally across the array, as shown in the following code:
float xcoord = totalCellLength – 0.5f*(totalCellLength) +(width*i);
14. The rectangle that corresponds to the shape of the button we want to display is then calculated with the following formula. Note that its position on the screen is a function of i, the loop index, as well as y, the screen width and height, and the button width and height:
Rect r = new Rect(totalCellLength - 0.5f*(totalCellLength) + (width*i), yPosition*sh, width, height);
With all of these quantities now calculated, we will display the button with the GUI.button(r, buttonTexture) method, as shown in the following code. We will check for a true return value from this function because this is how we track when the user clicks on a button:
if (GUI.Button(r, buttonTexture))
{
// to do – handle clicks there
}
15. Recall that we need to display the number of items with each button. We do this with the GUI.Label method in a way analogous to the previous code. We will compute a second rectangle for the quantity that mirrors the cell for the button, but we will use half the cell width and height to position the rectangle in the upper-left corner for a nice effect!
16. We will convert the quantity field of the current InventoryItem class to a string with the built-in function called ToString() that the integer implements, and we will pass this to the GUI.Label method, as shown in the following code:
17.Istring s = quantity.ToString()
GUI.Label(r2, s);
18. To display UI textures and elements on the screen, Unity provides a special callback method to place our UI code whenever the UI is refreshed. This method is called OnGui() and has the following signature:
19.void OnGUI(){
}
20. We invoke our DisplayInventory() method inside the void OnGUI() method that Unity provides because this method draws the InventoryItems list of InventoryMgr to the screen in the form of UI buttons. This callback is where all drawing and GUI-related processing occurs, as shown in the following code:
21.void OnGUI()
22.{
23. DisplayInventory();
}
We could modify this code slightly to draw the maximum number of cells in the inventory rather than the total number of filled InventoryMgr cells. We must be careful to not dereference past the end of the collection if we have been doing so!
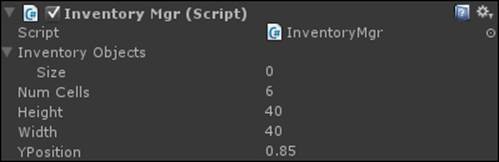
Congratulations! We now have a working InventoryMgr system that can interface with interactive objects and collect them based on their custom type! While we touched briefly on the MissionToken class in this explanation, we need to develop a system for tracking the abstract mission objectives and rewarding the player on achieving success. This requires multiple classes. The result of performing these steps is shown in the following screenshot:
Implementing the MissionMgr script
The MissionMgr class tracks the user's progress through abstract objectives. These objectives will be learning objectives that satisfy the game design. The pattern we use to manage missions will be similar to InventoryMgr; however, this system will be in charge of comparing the player's objectives with a master list of missions and with what is required to complete each one. To develop it, let's perform the following steps:
1. To accomplish this work, MissionMgr will need two lists. One list to hold all of the missions that the player could try and solve and another for the current tokens that the player has acquired (through interacting with interactive objects, for instance). TheMissionTokens collection is allocated at runtime and set to empty so that the player always starts having accomplished nothing; we could develop a way later to load and save the mission progress via this system. The missions' list will be populated at runtime in the editor and saved, so we don't want to initialize this at runtime:
2. Public List<mission> missions;
Public List<missionToken> missionTokens = new List<missionTokens>();
3. The MissionMgr implements three methods that allow it to perform its role and interface with other game systems:
· Add(missionToken): This method adds a newly acquired MissionToken to the collection. This collection will be queried while trying to determine if a mission has been completed. In Add(), we use a similar methodology as the Add() method for InventoryMgr. In this case, assume that the token is unique and search for a duplicate by iterating over all of the tokens for the current mission m, as shown in the following code:
· bool uniqueToken = true;
· for (int i = 0; i<missionTokens.Count; i++)
· {
· //…
}
If a duplicate is found, namely, a token is found in the collection with the same id field as the add candidate, we abort the operation as shown in the following code:
if (missionTokens[i].id == mt.id)
{
// duplicate token found, so abort the insert
uniqueToken = false;
break;
}
If a duplicate is not found, we add this token to the list as shown in the following code:
if (uniqueToken)
{
missionTokens.add(mt);
}
· Validate(mission): This method will compare currentToken set to a specific mission. If it has been found to have been satisfied, the system is notified. To do this, we will use a search pattern similar to the one used in the Add() method and start by assumingthe mission is complete; only this time we will use a double-nested loop! This is because to validate a mission means to search, individually, for each token in the current mission against all of the tokens the user has collected so far. This is done as shown in the following code:
· bool missionComplete = true;
· for (intinti = 0; I < m.tokens.Count; i++)
· {
· bool tokenFound = false;
· for (int j = 0; j < missionTokens.count ; j++)
· {
· // if tokens match, tokenFound = true
· }
}
By assuming the token will not be found initially, we are required to search for a matching token ID. If we don't find it, it automatically means that the mission cannot be complete, and we don't have to process any more comparisons, as shown in the following code:
if (tokenFound == true))
{
missionComplete = false;
break;
}
· ValidateAll(): This methods invokes Validate() on all user-defined missions if they are not already complete. If any mission is found to be completed, a reward is instantiated for the player through the InvokeReward() method, as shown in the following code:
· void ValidateAll() {
·
· for (int i = 0; i < missions.Count; i++)
· {
· Mission m = missions[i];
·
· // validate missions…
· }
}
We will sequentially search through all user-defined missions that have not already been completed (no need to do this once a mission is done). This enumeration will be defined in the Mission script, as shown in the following code:
if (m.status != mission.missionStatus.MS_Completed)
{
bool missionSuccess = Validate(m);
If the mission has been validated as being complete, the mission implements an InvokeReward() method to reward the user, as shown in the following code:
if (missionSuccess == true)
{
m.InvokeReward();
}
Implementing the Mission script
The Mission class is the container for MissionTokens. It implements a state that helps us specialize how a mission should be treated by the game (for instance, we may want to have the player acquire a mission but not start it). This class has a number of state variables for future extension such as activated, visible, and points.
1. As with the InventoryItem class, the Mission class is a helper class that only the MissionMgr class uses. Hence, it does not inherit from monobehavior. Therefore, the class signature must include the [System.Serializable] tag as before:
2. using UnityEngine;
3. using System.Collections;
4. using System.Collections.Generic;
5.
6. [System.Serializable]
public class Mission {
7. This class also implements an enumeration to describe the state of a particular mission. This is used to encode whether a state is invalid, acquired, in progress, or solved so that MissionMgr can handle the mission appropriately, as shown in the following code:
8. public enum missionStatus
9. {
10. MS_Invalid = -1,
11. MS_Acquired = 0,
12. MS_InProgress = 1,
13. MS_Completed = 2
};
14. The public variable status is an instance variable of the status enumerated type in this class. We will use this initially to make sure that once a mission is complete, MissionMgr no longer tries to validate it. This can be done with the following code:
Public missionStatus status;
15. The specific elements that comprise a mission are the mission tokens that the user puts in the tokens' collection. This is a collection of logical pieces that comprises a complete objective in the game. This list will be compared against the players' acquired tokens in MissionMgr, as shown in the following code:
Public List<missionTokens> tokens;
16. The points and reward public variables are used to store the numerical score and the in-game rewards that are given to the user when a mission is completed. Note, GameObject reward could be used as a completion callback, in addition to a reference to a Prefab item for the user to pick up, as shown in the following code:
17.public int points;
public GameObject reward;
18. The displayName public variable is used by the user in the Unity3D Editor as a place for a helpful string to describe the mission's nature, as shown in the following code:
public string displayName;
This class implements one method: the InvokeReward() method. This function will spawn a new gameObject into the world that has been set in the editor. Through this mechanism, the player can be rewarded with points, a new object or objective can appear in the world, or any other outcome can be encapsulated in a Unity Prefab object.
19. Once a mission has been validated and InvokeReward has been called, the mission itself is disabled and its status is set to Completed, as shown in the following code:
this.status = missionStatus.MS_Completed;
Implementing the MissionToken script
The MissionToken class stores the information for an individual mission component. This class acts as a container for this abstract data. We give it an ID, a title that is human readable, and a description. By giving each MissionToken a unique ID, we give the Missionclass a powerful way of tracking the mission progress. This class is used in a way by which the user adds instances of this component to various interactive objects that can be manipulated by the player, as shown in the following code:
Public int id;
Public string title;
Public string description;
Implementing the SimpleLifespanScript
The SimpleLifespanScript class is a simple helper class that can be used in conjunction with the Instantiate() method to instantiate a GameObject in the world that will have a specified but finite lifespan. We use it to enable an instance of a Prefab that is live for a set period of time and then destroys itself as a reward for completing a mission. By attaching this to the reward that is displayed when a mission is completed, the prompt is given a set duration on the screen after which it disappears.
Specifically, the seconds parameter is the time for which the object will survive before self destruction, as shown in the following code:
Public float seconds
In the update method, we count this value by the actual time elapsed in each frame (from Timer.deltaTime). Once this reaches zero, we destroy the object and all the scripts attached to it (including the simpleLifespanScript), as shown in the following code:
seconds -= Time.deltaTime;
if (seconds <= 0.0f)
GameObject.Destroy(this.gameObject);
Congratulations! We now have a robust set of scripts for MissionMgr, missions, tokens, and rewards. Let's apply what we have built in an example that exercises the mission system, the inventory system, and interactive objects.
Putting it all together
Now that we have developed the classes necessary for the InventoryMgr, MissionMgr, and InteractiveObj systems, let's build a scene that illustrates their functionality.
1. To get started, let's continue from Chapter 1, Introduction to E-Learning and the Three Cs of 3D Games, where we left off. Load the scene and save a copy named chapter2.
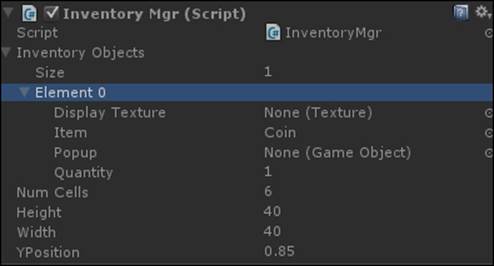
2. Add an instance of InventoryMgr to the Player GameObject by dragging-and-dropping it from the Project tab to the player object. Alternatively, click on Player and select Add component from the Inspector pane. Type in the name InventoryMgr and then click on it to add an instance.
3. Click on Player and ensure that the Tag is set to Player. The InteractiveObj class will use this to make sure they can only be picked up by the player.
4. Set Height and Width to 40 pixels to make the individual cells square shaped. Set the Yposition to 0.85 to indicate a y coordinate of 85 percent from the top of the screen.
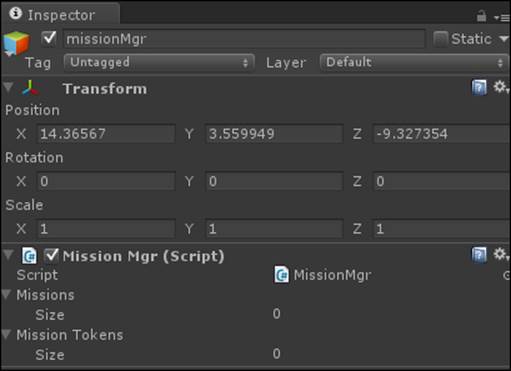
5. Create a new empty GameObject and name it MissionMgr. Attach the MissionMgr script to this object. We purposely detach this script from the player because the lifespan of MissionMgr may differ from the player object.
The results of all the discussed settings are shown in the following screenshot:
Now that we have added our new tracking systems to the game, let's create some objects to interact with:
1. Create a sphere and place it on the ground plane. Name it A_Coin and disable the mesh renderer component. On the sphere collider, click the IsTrigger checkbox so that we can detect when the player enters the object.
2. Add a Rigidbody component to the object. This is necessary for the OnTriggerEnter callback to be dispatched by the engine. Remember, the way Unity detects when the player (or any other object) enters a trigger is by checking its Rigidbody component; so, if there is no such component attached, the the callback will not be dispatched.
3. Add a CustomGameObject script to this object. Set the display name to money and the object type to coin.
4. Add a MissionToken script to this object. Set id to 1, Title to token, and the Description to mission 1 token.
5. Add an InteractiveObj script to this object. Set Rot Axis to (0, 1, 0) to make the object rotate horizontally about the y axis. Set Rot Speed to 40 for a gentle rotation.
6. Add an ObjectInteraction script to this object. Set the interaction to putInInventory. Set the interaction type to accumulate. Point Tex to the Coin-icon coin texture.
7. Drag-and-drop this gameObject into the OnCloseEnough variable of the InteractiveObject component. This will connect this reference to the ObjectInteraction component on gameObject itself.
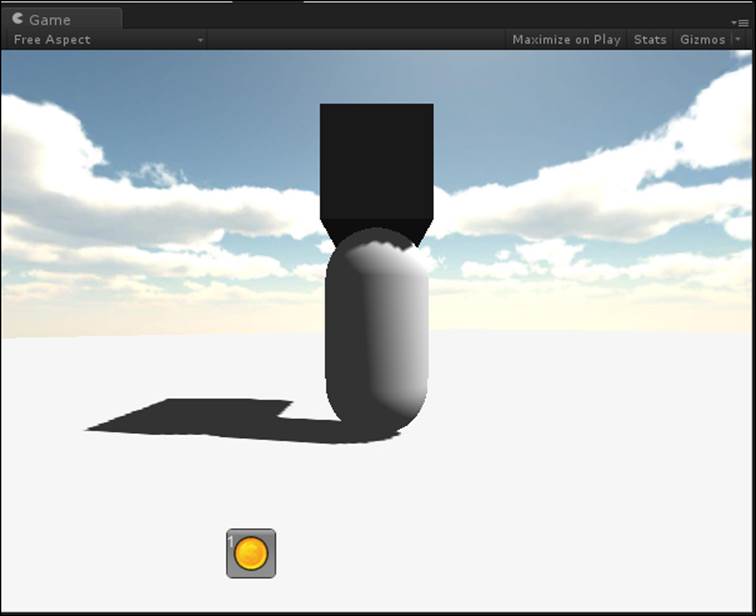
8. Now that the script is wired up, let's add a yellow coin model to the coin base. Create a cylinder gameObject, parent it to the A_Coin base, and set its local position to (0, 0, 0). Create a material, colored yellow, and attach it to the mesh renderer of the cylinder.
9. Set its rotation to (90, 0, 0) in the inspector. Set its scale to (0, 0.16, 0) in the inspector as well.
The result of all these steps can be seen in the following screenshot:
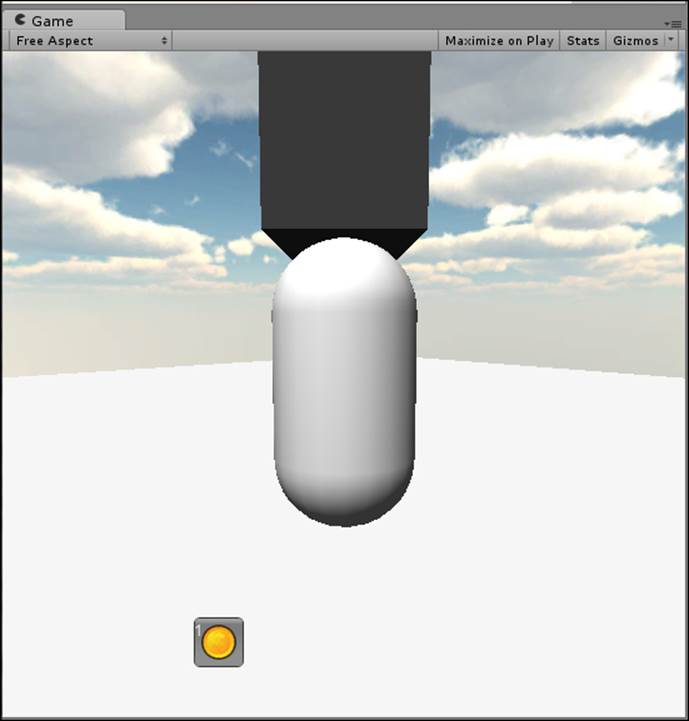
Congratulations! We now have one interactive object in the world. To test this, let's click on play and observe a slowly rotating coin. If we then walk the player up to it so that he or she can collect it, we will then see the inventory displaying the item.
Testing the mission system
Let's add another type of interactive object and then build a couple of missions to finish validating our work.
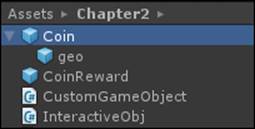
1. Drag-and-drop this A_Coin object from the Hierarchy tab into the Project tab, thereby creating a Prefab. Name this Prefab coin, as shown in the following screenshot:
2. Create a second interactive object, following the steps 1 to 9 from the Building an interactive object section. Instead of making a yellow coin, create a red ruby and point the inventory texture to the ruby icon texture provided.
3. Name this object A_Ruby and set the mission token ID to 4.
4. Drag-and-drop A_Ruby to the Project tab, forming a Prefab named Ruby.
5. Drag-and-drop the coin and ruby Prefabs back into the Hierarchy tab. At this point, there should be two coins and two rubies. Set the mission token ID of the second coin to 2 and the second ruby to 4.
Now that we have two coins and two rubies, let's create two missions!
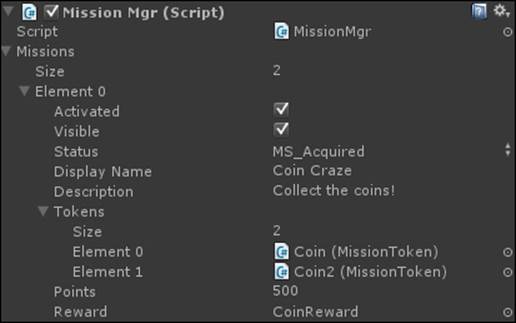
1. Click on MissionMgr and increase the size of the missions' array to 2. Note that the array populates with an empty version of the Mission class. Set the first mission to activated and visible.
2. Set the first mission state to MS_ACQUIRED and name it Coin Craze.
3. Set the description to collect all of the coins.
4. Set the points to 500.
5. Under tokens, drag-and-drop the two coin game objects. This will set the references to MissionTokens attached to the coin Prefabs.
6. Create a reward Prefab out of GuiText with SimpleLifeSpanScript attached. Set the string to You have completed the coin challenge with a lifespan of 2 seconds. Drag-and-drop this Prefab into the reward field of mission 1 in the mission manager. Make sure to delete any instances of this reward Prefab from the hierarchy; we want MissionMgr to spawn this!
7. Follow steps 7 to 12 from the Building an interactive object section again, only this time name the mission Ruby Run and point the mission tokens to the two ruby instances in the world (with unique mission token IDs). Create a new reward for this mission and drag-and-drop its Prefab onto the reward for mission 2.
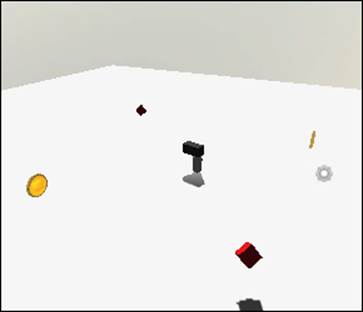
8. Position the coins and rubies in the world at random locations in the game world. Play the level to observe MissionMgr in action, as shown in the following screenshot:
Try it out!
Congratulations! We now have two missions with which we can test interactive objects and player mission objectives. Note that when you play the game, you can collect the items in any order and that the inventory will update the quantity of objects from one to two as you collect them. The reward displays for two seconds and then the mission disables itself.
Summary
We have learned how to develop interactive objects, an inventory system, and a mission tracking system. We have shown examples of how components attached to GameObject can communicate with one another. We have extensively used the list container and the search pattern to implement tracking and inventory maintenance methods. Going forward, we will use these systems in conjunction with a little applied psychology and gamification theory to develop the first mission in our game.
All materials on the site are licensed Creative Commons Attribution-Sharealike 3.0 Unported CC BY-SA 3.0 & GNU Free Documentation License (GFDL)
If you are the copyright holder of any material contained on our site and intend to remove it, please contact our site administrator for approval.
© 2016-2026 All site design rights belong to S.Y.A.