Automate the Boring Stuff with Python: Practical Programming for Total Beginnerso (2015)
Part II. Automating Tasks
Chapter 15. Keeping Time, Scheduling Tasks, and Launching Programs
Running programs while you’re sitting at your computer is fine, but it’s also useful to have programs run without your direct supervision. Your computer’s clock can schedule programs to run code at some specified time and date or at regular intervals. For example, your program could scrape a website every hour to check for changes or do a CPU-intensive task at 4 AM while you sleep. Python’s time and datetime modules provide these functions.
You can also write programs that launch other programs on a schedule by using the subprocess and threading modules. Often, the fastest way to program is to take advantage of applications that other people have already written.
The time Module
Your computer’s system clock is set to a specific date, time, and time zone. The built-in time module allows your Python programs to read the system clock for the current time. The time.time() and time.sleep() functions are the most useful in the time module.
The time.time() Function
The Unix epoch is a time reference commonly used in programming: 12 AM on January 1, 1970, Coordinated Universal Time (UTC). The time.time() function returns the number of seconds since that moment as a float value. (Recall that a float is just a number with a decimal point.) This number is called an epoch timestamp. For example, enter the following into the interactive shell:
>>> import time
>>> time.time()
1425063955.068649
Here I’m calling time.time() on February 27, 2015, at 11:05 Pacific Standard Time, or 7:05 PM UTC. The return value is how many seconds have passed between the Unix epoch and the moment time.time() was called.
NOTE
The interactive shell examples will yield dates and times for when I wrote this chapter in February 2015. Unless you’re a time traveler, your dates and times will be different.
Epoch timestamps can be used to profile code, that is, measure how long a piece of code takes to run. If you call time.time() at the beginning of the code block you want to measure and again at the end, you can subtract the first timestamp from the second to find the elapsed time between those two calls. For example, open a new file editor window and enter the following program:
import time
➊ def calcProd():
# Calculate the product of the first 100,000 numbers.
product = 1
for i in range(1, 100000):
product = product * i
return product
➋ startTime = time.time()
prod = calcProd()
➌ endTime = time.time()
➍ print('The result is %s digits long.' % (len(str(prod))))
➎ print('Took %s seconds to calculate.' % (endTime - startTime))
At ➊, we define a function calcProd() to loop through the integers from 1 to 99,999 and return their product. At ➋, we call time.time() and store it in startTime. Right after calling calcProd(), we call time.time() again and store it in endTime ➌. We end by printing the length of the product returned by calcProd() ➍ and how long it took to run calcProd() ➎.
Save this program as calcProd.py and run it. The output will look something like this:
The result is 456569 digits long.
Took 2.844162940979004 seconds to calculate.
NOTE
Another way to profile your code is to use the cProfile.run() function, which provides a much more informative level of detail than the simple time.time() technique. The cProfile.run() function is explained at https://docs.python.org/3/library/profile.html.
The time.sleep() Function
If you need to pause your program for a while, call the time.sleep() function and pass it the number of seconds you want your program to stay paused. Enter the following into the interactive shell:
>>> import time
>>> for i in range(3):
➊ print('Tick')
➋ time.sleep(1)
➌ print('Tock')
➍ time.sleep(1)
Tick
Tock
Tick
Tock
Tick
Tock
➎ >>> time.sleep(5)
The for loop will print Tick ➊, pause for one second ➋, print Tock ➌, pause for one second ➍, print Tick, pause, and so on until Tick and Tock have each been printed three times.
The time.sleep() function will block — that is, it will not return and release your program to execute other code — until after the number of seconds you passed to time.sleep() has elapsed. For example, if you enter time.sleep(5) ➎, you’ll see that the next prompt (>>>) doesn’t appear until five seconds have passed.
Be aware that pressing CTRL-C will not interrupt time.sleep() calls in IDLE. IDLE waits until the entire pause is over before raising the KeyboardInterrupt exception. To work around this problem, instead of having a single time.sleep(30) call to pause for 30 seconds, use a for loop to make 30 calls to time.sleep(1).
>>> for i in range(30):
time.sleep(1)
If you press CTRL-C sometime during these 30 seconds, you should see the KeyboardInterrupt exception thrown right away.
Rounding Numbers
When working with times, you’ll often encounter float values with many digits after the decimal. To make these values easier to work with, you can shorten them with Python’s built-in round() function, which rounds a float to the precision you specify. Just pass in the number you want to round, plus an optional second argument representing how many digits after the decimal point you want to round it to. If you omit the second argument, round() rounds your number to the nearest whole integer. Enter the following into the interactive shell:
>>> import time
>>> now = time.time()
>>> now
1425064108.017826
>>> round(now, 2)
1425064108.02
>>> round(now, 4)
1425064108.0178
>>> round(now)
1425064108
After importing time and storing time.time() in now, we call round(now, 2) to round now to two digits after the decimal, round(now, 4) to round to four digits after the decimal, and round(now) to round to the nearest integer.
Project: Super Stopwatch
Say you want to track how much time you spend on boring tasks you haven’t automated yet. You don’t have a physical stopwatch, and it’s surprisingly difficult to find a free stopwatch app for your laptop or smartphone that isn’t covered in ads and doesn’t send a copy of your browser history to marketers. (It says it can do this in the license agreement you agreed to. You did read the license agreement, didn’t you?) You can write a simple stopwatch program yourself in Python.
At a high level, here’s what your program will do:
§ Track the amount of time elapsed between presses of the ENTER key, with each key press starting a new “lap” on the timer.
§ Print the lap number, total time, and lap time.
This means your code will need to do the following:
§ Find the current time by calling time.time() and store it as a timestamp at the start of the program, as well as at the start of each lap.
§ Keep a lap counter and increment it every time the user presses ENTER.
§ Calculate the elapsed time by subtracting timestamps.
§ Handle the KeyboardInterrupt exception so the user can press CTRL-C to quit.
Open a new file editor window and save it as stopwatch.py.
Step 1: Set Up the Program to Track Times
The stopwatch program will need to use the current time, so you’ll want to import the time module. Your program should also print some brief instructions to the user before calling input(), so the timer can begin after the user presses ENTER. Then the code will start tracking lap times.
Enter the following code into the file editor, writing a TODO comment as a placeholder for the rest of the code:
#! python3
# stopwatch.py - A simple stopwatch program.
import time
# Display the program's instructions.
print('Press ENTER to begin. Afterwards, press ENTER to "click" the stopwatch.
Press Ctrl-C to quit.')
input() # press Enter to begin
print('Started.')
startTime = time.time() # get the first lap's start time
lastTime = startTime
lapNum = 1
# TODO: Start tracking the lap times.
Now that we’ve written the code to display the instructions, start the first lap, note the time, and set our lap count to 1.
Step 2: Track and Print Lap Times
Now let’s write the code to start each new lap, calculate how long the previous lap took, and calculate the total time elapsed since starting the stopwatch. We’ll display the lap time and total time and increase the lap count for each new lap. Add the following code to your program:
#! python3
# stopwatch.py - A simple stopwatch program.
import time
--snip--
# Start tracking the lap times.
➊ try:
➋ while True:
input()
➌ lapTime = round(time.time() - lastTime, 2)
➍ totalTime = round(time.time() - startTime, 2)
➎ print('Lap #%s: %s (%s)' % (lapNum, totalTime, lapTime), end='')
lapNum += 1
lastTime = time.time() # reset the last lap time
➏ except KeyboardInterrupt:
# Handle the Ctrl-C exception to keep its error message from displaying.
print('\nDone.')
If the user presses CTRL-C to stop the stopwatch, the KeyboardInterrupt exception will be raised, and the program will crash if its execution is not a try statement. To prevent crashing, we wrap this part of the program in a try statement ➊. We’ll handle the exception in the except clause ➏, so when CTRL-C is pressed and the exception is raised, the program execution moves to the except clause to print Done, instead of the KeyboardInterrupt error message. Until this happens, the execution is inside an infinite loop ➋ that calls input() and waits until the user presses ENTER to end a lap. When a lap ends, we calculate how long the lap took by subtracting the start time of the lap, lastTime, from the current time, time.time() ➌. We calculate the total time elapsed by subtracting the overall start time of the stopwatch, startTime, from the current time ➍.
Since the results of these time calculations will have many digits after the decimal point (such as 4.766272783279419), we use the round() function to round the float value to two digits at ➌ and ➍.
At ➎, we print the lap number, total time elapsed, and the lap time. Since the user pressing ENTER for the input() call will print a newline to the screen, pass end='' to the print() function to avoid double-spacing the output. After printing the lap information, we get ready for the next lap by adding 1 to the count lapNum and setting lastTime to the current time, which is the start time of the next lap.
Ideas for Similar Programs
Time tracking opens up several possibilities for your programs. Although you can download apps to do some of these things, the benefit of writing programs yourself is that they will be free and not bloated with ads and useless features. You could write similar programs to do the following:
§ Create a simple timesheet app that records when you type a person’s name and uses the current time to clock them in or out.
§ Add a feature to your program to display the elapsed time since a process started, such as a download that uses the requests module. (See Chapter 11.)
§ Intermittently check how long a program has been running and offer the user a chance to cancel tasks that are taking too long.
The datetime Module
The time module is useful for getting a Unix epoch timestamp to work with. But if you want to display a date in a more convenient format, or do arithmetic with dates (for example, figuring out what date was 205 days ago or what date is 123 days from now), you should use the datetimemodule.
The datetime module has its own datetime data type. datetime values represent a specific moment in time. Enter the following into the interactive shell:
>>> import datetime
➊ >>> datetime.datetime.now()
➋ datetime.datetime(2015, 2, 27, 11, 10, 49, 55, 53)
➌ >>> dt = datetime.datetime(2015, 10, 21, 16, 29, 0)
➍ >>> dt.year, dt.month, dt.day
(2015, 10, 21)
➎ >>> dt.hour, dt.minute, dt.second
(16, 29, 0)
Calling datetime.datetime.now() ➊ returns a datetime object ➋ for the current date and time, according to your computer’s clock. This object includes the year, month, day, hour, minute, second, and microsecond of the current moment. You can also retrieve a datetime object for a specific moment by using the datetime.datetime() function ➌, passing it integers representing the year, month, day, hour, and second of the moment you want. These integers will be stored in the datetime object’s year, month, day ➍, hour, minute, and second ➎ attributes.
A Unix epoch timestamp can be converted to a datetime object with the datetime.datetime.fromtimestamp() function. The date and time of the datetime object will be converted for the local time zone. Enter the following into the interactive shell:
>>> datetime.datetime.fromtimestamp(1000000)
datetime.datetime(1970, 1, 12, 5, 46, 40)
>>> datetime.datetime.fromtimestamp(time.time())
datetime.datetime(2015, 2, 27, 11, 13, 0, 604980)
Calling datetime.datetime.fromtimestamp() and passing it 1000000 returns a datetime object for the moment 1,000,000 seconds after the Unix epoch. Passing time.time(), the Unix epoch timestamp for the current moment, returns a datetime object for the current moment. So the expressions datetime.datetime.now() and datetime.datetime.fromtimestamp(time.time()) do the same thing; they both give you a datetime object for the present moment.
NOTE
These examples were entered on a computer set to Pacific Standard Time. If you’re in another time zone, your results will look different.
datetime objects can be compared with each other using comparison operators to find out which one precedes the other. The later datetime object is the “greater” value. Enter the following into the interactive shell:
➊ >>> halloween2015 = datetime.datetime(2015, 10, 31, 0, 0, 0)
➋ >>> newyears2016 = datetime.datetime(2016, 1, 1, 0, 0, 0)
>>> oct31_2015 = datetime.datetime(2015, 10, 31, 0, 0, 0)
➌ >>> halloween2015 == oct31_2015
True
➍ >>> halloween2015 > newyears2016
False
➎ >>> newyears2016 > halloween2015
True
>>> newyears2016 != oct31_2015
True
Make a datetime object for the first moment (midnight) of October 31, 2015 and store it in halloween2015 ➊. Make a datetime object for the first moment of January 1, 2016 and store it in newyears2016 ➋. Then make another object for midnight on October 31, 2015 and store it inoct31_2015. Comparing halloween2015 and oct31_2015 shows that they’re equal ➌. Comparing newyears2016 and halloween2015 shows that newyears2016 is greater (later) than halloween2015 ➍ ➎.
The timedelta Data Type
The datetime module also provides a timedelta data type, which represents a duration of time rather than a moment in time. Enter the following into the interactive shell:
➊ >>> delta = datetime.timedelta(days=11, hours=10, minutes=9, seconds=8)
➋ >>> delta.days, delta.seconds, delta.microseconds
(11, 36548, 0)
>>> delta.total_seconds()
986948.0
>>> str(delta)
'11 days, 10:09:08'
To create a timedelta object, use the datetime.timedelta() function. The datetime.timedelta() function takes keyword arguments weeks, days, hours, minutes, seconds, milliseconds, and microseconds. There is no month or year keyword argument because “a month” or “a year” is a variable amount of time depending on the particular month or year. A timedelta object has the total duration represented in days, seconds, and microseconds. These numbers are stored in the days, seconds, and microseconds attributes, respectively. The total_seconds() method will return the duration in number of seconds alone. Passing a timedelta object to str() will return a nicely formatted, human-readable string representation of the object.
In this example, we pass keyword arguments to datetime.delta() to specify a duration of 11 days, 10 hours, 9 minutes, and 8 seconds, and store the returned timedelta object in delta ➊. This timedelta object’s days attributes stores 11, and its seconds attribute stores 36548 (10 hours, 9 minutes, and 8 seconds, expressed in seconds) ➋. Calling total_seconds() tells us that 11 days, 10 hours, 9 minutes, and 8 seconds is 986,948 seconds. Finally, passing the timedelta object to str() returns a string clearly explaning the duration.
The arithmetic operators can be used to perform date arithmetic on datetime values. For example, to calculate the date 1,000 days from now, enter the following into the interactive shell:
>>> dt = datetime.datetime.now()
>>> dt
datetime.datetime(2015, 2, 27, 18, 38, 50, 636181)
>>> thousandDays = datetime.timedelta(days=1000)
>>> dt + thousandDays
datetime.datetime(2017, 11, 23, 18, 38, 50, 636181)
First, make a datetime object for the current moment and store it in dt. Then make a timedelta object for a duration of 1,000 days and store it in thousandDays. Add dt and thousandDays together to get a datetime object for the date 1,000 days from now. Python will do the date arithmetic to figure out that 1,000 days after February 27, 2015, will be November 23, 2017. This is useful because when you calculate 1,000 days from a given date, you have to remember how many days are in each month and factor in leap years and other tricky details. The datetime module handles all of this for you.
timedelta objects can be added or subtracted with datetime objects or other timedelta objects using the + and - operators. A timedelta object can be multiplied or divided by integer or float values with the * and / operators. Enter the following into the interactive shell:
➊ >>> oct21st = datetime.datetime(2015, 10, 21, 16, 29, 0)
➋ >>> aboutThirtyYears = datetime.timedelta(days=365 * 30)
>>> oct21st
datetime.datetime(2015, 10, 21, 16, 29)
>>> oct21st - aboutThirtyYears
datetime.datetime(1985, 10, 28, 16, 29)
>>> oct21st - (2 * aboutThirtyYears)
datetime.datetime(1955, 11, 5, 16, 29)
Here we make a datetime object for October 21, 2015 ➊ and a timedelta object for a duration of about 30 years (we’re assuming 365 days for each of those years)➋. Subtracting aboutThirtyYears from oct21st gives us a datetime object for the date 30 years before October 21, 2015. Subtracting 2 * aboutThirtyYears from oct21st returns a datetime object for the date 60 years before October 21, 2015.
Pausing Until a Specific Date
The time.sleep() method lets you pause a program for a certain number of seconds. By using a while loop, you can pause your programs until a specific date. For example, the following code will continue to loop until Halloween 2016:
import datetime
import time
halloween2016 = datetime.datetime(2016, 10, 31, 0, 0, 0)
while datetime.datetime.now() < halloween2016:
time.sleep(1)
The time.sleep(1) call will pause your Python program so that the computer doesn’t waste CPU processing cycles simply checking the time over and over. Rather, the while loop will just check the condition once per second and continue with the rest of the program after Halloween 2016 (or whenever you program it to stop).
Converting datetime Objects into Strings
Epoch timestamps and datetime objects aren’t very friendly to the human eye. Use the strftime() method to display a datetime object as a string. (The f in the name of the strftime() function stands for format.)
The strftime() method uses directives similar to Python’s string formatting. Table 15-1 has a full list of strftime() directives.
Table 15-1. strftime() Directives
|
strftime directive |
Meaning |
|
%Y |
Year with century, as in '2014' |
|
%y |
Year without century, '00' to '99' (1970 to 2069) |
|
%m |
Month as a decimal number, '01' to '12' |
|
%B |
Full month name, as in 'November' |
|
%b |
Abbreviated month name, as in 'Nov' |
|
%d |
Day of the month, '01' to '31' |
|
%j |
Day of the year, '001' to '366' |
|
%w |
Day of the week, '0' (Sunday) to '6' (Saturday) |
|
%A |
Full weekday name, as in 'Monday' |
|
%a |
Abbreviated weekday name, as in 'Mon' |
|
%H |
Hour (24-hour clock), '00' to '23' |
|
%I |
Hour (12-hour clock), '01' to '12' |
|
%M |
Minute, '00' to '59' |
|
%S |
Second, '00' to '59' |
|
%p |
'AM' or 'PM' |
|
%% |
Literal '%' character |
Pass strrftime() a custom format string containing formatting directives (along with any desired slashes, colons, and so on), and strftime() will return the datetime object’s information as a formatted string. Enter the following into the interactive shell:
>>> oct21st = datetime.datetime(2015, 10, 21, 16, 29, 0)
>>> oct21st.strftime('%Y/%m/%d %H:%M:%S')
'2015/10/21 16:29:00'
>>> oct21st.strftime('%I:%M %p')
'04:29 PM'
>>> oct21st.strftime("%B of '%y")
"October of '15"
Here we have a datetime object for October 21, 2015 at 4:29 PM, stored in oct21st. Passing strftime() the custom format string '%Y/%m/%d %H:%M:%S' returns a string containing 2015, 10, and 21 separated by slahes and 16, 29, and 00 separated by colons. Passing '%I:%M% p' returns '04:29 PM', and passing "%B of '%y" returns "October of '15". Note that strftime() doesn’t begin with datetime.datetime.
Converting Strings into datetime Objects
If you have a string of date information, such as '2015/10/21 16:29:00' or 'October 21, 2015', and need to convert it to a datetime object, use the datetime.datetime.strptime() function. The strptime() function is the inverse of the strftime() method. A custom format string using the same directives as strftime() must be passed so that strptime() knows how to parse and understand the string. (The p in the name of the strptime() function stands for parse.)
Enter the following into the interactive shell:
➊ >>> datetime.datetime.strptime('October 21, 2015', '%B %d, %Y')
datetime.datetime(2015, 10, 21, 0, 0)
>>> datetime.datetime.strptime('2015/10/21 16:29:00', '%Y/%m/%d %H:%M:%S')
datetime.datetime(2015, 10, 21, 16, 29)
>>> datetime.datetime.strptime("October of '15", "%B of '%y")
datetime.datetime(2015, 10, 1, 0, 0)
>>> datetime.datetime.strptime("November of '63", "%B of '%y")
datetime.datetime(2063, 11, 1, 0, 0)
To get a datetime object from the string 'October 21, 2015', pass 'October 21, 2015' as the first argument to strptime() and the custom format string that corresponds to 'October 21, 2015' as the second argument ➊. The string with the date information must match the custom format string exactly, or Python will raise a ValueError exception.
Review of Python’s Time Functions
Dates and times in Python can involve quite a few different data types and functions. Here’s a review of the three different types of values used to represent time:
§ A Unix epoch timestamp (used by the time module) is a float or integer value of the number of seconds since 12 AM on January 1, 1970, UTC.
§ A datetime object (of the datetime module) has integers stored in the attributes year, month, day, hour, minute, and second.
§ A timedelta object (of the datetime module) represents a time duration, rather than a specific moment.
Here’s a review of time functions and their parameters and return values:
§ The time.time() function returns an epoch timestamp float value of the current moment.
§ The time.sleep(seconds) function stops the program for the amount of seconds specified by the seconds argument.
§ The datetime.datetime(year, month, day, hour, minute, second) function returns a datetime object of the moment specified by the arguments. If hour, minute, or second arguments are not provided, they default to 0.
§ The datetime.datetime.now() function returns a datetime object of the current moment.
§ The datetime.datetime.fromtimestamp(epoch) function returns a datetime object of the moment represented by the epoch timestamp argument.
§ The datetime.timedelta(weeks, days, hours, minutes, seconds, milliseconds, microseconds) function returns a timedelta object representing a duration of time. The function’s keyword arguments are all optional and do not include month or year.
§ The total_seconds() method for timedelta objects returns the number of seconds the timedelta object represents.
§ The strftime(format) method returns a string of the time represented by the datetime object in a custom format that’s based on the format string. See Table 15-1 for the format details.
§ The datetime.datetime.strptime(time_string, format) function returns a datetime object of the moment specified by time_string, parsed using the format string argument. See Table 15-1 for the format details.
Multithreading
To introduce the concept of multithreading, let’s look at an example situation. Say you want to schedule some code to run after a delay or at a specific time. You could add code like the following at the start of your program:
import time, datetime
startTime = datetime.datetime(2029, 10, 31, 0, 0, 0)
while datetime.datetime.now() < startTime:
time.sleep(1)
print('Program now starting on Halloween 2029')
--snip--
This code designates a start time of October 31, 2029, and keeps calling time.sleep(1) until the start time arrives. Your program cannot do anything while waiting for the loop of time.sleep() calls to finish; it just sits around until Halloween 2029. This is because Python programs by default have a single thread of execution.
To understand what a thread of execution is, remember the Chapter 2 discussion of flow control, when you imagined the execution of a program as placing your finger on a line of code in your program and moving to the next line or wherever it was sent by a flow control statement. A single-threaded program has only one finger. But a multithreaded program has multiple fingers. Each finger still moves to the next line of code as defined by the flow control statements, but the fingers can be at different places in the program, executing different lines of code at the same time. (All of the programs in this book so far have been single threaded.)
Rather than having all of your code wait until the time.sleep() function finishes, you can execute the delayed or scheduled code in a separate thread using Python’s threading module. The separate thread will pause for the time.sleep calls. Meanwhile, your program can do other work in the original thread.
To make a separate thread, you first need to make a Thread object by calling the threading.Thread() function. Enter the following code in a new file and save it as threadDemo.py:
import threading, time
print('Start of program.')
➊ def takeANap():
time.sleep(5)
print('Wake up!')
➋ threadObj = threading.Thread(target=takeANap)
➌ threadObj.start()
print('End of program.')
At ➊, we define a function that we want to use in a new thread. To create a Thread object, we call threading.Thread() and pass it the keyword argument target=takeANap ➋. This means the function we want to call in the new thread is takeANap(). Notice that the keyword argument istarget=takeANap, not target=takeANap(). This is because you want to pass the takeANap() function itself as the argument, not call takeANap() and pass its return value.
After we store the Thread object created by threading.Thread() in threadObj, we call threadObj.start() ➌ to create the new thread and start executing the target function in the new thread. When this program is run, the output will look like this:
Start of program.
End of program.
Wake up!
This can be a bit confusing. If print('End of program.') is the last line of the program, you might think that it should be the last thing printed. The reason Wake up! comes after it is that when threadObj.start() is called, the target function for threadObj is run in a new thread of execution. Think of it as a second finger appearing at the start of the takeANap() function. The main thread continues to print('End of program.'). Meanwhile, the new thread that has been executing the time.sleep(5) call, pauses for 5 seconds. After it wakes from its 5-second nap, it prints 'Wake up!'and then returns from the takeANap() function. Chronologically, 'Wake up!' is the last thing printed by the program.
Normally a program terminates when the last line of code in the file has run (or the sys.exit() function is called). But threadDemo.py has two threads. The first is the original thread that began at the start of the program and ends after print('End of program.'). The second thread is created when threadObj.start() is called, begins at the start of the takeANap() function, and ends after takeANap() returns.
A Python program will not terminate until all its threads have terminated. When you ran threadDemo.py, even though the original thread had terminated, the second thread was still executing the time.sleep(5) call.
Passing Arguments to the Thread’s Target Function
If the target function you want to run in the new thread takes arguments, you can pass the target function’s arguments to threading.Thread(). For example, say you wanted to run this print() call in its own thread:
>>> print('Cats', 'Dogs', 'Frogs', sep=' & ')
Cats & Dogs & Frogs
This print() call has three regular arguments, 'Cats', 'Dogs', and 'Frogs', and one keyword argument, sep=' & '. The regular arguments can be passed as a list to the args keyword argument in threading.Thread(). The keyword argument can be specified as a dictionary to the kwargskeyword argument in threading.Thread().
Enter the following into the interactive shell:
>>> import threading
>>> threadObj = threading.Thread(target=print, args=['Cats', 'Dogs', 'Frogs'],
kwargs={'sep': ' & '})
>>> threadObj.start()
Cats & Dogs & Frogs
To make sure the arguments 'Cats', 'Dogs', and 'Frogs' get passed to print() in the new thread, we pass args=['Cats', 'Dogs', 'Frogs'] to threading.Thread(). To make sure the keyword argument sep=' & ' gets passed to print() in the new thread, we pass kwargs={'sep': '& '} tothreading.Thread().
The threadObj.start() call will create a new thread to call the print() function, and it will pass 'Cats', 'Dogs', and 'Frogs' as arguments and ' & ' for the sep keyword argument.
This is an incorrect way to create the new thread that calls print():
threadObj = threading.Thread(target=print('Cats', 'Dogs', 'Frogs', sep=' & '))
What this ends up doing is calling the print() function and passing its return value (print()’s return value is always None) as the target keyword argument. It doesn’t pass the print() function itself. When passing arguments to a function in a new thread, use the threading.Thread()function’s args and kwargs keyword arguments.
Concurrency Issues
You can easily create several new threads and have them all running at the same time. But multiple threads can also cause problems called concurrency issues. These issues happen when threads read and write variables at the same time, causing the threads to trip over each other. Concurrency issues can be hard to reproduce consistently, making them hard to debug.
Multithreaded programming is its own wide subject and beyond the scope of this book. What you have to keep in mind is this: To avoid concurrency issues, never let multiple threads read or write the same variables. When you create a new Thread object, make sure its target function uses only local variables in that function. This will avoid hard-to-debug concurrency issues in your programs.
NOTE
A beginner’s tutorial on multithreaded programming is available at http://nostarch.com/automatestuff/.
Project: Multithreaded XKCD Downloader
In Chapter 11, you wrote a program that downloaded all of the XKCD comic strips from the XKCD website. This was a single-threaded program: It downloaded one comic at a time. Much of the program’s running time was spent establishing the network connection to begin the download and writing the downloaded images to the hard drive. If you have a broadband Internet connection, your single-threaded program wasn’t fully utilizing the available bandwidth.
A multithreaded program that has some threads downloading comics while others are establishing connections and writing the comic image files to disk uses your Internet connection more efficiently and downloads the collection of comics more quickly. Open a new file editor window and save it as multidownloadXkcd.py. You will modify this program to add multithreading. The completely modified source code is available to download from http://nostarch.com/automatestuff/.
Step 1: Modify the Program to Use a Function
This program will mostly be the same downloading code from Chapter 11, so I’ll skip the explanation for the Requests and BeautifulSoup code. The main changes you need to make are importing the threading module and making a downloadXkcd() function, which takes starting and ending comic numbers as parameters.
For example, calling downloadXkcd(140, 280) would loop over the downloading code to download the comics at http://xkcd.com/140, http://xkcd.com/141, http://xkcd.com/142, and so on, up to http://xkcd.com/279. Each thread that you create will call downloadXkcd() and pass a different range of comics to download.
Add the following code to your multidownloadXkcd.py program:
#! python3
# multidownloadXkcd.py - Downloads XKCD comics using multiple threads.
import requests, os, bs4, threading
➊ os.makedirs('xkcd', exist_ok=True) # store comics in ./xkcd
➋ def downloadXkcd(startComic, endComic):
➌ for urlNumber in range(startComic, endComic):
# Download the page.
print('Downloading page http://xkcd.com/%s...' % (urlNumber))
➍ res = requests.get('http://xkcd.com/%s' % (urlNumber))
res.raise_for_status()
➎ soup = bs4.BeautifulSoup(res.text)
# Find the URL of the comic image.
➏ comicElem = soup.select('#comic img')
if comicElem == []:
print('Could not find comic image.')
else:
➐ comicUrl = comicElem[0].get('src')
# Download the image.
print('Downloading image %s...' % (comicUrl))
➑ res = requests.get(comicUrl)
res.raise_for_status()
# Save the image to ./xkcd.
imageFile = open(os.path.join('xkcd', os.path.basename(comicUrl)), 'wb')
for chunk in res.iter_content(100000):
imageFile.write(chunk)
imageFile.close()
# TODO: Create and start the Thread objects.
# TODO: Wait for all threads to end.
After importing the modules we need, we make a directory to store comics in ➊ and start defining downloadxkcd() ➋. We loop through all the numbers in the specified range ➌ and download each page ➍. We use Beautiful Soup to look through the HTML of each page ➎ and find the comic image ➏. If no comic image is found on a page, we print a message. Otherwise, we get the URL of the image ➐ and download the image ➑. Finally, we save the image to the directory we created.
Step 2: Create and Start Threads
Now that we’ve defined downloadXkcd(), we’ll create the multiple threads that each call downloadXkcd() to download different ranges of comics from the XKCD website. Add the following code to multidownloadXkcd.py after the downloadXkcd() function definition:
#! python3
# multidownloadXkcd.py - Downloads XKCD comics using multiple threads.
--snip--
# Create and start the Thread objects.
downloadThreads = [] # a list of all the Thread objects
for i in range(0, 1400, 100): # loops 14 times, creates 14 threads
downloadThread = threading.Thread(target=downloadXkcd, args=(i, i + 99))
downloadThreads.append(downloadThread)
downloadThread.start()
First we make an empy list downloadThreads; the list will help us keep track of the many Thread objects we’ll create. Then we start our for loop. Each time through the loop, we create a Thread object with threading.Thread(), append the Thread object to the list, and call start() to start running downloadXkcd() in the new thread. Since the for loop sets the i variable from 0 to 1400 at steps of 100, i will be set to 0 on the first iteration, 100 on the second iteration, 200 on the third, and so on. Since we pass args=(i, i + 99) to threading.Thread(), the two arguments passed todownloadXkcd() will be 0 and 99 on the first iteration, 100 and 199 on the second iteration, 200 and 299 on the third, and so on.
As the Thread object’s start() method is called and the new thread begins to run the code inside downloadXkcd(), the main thread will continue to the next iteration of the for loop and create the next thread.
Step 3: Wait for All Threads to End
The main thread moves on as normal while the other threads we create download comics. But say there’s some code you don’t want to run in the main thread until all the threads have completed. Calling a Thread object’s join() method will block until that thread has finished. By using a forloop to iterate over all the Thread objects in the downloadThreads list, the main thread can call the join() method on each of the other threads. Add the following to the bottom of your program:
#! python3
# multidownloadXkcd.py - Downloads XKCD comics using multiple threads.
--snip--
# Wait for all threads to end.
for downloadThread in downloadThreads:
downloadThread.join()
print('Done.')
The 'Done.' string will not be printed until all of the join() calls have returned. If a Thread object has already completed when its join() method is called, then the method will simply return immediately. If you wanted to extend this program with code that runs only after all of the comics downloaded, you could replace the print('Done.') line with your new code.
Launching Other Programs from Python
Your Python program can start other programs on your computer with the Popen() function in the built-in subprocess module. (The P in the name of the Popen() function stands for process.) If you have multiple instances of an application open, each of those instances is a separate process of the same program. For example, if you open multiple windows of your web browser at the same time, each of those windows is a different process of the web browser program. See Figure 15-1 for an example of multiple calculator processes open at once.
Every process can have multiple threads. Unlike threads, a process cannot directly read and write another process’s variables. If you think of a multithreaded program as having multiple fingers following source code, then having multiple processes of the same program open is like having a friend with a separate copy of the program’s source code. You are both independently executing the same program.
If you want to start an external program from your Python script, pass the program’s filename to subprocess.Popen(). (On Windows, right-click the application’s Start menu item and select Properties to view the application’s filename. On OS X, CTRL-click the application and select Show Package Contents to find the path to the executable file.) The Popen() function will then immediately return. Keep in mind that the launched program is not run in the same thread as your Python program.
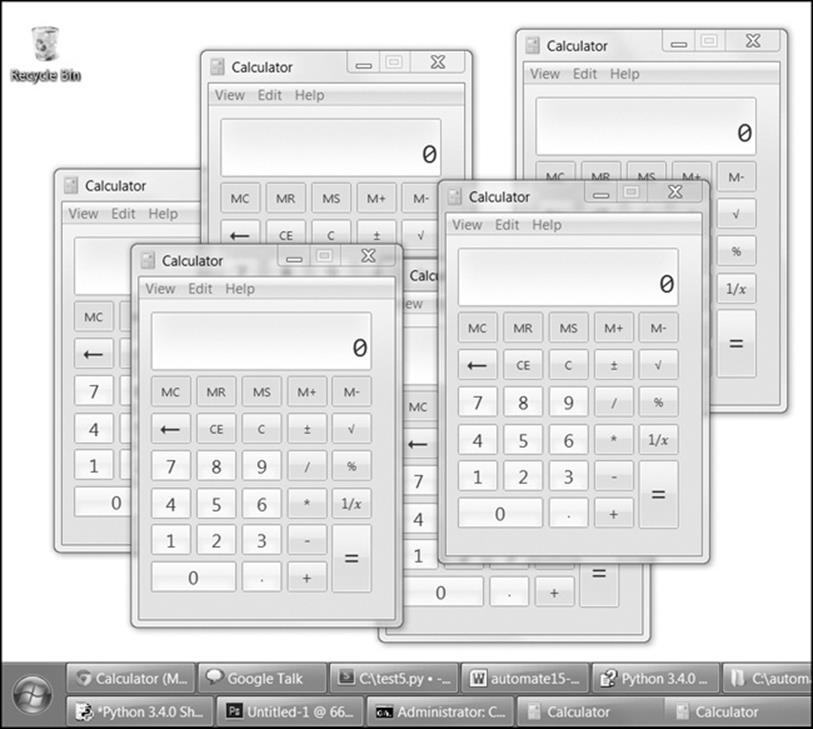
Figure 15-1. Six running processes of the same calculator program
On a Windows computer, enter the following into the interactive shell:
>>> import subprocess
>>> subprocess.Popen('C:\\Windows\\System32\\calc.exe')
<subprocess.Popen object at 0x0000000003055A58>
On Ubuntu Linux, you would enter the following:
>>> import subprocess
>>> subprocess.Popen('/usr/bin/gnome-calculator')
<subprocess.Popen object at 0x7f2bcf93b20>
On OS X, the process is slightly different. See Opening Files with Default Applications.
The return value is a Popen object, which has two useful methods: poll() and wait().
You can think of the poll() method as asking your friend if she’s finished running the code you gave her. The poll() method will return None if the process is still running at the time poll() is called. If the program has terminated, it will return the process’s integer exit code. An exit code is used to indicate whether the process terminated without errors (an exit code of 0) or whether an error caused the process to terminate (a nonzero exit code — generally 1, but it may vary depending on the program).
The wait() method is like waiting for your friend to finish working on her code before you keep working on yours. The wait() method will block until the launched process has terminated. This is helpful if you want your program to pause until the user finishes with the other program. The return value of wait() is the process’s integer exit code.
On Windows, enter the following into the interactive shell. Note that the wait() call will block until you quit the launched calculator program.
➊ >>> calcProc = subprocess.Popen('c:\\Windows\\System32\\calc.exe')
➋ >>> calcProc.poll() == None
True
➌ >>> calcProc.wait()
0
>>> calcProc.poll()
0
Here we open a calculator process ➊. While it’s still running, we check if poll() returns None ➋. It should, as the process is still running. Then we close the calculator program and call wait() on the terminated process ➌. wait() and poll() now return 0, indicating that the process terminated without errors.
Passing Command Line Arguments to Popen()
You can pass command line arguments to processes you create with Popen(). To do so, you pass a list as the sole argument to Popen(). The first string in this list will be the executable filename of the program you want to launch; all the subsequent strings will be the command line arguments to pass to the program when it starts. In effect, this list will be the value of sys.argv for the launched program.
Most applications with a graphical user interface (GUI) don’t use command line arguments as extensively as command line–based or terminal-based programs do. But most GUI applications will accept a single argument for a file that the applications will immediately open when they start. For example, if you’re using Windows, create a simple text file called C:\hello.txt and then enter the following into the interactive shell:
>>> subprocess.Popen(['C:\\Windows\\notepad.exe', 'C:\\hello.txt'])
<subprocess.Popen object at 0x00000000032DCEB8>
This will not only launch the Notepad application but also have it immediately open the C:\hello.txt file.
Task Scheduler, launchd, and cron
If you are computer savvy, you may know about Task Scheduler on Windows, launchd on OS X, or the cron scheduler on Linux. These well-documented and reliable tools all allow you to schedule applications to launch at specific times. If you’d like to learn more about them, you can find links to tutorials at http://nostarch.com/automatestuff/.
Using your operating system’s built-in scheduler saves you from writing your own clock-checking code to schedule your programs. However, use the time.sleep() function if you just need your program to pause briefly. Or instead of using the operating system’s scheduler, your code can loop until a certain date and time, calling time.sleep(1) each time through the loop.
Opening Websites with Python
The webbrowser.open() function can launch a web browser from your program to a specific website, rather than opening the browser application with subprocess.Popen(). See Project: mapit.py with the webbrowser Module for more details.
Running Other Python Scripts
You can launch a Python script from Python just like any other application. You just have to pass the python.exe executable to Popen() and the filename of the .py script you want to run as its argument. For example, the following would run the hello.py script from Chapter 1:
>>> subprocess.Popen(['C:\\python34\\python.exe', 'hello.py'])
<subprocess.Popen object at 0x000000000331CF28>
Pass Popen() a list containing a string of the Python executable’s path and a string of the script’s filename. If the script you’re launching needs command line arguments, add them to the list after the script’s filename. The location of the Python executable on Windows isC:\python34\python.exe. On OS X, it is /Library/Frameworks/Python.framework/Versions/3.3/bin/python3. On Linux, it is /usr/bin/python3.
Unlike importing the Python program as a module, when your Python program launches another Python program, the two are run in separate processes and will not be able to share each other’s variables.
Opening Files with Default Applications
Double-clicking a .txt file on your computer will automatically launch the application associated with the .txt file extension. Your computer will have several of these file extension associations set up already. Python can also open files this way with Popen().
Each operating system has a program that performs the equivalent of double-clicking a document file to open it. On Windows, this is the start program. On OS X, this is the open program. On Ubuntu Linux, this is the see program. Enter the following into the interactive shell, passing'start', 'open', or 'see' to Popen() depending on your system:
>>> fileObj = open('hello.txt', 'w')
>>> fileObj.write('Hello world!')
12
>>> fileObj.close()
>>> import subprocess
>>> subprocess.Popen(['start', 'hello.txt'], shell=True)
Here we write Hello world! to a new hello.txt file. Then we call Popen(), passing it a list containing the program name (in this example, 'start' for Windows) and the filename. We also pass the shell=True keyword argument, which is needed only on Windows. The operating system knows all of the file associations and can figure out that it should launch, say, Notepad.exe to handle the hello.txt file.
On OS X, the open program is used for opening both document files and programs. Enter the following into the interactive shell if you have a Mac:
>>> subprocess.Popen(['open', '/Applications/Calculator.app/'])
<subprocess.Popen object at 0x10202ff98>
The Calculator app should open.
THE UNIX PHILOSOPHY
Programs well designed to be launched by other programs become more powerful than their code alone. The Unix philosophy is a set of software design principles established by the programmers of the Unix operating system (on which the modern Linux and OS X are built). It says that it’s better to write small, limited-purpose programs that can interoperate, rather than large, feature-rich applications. The smaller programs are easier to understand, and by being interoperable, they can be the building blocks of much more powerful applications.
Smartphone apps follow this approach as well. If your restaurant app needs to display directions to a café, the developers didn’t reinvent the wheel by writing their own map code. The restaurant app simply launches a map app while passing it the café’s address, just as your Python code would call a function and pass it arguments.
The Python programs you’ve been writing in this book mostly fit the Unix philosophy, especially in one important way: They use command line arguments rather than input() function calls. If all the information your program needs can be supplied up front, it is preferable to have this information passed as command line arguments rather than waiting for the user to type it in. This way, the command line arguments can be entered by a human user or supplied by another program. This interoperable approach will make your programs reusable as part of another program.
The sole exception is that you don’t want passwords passed as command line arguments, since the command line may record them as part of its command history feature. Instead, your program should call the input() function when it needs you to enter a password.
You can read more about Unix philosophy at https://en.wikipedia.org/wiki/Unix_philosophy/.
Project: Simple Countdown Program
Just like it’s hard to find a simple stopwatch application, it can be hard to find a simple countdown application. Let’s write a countdown program that plays an alarm at the end of the countdown.
At a high level, here’s what your program will do:
§ Count down from 60.
§ Play a sound file (alarm.wav) when the countdown reaches zero.
This means your code will need to do the following:
§ Pause for one second in between displaying each number in the countdown by calling time.sleep().
§ Call subprocess.Popen() to open the sound file with the default application.
Open a new file editor window and save it as countdown.py.
Step 1: Count Down
This program will require the time module for the time.sleep() function and the subprocess module for the subprocess.Popen() function. Enter the following code and save the file as countdown.py:
#! python3
# countdown.py - A simple countdown script.
import time, subprocess
➊ timeLeft = 60
while timeLeft > 0:
➋ print(timeLeft, end='')
➌ time.sleep(1)
➍ timeLeft = timeLeft - 1
# TODO: At the end of the countdown, play a sound file.
After importing time and subprocess, make a variable called timeLeft to hold the number of seconds left in the countdown ➊. It can start at 60 — or you can change the value here to whatever you need or even have it get set from a command line argument.
In a while loop, you display the remaining count ➋, pause for one second ➌, and then decrement the timeLeft variable ➍ before the loop starts over again. The loop will keep looping as long as timeLeft is greater than 0. After that, the countdown will be over.
Step 2: Play the Sound File
While there are third-party modules to play sound files of various formats, the quick and easy way is to just launch whatever application the user already uses to play sound files. The operating system will figure out from the .wav file extension which application it should launch to play the file. This .wav file could easily be some other sound file format, such as .mp3 or .ogg.
You can use any sound file that is on your computer to play at the end of the countdown, or you can download alarm.wav from http://nostarch.com/automatestuff/.
Add the following to your code:
#! python3
# countdown.py - A simple countdown script.
import time, subprocess
--snip--
# At the end of the countdown, play a sound file.
subprocess.Popen(['start', 'alarm.wav'], shell=True)
After the while loop finishes, alarm.wav (or the sound file you choose) will play to notify the user that the countdown is over. On Windows, be sure to include 'start' in the list you pass to Popen() and pass the keyword argument shell=True. On OS X, pass 'open' instead of 'start' and remove shell=True.
Instead of playing a sound file, you could save a text file somewhere with a message like Break time is over! and use Popen() to open it at the end of the countdown. This will effectively create a pop-up window with a message. Or you could use the webbrowser.open() function to open a specific website at the end of the countdown. Unlike some free countdown application you’d find online, your own countdown program’s alarm can be anything you want!
Ideas for Similar Programs
A countdown is a simple delay before continuing the program’s execution. This can also be used for other applications and features, such as the following:
§ Use time.sleep() to give the user a chance to press CTRL-C to cancel an action, such as deleting files. Your program can print a “Press CTRL-C to cancel” message and then handle any KeyboardInterrupt exceptions with try and except statements.
§ For a long-term countdown, you can use timedelta objects to measure the number of days, hours, minutes, and seconds until some point (a birthday? an anniversary?) in the future.
Summary
The Unix epoch (January 1, 1970, at midnight, UTC) is a standard reference time for many programming languages, including Python. While the time.time() function module returns an epoch timestamp (that is, a float value of the number of seconds since the Unix epoch), the datetimemodule is better for performing date arithmetic and formatting or parsing strings with date information.
The time.sleep() function will block (that is, not return) for a certain number of seconds. It can be used to add pauses to your program. But if you want to schedule your programs to start at a certain time, the instructions at http://nostarch.com/automatestuff/ can tell you how to use the scheduler already provided by your operating system.
The threading module is used to create multiple threads, which is useful when you need to download multiple files or do other tasks simultaneously. But make sure the thread reads and writes only local variables, or you might run into concurrency issues.
Finally, your Python programs can launch other applications with the subprocess.Popen() function. Command line arguments can be passed to the Popen() call to open specific documents with the application. Alternatively, you can use the start, open, or see program with Popen() to use your computer’s file associations to automatically figure out which application to use to open a document. By using the other applications on your computer, your Python programs can leverage their capabilities for your automation needs.
Practice Questions
|
Q: |
1. What is the Unix epoch? |
|
Q: |
2. What function returns the number of seconds since the Unix epoch? |
|
Q: |
3. How can you pause your program for exactly 5 seconds? |
|
Q: |
4. What does the round() function return? |
|
Q: |
5. What is the difference between a datetime object and a timedelta object? |
|
Q: |
6. Say you have a function named spam(). How can you call this function and run the code inside it in a separate thread? |
|
Q: |
7. What should you do to avoid concurrency issues with multiple threads? |
|
Q: |
8. How can you have your Python program run the calc.exe program located in the C:\Windows\System32 folder? |
Practice Projects
For practice, write programs that do the following.
Prettified Stopwatch
Expand the stopwatch project from this chapter so that it uses the rjust() and ljust() string methods to “prettify” the output. (These methods were covered in Chapter 6.) Instead of output such as this:
Lap #1: 3.56 (3.56)
Lap #2: 8.63 (5.07)
Lap #3: 17.68 (9.05)
Lap #4: 19.11 (1.43)
... the output will look like this:
Lap # 1: 3.56 ( 3.56)
Lap # 2: 8.63 ( 5.07)
Lap # 3: 17.68 ( 9.05)
Lap # 4: 19.11 ( 1.43)
Note that you will need string versions of the lapNum, lapTime, and totalTime integer and float variables in order to call the string methods on them.
Next, use the pyperclip module introduced in Chapter 6 to copy the text output to the clipboard so the user can quickly paste the output to a text file or email.
Scheduled Web Comic Downloader
Write a program that checks the websites of several web comics and automatically downloads the images if the comic was updated since the program’s last visit. Your operating system’s scheduler (Scheduled Tasks on Windows, launchd on OS X, and cron on Linux) can run your Python program once a day. The Python program itself can download the comic and then copy it to your desktop so that it is easy to find. This will free you from having to check the website yourself to see whether it has updated. (A list of web comics is available athttp://nostarch.com/automatestuff/.)