Automate the Boring Stuff with Python: Practical Programming for Total Beginnerso (2015)
Part II. Automating Tasks
Chapter 16. Sending Email and Text Messages
Checking and replying to email is a huge time sink. Of course, you can’t just write a program to handle all your email for you, since each message requires its own response. But you can still automate plenty of email-related tasks once you know how to write programs that can send and receive email.
For example, maybe you have a spreadsheet full of customer records and want to send each customer a different form letter depending on their age and location details. Commercial software might not be able to do this for you; fortunately, you can write your own program to send these emails, saving yourself a lot of time copying and pasting form emails.
You can also write programs to send emails and SMS texts to notify you of things even while you’re away from your computer. If you’re automating a task that takes a couple of hours to do, you don’t want to go back to your computer every few minutes to check on the program’s status. Instead, the program can just text your phone when it’s done — freeing you to focus on more important things while you’re away from your computer.
SMTP
Much like HTTP is the protocol used by computers to send web pages across the Internet, Simple Mail Transfer Protocol (SMTP) is the protocol used for sending email. SMTP dictates how email messages should be formatted, encrypted, and relayed between mail servers, and all the other details that your computer handles after you click Send. You don’t need to know these technical details, though, because Python’s smtplib module simplifies them into a few functions.
SMTP just deals with sending emails to others. A different protocol, called IMAP, deals with retrieving emails sent to you and is described in IMAP.
Sending Email
You may be familiar with sending emails from Outlook or Thunderbird or through a website such as Gmail or Yahoo! Mail. Unfortunately, Python doesn’t offer you a nice graphical user interface like those services. Instead, you call functions to perform each major step of SMTP, as shown in the following interactive shell example.
NOTE
Don’t enter this example in IDLE; it won’t work because smtp.example.com, bob@example.com, MY_SECRET_PASSWORD, and alice@example.com are just placeholders. This code is just an overview of the process of sending email with Python.
>>> import smtplib
>>> smtpObj = smtplib.SMTP('smtp.example.com', 587)
>>> smtpObj.ehlo()
(250, b'mx.example.com at your service, [216.172.148.131]\nSIZE 35882577\
n8BITMIME\nSTARTTLS\nENHANCEDSTATUSCODES\nCHUNKING')
>>> smtpObj.starttls()
(220, b'2.0.0 Ready to start TLS')
>>> smtpObj.login('bob@example.com', ' MY_SECRET_PASSWORD')
(235, b'2.7.0 Accepted')
>>> smtpObj.sendmail('bob@example.com', 'alice@example.com', 'Subject: So
long.\nDear Alice, so long and thanks for all the fish. Sincerely, Bob')
{}
>>> smtpObj.quit()
(221, b'2.0.0 closing connection ko10sm23097611pbd.52 - gsmtp')
In the following sections, we’ll go through each step, replacing the placeholders with your information to connect and log in to an SMTP server, send an email, and disconnect from the server.
Connecting to an SMTP Server
If you’ve ever set up Thunderbird, Outlook, or another program to connect to your email account, you may be familiar with configuring the SMTP server and port. These settings will be different for each email provider, but a web search for <your provider> smtp settings should turn up the server and port to use.
The domain name for the SMTP server will usually be the name of your email provider’s domain name, with smtp. in front of it. For example, Gmail’s SMTP server is at smtp.gmail.com. Table 16-1 lists some common email providers and their SMTP servers. (The port is an integer value and will almost always be 587, which is used by the command encryption standard, TLS.)
Table 16-1. Email Providers and Their SMTP Servers
|
Provider |
SMTP server domain name |
|
Gmail |
smtp.gmail.com |
|
Outlook.com/Hotmail.com |
smtp-mail.outlook.com |
|
Yahoo Mail |
smtp.mail.yahoo.com |
|
AT&T |
smpt.mail.att.net (port 465) |
|
Comcast |
smtp.comcast.net |
|
Verizon |
smtp.verizon.net (port 465) |
Once you have the domain name and port information for your email provider, create an SMTP object by calling smptlib.SMTP(), passing the domain name as a string argument, and passing the port as an integer argument. The SMTP object represents a connection to an SMTP mail server and has methods for sending emails. For example, the following call creates an SMTP object for connecting to Gmail:
>>> smtpObj = smtplib.SMTP('smtp.gmail.com', 587)
>>> type(smtpObj)
<class 'smtplib.SMTP'>
Entering type(smtpObj) shows you that there’s an SMTP object stored in smtpObj. You’ll need this SMTP object in order to call the methods that log you in and send emails. If the smptlib.SMTP() call is not successful, your SMTP server might not support TLS on port 587. In this case, you will need to create an SMTP object using smtplib.SMTP_SSL() and port 465 instead.
>>> smtpObj = smtplib.SMTP_SSL('smtp.gmail.com', 465)
NOTE
If you are not connected to the Internet, Python will raise a socket.gaierror: [Errno 11004] getaddrinfo failed or similar exception.
For your programs, the differences between TLS and SSL aren’t important. You only need to know which encryption standard your SMTP server uses so you know how to connect to it. In all of the interactive shell examples that follow, the smtpObj variable will contain an SMTP object returned by the smtplib.SMTP() or smtplib.SMTP_SSL() function.
Sending the SMTP “Hello” Message
Once you have the SMTP object, call its oddly named ehlo() method to “say hello” to the SMTP email server. This greeting is the first step in SMTP and is important for establishing a connection to the server. You don’t need to know the specifics of these protocols. Just be sure to call theehlo() method first thing after getting the SMTP object or else the later method calls will result in errors. The following is an example of an ehlo() call and its return value:
>>> smtpObj.ehlo()
(250, b'mx.google.com at your service, [216.172.148.131]\nSIZE 35882577\
n8BITMIME\nSTARTTLS\nENHANCEDSTATUSCODES\nCHUNKING')
If the first item in the returned tuple is the integer 250 (the code for “success” in SMTP), then the greeting succeeded.
Starting TLS Encryption
If you are connecting to port 587 on the SMTP server (that is, you’re using TLS encryption), you’ll need to call the starttls() method next. This required step enables encryption for your connection. If you are connecting to port 465 (using SSL), then encryption is already set up, and you should skip this step.
Here’s an example of the starttls() method call:
>>> smtpObj.starttls()
(220, b'2.0.0 Ready to start TLS')
starttls() puts your SMTP connection in TLS mode. The 220 in the return value tells you that the server is ready.
Logging in to the SMTP Server
Once your encrypted connection to the SMTP server is set up, you can log in with your username (usually your email address) and email password by calling the login() method.
>>> smtpObj.login(' my_email_address@gmail.com ', ' MY_SECRET_PASSWORD ')
(235, b'2.7.0 Accepted')
GMAIL’S APPLICATION-SPECIFIC PASSWORDS
Gmail has an additional security feature for Google accounts called application-specific passwords. If you receive an Application-specific password required error message when your program tries to log in, you will have to set up one of these passwords for your Python script. Check out the resources at http://nostarch.com/automatestuff/ for detailed directions on how to set up an application-specific password for your Google account.
Pass a string of your email address as the first argument and a string of your password as the second argument. The 235 in the return value means authentication was successful. Python will raise an smtplib.SMTPAuthenticationError exception for incorrect passwords.
WARNING
Be careful about putting passwords in your source code. If anyone ever copies your program, they’ll have access to your email account! It’s a good idea to call input() and have the user type in the password. It may be inconvenient to have to enter a password each time you run your program, but this approach will prevent you from leaving your password in an unencrypted file on your computer where a hacker or laptop thief could easily get it.
Sending an Email
Once you are logged in to your email provider’s SMTP server, you can call the sendmail() method to actually send the email. The sendmail() method call looks like this:
>>> smtpObj.sendmail(' my_email_address@gmail.com ', ' recipient@example.com ',
'Subject: So long.\nDear Alice, so long and thanks for all the fish. Sincerely,
Bob')
{}
The sendmail() method requires three arguments.
§ Your email address as a string (for the email’s “from” address)
§ The recipient’s email address as a string or a list of strings for multiple recipients (for the “to” address)
§ The email body as a string
The start of the email body string must begin with 'Subject: \n' for the subject line of the email. The '\n' newline character separates the subject line from the main body of the email.
The return value from sendmail() is a dictionary. There will be one key-value pair in the dictionary for each recipient for whom email delivery failed. An empty dictionary means all recipients were successfully sent the email.
Disconnecting from the SMTP Server
Be sure to call the quit() method when you are done sending emails. This will disconnect your program from the SMTP server.
>>> smtpObj.quit()
(221, b'2.0.0 closing connection ko10sm23097611pbd.52 - gsmtp')
The 221 in the return value means the session is ending.
To review all the steps for connecting and logging in to the server, sending email, and disconnection, see Sending Email.
IMAP
Just as SMTP is the protocol for sending email, the Internet Message Access Protocol (IMAP) specifies how to communicate with an email provider’s server to retrieve emails sent to your email address. Python comes with an imaplib module, but in fact the third-party imapclient module is easier to use. This chapter provides an introduction to using IMAPClient; the full documentation is at http://imapclient.readthedocs.org/.
The imapclient module downloads emails from an IMAP server in a rather complicated format. Most likely, you’ll want to convert them from this format into simple string values. The pyzmail module does the hard job of parsing these email messages for you. You can find the complete documentation for PyzMail at http://www.magiksys.net/pyzmail/.
Install imapclient and pyzmail from a Terminal window. Appendix A has steps on how to install third-party modules.
Retrieving and Deleting Emails with IMAP
Finding and retrieving an email in Python is a multistep process that requires both the imapclient and pyzmail third-party modules. Just to give you an overview, here’s a full example of logging in to an IMAP server, searching for emails, fetching them, and then extracting the text of the email messages from them.
>>> import imapclient
>>> imapObj = imapclient.IMAPClient('imap.gmail.com', ssl=True)
>>> imapObj.login(' my_email_address@gmail.com ', ' MY_SECRET_PASSWORD ')
'my_email_address@gmail.com Jane Doe authenticated (Success)'
>>> imapObj.select_folder('INBOX', readonly=True)
>>> UIDs = imapObj.search(['SINCE 05-Jul-2014'])
>>> UIDs
[40032, 40033, 40034, 40035, 40036, 40037, 40038, 40039, 40040, 40041]
>>> rawMessages = imapObj.fetch([40041], ['BODY[]', 'FLAGS'])
>>> import pyzmail
>>> message = pyzmail.PyzMessage.factory(rawMessages[40041]['BODY[]'])
>>> message.get_subject()
'Hello!'
>>> message.get_addresses('from')
[('Edward Snowden', 'esnowden@nsa.gov')]
>>> message.get_addresses('to')
[(Jane Doe', 'jdoe@example.com')]
>>> message.get_addresses('cc')
[]
>>> message.get_addresses('bcc')
[]
>>> message.text_part != None
True
>>> message.text_part.get_payload().decode(message.text_part.charset)
'Follow the money.\r\n\r\n-Ed\r\n'
>>> message.html_part != None
True
>>> message.html_part.get_payload().decode(message.html_part.charset)
'<div dir="ltr"><div>So long, and thanks for all the fish!<br><br></div>-
Al<br></div>\r\n'
>>> imapObj.logout()
You don’t have to memorize these steps. After we go through each step in detail, you can come back to this overview to refresh your memory.
Connecting to an IMAP Server
Just like you needed an SMTP object to connect to an SMTP server and send email, you need an IMAPClient object to connect to an IMAP server and receive email. First you’ll need the domain name of your email provider’s IMAP server. This will be different from the SMTP server’s domain name. Table 16-2 lists the IMAP servers for several popular email providers.
Table 16-2. Email Providers and Their IMAP Servers
|
Provider |
IMAP server domain name |
|
Gmail |
imap.gmail.com |
|
Outlook.com/Hotmail.com |
imap-mail.outlook.com |
|
Yahoo Mail |
imap.mail.yahoo.com |
|
AT&T |
imap.mail.att.net |
|
Comcast |
imap.comcast.net |
|
Verizon |
incoming.verizon.net |
Once you have the domain name of the IMAP server, call the imapclient.IMAPClient() function to create an IMAPClient object. Most email providers require SSL encryption, so pass the ssl=True keyword argument. Enter the following into the interactive shell (using your provider’s domain name):
>>> import imapclient
>>> imapObj = imapclient.IMAPClient('imap.gmail.com', ssl=True)
In all of the interactive shell examples in the following sections, the imapObj variable will contain an IMAPClient object returned from the imapclient.IMAPClient() function. In this context, a client is the object that connects to the server.
Logging in to the IMAP Server
Once you have an IMAPClient object, call its login() method, passing in the username (this is usually your email address) and password as strings.
>>> imapObj.login(' my_email_address@gmail.com ', ' MY_SECRET_PASSWORD ')
'my_email_address@gmail.com Jane Doe authenticated (Success)'
WARNING
Remember, never write a password directly into your code! Instead, design your program to accept the password returned from input().
If the IMAP server rejects this username/password combination, Python will raise an imaplib.error exception. For Gmail accounts, you may need to use an application-specific password; for more details, see Gmail’s Application-Specific Passwords.
Searching for Email
Once you’re logged on, actually retrieving an email that you’re interested in is a two-step process. First, you must select a folder you want to search through. Then, you must call the IMAPClient object’s search() method, passing in a string of IMAP search keywords.
Selecting a Folder
Almost every account has an INBOX folder by default, but you can also get a list of folders by calling the IMAPClient object’s list_folders() method. This returns a list of tuples. Each tuple contains information about a single folder. Continue the interactive shell example by entering the following:
>>> import pprint
>>> pprint.pprint(imapObj.list_folders())
[(('\\HasNoChildren',), '/', 'Drafts'),
(('\\HasNoChildren',), '/', 'Filler'),
(('\\HasNoChildren',), '/', 'INBOX'),
(('\\HasNoChildren',), '/', 'Sent'),
--snip-
(('\\HasNoChildren', '\\Flagged'), '/', '[Gmail]/Starred'),
(('\\HasNoChildren', '\\Trash'), '/', '[Gmail]/Trash')]
This is what your output might look like if you have a Gmail account. (Gmail calls its folders labels, but they work the same way as folders.) The three values in each of the tuples — for example, (('\\HasNoChildren',), '/', 'INBOX') — are as follows:
§ A tuple of the folder’s flags. (Exactly what these flags represent is beyond the scope of this book, and you can safely ignore this field.)
§ The delimiter used in the name string to separate parent folders and subfolders.
§ The full name of the folder.
To select a folder to search through, pass the folder’s name as a string into the IMAPClient object’s select_folder() method.
>>> imapObj.select_folder('INBOX', readonly=True)
You can ignore select_folder()’s return value. If the selected folder does not exist, Python will raise an imaplib.error exception.
The readonly=True keyword argument prevents you from accidentally making changes or deletions to any of the emails in this folder during the subsequent method calls. Unless you want to delete emails, it’s a good idea to always set readonly to True.
Performing the Search
With a folder selected, you can now search for emails with the IMAPClient object’s search() method. The argument to search() is a list of strings, each formatted to the IMAP’s search keys. Table 16-3 describes the various search keys.
Table 16-3. IMAP Search Keys
|
Search key |
Meaning |
|
'ALL' |
Returns all messages in the folder. You may run in to imaplib size limits if you request all the messages in a large folder. See Size Limits. |
|
'BEFORE date', 'ON date', 'SINCE date' |
These three search keys return, respectively, messages that were received by the IMAP server before, on, or after the given date. The date must be formatted like 05-Jul-2015. Also, while 'SINCE 05-Jul-2015' will match messages on and after July 5, 'BEFORE 05-Jul-2015' will match only messages before July 5 but not on July 5 itself. |
|
'SUBJECT string', 'BODY string', 'TEXT string' |
Returns messages where string is found in the subject, body, or either, respectively. If string has spaces in it, then enclose it with double quotes: 'TEXT "search with spaces"'. |
|
'FROM string', 'TO string', 'CC string', 'BCCstring' |
Returns all messages where string is found in the “from” emailaddress, “to” addresses, “cc” (carbon copy) addresses, or “bcc” (blind carbon copy) addresses, respectively. If there are multiple email addresses in string, then separate them with spaces and enclose them all with double quotes: 'CC "firstcc@example.com secondcc@example.com"'. |
|
'SEEN', 'UNSEEN' |
Returns all messages with and without the \Seen flag, respectively. An email obtains the \Seen flag if it has been accessed with a fetch() method call (described later) or if it is clicked when you’re checking your email in an email program or web browser. It’s more common to say the email has been “read” rather than “seen,” but they mean the same thing. |
|
'ANSWERED', 'UNANSWERED' |
Returns all messages with and without the \Answered flag, respectively. A message obtains the \Answered flag when it is replied to. |
|
'DELETED', 'UNDELETED' |
Returns all messages with and without the \Deleted flag, respectively. Email messages deleted with the delete_messages() method are given the \Deleted flag but are not permanently deleted until the expunge() method is called (see Deleting Emails). Note that some email providers, such as Gmail, automatically expunge emails. |
|
'DRAFT', 'UNDRAFT' |
Returns all messages with and without the \Draft flag, respectively. Draft messages are usually kept in a separate Drafts folder rather than in the INBOX folder. |
|
'FLAGGED', 'UNFLAGGED' |
Returns all messages with and without the \Flagged flag, respectively. This flag is usually used to mark email messages as “Important” or “Urgent.” |
|
'LARGER N', 'SMALLER N' |
Returns all messages larger or smaller than N bytes, respectively. |
|
'NOT search-key' |
Returns the messages that search-key would not have returned. |
|
'OR search-key1 search-key2' |
Returns the messages that match either the first or second search-key. |
Note that some IMAP servers may have slightly different implementations for how they handle their flags and search keys. It may require some experimentation in the interactive shell to see exactly how they behave.
You can pass multiple IMAP search key strings in the list argument to the search() method. The messages returned are the ones that match all the search keys. If you want to match any of the search keys, use the OR search key. For the NOT and OR search keys, one and two complete search keys follow the NOT and OR, respectively.
Here are some example search() method calls along with their meanings:
§ imapObj.search(['ALL']). Returns every message in the currently selected folder.
§ imapObj.search(['ON 05-Jul-2015']). Returns every message sent on July 5, 2015.
§ imapObj.search(['SINCE 01-Jan-2015', 'BEFORE 01-Feb-2015', 'UNSEEN']). Returns every message sent in January 2015 that is unread. (Note that this means on and after January 1 and up to but not including February 1.)
§ imapObj.search(['SINCE 01-Jan-2015', 'FROM alice@example.com']). Returns every message from alice@example.com sent since the start of 2015.
§ imapObj.search(['SINCE 01-Jan-2015', 'NOT FROM alice@example.com']). Returns every message sent from everyone except alice@example.com since the start of 2015.
§ imapObj.search(['OR FROM alice@example.com FROM bob@example.com']). Returns every message ever sent from alice@example.com or bob@example.com.
§ imapObj.search(['FROM alice@example.com', 'FROM bob@example.com']). Trick example! This search will never return any messages, because messages must match all search keywords. Since there can be only one “from” address, it is impossible for a message to be from bothalice@example.com and bob@example.com.
The search() method doesn’t return the emails themselves but rather unique IDs (UIDs) for the emails, as integer values. You can then pass these UIDs to the fetch() method to obtain the email content.
Continue the interactive shell example by entering the following:
>>> UIDs = imapObj.search(['SINCE 05-Jul-2015'])
>>> UIDs
[40032, 40033, 40034, 40035, 40036, 40037, 40038, 40039, 40040, 40041]
Here, the list of message IDs (for messages received July 5 onward) returned by search() is stored in UIDs. The list of UIDs returned on your computer will be different from the ones shown here; they are unique to a particular email account. When you later pass UIDs to other function calls, use the UID values you received, not the ones printed in this book’s examples.
Size Limits
If your search matches a large number of email messages, Python might raise an exception that says imaplib.error: got more than 10000 bytes. When this happens, you will have to disconnect and reconnect to the IMAP server and try again.
This limit is in place to prevent your Python programs from eating up too much memory. Unfortunately, the default size limit is often too small. You can change this limit from 10,000 bytes to 10,000,000 bytes by running this code:
>>> import imaplib
>>> imaplib._MAXLINE = 10000000
This should prevent this error message from coming up again. You may want to make these two lines part of every IMAP program you write.
USING IMAPCLIENT’S GMAIL_SEARCH( ) METHOD
If you are logging in to the imap.gmail.com server to access a Gmail account, the IMAPClient object provides an extra search function that mimics the search bar at the top of the Gmail web page, as highlighted in Figure 16-1.
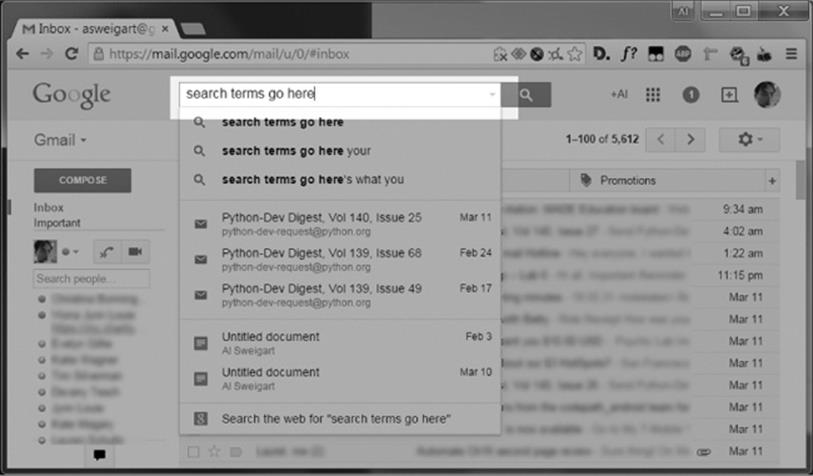
Figure 16-1. The search bar at the top of the Gmail web page
Instead of searching with IMAP search keys, you can use Gmail’s more sophisticated search engine. Gmail does a good job of matching closely related words (for example, a search for driving will also match drive and drove) and sorting the search results by most significant matches. You can also use Gmail’s advanced search operators (see http://nostarch.com/automatestuff/ for more information). If you are logging in to a Gmail account, pass the search terms to the gmail_search() method instead of the search() method, like in the following interactive shell example:
>>> UIDs = imapObj.gmail_search('meaning of life')
>>> UIDs
[42]
Ah, yes — there’s that email with the meaning of life! I was looking for that.
Fetching an Email and Marking It As Read
Once you have a list of UIDs, you can call the IMAPClient object’s fetch() method to get the actual email content.
The list of UIDs will be fetch()’s first argument. The second argument should be the list ['BODY[]'], which tells fetch() to download all the body content for the emails specified in your UID list.
Let’s continue our interactive shell example.
>>> rawMessages = imapObj.fetch(UIDs, ['BODY[]'])
>>> import pprint
>>> pprint.pprint(rawMessages)
{40040: {'BODY[]': 'Delivered-To: my_email_address@gmail.com\r\n'
'Received: by 10.76.71.167 with SMTP id '
--snip--
'\r\n'
'------=_Part_6000970_707736290.1404819487066--\r\n',
'SEQ': 5430}}
Import pprint and pass the return value from fetch(), stored in the variable rawMessages, to pprint.pprint() to “pretty print” it, and you’ll see that this return value is a nested dictionary of messages with UIDs as the keys. Each message is stored as a dictionary with two keys: 'BODY[]' and'SEQ'. The 'BODY[]' key maps to the actual body of the email. The 'SEQ' key is for a sequence number, which has a similar role to the UID. You can safely ignore it.
As you can see, the message content in the 'BODY[]' key is pretty unintelligible. It’s in a format called RFC 822, which is designed for IMAP servers to read. But you don’t need to understand the RFC 822 format; later in this chapter, the pyzmail module will make sense of it for you.
When you selected a folder to search through, you called select_folder() with the readonly=True keyword argument. Doing this will prevent you from accidentally deleting an email — but it also means that emails will not get marked as read if you fetch them with the fetch() method. If you do want emails to be marked as read when you fetch them, you will need to pass readonly=False to select_folder(). If the selected folder is already in readonly mode, you can reselect the current folder with another call to select_folder(), this time with the readonly=False keyword argument:
>>> imapObj.select_folder('INBOX', readonly=False)
Getting Email Addresses from a Raw Message
The raw messages returned from the fetch() method still aren’t very useful to people who just want to read their email. The pyzmail module parses these raw messages and returns them as PyzMessage objects, which make the subject, body, “To” field, “From” field, and other sections of the email easily accessible to your Python code.
Continue the interactive shell example with the following (using UIDs from your own email account, not the ones shown here):
>>> import pyzmail
>>> message = pyzmail.PyzMessage.factory(rawMessages[40041]['BODY[]'])
First, import pyzmail. Then, to create a PyzMessage object of an email, call the pyzmail.PyzMessage.factory() function and pass it the 'BODY[]' section of the raw message. Store the result in message. Now message contains a PyzMessage object, which has several methods that make it easy to get the email’s subject line, as well as all sender and recipient addresses. The get_subject() method returns the subject as a simple string value. The get_addresses() method returns a list of addresses for the field you pass it. For example, the method calls might look like this:
>>> message.get_subject()
'Hello!'
>>> message.get_addresses('from')
[('Edward Snowden', 'esnowden@nsa.gov')]
>>> message.get_addresses('to')
[(Jane Doe', 'my_email_address@gmail.com')]
>>> message.get_addresses('cc')
[]
>>> message.get_addresses('bcc')
[]
Notice that the argument for get_addresses() is 'from', 'to', 'cc', or 'bcc'. The return value of get_addresses() is a list of tuples. Each tuple contains two strings: The first is the name associated with the email address, and the second is the email address itself. If there are no addresses in the requested field, get_addresses() returns a blank list. Here, the 'cc' carbon copy and 'bcc' blind carbon copy fields both contained no addresses and so returned empty lists.
Getting the Body from a Raw Message
Emails can be sent as plaintext, HTML, or both. Plaintext emails contain only text, while HTML emails can have colors, fonts, images, and other features that make the email message look like a small web page. If an email is only plaintext, its PyzMessage object will have its html_partattributes set to None. Likewise, if an email is only HTML, its PyzMessage object will have its text_part attribute set to None.
Otherwise, the text_part or html_part value will have a get_payload() method that returns the email’s body as a value of the bytes data type. (The bytes data type is beyond the scope of this book.) But this still isn’t a string value that we can use. Ugh! The last step is to call the decode()method on the bytes value returned by get_payload(). The decode() method takes one argument: the message’s character encoding, stored in the text_part.charset or html_part.charset attribute. This, finally, will return the string of the email’s body.
Continue the interactive shell example by entering the following:
➊ >>> message.text_part != None
True
>>> message.text_part.get_payload().decode(message.text_part.charset)
➋ 'So long, and thanks for all the fish!\r\n\r\n-Al\r\n'
➌ >>> message.html_part != None
True
➍ >>> message.html_part.get_payload().decode(message.html_part.charset)
'<div dir="ltr"><div>So long, and thanks for all the fish!<br><br></div>-Al
<br></div>\r\n'
The email we’re working with has both plaintext and HTML content, so the PyzMessage object stored in message has text_part and html_part attributes not equal to None ➊ ➌. Calling get_payload() on the message’s text_part and then calling decode() on the bytes value returns a string of the text version of the email ➋. Using get_payload() and decode() with the message’s html_part returns a string of the HTML version of the email ➍.
Deleting Emails
To delete emails, pass a list of message UIDs to the IMAPClient object’s delete_messages() method. This marks the emails with the \Deleted flag. Calling the expunge() method will permanently delete all emails with the \Deleted flag in the currently selected folder. Consider the following interactive shell example:
➊ >>> imapObj.select_folder('INBOX', readonly=False)
➋ >>> UIDs = imapObj.search(['ON 09-Jul-2015'])
>>> UIDs
[40066]
>>> imapObj.delete_messages(UIDs)
➌ {40066: ('\\Seen', '\\Deleted')}
>>> imapObj.expunge()
('Success', [(5452, 'EXISTS')])
Here we select the inbox by calling select_folder() on the IMAPClient object and passing 'INBOX' as the first argument; we also pass the keyword argument readonly=False so that we can delete emails ➊. We search the inbox for messages received on a specific date and store the returned message IDs in UIDs ➋. Calling delete_message() and passing it UIDs returns a dictionary; each key-value pair is a message ID and a tuple of the message’s flags, which should now include \Deleted ➌. Calling expunge() then permanently deletes messages with the \Deleted flag and returns a success message if there were no problems expunging the emails. Note that some email providers, such as Gmail, automatically expunge emails deleted with delete_messages() instead of waiting for an expunge command from the IMAP client.
Disconnecting from the IMAP Server
When your program has finished retrieving or deleting emails, simply call the IMAPClient’s logout() method to disconnect from the IMAP server.
>>> imapObj.logout()
If your program runs for several minutes or more, the IMAP server may time out, or automatically disconnect. In this case, the next method call your program makes on the IMAPClient object will raise an exception like the following:
imaplib.abort: socket error: [WinError 10054] An existing connection was
forcibly closed by the remote host
In this event, your program will have to call imapclient.IMAPClient() to connect again.
Whew! That’s it. There were a lot of hoops to jump through, but you now have a way to get your Python programs to log in to an email account and fetch emails. You can always consult the overview in Retrieving and Deleting Emails with IMAP whenever you need to remember all of the steps.
Project: Sending Member Dues Reminder Emails
Say you have been “volunteered” to track member dues for the Mandatory Volunteerism Club. This is a truly boring job, involving maintaining a spreadsheet of everyone who has paid each month and emailing reminders to those who haven’t. Instead of going through the spreadsheet yourself and copying and pasting the same email to everyone who is behind on dues, let’s — you guessed it — write a script that does this for you.
At a high level, here’s what your program will do:
§ Read data from an Excel spreadsheet.
§ Find all members who have not paid dues for the latest month.
§ Find their email addresses and send them personalized reminders.
This means your code will need to do the following:
§ Open and read the cells of an Excel document with the openpyxl module. (See Chapter 12 for working with Excel files.)
§ Create a dictionary of members who are behind on their dues.
§ Log in to an SMTP server by calling smtplib.SMTP(), ehlo(), starttls(), and login().
§ For all members behind on their dues, send a personalized reminder email by calling the sendmail() method.
Open a new file editor window and save it as sendDuesReminders.py.
Step 1: Open the Excel File
Let’s say the Excel spreadsheet you use to track membership dues payments looks like Figure 16-2 and is in a file named duesRecords.xlsx. You can download this file from http://nostarch.com/automatestuff/.
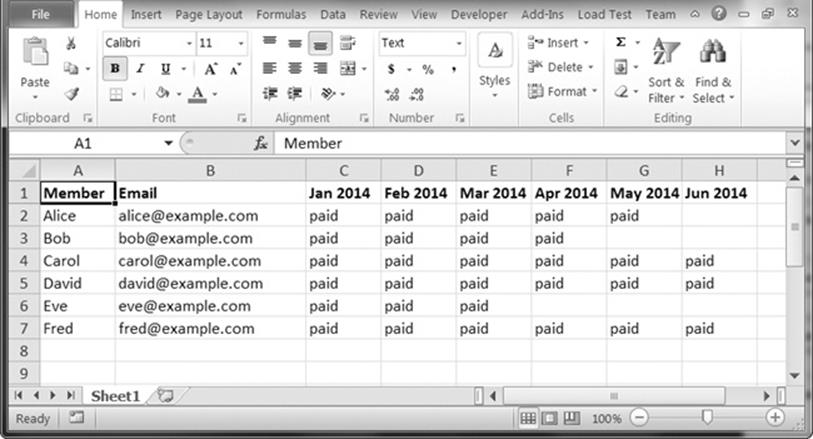
Figure 16-2. The spreadsheet for tracking member dues payments
This spreadsheet has every member’s name and email address. Each month has a column tracking members’ payment statuses. The cell for each member is marked with the text paid once they have paid their dues.
The program will have to open duesRecords.xlsx and figure out the column for the latest month by calling the get_highest_column() method. (You can consult Chapter 12 for more information on accessing cells in Excel spreadsheet files with the openpyxl module.) Enter the following code into the file editor window:
#! python3
# sendDuesReminders.py - Sends emails based on payment status in spreadsheet.
import openpyxl, smtplib, sys
# Open the spreadsheet and get the latest dues status.
➊ wb = openpyxl.load_workbook('duesRecords.xlsx')
➋ sheet = wb.get_sheet_by_name('Sheet1')
➌ lastCol = sheet.get_highest_column()
➍ latestMonth = sheet.cell(row=1, column=lastCol).value
# TODO: Check each member's payment status.
# TODO: Log in to email account.
# TODO: Send out reminder emails.
After importing the openpyxl, smtplib, and sys modules, we open our duesRecords.xlsx file and store the resulting Workbook object in wb ➊. Then we get Sheet 1 and store the resulting Worksheet object in sheet ➋. Now that we have a Worksheet object, we can access rows, columns, and cells. We store the highest column in lastCol ➌, and we then use row number 1 and lastCol to access the cell that should hold the most recent month. We get the value in this cell and store it in latestMonth ➍.
Step 2: Find All Unpaid Members
Once you’ve determined the column number of the latest month (stored in lastCol), you can loop through all rows after the first row (which has the column headers) to see which members have the text paid in the cell for that month’s dues. If the member hasn’t paid, you can grab the member’s name and email address from columns 1 and 2, respectively. This information will go into the unpaidMembers dictionary, which will track all members who haven’t paid in the most recent month. Add the following code to sendDuesReminder.py.
#! python3
# sendDuesReminders.py - Sends emails based on payment status in spreadsheet.
--snip--
# Check each member's payment status.
unpaidMembers = {}
➊ for r in range(2, sheet.get_highest_row() + 1):
➋ payment = sheet.cell(row=r, column=lastCol).value
if payment != 'paid':
➌ name = sheet.cell(row=r, column=1).value
➍ email = sheet.cell(row=r, column=2).value
➎ unpaidMembers[name] = email
This code sets up an empty dictionary unpaidMembers and then loops through all the rows after the first ➊. For each row, the value in the most recent column is stored in payment ➋. If payment is not equal to 'paid', then the value of the first column is stored in name ➌, the value of the second column is stored in email ➍, and name and email are added to unpaidMembers ➎.
Step 3: Send Customized Email Reminders
Once you have a list of all unpaid members, it’s time to send them email reminders. Add the following code to your program, except with your real email address and provider information:
#! python3
# sendDuesReminders.py - Sends emails based on payment status in spreadsheet.
--snip--
# Log in to email account.
smtpObj = smtplib.SMTP('smtp.gmail.com', 587)
smtpObj.ehlo()
smtpObj.starttls()
smtpObj.login(' my_email_address@gmail.com ', sys.argv[1])
Create an SMTP object by calling smtplib.SMTP() and passing it the domain name and port for your provider. Call ehlo() and starttls(), and then call login() and pass it your email address and sys.argv[1], which will store your password string. You’ll enter the password as a command line argument each time you run the program, to avoid saving your password in your source code.
Once your program has logged in to your email account, it should go through the unpaidMembers dictionary and send a personalized email to each member’s email address. Add the following to sendDuesReminders.py:
#! python3
# sendDuesReminders.py - Sends emails based on payment status in spreadsheet.
--snip--
# Send out reminder emails.
for name, email in unpaidMembers.items():
➊ body = "Subject: %s dues unpaid.\nDear %s,\nRecords show that you have not
paid dues for %s. Please make this payment as soon as possible. Thank you!'" %
(latestMonth, name, latestMonth)
➋ print('Sending email to %s...' % email)
➌ sendmailStatus = smtpObj.sendmail('my_email_address@gmail.com', email, body)
➍ if sendmailStatus != {}:
print('There was a problem sending email to %s: %s' % (email,
sendmailStatus))
smtpObj.quit()
This code loops through the names and emails in unpaidMembers. For each member who hasn’t paid, we customize a message with the latest month and the member’s name, and store the message in body ➊. We print output saying that we’re sending an email to this member’s email address ➋. Then we call sendmail(), passing it the from address and the customized message ➌. We store the return value in sendmailStatus.
Remember that the sendmail() method will return a nonempty dictionary value if the SMTP server reported an error sending that particular email. The last part of the for loop at ➍ checks if the returned dictionary is nonempty, and if it is, prints the recipient’s email address and the returned dictionary.
After the program is done sending all the emails, the quit() method is called to disconnect from the SMTP server.
When you run the program, the output will look something like this:
Sending email to alice@example.com...
Sending email to bob@example.com...
Sending email to eve@example.com...
The recipients will receive an email that looks like Figure 16-3.
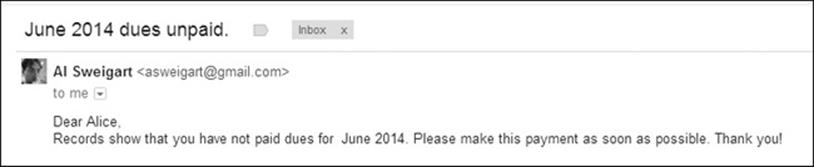
Figure 16-3. An automatically sent email from sendDuesReminders.py
Sending Text Messages with Twilio
Most people are more likely to be near their phones than their computers, so text messages can be a more immediate and reliable way of sending notifications than email. Also, the short length of text messages makes it more likely that a person will get around to reading them.
In this section, you’ll learn how to sign up for the free Twilio service and use its Python module to send text messages. Twilio is an SMS gateway service, which means it’s a service that allows you to send text messages from your programs. Although you will be limited in how many texts you can send per month and the texts will be prefixed with the words Sent from a Twilio trial account, this trial service is probably adequate for your personal programs. The free trial is indefinite; you won’t have to upgrade to a paid plan later.
Twilio isn’t the only SMS gateway service. If you prefer not to use Twilio, you can find alternative services by searching online for free sms gateway, python sms api, or even twilio alternatives.
Before signing up for a Twilio account, install the twilio module. Appendix A has more details about installing third-party modules.
NOTE
This section is specific to the United States. Twilio does offer SMS texting services for countries outside of the United States, but those specifics aren’t covered in this book. The twilio module and its functions, however, will work the same outside the United States. See http://twilio.com/ for more information.
Signing Up for a Twilio Account
Go to http://twilio.com/ and fill out the sign-up form. Once you’ve signed up for a new account, you’ll need to verify a mobile phone number that you want to send texts to. (This verification is necessary to prevent people from using the service to spam random phone numbers with text messages.)
After receiving the text with the verification number, enter it into the Twilio website to prove that you own the mobile phone you are verifying. You will now be able to send texts to this phone number using the twilio module.
Twilio provides your trial account with a phone number to use as the sender of text messages. You will need two more pieces of information: your account SID and the auth (authentication) token. You can find this information on the Dashboard page when you are logged in to your Twilio account. These values act as your Twilio username and password when logging in from a Python program.
Sending Text Messages
Once you’ve installed the twilio module, signed up for a Twilio account, verified your phone number, registered a Twilio phone number, and obtained your account SID and auth token, you will finally be ready to send yourself text messages from your Python scripts.
Compared to all the registration steps, the actual Python code is fairly simple. With your computer connected to the Internet, enter the following into the interactive shell, replacing the accountSID, authToken, myTwilioNumber, and myCellPhone variable values with your real information:
➊ >>> from twilio.rest import TwilioRestClient
>>> accountSID = 'ACxxxxxxxxxxxxxxxxxxxxxxxxxxxxxxxx'
>>> authToken = 'xxxxxxxxxxxxxxxxxxxxxxxxxxxxxxxx'
➋ >>> twilioCli = TwilioRestClient(accountSID, authToken)
>>> myTwilioNumber = '+14955551234'
>>> myCellPhone = '+14955558888'
➌ >>> message = twilioCli.messages.create(body='Mr. Watson - Come here - I want
to see you.', from_=myTwilioNumber, to=myCellPhone)
A few moments after typing the last line, you should receive a text message that reads Sent from your Twilio trial account - Mr. Watson - Come here - I want to see you.
Because of the way the twilio module is set up, you need to import it using from twilio.rest import TwilioRestClient, not just import twilio ➊. Store your account SID in accountSID and your auth token in authToken and then call TwilioRestClient() and pass it accountSID andauthToken. The call to TwilioRestClient() returns a TwilioRestClient object ➋. This object has a messages attribute, which in turn has a create() method you can use to send text messages. This is the method that will instruct Twilio’s servers to send your text message. After storing your Twilio number and cell phone number in myTwilioNumber and myCellPhone, respectively, call create() and pass it keyword arguments specifying the body of the text message, the sender’s number (myTwilioNumber), and the recipient’s number (myCellPhone) ➌.
The Message object returned from the create() method will have information about the text message that was sent. Continue the interactive shell example by entering the following:
>>> message.to
'+14955558888'
>>> message.from_
'+14955551234'
>>> message.body
'Mr. Watson - Come here - I want to see you.'
The to, from_, and body attributes should hold your cell phone number, Twilio number, and message, respectively. Note that the sending phone number is in the from_ attribute — with an underscore at the end — not from. This is because from is a keyword in Python (you’ve seen it used in the from modulename import * form of import statement, for example), so it cannot be used as an attribute name. Continue the interactive shell example with the following:
>>> message.status
'queued'
>>> message.date_created
datetime.datetime(2015, 7, 8, 1, 36, 18)
>>> message.date_sent == None
True
The status attribute should give you a string. The date_created and date_sent attributes should give you a datetime object if the message has been created and sent. It may seem odd that the status attribute is set to 'queued' and the date_sent attribute is set to None when you’ve already received the text message. This is because you captured the Message object in the message variable before the text was actually sent. You will need to refetch the Message object in order to see its most up-to-date status and date_sent. Every Twilio message has a unique string ID (SID) that can be used to fetch the latest update of the Message object. Continue the interactive shell example by entering the following:
>>> message.sid
'SM09520de7639ba3af137c6fcb7c5f4b51'
➊ >>> updatedMessage = twilioCli.messages.get(message.sid)
>>> updatedMessage.status
'delivered'
>>> updatedMessage.date_sent
datetime.datetime(2015, 7, 8, 1, 36, 18)
Entering message.sid show you this message’s long SID. By passing this SID to the Twilio client’s get() method ➊, you can retrieve a new Message object with the most up-to-date information. In this new Message object, the status and date_sent attributes are correct.
The status attribute will be set to one of the following string values: 'queued', 'sending', 'sent', 'delivered', 'undelivered', or 'failed'. These statuses are self-explanatory, but for more precise details, take a look at the resources at http://nostarch.com/automatestuff/.
RECEIVING TEXT MESSAGES WITH PYTHON
Unfortunately, receiving text messages with Twilio is a bit more complicated than sending them. Twilio requires that you have a website running its own web application. That’s beyond the scope of this book, but you can find more details in the resources for this book (http://nostarch.com/automatestuff/).
Project: “Just Text Me” Module
The person you’ll most often text from your programs is probably you. Texting is a great way to send yourself notifications when you’re away from your computer. If you’ve automated a boring task with a program that takes a couple of hours to run, you could have it notify you with a text when it’s finished. Or you may have a regularly scheduled program running that sometimes needs to contact you, such as a weather-checking program that texts you a reminder to pack an umbrella.
As a simple example, here’s a small Python program with a textmyself() function that sends a message passed to it as a string argument. Open a new file editor window and enter the following code, replacing the account SID, auth token, and phone numbers with your own information. Save it as textMyself.py.
#! python3
# textMyself.py - Defines the textmyself() function that texts a message
# passed to it as a string.
# Preset values:
accountSID = 'ACxxxxxxxxxxxxxxxxxxxxxxxxxxxxxxxx'
authToken = 'xxxxxxxxxxxxxxxxxxxxxxxxxxxxxxxx'
myNumber = '+15559998888'
twilioNumber = '+15552225678'
from twilio.rest import TwilioRestClient
➊ def textmyself(message):
➋ twilioCli = TwilioRestClient(accountSID, authToken)
➌ twilioCli.messages.create(body=message, from_=twilioNumber, to=myNumber)
This program stores an account SID, auth token, sending number, and receiving number. It then defined textmyself() to take on argument ➊, make a TwilioRestClient object ➋, and call create() with the message you passed ➌.
If you want to make the textmyself() function available to your other programs, simply place the textMyself.py file in the same folder as the Python executable (C:\Python34 on Windows, /usr/local/lib/python3.4 on OS X, and /usr/bin/python3 on Linux). Now you can use the function in your other programs. Whenever you want one of your programs to text you, just add the following:
import textmyself
textmyself.textmyself('The boring task is finished.')
You need to sign up for Twilio and write the texting code only once. After that, it’s just two lines of code to send a text from any of your other programs.
Summary
We communicate with each other on the Internet and over cell phone networks in dozens of different ways, but email and texting predominate. Your programs can communicate through these channels, which gives them powerful new notification features. You can even write programs running on different computers that communicate with one another directly via email, with one program sending emails with SMTP and the other retrieving them with IMAP.
Python’s smtplib provides functions for using the SMTP to send emails through your email provider’s SMTP server. Likewise, the third-party imapclient and pyzmail modules let you access IMAP servers and retrieve emails sent to you. Although IMAP is a bit more involved than SMTP, it’s also quite powerful and allows you to search for particular emails, download them, and parse them to extract the subject and body as string values.
Texting is a bit different from email, since, unlike email, more than just an Internet connection is needed to send SMS texts. Fortunately, services such as Twilio provide modules to allow you to send text messages from your programs. Once you go through an initial setup process, you’ll be able to send texts with just a couple lines of code.
With these modules in your skill set, you’ll be able to program the specific conditions under which your programs should send notifications or reminders. Now your programs will have reach far beyond the computer they’re running on!
Practice Questions
|
Q: |
1. What is the protocol for sending email? For checking and receiving email? |
|
Q: |
2. What four smtplib functions/methods must you call to log in to an SMTP server? |
|
Q: |
3. What two imapclient functions/methods must you call to log in to an IMAP server? |
|
Q: |
4. What kind of argument do you pass to imapObj.search()? |
|
Q: |
5. What do you do if your code gets an error message that says got more than 10000 bytes? |
|
Q: |
6. The imapclient module handles connecting to an IMAP server and finding emails. What is one module that handles reading the emails that imapclient collects? |
|
Q: |
7. What three pieces of information do you need from Twilio before you can send text messages? |
Practice Projects
For practice, write programs that do the following.
Random Chore Assignment Emailer
Write a program that takes a list of people’s email addresses and a list of chores that need to be done and randomly assigns chores to people. Email each person their assigned chores. If you’re feeling ambitious, keep a record of each person’s previously assigned chores so that you can make sure the program avoids assigning anyone the same chore they did last time. For another possible feature, schedule the program to run once a week automatically.
Here’s a hint: If you pass a list to the random.choice() function, it will return a randomly selected item from the list. Part of your code could look like this:
chores = ['dishes', 'bathroom', 'vacuum', 'walk dog']
randomChore = random.choice(chores)
chores.remove(randomChore) # this chore is now taken, so remove it
Umbrella Reminder
Chapter 11 showed you how to use the requests module to scrape data from http://weather.gov/. Write a program that runs just before you wake up in the morning and checks whether it’s raining that day. If so, have the program text you a reminder to pack an umbrella before leaving the house.
Auto Unsubscriber
Write a program that scans through your email account, finds all the unsubscribe links in all your emails, and automatically opens them in a browser. This program will have to log in to your email provider’s IMAP server and download all of your emails. You can use BeautifulSoup (covered in Chapter 11) to check for any instance where the word unsubscribe occurs within an HTML link tag.
Once you have a list of these URLs, you can use webbrowser.open() to automatically open all of these links in a browser.
You’ll still have to manually go through and complete any additional steps to unsubscribe yourself from these lists. In most cases, this involves clicking a link to confirm.
But this script saves you from having to go through all of your emails looking for unsubscribe links. You can then pass this script along to your friends so they can run it on their email accounts. (Just make sure your email password isn’t hardcoded in the source code!)
Controlling Your Computer Through Email
Write a program that checks an email account every 15 minutes for any instructions you email it and executes those instructions automatically. For example, BitTorrent is a peer-to-peer downloading system. Using free BitTorrent software such as qBittorrent, you can download large media files on your home computer. If you email the program a (completely legal, not at all piratical) BitTorrent link, the program will eventually check its email, find this message, extract the link, and then launch qBittorrent to start downloading the file. This way, you can have your home computer begin downloads while you’re away, and the (completely legal, not at all piratical) download can be finished by the time you return home.
Chapter 15 covers how to launch programs on your computer using the subprocess.Popen() function. For example, the following call would launch the qBittorrent program, along with a torrent file:
qbProcess = subprocess.Popen(['C:\\Program Files (x86)\\qBittorrent\\
qbittorrent.exe', 'shakespeare_complete_works.torrent'])
Of course, you’ll want the program to make sure the emails come from you. In particular, you might want to require that the emails contain a password, since it is fairly trivial for hackers to fake a “from” address in emails. The program should delete the emails it finds so that it doesn’t repeat instructions every time it checks the email account. As an extra feature, have the program email or text you a confirmation every time it executes a command. Since you won’t be sitting in front of the computer that is running the program, it’s a good idea to use the logging functions (seeChapter 10) to write a text file log that you can check if errors come up.
qBittorrent (as well as other BitTorrent applications) has a feature where it can quit automatically after the download completes. Chapter 15 explains how you can determine when a launched application has quit with the wait() method for Popen objects. The wait() method call will block until qBittorrent has stopped, and then your program can email or text you a notification that the download has completed.
There are a lot of possible features you could add to this project. If you get stuck, you can download an example implementation of this program from http://nostarch.com/automatestuff/.