Beginning Python Games Development With Pygame (2015)
CHAPTER 3
Introducing Pygame
Have you ever opened up your computer and had a look inside the case? No need to do it now, but you will find that it is built from a number of parts necessary to deliver your computing experience. The video card generates an image and sends a signal to your monitor. The sound card mixes sound together and sends audio to your speakers. Then there are the input devices, such as the keyboard, mouse, and joystick(s), and a variety of other electronic gizmos—all of which are essential in making a game.
In the early days of home computers, programmers with bad haircuts and thick-rimmed glasses had to come to grips with each of the computer’s components. The game programmer had to read the technical manual for each device in order to write the computer code to communicate with it—all before working on the actual game. The situation only got worse when the manufacturers brought out different devices and versions of existing devices with new capabilities. Programmers wanted to support as many devices as possible so there was a bigger market for their games, but they found themselves bogged down in the details of working with these new graphics and sound cards. It was also a pain for the game-buying public, who had to carefully check the box to see whether they had the right combination of devices to make the game work.
Things got a little easier with the introduction of graphical operating systems such as Microsoft Windows. They gave the game programmer a single way of communicating with the devices. It meant that the programmer could throw away the technical manuals because the manufacturers supplied drivers, small programs that handle the communication between the operating system and the hardware.
Fast-forward to more recent times, when programmers still have bad haircuts but thinner rims on their glasses. The life of a game programmer is still not an easy one. Even though there is a common way of communicating with graphics, audio, and input, it can still be tricky to write games because of the variety of hardware on the market. The cheap family PC that Mom bought at the local superstore is vastly different from the top-of-the-range machine purchased by a company executive. It’s this variety that makes it such an effort to initialize the hardware and ready it for use in the game. Fortunately, now that Pygame is here we have a way of creating games without having to worry about these details (and game programmers have time to go out and get decent haircuts).
In this chapter we will introduce you to Pygame and explain how to use it to create a graphical display and read the state of input devices.
History of Pygame
Pygame is built on another game creation library called Simple DirectMedia Layer (SDL). SDL was written by Sam Lantinga while he was working for Loki Software (a now-defunct game company) to simplify the task of porting games from one platform to another. It provided a common way to create a display on multiple platforms as well as work with graphics and input devices. Because it was so simple to work with, it became very popular with game developers when it was released in 1998, and has since been used for many hobby and commercial games.
SDL was written in C, a language commonly used for games because of its speed and ability to work with the hardware at a low level. But developing in C, or its successor C++, can be slow and error prone. So programmers produced bindings to their favorite languages, and SDL can now be used from just about any language out there. One such binding is Pygame, which lets Python programmers use the powerful SDL library.
Pygame and SDL have been in active development for many years, and because they are both open source, a large number of programmers have worked to refine and enhance this superb tool for creating games.
Installing Pygame
Installing modules can be one of the largest challenges to learning Python. As time has gone on, the developers for Python have tried to make this process a bit easier. Installing modules can vary by your operating system, but I will do my best to illustrate the methods for the major ones: Windows, Mac, Linux.
The very first thing you will want to do is address the bit version of your installation of Python. The default is 32-bit, but you may have grabbed a 64-bit installation. To find out what you have, open IDLE, and read the very top bit of text. Here is an example of a 32-bit installation of Python on a Windows OS:
Python 3.4.3 (v3.4.3:9b73f1c3e601, Feb 24 2015, 22:43:06) [MSC v.1600 32 bit (Intel)] on win32
Type "copyright", "credits" or "license()" for more information.
Notice where it says 32 bit (Intel); this means I am using a 32 bit version of Python. This means all my modules must be 32 bit modules. If you are using a 64 bit version of Python, all your modules must be 64 bit (despite what you might expect). It is possible, however, to be running a 32 bit version of Python on a 64 bit version of Windows.
So, assuming you used the default installation of Python, which is 32 bit, you now are on the hunt for a 32 bit version of Pygame. The easiest method for installing Pygame is to open bash, your terminal, or your command line, typing:
pip install pygame
Simple as that! You may have not been successful here. You may have an error such as:
'pip' is not recognized as an internal or external command, operable program or batch file
If so, then instead try to reference the pip script directly. The pip script is literally a pip.py file that is contained within your Python installation. Find your Python installation directory, look inside it for a “Scripts” directory, and then you should see the pip.py file within that. Note this full path, and use it. For example, if you are on Windows, you would type:
C:/Python34/Scripts/pip install pygame
On either Windows or Linux, you should have success with the preceding attempts.
For the Mac users, things may not be so simple. Mac OS has historically had a lot of trouble with Python GUI-related modules in all forms. This is an ongoing campaign, so your best bet is to see the latest installation instructions from http://pygame.org/wiki/macintosh.
The instructions have changed since I last looked there, so they may change more in time.
If you are on a Windows machine, you may find that everything is still proving problematic. A relatively new method for installing modules, which may prove more prevalent in time, is by using Wheel files, which have a .whl extension.
To install these, you simply download the .whl file, then use pip to install it by referencing the .whl file as what you want to install. For example, you may download a .whl named pygame-1.9.2a0-cp34-none-win32.whl. To install this, assuming you downloaded this file to your downloads directory, you would type something like:
pip install C:/Users/H/Downloads/pygame-1.9.2a0-cp34-none-win32.whl
Again, you may need to give the full path to the pip script.
Using Pygame
The Pygame package contains a number of modules that can be used independently. There is a module for each of the devices that you might use in a game, and many others to make game creation a breeze. See Table 3-1 for all the Pygame modules. You access these modules through thepygame namespace; for instance, pygame.display refers to the display module.
Table 3-1. Modules in the Pygame Package
|
Module Name |
Purpose |
|
pygame.cdrom |
Accesses and controls CD drives |
|
pygame.cursors |
Loads cursor images |
|
pygame.display |
Accesses the display |
|
pygame.draw |
Draws shapes, lines, and points |
|
pygame.event |
Manages external events |
|
pygame.font |
Uses system fonts |
|
pygame.image |
Loads and saves an image |
|
pygame.joystick |
Uses joysticks and similar devices |
|
pygame.key |
Reads key presses from the keyboard |
|
pygame.mixer |
Loads and plays sounds |
|
pygame.mouse |
Manages the mouse |
|
pygame.movie |
Plays movie files |
|
pygame.music |
Works with music and streaming audio |
|
pygame.overlay |
Accesses advanced video overlays pygame |
|
Contains high-level Pygame functions |
|
|
pygame.rect |
Manages rectangular areas |
|
pygame.sndarray |
Manipulates sound data |
|
pygame.sprite |
Manages moving images |
|
pygame.surface |
Manages images and the screen |
|
pygame.surfarray |
Manipulates image pixel data |
|
pygame.time |
Manages timing and frame rate |
|
pygame.transform |
Resizes and moves images |
*For complete documentation on the Pygame modules, see http://pygame.org/docs/.
Some of the modules you will use in every game. You will always have some sort of display, so the display module is essential, and you will definitely need some kind of input, whether it is keyboard, joystick, or mouse. Other modules are less commonly used, but in combination they give you one of the most powerful game creation tools around.
Not all the modules in Table 3-1 are guaranteed to be present on every platform. It is possible that the hardware the game is running on does not have certain capabilities, or that required drivers are not installed. If this is the case, Pygame will set the module to None, which makes it easy to test for. The following snippet detects whether the pygame.font module is available and exits if it isn’t:
if pygame.font is None:
print("The font module is not available!")
exit()
Hello World Revisited
As I mentioned in Chapter 1, there is a tradition when learning new languages that the first code you write displays the text “Hello, World!” on the screen. Technically we have already done this with a print 'Hello, World!' statement—but it is a little disappointing because as game programmers we are interested in creating appealing visuals and a line of text just does not cut it! We are going to create a Hello World script with Pygame that opens a graphical window on your desktop and draws an image under the standard mouse cursor. When run, you’ll see a window similar to what’s shown in Figure 3-1.
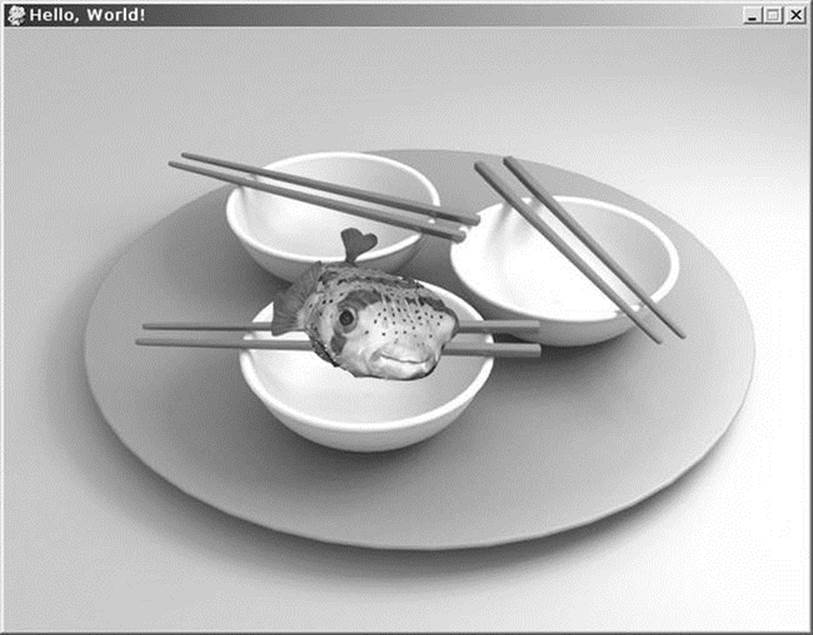
Figure 3-1. Hello World in Pygame
See Listing 3-1 for the code. Run it now if you like; we will go through it step by step in this chapter.
Listing 3-1. Hello World Redux (helloworld.py)
#!/usr/bin/env python
background_image_filename = 'sushiplate.jpg'
mouse_image_filename = 'fugu.png'
import pygame
from pygame.locals import *
from sys import exit
pygame.init()
screen = pygame.display.set_mode((640, 480), 0, 32)
pygame.display.set_caption("Hello, World!")
background = pygame.image.load(background_image_filename).convert()
mouse_cursor = pygame.image.load(mouse_image_filename).convert_alpha()
while True:
for event in pygame.event.get():
if event.type == QUIT:
pygame.quit()
exit()
screen.blit(background, (0,0))
x, y = pygame.mouse.get_pos()
x-= mouse_cursor.get_width() / 2
y-= mouse_cursor.get_height() / 2
screen.blit(mouse_cursor, (x, y))
pygame.display.update()
We need two images for Listing 3-1: one to use as a background and another to draw as our mouse cursor. You can download the files for this and the other samples from the Source Code/ Download section at the Apress web site. If you don’t have Internet access at the moment, you can use image files you have on your hard drive, or make them with any graphics or photo editing software. Any image is fine for the background, as long as it is at least 640 by 480 in size (any larger and the excess will be clipped). For the mouse cursor, you will need a smaller image that fits comfortably inside the background; a good size is 80 by 80. To continue with the fugu theme of the first chapter, the official background will be a picture of bowls and chopsticks, and a picture of a very raw fugu for the mouse cursor. The first two lines set the file names of the images; if you are using different images, you should replace the file names with the location of your images. Let’s break this script into bite-sized chunks. At the top of the script we import the external modules, classes, functions, and so forth we will need when running the example:
import pygame
from pygame.locals import *
from sys import exit
The first line imports the pygame package, which gives us access to all its submodules, such as pygame.image and pygame.sound. The second line imports a number of functions and constants (values that don’t change) into the top-level namespace. It isn’t essential to do this in order to use Pygame, but it is convenient because we don’t have to precede frequently used values with the pygame namespace. The last import statement imports a single function from sys (a module in the standard library). As you may have guessed, the purpose of exit is to immediately finish with the script. Calling it causes the Pygame window to disappear and Python to close. The script calls exit when the user clicks the close button; otherwise, the user would have no way of closing the window!
![]() Tip If you get into a situation where you can't close the Pygame window, you may be able to stop Python in its tracks by pressing Ctrl+C.
Tip If you get into a situation where you can't close the Pygame window, you may be able to stop Python in its tracks by pressing Ctrl+C.
This rather simple line of Python code actually does a lot of work:
pygame.init()
It initializes each of the submodules in the pygame package, which may load drivers and query hardware so that Pygame is ready to use all the devices on your computer. You can initialize only the modules you intend to use by calling the init function in each submodule individually; for example, pygame.sound.init() will initialize the sound module. This can make the script start a little quicker because only the modules you actually use will be initialized. For games you will require most, if not all, of the modules—so we will stick with this catchall initialize function. After we call it, we have the full power of Pygame at our disposal!
After initializing Pygame we need to create a display surface:
screen = pygame.display.set_mode((640, 480), 0, 32)
pygame.display.set_caption("Hello, World!")
The display could be a window on your desktop or it could be the entire screen, but you always access it via a Pygame Surface object. The call to pygame.display.set_mode in our script returns the Surface object representing the window on your desktop. It takes three parameters; only the first is required, which should be a tuple containing the width and height of the display we want to create. Our window will be 640 x 480 pixels, which is large enough so we can see what is happening, but not so large that it obscures too much of the desktop. The next parameter we give to set_mode is a value containing flags used in the display creation. A flag is a feature that can be switched on or off; you can combine several flags with the bitwise OR operator (|). For instance, to create a double-buffered hardware surface, set the flags parameter to DOUBLEBUF|HWSURFACE. See Table 3-2 for the flags you can use. I will cover them in more detail in the “Opening a Display” section later in this chapter. We won’t be enabling any of these flags for this first Pygame script, so the value we give for flags is just 0, which is also the default.
Table 3-2. Flags for pygame.display.set_mode
|
Flag |
Purpose |
|
FULLSCREEN |
Creates a display that fills the entire screen. |
|
DOUBLEBUF |
Creates a “double-buffered” display. Recommended for HWSURFACE or OPENGL. |
|
HWSURFACE |
Creates a hardware-accelerated display (must be combined with the FULLSCREEN flag). |
|
OPENGL |
Creates an OpenGL renderable display. |
|
RESIZABLE |
Creates a resizable display. |
|
NOFRAME |
Removes the border and title bar from the display. |
The next parameter specifies the depth of the display surface, which is the amount of bits used to store colors in the display. A bit, or binary digit, is the most fundamental unit of storage in a computer. Bits have exactly two potential values, 1 or 0, and are arranged in memory as groups of 8. A group of 8 bits is called a byte. Don’t worry if this sounds like techno-babble to you; Python tends to hide this kind of thing from the programmer. We will use the value 32 for our bit depth because it gives us the most colors; see Table 3-3 for other potential bit-depth values. If you don’t supply a value for the depth or set it to 0, Pygame will use the depth of your desktop.
Table 3-3. Bit-Depth Values
|
Bit Depth |
Number of Colors |
|
8 bits |
256 colors, chosen from a larger palette of colors |
|
15 bits |
32,768 colors, with a spare bit |
|
16 bits |
65,536 colors |
|
24 bits |
16.7 million colors |
|
32 bits |
16.7 million colors, with a spare 8 bits |
* It is possible to have other bit depths, but these are the most common.
![]() Note Sometimes Pygame is unable to give us the exact display we ask for. It may be that the graphics card doesn't support the features we are requesting. Fortunately, Pygame will choose a display that is compatible with the hardware and emulates the display we actually asked for. Thank you, Pygame!
Note Sometimes Pygame is unable to give us the exact display we ask for. It may be that the graphics card doesn't support the features we are requesting. Fortunately, Pygame will choose a display that is compatible with the hardware and emulates the display we actually asked for. Thank you, Pygame!
If all goes well, the call to set_mode will display a Pygame window on your desktop and return a Surface object, which is then stored in the variable screen. The first thing we do with our newly created surface is call set_caption in the display module to set the title bar of the Pygame window. We set the title to “Hello, World!”—just to make it a valid Hello World script!
Next up we use the load function in pygame.image to load the two images for the background and mouse cursor. We pass in the file names of the images stored at the start of the script:
background = pygame.image.load(background_image_filename).convert()
mouse_cursor = pygame.image.load(mouse_image_filename).convert_alpha()
The load function reads a file from your hard drive and returns a surface containing the image data. These are the same type of objects as our display, but they represent images stored in memory and aren’t visible until we draw them to the main display. The first call topygame.image.load reads in the background image and then immediately calls convert, which is a member function for Surface objects. This function converts the image to the same format as our display, because it is faster to draw images if the display is of the same depth. The mouse cursor is loaded in a similar way, but we call convert_alpha rather than convert. This is because our mouse cursor image contains alpha information, which means that portions of the image could be translucent or completely invisible. Without alpha information in our mouse image, we are limited to an unsightly square or rectangle as our mouse cursor! The next chapter will cover alpha and image formats in more detail.
The next line in the script jumps straight into the main game loop:
while True:
This while loop has True as the condition, which means it will loop continually until we break out of it, or force it to exit in some other way. All games will have a loop similar to this, which typically repeats once per screen refresh.
Inside the main game loop we have another loop—the event loop, which most games will also have in one form or another:
for event in pygame.event.get():
if event.type == QUIT:
pygame.quit()
exit()
An event is how Pygame informs you that something has happened outside your code. Events are created for many things, from key presses to receiving information from the Internet, and are queued up for you until you handle them. The function get in the pygame.event module returns any events waiting for us, which we then loop through in a for loop. For this script, we are only interested in the QUIT event, which is generated by Pygame when the user clicks the close button in the Pygame window. So if the event type is QUIT we call exit to shut down, and all other events are ignored. In a game, of course, we would have to handle a greater number of events. It is important to call pygame.quit() and exit() in order to fully close Pygame. Pygame.quit() un-initializes pygame.
The next line blits the background image to the screen (blitting means copying from one image to another):
screen.blit(background, (0,0))
This line uses the blit member function of the screen Surface object, which takes a source image—in this case, our 640 x 480 background—and a tuple containing the destination position. The background never moves; we just want it to cover the entire Pygame window, so we blit to the coordinate (0, 0), which is the top left of the screen.
![]() Tip It is important that you blit to every portion of the screen. If you don't, strange visual effects may occur when you animate things, and your game may look different on each computer it is run on. Try commenting out the call to screen.blit to see what happens.
Tip It is important that you blit to every portion of the screen. If you don't, strange visual effects may occur when you animate things, and your game may look different on each computer it is run on. Try commenting out the call to screen.blit to see what happens.
After we draw the background, we want to draw mouse_cursor underneath the usual mouse pointer:
x, y = pygame.mouse.get_pos()
x -= mouse_cursor.get_width()/2
y -= mouse_cursor.get_height()/2
screen.blit(mouse_cursor, (x, y))
Getting the position of the mouse is nice and simple; the pygame.mouse module contains all we need to work with the mouse, including get_pos, which returns a tuple containing the mouse coordinates. The first line unpacks this tuple into two values for convenience: x and y. We could use these two values as coordinates when we blit the mouse cursor, but that would place the top-left corner of the image under the mouse, and we want the center of the image to be under the mouse. So we do a little math (fear not!) to adjust x and y so that the mouse image is moved up by half its height and left by half its width. Using these coordinates places the center of the image right under the mouse pointer, which looks better. At least it does for an image of a fish—if you want to use a more typical pointer image, adjust the coordinates so that the tip lies underneath the real mouse coordinates.
Blitting the mouse image is done in the same way as blitting the background, but we use the coordinates we calculated rather than (0, 0). This is enough to create the effect we are looking for, but there is one more thing we have to do before we can see anything:
pygame.display.update()
When you build an image through blits to the screen surface, you won’t see them right away. This is because Pygame first builds up an image to a back buffer, which is an invisible display in memory, before it is displayed. If we didn’t have this step, the user would see individual blits as they happen, which would flicker most unpleasantly. For games programmers, flicker is the enemy! We want to see silky-smooth, convincing animation. Fortunately a call to pygame.display.update() is all we need to ensure that the image we have created in memory is shown to the user without flicker.
When you run this script, you should see something like Figure 3-1. If you are using the “official” images, then an odd-looking fish will dutifully follow the mouse cursor.
Understanding Events
In Hello World we only handled the QUIT event, which is essential unless you want to have immortal Pygame windows! Pygame creates other events to inform you of things such as mouse movement and key presses.
Events can be generated at any time, no matter what your program is currently doing. For example, your code could be drawing a tank on the screen when the user presses the fire button on the joypad. Because you can’t react to events the instant they happen, Pygame stores them in a queue until you are ready to handle them (typically at the beginning of the main game loop). You can think of the event queue as a line of people waiting to get into a building, each carrying specific information about an event. When the player presses the fire button, the joystick event arrives, carrying information about which key was pressed. Similarly, when the player releases the fire button, a clone of the same joystick event arrives with information about the button that was released. They could be followed by a mouse event and key event.
Retrieving Events
In the earlier example, we called pygame.event.get() to retrieve all the events and remove them from the queue, which is like opening the door and letting everyone in. This is probably the best way to deal with events, as it ensures we have handled everything before we go on to draw something to the screen—but there are other ways to work with the event queue. If you call pygame.event.wait(), Pygame will wait for an event to occur before it returns, which is like waiting by the door until someone arrives. This function isn’t often used for games because it suspends the script until something happens, but it can be useful for Pygame applications that cooperate more with other programs on your system, such as media players. An alternative is pygame.event.poll(), which returns a single event if there is one waiting, or a dummy event of type NOEVENT if there are no events in the queue. Whatever method you use, it is important to not allow them to build up, because the event queue is limited in size and events will be lost if the queue overflows.
It is necessary to call at least one of the event-handling functions at regular intervals so that Pygame can process events internally. If you don’t use any of the event-handling functions, you can call pygame.event.pump() in place of an event loop.
Event objects contain a few member variables that describe the event that occurred. The information they contain varies depending on the event. The only thing common to all event objects is type, which is a value that indicates the type of the event. It is this value that you first query so you can decide what to do with it. Table 3-4 lists the standard events that you may receive; we will go over a few of them in this chapter.
Table 3-4. Standard Events
|
Event |
Purpose |
Parameters |
|
QUIT |
User has clicked the close button. |
none |
|
ACTIVEEVENT |
Pygame has been activated or hidden. |
gain, state |
|
KEYDOWN |
Key has been pressed. |
unicode, key, mod |
|
KEYUP |
Key has been released. |
key, mod |
|
MOUSEMOTION |
Mouse has been moved. |
pos, rel, buttons |
|
MOUSEBUTTONDOWN |
Mouse button was pressed. |
pos, button |
|
MOUSEBUTTONUP |
Mouse button was released. |
pos, button |
|
JOYAXISMOTION |
Joystick or pad was moved. |
joy, axis, value |
|
JOYBALLMOTION |
Joy ball was moved. |
joy, ball, rel |
|
JOYHATMOTION |
Joystick hat was moved. |
joy, hat, value |
|
JOYBUTTONDOWN |
Joystick or pad button was pressed. |
joy, button |
|
JOYBUTTONUP |
Joystick or pad button was released. |
joy, button |
|
VIDEORESIZE |
Pygame window was resized. |
size, w, h |
|
VIDEOEXPOSE |
Part or all of the Pygame window was exposed. |
none |
|
USEREVENT |
A user event has occurred. |
code |
Let’s write a simple Pygame script to display all the events that are generated. Listing 3-2 uses pygame.event.wait() to wait for a single event. As soon as it gets one, it turns it into a string with str and adds it to a list. The rest of the code displays the new event along with as many previous events as it can fit on the screen. It uses the font module to display text (which we will discuss later).
![]() Tip If you change the fill color in Listing 3-2 to (0,0,0) and the color of the font to (0, 255, 0), it will look a little like Matrix-style code. You may have to use your imagination a little!
Tip If you change the fill color in Listing 3-2 to (0,0,0) and the color of the font to (0, 255, 0), it will look a little like Matrix-style code. You may have to use your imagination a little!
Listing 3-2. Displaying the Message Queueimport pygame
from pygame.locals import *
from sys import exit
pygame.init()
SCREEN_SIZE = (800, 600)
screen = pygame.display.set_mode(SCREEN_SIZE, 0, 32)
while True:
for event in pygame.event.get():
if event.type == QUIT:
pygame.quit()
exit()
print(event)
pygame.display.update()
If you run Listing 3-2, you will see a simple black window. If you move your mouse over the window, you will start to see printed output to the console (see Figure 3-2). These events specify the current position of the mouse, how far the mouse has moved since the last motion event, and which buttons are currently pressed. You can get the current position of the mouse with the pygame.mouse module, as we did in the Hello World example, but you risk losing information about what the player has been doing. This is a particular problem on desktop computers that do a lot of work in the background, and may occasionally pause your game for a brief amount of time. For a mouse cursor, you only need to know where the mouse is at the beginning of every frame, so it is reasonable to use pygame.mouse.get_pos(). If you were using mouse movement to drive a tank and the buttons to fire, it would be better to work with events so that the game can more closely monitor what the player has been doing.
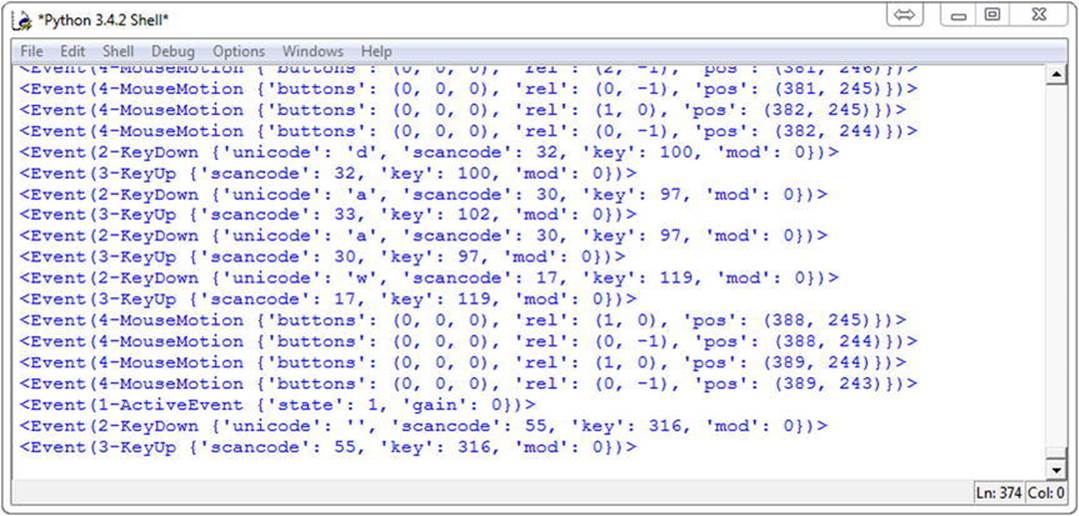
Figure 3-2. Output from the events script
Handling Mouse Motion Events
As you have seen, MOUSEMOTION events are issued whenever you move the mouse over the Pygame window. They contain these three values:
· buttons—A tuple of three numbers that correspond to the buttons on the mouse.
So buttons[0] is the left mouse button, buttons[1] is the middle button (like a mouse wheel), and buttons[2] is the right button. If the button is pressed, then its value is set to 1; if it is not pressed, the value will be 0. Multiple buttons can be pressed at once.
· pos—A tuple containing the position of the mouse when the event was generated.
· rel—A tuple containing the distance the mouse has moved since the last mouse motion event (sometimes called the mouse mickies).
Handling Mouse Button Events
In addition to motion events, the mouse generates MOUSEBUTTONDOWN and MOUSEBUTTONUP events. If you click the mouse on the message queue script, you will first see the down event, followed by an up event when you take your finger off the button. So why have the two events? If you are using the mouse button as a trigger to fire a rocket, you would only need one of the events, but you may have a different type of weapon, such as a chain gun that fires continuously while the button is held down. In this case you would start the chain gun speeding up on the downevent and have it fire until you get the corresponding up event. Both types of mouse button events contain the following two values:
· button—The number of the button that was pressed. A value of 1 indicates that the left mouse button was pressed, 2 indicates that the middle button was pressed, and 3 indicates the right button was pressed.
· pos—A tuple containing the position of the mouse when the event was generated.
Handling Keyboard Events
The keyboard and joystick have similar up and down events; KEYDOWN is issued when a key is pressed, and KEYUP is issued when the key is released. Listing 3-3 demonstrates how you might respond to KEYUP and KEYDOWN events to move something on screen with the cursor keys. If you run this listing, you will see a window containing a simple background image. Press up, down, left, or right and the background will slide in that direction. Take your finger off the cursor key and the background will stop moving.
Listing 3-3. Using Keyboard Events to Move a Background
import pygame
from pygame.locals import *
from sys import exit
background_image_filename = 'sushiplate.jpg'
pygame.init()
screen = pygame.display.set_mode((640, 480), 0, 32)
background = pygame.image.load(background_image_filename).convert()
x, y = 0, 0
move_x, move_y = 0, 0
while True:
for event in pygame.event.get():
if event.type == QUIT:
pygame.quit()
exit()
if event.type == KEYDOWN:
if event.key == K_LEFT:
move_x = -1
elif event.key == K_RIGHT:
move_x = +1
elif event.key == K_UP:
move_y = -1
elif event.key == K_DOWN:
move_y = +1
elif event.type == KEYUP:
if event.key == K_LEFT:
move_x = 0
elif event.key == K_RIGHT:
move_x = 0
elif event.key == K_UP:
move_y = 0
elif event.key == K_DOWN:
move_y = 0
x+= move_x
y+= move_y
screen.fill((0, 0, 0))
screen.blit(background, (x, y))
pygame.display.update()
Listing 3-3 begins just like Hello World; it imports and initializes Pygame, then loads a background image. The event loop in this script is different, because it handles KEYDOWN and KEYUP. These key events both contain the same three values:
· key—This is a number representing the key that was pressed or released. Each physical key on the keyboard has a constant that begins with K_. The alphabet keys are K_a through K_z, but there are also constants for all the other keys, such as K_SPACE andK_RETURN. For a complete list of the key constants you can use, see www.pygame.org/docs/ref/key.html.
· mod—This value represents keys that are used in combination with other keys, such as Shift, Alt, and Ctrl. Each of these modifier keys are represented by a constant that begins with KMOD_, such as KMOD_SHIFT, KMOD_ALT, and KMOD_CTRL. Check for these values by using the bitwise AND operator. For example, mod & KMOD_CTRL will evaluate to True if the Ctrl key is pressed. www.pygame.org/docs/ref/key.html provides a full list of the modifier keys.
· unicode—This is the Unicode value of the key that was pressed. It is produced by combining the pressed key with any of the modifier keys that was pressed. There is a Unicode value for every symbol in the English alphabet and other languages. You won’t often use this value in a game because keys tend to be used more like switches than for entering text. An exception would be for entering a high score table, where you would want the player to be able to type non-English letters as well as mix upper- and lowercase.
Inside the handler for KEYDOWN we check for the four key constants that correspond to the cursor keys. If K_LEFT is pressed, then the value of move_x is set to –1; if K_RIGHT is pressed, it is set to +1. This value is later added to the x coordinate of the background in order to move it left or right. There is also a move_y value, which is set if K_UP or K_DOWN is pressed, which will move the background vertically.
We also handle the KEYUP event, because we want the background to stop moving when the user releases the cursor key. The code inside the handler for KEYUP events is similar to the down event, but it sets move_x or move_y back to zero to stop the background from moving.
After the event loop, all we have to do is add the values move_x and move_y to x and y, then draw the background at (x, y). The only thing you haven’t seen before is screen.fill((0, 0, 0)), which is used to clear the display to black (colors are explained in Chapter 4). This line is necessary because if we move the background image it no longer covers the whole display— which I guess would technically mean it is no longer a background!
Filtering Events
Not all events need to be handled in every game, and there are often alternative ways of getting the information that events might give you. For example, if you are using pygame.mouse.get_pos() you will not need to respond to the MOUSEMOTION event.
Occasionally you also need to suspend the handling of certain events. If you were to play a cut scene movie between levels, you would probably want to ignore input events until it is finished. The Pygame event module has a number of functions to help you just do that.
You can block events from the event queue with the set_block function. For example, the following line will disable mouse movement:
pygame.event.set_blocked(MOUSEMOTION)
If you pass in a list of event types, all those events will be blocked. For example, the following line will disable all keyboard input by blocking both KEYDOWN and KEYUP events:
pygame.event.set_blocked([KEYDOWN, KEYUP])
If you want to unblock all events, pass the value of None to set_blocked. This line will allow all events to occur in the event queue:
pygame.event.set_blocked(None)
The opposite of set_blocked is set_allowed, which selects the events that should be allowed (unblocked). It also takes a single event type, or a list of event types. But if you pass in the value of None, it effectively blocks all events. You can ask Pygame if an event is currently blocked with pygame.event.get_block, which takes a single event type.
Posting Events
Generally it is Pygame that creates all the events for you, but you can create your own. You could use this ability to play back demos (by replicating the player’s input), or simulate the effects of a cat walking across the keyboard (I like to make my games cat proof).
To send an event, you first construct an event object with pygame.event.Event and then post it with pygame.event.post. The event will be placed on the end of the queue, ready for retrieval in the event loop. Here’s how to simulate the player pressing the spacebar:
my_event = pygame.event.Event(KEYDOWN, key=K_SPACE, mod=0, unicode=u' ')
pgame.event.post(my_event)
The Event constructor takes the type of the event, such as one of the events in Table 3-4, followed by the values the event should contain. Because we are simulating the KEYDOWN event, we need to supply all the values that the event handler would expect to be there. If you prefer, you can supply these values as a dictionary. This line creates the same event object:
my_event = pygame.event.Event(KEYDOWN, {"key":K_SPACE, "mod":0, "unicode":u' '})
In addition to simulating Pygame-generated events, you can create completely new events. All you have to do is use a value for the event that is above USEREVENT, which is the maximum value that Pygame will use for its own event IDs. This can sometimes be useful if you want to do something in the event loop before you go on to draw to the screen. Here’s an example of a user event to respond to a cat walking over the keyboard:
CATONKEYBOARD = USEREVENT+1
my_event = pygame.event.Event(CATONKEYBOARD, message="Bad cat!")
pgame.event.post(my_event)
Handling user events is done in the same way as the usual events that Pygame generates— just check the event type to see if it matches your custom event. Here’s how you might handle a CATONKEYBOARD event:
for event in pygame.event.get():
if event.type == CATONKEYBOARD:
print(event.message)
Opening a Display
I deliberately glossed over opening a display in the Hello World example because we only needed a simple display, but Pygame has a variety of options for displays. The type of display you create depends on the game. It is generally easier to used fixed resolution (display size) because it can simplify your code. Your decision also depends on how much action you will have in the game—the more things you have moving on screen at one time, the slower the game will run. You may have to compensate by selecting a lower resolution (which will speed things up again).
The best solution is usually to let the player decide what resolution they want to run in so that they can adjust the display until they have a good compromise between visual quality and how smoothly the game runs. If you go this route, you will have to make sure that your game looks okay in all potential resolutions!
Don’t worry about this until it comes time to write your game. Just select a resolution that works for you while you are experimenting with Pygame scripts, but feel free to experiment a little.
Full-Screen Displays
In Hello World we used the following line to create a Pygame window:
screen = pygame.display.set_mode((640, 480), 0, 32)
The first parameter is the size of the window we want to create. A size of (640, 480) creates a small window that will fit comfortably on most desktops, but you can select a different size if you wish. Running in a window is great for debugging, but most games fill the entire screen with the action and don’t have the usual borders and title bar. Full-screen mode is usually faster because your Pygame script doesn’t have to cooperate with other windows on your desktop. To set full-screen mode, use the FULLSCREEN flag for the second parameter of set_mode:
screen = pygame.display.set_mode((640, 480), FULLSCREEN, 32)
![]() Caution If something goes wrong with your script in full-screen mode, it can sometimes be difficult to get back to your desktop. Therefore, it's best to test it in windowed mode first. You should also provide an alternative way to exit the script because the close button is not visible in full-screen mode.
Caution If something goes wrong with your script in full-screen mode, it can sometimes be difficult to get back to your desktop. Therefore, it's best to test it in windowed mode first. You should also provide an alternative way to exit the script because the close button is not visible in full-screen mode.
When you go full screen, your video card will probably switch to a different video mode, which will change the width and height of the display, and potentially how many colors it can show at one time. Video cards only support a few combinations of size and number of colors, but Pygame will help you if you try to select a video mode that the card does not support directly. If the size of display you ask for isn’t supported, Pygame will select the next size up and copy your display to the center of it, which may lead to black borders at the top and bottom of your display. To avoid these borders, select one of the standard resolutions that virtually all video cards support: (640, 480), (800, 600), or (1024, 768). To see exactly what resolutions your display supports, you can use pygame.display.list_modes(), which returns a list of tuples containing supported resolutions. Let’s try this from the interactive interpreter:
>>> import pygame
>>> pygame.init()
(6, 0)
>>> pygame.display.list_modes()
[(1920, 1080), (1680, 1050), (1600, 1024), (1600, 900), (1366, 768), (1360, 768), (1280, 1024), (1280, 960), (1280, 800), (1280, 768), (1280, 720), (1152, 864), (1024, 768), (800, 600), (720, 576), (720, 480), (640, 480)]
![]() Note Notice how pygame.init() returned a tuple of (6,0). pygame.init() returns a tuple containing the number successful initializations followed by the number of failed initializations.
Note Notice how pygame.init() returned a tuple of (6,0). pygame.init() returns a tuple containing the number successful initializations followed by the number of failed initializations.
If the video card can’t give you the number of colors you asked for, Pygame will convert colors in the display surface automatically to fit (which may result in a slight drop in image quality).
Listing 3-4 is a short script that demonstrates going from windowed mode to full-screen mode. If you press the F key, the display will fill the entire screen (there may be a delay of a few seconds while this happens). Press F a second time, and the display will return to a window.
Listing 3-4. Full-Screen Example
import pygame
from pygame.locals import *
from sys import exit
background_image_filename = 'sushiplate.jpg'
pygame.init()
screen = pygame.display.set_mode((640, 480), 0, 32)
background = pygame.image.load(background_image_filename).convert()
Fullscreen = False
while True:
for event in pygame.event.get():
if event.type == QUIT:
pygame.quit()
exit()
if event.type == KEYDOWN:
if event.key == K_f:
Fullscreen = not Fullscreen
if Fullscreen:
screen = pygame.display.set_mode((640, 480), FULLSCREEN, 32)
else:
screen = pygame.display.set_mode((640, 480), 0, 32)
screen.blit(background, (0,0))
pygame.display.update()
Resizable Pygame Windows
Occasionally you may want the user to be able to resize a Pygame window, which you typically do by clicking on the corner of the window and dragging with the mouse. It’s easy enough to do this by using the RESIZABLE flag when you call set_mode. Pygame informs your code if the user has changed the window size by sending a VIDEORESIZE event that contains the new width and height of the window. When you get one of these events, you should call pygame.display.set_mode again to set the display to the new dimensions. Listing 3-5 demonstrates how to respond to VIDEORESIZE events.
Listing 3-5. Using a Resizable Window
import pygame
from pygame.locals import *
from sys import exit
background_image_filename = 'sushiplate.jpg'
SCREEN_SIZE = (640, 480)
pygame.init()
screen = pygame.display.set_mode(SCREEN_SIZE, RESIZABLE, 32)
background = pygame.image.load(background_image_filename).convert()
while True:
event = pygame.event.wait()
if event.type == QUIT:
pygame.quit()
exit()
if event.type == VIDEORESIZE:
SCREEN_SIZE = event.size
screen = pygame.display.set_mode(SCREEN_SIZE, RESIZABLE, 32)
pygame.display.set_caption("Window resized to "+str(event.size))
screen_width, screen_height = SCREEN_SIZE
for y in range(0, screen_height, background.get_height()):
for x in range(0, screen_width, background.get_width()):
screen.blit(background, (x, y))
pygame.display.update()
When you run this script, it will display a simple Pygame window with a background image. If you click on the corner or edge of the window and drag with the mouse, the script will get a VIDEORESIZE event. In the handler to that message is another call to set_mode, which creates a new screen surface that matches the new dimensions. The resize message contains the following values:
· size—This is a tuple containing the new dimensions of the window; size[0] is the width and size[1] is the height.
· w—This value contains the new width of the window. It is the same value as size[0], but may be more convenient.
· h—This value contains the new height of the window. It is the same value as size[1], but may be more convenient.
Because the display size can vary with this script, we draw the background slightly differently by blitting the background image as many times as necessary to cover the display. The two calls to range produce the coordinates needed to place these multiple background images.
Most games run in full screen so resizable displays are perhaps not a feature you will use very often. But it is there in your toolbox if you need it!
Windows with No Borders
Generally when you create a Pygame window you will want a standard window with title bars and border. It is possible, though, to create a window that doesn’t have these features so that the user will not be able to move or resize the window, or close it via the close button. One instance of such a use is the window used for splash screens. Some games can take a while to load because they contain many image and sound files. If there is nothing visible on the screen while this is happening, the player may feel that the game is not working and try to launch it again. To set a display with no borders, use the NOFRAME flag when calling set_mode. For example, the following line will create a “naked” window:
screen = pygame.display.set_mode(SCREEN_SIZE, RESIZABLE, 32)
Additional Display Flags
There are a few more flags you can use in a call to set_mode. I consider them advanced, because they can hurt performance if used incorrectly or cause compatibility problems on some platforms. It is usually best to use the value 0 for windowed displays and FULLSCREEN for full-screen displays to ensure your game will work well on all platforms. That said, if you know what you are doing you can set a few advanced flags for extra performance. There is also no harm in experimenting (it won’t hurt your computer).
If you set the HWSURFACE flag, it will create what is called a hardware surface. This is a special kind of display surface that is stored in the memory of your graphics card. It can only be used in combination with the FULLSCREEN flag, like this:
screen = pygame.display.set_mode(SCREEN_SIZE, HWSURFACE | FULLSCREEN, 32)
Hardware surfaces can be faster than surfaces created in system (regular) memory, because they can take advantage of more features of your graphics card to speed up blitting. The disadvantage of hardware surfaces is that they are not that well supported on all platforms. They tend to work on Windows platforms but not so well on others. Hardware surfaces also benefit from the DOUBLEBUF flag. This effectively creates two hardware surfaces, but only one is visible at any one time. The following line creates a double-buffered hardware surface:
screen = pygame.display.set_mode(SCREEN_SIZE, DOUBLEBUF | HWSURFACE | FULLSCREEN, 32)
Normally when you call pygame.display.update() an entire screen is copied from memory to the display—which takes a little time. Double-buffered surfaces allow you to switch to the new screen instantly and thus makes your game run a little faster.
The last display flag you can use is OPENGL. OpenGL (www.opengl.org/) is a graphics library that uses the 3D graphics accelerator found on just about every graphics card. The downside of using this flag is that you will no longer be able to use Pygame’s 2D graphics functions. We will cover using OpenGL to create 3D in Chapter 9.
![]() Note If you use a double-buffered display, you should call pygame.display.flip() rather than pygame.display.update(). This does the instant display switch rather than copying screen data.
Note If you use a double-buffered display, you should call pygame.display.flip() rather than pygame.display.update(). This does the instant display switch rather than copying screen data.
Using the Font Module
I promised to cover the font module that we used in the event queue script. The ability to draw text on the screen can really help with testing scripts; you may also need it to display game instructions, menu options, and so forth. The font module uses TrueType fonts (TTFs), which are used on most systems to render high-quality, smooth text. There will be many such fonts installed on your computer that can be used by the font module.
To use a font, you must first create a Font object. The easiest way to do this is with pygame.font.SysFont, which uses one of the fonts you have installed on your computer. The following line creates a Font object for the Arial font (a common font that is easy to read):
my_font = pygame.font.SysFont("arial", 16)
The first parameter is the name of font you want to create, and the next parameter specifies the font size in pixels. Pygame will look for a font with the name “arial” in your installed fonts; if it doesn’t find it, a default font will be returned. You can get a list of the fonts installed on your system by calling pygame.font.get_fonts(). Fonts can also be created directly from .ttf files by calling pygame.font.Font, which takes a file name. The following line loads the file my_font.ttf and returns a Font object:
my_font = pygame.font.Font("my_font.ttf", 16)
Once you have created a Font object, you can use it to render text to a new surface. To render text, use the render member function of Font objects. It creates a new surface containing the text, which you can then blit to the display. The following line renders a piece of text and returns a new surface:
text_surface = my_font.render("Pygame is cool!", True, (0,0,0), (255, 255, 255))
The first parameter of render is the text you want to render. It has to be a single line; if you want multiple lines, you will have to break the string and use multiple render calls. The second parameter is a boolean (True or False), used to enable antialiased text. If it is set to True, the text will have a modern, smooth look; otherwise, it will appear more pixelated. The next two parameters of render are the text color, followed by the background color. The background is optional, if you leave it out (or set it to None), the background will be transparent.
To finish this introduction to the font module, let’s write a small script to render my name to a surface and save it as an image. Feel free to change the name that is drawn to your own. If you modify the first line of Listing 3-6, it will do just that.
Listing 3-6. Writing Your Name to an Image File
import pygame
my_name = "Harrison Kinsley"
pygame.init()
my_font = pygame.font.SysFont("arial", 64)
name_surface = my_font.render(my_name, True, (0, 0, 0), (255, 255, 255))
pygame.image.save(name_surface, "name.png")
This script is so simple that we don’t even need to create a display! When you run Listing 3-6, you won’t see much happen on the screen, but the code creates an image file called name.png in the same location as the script. You can open the file with any image viewer software. Saving the surface to a file is done with the pygame.image module, which we will cover in the next chapter.
The font module provides other functions as well as Font objects, which you may occasionally need to use. They are mostly informational, designed to retrieve various pieces of information regarding the fonts. There are functions that will simulate bold and italic text, but it is better to use a dedicated bold or italic font. For complete details on the font module, see the documentation at www.pygame.org/docs/ref/font.html.
![]() Caution Installed fonts vary from computer to computer, and you cannot always rely on a particular font being present. If Pygame doesn't find the font you are asking for, it will use a default font that may not look the same. The solution is to distribute the .ttf files with your game, but make sure you have permission from the font author to do this! For a free-to-distribute font, you could use something from the BitStream Vera family (http://en.wikipedia.org/wiki/Bitstream_Vera).
Caution Installed fonts vary from computer to computer, and you cannot always rely on a particular font being present. If Pygame doesn't find the font you are asking for, it will use a default font that may not look the same. The solution is to distribute the .ttf files with your game, but make sure you have permission from the font author to do this! For a free-to-distribute font, you could use something from the BitStream Vera family (http://en.wikipedia.org/wiki/Bitstream_Vera).
Pygame in Action
Back when I was a youngling, the “scrolly message” was a very popular effect among hobbyist graphics programmers. A scrolly message, or marquee as it is now known, is simply text sliding across the screen from right to left. Listing 3-7 is a Pygame implementation of a scrolly message. It’s not without its faults, the most major of which is that it moves at an inconsistent speed, and may be faster or slower on different computers. This is a problem that you will learn how to solve in the next chapter.
Most of this script should be familiar by now, so I won’t break it down. Try tweaking the code to produce different results. You may also want to insert text of your own choice, which you can do by modifying the message string at the start of the script.
Listing 3-7. Scrolly Message Script
import pygame
from pygame.locals import *
from sys import exit
background_image_filename = 'sushiplate.jpg'
SCREEN_SIZE = (640, 480)
message=" This is a demonstration of the scrolly message script. "
pygame.init()
screen = pygame.display.set_mode(SCREEN_SIZE)
font = pygame.font.SysFont("arial", 80);
text_surface = font.render(message, True, (0, 0, 255))
x = 0
y = ( SCREEN_SIZE[1] - text_surface.get_height() ) / 2
background = pygame.image.load(background_image_filename).convert()
while True:
for event in pygame.event.get():
if event.type == QUIT:
pygame.quit()
exit()
screen.blit(background, (0,0))
x-= 2
if x < -text_surface.get_width():
x = 0
screen.blit(text_surface, (x, y))
screen.blit(text_surface, (x+text_surface.get_width(), y))
pygame.display.update()
Summary
Pygame is a powerful platform for building games. It consists of many submodules for a variety of game-related tasks. Pygame works equally well on a large number of platforms. Ports are available for all the major desktop systems and even some consoles—so you can develop a game on your favorite platform and play it on another.
We’ve produced a Hello World script that demonstrates the basics of starting Pygame, creating a display, receiving events, and then drawing to the screen—steps that you will use when creating more sophisticated games and demos. If you have done any game programming in C or C++, you will appreciate the simplicity of the code, especially the one-liner to create a display.
We explored the flags you can use when creating a display, which can improve performance or add capabilities. It is probably best to leave most of these flags disabled, at least until you are more familiar with Pygame and computer graphics in general. You should find that the default settings still give you excellent performance.
You also learned how to manage the event queue to handle the various events that Pygame can send you, and you even learned how to create custom events. Listing 2-3 lets you see exactly what events are generated and the information they contain. You will find this listing to be a handy tool when you experiment with your own script.
This chapter covered all the boilerplate code you need to get up and running with Pygame. The next chapter examines graphics, movement, and animation.
All materials on the site are licensed Creative Commons Attribution-Sharealike 3.0 Unported CC BY-SA 3.0 & GNU Free Documentation License (GFDL)
If you are the copyright holder of any material contained on our site and intend to remove it, please contact our site administrator for approval.
© 2016-2026 All site design rights belong to S.Y.A.