Introducing Python (2014)
Appendix A. Py Art
Well, art is art, isn’t it? Still, on the other hand, water is water! And east is east and west is west, and if you take cranberries and stew them like applesauce, they taste much more like prunes than rhubarb does.
— Groucho Marx
Maybe you’re an artist, or a musician. Or maybe you just want to try something creative and different.
These first three appendices are explorations of some common human endeavors using Python. If your interest lies in any of these areas, you might get some ideas from the chapters, or the urge to try something new.
2-D Graphics
All computer languages have been applied to computer graphics to some degree. Many of the heavy-duty platforms in this chapter were written in C or C++ for speed, but added Python libraries for productivity. Let’s begin by looking at some 2-D imaging libraries.
Standard Library
Only a few graphics-related modules are in the standard library. Here are two of them:
imghdr
This module detects the file type of some image files.
colorsys
This module converts colors between various systems: RGB, YIQ, HSV, and HLS.
If you downloaded the O’Reilly logo to a local file called oreilly.png, you could run this:
>>> import imghdr
>>> imghdr.what('oreilly.png')
'png'
To do anything serious with graphics in Python, we need to get some third-party packages. Let’s see what’s out there.
PIL and Pillow
For many years, the Python Image Library (PIL), although not in the standard library, has been Python’s best-known 2-D image processing library. It predated installers such as pip, so a “friendly fork” called Pillow was created. Pillow’s imaging code is backward-compatible with PIL, and its documentation is good, so we’ll use it here.
Installation is simple; just type the following command:
$ pip install Pillow
If you’ve already installed operating system packages such as libjpeg, libfreetype, and zlib, they’ll be detected and used by Pillow. See the installation page for details on this.
Open an image file:
>>> from PIL import Image
>>> img = Image.open('oreilly.png')
>>> img.format
'PNG'
>>> img.size
(154, 141)
>>> img.mode
'RGB'
Although the package is called Pillow, you import it as PIL to make it compatible with the older PIL.
To display the image on your screen using the Image object’s show() method, you’ll first need to install the ImageMagick package described in the next section, and then try this:
>>> img.show()
The image displayed in Figure A-1 opens in another window. (This screenshot was captured on a Mac, where the show() function used the Preview application. Your window’s appearance might vary.)

Figure A-1. Image opened via the Python library
Let’s crop the image in memory, save the result as a new object called img2, and display it. Images are always measured by horizontal (x) values and vertical (y) values, with one corner of the image known as the origin and arbitrarily assigned an x and y of 0. In this library, the origin (0, 0) is at the upper left of the image, x increases to the right, and y increases as you move down. We want to give the values of left x (55), top y (70), right x (85), and bottom y (100) to the crop() method, so we’ll pass it a tuple with those values in that order.
>>> crop = (55, 70, 85, 100)
>>> img2 = img.crop(crop)
>>> img2.show()
The results are shown in Figure A-2.
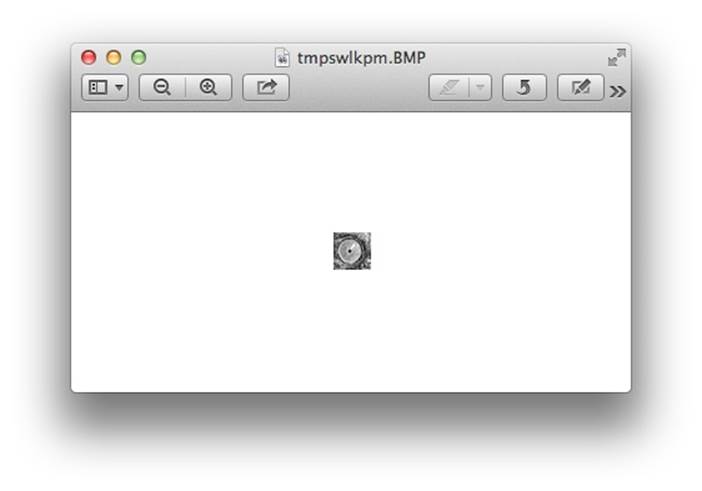
Figure A-2. The cropped image
Save an image file with the save method. It takes a filename and an optional type. If the filename has a suffix, the library uses that to determine the type. But, you can also specify the type explicitly. To save our cropped image as a GIF file, do the following:
>>> img2.save('cropped.gif', 'GIF')
>>> img3 = Image.open('cropped.gif')
>>> img3.format
'GIF'
>>> img3.size
(30, 30)
Let’s “improve” our little mascot. First download an image of moustaches to moustaches.png. We’ll load it, crop it suitably, and then overlay it on our spokescritter:
>>> mustache = Image.open('moustaches.png')
>>> handlebar = mustache.crop( (316, 282, 394, 310) )
>>> handlebar.size
(78, 28)
>>> img.paste(handlebar, (45, 90) )
>>> img.show()
Figure A-3 presents the highly satisfactory results.
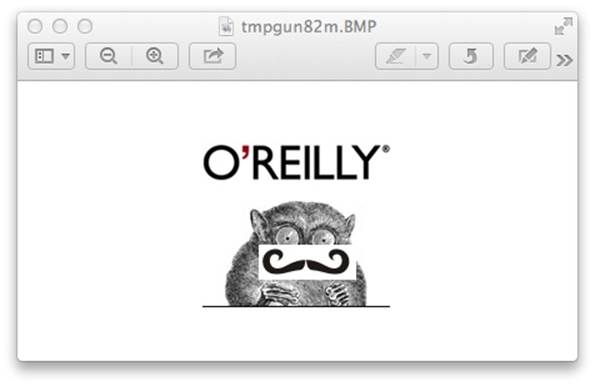
Figure A-3. Our new, dapper mascot
It would be nice to make that moustache background transparent. Hey, there’s an exercise for you! If you’d like to play with this, look up transparency and alpha channel in the Pillow tutorial.
ImageMagick
ImageMagick is a suite of programs to convert, modify, and display 2-D bitmap images. It’s been around for more than 20 years. Various Python libraries have connected to the ImageMagick C library. A recent one that supports Python 3 is wand. To install it, type the following command:
$ pip install Wand
You can do many of the same things with wand as you can with Pillow:
>>> from wand.image import Image
>>> from wand.display import display
>>>
>>> img = Image(filename='oreilly.png')
>>> img.size
(154, 141)
>>> img.format
'PNG'
As with Pillow, this displays the image on the screen:
>>> display(img)
wand includes rotation, resizing, text and line drawing, format conversion, and other features that you can also find in Pillow. Both have good APIs and documentation.
Graphical User Interfaces (GUIs)
The name includes the word graphic, but GUIs concentrate more on the user interface: widgets to present data, input methods, menus, buttons, and windows to frame everything.
The GUI programming wiki page and FAQ list many Python-powered GUIs. Let’s begin with the only one that’s built into the standard library: Tkinter. It’s plain, but it works on all platforms to produce native-looking windows and widgets.
Here’s a teeny, tiny Tkinter program to display our favorite googly-eyed mascot in a window:
>>> import tkinter
>>> from PIL import Image, ImageTk
>>>
>>> main = tkinter.Tk()
>>> img = Image.open('oreilly.png')
>>> tkimg = ImageTk.PhotoImage(img)
>>> tkinter.Label(main, image=tkimg).pack()
>>> main.mainloop()
Notice that it used some modules from PIL/Pillow. You should see the O’Reilly logo again, as shown in Figure A-4.

Figure A-4. Image shown through Tkinter library
To make the window go away, click its close button, or leave your Python interpreter.
Read more about Tkinter at the tkinter wiki and the Python wiki. Now for the GUIs that are not in the standard library.
Qt
This is a professional GUI and application toolkit, originated about 20 years ago by Trolltech in Norway. It’s been used to help build applications such as Google Earth, Maya, and Skype. It was also used as the base for KDE, a Linux desktop. There are two main Python libraries for Qt:PySide is free (LGPL license), and PyQt is licensed either with the GPL or commercially. The Qt folks see these differences. Download PySide from PyPI or Qt and read the tutorial. You can download Qt for free online.
GTK+
GTK+ is a competitor of Qt, and it, too, has been used to create many applications, including GIMP and the Gnome desktop for Linux. The Python binding is PyGTK. To download the code, go to the PyGTK site, where you can also read the documents.
WxPython
This is the Python binding for WxWidgets. It’s another hefty package, free to download online.
Kivy
Kivy is a free modern library for building multimedia user interfaces portably across platforms—desktop (Windows, OS X, Linux), and mobile (Android, iOS). It includes multitouch support. You can download for all the platforms on the Kivy website. Kivy includes application development tutorials.
The Web
Frameworks such as Qt use native components, but some others use the Web. After all, the Web is a universal GUI, and it has graphics (SVG), text (HTML), and even multimedia now (in HTML5). Some web-based GUI tools written in Python include RCTK (Remote Control Toolkit)and Muntjac. You can build web applications with any combination of frontend (browser-based) and backend (web server) tools. A thin client lets the backend do most of the work. If the frontend dominates, it’s a thick, or fat, or rich client; the last adjective sounds more flattering. It’s common for the sides to communicate with RESTful APIs, AJAX, and JSON.
3-D Graphics and Animation
Watch the long end-credits for almost any contemporary movie, and you’ll see mass quantities of people doing special effects and animation. Most of the big studios—Walt Disney Animation, ILM, Weta, Dreamworks, Pixar—hire people with Python experience. Do a web search for “python animation jobs” or visit vfxjobs and search for “python” to see what’s available now.
If you’d like to experiment with Python and 3-D, animation, multimedia, and games, try Panda3D. It’s open source and free to use, even for commercial applications. You can download a version for your computer from the Panda3D website. To try some sample programs, change to the directory /Developer/Examples/Panda3D. Each subdirectory contains one or more .py files. Run one of them by using the ppython command that came with Panda3D. For example:
$ cd /Developer/Examples/Panda3D
$ cd Ball-in-Maze/
$ ppython Tut-Ball-in-Maze.py
DirectStart: Starting the game.
Known pipe types:
osxGraphicsPipe
(all display modules loaded.)
A window similar to Figure A-5 opens.
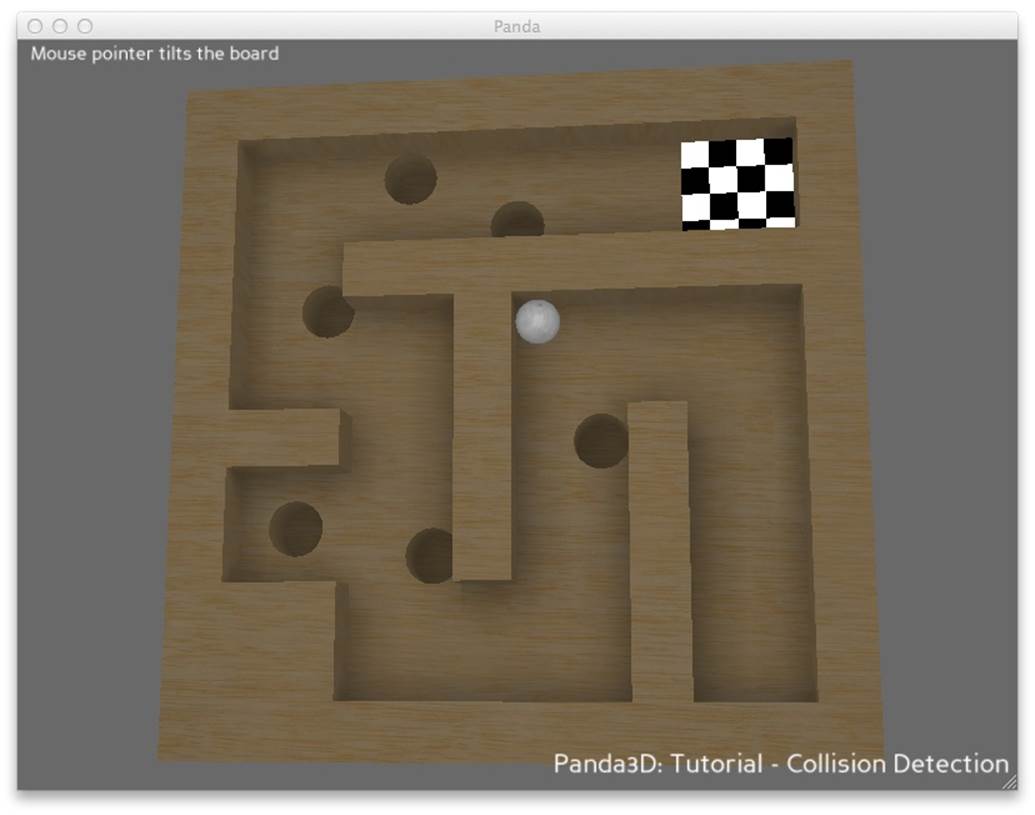
Figure A-5. An image shown through the Panda3D library
Use your mouse to tilt the box and move the ball in the maze.
If that all worked, and the base Panda3D installation looks good, then you can start playing with the Python library.
Here’s a simple example application from the Panda3D documentation; save it as panda1.py:
from direct.showbase.ShowBase import ShowBase
class MyApp(ShowBase):
def __init__(self):
ShowBase.__init__(self)
# Load the environment model.
self.environ = self.loader.loadModel("models/environment")
# Reparent the model to render.
self.environ.reparentTo(self.render)
# Apply scale and position transforms on the model.
self.environ.setScale(0.25, 0.25, 0.25)
self.environ.setPos(-8, 42, 0)
app = MyApp()
app.run()
Run it by using this command:
$ ppython panda1.py
Known pipe types:
osxGraphicsPipe
(all display modules loaded.)
A window opens displaying the scene in Figure A-6.
The rock and tree are floating above the ground. Click the Next buttons to continue the guided tour and fix these problems.
Following are some other 3-D packages with Python:
Blender
Blender is a free 3-D animation and game creator. When you download and install it from www.blender.org/download, it comes bundled with its own copy of Python 3.
Maya
This is a commercial 3-D animation and graphic system. It also comes bundled with a version of Python, currently 2.6. Chad Vernon has written a free downloadable book, Python Scripting for Maya Artists. If you search for Python and Maya on the Web, you’ll find many other resources, both free and commercial, including videos.
Houdini
Houdini is commercial, although you can download a free version called Apprentice. Like the other animation packages, it comes with a Python binding.
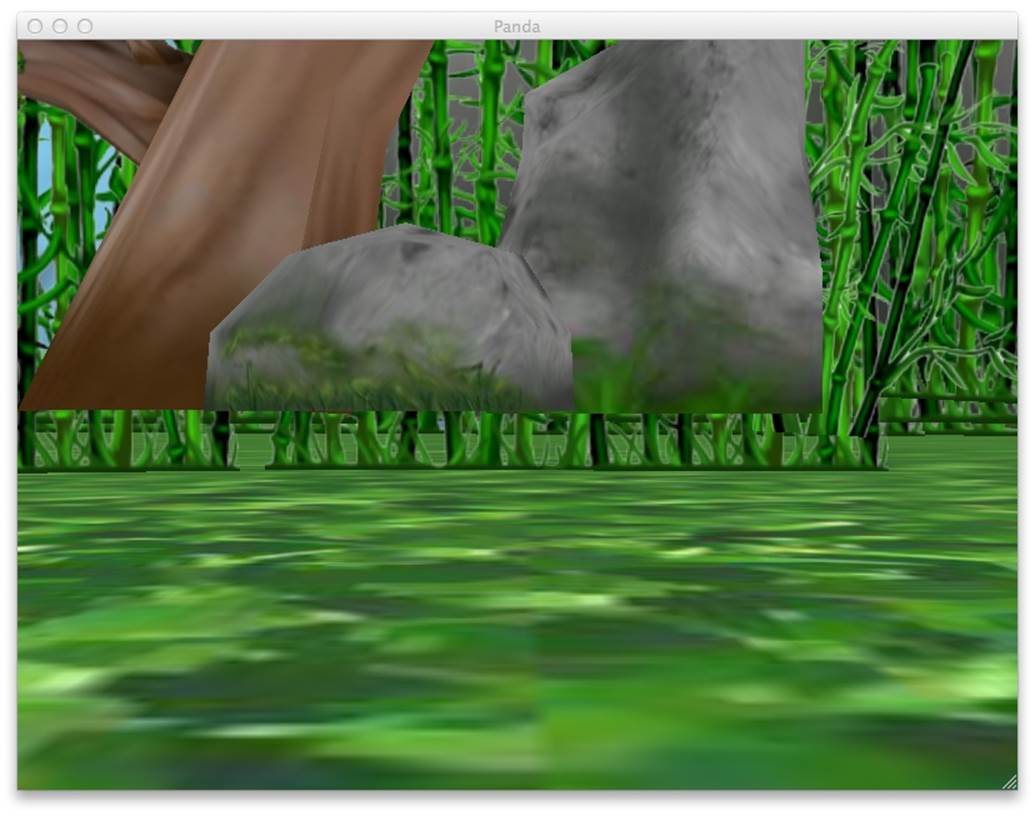
Figure A-6. Scaled image shown through Panda3D library
Plots, Graphs, and Visualization
Python has become a leading solution for plots, graphs, and data visualization. It’s especially popular in science, which is covered in Appendix C. The official Python site has an overview. Allow me to take a few moments to say a little more about some of these.
matplotlib
The free matplotlib 2-D plotting library can be installed by using the following command:
$ pip install matplotlib
The examples in the gallery show the breadth of matplotlib. Let’s try the same image display application (with results shown in Figure A-7), just to see how the code and presentation look:
import matplotlib.pyplot as plot
import matplotlib.image as image
img = image.imread('oreilly.png')
plot.imshow(img)
plot.show()
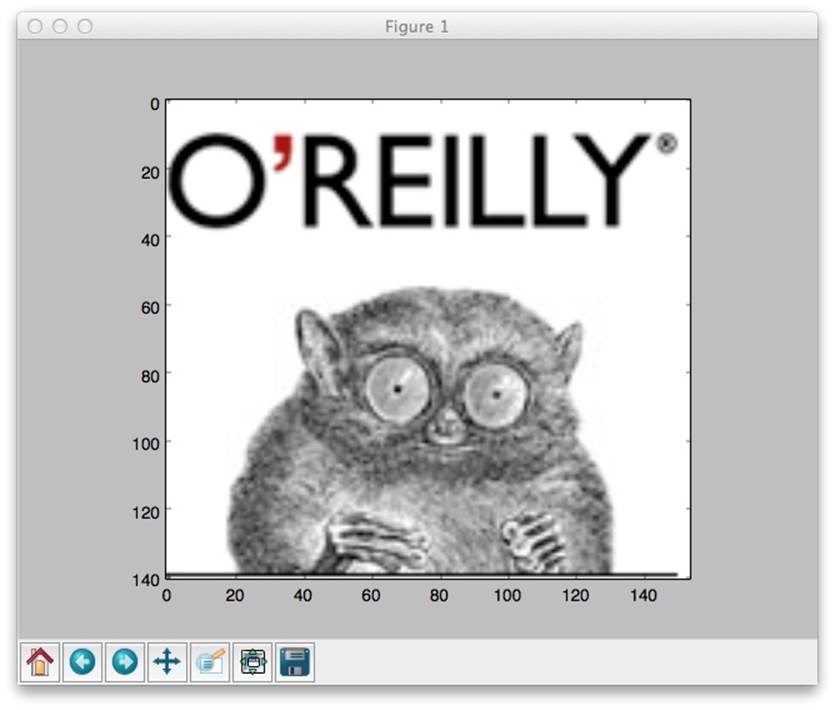
Figure A-7. Image shown through the matplotlib library
You can see more of matplotlib in Appendix C; it has strong ties to NumPy and other scientific applications.
bokeh
In the old web days, developers would generate graphics on the server and give the web browser some URL to access them. More recently, JavaScript has gained performance and client-side graphics generation tools like D3. A page or two ago, I mentioned the possibility of using Python as part of a frontend-backend architecture for graphics and GUIs. A new tool called bokeh combines the strengths of Python (large data sets, ease of use) and JavaScript (interactivity, less graphics latency). Its emphasis is quick visualization of large data sets.
If you’ve already installed its prerequisites (NumPy, Pandas, and Redis) you can install bokeh by typing this command:
$ pip install bokeh
(You can see NumPy and Pandas in action in Appendix C.)
Or, install everything at once from the Bokeh website. Although matplotlib runs on the server, bokeh runs mainly in the browser and can take advantage of recent advances on the client side. Click any image in the gallery for an interactive view of the display and its Python code.
Games
Python is good at data wrangling, and you’ve seen in this appendix that it’s also good at multimedia. How about games?
It happens that Python is such a good game development platform that people have written books about it. Here are a couple of them:
§ Invent Your Own Computer Games with Python by Al Sweigart
§ The Python Game Book, by Horst Jens (a docuwiki book)
There’s a general discussion at the Python wiki with even more links.
The best known Python game platform is probably pygame. You can download an executable installer for your platform from the Pygame website, and read a line-by-line example of a “pummel the chimp” game.
Audio and Music
What about sound, and music, and cats singing Jingle Bells?
Well, maybe just the first two.
The standard library has some rudimentary audio modules under multimedia services. There’s also a discussion of third-party modules.
The following libraries can help you generate music:
§ pyknon is used by the book Music for Geeks and Nerds by Pedro Kroger (CreateSpace).
§ mingus is a music sequencer that can read and produce MIDI files.
§ remix, as the name implies, is an API to remix music. One example of its use is morecowbell.dj, which adds more cowbell to uploaded songs.
§ sebastian is a library for music theory and analysis.
§ Piano lets you play piano on your computer keyboard with the keys C, D, E, F, A, B, and C.
Finally, the libraries in the following list can help you organize your collection or give you access to music data:
§ Beets manages your music collection.
§ Echonest APIs access music metadata.
§ Monstermash mashes song fragments together; it’s built on Echonest, Flask, ZeroMQ, and Amazon EC2.
§ Shiva is a RESTful API and server to query your collection.
§ Get album art to match your music.
All materials on the site are licensed Creative Commons Attribution-Sharealike 3.0 Unported CC BY-SA 3.0 & GNU Free Documentation License (GFDL)
If you are the copyright holder of any material contained on our site and intend to remove it, please contact our site administrator for approval.
© 2016-2026 All site design rights belong to S.Y.A.