Teach Your Kids to Code: A Parent-Friendly Guide to Python Programming (2015)
Chapter 7. Functions: There’s a Name for That
We’ve made use of a number of functions so far — everything from print() to input() to turtle.forward(). But all of these functions have been either built-in or imported from Python modules and libraries. In this chapter, we’ll write our own functions to do anything we want, including responding to user actions like mouse-clicking and keypresses.
Functions are helpful because they give us the ability to organize pieces of reusable code, then refer to those pieces later in our programs by a single short name or command. Take input() as an example: it prints a text prompt to ask a user for input, collects what the user types, and passes it to our program as a string that we can store in a variable. We reuse the input() function anytime we want to know something more from the user. If we didn’t have this function, we might have to do all that work ourselves every time we wanted to ask the user for information.
The turtle.forward() function is another great visual example: every time we move the turtle forward to draw one of the sides of our spirals, Python draws one pixel at a time in the direction our turtle is currently heading on the screen, to the exact length we ask for. If we didn’t have theturtle.forward() function, we would have to figure out how to color pixels on the screen, keep track of locations and angles, and do some fairly complex math to draw a certain distance every time.

Without these functions, our programs would be longer, harder to read, and harder to write. Functions let us take advantage of the previous programming work of lots of fellow coders. The good news is that we can also write our own functions to make our code shorter, easier to read, and more reusable.
In Chapter 6, we built programs that drew random spirals and a kaleidoscope pattern. We can use functions to make the code in these programs easier to read and to make parts of the code more reusable.
Putting Things Together with Functions
Look back at RandomSpirals.py. Everything in the first for loop is the code to create just one random spiral. The for loop uses that code to draw 50 spirals of random color, size, and location.
Say we want to use that random spiral code in another program, like a game or a screensaver app. In RandomSpirals.py, it’s not easy to tell where the actual spiral drawing starts or stops, and we just wrote that code a few pages ago. Imagine coming back to this program in three months! We would have a hard time figuring out what the app is supposed to do and which lines we need to copy over into a new program if we want to draw random spirals again.
To make a piece of code reusable later, or just easier to read now, we can define a function and give it an easy-to-understand name, just like input() or turtle.forward(). Defining a function is also called declaring the function, and it just means that we’re telling the computer what we want the function to do. Let’s create a function to draw a random spiral on the screen; we’ll call it random_spiral(). We can reuse this function anytime we want to draw random spirals, in any program.
Defining Random_Spiral()
Open RandomSpirals.py (Chapter 6), save it as a new file called RandomSpiralsFunction.py, and begin this function definition after setting up the turtle’s pen, speed, and colors but before the for loop. (You can refer to the final program in RandomSpiralsFunction.py to see how this should look.) Our definition of random_spiral() should go after the turtle setup because the function will need to use the turtle pen t and the list of colors. The definition should go before the for loop because we’ll be using random_spiral() in the for loop, and you have to define a function before you can use it. Now that we’ve found the right place in our program, let’s start defining the random_spiral() function.
We define a function in Python using the keyword def (short for definition), followed by the name of the function, parentheses (), and a colon (:). Here’s the first line of the random_spiral() function we’ll build:
def random_spiral():
The rest of the function definition will be one or more statements, indented from the left, just like when we grouped statements in our for loops. To draw a random spiral, we need to set a random color, a random size, and a random (x, y) location on the screen, and then move the pen there and draw the spiral. Here’s the code to complete our random_spiral() function:
def random_spiral():
t.pencolor(random.choice(colors))
size = random.randint(10,40)
x = random.randrange(-turtle.window_width()//2,
turtle.window_width()//2)
y = random.randrange(-turtle.window_height()//2,
turtle.window_height()//2)
t.penup()
t.setpos(x,y)
t.pendown()
for m in range(size):
t.forward(m*2)
t.left(91)
Note that the computer doesn’t actually run the code when the function is being defined. If we type the function definition into IDLE, we won’t get a spiral — yet. To actually draw a spiral, we need to call the random_spiral() function.
Calling Random_Spiral()
A function definition tells the computer what we want to do when someone actually calls the function. After defining a function, we call it in our program using the function’s name followed by parentheses:
random_spiral()
You’ve got to remember the parentheses, because that tells the computer you want to run the function. Now that we’ve defined random_spiral() as a function, when we call random_spiral() like this in our program, we’ll get a random spiral drawn on a turtle screen.
Now, to draw 50 random spirals, instead of using all the code in RandomSpirals.py, we can shorten our for loop to this:
for n in range(50):
random_spiral()
This loop is easier to read, thanks to our use of a function that we built all by ourselves. We’ve made our code easier to understand, and we can easily move the random spiral code over into another program by copying and pasting the function definition.
Here’s the whole program together; type this into IDLE and save it as RandomSpiralsFunction.py or download it from http://www.nostarch.com/teachkids/.
RandomSpiralsFunction.py
import random
import turtle
t = turtle.Pen()
t.speed(0)
turtle.bgcolor("black")
colors = ["red", "yellow", "blue", "green", "orange", "purple",
"white", "gray"]
def random_spiral():
t.pencolor(random.choice(colors))
size = random.randint(10,40)
x = random.randrange(-turtle.window_width()//2,
turtle.window_width()//2)
y = random.randrange(-turtle.window_height()//2,
turtle.window_height()//2)
t.penup()
t.setpos(x,y)
t.pendown()
for m in range(size):
t.forward(m*2)
t.left(91)
for n in range(50):
random_spiral()
In addition to a more readable program, we also get a reusable random_spiral() function that we can copy, modify, and easily use in other programs.
If you find yourself reusing a chunk of code again and again, convert it into a function like we did with random_spiral() using def, and you’ll find it much easier to port the code — that is, carry it over and reuse it — into new applications.
NOTE
You can even create your own module full of functions and import your module just like we’ve imported turtle and random in our programs (see Appendix C on how to create a module in Python). That way you can share your code with friends.
Parameters: Feeding Your Function
When creating a function, we can define parameters for that function. Parameters allow us to send information to the function by passing values to it as arguments inside its parentheses. We’ve been passing arguments to functions since our first print() statement. When we codeprint("Hello"), "Hello" is an argument representing the string value that we want printed to the screen. When we call the turtle function t.left(90), we’re passing the value 90 as the number of degrees we want our turtle to turn left.
The random_spiral() function didn’t need parameters. All the information it needed was in the code inside the function. But if we want, functions that we build can take information in the form of parameters. Let’s define a function, draw_smiley(), to draw a smiley face at a random location on the screen. This function will take a pair of random coordinates and draw the smiley face at those coordinates. We’ll define and call draw_smiley() in a program called RandomSmileys.py. The complete program is shown in Putting it all together — but let’s build it step by step.
Smileys at Random Locations
We want to write a program that, rather than drawing random spirals, draws smiley faces. It’ll take a bit more planning to draw a smiley face than it did to randomly pick a color and size and draw a spiral. Let’s go back to our friend from Chapter 6, a piece of graph paper. Because we haven’t drawn something as complicated as a smiley face in our programs before, it’s best to draw this on paper first and then translate it into code, one part at a time. Figure 7-1 shows a smiley face on a graph-paper grid that we can use to plan our drawing.
Our program will draw smileys like this one all over the screen at random (x, y) coordinates. The function definition for draw_smiley() will take two parameters, x and y, for the location where the smiley is to be drawn. As shown in Figure 7-1, we will draw the smiley face as if it were sitting on the (x, y) location, so picture moving this smiley face template around by placing its origin (0, 0) over any other point (x, y) on the screen. Let’s figure out how to draw each smiley face starting from a given point.

Figure 7-1. We’re planning our program by drawing a smiley face on graph paper first.
Drawing a head
Each smiley face has a yellow circle for the head, two small blue circles for eyes, and some black lines for the mouth. Given a point on the screen, our draw_smiley() function will need to draw a head, eyes, and a mouth at the correct positions relative to the given point. To figure out the code that will go in our function definition, let’s plan the head, eyes, and mouth separately, starting with the head. We’ll draw the head first so that it doesn’t cover the eyes and mouth we’ll draw next.
We’ll count each grid line in Figure 7-1 as 10 pixels, so the smiley we’ve drawn would measure 100 pixels tall; that will equal around an inch, give or take, on most computer screens. Since the diameter, or height and width, of the circle is 100 pixels, that means it has a radius (one-half the diameter) of 50 pixels. We need the radius because the turtle module’s circle() command takes the radius as its parameter. The command to draw a circle with a radius of 50 (which makes a diameter of 100) is t.circle(50). The circle() function draws a circle directly above the turtle’s current (x, y) location. We’ll need to know this to correctly place the eyes and mouth, so I’ve drawn my smiley face with the bottom edge resting on the origin, (0, 0). We can figure out where we need to draw everything else by adding the coordinates of each part to that starting (x, y) location of (0, 0).
To draw the big yellow head, we’ll make the pen color yellow, make the fill color yellow, turn on the paint fill for our shape, draw the circle (which gets filled with yellow because we turned on the paint fill), and turn off the paint fill when we’re done. Assuming we have a turtle pen named tdefined earlier in the program, the code to draw the yellow circle as the head of our smiley face at the current (x, y) location looks like this:
# Head
t.pencolor("yellow")
t.fillcolor("yellow")
t.begin_fill()
t.circle(50)
t.end_fill()
To fill the circle with yellow, we add four lines of code around our t.circle(50) command. First, we set the pen color to yellow with t.pencolor("yellow"). Second, we set the fill color with t.fillcolor("yellow"). Third, before we call the t.circle(50) command to draw the face of our smiley, we tell the computer that we want to fill the circle we’re drawing. We do this with the t.begin_ fill() function. Finally, after we draw our circle, we call the t.end_fill() function to tell the computer that we’re done with the shape that we want to fill with color.
Drawing eyes
First, we need to figure out where to position the turtle to draw the left eye in the correct place, then set the fill color to blue, and finally draw a circle of the correct size. The eyes are about 20 pixels (two grid lines) tall, and we know that a diameter of 20 means that we need a radius of half that amount, or 10, so we’ll use the t.circle(10) command to draw each eye. The tricky part is deciding where to draw them.
Our (x, y) starting point will be the local origin of each smiley face, and you can locate the left eye in Figure 7-1. It looks like it starts about 6 grid lines above the origin (60 pixels up, in the positive y-direction), and it’s sitting about 1.5 grid lines to the left of the y-axis (or about 15 pixels left, in the negative x-direction).
To tell our program how to get to the right place to draw the left eye, starting from the bottom of the big yellow circle at a given (x, y) passed to our function as a pair of arguments, we need to start at x and move left 15 pixels, start at y and move up 60 pixels, or move to (x-15, y+60). So, calling t.setpos(x-15, y+60) should put the turtle where we need to start drawing our left eye. Here’s the code for the left eye:
# Left eye
t.setpos(x-15, y+60)
t.fillcolor("blue")
t.begin_fill()
t.circle(10)
t.end_fill()
An easy mistake might be writing the setpos command with just (–15, 60) as arguments, but remember that we want to draw lots of smiley faces at various (x, y) positions on the screen; not all the faces will begin at (0, 0). The command t.setpos(x-15, y+60) will make sure that wherever our yellow face is being drawn, our left eye will be in the upper left of that face.
The code to draw the right eye is almost identical to the code for drawing the left eye. We can see that the right eye is 15 pixels (1.5 grid lines) to the right of our (x, y) location, and still 60 pixels up. The command t.setpos(x+15, y+60) should place the eye symmetrically. Here’s the code for the right eye:
# Right eye
t.setpos(x+15, y+60)
t.begin_fill()
t.circle(10)
t.end_fill()
The fill color is still blue from the left eye, so we just have to set the turtle to the correct position (x+15, y+60), turn the fill on, draw the eye, and finish filling it.
Drawing a mouth
Now let’s plan the most important part of the smiley face: the smile. To make the smile simpler, we’re going to draw the mouth with just three thick, black lines. The left side of the mouth looks like it starts about 2.5 grid lines to the left of and 4 grid lines above our point (x, y), so we’ll position the turtle at (x-25, y+40) to start drawing the smile. We’ll set the pen color to black and the width to 10 so that the smile is thick and easy to see. From the upper-left corner of the smile, we need to go to (x-10, y+20), then to (x+10, y+20), and finally to the upper-right corner of the smile at (x+25, y+40). Notice that these pairs of points are mirror images of one another across the y-axis; this makes our smiley face nice and even.
Here’s the code for the mouth:
# Mouth
t.setpos(x-25, y+40)
t.pencolor("black")
t.width(10)
t.goto(x-10, y+20)
t.goto(x+10, y+20)
t.goto(x+25, y+40)
➊ t.width(1)
After we set the turtle at the upper-left corner of the mouth, we change the pen color to black and the width to 10. We start drawing by telling the turtle to go to each of the other three points of the smile. The turtle module’s goto() function does the same thing as setpos(): it moves the turtle to a given point. I’m using it here just so you can see there’s an alternative to setpos(). Finally, at ➊, t.width(1) sets the pen width back down to 1 so that our shapes aren’t too thick when the next face is drawn.
Defining and Calling Draw_Smiley()
All that remains is to define the draw_smiley() function with all the code to draw a smiley face, set up a loop to generate 50 random (x, y) locations on the screen, and call the draw_smiley(x,y) function to draw smileys at all 50 locations.
The function definition for draw_smiley() will need to take two parameters, x and y, for the location where the smiley is to be drawn, and it will need to lift the turtle’s pen, move the turtle to that (x, y) position, and then put the pen back down to get ready to draw. After that, we just need to add our code snippets for drawing the big yellow face, the left and right eyes, and the mouth.
def draw_smiley(x,y):
t.penup()
t.setpos(x,y)
t.pendown()
# All of your drawing code goes here...
The final piece will be our for loop to generate 50 random locations for the smiley faces and call the draw_smiley() function to draw each face. It will look like this:
for n in range(50):
x = random.randrange(-turtle.window_width()//2,
turtle.window_width()//2)
y = random.randrange(-turtle.window_height()//2,
turtle.window_height()//2)
draw_smiley(x,y)
Our random x- and y-coordinate values are just like those we saw in Chapter 6, generating random points from the left half to the right half of the screen, and from the bottom half to the top half. With draw_smiley(x,y), we’re passing these random coordinates as arguments to thedraw_smiley() function, which will draw a smiley at that random spot.
Putting it all together
Put the program together, and it looks something like this:
RandomSmileys.py
import random
import turtle
t = turtle.Pen()
t.speed(0)
t.hideturtle()
turtle.bgcolor("black")
➊ def draw_smiley(x,y):
t.penup()
t.setpos(x,y)
t.pendown()
# Head
t.pencolor("yellow")
t.fillcolor("yellow")
t.begin_fill()
t.circle(50)
t.end_fill()
# Left eye
t.setpos(x-15, y+60)
t.fillcolor("blue")
t.begin_fill()
t.circle(10)
t.end_fill()
# Right eye
t.setpos(x+15, y+60)
t.begin_fill()
t.circle(10)
t.end_fill()
# Mouth
t.setpos(x-25, y+40)
t.pencolor("black")
t.width(10)
t.goto(x-10, y+20)
t.goto(x+10, y+20)
t.goto(x+25, y+40)
t.width(1)
➋ for n in range(50):
x = random.randrange(-turtle.window_width()//2,
turtle.window_width()//2)
y = random.randrange(-turtle.window_height()//2,
turtle.window_height()//2)
draw_smiley(x,y)
As usual, we import the modules we need and set up our turtle, setting its speed to 0 (the fastest). We use hideturtle() so the turtle itself doesn’t show up on the screen; this speeds up drawing too.
At ➊, we define our draw_smiley() function so that its job is to draw the smiley’s face, left eye, right eye, and smile, using all that code we wrote before. All it needs to do its job is an x-coordinate and a y-coordinate.
In our for loop at ➋, a random x and y are chosen and passed to draw_smiley(), which then draws a smiley with all features in the correct locations relative to that random point.
The RandomSmileys.py program will draw 50 smiley faces at random positions on the drawing screen, as shown in Figure 7-2.
You can customize the program to draw just about any shape you want, as long as you design a function to draw that shape starting from any (x, y) location. Start with graph paper like we did in this example to make it easier to find the important points. If it bothers you that some of the smiley faces are halfway off the screen on the left and right, or almost all the way off the screen at the top, you can use a bit of math in the x and y randrange() statements to keep your smileys completely on the screen. Go to http://www.nostarch.com/teachkids/ for a sample answer to this challenge.
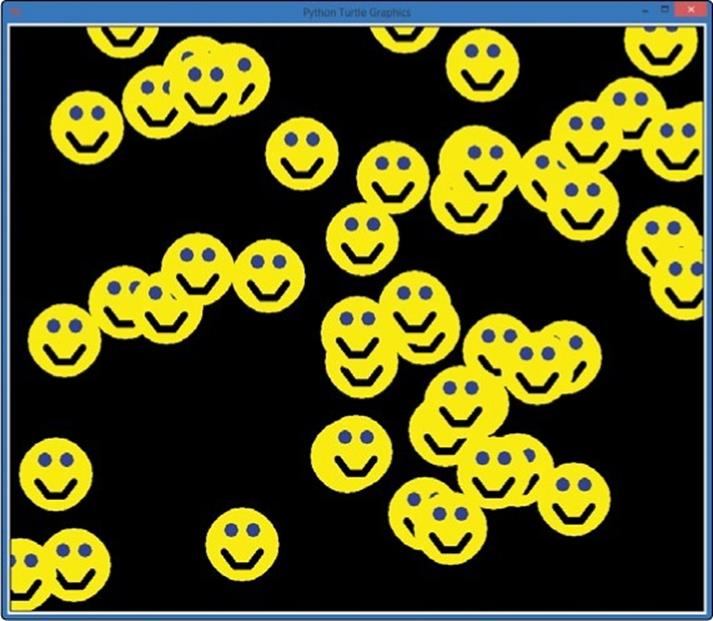
Figure 7-2. The RandomSmileys.py program produces a happy result.
Return: It’s What You Give Back That Counts
We can send information to a function using arguments, but what if we want to receive information back from a function? For example, what if we build a function to convert inches to centimeters, and we want to store the converted number to use in further calculations, rather than just printing it directly to the screen? To pass information from a function back to the rest of our program, we use a return statement.
Returning a Value from a Function
There are lots of times when we want to get information back from a function. For example, let’s actually build the function to convert inches to centimeters and call it convert_in2cm(). We can imagine the parameter that we might want to accept in the function: a measurement in inches. But this function is a perfect candidate for giving information back to the rest of our program — namely, the converted measurement in centimeters.
To convert a length in inches to its equivalent in centimeters, we multiply the number of inches by 2.54 — the approximate number of centimeters in an inch. To pass that calculation back to the rest of the program, we would use a return statement. The value after the keyword return will be passed back to the program as the function’s return value, or result. Let’s define our function:
def convert_in2cm(inches):
return inches * 2.54
If you type these two lines into the Python shell and then type convert_in2cm(72) and press ENTER, Python will respond with 182.88. There are about 182.88 centimeters in 72 inches (or 6 feet — my height). The value 182.88 is returned by the function, and in the command line shell, we see the return value printed on the next line after we call a function.
We could also perform another useful conversion: pounds to kilograms. To convert pounds to kilograms, we divide the weight in pounds by 2.2, the approximate number of pounds in 1 kilogram. Let’s create a function called convert_lb2kg() that will take a value in pounds as its parameter and return the converted value in kilograms:
def convert_lb2kg(pounds):
return pounds / 2.2
The return statement is sort of like using parameters in reverse, except that we can return only one value, not a set of values like the parameters we take in. (That one value can be a list, however, so with some work you can pass multiple values back in a single return variable.)
Using Return Values in a Program
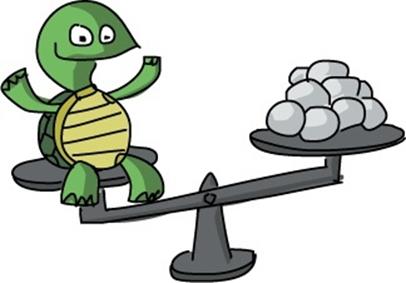
Using these two conversion functions, let’s build a silly application: a Ping-Pong-ball height and weight calculator. This program will answer the questions “How many Ping-Pong balls tall am I?” and “What is my weight in Ping-Pong balls?”
An official Ping-Pong ball weighs 2.7 grams (0.095 ounces) and measures 40 millimeters (4 centimeters, or 1.57 inches) in diameter. To calculate how many Ping-Pong balls it would take to match our height and weight, we need to divide our height in centimeters by 4 and divide our weight in grams by 2.7. But not everyone knows their weight in grams or height in centimeters: in the United States, we usually measure our weight in pounds and our height in feet and inches. Fortunately, the two conversion functions we just developed will help us convert those measurements to their equivalents in the metric system. We can then use these numbers to perform the conversion to Ping-Pong-ball units.
Our program will define the two conversion functions convert_in2cm() and convert_lb2kg(). Then it will ask the user for their height and weight, calculate the user’s height and weight in Ping-Pong balls, and display the calculations on the screen. Type and run the following code:
PingPongCalculator.py
➊ def convert_in2cm(inches):
return inches * 2.54
def convert_lb2kg(pounds):
return pounds / 2.2
➋ height_in = int(input("Enter your height in inches: "))
weight_lb = int(input("Enter your weight in pounds: "))
➌ height_cm = convert_in2cm(height_in)
➍ weight_kg = convert_lb2kg(weight_lb)
➎ ping_pong_tall = round(height_cm / 4)
➏ ping_pong_heavy = round(weight_kg * 1000 / 2.7)
➐ feet = height_in // 12
➑ inch = height_in % 12
➒ print("At", feet, "feet", inch, "inches tall, and", weight_lb,
"pounds,")
print("you measure", ping_pong_tall, "Ping-Pong balls tall, and ")
print("you weigh the same as", ping_pong_heavy, "Ping-Pong balls!")
At ➊, we enter the two conversion formulas we developed. Both functions take an input parameter (inches and pounds), and each function returns a value. At ➋, we ask the user for a height and weight and store those values in height_in and weight_lb. At ➌, we call the convert_in2cm()function, passing height_in as the value we want to convert, and we store the converted answer in the variable height_cm. We perform another conversion calculation at ➍ using the convert_lb2kg() function to convert the person’s weight in pounds (abbreviated as lbs) into the equivalent in kilograms (kg).
The equation at ➎ does two things: first, it divides the user’s height in centimeters by 4 to find their height in Ping-Pong balls; then, it rounds that answer to the nearest whole number with the round() function and stores the result in the variable ping_pong_tall. At ➏, we do something similar by converting the user’s weight in kilograms to grams by multiplying by 1,000 and then dividing that amount by 2.7 — the mass in grams of a standard Ping-Pong ball. That number is rounded to the nearest whole number and stored in the variable ping_pong_heavy.
At ➐ and ➑, we do just a little more math by figuring out the person’s height in feet and inches. As I mentioned previously, this is normally how we express our height in the United States, and it will be a nice finishing touch as well as a way for the person to check that they entered the correct information. The // operator does integer division, so 66 inches, or 5.5 feet, would result in just 5 being stored in the variable feet, and the % operator (modulo) would store the remainder, 6 inches. The print statements at ➒ print out the user’s height and weight, both in standard units and in Ping-Pong balls.
Here are the results from a few sample runs of the Ping-Pong calculator program, with Ping-Pong-ball measurements for my sons, Max and Alex, and me. (The only downside is that now my kids want to get 31,000 Ping-Pong balls.)
>>> ================================ RESTART ================================
>>>
Enter your height in inches: 42
Enter your weight in pounds: 45
At 3 feet 6 inches tall, and 45 pounds,
you measure 27 Ping-Pong balls tall, and
you weigh the same as 7576 Ping-Pong balls!
>>> ================================ RESTART ================================
>>>
Enter your height in inches: 47
Enter your weight in pounds: 55
At 3 feet 11 inches tall, and 55 pounds,
you measure 30 Ping-Pong balls tall, and
you weigh the same as 9259 Ping-Pong balls!
>>> ================================ RESTART ================================
>>>
Enter your height in inches: 72
Enter your weight in pounds: 185
At 6 feet 0 inches tall, and 185 pounds,
you measure 46 Ping-Pong balls tall, and
you weigh the same as 31145 Ping-Pong balls!
>>>
Any function we create can return a value, just like any function that we define can take parameters as input. Depending on what you want your function to do, use one or both of these features to write exactly the code for the function you need.
A Touch of Interaction
We’ve coded some nice-looking graphical apps, but we’re still a step or two away from building the next video game or mobile app. One of the remaining skills we need to learn is coding for user interaction: making our programs respond to mouse clicks, keypresses, and so on.
Most apps are interactive — they allow the user to touch, click, drag, press buttons, and feel in control of the program. We call these event-driven apps because they wait for the user to perform an action, or event. The code that responds to a user event, like opening a window when the user clicks an icon or starting a game when they touch a button, is referred to as an event handler because it handles or responds to an event from the user. It’s also called an event listener because it’s as if the computer is sitting patiently, listening for the user to tell it what to do. We’re going to learn to handle user events and make our programs even more engaging and interactive.
Handling Events: TurtleDraw
There are lots of ways to make apps handle user events. Python’s turtle module includes some functions for handling user events, including mouse clicks and keypresses. The first one we’ll try is the turtle.onscreenclick() function. As the name suggests, this function allows us to handle events created by the user clicking on the turtle’s screen.
There’s a difference between this function and the ones we’ve used and built before: the argument that we send to turtle.onscreenclick() isn’t a value — it’s the name of another function:
turtle.onscreenclick(t.setpos)
Remember the setpos() function that we’ve used to move the mouse to a certain (x, y) location on the screen? Now we’re telling the computer that when the turtle screen gets a mouse click, it should set the turtle to the position of that click on the screen. A function we pass as an argument to another function is sometimes called a callback function (because it gets called back by the other function). Notice that when we send a function as an argument to another function, the inside function doesn’t need the parentheses after its name.
By sending the function name t.setpos to turtle.onscreenclick(), we’re telling the computer what we want screen clicks to do: we want to set the position of the turtle to wherever the user clicked. Let’s try it in a short program:
TurtleDraw.py
import turtle
t = turtle.Pen()
t.speed(0)
turtle.onscreenclick(t.setpos)
Type these four lines into IDLE, run the program, and then click different places around the screen. You just created a drawing program in four lines of code! Figure 7-3 shows a sample sketch I drew.
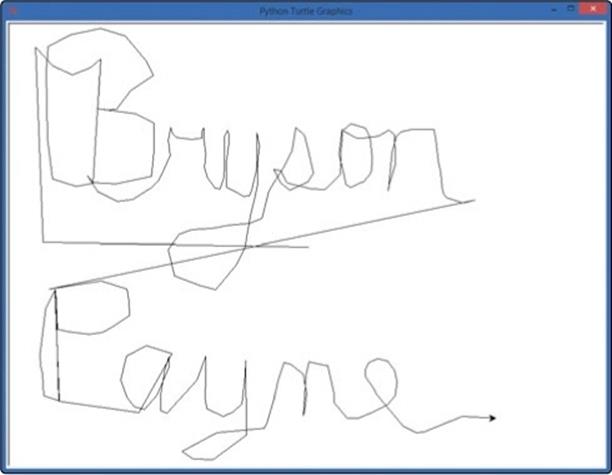
Figure 7-3. A TurtleDraw.py sketch (there’s a reason I’m an author and not an artist)
The reason this works is that we’ve told the computer to do something when the user clicks the mouse on the screen: set the position of the turtle to that location. The turtle’s pen is down by default, so when the user clicks on the drawing window, the turtle moves there and draws a line from its old location to the location where the user clicked.
You can customize TurtleDraw.py by changing the background color of the screen, the turtle’s pen color, the width of the pen, and more. Check out the version my four-year-old son created (with some help from his dad):
TurtleDrawMax.py
import turtle
t = turtle.Pen()
t.speed(0)
turtle.onscreenclick(t.setpos)
turtle.bgcolor("blue")
t.pencolor("green")
t.width(99)
Max liked the drawing program (a lot), but he wanted the screen to be blue and the pen to be green and really thick, so we set the bgcolor(), pencolor(), and width() to blue, green, and 99, respectively. We made an arbitrary choice to set these after we told the computer what to do with mouse clicks on the screen (t.setpos).
This is fine, because the program keeps running even while it’s listening for mouse clicks, so by the time the user clicks for the first time, the screen and pen are correctly colored and sized, as shown in Figure 7-4.
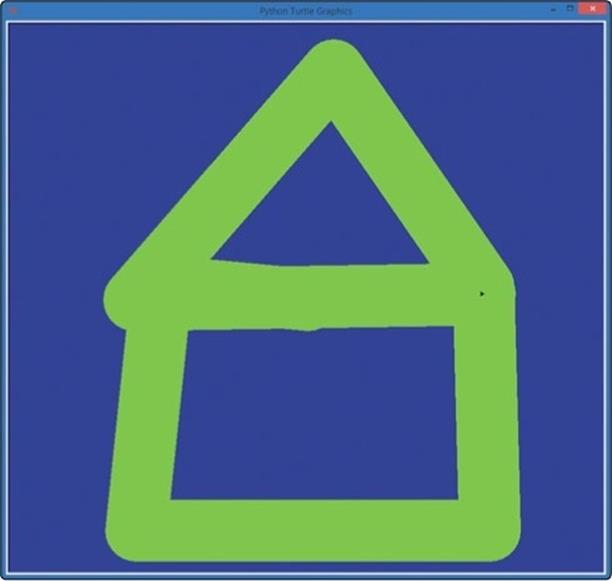
Figure 7-4. A drawing I produced by clicking a few times with TurtleDrawMax.py
Using the setpos() function as the callback for turtle.onscreenclick(), we’ve built a fun paint program that interacts with the user when they click the mouse by drawing lines to wherever they click. Try customizing the app with different colors, widths, or anything else you can think of to make it your own.
Listening for Keyboard Events: ArrowDraw
With our turtle drawing program, we saw how listening for mouse clicks can make the user feel like they’re more in control of the program. In this section, we’ll learn to use keyboard interaction to give the user even more options. We’ll also define our own functions to use as event handlers.
In the TurtleDraw.py program, we passed t.setpos as the callback function to tell the computer what to do when an onscreenclick() event happened; we wanted to set the turtle’s position to the location of that mouse click on the screen. The setpos() function is already given to us in theturtle module, but what if we want to create our own functions to handle events? Say we want to build a program that lets the user move the turtle on their screen by pressing the arrow keys instead of clicking the mouse button. How would we do that?
First, we have to build functions for moving the turtle for each arrow keypress on the keyboard, and then we have to tell the computer to listen for those keys to be pressed. Let’s write a program that will listen for the up (↑), left (←), and right (→) keyboard arrow keys and let the user move the turtle forward or turn left or right with those keys.
Let’s define some functions — up(), left(), and right() — that will move and turn the turtle:
def up():
t.forward(50)
def left():
t.left(90)
def right():
t.right(90)
Our first function, up(), moves the turtle forward 50 pixels. The second, left(), turns the turtle left 90 degrees. Finally, right() turns the turtle right 90 degrees.
To run each of these functions when the user presses the correct arrow key, we have to tell the computer which function goes with which key and tell it to start listening for keypresses. To set the callback function for a keypress event, we use turtle.onkeypress(). This function usually takes two parameters: the name of the callback function (the event handler functions we created) and the specific key to listen for. To connect each of the three functions to its corresponding arrow key, we would write:
turtle.onkeypress(up, "Up")
turtle.onkeypress(left, "Left")
turtle.onkeypress(right, "Right")
The first line sets the up() function as the event handler for "Up" arrow keypresses; the function (up) goes first, and "Up" is the name of the up arrow key, ↑. The same goes for the left and right arrow keypresses. The final step is telling the computer to begin listening for keypresses, which we do with this command:
turtle.listen()
We need this last line for a couple of reasons. First, unlike with mouse clicks, simply pressing a key doesn’t ensure that our turtle window will receive the keypress. When you click a window on your desktop, that window moves to the front and receives the focus, meaning that window will receive input from the user. When you click the mouse on the turtle window, it automatically makes that window the focus of the screen and of any mouse events that follow. With the keyboard, though, just pressing keys doesn’t make a window receive those keypresses; the turtle.listen()command makes sure our turtle’s window is the focus of the desktop so that it will be able to hear keypresses. Second, the listen() command tells the computer to start handling keypress events for all keys that we connected to functions with the onkeypress() function.
Here’s the complete ArrowDraw.py program:
ArrowDraw.py
import turtle
t = turtle.Pen()
t.speed(0)
➊ t.turtlesize(2,2,2)
def up():
t.forward(50)
def left():
t.left(90)
def right():
t.right(90)
turtle.onkeypress(up, "Up")
turtle.onkeypress(left, "Left")
turtle.onkeypress(right, "Right")
turtle.listen()
At ➊, the only new line in ArrowDraw.py, we make the turtle arrow twice as big, and give it a thicker outline with t.turtlesize(2,2,2). The three parameters are the horizontal stretch (2 means to make it twice as wide), the vertical stretch (2 times as tall), and the outline thickness (2 pixels thick). Figure 7-5 shows the result.
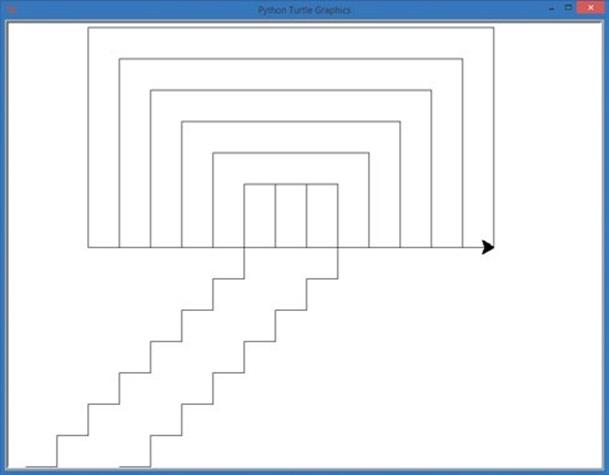
Figure 7-5. The ArrowDraw.py program lets the user draw using the up, right, and left arrow keys. The larger turtle arrow makes it easier to see where the turtle is headed.
This app is a bit like the old Etch-A-Sketch toy: you can draw fun shapes using just those three arrow keys, and you can retrace your steps. Feel free to customize the app with your own colors, pen width, and any other features you’d like to add. One extra feature you could add, which is included as a challenge at the end of this chapter, is the ability to click to move the turtle to a new location. Dream up new features and give them a try — that’s the best way to learn something new!
Handling Events with Parameters: Clickspiral
In TurtleDraw.py, we let the user click to draw by telling the turtle.onscreenclick() listener to call the t.setpos function anytime the user clicked the screen. Let’s build a new program named ClickSpiral.py that will draw spirals wherever the user clicks, as shown in Figure 7-6.
The onscreenclick() listener passes the x- and y-coordinates of every mouse click as arguments to the callback function we specify. When we want to handle mouse click events with a function of our own, we simply write a function that accepts those values — the x- and y-coordinates of the mouse click — as a pair of parameters.
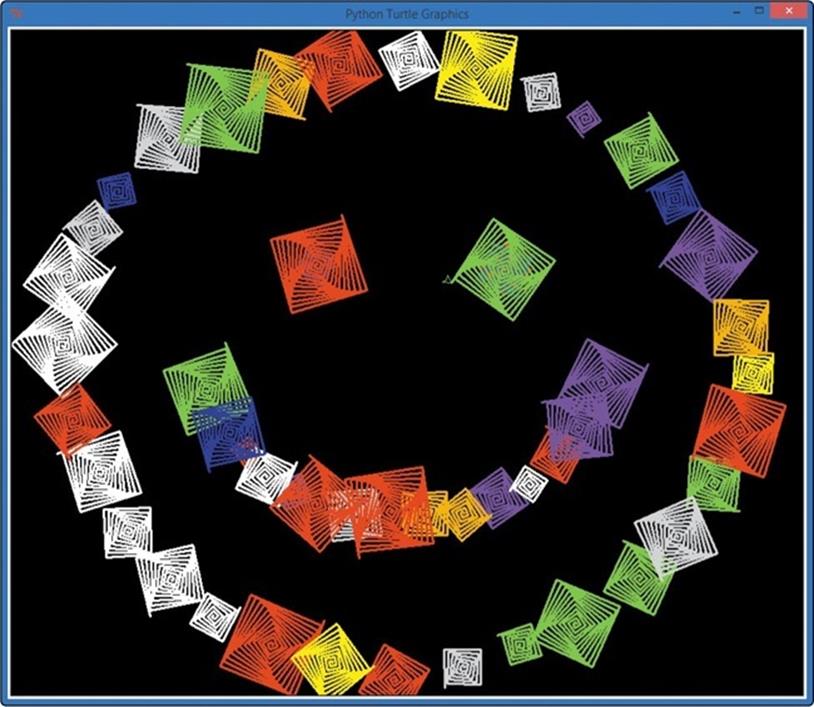
Figure 7-6. A smiley face drawn using the ClickSpiral.py app
RandomSpiralsFunction.py (RandomSpiralsFunction.py) contained a function called random_spiral() that drew colorful spirals in random places on the screen. Now, however, instead of spirals at random locations, we want a spiral to appear where the user clicks the mouse. To do this, we can rewrite the random_spiral() function to take two parameters, x and y, from the turtle.onscreenclick() listener. We’ll rename the function spiral(x,y):
def spiral(x,y):
t.pencolor(random.choice(colors))
size = random.randint(10,40)
t.penup()
t.setpos(x,y)
t.pendown()
for m in range(size):
t.forward(m*2)
t.left(91)
In this new version, we change the function’s definition to reflect the new name and the two parameters that we will receive to draw at chosen positions on the screen as spiral(x,y). We still choose a random color and size for each spiral, but we have removed the two lines that generate a random x and y, because we will get the x and y as arguments from the onscreenclick() listener. Just as with the random_spiral() function, we move the pen to the correct (x, y) position and then draw the spiral.
The only step left is to set up our turtle window and the list of colors, and then tell our turtle.onscreenclick() listener to call the spiral function whenever the user clicks the mouse button over the drawing window. Here’s the complete program:
ClickSpiral.py
import random
import turtle
t = turtle.Pen()
t.speed(0) turtle.bgcolor("black")
colors = ["red", "yellow", "blue", "green", "orange", "purple",
"white", "gray"]
def spiral(x,y):
t.pencolor(random.choice(colors))
size = random.randint(10,40)
t.penup()
t.setpos(x,y)
t.pendown()
for m in range(size):
t.forward(m*2)
t.left(91)
➊ turtle.onscreenclick(spiral)
As in TurtleDraw.py, we leave out the parentheses and parameters for our callback function ➊: turtle.onscreenclick(spiral) tells our program that it should call our spiral(x,y) function every time the user clicks the mouse on the screen, and the event listener automatically sends two arguments — the x-position and y-position of that click — to the spiral callback function. The same thing happened in TurtleDraw.py with the t.setpos callback, but this time, we created our own function to draw a spiral of a random color and size at the location of the mouse button click.
Taking It One Step Further: Clickandsmile
Let’s extend this interactive app by making one more change. Instead of drawing a spiral, say we want to draw a smiley face wherever the user clicks the mouse on the drawing screen. The code will look a lot like our RandomSmileys.py program from Putting it all together, but instead of a loop that draws 50 smiley faces at random locations on the screen, this program will handle the mouse click event by drawing a smiley at the location the user chooses, as many or as few times as the user wishes to click.
In fact, because our draw_smiley() function already takes two parameters (the x- and y-coordinates of the location where we wish to draw the smiley face), the code for ClickAndSmile.py is identical to RandomSmileys.py, except for the last section. Just replace the for loop that draws 50 random smileys with a call to turtle.onscreenclick(draw_smiley). Remember how the turtle.onscreenclick() function allows us to pass the name of a function (like setpos) as the event handler for mouse clicks? We can pass it draw_smiley so that when the user clicks, our draw_smiley()function will do its work at the location of the click. We do not include draw_smiley’s parentheses, or any arguments, inside the parentheses for turtle.onscreenclick().
ClickAndSmile.py
import random
import turtle
t = turtle.Pen()
t.speed(0)
t.hideturtle()
turtle.bgcolor("black")
def draw_smiley(x,y):
t.penup()
t.setpos(x,y)
t.pendown()
# Face
t.pencolor("yellow")
t.fillcolor("yellow")
t.begin_fill()
t.circle(50)
t.end_fill()
# Left eye
t.setpos(x-15, y+60)
t.fillcolor("blue")
t.begin_fill()
t.circle(10)
t.end_fill()
# Right eye
t.setpos(x+15, y+60)
t.begin_fill()
t.circle(10)
t.end_fill()
# Mouth
t.setpos(x-25, y+40)
t.pencolor("black")
t.width(10)
t.goto(x-10, y+20)
t.goto(x+10, y+20)
t.goto(x+25, y+40)
t.width(1)
turtle.onscreenclick(draw_smiley)
Now, instead of drawing random smiley faces all over the screen, the user can draw a smiley face wherever they click the mouse; they can even draw a big smiley face out of little smiley faces, as shown in Figure 7-7.
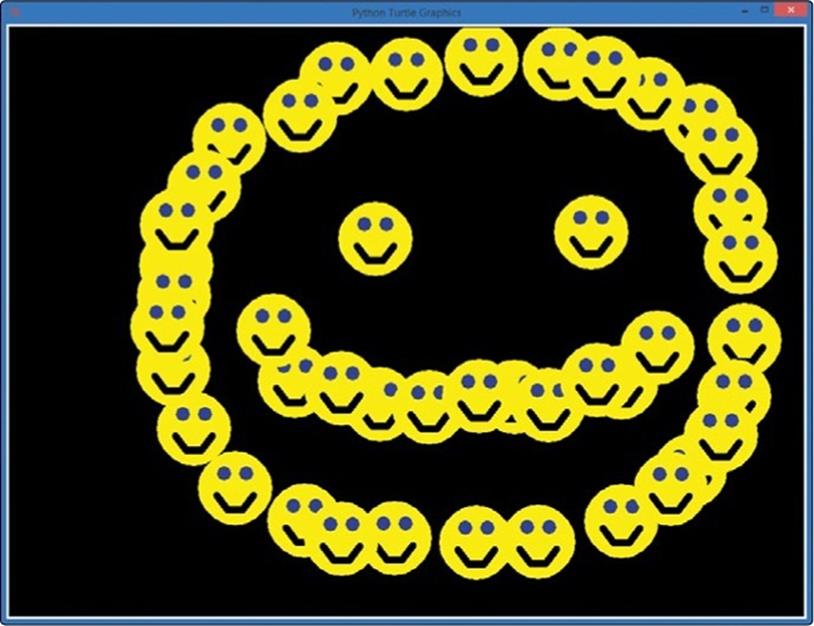
Figure 7-7. We’ve made our smiley program more interactive, drawing wherever the user clicks.
Whatever kinds of apps you want to build, you’re probably going to rely on user interaction to drive the experience. Think of the games or other apps that you spend the most time playing: what they all have in common is that you have some kind of control over what happens and when. Whether you’re moving a paddle to hit a ball; pressing the mouse button or touching and dragging to fire something through the air; or clicking, swiping, and tapping to clear a screen, you’re generating user events — and the programs you love handle those events by doing something cool. Let’s build one more interactive app for practice, and then we’ll build even more of the kinds of apps we play with every day.
ClickKaleidoscope
Let’s combine our ability to create functions and our ability to handle interactive clicks to create an interactive kaleidoscope. The user will be able to click anywhere on the screen, and four reflected spirals of a random shape and color will be drawn starting from the point where the user clicked. The result will look like our Kaleidoscope.py program from Kaleidoscope.py, but the user will be able to create their own unique patterns using this kaleidoscope.
The Draw_Kaleido() Function
Let’s talk about the challenges in building a customized kaleidoscope program. We know we want to allow the user to click the screen to begin the drawing process, so we’ll use the turtle.onscreenclick() function from the previous section. We know that this function will give us an (x, y) location on the screen that we can use in our callback function. And we can look back at our original kaleidoscope program to see that all we have to do is draw a spiral at each of the four points (x, y), (–x, y), (–x, –y), and (x, –y) to achieve the desired reflection effect.
Each of our four reflected spirals should be the same color and size to create the mirror illusion. We will call our function draw_ kaleido() and define it as follows:
➊ def draw_kaleido(x,y):
➋ t.pencolor(random.choice(colors))
➌ size = random.randint(10,40)
draw_spiral(x,y, size)
draw_spiral(-x,y, size)
draw_spiral(-x,-y, size)
draw_spiral(x,-y, size)
At ➊, we name our function draw_kaleido, and we allow it to take the two parameters, x and y, from the turtle.onscreenclick() event handler so that our four reflected spirals will start at the (x, y) location where the user clicked the mouse. Then, at ➋, we randomly choose a pen color for all four reflected spirals in a set from our usual list of colors, colors.
At ➌, we pick a random size for all four reflected spirals and store it in size. Finally, we draw all of the four spirals at their (x, y), (–x, y), (–x, –y), and (x, –y) locations with a new function we’ve yet to actually write, called draw_spiral().
The Draw_Spiral() Function
Our draw_spiral() function will need to draw a spiral starting at a custom (x, y) location on the screen. Python’s turtle pen will remember the color once it’s set, so we don’t have to pass that information as a parameter to our draw_spiral() function, but we do need the (x, y) location and thesize of the spiral that we want to draw. So we’ll define our draw_spiral() function to take three parameters:
def draw_spiral(x,y, size):
t.penup()
t.setpos(x,y)
t.pendown()
for m in range(size):
t.forward(m*2)
t.left(92)
This function takes the parameters x and y for the location to start drawing each spiral, and the parameter size to tell us how big to make the spiral. Inside the function, we lift the turtle’s pen so that we can move without leaving a trail, we move the pen to the given (x, y) location, and we put the pen back down to prepare for the spiral. Our for loop will iterate m over the values from 0 to size, drawing a square spiral up to that side length.
All we’ll have to do in our program, besides importing random and turtle and setting up our screen and list of colors, is tell the computer to listen for clicks on the turtle screen and call the draw_ kaleido() function whenever a click event happens. We can do that with the commandturtle.onscreenclick(draw_kaleido).
Putting It All Together
Here’s the full ClickKaleidoscope.py program. Type it in IDLE or download it from http://www.nostarch.com/teachkids/ and run it.
ClickKaleidoscope.py
import random
import turtle
t = turtle.Pen()
t.speed(0)
t.hideturtle()
turtle.bgcolor("black")
colors = ["red", "yellow", "blue", "green", "orange", "purple",
"white", "gray"]
def draw_kaleido(x,y):
t.pencolor(random.choice(colors))
size = random.randint(10,40)
draw_spiral(x,y, size)
draw_spiral(-x,y, size)
draw_spiral(-x,-y, size)
draw_spiral(x,-y, size)
def draw_spiral(x,y, size):
t.penup()
t.setpos(x,y)
t.pendown()
for m in range(size):
t.forward(m*2)
t.left(92)
turtle.onscreenclick(draw_kaleido)
We begin with our normal import statements and then set up our turtle environment and list of colors. Next, we define our draw_spiral() function, followed by draw_kaleido(), and we finish by telling the computer to listen for clicks on the turtle screen and call draw_kaleido() when click events occur. Now, whenever the user clicks a location on the drawing window, a spiral will be drawn there and reflected across the x- and y-axes for a total of four spirals of the same random shape and size.
The result is a fully interactive version of our spiral kaleidoscope program that allows the user to control the reflected pattern by clicking only in parts of the screen where they want spirals to appear. Figure 7-8 shows a sample run of the program with reflected patterns made of spirals.
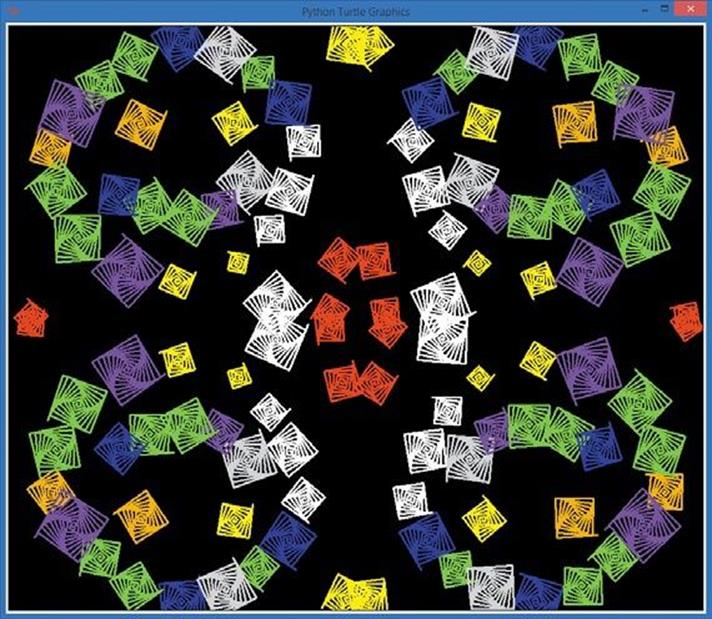
Figure 7-8. With our interactive kaleidoscope program, you can create any reflected pattern you wish!
Try your own patterns (like your first initial!) and take a screenshot of your results (in Windows, hold down the ALT and PRINT SCREEN keys to copy the turtle window and then paste into Word or your favorite drawing program; on a Mac, press and hold the COMMAND [![]() ], SHIFT, and 4 keys, then press the spacebar, and then click the turtle drawing window to save a copy of the picture to your desktop as Screenshot <date and time>.png). Tweet your best screenshots to me at @brysonpayne on Twitter with the hashtag #kidscodebook, and I’ll do my best to respond!
], SHIFT, and 4 keys, then press the spacebar, and then click the turtle drawing window to save a copy of the picture to your desktop as Screenshot <date and time>.png). Tweet your best screenshots to me at @brysonpayne on Twitter with the hashtag #kidscodebook, and I’ll do my best to respond!
What You Learned
In this chapter, you learned how to organize chunks of reusable code into functions, call your own functions from anywhere in your programs, pass information as parameters to those functions, and get information back from functions as return values. We wrote our first event-driven programs by telling the computer to listen for mouse clicks and keypresses, and you learned how to write your own callback functions to respond to user events.
We’ve developed our first fully interactive programs. Using the skills you’ve gained in this chapter, you’re ready to begin writing even more advanced apps. The apps we frequently enjoy give users the experience of being in control of the program by responding to clicks, touches, keypresses, and more.
After mastering the concepts in this chapter, you should be able to do the following:
§ Make code more reusable using functions.
§ Organize and group code into functions.
§ Define functions in Python using the def keyword.
§ Call your own functions from programs that you write.
§ Define and use functions that accept parameters as input values.
§ Write functions that return values when called.
§ Convert a mathematical formula into a function that returns the function’s value.
§ Explain some features of event-driven programs.
§ Write a basic event-driven app that uses an event handler.
§ Write an app that accepts mouse clicks and draws on the screen.
§ Code event handlers for keyboard events.
§ Program event handler functions that take parameters.
§ Use x- and y-coordinates on the screen to draw specific patterns, such as kaleidoscopes.
PROGRAMMING CHALLENGES
Here are three challenges to extend what you learned in this chapter. For sample answers to these challenges, go to http://www.nostarch.com/teachkids/.
#1: Mirrored Smileys
Create a mashup of the programs ClickAndSmile.py and ClickKaleidoscope.py to draw a smiley face in four mirrored corners of the screen when you click, just like the kaleidoscope program did with spirals. If you’d like an advanced challenge, draw two of the smiley faces flipped upside down so that they really look mirrored across the x-axis.
#2: More Ping-Pong Calculations
Modify the Ping-Pong calculator so it asks the user for a number of Ping-Pong balls as input. Have it tell the user both how tall those Ping-Pong balls would be if stacked on top of one another and how much that number of Ping-Pong balls would weigh.
#3: A Better Drawing Program
Change the ArrowDraw.py program to allow the user to turn the turtle in smaller increments — say 45 degrees (or even 30 or 15) — to give them finer control of the turtle. Then, add more key options, like allowing the user to press the greater-than symbol (>) to make the drawing length longer, the less-than symbol (<) to shorten the drawing length, the W key to make the pen wider, and the T key to make the pen thinner. To make it a great drawing program, add feedback in the form of drawing a string on the screen to show the pen width, segment length, and turtle’s direction after every change.
For a finishing touch, add the ability to click to reposition the turtle. (Hint: create a function that accepts two parameters (x, y), lifts the turtle’s pen, moves to (x, y), then puts the pen back down. Then, pass the name of this function to turtle.onscreenclick() to complete the app.)
All materials on the site are licensed Creative Commons Attribution-Sharealike 3.0 Unported CC BY-SA 3.0 & GNU Free Documentation License (GFDL)
If you are the copyright holder of any material contained on our site and intend to remove it, please contact our site administrator for approval.
© 2016-2025 All site design rights belong to S.Y.A.