Take Control of 1Password (1.2.1) (2014)
Chapter 5. Store Other Information in 1Password
In the previous chapter I talked about using 1Password with a Web browser—storing and filling in usernames, passwords, contact data, credit card numbers, and so on. That combination of features may be 1Password’s main focus, but the app can do many other powerful things too. In this chapter, I talk about the types of information 1Password can work with that have nothing to do with Web browsing. Later, in Search & Organize Your 1Password Items and Edit 1Password Items, I cover some of the ways you can work with this and other 1Password data beyond the basics.
Stand-alone Passwords
Passwords are needed for many reasons other than logging in to Web sites. I talk about a number of other categories, such as wireless routers, reward programs, and memberships, later in this chapter—see Other Data Types. But sometimes you need to create a password and nothing more—no username, URL, or other fields. Just a password. For example, you may need:
· Passcodes for smartphones or tablets
· Passwords for full-disk encryption, disk images, and other encrypted files
· PINs for alarms and keyless entry systems
In these and other cases where you need to store a password (perhaps with other data) in 1Password and you can’t find an appropriate category, you can create a password item.
Since you generally won’t be looking at a Web page when you need to create or save stand-alone passwords, automatic login saving won’t help. Instead, open the main 1Password app, click File > New Item > Password, and fill in the form (using the built-in password generator when you get to the Password field). Be sure to give the item a descriptive title that will help you find it later. Then click Save (Mac) or OK (Windows).
On a Mac, as an alternative, you can use 1Password mini:
1. Press Command-Option-\ or click the 1Password key ![]() icon in your menu bar to display 1Password mini.
icon in your menu bar to display 1Password mini.
2. Use the password generator (see Generate Random Passwords) to create a new password, and click Copy. Paste the password into the desired location (such as an encryption program).
3. Later, at your convenience, open the main 1Password app and select Passwords in the sidebar.
4. Find the password you created (sorted by default according to Date Created), and edit its title or other attributes to show what you used it for (see Edit Saved Items).
Your password item is now ready for use.
When it comes time to retrieve your password later, you can again go to the main 1Password app—or, on a Mac, call up 1Password mini and search for it there. Then, on a Mac, you can quickly copy the password by clicking the Password field or reveal it temporarily by holding down the Option key. On a PC, click the Copy to Clipboard ![]() button next to the Password field to copy it.
button next to the Password field to copy it.
Software Licenses
Many apps require a license key or serial number, and 1Password makes a great storage place for all those licenses (Figure 18). Even though they may not be as secret as your passwords, they’re likely just as valuable to you—and keeping them in 1Password makes them easier to find than rummaging through filing cabinets and email receipts when you need one of your licenses.
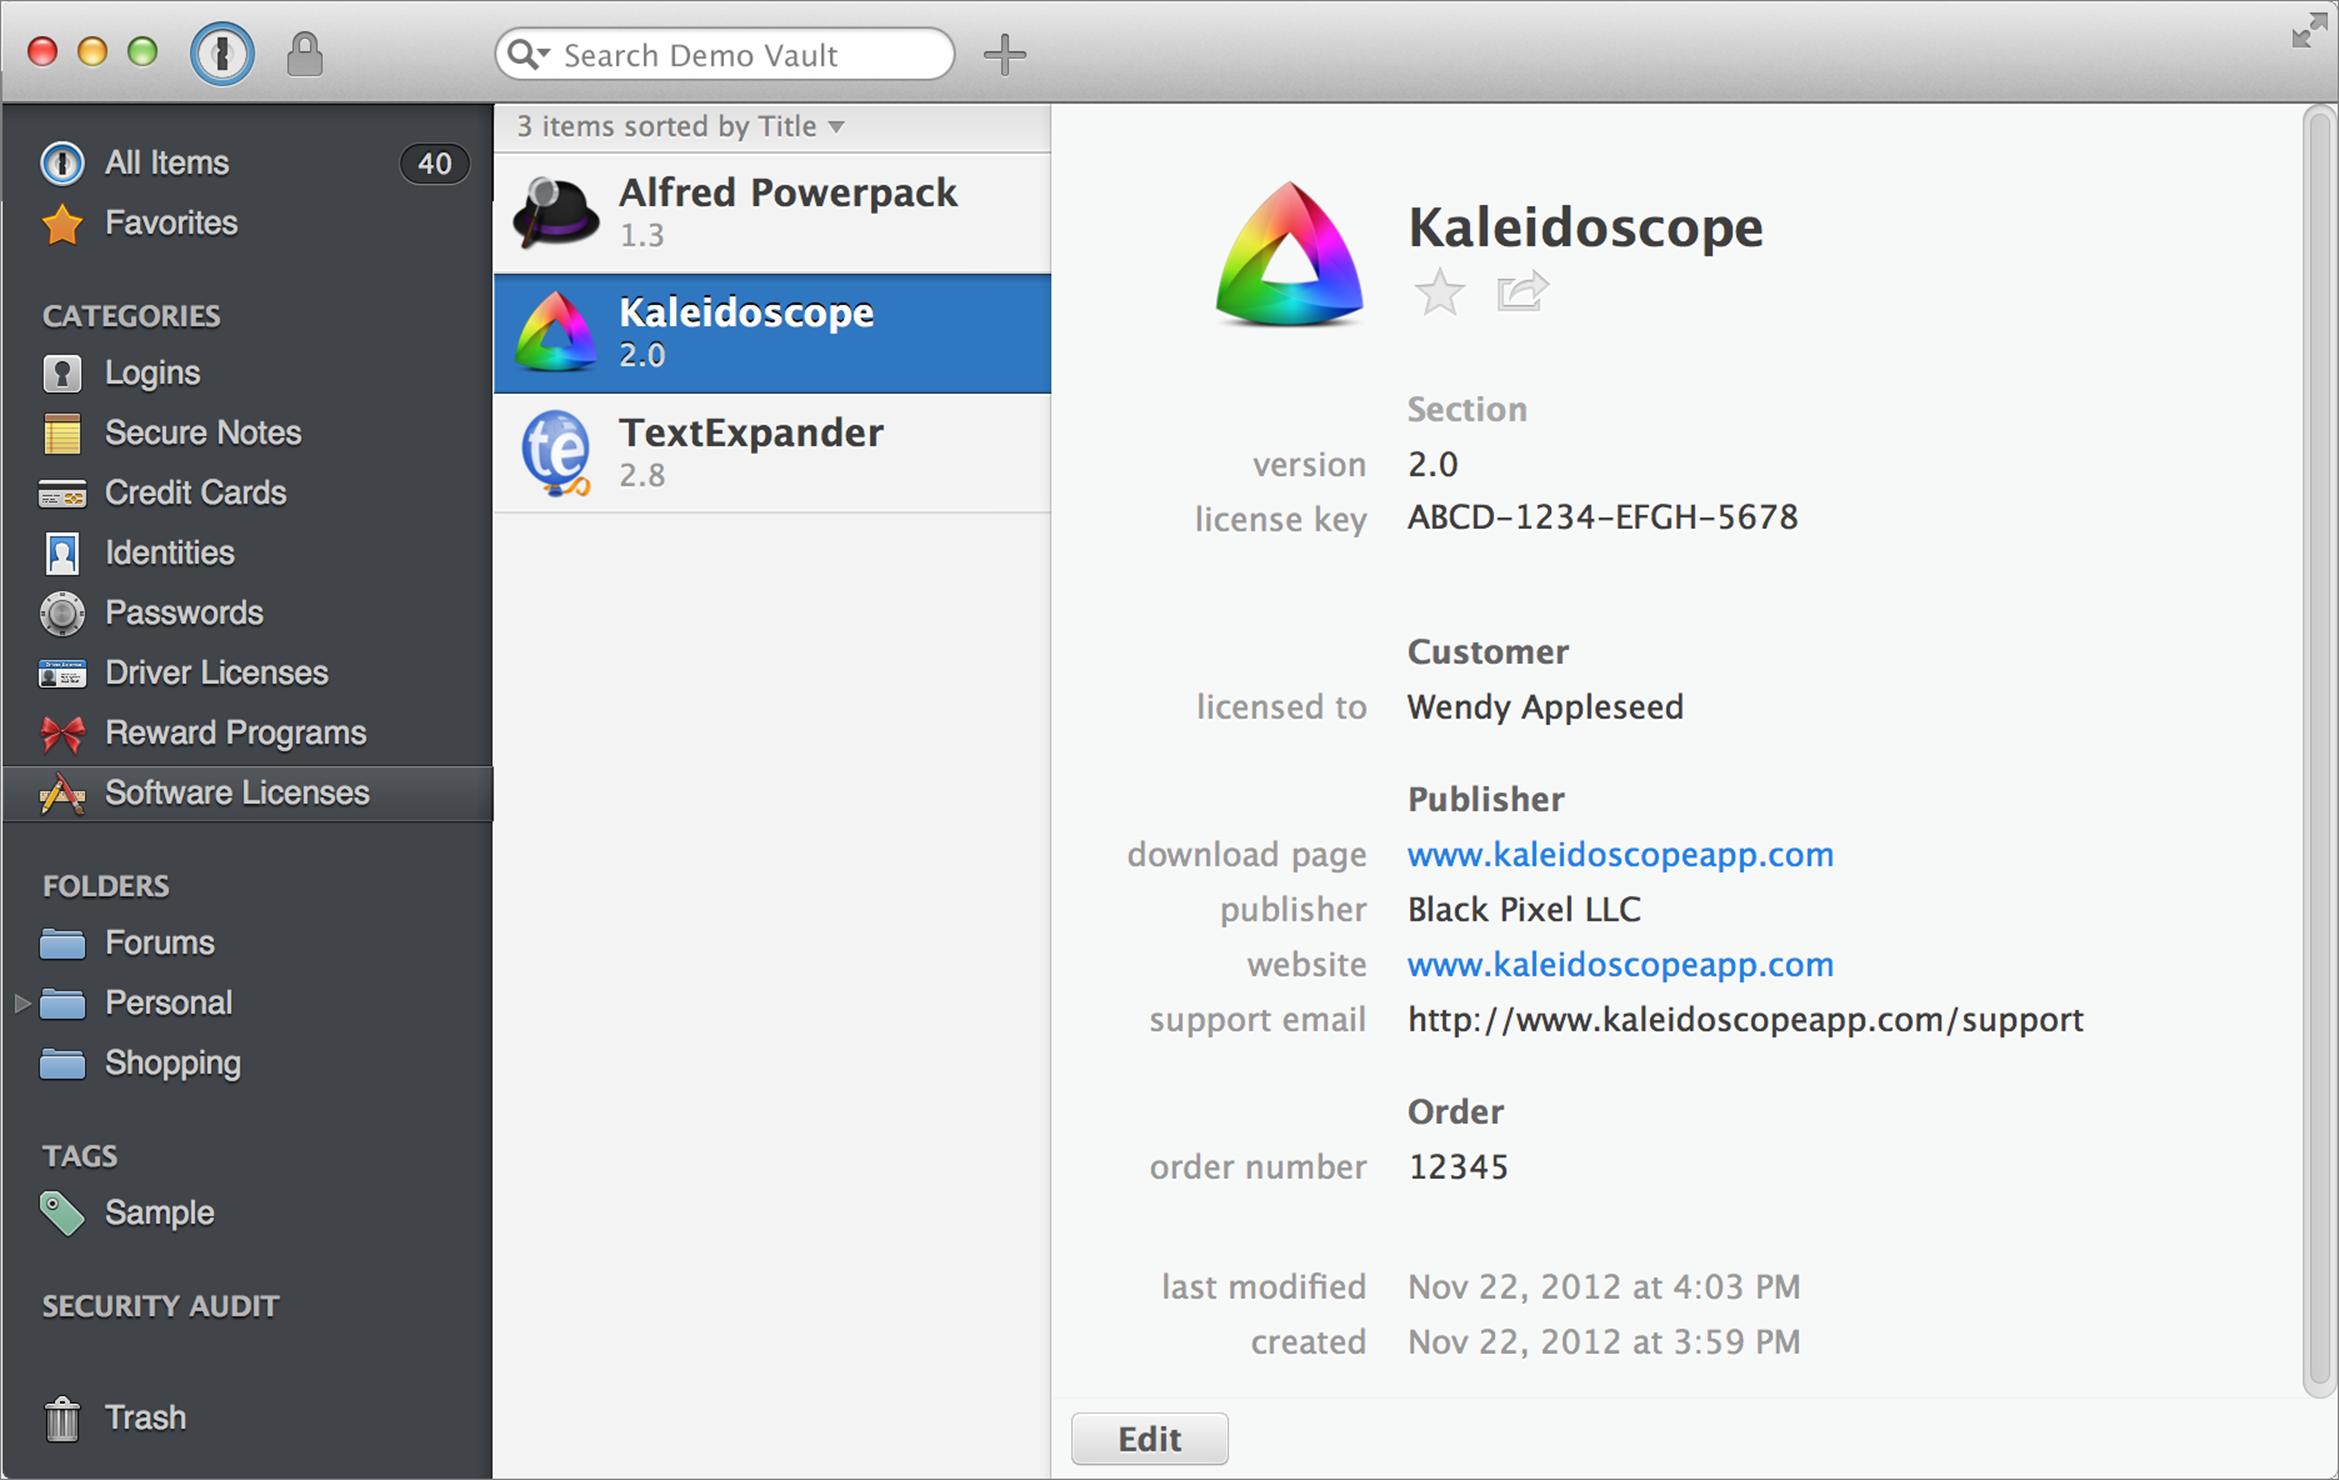
Figure 18: 1Password can store software licenses, complete with icons, for all your favorite apps.
To add a software license, choose File > New Item > Software License and fill in as much or as little of the form as you like—but at the very least, fill in the app’s name, version number, and license key. Then click Save (Mac) or OK (Windows).
Tip: If your license came as a separate file, you can store the entire file as an attachment. On a Mac, click Edit to make the item editable and drag the file into the Attachments field at the bottom of the software license item. On a PC, select the item (no need to click Edit) and drag the file to the Attachments field.
1Password can store and display an application’s icon, which makes it easier to find applications in a long list. The process varies by platform.
Add icons on a Mac:
1. Make sure you have Use Rich Icons selected in the General pane of 1Password Preferences. If you do, then as soon as you click Save, 1Password checks an online image server for a matching icon and, if it finds one, downloads it and adds it to the record—so you can skip the rest of these steps.
If the image server doesn’t have an icon for an app, proceed to the next step to add your own.
2. Click Edit to make the software license item editable
3. Drag the application icon from the Finder onto the icon in the 1Password window.
4. Make any desired changes (see Work with Icons & Thumbnails for details), and click Done.
1Password stores (and syncs) the icon for your application.
Add icons on a PC:
1. Click Edit to make the software license item editable.
2. Click Select Thumb.
3. Navigate to the app’s executable file, select it, and click Open.
4. Click OK.
1Password stores (and syncs) the icon for your application.
Track Multiple Versions of an Application
What if you have several versions of the same application, each with its own license key? You can treat them as separate items or group them into a single item. Each method has its virtues.
The first way is to have two distinct entries with the same product name (for example, FileMaker Pro) but with different numbers in the Version field (say, 12.0 and 13.0) and different license keys. This method makes entering new data easy, but if you’re listing software in a view that doesn’t show version numbers (such as the only view available in the Windows version of 1Password), it won’t be obvious which entry goes with which version. And, if you try to compensate by adding the version number to the product name (as in “FileMaker Pro 13”), that will prevent 1Password from matching the app’s icon automatically.
The other approach is to use a single, combined entry for all versions but add custom labels for the older versions. For example, if you have an entry for FileMaker Pro 13, you could add a custom label “old version” and fill in 12, and underneath that, add “old license key” and fill in the previous version’s key. That way your list of apps is less cluttered and unambiguous. Unfortunately, custom labels aren’t available on Windows, so your next best strategy if Windows is one of your operating systems is to store the older data in the Notes field.
Although I generally prefer to combine multiple versions of an app in a single entry, I always want the most current version and its key listed in the main version and license key fields. That means every time I upgrade, I have to do a bit of extra housekeeping to move the previous version and license key to newly added “previous” fields.
Secure Notes
Secure notes are designed to hold plain text—anything you can type or paste and want to keep safely encrypted (and synced with your other devices) in 1Password. Other than the obligatory fields for tags and attachments (both of which I discuss later), secure notes are as bare-bones as you can get. For that reason, they’re good for random, freeform information such as lists, the outline for your new blockbuster novel, diary entries, or anything else that doesn’t fit in another category and consists entirely of text. You can also use them for password-like strings such as locker/padlock/safe combinations, SSL and PGP keys, and similar fixed codes created elsewhere (as opposed to passwords you would generate in 1Password).
To create a secure note, go to the main 1Password app and choose File > New Item > Secure Note.
Secure notes don’t have a Password field, which means you can’t conveniently create a new password for a secure note from within the main 1Password app. You could, of course, generate a password in 1Password mini and paste it into a secure note, but you’ll probably find a different item type that’s better suited to holding information that includes passwords.
Other Data Types
Beyond the core data types I’ve discussed already (logins, identities, credit cards, and secure notes), you can store numerous other kinds of structured information in 1Password. There are built-in categories (which are really nothing more than templates with a collection of relevant fields) for the following additional items—those with an asterisk (*) contain a Password or PIN field that uses the built-in password generator:
· Bank Account
· Database*
· Driver’s License
· Email Account*
· Membership*
· Outdoor License
· Passport
· Reward Program*
· Server*
· Social Security Number
· Wireless Router*
To add any of these data types, choose the type from the File > New Item menu. I won’t go into these in detail because they’re largely self-explanatory. However, I would like to mention a few tips:
· Currently, there’s no way to create a new category. These are the only options, so if you have a type of data that doesn’t quite fit, choose whichever category is most similar—or use a secure note instead.
· Similarly, it’s not possible to change an item’s category after the fact. That’s because categories aren’t merely labels but templates that include particular fields. (There’s one exception to this rule: previously generated passwords can be converted to full login items, as I explain later, in Work with Previously Generated Passwords.)
· With a few exceptions, categories don’t appear in 1Password’s sidebar until you have added at least one item in that category.
· For official documents such as driver’s licenses, health insurance cards, and passports, you may find it useful to include a photograph or scanned image of the front and back of the document as an attachment. On a Mac, first create and save the entry. Then click Edit and drag one or more files to an item’s Attachments field at the bottom of the entry (Figure 19); on a PC, select an item (no need to click Edit) and drag one or more files to the Attachments field.

Figure 19: To include an attachment, such as a scanned image of a document, drag it to the Attachments field in 1Password for Mac.
Using Attachments
Any item that you create in 1Password can have one or more attachments. As I’ve shown a couple of times already, you need merely drag the file(s) from the Finder to the Attachments field in a 1Password item.
Although attachments are handy for things related to an item—scans of a passport or a software license file, for example—you can also use them to encrypt and sync any sensitive file at all. If you have confidential financial records, product plans, or other secret materials, create a new item (the type doesn’t matter, but I’d suggest a secure note for simplicity) and drag in the files.
However, two words of caution when storing file attachments in 1Password:
· Be conscious of file sizes—the maximum attachment size is 5 MB. Remember, your attachments must sync across all your devices, even mobile devices that may have storage and bandwidth limits.
· Once you’ve stored something in 1Password, be sure to securely erase the original. On a Mac, the easiest way to do this is to drag it to the Trash and then choose Finder > Secure Empty Trash. On a Windows PC, you’ll need to download an app to do this, such as the free Eraser utility.