CCNP Security FIREWALL 642-618 Official Cert Guide (2012)
Chapter 2. Working with a Cisco ASA
This chapter covers the following topics:
• Using the CLI: This section describes the Cisco ASA command-line interface (CLI) and how you can use it to configure and display information about an ASA device.
• Using Cisco ASDM: This section describes the Adaptive Security Device Manager (ASDM) and how you can enter an initial ASA configuration to use it.
• Understanding the Factory Default Configuration: Every Cisco ASA comes with a factory default or preinstalled initial configuration. This section explains the initial configuration and how it bootstraps an ASA so that you can connect and make configuration changes.
• Working with Configuration Files: This section describes the startup and running configurations that an ASA uses as it boots and runs.
• Working with the ASA File System: This section covers the nonvolatile flash file system that an ASA uses to store configuration files, image files, and other types of files.
• Reloading an ASA: This section describes the ASA bootup sequence, how you can make an ASA reload, and how you can upgrade the operating system image during a reload.
A Cisco Adaptive Security Appliance (ASA), like any other networking device, offers several ways for an administrative user to connect to and interact with it. The command-line interface (CLI) is an important part of that process. As you work with an ASA, you also need to understand its configuration files, file systems, and how to reboot or reload it when necessary.
“Do I Know This Already?” Quiz
The “Do I Know This Already?” quiz allows you to assess whether you should read this entire chapter thoroughly or jump to the “Exam Preparation Tasks” section. If you are in doubt about your answers to these questions or your own assessment of your knowledge of the topics, read the entire chapter. Table 2-1 lists the major headings in this chapter and their corresponding “Do I Know This Already?” quiz questions. You can find the answers in Appendix A, “Answers to the ‘Do I Know This Already?’ Quizzes.”
Table 2-1. “Do I Know This Already?” Section-to-Question Mapping
Caution
The goal of self-assessment is to gauge your mastery of the topics in this chapter. If you do not know the answer to a question or are only partially sure of the answer, you should mark that question as wrong for purposes of the self-assessment. Giving yourself credit for an answer you correctly guess skews your self-assessment results and might provide you with a false sense of security.
1. Which of the following are modes that an ASA can offer through the CLI? (Choose all that apply.)
a. Configuration mode
b. Privileged EXEC mode
c. Service mode
d. User EXEC mode
e. Specific configuration mode
f. ROMMON mode
g. Routed mode
2. Which keyboard key can be used to autocomplete a command in the ASA CLI?
a. Space
b. ESC
c. ?
d. Tab
e. *
3. You want to display an ASA’s running configuration to find any occurrence of the deny keyword, but the output is so large that it scrolls by too fast on your terminal emulator. Which one of the following commands can help you pinpoint the information?
a. show running-config deny
b. show running-config | begin deny
c. show running-config | include deny
d. show running-config > grep deny
e. show running-config all
4. An ASA is booted up with its initial factory default configuration. You connect a PC to the appropriate Ethernet interface on the ASA so that you can use a web browser to open an ASDM session. Which IP address should you use for the ASA in your web browser?
a. 10.0.0.1
b. 10.1.1.1
c. 192.168.0.1
d. 192.168.1.1
e. 1.1.1.1
5. Which one of the following commands should you use to force an ASA to return to its initial factory default configuration?
a. write erase
b. copy factory-config startup-config
c. configure factory-default
d. clear configure default
e. reload /default
6. After making some configuration changes to an ASA, you would like to save the changes permanently. Which one of the following commands should you use?
a. save all
b. copy start run
c. copy startup-config
d. reload /save
e. copy run start
7. Suppose you decide to use a new startup configuration file called new-startup.cfg on an ASA. Based on the following commands and console output, which startup configuration will the ASA use after it is reloaded?
ciscoasa# copy run disk0:/new-startup.cfg
ciscoasa# config term
ciscoasa(config)# boot config disk0:/new-startup.cfg
ciscoasa(config)# exit
ciscoasa#
ciscoasa# show bootvar
BOOT variable = disk0:/asa823-k8.bin
Current BOOT variable =
CONFIG_FILE variable =
Current CONFIG_FILE variable = disk0:/new-startup.cfg
ciscoasa# reload
a. The initial factory default configuration.
b. The original startup configuration.
c. The new disk0:/new-startup.cfg file.
d. The disk0:/asa823-k8.bin file.
e. None; the ASA will boot into ROMMON mode.
The original startup-configuration will be used because the running configuration has not yet been saved. If the running configuration had been saved, “CONFIG_FILE variable” would be shown as “disk0:/new-startup.cfg.”
8. Suppose you enter the write erase command on a functioning ASA. What should you do before the next time the ASA is reloaded?
a. Enter copy startup-config running-config.
b. Enter copy running-config startup-config.
c. Do nothing, because the ASA will be just fine.
d. Panic because the ASA just lost its running configuration.
9. Entering the command dir flash: will actually show the contents of which one of the following file systems?
a. Running configuration
b. /
c. disk0:/
d. disk1:/
e. All of the answers are correct.
10. A new startup configuration file has been saved on an ASA as disk0:/mystartup.cfg. The boot config disk0:/mystartup.cfg command has already been entered. Which of the following commands can be used to view the contents of the new file? (Choose all that apply.)
a. show disk0:/mystartup.cfg
b. show startup-config
c. show running-config
d. more disk0:/mystartup.cfg
e. view disk0:/mystartup.cfg
11. An ASA is currently in production in your network. Suppose that you want it to be running operating system release 8.4(8) to leverage some new features and bug fixes. The 8.4(8) image file is located on a TFTP server. The following output is obtained from the show version, show boot, and dir flash: commands:
ciscoasa# show version
Cisco Adaptive Security Appliance Software Version 8.4(2)
Device Manager Version 6.4(5)
Compiled on Fri 10-Jan-11 07:51 by builders
System image file is "disk0:/asa842-k8.bin"
Config file at boot was "startup-config"
ciscoasa up 2 days 6 hours
Hardware: ASA5510-K8, 256 MB RAM, CPU Pentium 4 Celeron 1599 MHz
Internal ATA Compact Flash, 256MB
BIOS Flash M50FW080 @ 0xffe00000, 1024KB
Encryption hardware device : Cisco ASA-55x0 on-board accelerator (revision 0x0)
Boot microcode : CN1000-MC-BOOT-2.00
SSL/IKE microcode : CNLite-MC-SSLm-PLUS-2.03
IPSec microcode : CNlite-MC-IPSECm-MAIN-2.04
0: Ext: Ethernet0/0 : address is 001a.a22d.1ddc, irq 9
1: Ext: Ethernet0/1 : address is 001a.a22d.1ddd, irq 9
[output truncated for brevity]
ciscoasa# show boot
BOOT variable =
Current BOOT variable =
CONFIG_FILE variable =
Current CONFIG_FILE variable =
ciscoasa#
ciscoasa# dir flash:
Directory of disk0:/
93 -rwx 14503836 14:46:38 Sep 17 2010 asdm-645.bin
94 -rwx 15243264 14:44:02 Sep 17 2010 asa842-k8.bin
3 drwx 8192 14:04:34 Apr 27 2007 log
13 drwx 8192 14:05:02 Apr 27 2007 crypto_archive
255426560 bytes total (225050624 bytes free)
ciscoasa#
Which one of the following answers reflects the most logical next step you should take in the upgrade process?
a. Do nothing; the ASA is already running the upgraded image.
b. Enter the reload command.
c. Enter the boot system disk0:/asa848-k8.bin command.
d. Enter the copy tftp: disk0:/asa848-k8.bin command.
e. Enter the copy running-config startup-config command.
12. Which one of the following commands can be used to show the operating system version that is currently running on an ASA?
a. show image
b. show version
c. dir disk0:/
d. show system
e. show running-config | include image
Foundation Topics
To work with a Cisco ASA, you need to be able to interact with it and perform some basic maintenance procedures. This chapter covers the CLI, ASA configuration files, ASA file systems, and how to reload an ASA as part of the system maintenance or upgrade processes.
Using the CLI
Security professionals usually need to make changes to a firewall’s security policies and its configuration. Other day-to-day tasks might include monitoring firewall activity and troubleshooting how a firewall is handling the traffic that is passing through it. An ASA offers the following ways for an administrative user to connect to and interact with it:
• CLI by an asynchronous console connection
• CLI by a Telnet session
• CLI by Secure Shell (SSH) version 1.x or 2
• Adaptive Security Device Manager (ASDM) through a web browser
In addition, before an ASA has fully booted up, it can provide a user interface to its ROM monitor bootstrap code when the normal operating system is not yet running.
Only the CLI itself is covered in this chapter. The mechanisms to reach it (Telnet, SSH, and ASDM) are covered in Chapter 5, “Managing a Cisco ASA.”
The CLI-based user interface of a Cisco Firewall consists of several modes, each providing a different level of administrative capability and a different function:

• User EXEC mode: By default, the initial access to an ASA places a user in user EXEC mode and offers a limited set of commands. When you connect to the firewall, a user EXEC level password is required. When you are in user EXEC mode, the ASA always gives a prompt of this form:
ciscoasa>
• Privileged EXEC mode: The privileged EXEC level offers complete access to all firewall information, configuration editing, and debugging commands. Once you gain access to user EXEC mode, you can use the enable command to enter the privileged EXEC or “enable” mode. The ASA prompts for a password before granting access to the privileged EXEC mode. To leave privileged EXEC mode, use the disable, quit, or exit command. The syntax for entering privileged EXEC mode is as follows:
ciscoasa> enable
password: password
ciscoasa#
Notice that the ASA changes the command prompt to differentiate the privileged EXEC and user EXEC modes. For privileged EXEC mode, a pound, or number, sign (#) is added at the end of the prompt.
• Global configuration mode: From privileged EXEC mode, you can enter global configuration mode. From this mode, you can issue firewall commands to configure any feature that is available in the operating system. To leave configuration mode and return to EXEC mode, enter exitor press Ctrl-Z. You can also use the exit command to exit a submode and return to global configuration mode.
The syntax for entering global configuration mode is as follows:
ciscoasa# configure terminal
ciscoasa(config)#
Notice how the ASA added (config) to the prompt to indicate global configuration mode.
• Specific configuration mode: The ASA offers many specific configuration submodes, much like Cisco IOS Software. More specific submodes are indicated by adding a suffix after config in the command prompt. For example, interface configuration mode is indicated by ciscoasa(config-if)#.
• ROMMON mode: As an ASA is booting, it runs an initial firmware from its read-only memory (ROM) that provides a limited interface that you can use to monitor the ASA hardware (hence, the name ROM monitor [ROMMON]).
From the CLI, you can enter commands and get helpful information about entering commands. As well, you can filter the information that an ASA displays in a CLI session as a result of a command. These mechanisms are discussed in the following sections.
Entering Commands
You can enable a feature or parameter by entering the command and its options into a CLI session. To disable a command that is in effect, begin the command with the no keyword, followed by the command. Be sure to include enough options to identify the command uniquely as it exists in the ASA session or configuration. For example, the following configuration commands enable and then disable the embedded HTTP server:
ciscoasa(config)# http server enable
ciscoasa(config)# no http server enable
You can see the configuration commands that are currently in effect by using one of the following commands:
ciscoasa# write terminal
or
ciscoasa# show running-config [command]
Notice that an ASA allows you to specify a command keyword in the show running-config command. If it is included, only the related configuration commands are shown, rather than the entire configuration.
Note
Some ASA configuration commands and their options are not shown if they use their default values. To see every configuration command that is enabled or active, even if it is a default, you can use the show running-config all [command] syntax.
The running configuration is covered in more detail in the section, “Working with Configuration Files.”
Commands and their options can be abbreviated with as few letters as possible without becoming ambiguous. For example, to enter configuration mode, the command configure terminal would normally be used. In Example 2-1, the command configure is shortened to co and the keywordterminal is shortened to just its first letter, t. Because there are other possible commands that begin with the letters “co,” the command is flagged as ambiguous. Adding one more letter, con, successfully identifies the right command, and configuration mode is entered.
Example 2-1. Abbreviating an ASA Command
ciscoasa# co t
ERROR: % Ambiguous command: "co t"
ciscoasa#
ciscoasa# con t
ciscoasa(config)#
The ASA also offers a keyword-completion function. If you enter a shortened or truncated keyword, you can press the Tab key to make the firewall complete the keyword for you. Keyword completion can be useful when you are entering keywords that are long or are hyphenated. For example, pressing the Tab key after entering show ru produces the completed command show running-config:
Firewall# show ru<Tab>
Firewall# show running-config
This works only if the truncated keyword is unambiguous; otherwise, the firewall can’t decide which one of several similar keywords you want. If you press Tab and the keyword stays the same, you know you haven’t entered enough characters to make it unambiguous.
You can edit a command line as you enter it by using the left and right arrow keys to move within the line. If you enter additional characters, the remainder of the line to the right is spaced over. You can use the Backspace and Delete keys to make corrections.
Sometimes, the firewall might display an informational or error message while you are entering a command. To see what you’ve entered so far, you can press Ctrl-l (lowercase L) to redisplay the line and continue editing.
For example, suppose you are trying to enter the hostname configuration command to change the ASA’s hostname. Before you can enter the command, the ASA displays a logging message that interrupts the command line, as shown in Example 2-2. Pressing Ctrl-l displays the line again without all the clutter.
Example 2-2. Redisplaying an Interrupted Command Line
ciscoasa# config t
ciscoasa(config)# hostnJan 10 2012 09:21:08 %ASA-5-502103: User priv level
changed:
Uname: enable_15 From: 1 To: 15<Ctrl-l>
ciscoasa(config)# hostn
Command Help
An ASA offers context-based help within the command line, much like Cisco IOS Software. Entering a question mark after a command keyword causes the ASA to list all the possible keywords or options that can be used. If you enter a question mark alone on a command line, the ASA will display all the available commands.
Suppose that you are interested in displaying the ASA’s ARP table, but you can’t remember the command syntax to use after the show command. Example 2-3 shows how the context-based help can be used as an aid. Entering show? displays all the possible keywords that can go along with the show command. The show arp command appears to be the one that you want in this case. From there, you might use another question mark to find out what other possible parameters you can enter at the end of the show arp command. As shown in the example, show arp can be followed by the statistics keyword, a pipe symbol (|), or the Enter key (<cr>).
Example 2-3. Using Context-Based Help
ciscoasa# show ?
aaa Show information for AAA runtime data
aaa-server Show aaa-server configuration information
access-list Show hit counters for access policies
activation-key Show activation-key
arp Show ARP table or ARP statistics
asdm Show Device Manager history, sessions or log
asp Show the current contents of selected memory in the
Accelerated Security Path
auto-update Show Auto Update
banner Show login/session banners
blocks Show system buffer utilization
[output truncated for brevity]
ciscoasa# show arp ?
statistics Show ARP statistics
| Output modifiers
<cr>
ciscoasa# show arp
You can also end a partially completed command keyword with a question mark if you don’t know the exact spelling or form to use. The ASA will display all possible keywords that can be formed from the truncated word. For example, suppose you don’t remember which commands can be used to configure access lists. In Example 2-4, entering access? in configuration mode reveals two possible commands: access-group and access-list. Notice that the truncated command keyword is displayed again, ready to be completed with more typing.
Example 2-4. Using Context-Based Help to List Possible Commands
ciscoasa(config)# access?
access-group access-list
ciscoasa(config)# access
If you enter a command but use the wrong syntax, you see the following error:
Type help or '?' for a list of available commands
An ASA will also display a carat (^) symbol below the command-line location to point out the error. In Example 2-5, suppose you forget the correct command and enter the command config type rather than config term. The carat points to the keyword type, starting at the y, where the syntax error begins.
Example 2-5. An ASA Pointing Out a Syntax Error
Firewall# config type
^
ERROR: % Invalid input detected at '^' marker.
Firewall#
You can also use the help [command] command to display some concise information about how to use a command, a description of the command, and the command syntax. Example 2-6 shows the help output generated from entering help passwd from within configuration mode.
Example 2-6. Help Output Generated from the help passwd Command
ciscoasa(config)# help passwd
USAGE:
[no] password | passwd <password> encrypted
clear configure passwd
DESCRIPTION:
passwd Change Telnet console access password
SYNTAX:
<password> A password of up to 16 alphanumeric characters
Factory-default password is cisco
encrypted Indicate the <password> entered is encrypted
see also: telnet
ciscoasa(config)#
Command History
An ASA keeps a history of the last 19 commands that were entered in each CLI session. You can see the entire history list for your current session with the show history command.
You can use the command history to recall a previous command that you want to use again. This can save you time in entering repetitive commands while allowing you to make edits or changes after you recall them.
Each press of the up arrow key (c) or Ctrl-p recalls the next older or previous command. Each press of the down arrow key (T) or Ctrl-n recalls the next most recent command. When you reach either end of the history cache, the firewall displays a blank command line.
When commands are recalled from the history, they can be edited as if you just entered them. You can use the left arrow key (d) or right arrow key (S) to move within the command line and begin typing to insert new characters. You can also use the Backspace or Delete key to delete characters.
Note
The arrow keys require the use of an American National Standards Institute (ANSI)-compatible terminal emulator, such as PuTTY. You can find PuTTY at www.chiark.greenend.org.uk/~sgtatham/putty/download.html.
Searching and Filtering Command Output
A show command can generate a long output listing. If the listing contains more lines than the terminal session can display (24 lines by default), the listing is displayed one screenful at a time, with the following prompt at the bottom:
<---More --->
To see the next screen, press the spacebar. To advance one line, press the Enter key one time. To exit to the command line, press the q key.
Sometimes, you might need to sift through a long output listing for some specific information. You can use a regular expression to match against lines of output. Regular expressions are made up of patterns—either simple text strings (such as permit or route) or more complex matching patterns. Typically, regular expressions are regular text words that offer a hint to a location in the output of a show command. You can use the following command structure to perform a regular-expression search:
Firewall# show command ... | {begin | include | exclude | grep [-v]}
reg-expression
To search for a specific regular expression and start the output listing there, use the begin keyword. This can be useful if your firewall has a large configuration. Rather than using the spacebar to eventually find a certain configuration line, you can use begin to jump right to the desired line.
To display only the lines that include a regular expression, use the include (or grep) keyword. To display all lines that don’t include a regular expression, use the exclude (or grep-v) keyword.
A more complex regular expression can be made up of patterns and operators. Table 2-2 lists and defines the characters that can be used as operators.
Table 2-2. Regular Expression Operators
Example 2-7 shows how the command show log | include 302013 can be used to display all the logging messages with message ID 302013 currently stored in the logging buffer. Because message 302013 records TCP connections that are built in either the inbound or outbound direction, you might decide to rework the regular expression to find more specific information. To display only the inbound TCP connections recorded, the regular expression could be changed to include 302013, any number of other characters (.*), and the string “inbound,” as shown at the bottom of the example.
Example 2-7. Searching Through Command Output
ciscoasa# show logging | include 302013
302013: Built outbound TCP connection 1788652405 for outside:69.25.38.107/80
(69.25.38.107/80) to inside:10.1.198.156/1667 (207.246.96.46/52531)
302013: Built outbound TCP connection 1788652406 for outside:218.5.80.219/21
(218.5.80.219/21) to inside:10.1.100.61/3528 (207.246.96.46/52532)
[output truncated]
ciscoasa# show log | include 302013.*inbound
302013: Built inbound TCP connection 1788639636 for outside:216.117.177.135/54780
(216.117.177.135/54780) to inside:10.1.3.16/25 (207.246.96.46/25)
ciscoasa#
You might also use a regular expression to display command output that contains IP addresses within a range. For example, the following command filters the output to contain only IP addresses that begin with 10.10.5, 10.10.6, and 10.10.7:
ciscoasa# show log | include 10.10.[5-7].*
Terminal Screen Format
By default, all output from an ASA is displayed for a terminal session screen that is 80 characters wide by 24 lines long. To change the terminal screen width, use the following configuration command:
ciscoasa(config)# terminal width characters
Here, characters is a value from 40 to 511. You can also specify 0, meaning the full 511-character width.
To change the screen length, or the number of lines displayed when paging through a large amount of output, use the following configuration command:
ciscoasa(config)# pager [lines] number
Here, number can be any positive value starting at 1. The lines keyword is optional, where the number of lines given is the same either with or without it.
You can also disable screen paging completely by using pager 0 or no pager. This action might be useful if you are capturing a large configuration or logging message output with a terminal emulator. With paging disabled, all of the output could scroll by and be captured into the emulator’s capture buffer. Otherwise, you would have to use the spacebar to page through the output and then later remove all the <-- More --> prompts that were captured.
Using Cisco ASDM
Cisco ASDM provides a GUI that you can use to administer, configure, and monitor an ASA. Although ASDM does not use a regular web browser, it does use the HTTPS protocol to communicate with the ASA.
To access ASDM, you need a PC-based launcher utility. The launcher allows you to select an ASA and enter administrator credentials. The launcher will then connect to the ASA, download the ASDM application (if it has not already been installed on the PC), and automatically launch it on the PC.
Before you can use ASDM, you need to enter an initial “bootstrap” configuration in the ASA using the following steps:
Step 1. Copy an ASDM image file into ASA flash memory.
Use a file transfer method such as TFTP to copy an ASDM image file from your PC to the ASA’s flash memory. Be aware that a specific ASDM image release might work with only a specific release of the ASA operating system. You can verify that the ASDM image is ready to use by using the dir disk0:/ command to display the flash file system contents, as shown here:
ciscoasa# dir disk0:/
Directory of disk0:/
132 -rwx 17232256 18:37:02 Nov 02 2011 asdm-645.bin
131 -rwx 25159680 18:36:08 Nov 02 2011 asa842-k8.bin
3 drwx 8192 14:04:34 Apr 27 2007 log
13 drwx 8192 14:05:02 Apr 27 2007 crypto_archive
255426560 bytes total (225050624 bytes free)
ciscoasa#
Step 2. Specify the ASDM image file to use.
Use the asdm image configuration command to specify which ASDM image file to use. For example, the following command tells the ASA to use ASDM release 6.4(5), contained in file disk0:/asdm-645.bin:
ciscoasa(config)# asdm image disk0:/asdm-645.bin
Once the ASDM image file has been specified, you can use the show asdm image command to display the file location and name.
Step 3. Enable the HTTP server process.
Use the following command to enable the HTTP server on the ASA. Both HTTP and HTTPS are supported, although ASDM uses only HTTPS.
ciscoasa(config)# http server enable
Step 4. Specify IP addresses that are permitted to access ASDM.
Because ASDM uses the HTTP server process, you can enter the following command to specify which IP addresses are permitted to access ASDM through a specified interface:
ciscoasa(config)# http ip-address subnet-mask interface
For example, you can use the following commands to permit clients in the 192.168.100.0/24 subnet on the outside interface and 192.168.2.0/24 on the inside interface to access ASDM:
ciscoasa(config)# http 192.168.100.0 255.255.255.0 outside
ciscoasa(config)# http 192.168.2.0 255.255.255.0 inside
You can also use the http 0.0.0.0 0.0.0.0 outside command to permit ASDM access to any host on the outside interface.
Next, you need to access ASDM for the first time. Open a web browser to the ASA interface that you have configured to permit HTTP connections. In Figure 2-1, the web browser has been opened to https://192.168.100.10—the outside interface of an ASA.
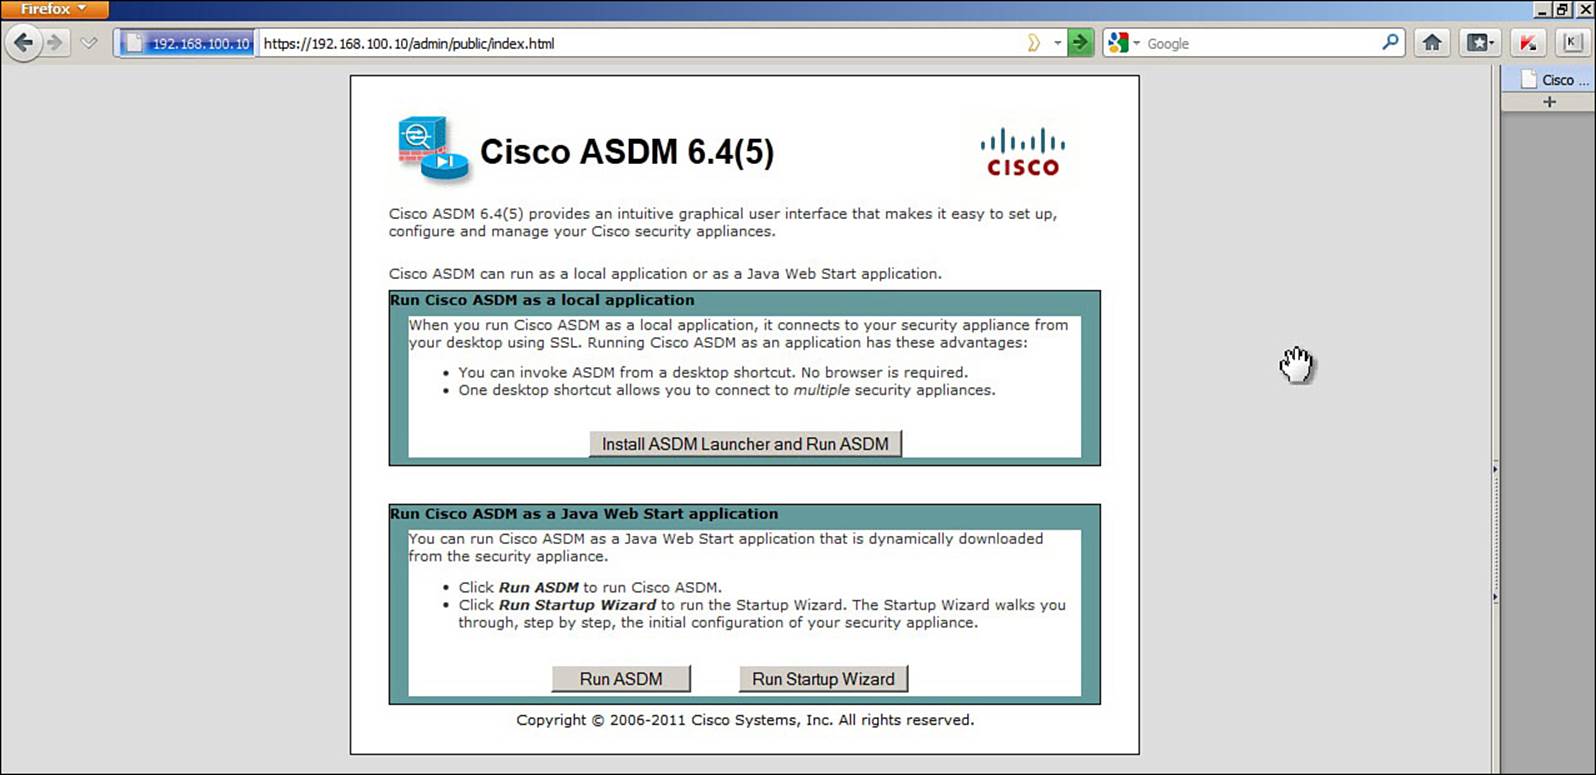
Figure 2-1. Accessing ASDM
The initial ASDM page gives you the following three options:
• Install ASDM Launcher and Run ASDM: The Launcher and ASDM will run as native applications on the PC, without the need for a web browser.
• Run ASDM: You can run ASDM from within the web browser as a Java application.
• Run Startup Wizard: ASDM will initiate a wizard to step you through the initial ASA configuration, if you have not already done so.
The first option is the most common choice and needs to be done only once. After the Launcher application is installed, you can run it directly to initiate an ASDM session. Click the Install ASDM Launcher and Run ASDM button. You will be prompted for an ASA username and password. The installer must authenticate with the ASA to download the Launcher file. ASDM always needs “enable” or the highest available user access in order to launch and run.
Next, the ASA prompts you to enter a location to store the downloaded Launcher installer, as shown in Figure 2-2. Click Save File and browse to the desired location. Once the installer file has been downloaded onto your PC, find the file and double-click it. The Launcher application will install and run automatically.
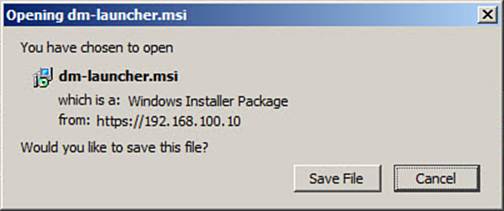
Figure 2-2. Saving the ASDM Installer File
Figure 2-3 shows the ASDM Launcher application. To connect to an ASA and begin an ASDM session, enter the ASA’s IP address and administrator credentials. The IP address will be cached and added to a list of possible ASAs so that you can choose from a list the next time you run the Launcher.
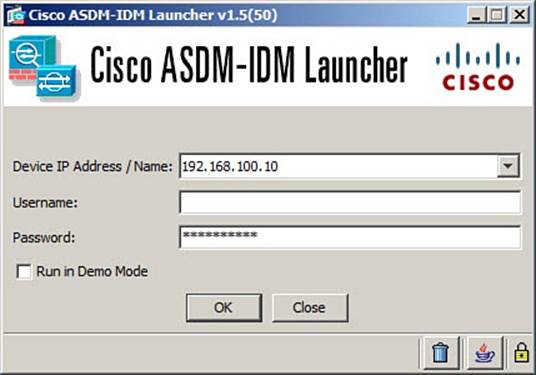
Figure 2-3. ASDM Launcher Application
Once the Launcher successfully connects to the ASA, the full-blown ASDM application window appears. Figure 2-4 shows the initial ASDM Home view. By clicking the buttons in the upper-left portion of the window, you can navigate through the following functions:
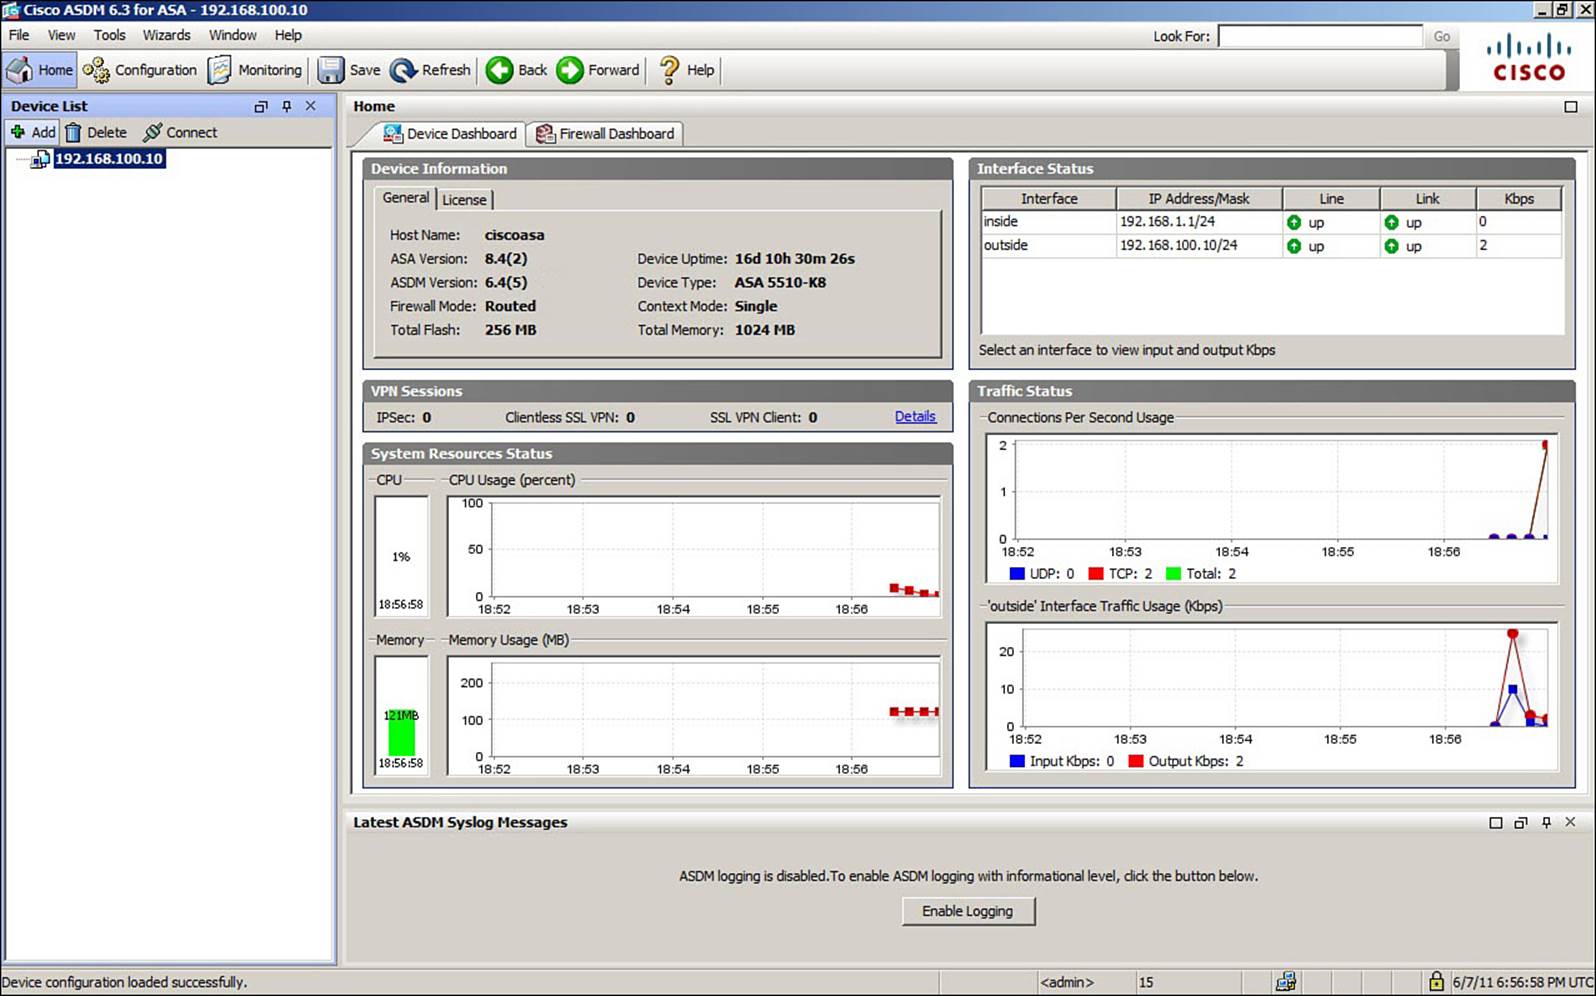
Figure 2-4. ASDM Home View
• Home: Displays information about the ASA platform, VPN sessions, CPU and memory resource usage, interface status, and traffic bandwidth.
• Configuration: Provides a hierarchy of ASA features and parameters that you configure and verify.
• Monitoring: Offers categories and lists of specific ASA parameters that you can monitor or observe.
At any time, you can click the Save button to save the current running configuration to the startup configuration, or click the Refresh button to load the current running configuration into ASDM.
In Configuration view, which is shown in Figure 2-5, you can select any of the following different feature categories in the lower-left area of the window:
• Device Setup: Features such as interfaces, routing, device name, and system time that are necessary for the ASA to operate
• Firewall: Stateful inspection features needed to inspect traffic and secure a network
• Remote Access VPN: Virtual private networks (VPN) used for remote clients to securely connect to the ASA
• Site-to-Site VPN: VPNs used for remote sites to securely connect to the ASA
• Device Management: Features such as management access, feature licensing, high availability, logging, DNS, and DHCP services
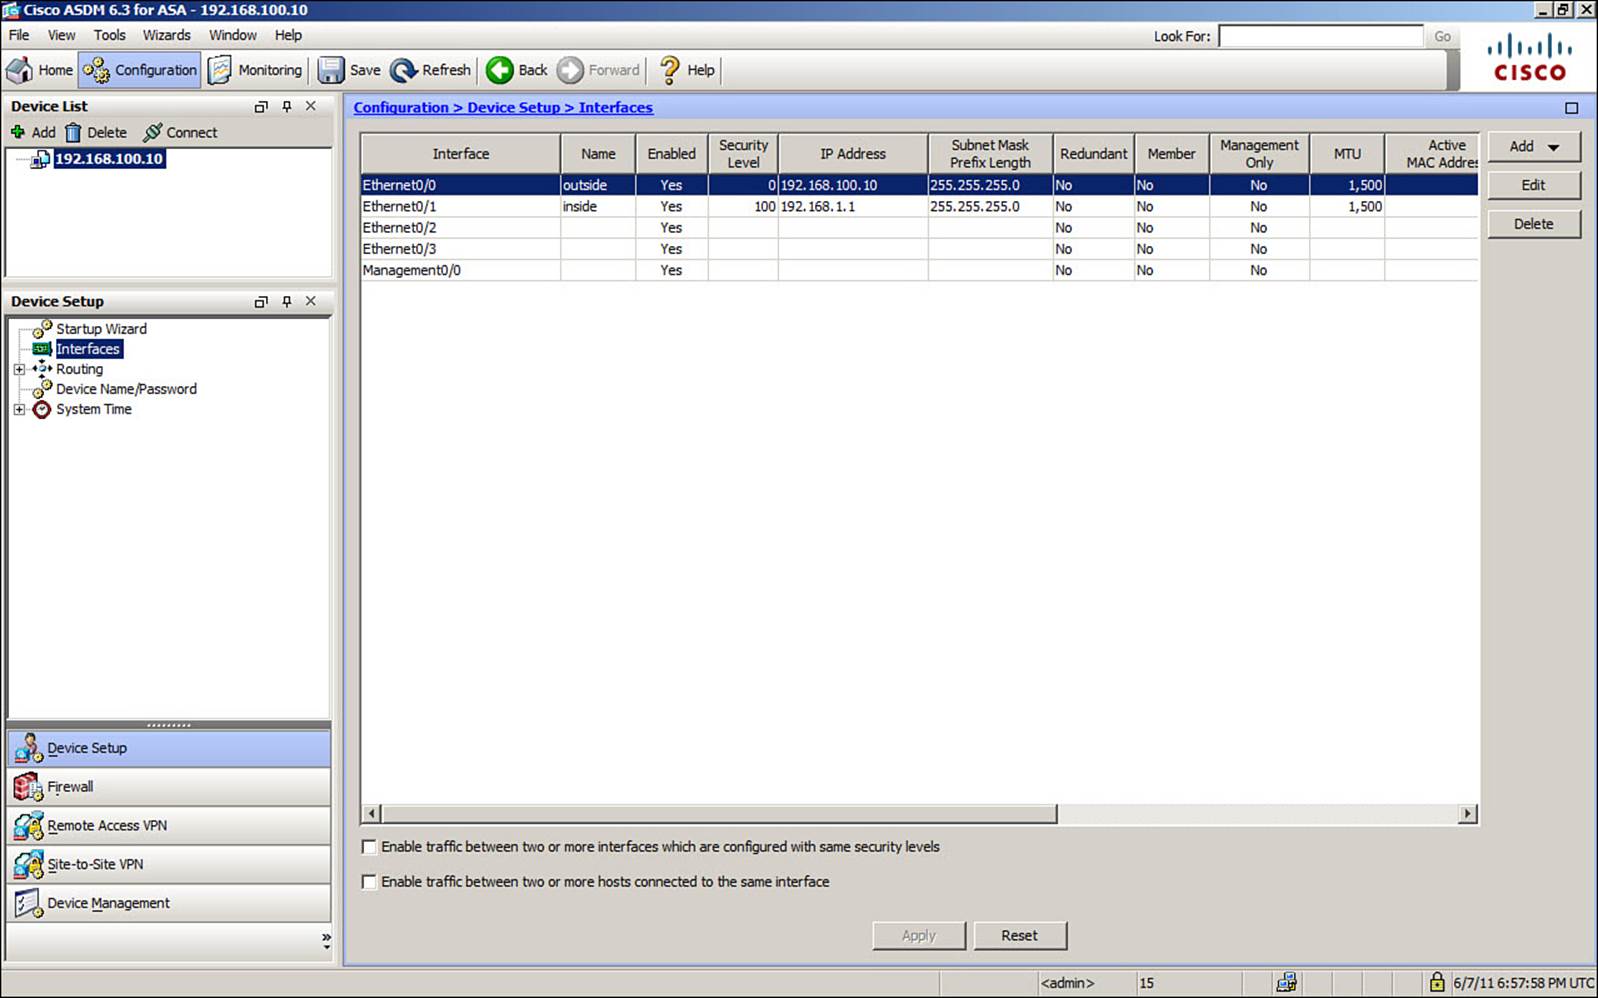
Figure 2-5. ASDM Configuration View
After selecting a feature category, you can select a specific feature to configure from the list in the middle-left portion of the ASDM window. You can then configure individual parameters that are shown in the main part of the window.
As you make configuration changes in ASDM, be aware that the changes are not made to the ASA dynamically. Instead, you must click the Apply button that is shown in Configuration view to actually apply the ASDM changes to the ASA’s running configuration.
In Monitoring view, shown in Figure 2-6, you can select categories of ASA functions to monitor. For example, you can select interface operation, VPN status, routing activity, device properties, and logging.
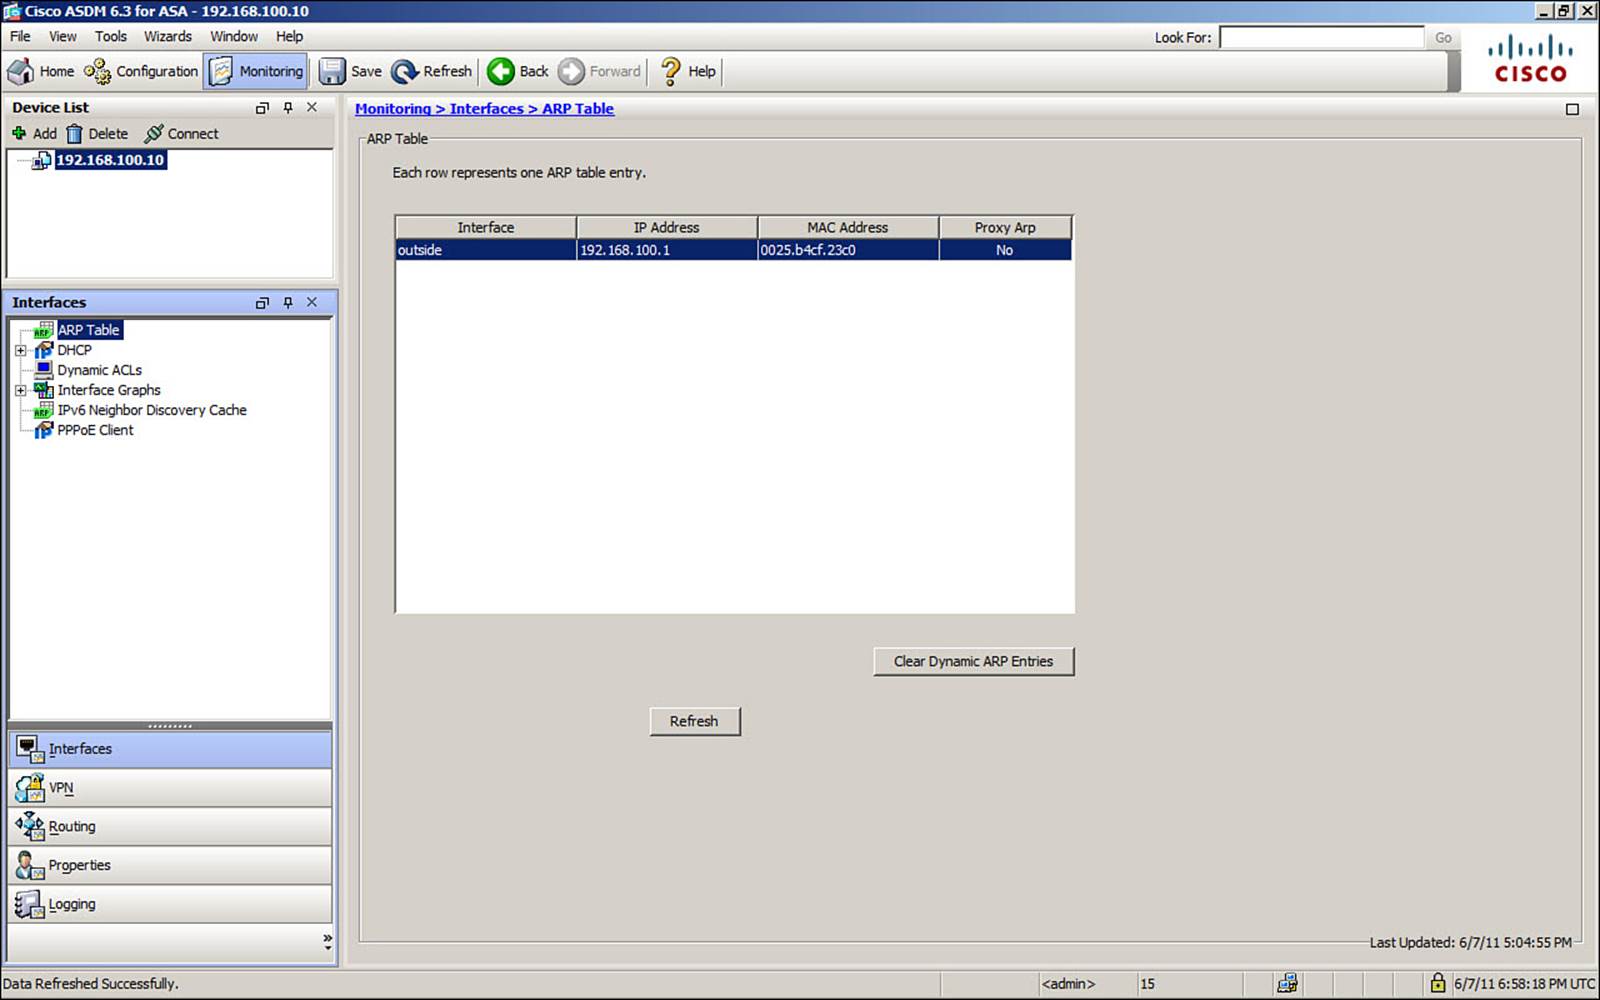
Figure 2-6. ASDM Monitoring View
Understanding the Factory Default Configuration
When an ASA boots for the first time, it comes up running a factory default or initial configuration. For the most part, the configuration is barebones, but provides enough functionality so that someone can connect a PC to the ASA and configure it further.
The initial configuration brings up the following basic functions:
• One interface is set aside as a protected “management” network, where a PC will be connected.
• A DHCP server is enabled on the management network, to automatically provide an IP address for the PC.
• An HTTP server is enabled on the management network, to allow the PC to access secure web-based ASDM sessions with the ASA via HTTPS over TCP port 443.
In the initial configuration, the management interface is always configured to use IP address 192.168.1.1 and subnet mask 255.255.255.0. The DHCP server is configured to provide addresses from a range of 192.168.1.2 to 192.168.1.254. The HTTP server is configured to allow ASDM sessions from devices on the 192.168.1.0/24 management network.
On ASA 5510 and higher platforms, the initial configuration always uses the Management0/0 physical interface for the management network, as shown in the top portion of Figure 2-7. The ASA 5505, however, doesn’t have a dedicated management interface. Instead, it uses VLAN 1 for the secure “inside” network, which is assigned to physical interfaces Ethernet0/1 through 0/7.
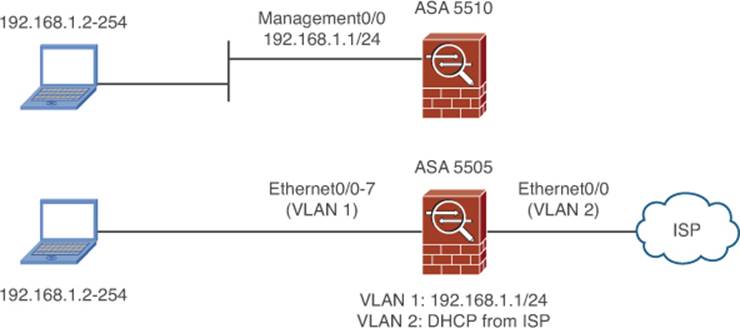
Figure 2-7. Using the ASA Factory Default Configuration
Because the ASA 5505 is usually installed in smaller environments, it often connects directly to an Internet service provider (ISP) through a broadband connection. The ASA 5505 default configuration provides basic connectivity from its inside network to the outside world, as shown in the bottom portion of Figure 2-7. The outside network must be connected to physical interface Ethernet0/0, which is mapped to VLAN 2. The ASA is configured to obtain an IP address for its outside interface automatically, through a DHCP request. Then, any device that is connected to the inside network will have its IP address translated as it passes through the ASA toward the outside world.
At any time in the future, you can force an ASA to return to its factory default configuration by entering the configure factory-default command in configuration mode. Be aware that this command immediately takes effect, with no further confirmation, as shown in Example 2-8. If you are connected to the ASA remotely, through Telnet, SSH, or ASDM, you will likely be cut off; instead, you should enter this command only while directly connected to the ASA console port.
Example 2-8. Returning an ASA to the Factory Default Configuration
ciscoasa(config)# configure factory-default
Based on the management IP address and mask, the DHCP address
pool size is reduced to 253 from the platform limit 256
WARNING: The boot system configuration will be cleared.
The first image found in disk0:/ will be used to boot the
system on the next reload.
Verify there is a valid image on disk0:/ or the system will
not boot.
Begin to apply factory-default configuration:
Clear all configuration
Executing command: interface management0/0
Executing command: nameif management
INFO: Security level for "management" set to 0 by default.
Executing command: ip address 192.168.1.1 255.255.255.0
Executing command: security-level 100
Executing command: no shutdown
Executing command: exit
Executing command: http server enable
Executing command: http 192.168.1.0 255.255.255.0 management
Executing command: dhcpd address 192.168.1.2-192.168.1.254 management
Executing command: dhcpd enable management
Executing command: logging asdm informational
Factory-default configuration is completed
ciscoasa(config)#
Working with Configuration Files
An ASA keeps a “startup” configuration file in flash memory. The configuration commands in the startup configuration are not lost after a reload or power failure. As soon as an ASA boots, the startup configuration commands are copied to the “running” configuration file in RAM (volatile) memory. Any command that is entered or copied into the running configuration is also executed at that time.
You can see the contents of the startup configuration by entering the show startup-config command, as demonstrated in Example 2-9. The first line denotes that the startup configuration has been saved at least once in the ASA’s lifetime. The next line records a timestamp that shows the last date and time that the running configuration has been saved to the startup configuration. In addition, a user called enable_15 (someone in privileged EXEC or enable mode) saved the configuration.
Example 2-9. Displaying the Startup Configuration Contents
ciscoasa# show startup-config
: Saved
: Written by enable_15 at 13:47:39.249 UTC Wed Nov 9 2011
!
ASA Version 8.4(2)
!
hostname ciscoasa
enable password 8Ry2YjIyt7RRXU24 encrypted
passwd 2KFQnbNIdI.2KYOU encrypted
names
!
interface Ethernet0/0
shutdown
no nameif
[output truncated for clarity]
You can see the current contents of the running configuration by entering the show running-config command. If the configuration is lengthy, you can always use the CLI filtering tools to jump to a specific string or to pick out specific items. For example, if you want to start the display where the access-list commands are located, you could use the show running-config | begin access-list command. Rather than paging through large amounts of configuration output, you can instantly find what you’re looking for.
From the CLI, you can start editing the running configuration by entering the configure terminal command. Any number of commands can then be entered. When you are finished editing, use the quit command or press Ctrl-Z.
After you enter new configuration commands, be aware that they are present only in the temporary running configuration. After you verify the operation of the new configuration commands, you should be sure to save the running configuration into flash memory. This preserves the configuration in case the firewall reloads later.
ASA platforms can maintain one or more startup configuration files in flash, provided that there is sufficient space to store them. Only one of these can be used at boot time. Having multiple startup configurations makes configuration rollback easy. For example, the startup configuration contents can be saved in one file during the time that the firewall configuration is stable. If major configuration changes need to be made, the new, updated running configuration can be saved to a new, different startup configuration file.
The next time the ASA is booted, it can use this new startup configuration file. Then, if you encounter problems with the new configuration, you can make one configuration change to force the firewall to roll back or use a previous version of the startup configuration, found in the original file in flash memory.
By default, an ASA stores its startup configuration in a hidden partition of flash memory. That file has no usable name and can be viewed only through the show startup-configuration command.
To force the ASA to use a different startup configuration filename, use the following command:
ciscoasa(config)# boot config url
Here, url represents the location of the startup configuration file. It can be flash:path, disk0:path, or disk1:path, where path represents the directory path that points to the file. For example, if a new startup configuration is stored in a file called newconfig in the root directory of the disk0: flash file system, you would enter the boot config disk0:/ newconfig command.
The boot config url command effectively changes an environment variable used only by the running configuration. When you use this command, be sure to save the running configuration with the copy running-config startup-config command. At this point, the ASA uses the new url and saves the startup configuration in that file, not in the default hidden location. If the file doesn’t exist, a new file is created; if it does exist, the running configuration is merged with that file’s contents. The environment variable is also updated and is used during the next boot cycle to find the new startup configuration file automatically.
You can see the current startup configuration environment variable with the show bootvar command. In Example 2-10, an ASA begins with the default startup configuration location, signified by the empty Current CONFIG FILE variable value. When the boot config command is used, the current value is updated to show the new file location.
However, until the running configuration is saved to the new startup configuration location, the new file is not even present in the flash memory. As well, the startup configuration file used at boot time is still the default (shown by an empty CONFIG FILE variable line). The running configuration must be saved before the new file can be used during the next firewall boot.
Example 2-10. Using a New Startup Configuration File
ciscoasa# show bootvar
BOOT variable = disk0:/asa842-k8.bin
Current BOOT variable =
CONFIG_FILE variable =
Current CONFIG_FILE variable =
ciscoasa#
ciscoasa# config term
ciscoasa(config)# boot config disk0:/new-startup.cfg
ciscoasa(config)# exit
ciscoasa#
ciscoasa# show bootvar
BOOT variable = disk0:/asa842-k8.bin
Current BOOT variable =
CONFIG_FILE variable =
Current CONFIG_FILE variable = disk0:/new-startup.cfg
ciscoasa#
ciscoasa# copy running-config startup-config
Source filename [running-config]?
Cryptochecksum: afbf65d8 203b6346 b1251849 000dfa47
2981 bytes copied in 3.350 secs (993 bytes/sec)
ciscoasa#
ciscoasa# show bootvar
BOOT variable =
Current BOOT variable =
CONFIG_FILE variable = disk0:/new-startup.cfg
Current CONFIG_FILE variable = disk0:/new-startup.cfg
ciscoasa#
Notice that even though a new location and a new filename are used for the startup configuration, you don’t have to specify those when you save the running configuration from that point on. The firewall continues to work with the startup-config keyword, but it uses the new URL to reference the actual file. In other words, copy running-config startup-config will automatically save the running configuration in the new file location in flash memory.
Clearing an ASA Configuration
Sometimes, you might need to clear a portion of the running configuration on an ASA if a function is no longer needed. On other occasions, you might need to clear the entire running configuration so that an existing ASA can be redeployed in a different scenario. You can use one of the following forms of the clear configure command in global configuration mode to erase all or certain parts of the running configuration:
• clear configure all: Clears the entire running configuration
• clear configure primary: Clears all commands related to connectivity, including the ip address, mtu, monitor-interface, boot, route, failover, tftp-server, and shun commands
• clear configure secondary: Clears all commands not related to ASA connectivity
• clear configure command: Clears all commands that use the command keyword
Usually, you can disable or delete individual commands out of a running configuration by re-entering the command, but beginning with the no keyword. For example, if an interface has been configured with an IP address by using the ip address 192.168.1.1 255.255.255.0 interface configuration command, you can clear the IP address by using the no ip address 192.168.1.1 255.255.255.0 command. Some commands don’t allow the use of the no keyword. In those cases, clear configure command can be used instead.
In Example 2-11, an ASA has an access list already added to its running configuration. A single access list entry can be deleted by beginning with the no keyword and repeating the access list entry command as it appears in the running configuration. However, the entire access list cannot be deleted by entering the no access-list test command. Instead, the access-list test command is cleared with the clear configure access-list test global configuration command.
Example 2-11. Clearing Portions of an ASA Running Configuration
ciscoasa# show running-config access-list test
access-list test extended permit ip any any
access-list test extended permit tcp any any
access-list test extended permit udp any any
access-list test extended permit icmp any any
ciscoasa#
ciscoasa# configure terminal
ciscoasa(config)# no access-list test extended permit ip any any
ciscoasa(config)#
ciscoasa(config)# no access-list test
ERROR: % Incomplete command
ciscoasa(config)#
ciscoasa(config)# clear configure access-list test
ciscoasa(config)# exit
ciscoasa# show running-config access-list test
ciscoasa#
Finally, you might have to clear the entire startup configuration if you need to take an ASA out of service or reboot it with an empty configuration. You could use the clear configure all configuration command to clear out the running configuration, followed by the copy running-config startup-config command to save the empty running configuration into the startup configuration.
A much easier approach is to use the write erase command, which erases everything in the startup configuration directly. This command does not disturb or erase the current running configuration. After the startup configuration is erased, you can reboot the ASA. Refer to the section, “Reloading an ASA,” for more information.
Working with the ASA File System
A Cisco ASA has a built-in flash (nonvolatile) memory file system that contains files such as an operating system image, a management application image, and the firewall configuration.
When an ASA boots, it uncompresses and copies an executable operating system image from flash into RAM. The image is actually run from RAM. While an image is being run, a different image can be copied or written into flash memory. In fact, the running image can be safely overwritten in flash, because it is run from RAM. The new image is not run until the next time the ASA reloads.
The management application, ASDM, is run from a separate file in the flash file system. ASDM offers a GUI front end to manage the ASA, and is run only on demand. The operating system and ASDM images must be compatible before ASDM can be used.
An image file can be transferred into an ASA’s flash memory by any of the following methods:
• TFTP at the monitor prompt, as the ASA begins its bootup procedure
• TFTP from an administrative session (ASA console, Telnet, or SSH)
• HTTP or HTTPS from a web server via ASDM
An ASA can also poll an Auto Update Server (AUS) device periodically to see if a new image is available for it. If so, the image is downloaded automatically using HTTPS.
After an ASDM image is downloaded into flash memory, it can be used immediately. After an operating system image is downloaded, however, the ASA must be manually rebooted so that it can run the new image.
Navigating an ASA Flash File System
ASA devices organize their flash file systems much like a traditional Cisco IOS file system, which must be formatted, and can contain a tree of directories, each containing arbitrary files. An ASA supports several different devices that can each contain a file system. For example, every ASA offers a disk0: and a flash: device. These both refer to the same internal flash memory file system. When you connect to an ASA, your session begins in the disk0:/ root directory. That directory can contain other files or subdirectories that also contain files and subdirectories, and so on. ASA models also support a disk1: device, which is a removable flash drive.
To view the contents of a flash directory, use the dir [device:][path] command. The device and pathname fields are each optional. If you omit the device name, the disk0: device is assumed. If you omit the pathname, the current directory is assumed. You can also use regular expressions or wildcard characters in the pathname to match specific patterns within filenames. Example 2-12 shows the contents of the flash file system in disk0:/.
Example 2-12. Listing the Contents of an ASA Flash File System
ciscoasa# dir disk0:/
Directory of disk0:/
131 -rwx 25159680 18:36:08 Nov 02 2011 asa842-k8.bin
132 -rwx 17232256 18:37:02 Nov 02 2011 asdm-645.bin
3 drwx 8192 13:52:08 Sep 09 2010 log
6 drwx 8192 13:52:08 Sep 09 2010 crypto_archive
255426560 bytes total (231604224 bytes free)
ciscoasa#
You can also add the /all keyword to list all the files in the directory, and add the /recursive keyword to recursively look in all nested directories and list the files that are found along the way.
You can use the cd [device:][path] command to change to a different directory. For example, the cd disk:/log command would move the CLI session into the log subdirectory. Because you can move around within the flash file system hierarchy, it’s easy to forget where the current directory is pointed. You can use the pwd command to see the current directory location for your CLI session.
If you need to create a new directory to hold some files, you can use the mkdir [/noconfirm] [device:]path command. To remove a directory, you can use the rmdir [/noconfirm] [device:]path command. A directory must be empty of all files and other directories before it can be removed.
By default, the ASA will ask you to confirm each item that is created or deleted. You can use the /noconfirm option to proceed without any confirmation.
Working with Files in an ASA File System
You can manipulate any files that are stored in an ASA’s file system. For example, to view the contents of a file, use the following command:
more [/ascii | /binary | /ebcdic] [device:]path
The file found at device:path is displayed, one page at a time, in the current CLI session. By default, the file contents are shown as plain text. You can add the /ascii or /binary option to display both hex and ASCII representations of the file contents. Similarly, the /ebcdic option displays the contents in both EBCDIC and ASCII. In Example 2-13, the contents of the disk0:/mytest text file is displayed, first in plain text, then in hex and ASCII.
Example 2-13. Displaying File Contents
ciscoasa# more disk0:/mytest
hello this is a test
the end
ciscoasa#
ciscoasa#
ciscoasa# more /ascii disk0:/mytest
00000000: 68656c6c 6f207468 69732069 73206120 hell o th is i s a
00000010: 74657374 0d0a7468 6520656e 64XXXXXX test ..th e en dXXX
ciscoasa#
Note
Be careful when you use the more command. If you attempt to view the contents of a large binary file, such as by using more image.bin to view the ASA image file, you could be stuck waiting a long time while every byte is shown as a literal (and often cryptic) character to your CLI session. If you want to look at the contents of a binary file, always use the more /binary or more /ascii forms of the command.
You can also copy files to and from an ASA file system. This becomes useful when you need to download a new image file into an ASA or upload a configuration or log file from an ASA. Use one of the following commands to copy a file from an ASA or to an ASA, respectively:
copy [/noconfirm] source destination
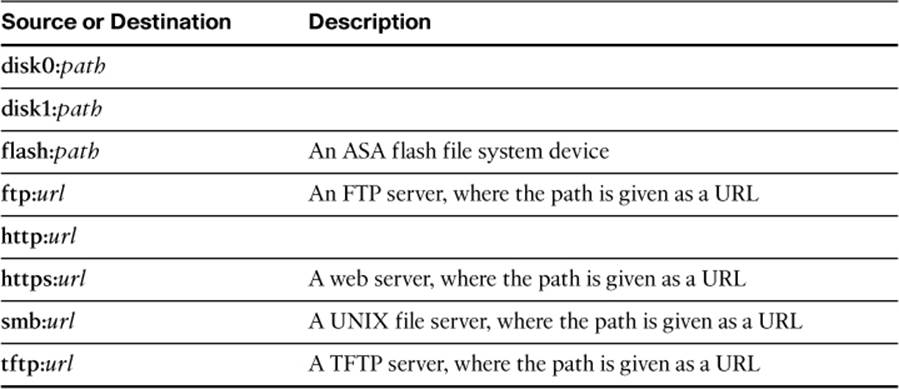
Here, the source and destination fields can be given in the form device:path, using the options listed in Table 2-3. You can also copy the running configuration or the startup configuration by using the running-config and startup-config keywords for either source or destination.
Table 2-3. Source and Destination Designations for Copying Files
You can also use source and destination device names alone, without specifying paths or filenames. In that case, the ASA will prompt for each of the missing fields before the file copy begins.
Example 2-14 demonstrates three different uses of the copy command. First, an ASA image file asa843-k8.bin is copied from a TFTP server to the ASA’s disk0: file system. All the file copy parameters are given in the command line. Notice that the ASA still prompts for each parameter and offers the command-line parameters as a default for each. Second, an ASDM image file is copied from a TFTP server to flash, but the parameters have been omitted from the command line to force the ASA to prompt for them. Finally, the running configuration is copied from the ASA to a TFTP server.
Example 2-14. Copying Files to an ASA File System
ciscoasa# copy tftp://192.168.100.10/asa843-k8.bin disk0:/asa843-k8.bin
Address or name of remote host [192.168.100.10]?
Source filename [asa843-k8.bin]?
Destination filename [asa843-k8.bin]?
Accessing tftp://192.168.100.10/asa843-k8.bin...!!!!!!!!!!!!!!!!!!!!!!!!!!
!!!!!!!!!!!!!!!!!!!!!!!!!!!!!!!!!!!!!!!!!!!!!!!!!!!!!!!!!!!!!!!!!!!!!!!!!!
!!!!!!!!!!!!!!!!!!!!!!!!!!!!!!!!!!!!!!!!!!!!!!!!!!!!!!!!!!
Writing file disk0:asa843-k8.bin...
!!!!!!!!!!!!!!!!!!!!!!!!!!!!!!!!!!!!!!!!!!!!!!!!!!!!!!!!!!!!!!!!!!!!!!!!!!
!!!!!!!!!!!!!!!!!!!!!!!!!!!!!!!!!!!!!!!!!!!!!!!!!!!!!!!!!!!!!!!!!!!!!!!!!!
!!!!!!!!!!
14524416 bytes copied in 31.200 secs (465526 bytes/sec)
ciscoasa#
ciscoasa# copy tftp: disk0:
Address or name of remote host [192.168.100.10]?
Source filename [asdm-646.bin]?
Destination filename [asdm-646.bin]?
Accessing tftp://192.168.100.10/asdm-646.bin...!!!!!!!!!!!!!!!!!!!!!!!!!!
!!!!!!!!!!!!!!!!!!!!!!!!!!!!!!!!!!!!!!!!!!!!!!!!!!!!!!!!!!!!!!!!!!!!!!!!!!
!!!!!!!!!!!!!!!!!!!!!!!!!!!!!!!!!!!!!!!!!!!!!!!!!!!!!!!!!!!!!!!!!
Writing file disk0:asdm-646.bin...
!!!!!!!!!!!!!!!!!!!!!!!!!!!!!!!!!!!!!!!!!!!!!!!!!!!!!!!!!!!!!!!!!!!!!!!!!!
!!!!!!!!!!!!!!!!!!!!!!!!!!!!!!!!!!!!!!!!!!!!!!!!!!!!!!!!!!!!!!!!!!!!!!!!!!
!!!!!!!!!!
14503836 bytes copied in 42.700 secs (338668 bytes/sec)
ciscoasa#
ciscoasa# copy running-config tftp:
Source filename [running-config]?
Address or name of remote host []? 192.168.100.10
Destination filename [running-config]? ciscoasa-confg
Cryptochecksum: 3313140e 3161fb4a 30902dbb 8e519a27
!
1598 bytes copied in 2.10 secs (799 bytes/sec)
ciscoasa#
Note
If you are copying files to or from a server that requires user authentication or a specific port number, you can add the extra information in the following URL format: ftp://[username[:password]@]server[:port]/[path/]filename
To rename an existing file in a flash file system, you can use the following command:
ciscoasa# rename [/noconfirm] [device:]source-path [device:]destination-path
In Example 2-15, the file backup-config is renamed to config-old. Because the CLI session begins in the disk0:/ directory, the device names can be omitted from the command.
Example 2-15. Renaming a File in an ASA File System
ciscoasa# pwd
disk0:/
ciscoasa# rename backup-config config-old
Source filename [backup-config]?
Destination filename [config-old]?
ciscoasa#
Finally, you can delete files from an ASA file system with the following command:
ciscoasa# delete [/noconfirm] [/recursive] [device:]path
You can use the /noconfirm keyword to delete the file without being asked to confirm the action. Without this keyword, you must press the Enter key each time the ASA prompts you for confirmation. You can also delete an entire directory and all of its contents recursively by using the/recursive keyword.
In Example 2-16, suppose an old configuration file called reallyold-config exists in flash and needs to be deleted. First, a directory is shown to find the correct filename, and then the file is deleted.
Example 2-16. Deleting a File in an ASA File System
ciscoasa# dir disk0:/
Directory of disk0:/
131 -rwx 25159680 18:36:08 Nov 02 2011 asa842-k8.bin
132 -rwx 17232256 18:37:02 Nov 02 2011 asdm-645.bin
3 drwx 8192 13:52:08 Sep 09 2010 log
6 drwx 8192 13:52:08 Sep 09 2010 crypto_archive
83 -rwx 2946 16:36:04 Sep 09 2010 reallyold-config
255426412 bytes total (231604034 bytes free)
ciscoasa#
ciscoasa# delete reallyold-config
Delete filename [reallyold-config]?
Delete disk0:/reallyold-config? [confirm]
ciscoasa#
You can also destroy or erase an entire flash file system in special cases, where the entire contents of the flash memory (both accessible and hidden flash file systems) need to be erased. This might be desirable if an ASA is to be turned over or transferred to a different owner and the flash contents need to remain confidential. To do this, use the erase device: or format device: command, with disk0:, disk1:, or flash: as the device name.
Every file, including image files, configuration files, and licensing files, is overwritten with a 0xFF data pattern so that it is completely removed. A generic flash file system is then rebuilt, but no other files are created. Even after the flash file system is erased, the ASA can continue to operate because its image file and running configuration are already loaded into RAM. However, once the ASA is rebooted, its operation will be affected.
Reloading an ASA

An ASA allows one or more operating system images to be stored in flash memory, as long as there is sufficient space to store them. Naturally, only one of the image files can be running on the firewall at any time, so you must select one file for use. Use the following command to select the bootable image:
ciscoasa(config)# boot system device:path
The ASA searches for the specified file as soon as the command is entered, just to confirm that the image file exists. If the file can’t be found in a flash file system, the command is accepted but a warning message is displayed.
The boot system command is stored in the running configuration after it is entered. It should also be written into the startup configuration so that the image can be identified during the next reload or bootup sequence. Once the startup configuration has been written, the ASA also stores the image file location in an environment variable called BOOT.
With a factory default configuration, the boot system command is not present and the BOOT environment variable is empty. Therefore, as it boots, the ASA will search for and run the first valid image file it can find in its flash file system.
You can use the show version command to find out information about the ASA hardware platform and which operating system image and release are currently running. In Example 2-17, the ASA 5510 is running image release 8.4(2) (found at disk0:/asa842-k8.bin) and ASDM 6.4(5).
Example 2-17. Determining ASA Hardware Platform, OS Image, and Release Information
ciscoasa# show version
Cisco Adaptive Security Appliance Software Version 8.4(2)
Device Manager Version 6.4(5)
Compiled on Wed 15-Jun-11 18:17 by builders
System image file is "disk0:/asa842-k8.bin"
Config file at boot was "startup-config"
ciscoasa up 16 days 14 hours
Hardware: ASA5510-K8, 1024 MB RAM, CPU Pentium 4 Celeron 1600 MHz
Internal ATA Compact Flash, 256MB
BIOS Flash M50FW080 @ 0xfff00000, 1024KB
Encryption hardware device : Cisco ASA-55x0 on-board accelerator (revision 0x0)
Boot microcode : CN1000-MC-BOOT-2.00
SSL/IKE microcode: CNLite-MC-SSLm-PLUS-2.03
IPSec microcode : CNlite-MC-IPSECm-MAIN-2.06
0: Ext: Ethernet0/0 : address is 001a.a22d.1ddc, irq 9
1: Ext: Ethernet0/1 : address is 001a.a22d.1ddd, irq 9
2: Ext: Ethernet0/2 : address is 001a.a22d.1dde, irq 9
3: Ext: Ethernet0/3 : address is 001a.a22d.1ddf, irq 9
4: Ext: Management0/0 : address is 001a.a22d.1ddb, irq 11
5: Int: Internal-Data0/0 : address is 0000.0001.0002, irq 11
[output truncated for clarity]
Upgrading the ASA Software at the Next Reload
By configuring the bootable image location, you can toggle between two image files to upgrade to a different software release. The upgrade procedure is straightforward by following these steps:
Step 1. Copy a new operating system image file onto the flash file system.
Step 2. Use the boot system command to point to the new image file.
Step 3. Save the running configuration with the copy running-config startup-config command.
Step 4. Reload the ASA.
You can also enter the boot system command more than once to configure a list of image files that can be executed. The list of filenames is tried in sequence so that if one file is not found in flash memory, the next file is tried, and so on.
You can display the current boot image setting with the show bootvar command. In Example 2-18, an ASA has two operating system image files in the disk0: file system. The ASA is currently running the asa823-k8.bin image file. A new image file named asa842-k8.bin has been copied onto the disk0: file system.
Notice that the example begins with an empty BOOT variable. The asa823-k8.bin image was the only valid image found at bootup time. The boot system disk0:/asa842-k8.bin command is then entered so that the ASA will run an upgraded image after its next reload. Immediately afterward, the Current BOOT variable line indicates that the new image has been identified, but will not yet be used.
Finally, the running configuration is saved to the startup configuration. At that point, the BOOT variable = line shows that the new image file will be booted at the next ASA reload.
Example 2-18. Preparing to Boot a Different Operating System Image File
ciscoasa# show bootvar
BOOT variable =
Current BOOT variable =
CONFIG_FILE variable =
Current CONFIG_FILE variable =
ciscoasa#
ciscoasa# dir disk0:
Directory of disk0:/
86 -rwx 15243264 22:49:21 Sep 9 2010 asa823-k8.bin
131 -rwx 25159680 18:36:08 Nov 02 2011 asa842-k8.bin
132 -rwx 17232256 18:37:02 Nov 02 2011 asdm-645.bin
3 drwx 8192 13:56:28 Sep 30 2009 log
6 drwx 8192 13:56:28 Sep 30 2009 crypto_archive
255426560 bytes total (233480192 bytes free)
ciscoasa#
ciscoasa# configure terminal
ciscoasa(config)# boot system disk0:/asa842-k8.bin
ciscoasa(config)#
ciscoasa# show bootvar
BOOT variable =
Current BOOT variable = disk0:/asa842-k8.bin
CONFIG_FILE variable =
Current CONFIG_FILE variable =
ciscoasa#
ciscoasa# copy running-config startup-config
Source filename [running-config]?
Cryptochecksum: 8e6d767d 3b9988d9 4758e4a7 6511b017
2756 bytes copied in 3.780 secs (918 bytes/sec)
ciscoasa#
ciscoasa# show bootvar
BOOT variable = disk0:/asa842-k8.bin
Current BOOT variable = disk0:/asa842-k8.bin
CONFIG_FILE variable =
Current CONFIG_FILE variable =
ciscoasa#
Performing a Reload
You can force an ASA to reload immediately by issuing the reload command alone. The ASA will check to see if the running configuration has already been saved; if not, it will prompt to ask if the configuration should be saved before reloading. The ASA will then prompt to ask if you want to proceed with the reload. To confirm, you simply press the Enter key. Any other response will cancel the reload. Once the reload process begins, the ASA performs an orderly shutdown of all of its subsystems and processes. Example 2-19 demonstrates the reload procedure.
Example 2-19. Manually Reloading an ASA
ciscoasa# reload
System config has been modified. Save? [Y]es/[N]o: Y
Cryptochecksum: 7565471f dc99fab5 64b052ca 952ce15c
2299 bytes copied in 1.550 secs (2299 bytes/sec)
Proceed with reload? [confirm]
ciscoasa#
***
*** --- START GRACEFUL SHUTDOWN ---
Shutting down isakmp
Shutting down webvpn
Shutting down File system
***
*** --- SHUTDOWN NOW ---
Process shutdown finished
Rebooting.....
CISCO SYSTEMS
Embedded BIOS Version 1.0(12)6 08/21/06 17:26:53.43
Low Memory: 632 KB
High Memory: 251 MB
[output truncated for clarity]
You can also schedule a reload for a specific date and time by using the following command syntax:
ciscoasa# reload at hh:mm [day month | month day]
Here, hh:mm specifies the reload time of hours and minutes. If no date is specified, today is assumed.
To schedule a reload after a time interval, you can use the following command syntax:
ciscoasa# reload in {mm | hhh:mm}
Here, the time interval can be given in either minutes or hours and minutes from the time the reload command is entered.
Once you schedule a reload, you can check the schedule and status with the show reload command. You can cancel a scheduled reload at any time before it actually begins by entering the reload cancel command.
You can add any of the following keywords and options after any form of the reload command:
• max-hold-time {mm | hhh:mm}: The ASA will wait a maximum elapsed time for the subsystems and processes to be gracefully shut down, and then it will perform a quick reload without waiting any further.
• noconfirm: Performs the reload without asking for confirmation.
• quick: Performs the reload without waiting for processes to be shut down gracefully.
• reason string: Records a text string in the ASA logs to indicate why the reload was requested; the reason text will be displayed to active VPN sessions, SSH, Telnet, console, and ASDM session users so that they are aware of the impending reload.
• save-config: Saves the running configuration before the reload begins.
Manually Upgrading the ASA Software During a Reload
Sometimes, you might have to install or upgrade the operating system image file on an ASA before it fully boots. You can do this by downloading an image file from a TFTP server when the ASA has booted into its ROMMON mode. At this point, the firewall is not inspecting any traffic and has no running configuration.
Follow the steps listed in Table 2-4 to download a firewall operating system image via TFTP.
Table 2-4. Steps for Upgrading an ASA Image File at Bootup
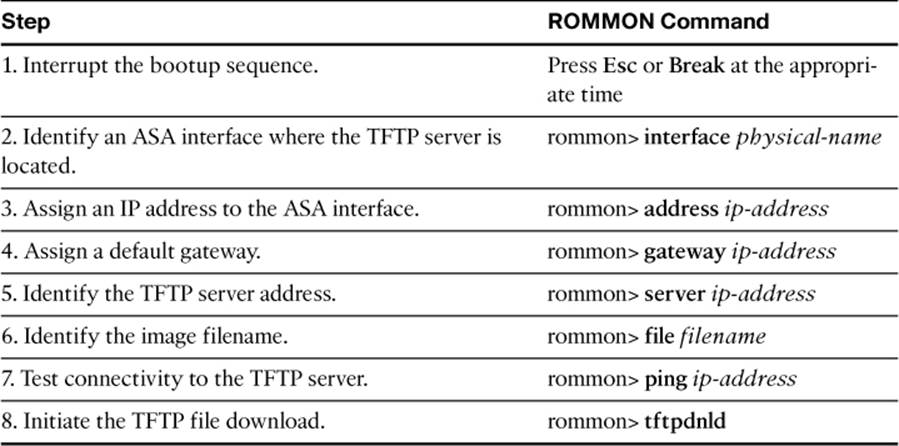
As an ASA is booting, it goes through a series of initial hardware and firmware checks, as shown in Example 2-20. At a certain point in the bootup sequence, the ASA announces that you can press the Esc or Break key to interrupt the remaining bootup process. Doing so leaves the ASA in the ROMMON mode, where the manual image-download commands can be entered.
Example 2-20. An ASA Bootup Sequence
Booting system, please wait...
CISCO SYSTEMS
Embedded BIOS Version 1.0(11)2 01/25/06 13:21:26.17
Low Memory: 631 KB
High Memory: 1024 MB
PCI Device Table.
Bus Dev Func VendID DevID Class Irq
00 00 00 8086 2578 Host Bridge
00 01 00 8086 2579 PCI-to-PCI Bridge
00 03 00 8086 257B PCI-to-PCI Bridge
00 1C 00 8086 25AE PCI-to-PCI Bridge
00 1D 00 8086 25A9 Serial Bus 11
00 1D 01 8086 25AA Serial Bus 10
00 1D 04 8086 25AB System
00 1D 05 8086 25AC IRQ Controller
00 1D 07 8086 25AD Serial Bus 9
00 1E 00 8086 244E PCI-to-PCI Bridge
00 1F 00 8086 25A1 ISA Bridge
00 1F 02 8086 25A3 IDE Controller 11
00 1F 03 8086 25A4 Serial Bus 5
00 1F 05 8086 25A6 Audio 5
02 01 00 8086 1075 Ethernet 11
03 01 00 177D 0003 Encrypt/Decrypt 9
03 02 00 8086 1079 Ethernet 9
03 02 01 8086 1079 Ethernet 9
03 03 00 8086 1079 Ethernet 9
03 03 01 8086 1079 Ethernet 9
04 02 00 8086 1209 Ethernet 11
04 03 00 8086 1209 Ethernet 5
Evaluating BIOS Options ...
Launch BIOS Extension to setup ROMMON
Cisco Systems ROMMON Version (1.0(11)2) #0: Thu Jan 26 10:43:08 PST2006
Platform ASA5510-K8
Use BREAK or ESC to interrupt boot.
Use SPACE to begin boot immediately.
Boot interrupted.
Management0/0
Ethernet auto negotiation timed out.
Interface-4 Link Not Established (check cable).
Default Interface number-4 Not Up
Use ? for help.
rommon #0>
The parameters you enter are used only temporarily until the ASA can download and run the new image file. None of the commands are stored in a configuration; as soon as the ASA reboots, they are lost.
Example 2-21 shows a sample image download. ASA interface Ethernet0/0 is used because the TFTP server is connected there. The interface is given IP address 192.168.100.5. The default gateway is optional and is needed only if the TFTP server is not located on the interface’s local subnet. The TFTP server is found at IP address 192.168.100.10 and the new image file is called asa842-k8.bin. As soon as the tftpdnld command is entered, the TFTP file transfer begins. Once the image file has been downloaded, the ASA automatically boots and runs the new image.
Note
Be aware that even though the image file is downloaded and executed by the ASA, it is not permanently stored anywhere. After the ASA finishes booting, copy the same image file onto a flash file system by using the copy command.
Example 2-21. Manually Downloading an Image File in ROMMON Mode
Link is UP
rommon #1> address 192.168.100.5
rommon #2> gateway 192.168.100.1
rommon #3> server 192.168.100.10
rommon #4> file asa842-k8.bin
rommon #6> ping 192.168.100.10
Sending 20, 100-byte ICMP Echoes to 192.168.100.10, timeout is 4 seconds:
?!!!!!!!!!!!!!!!!!!!
Success rate is 95 percent (19/20)
rommon #7>
rommon #7> tftpdnld
ROMMON Variable Settings:
ADDRESS=192.168.100.5
SERVER=192.168.100.10
GATEWAY=192.168.100.1
PORT=Ethernet0/0
VLAN=untagged
IMAGE=asa842-k8.bin
CONFIG=
LINKTIMEOUT=20
PKTTIMEOUT=4
RETRY=20
tftp asa842-k8.bin@192.168.100.10 via 192.168.100.1
!!!!!!!!!!!!!!!!!!!!!!!!!!!!!!!!!!!!!!!!!!!!!!!!!!!!!!!!!!!!!!!!!!!!!!!!!!!!!!!!!!!!!!!
!!!!!!!!!!!!!!!!!!!!!!!!!!!!!!!!!!!!!!!!!!!!!!!!!!!!!!!!!!!!!!!!!!!!!!!!!!!!!!!!!!!!!!!
!!!!!!!!!!!!!!!!!!!!!!!!!!!!!!!!!!!!!!!!!!!!!!!!!!!!!!!!!!!!!!!!!!!!!!!!!!!!!!!!!!!!!!!
[output truncated for clarity]
!!!!!!!!!!!!!!!!!!!!!!!!!!!!!!!!!!!!!!!!!!!!!!!!!!!!!!!!!!!!!!!!!!!
Received 15243264 bytes
Launching TFTP Image...
Cisco Security Appliance admin loader (3.0) #0: Fri Aug 6 07:52:16 MDT 2010
Cisco Adaptive Security Appliance Software Version 8.4(2)
[output truncated for clarity]
Cryptochecksum (unchanged): 1f9718cc 8bfafb64 55268ff4 b8fe0c26
Type help or '?' for a list of available commands.
ciscoasa>
Exam Preparation Tasks
As mentioned in the section, “How to Use This Book,” in the Introduction, you have a couple of choices for exam preparation: the exercises here, Chapter 17, “Final Preparation,” and the exam simulation questions on the CD-ROM.
Review All Key Topics
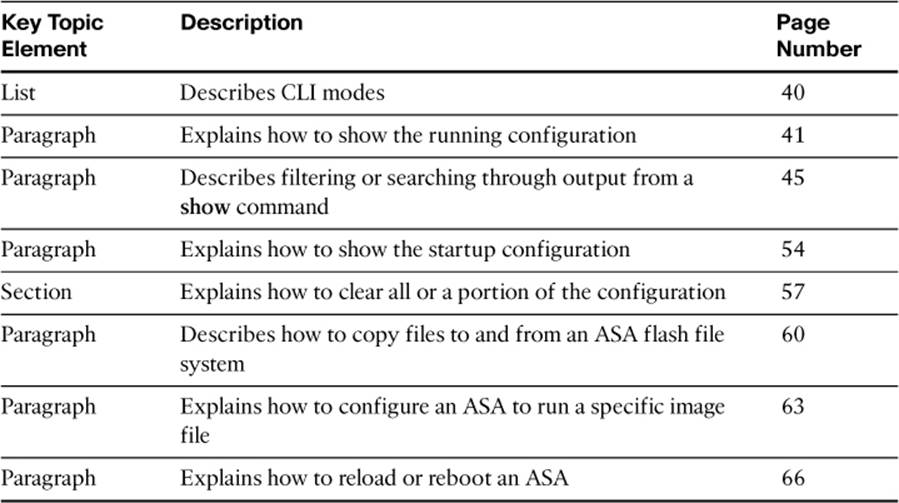
Review the most important topics in this chapter, noted with the Key Topics icon in the outer margin of the page. Table 2-5 lists a reference of these key topics and the page numbers on which each is found.
Table 2-5. Key Topics for Chapter 2
Define Key Terms
Define the following key terms from this chapter and check your answers in the glossary:
user EXEC mode
privileged EXEC mode
global configuration mode
specific configuration modes
ROMMON (ROM monitor) mode
running configuration
startup configuration
Command Reference to Check Your Memory
This section includes the most important configuration and EXEC commands covered in this chapter. It might not be necessary to memorize the complete syntax of every command, but you should be able to remember the basic keywords that are needed.
To test your memory of the commands, cover the right side of Tables 2-6 through 2-9 with a piece of paper, read the description on the left side, and then see how much of the command you can remember.
Table 2-6. ASA CLI Commands
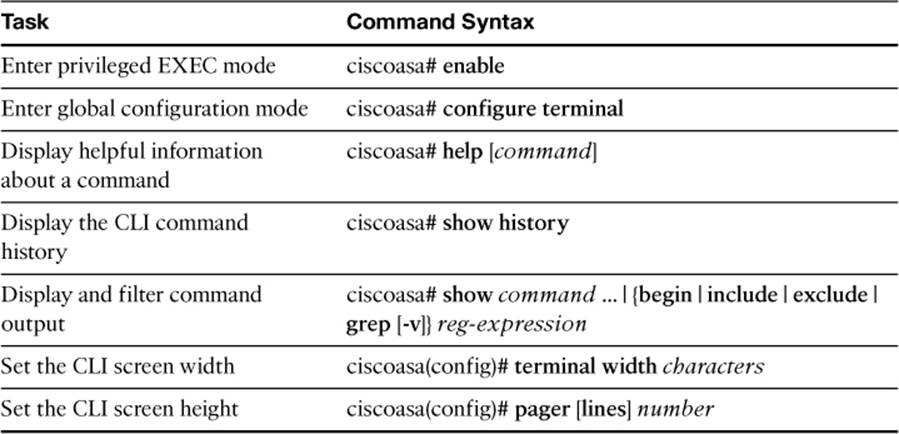
Table 2-7. ASA Configuration File Commands
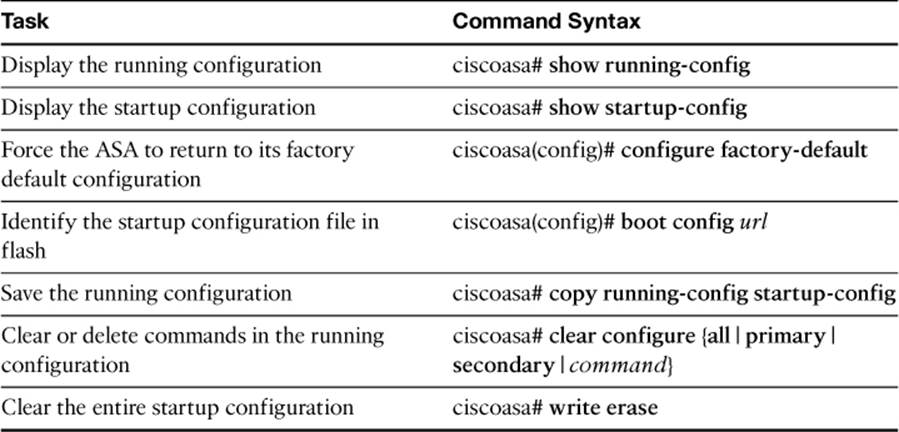
Table 2-8. ASA Flash File System Commands
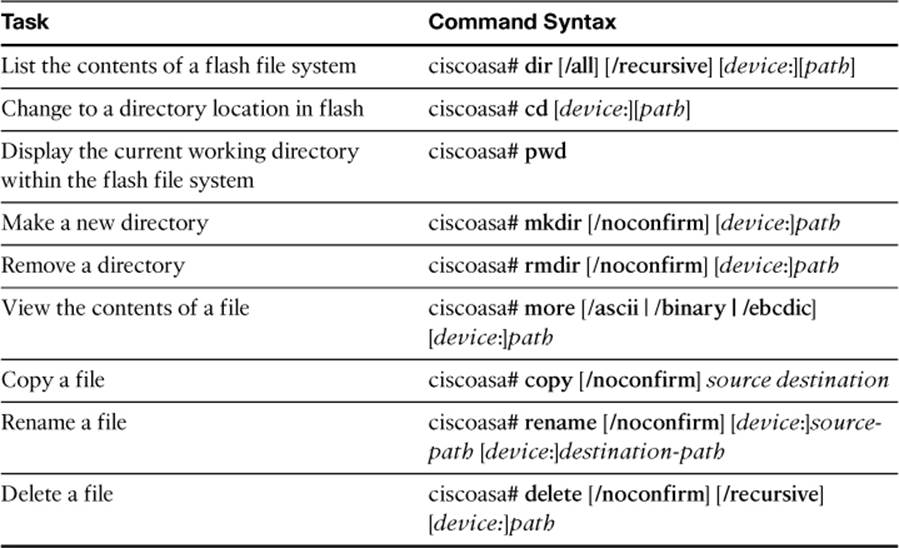
Table 2-9. Commands Related to Reloading an ASA

The FIREWALL exam focuses on practical, hands-on skills that are used by a networking professional. Therefore, you should be able to identify the commands needed to configure and test an ASA feature.
All materials on the site are licensed Creative Commons Attribution-Sharealike 3.0 Unported CC BY-SA 3.0 & GNU Free Documentation License (GFDL)
If you are the copyright holder of any material contained on our site and intend to remove it, please contact our site administrator for approval.
© 2016-2026 All site design rights belong to S.Y.A.