BackTrack – Testing Wireless Network Security (2013)
Chapter 5. Securing Your Wireless Network
In this chapter, we will look at the following information:
· Configuring initial wireless security
· Adjusting transmit power
· Defending from surveillance
· Configuring encryption
Configuring initial wireless security
In the last chapter, we discussed how an attacker can break into a wireless network. Now that we have discussed this process and methodology, we will look at securing our wireless networks from attacks.
The first steps in the methodology that we discussed were probing and network discovery. As was mentioned in the previous chapter, it is difficult to prevent this because we need to have our networks available. Having said that, there are things we can do to limit our "visibility" when it comes to wireless networks.
Unless you need to broadcast your wireless network out to the public, there is no need to transmit your signals at full power. Not all access points will have the option to reduce the transmission power, but it is worth looking into, to see if yours supports it.
The majority of access points will have a web-based interface that you can use to configure information about the network. To access it is a simple matter of opening a browser and entering the IP address. If you do not know the IP address, note that it is usually the address of the default gateway when you view your wireless connection. On a Windows machine, open a command prompt window, and enter ipconfig /all | more. This should result in a list of details of your network cards on that machine. An example of this is shown in the following screenshot:

As you can see from the previous screenshot, the wireless access point is located at the location 192.168.100.1 on this network. The next thing to do is to access the web server that is running on the machine and look at the configuration settings and, more importantly, at the options. We'll do this by opening a browser and entering the IP address that we discovered. For this example, we will enter http://192.168.100.1.
If all goes well, we will be presented with a login page for the device. This is shown in the following screenshot:
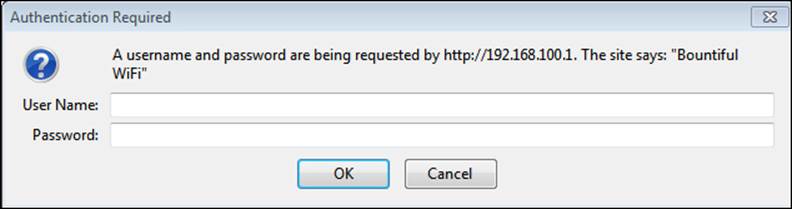
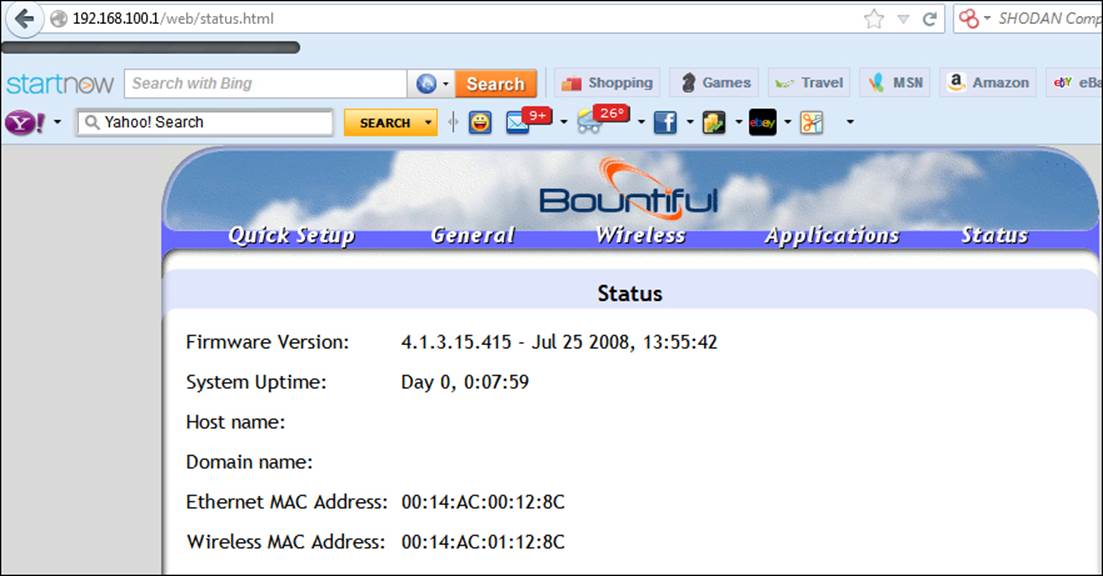
At this point, we need to know the username and password of the device. In many cases this is admin, with a password of admin. If it has been changed, we could be in for a challenge; if all else fails, we can reset it using the button on the device. There are a number of ways to discover what credentials are required to access the device. Some devices will have the information on the device itself. If you are struggling, you can use the Internet to do a search for the default password of the device. A favorite site to use iswww.defaultpassword.com. Once you are on the site, you can enter the manufacturer and product's information and look up the default passwords of the device. If you have a user manual available, you can try using that. If all else fails, you can try to hack into the device. Once you have successfully determined the login credentials, you should be provided access to the device's configuration pages. These pages may vary depending on the device, so it is best to consult the user manual. An example of the configuration page of a Bountiful router is shown in the next screenshot:
Again, there really is no good way to explore the settings here, so we can either use the user manual, search on the Internet, or just click on things to see what we have. The first thing to click on is usually the tab that has something to do with wireless networks. When you click on the Wireless tab of the configuration page for the Bountiful router, you are presented with the screen shown in the next screenshot:
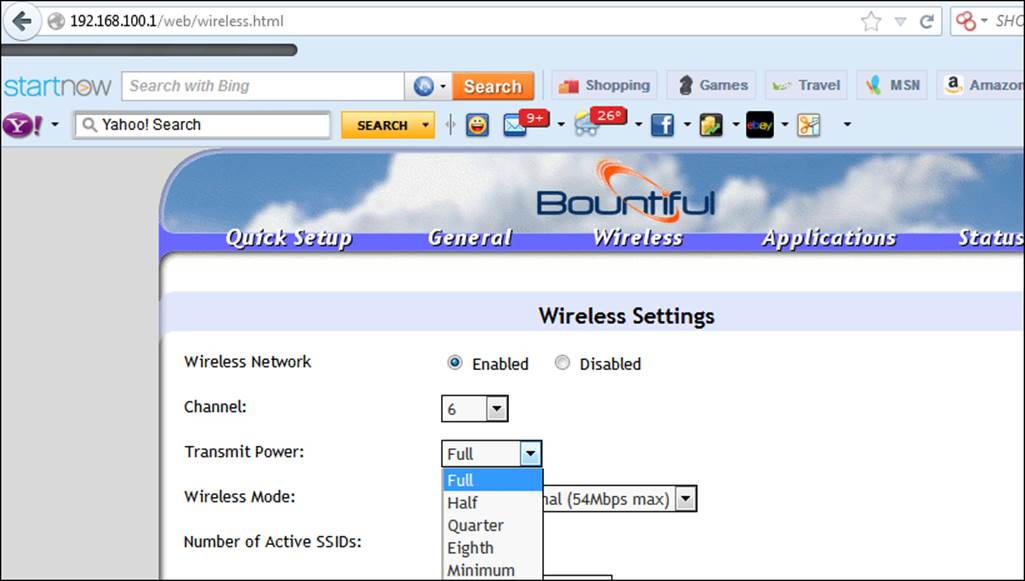
As we can see, the Bountiful router makes it very easy for us to make changes to the transmit power on the device. It is recommended that you reduce the transmit power to half and test it to see how the signal is received in the areas that it is required in. Again, there is no reason to transmit at full power unless you have a weak signal or dead spot somewhere that you are trying to overcome.
Defending from surveillance
The second step of the attacking methodology that we discussed in Chapter 4, Breaching Wireless Security, is the surveillance step. In this step, the attacker surveys and looks for a weak network to attack. In the example shown in the next screenshot, what kind of network do you think the attacker would attempt to attack?
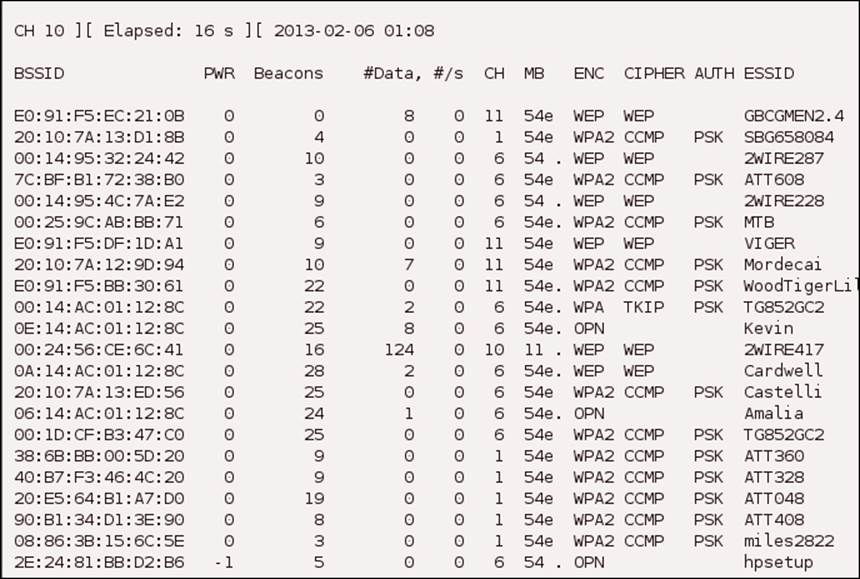
While many of you would probably be tempted to go after the access points that use the WEP protocol, an attacker would usually go for the open access points that are not protected by any form of encryption. This is because if the access point is not protected, it is just a matter of connecting to it and then carrying out the rest of the process. This should provide you with the first step for defending your network once you have made the power modifications that are allowed by your device. The next step is to configure encryption on the access point. Since we are several chapters into the book at this time and have discussed the flaws of WEP, there should be no doubt in your mind that we need to select one of the WPA protection options for the access point.
Configuring encryption
The challenge we have is that there is no standard, and different access points will provide different methods and names for the settings. The options of the Bountiful router are shown in the following screenshot:
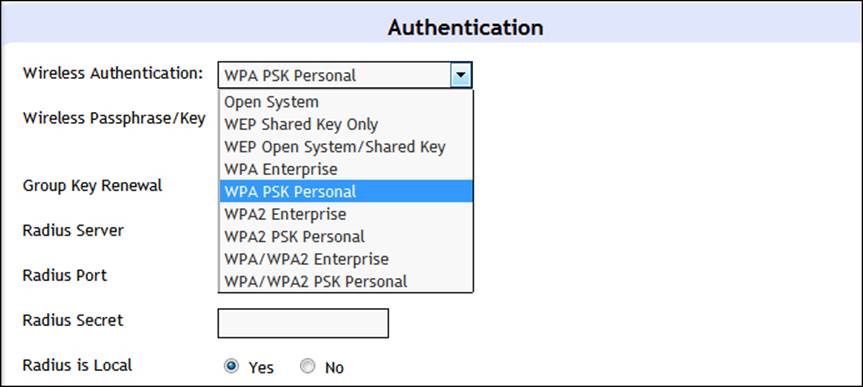
When you look at the previous screenshot, how do you know what it means? Well, this is where you either consult the manual or configure a particular setting and then see what happens. We all know that WEP is not an option, so we can eliminate that right away. The challenge is all of the variants of WPA. What exactly do they mean? The important thing to remember is that the WPA configuration changes from a key that is based on the hexadecimal numbering system to a password or passphrase. This means that, as a user, you have to select a strong password or passphrase. You may recall that we cracked a dictionary word that was used in a WPA configuration. So, one of the first things you want to do is think of a strong password or passphrase to use for your configuration. On this configuration page, we do not have much information to go on other than the options WPA/WPA2 and personal/enterprise. Which one should we use? The best way to think about this is that you want to use the strongest possible option that you can configure and set up easily.
The WPA2 Enterprise option usually requires a RADIUS server to act as the authentication server. Now that we have discussed some of the options, refer to the previous screenshot once again. Which one would you say is the strongest and best protection scheme? This is kind of a trick question because, as we have already stated, the strength of the authentication comes down to the password or passphrase. The recommendation is that you use a password or passphrase that is greater than 14 characters in length. In the Bountiful interface, we really cannot tell what algorithm is being used. There have been some attacks against WPA that were not classic dictionary attacks, so we do not want to select one of them.
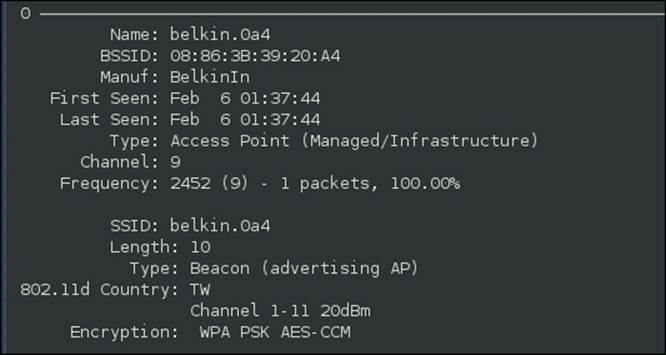
In WPA, we have two main cryptographic algorithms. The first one, which has been around the longest, is referred to as WPA Personal or WPA PSK TKIP. The TKIP stands for Temporal Key Integrity Protocol; and since it has been around the longest, some attacks have been developed against it. In fact, it has not been recommended for wireless security since 2006. The second algorithm is AES that stands for Advanced Encryption Standard. This is the algorithm that is recommended today, and this is usually what is meant by WPA2 PSK Enterprise. If you refer to the next screenshot, you can see what the AES configuration page looks like in Kismet:
The challenge is, if you refer to the following screenshot of the settings available in the Bountiful router, the router really does not come out and state AES. Fortunately, most of the newer routers will state whether the configuration setting is AES or not. An example of this is shown in the following screenshot:
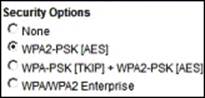
If the wireless router you have does not have AES listed, as shown in the previous screenshot, you can either consult the user manual or configure the router and then use one of the tools that we have covered to see if you can detect what algorithm is being used.
Settings that provide protection from masquerade and rogue AP attacks
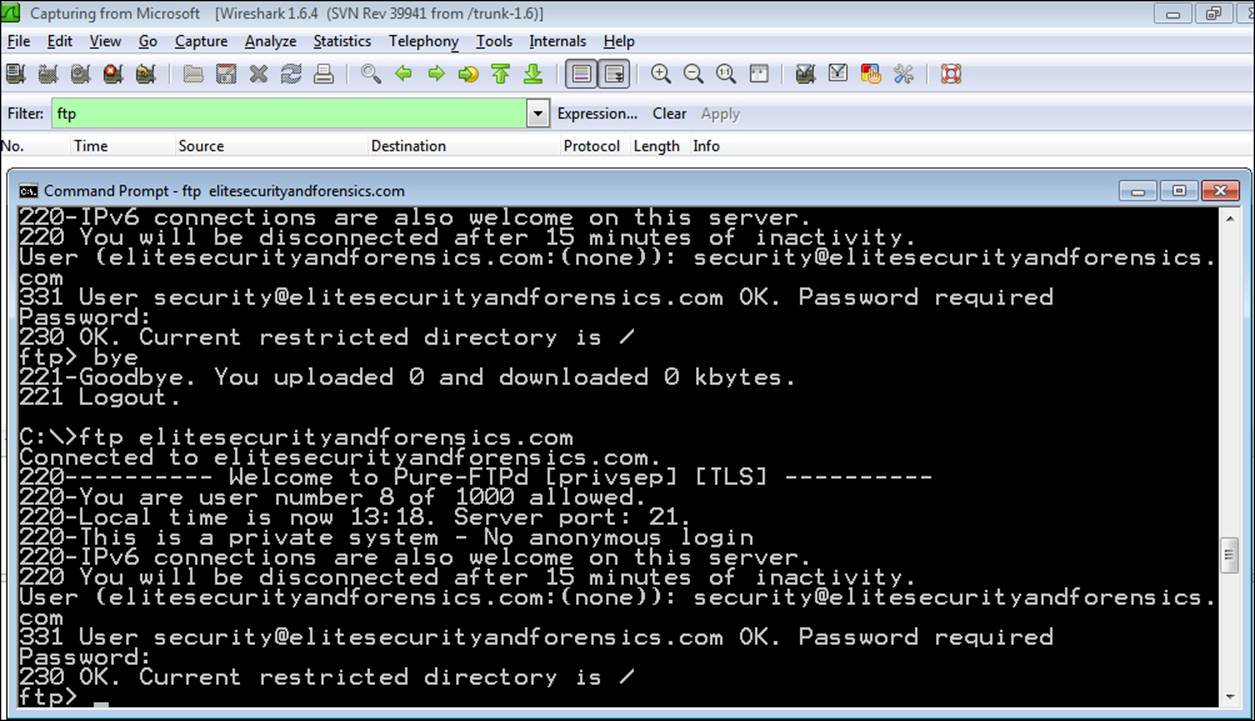
This brings us to the masquerade and rogue AP attacks. The best defense against these types of attacks is encryption; by this we mean the encryption of the data on your network. This will prevent an attacker from successfully compromising WLAN traffic because it will be encrypted even if they manage to break in to the wireless network. This is best accomplished by setting up a Virtual Private Network (VPN). This is an essential component to deploy when you are connected to wireless hotspots. There are a number of VPN services out there, but before we get into them, we will look at examples with and without a VPN. If you refer to the next screenshot, you will see the network data from a wireless network that is not protected by a VPN.
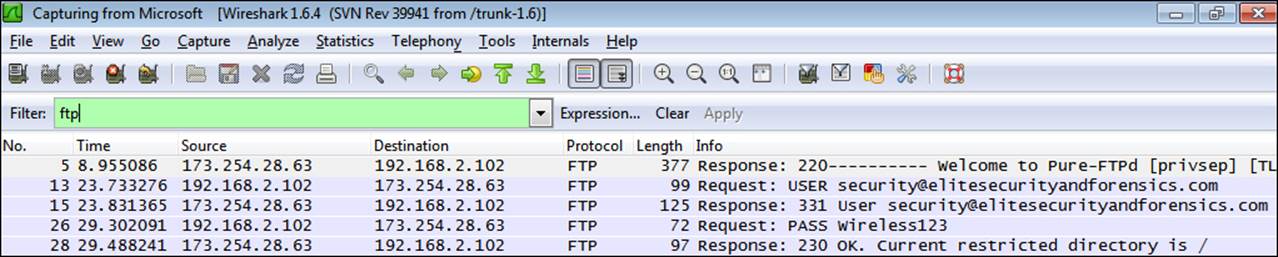
As you can see, the FTP protocol is clear text, and as such, the data that was entered (that is, the username and password) has been compromised on this network. The way to protect this is to use a VPN and encrypt the data. The next example shows the same network data after a VPN setup.
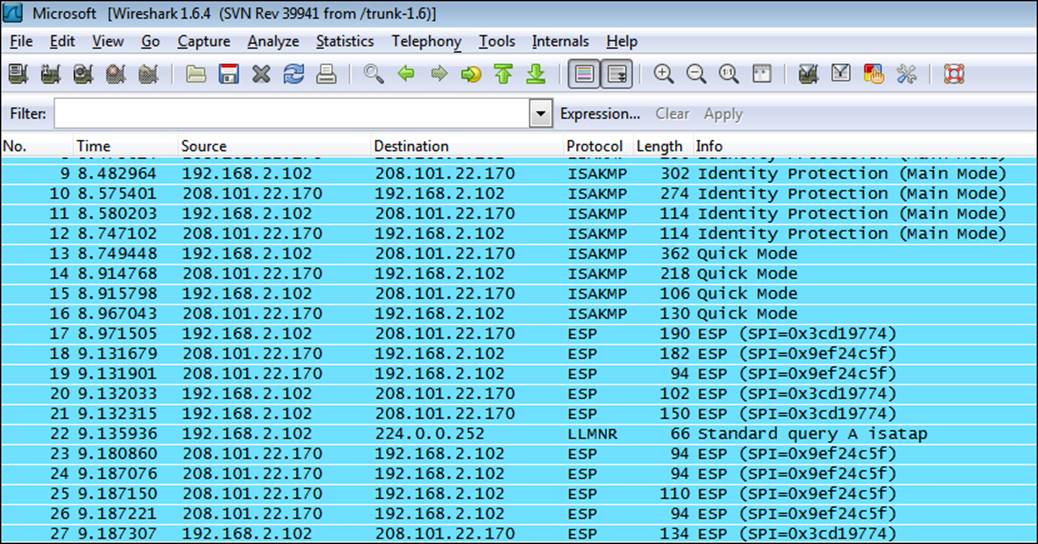
As you can see from the next screenshot, there is no information about the username and password; in fact, there is nothing on the protocol either! This is the power of a VPN and, to reiterate, it is essential that you use these when connecting from public hotspots and do everything from within a VPN. If you'll look at the example in the next screenshot, you will see that there is nothing in the network traffic other than the encrypted traffic; the network traffic is all-encrypted.
You are probably wondering how to get a VPN. Well, there are a number of them on the market, and it is beyond the scope of this book to cover them in detail. As with most software, there are reviews available online; so if you'll conduct a search in your favorite search engine, you will be able read the reviews for the different VPN products. There are three that we will mention here. The first one is the OpenVPN product; it has both free and commercial versions, and you can find out more about it athttp://openvpn.net/index.php/open-source.html. The second one we will discuss is the proXPN product. For the PC, it is free; for mobile devices, it requires payment. You can find out more at http://www.proxpn.com/. The last one we will talk about is the BananaVPN. There is no free version of this; you can get more information about it at http://www.bananavpn.com/. It does not matter what product you choose, but it is essential that you get the VPN software and start protecting your data in transit.
The last protection mechanism we will cover is the firmware. It is essential that you update the firmware of your wireless devices. Just like software, these devices require updating. It is no different from patching your operating system or software on your computers or mobile devices. Unfortunately, it is often neglected, and as a result of this, many attacks have been conducted against the device itself. For an indication of this, you can go to www.routerpwn.com and see a list of attacks against a variety of different router manufacturers. This is just a small sample of the attacks out there, so update your firmware. Do it today!
Summary
In this chapter, we have discussed the measures you need to take to secure your wireless network. It is imperative that you select a data protection configuration to make your wireless network as secure as possible. The recommended setting is WPA2 with the Advanced Encryption Standard (AES). For those of you who want to go the extra mile and configure your wireless network to the level of an enterprise configuration, you might want to review the documentation at www.freeradius.org and experiment with building a RADIUS server to handle your authentication. It is not the easiest setup to deploy, but it does provide you with an enterprise-level wireless network. For home use, this is not required; the WPA2 AES is as strong as most will ever need. Bear in mind that you need to set a complex password with a minimum length of 14 characters. Refer to the following table for a small sample of how long it takes to crack a password depending on the password's length. For more information, refer to http://www.geodsoft.com/cgi-bin/crakcalc.pl.
|
Length of password |
Estimated crack time (assuming 100 billion guesses per second) |
|
Seven – alphanumeric and symbols. For example, HHffg!!. |
5 minutes |
|
Nine – alphanumeric and symbols. For example, HHffg!!68. |
2.5 months |
|
Fourteen – alphanumeric and symbols. For example, HHffg!!68340fg. |
15 million centuries |
What usually works best is a phrase that only you know. Finally, we looked at the reality that a wireless network is, in fact, open to the air, and the result of this is that the data is not protected in transit in most cases. Our solution for this is to deploy a VPN. It is imperative that we always use a VPN when connecting to public access points or hotspots.
In conclusion, there are things we can do to protect our wireless networks. The techniques we have discussed throughout the book will provide you with the best protection possible and allow you to continue to use and enjoy the conveniences of wireless networks in a safe and secure manner.
All materials on the site are licensed Creative Commons Attribution-Sharealike 3.0 Unported CC BY-SA 3.0 & GNU Free Documentation License (GFDL)
If you are the copyright holder of any material contained on our site and intend to remove it, please contact our site administrator for approval.
© 2016-2026 All site design rights belong to S.Y.A.