Computer Forensics with FTK (2014)
Chapter 6. New Features of FTK 5
This chapter is an overview of the main new features that have been developed in the newest version of the product, the FTK 5.
We will not explore all features in detail, but you will be able to understand the goals of each one of them and apply them in your investigation case.
Let's understand how these new features can help us to locate evidence quickly; a task that would earlier have taken a long time or may even have been impossible to achieve without a specific tool.
Distributed processing
Distributed processing allows you to improve performance and process investigation cases using computational resources of other computers on your network.
To use this resource, you need to install the Distributed Processing Engine (DPE) add-on in all the additional computers that you have available.
We know that the processing step requires a lot of hardware resources and the distributed processing can help us to reduce processing time without having to perform an upgrade on the examiner machine.
The DPE product can be found on the FTK installation disk in the path [Drive]:\FTK\AccessData Distributed Processing Engine.EXE.
Once the DPE is installed, you can use other machines to process your case, load balancing, and minimizing the processing time.
Encryption support
FTK users can send files directly to Password Recovery Toolkit (PRTK) for on-the-fly password recovery during evidence review.
Files supported include: Credant, SafeBoot, Utimaco, SafeGuard Enterprise and Easy, EFS, PGP, GuardianEdge, Pointsec, S/MIME OpenOffice, TrueCrypt, FileVault (Apple), FileVault 2 (Apple), DMG files (Apple), RAR, ZIP including WinZip advanced encryption, 7-Zip, password protected iOS backup files, PGP password files, BCArchive, BCTextEncoder, ABICoder, AdvancedFileLock, AShampoo, CryptoForge, Cypherus, and more.
The PRTK tool will be presented in detail in the next chapter.
Data visualization
Data visualization is a feature that provides a graphical interface to enhance understanding and analysis of the files and e-mails in a case. You view data based on the file and e-mail dates.
Data visualization supports the following data types:
· File data: This lets you view file data from either the Explore tab or the Overview tab
· E-mail data: This lets you view e-mail data from the Email tab
· Internet browser history: This lets you view Internet browser history data
To open data visualization, see the Explorer, Overview, or Email tab to select your dataset. Click on Tools and select Visualization.
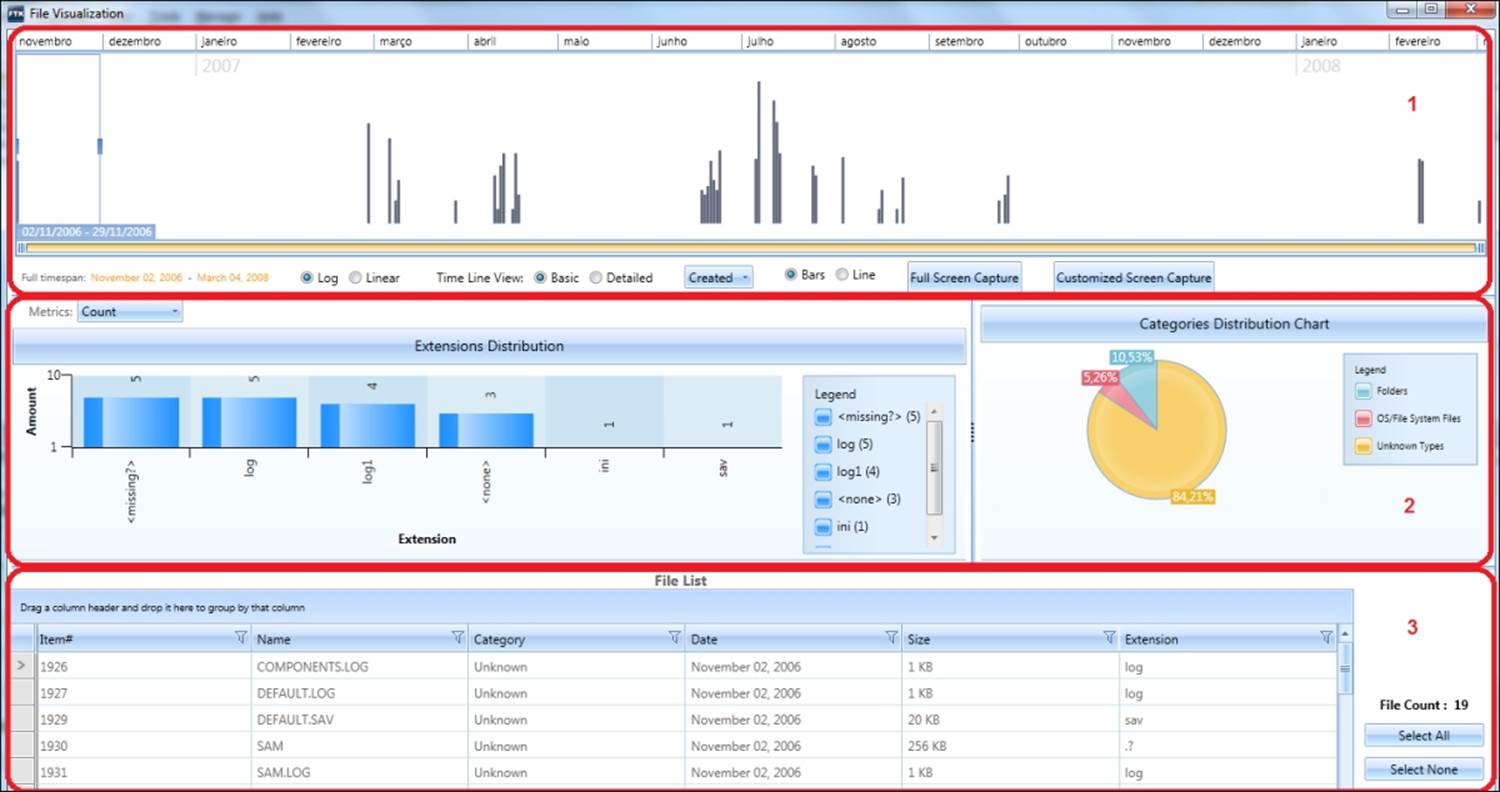
Data visualization has the following three main components:
· Time line pane: This provides graphics that represent the available data
· Dashboard: This provides graphical chart panes of the data
· Data list pane: This provides a list of the data items
Tip
Normally, to use the data visualization feature, you need a separate license. Check this information at the time of acquisition of the solution.
The Single-node enterprise
As mentioned in Chapter 1, Getting Started with Computer Forensics Using FTK, to conduct a remote acquisition through the network, you need a product in the enterprise version, such as the AD of AccessData Enterprise.
However, a very interesting feature of FTK forensics is that it allows this remote acquisition limited to a single agent called Single-node enterprise. To use this feature, perform the following steps:
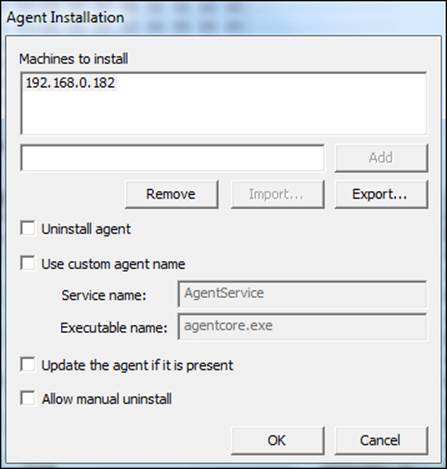
1. Click on Tools and select Push Agents.
2. Insert the IP address or hostname of the machine that you want to acquire and click on Add.
3. Click on OK.
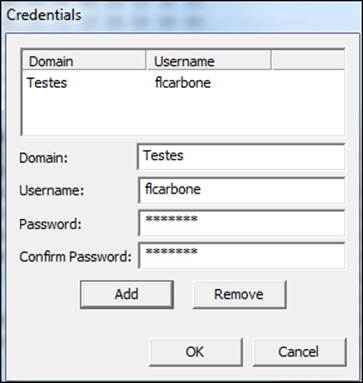
4. Insert the credentials information of the remote machine or of your active directory structure and click on Add.
5. Click on OK to start the deploy agent process.
You may also run the agent manually. It is located in the path C:\Program Files\AccessData\Forensic Toolkit\5.0\bin\Agent.
Once an agent is distributed to the remote machine, you can connect this device and perform a pre-analysis or data acquisition by performing the following steps:
1. Click on Evidence and then select Add Remote Data.
2. Insert the remote IP address and click on OK.
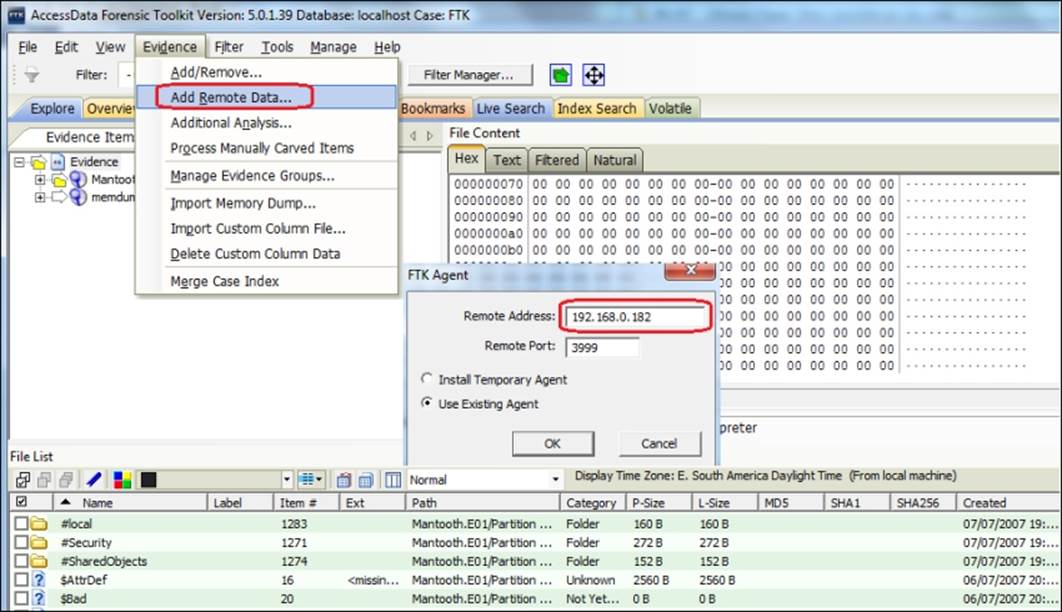
The machine will be added as an evidence allowing the analysis or acquisition process.
Tip
Check if the TCP port 3999 (default port) is enabled on the firewall and if the WMI service is enabled and running.
Advanced volatile and memory analysis
Volatile data is information that changes frequently and is often lost upon powering down the computer. The acquisition of this type of information should be made with the equipment powered on, which is known as live acquisition.
Volatile data will include information about the running process, network connections, clipboard contents, and data in memory. This information may be critical to the discovery of the cause of an incident or to understand a specific behavior.
As seen in previous chapters, the FTK imager can help in the collection of this data, specifically memory acquisition. Once collected, you can do a deeper analysis using the platform FTK.
To start the memory analysis, firstly add the file of dump in your case as follows:
1. Click on Evidence and select Import Memory Dump.
2. Once added, select the Volatile tab to see all the extracted data of the evidence.
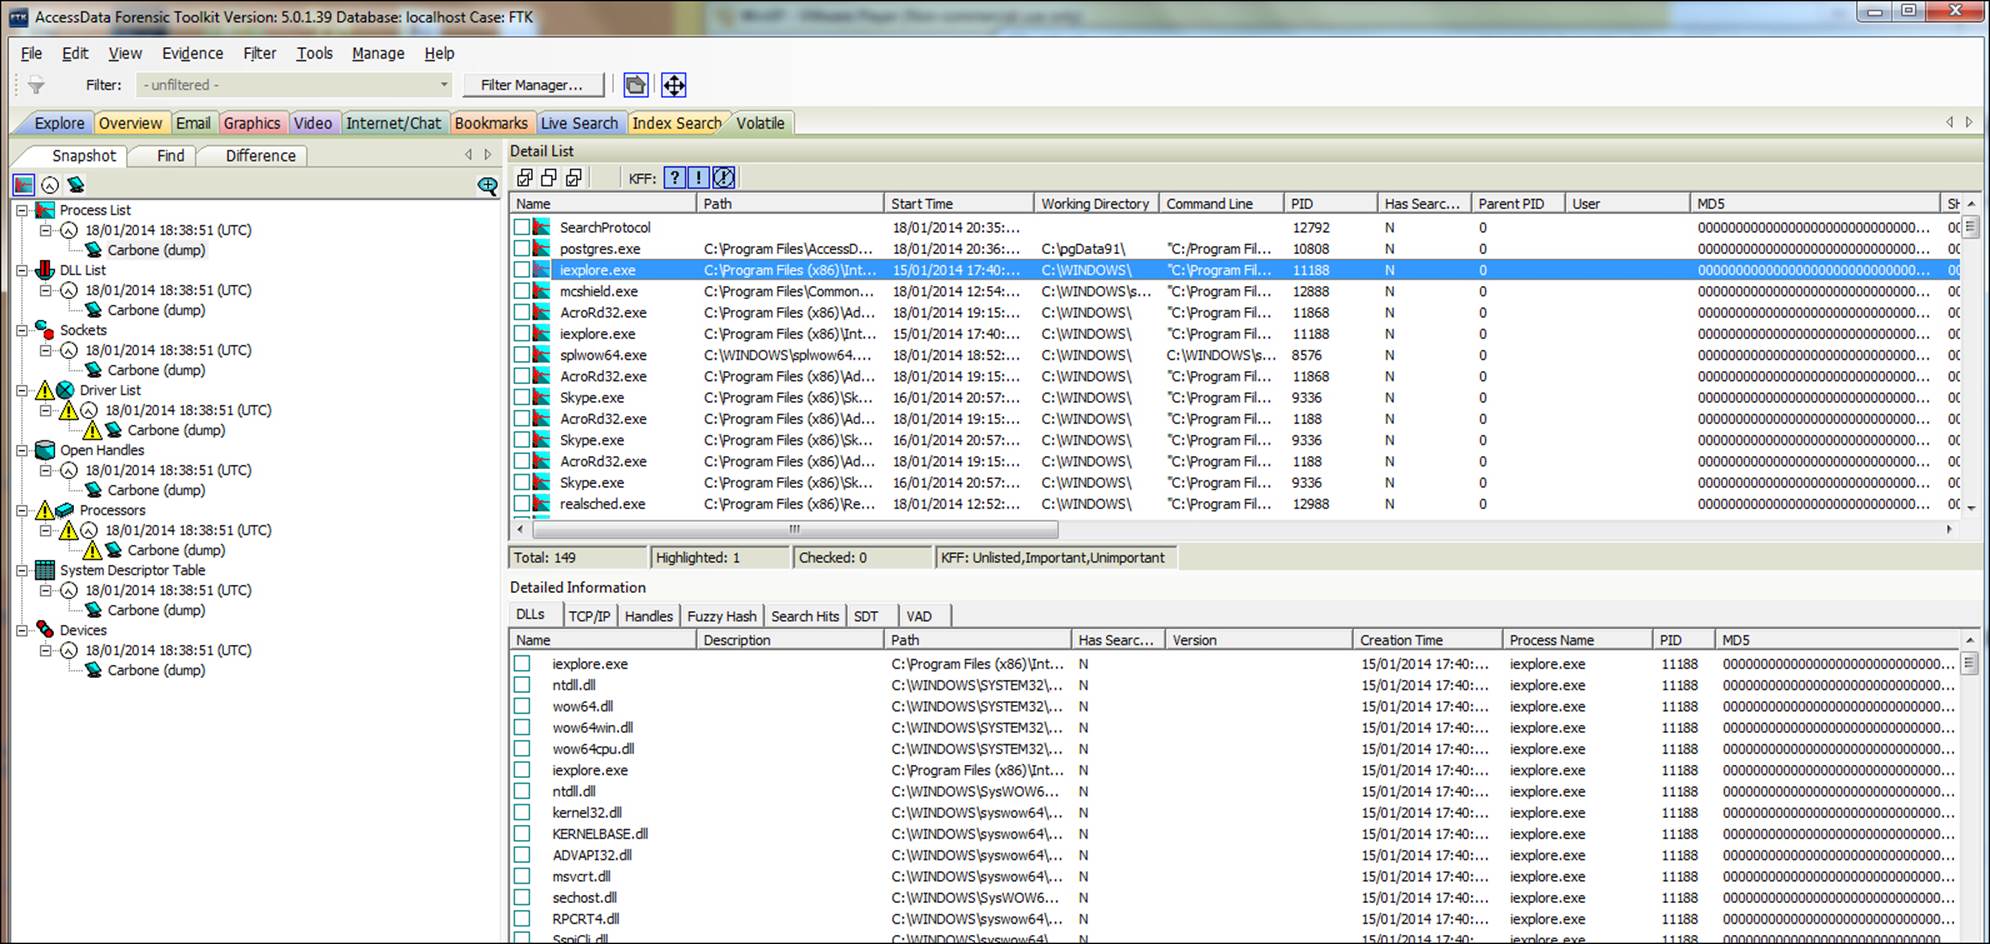
The information is presented in a classified and categorized form using a friendly FTK interface, to help the process of analysis.
Explicit Image Detection
If your investigation case has some relation with the search of explicit material, you can use Explicit Image Detection (EID) to locate this kind of content in evidence, thus avoiding a manual search of this information.
To execute EID analysis, perform the following steps:
1. Click on Evidence and select Additional Analysis.
2. Select the Indexing/Tools tab.
3. In the section Other Tools, select the Explicit Image Detection option.
4. Choose the tree scan type options and click on OK.
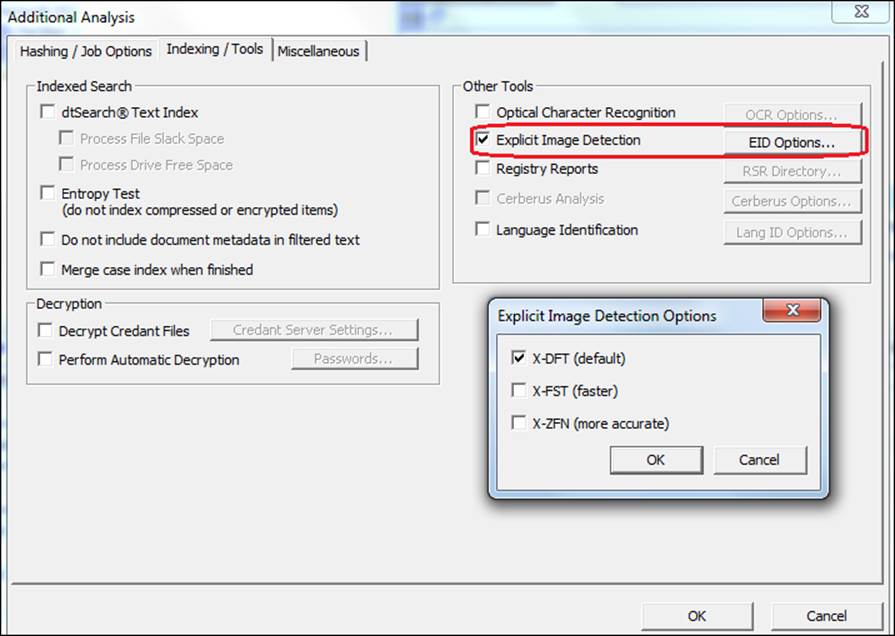
The difference between the types of scans is related to the accuracy of research, which may have an impact on the time to complete the process if you choose higher accuracy.
To visualize the results of the analysis of EID, just use the filters related to Explicit Images Folder.
Tip
Normally, to use the feature of EID, you need a separate license. Check this information at the time of acquisition of the solution.
Malware triage and analysis with Cerberus
Cerberus lets you do a malware analysis on executable binaries. You can use Cerberus to analyze executable binaries on a disk, on a network share, or unpacked in system memory.
Cerberus consists of the following stages of analysis:
· Threat analysis: This is general file and metadata analysis that identifies potentially malicious code
· Static analysis: This is disassembly analysis that examines elements of the code
To use Cerberus is very simple; just perform the following steps:
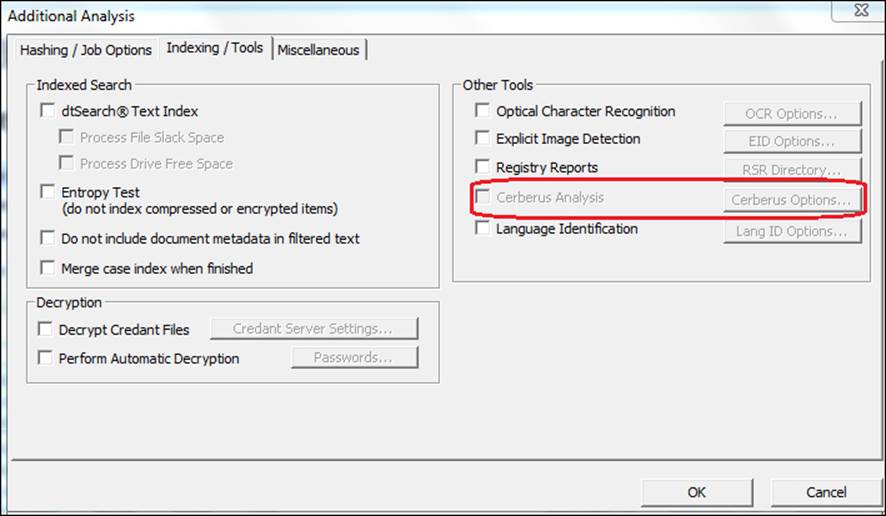
1. Click on Evidence and select Additional Analysis.
2. Select the Indexing/Tools tab.
3. In the section Other Tools, select the Cerberus Analysis option.
The results of the Cerberus analysis generates and assigns a threat score to the executable binary as seen in the following screenshot:
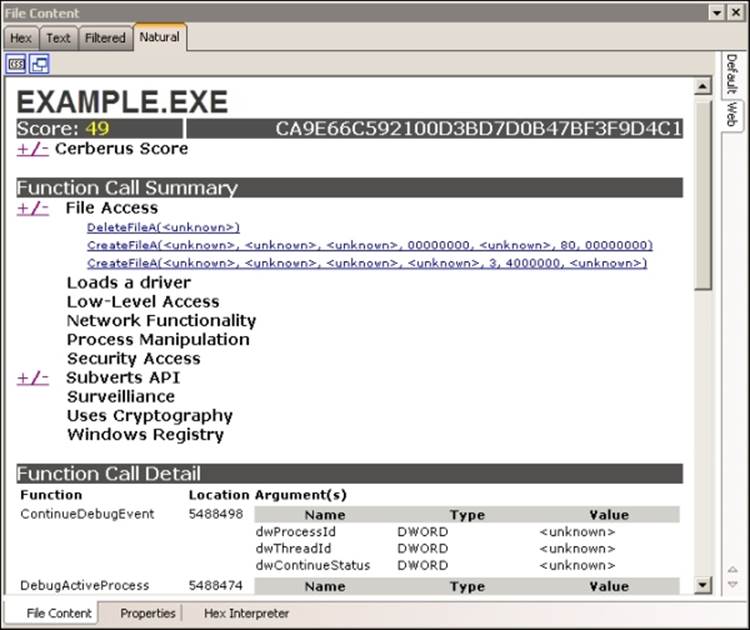
To visualize the results of the analysis of Cerberus, just use the filters related to Cerberus Score or Cerberus Static Analysis.
Tip
Normally, to use the feature of Cerberus, you need a separate license. Check this information at the time of acquisition of the solution.
Mobile Phone Examiner
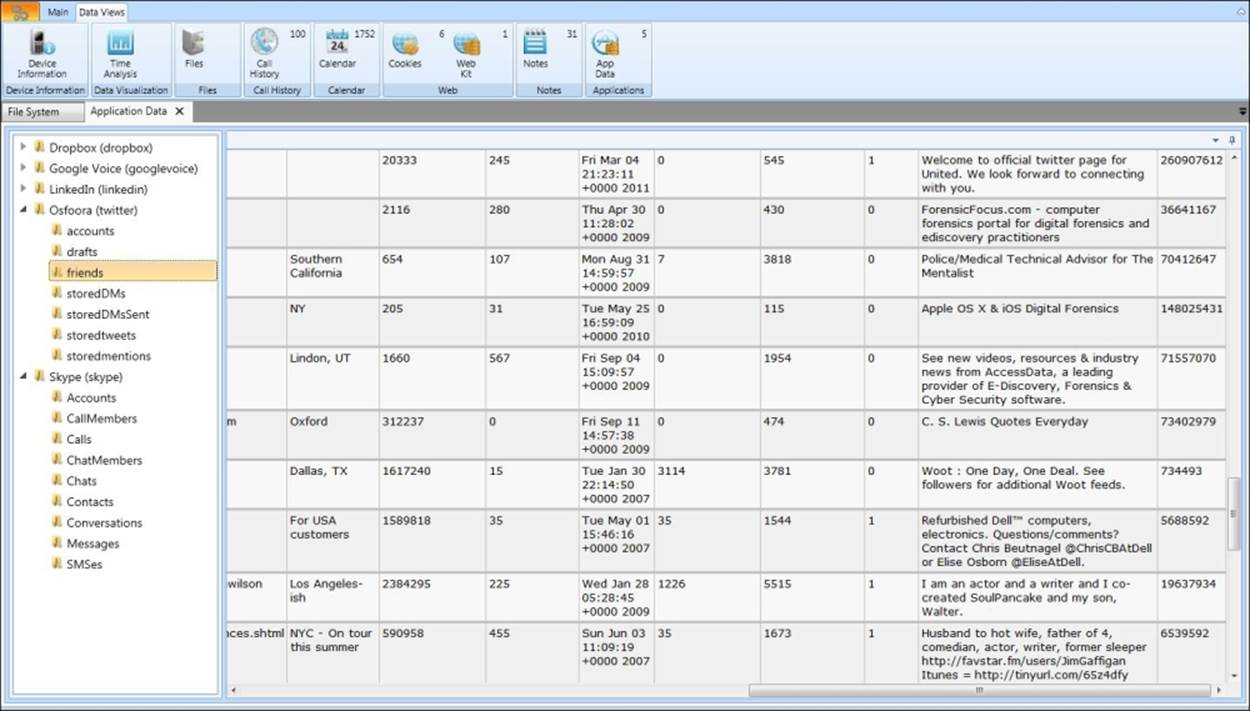
Smartphones have become one of the most important evidence to be analyzed during an investigation as they may contain information relevant to the case such as files, photos and videos, call records, and geolocations.
The Mobile Phone Examiner (MPE) is a solution for mobile forensics that delivers an intuitive and simple interface, data visualization, and smart device support in a single forensic interface. MPE images integrate seamlessly with the FTK, allowing you to correlate evidence from multiple mobile devices with evidence from multiple computers within a single interface.
The following is a sample of smartphone analysis with MPE:
Summary
This chapter covered the main features of the new version of the Forensics Tool Kit. Activities that usually take a long time to execute can be performed in a much simpler way with the help of these new features.
The FTK 5 is a complete platform for the acquisition and analysis of many different types of digital media, and enables the extraction of evidence quickly and efficiently. Its new features provide an integrated and easy-to-use platform to help in the examiner's work.
The next chapter will discuss in detail the tool that cracks and recovers passwords, PRTK.
All materials on the site are licensed Creative Commons Attribution-Sharealike 3.0 Unported CC BY-SA 3.0 & GNU Free Documentation License (GFDL)
If you are the copyright holder of any material contained on our site and intend to remove it, please contact our site administrator for approval.
© 2016-2025 All site design rights belong to S.Y.A.