Introducing GitHub: A Non-Technical Guide (2014)
Chapter 5. Creating and Configuring
So far we’ve looked at how to view, edit, and collaborate on projects. In this chapter we’re going to go through the process of creating and configuring a GitHub repository for a new project.
If you’re working with developers on a contract basis, you’ll want to create the repository they use to work on. By creating the repo, it means that you’ll always have access to the code and the additional information contained in pull requests, issues, and wikis. Once you’ve created the repo, you can then add the developers as collaborators so they’ll have access to the project—until you decide to revoke it. You do not want contract developers to create the repo for you. If they do, they’ll be able to remove you from the project at any time.
Creating a Repository
To create a new project on GitHub, click the + sign to the right of your username at the top right of the page. Then click the “New repository” option in the drop-down list. You’ll see the new repository form, as shown in Figure 5-1.
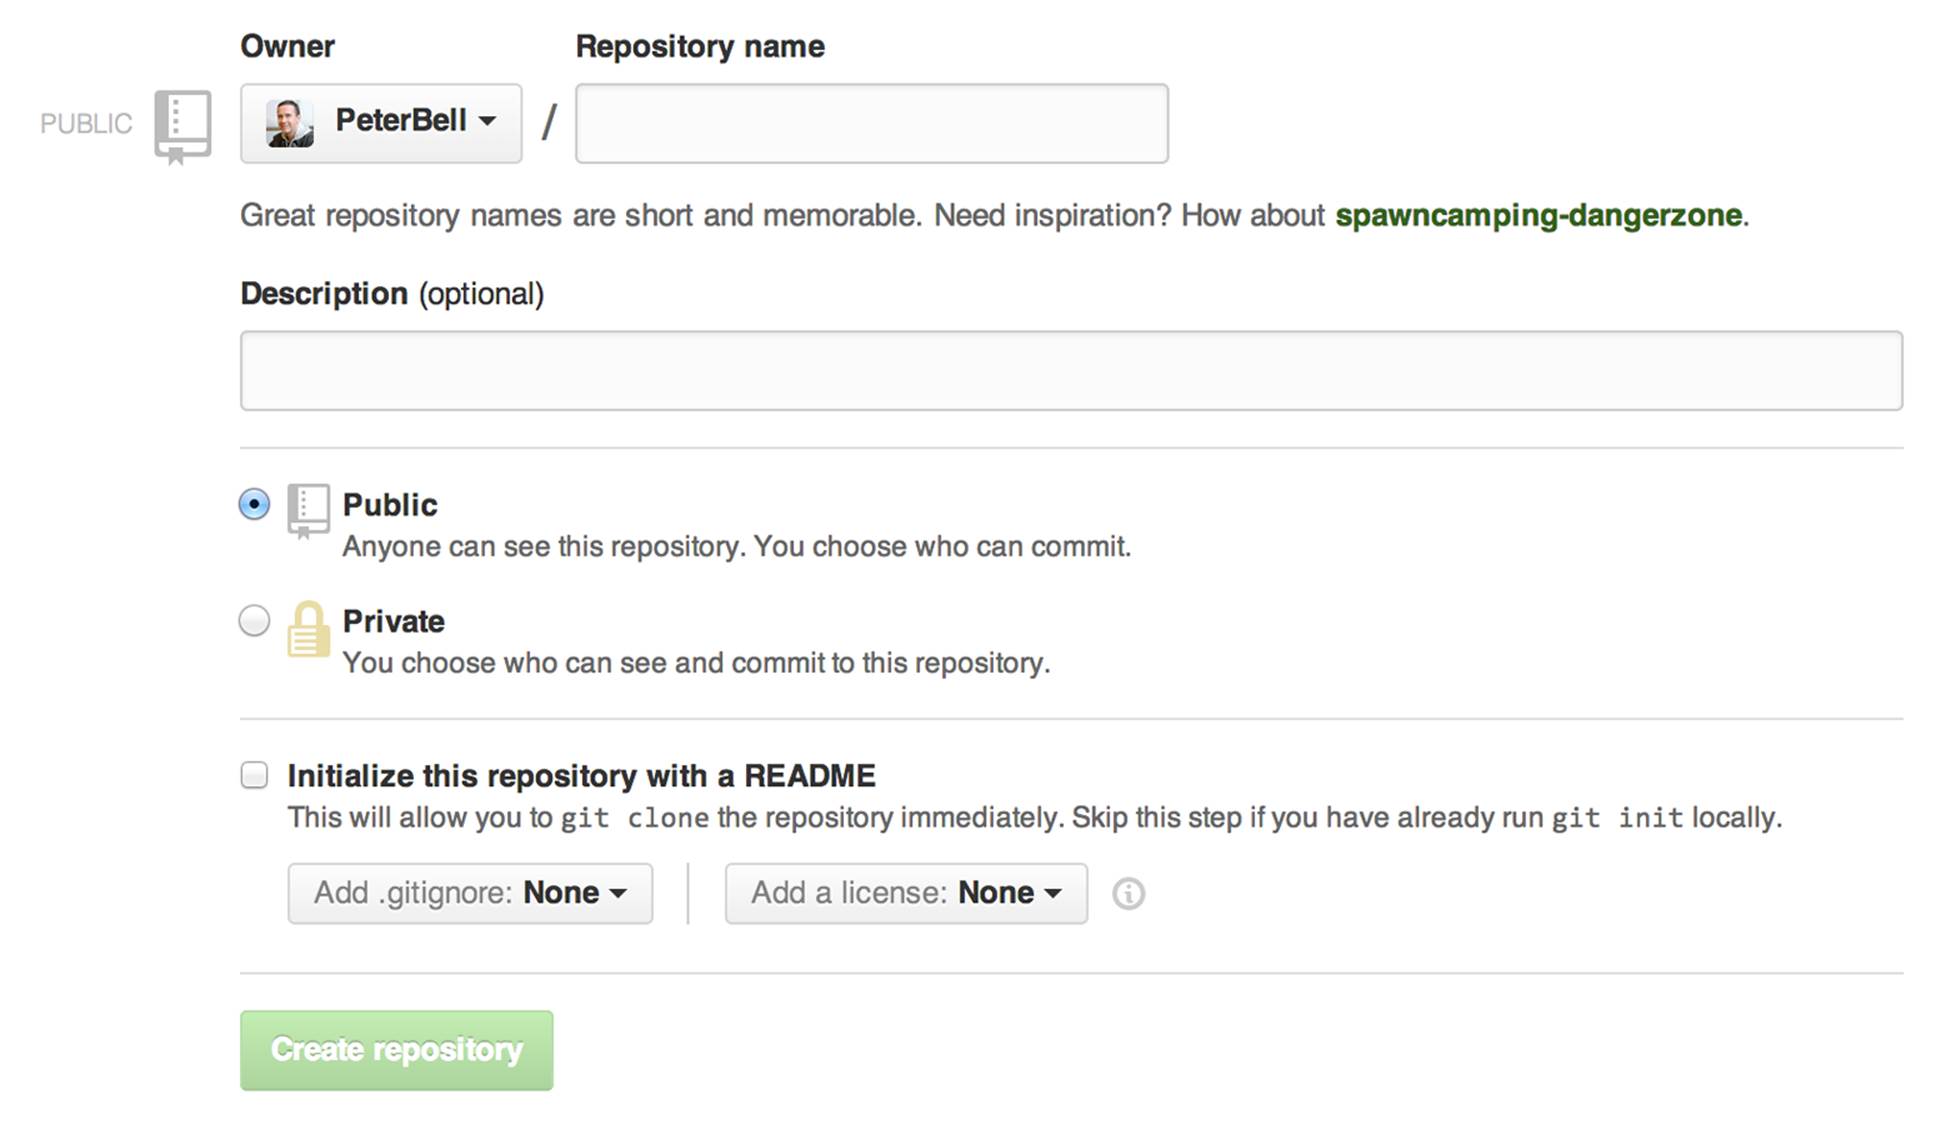
Figure 5-1. The new repository form
The first thing to do is decide whether to create the repository under your username or under an organization. You can see in Figure 5-2 a list of the possible organizations to which I could add a new repository. If you don’t have access to any organizations, you’ll just leave this defaulted to your username. Remember, you’ll always be able to transfer the project later if you want to.
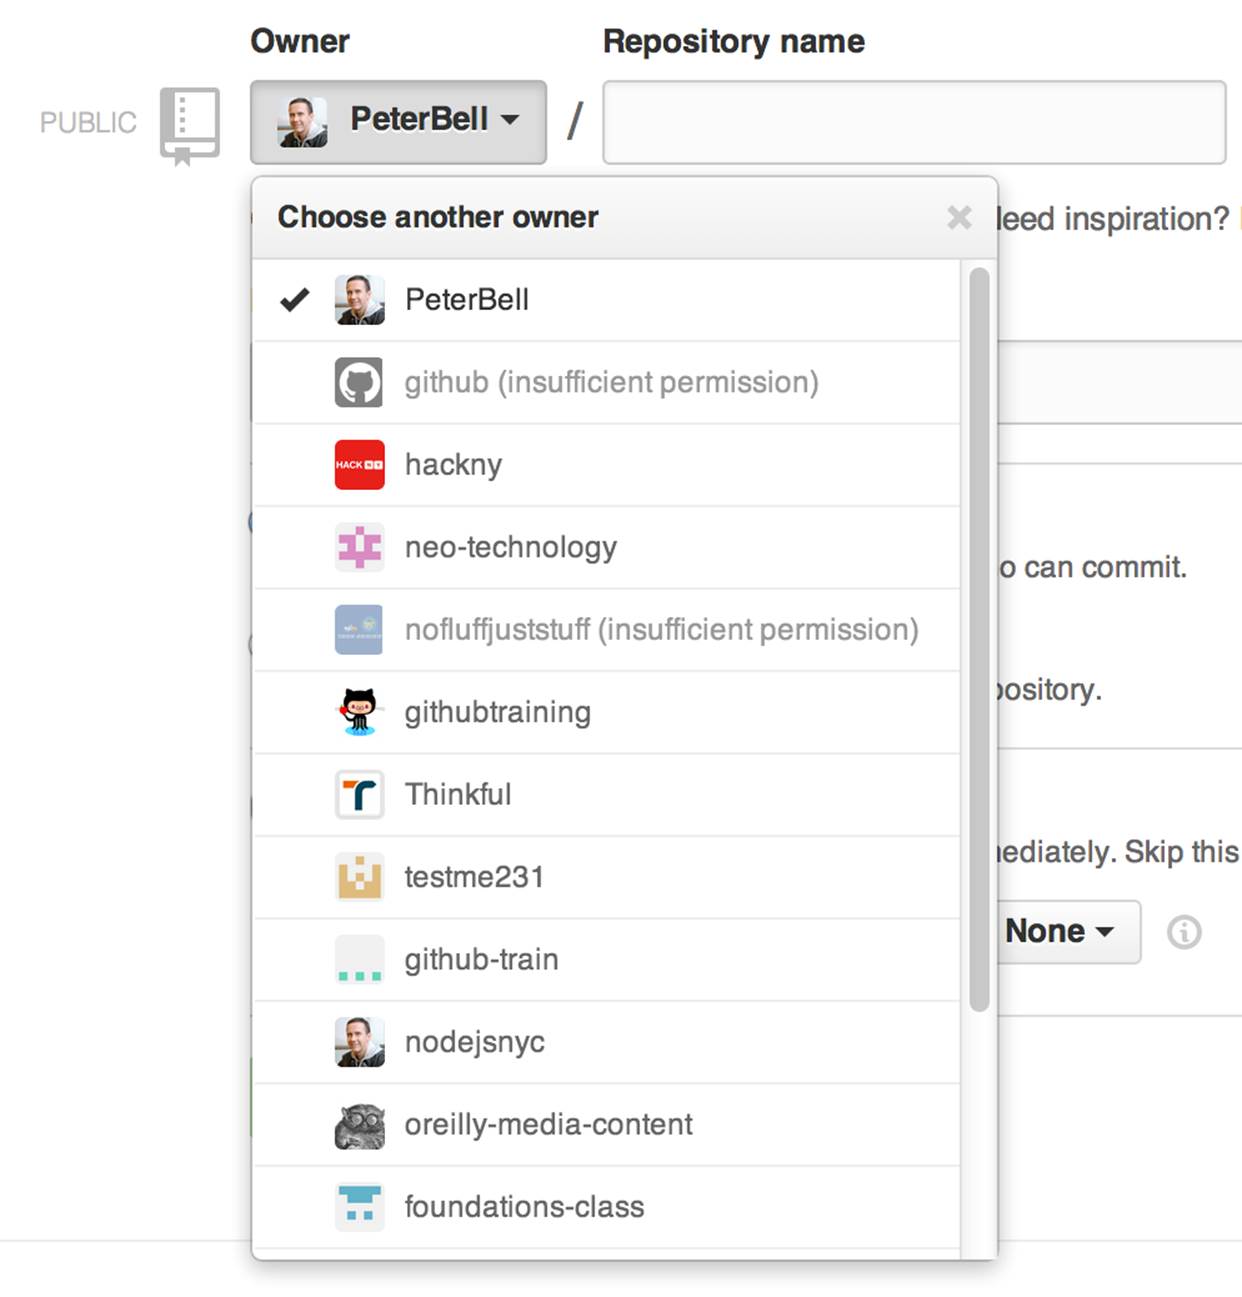
Figure 5-2. Selecting who should own the new repository
The next step is to give the repository a name. Names should be comprised of letters, numbers, hyphens, and/or underscores. Any other characters will be replaced with a hyphen.
After entering the name, you need to decide whether to make the repository private or not. Public repositories can be viewed by anyone. Private repositories can be viewed only by people that you specifically invite as collaborators. In either case, the project can be modified only by people you add as collaborators.
Generally, if your code is commercially sensitive, you’ll pay the few dollars a month to be able to keep it private. If it isn’t, you can just create a public repository, and it won’t cost you a thing. If you don’t see the option to make the repository private, you’ll need to upgrade the user or organization you’re creating the project under to allow it to host private repositories.
The final decision you’ll need to make when creating a new repository is whether or not to initialize it with a README file by checking the checkbox, as shown in Figure 5-3.

Figure 5-3. Initializing a repository with a README.md
Most developers will not check the box to initialize the repo. They’ll just create a project locally, save it using Git, and then push their work up to GitHub. However, if you’re not a developer, you’ll probably want to initialize the project with a README as it allows you to create a project without having to create a local Git repository and upload it. Then your developers will be able to clone (download) the repo and add all of their code. Once you’re ready, click the Create repository button, and the new repo will be created.
If you initialize the repo with a README, it will create a project and take you to a screen that looks something like Figure 5-4. That project is ready for your developers to clone and start committing to.
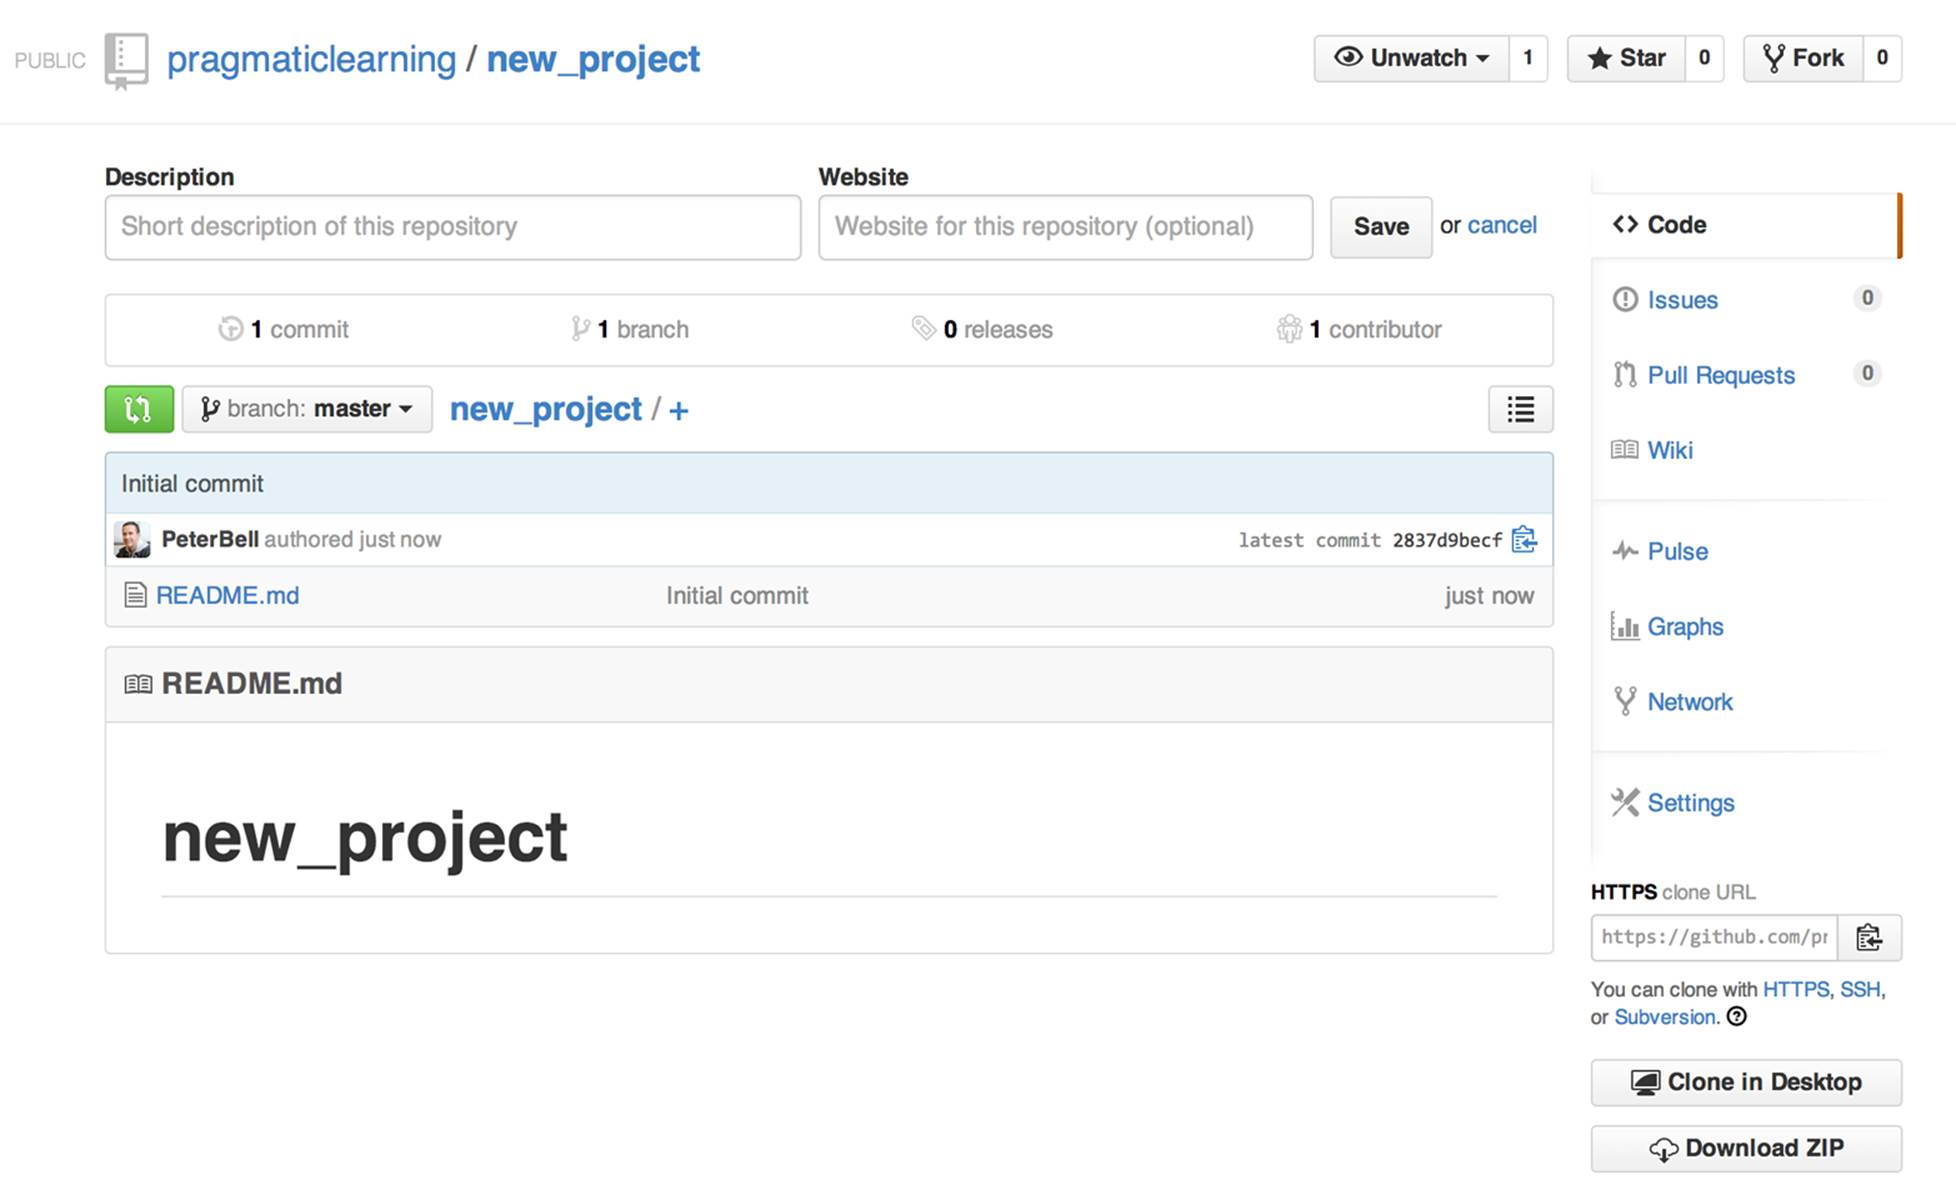
Figure 5-4. A new project initialized with a README.md
If you don’t initialize your repo, you’ll see a screen like Figure 5-5. Notice that you or someone on your team is going to have to upload an existing Git repository before anyone will be able to clone or work with this repository.
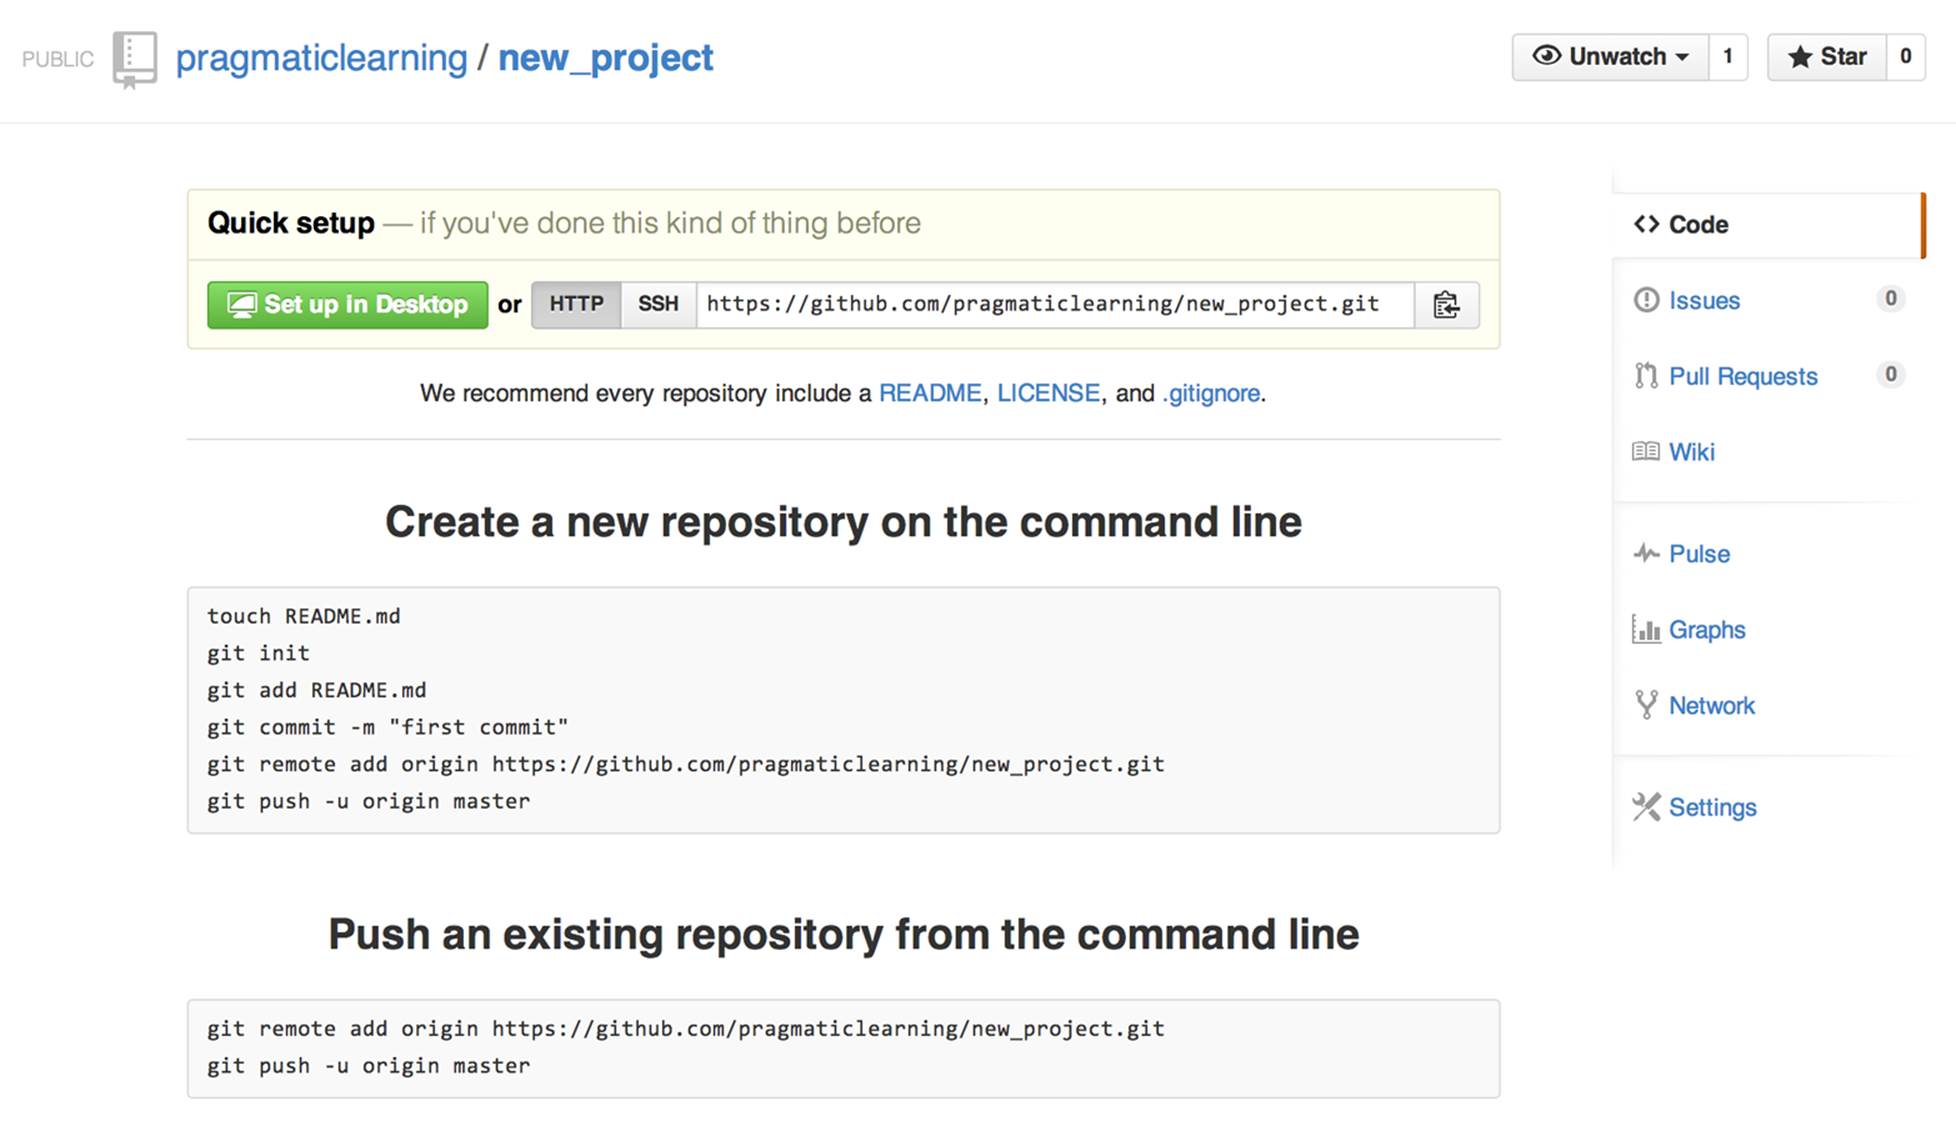
Figure 5-5. A new project that needs a repository to be uploaded
Adding Collaborators
Once you’ve created and initialized your repository, the next step is to add any collaborators. If you’ve created a public repository, you may not need to add collaborators, especially if you’re just working with people occasionally. Ask them to fork your repo and send you a pull request any time they have a contribution to make. However, if you created a private repo or you have people who will be working on the project regularly, you should add them as collaborators.
If you’ve added the repository to an organization, you can manage access using teams, which we’ll look at later in this chapter. However, if you just added the repo to your personal account, you’ll have to add collaborators individually.
To add collaborators, click the Settings link in the bottom-right corner of the screen and then click the Collaborators tab, as shown in Figure 5-6. You may be asked for your password just to confirm that it’s you making the change.
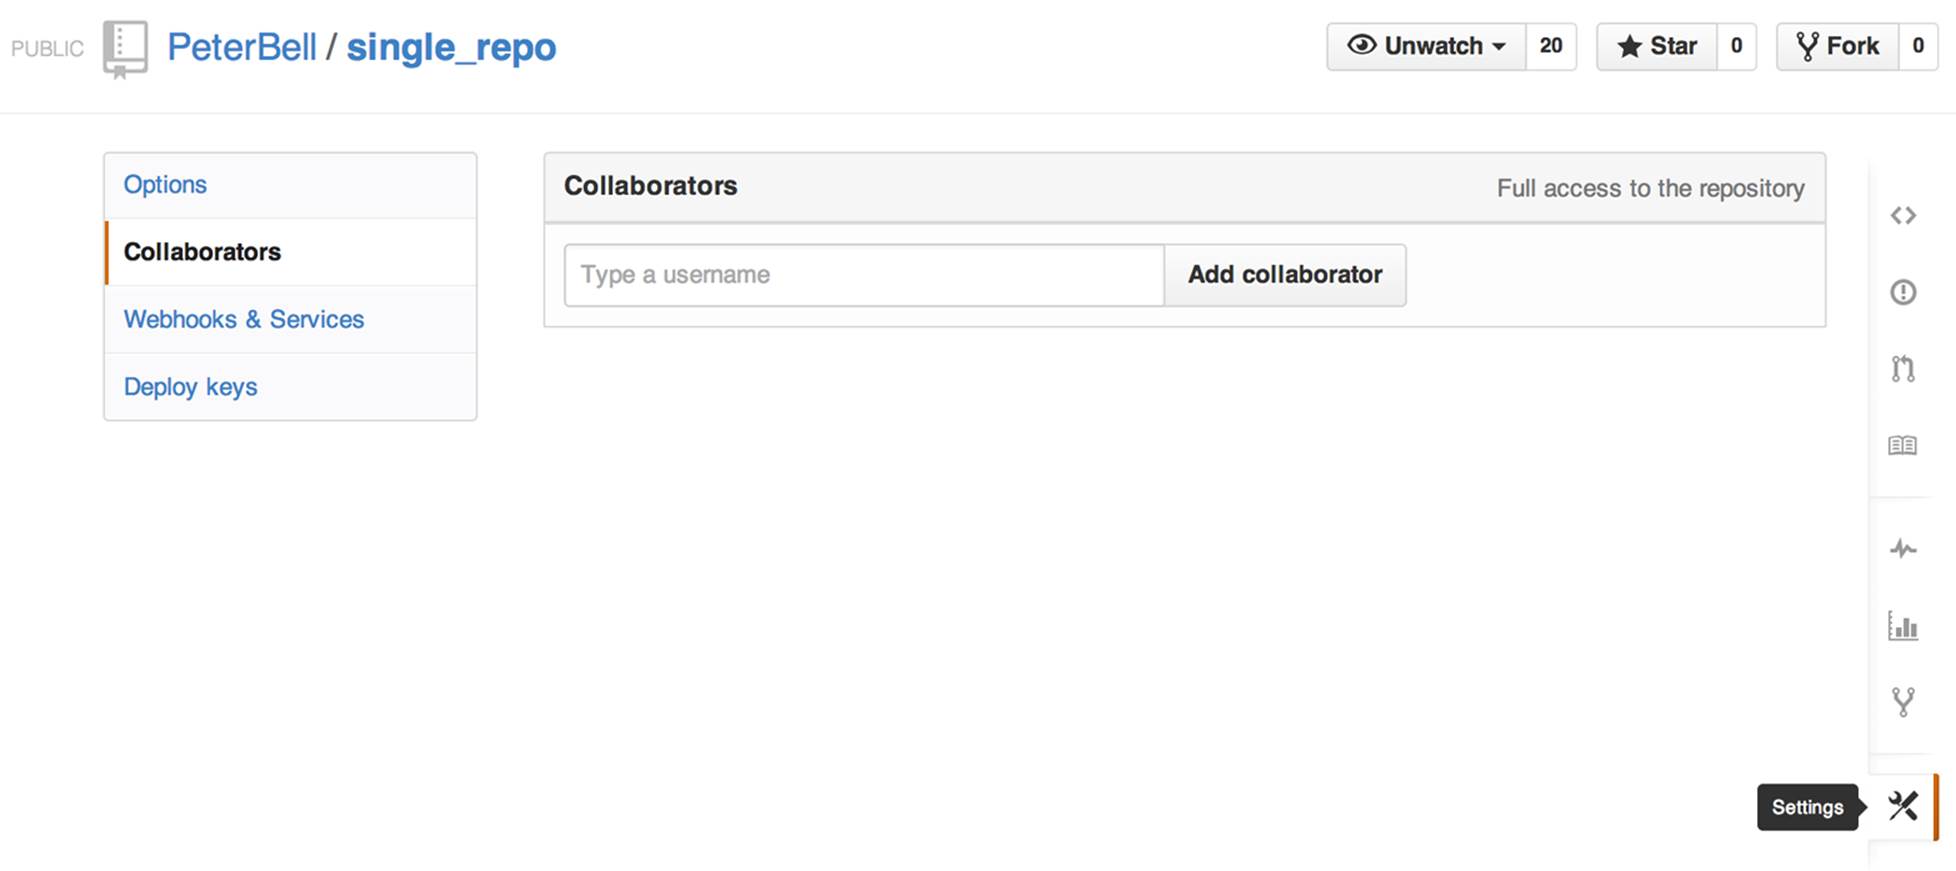
Figure 5-6. The Settings link and the Collaborators tab
To add collaborators, you’ll need to know the GitHub usernames of the people you want to work with. Start typing a username, and the name will auto-complete, as shown in Figure 5-7. Select the auto-completed name and then click the “Add collaborator” button.
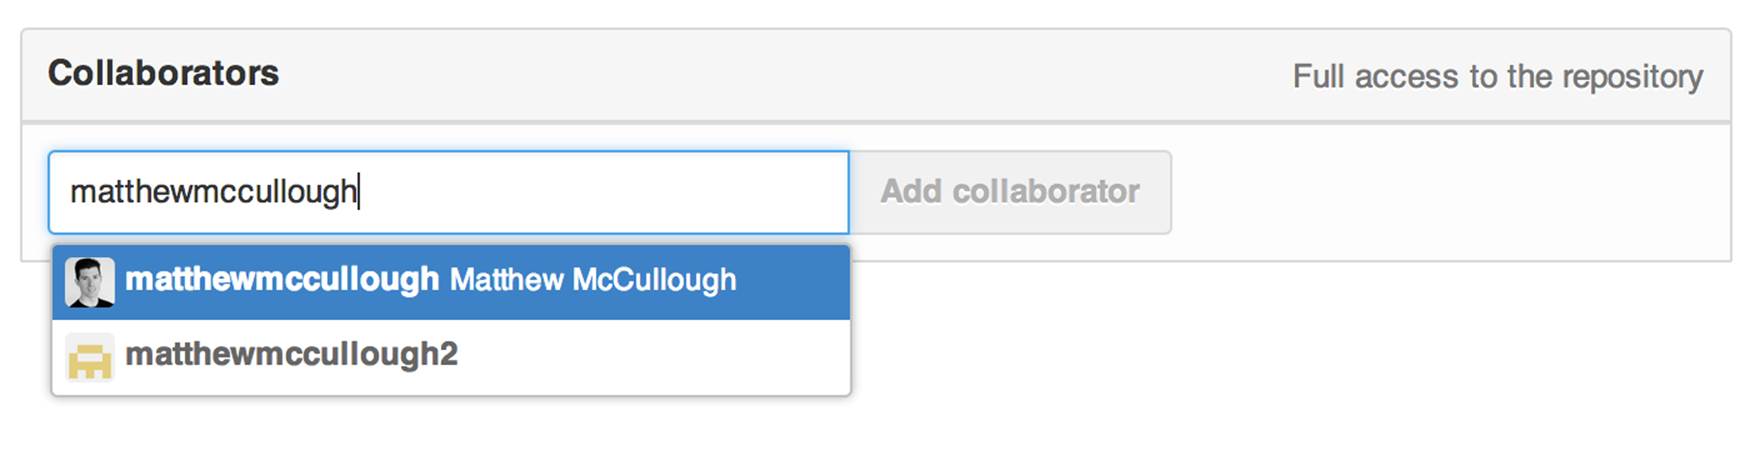
Figure 5-7. Auto-completion of a collaborator
Once you’ve added collaborators, it’s worth taking a little bit of time to go through the other configuration options to see if there’s anything else you want to set up.
Configuring a Repository
To configure a repository, start by clicking the Settings link at the bottom right of the page. By default you’ll go to the Options tab within Settings, as shown in Figure 5-8, which allows you to configure some high-level settings.
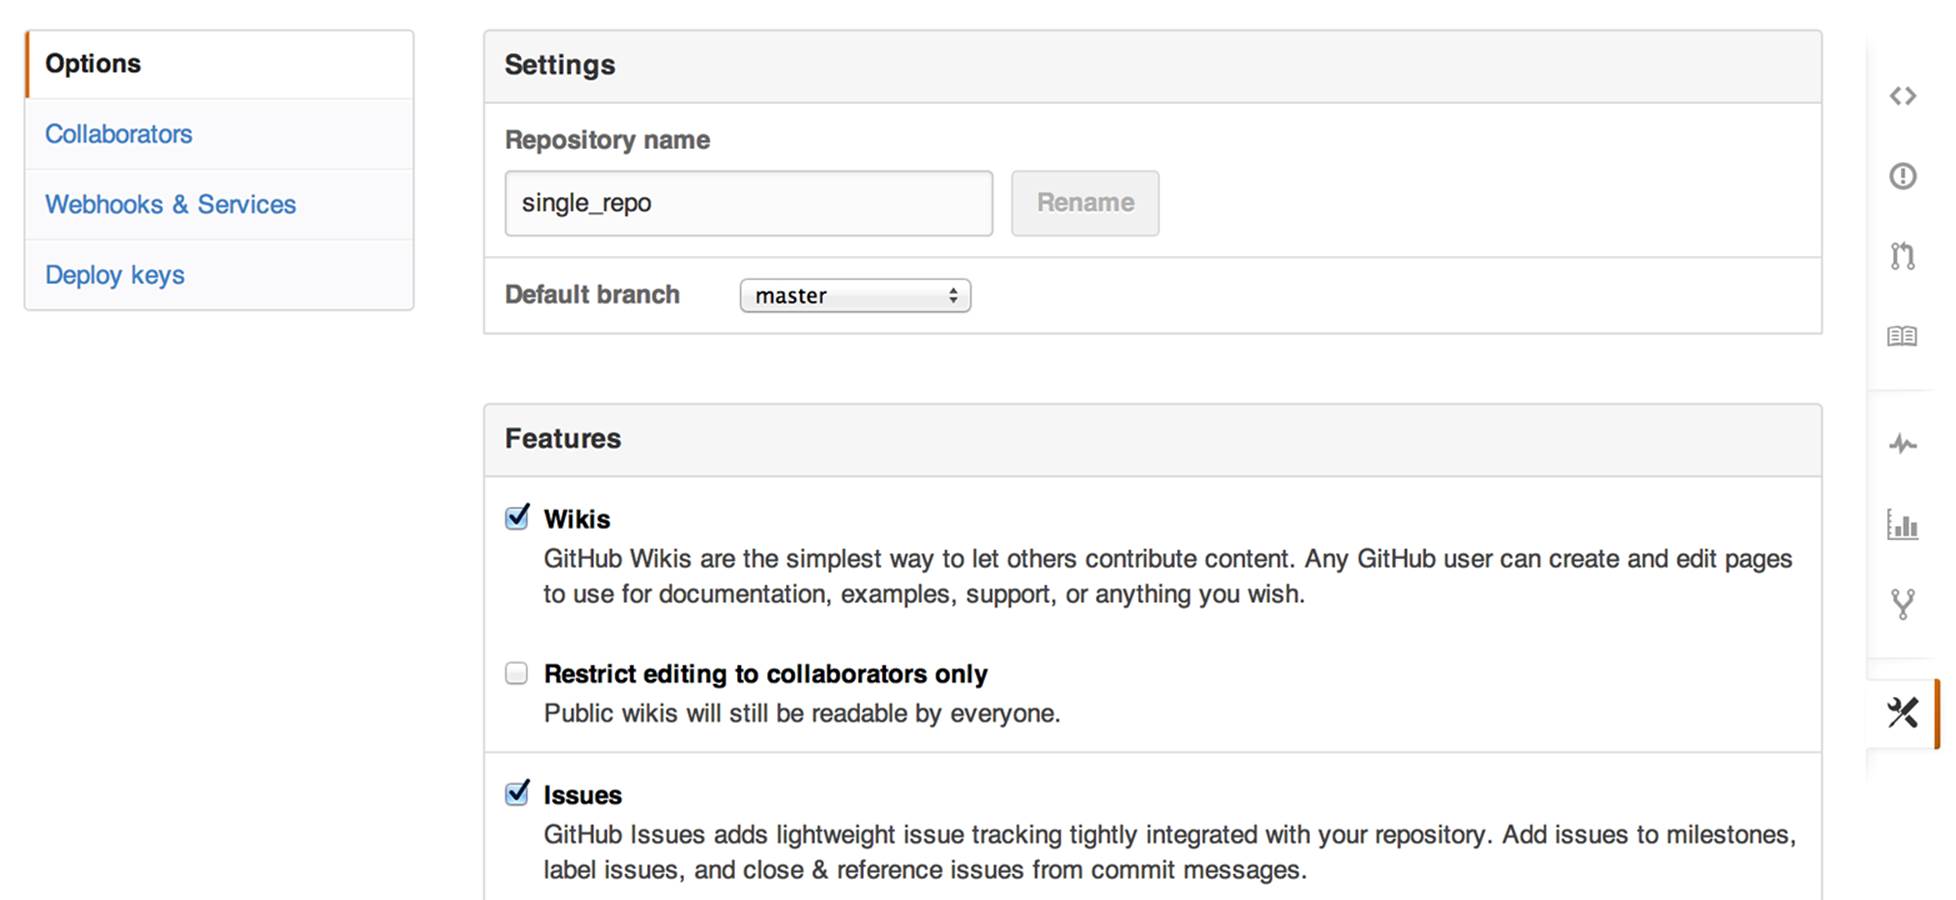
Figure 5-8. The Settings→Options screen
The first option is to rename the repository. If you change the repo name in the text box, the Rename button will become active, allowing you to change the name of the project. Don’t worry if your developers are already connected to the project. They won’t have to change anything—anybody using the old name or URL to access the project will be redirected automatically.
You also get the option to change the “Default branch” from master to any other branch. Generally it’s best to leave this option alone, but if your development team really wanted to create a new default branch, they could do so and you could make it the default branch here. The default branch is used for features like auto-closing of issues. Usually, when you have a commit message that says something like “closes #10” or “fixed #10,” when that commit is merged into the master branch, it will automatically close issue #10. However, it’s really when the commit gets merged into the default branch, so if you wanted to have a default branch named “trunk” or something else, you could do that if you really wanted to.
On the Settings→Options screen, you also get the chance to configure wikis and issues. By default, new projects have both wikis and issues enabled. Just uncheck the boxes to disable them. If you want to limit the wiki on a public project so that only collaborators can edit the content, check the necessary box.
As you go further down the Settings→Options screen, you’ll see some additional configuration settings, as shown in Figure 5-9.
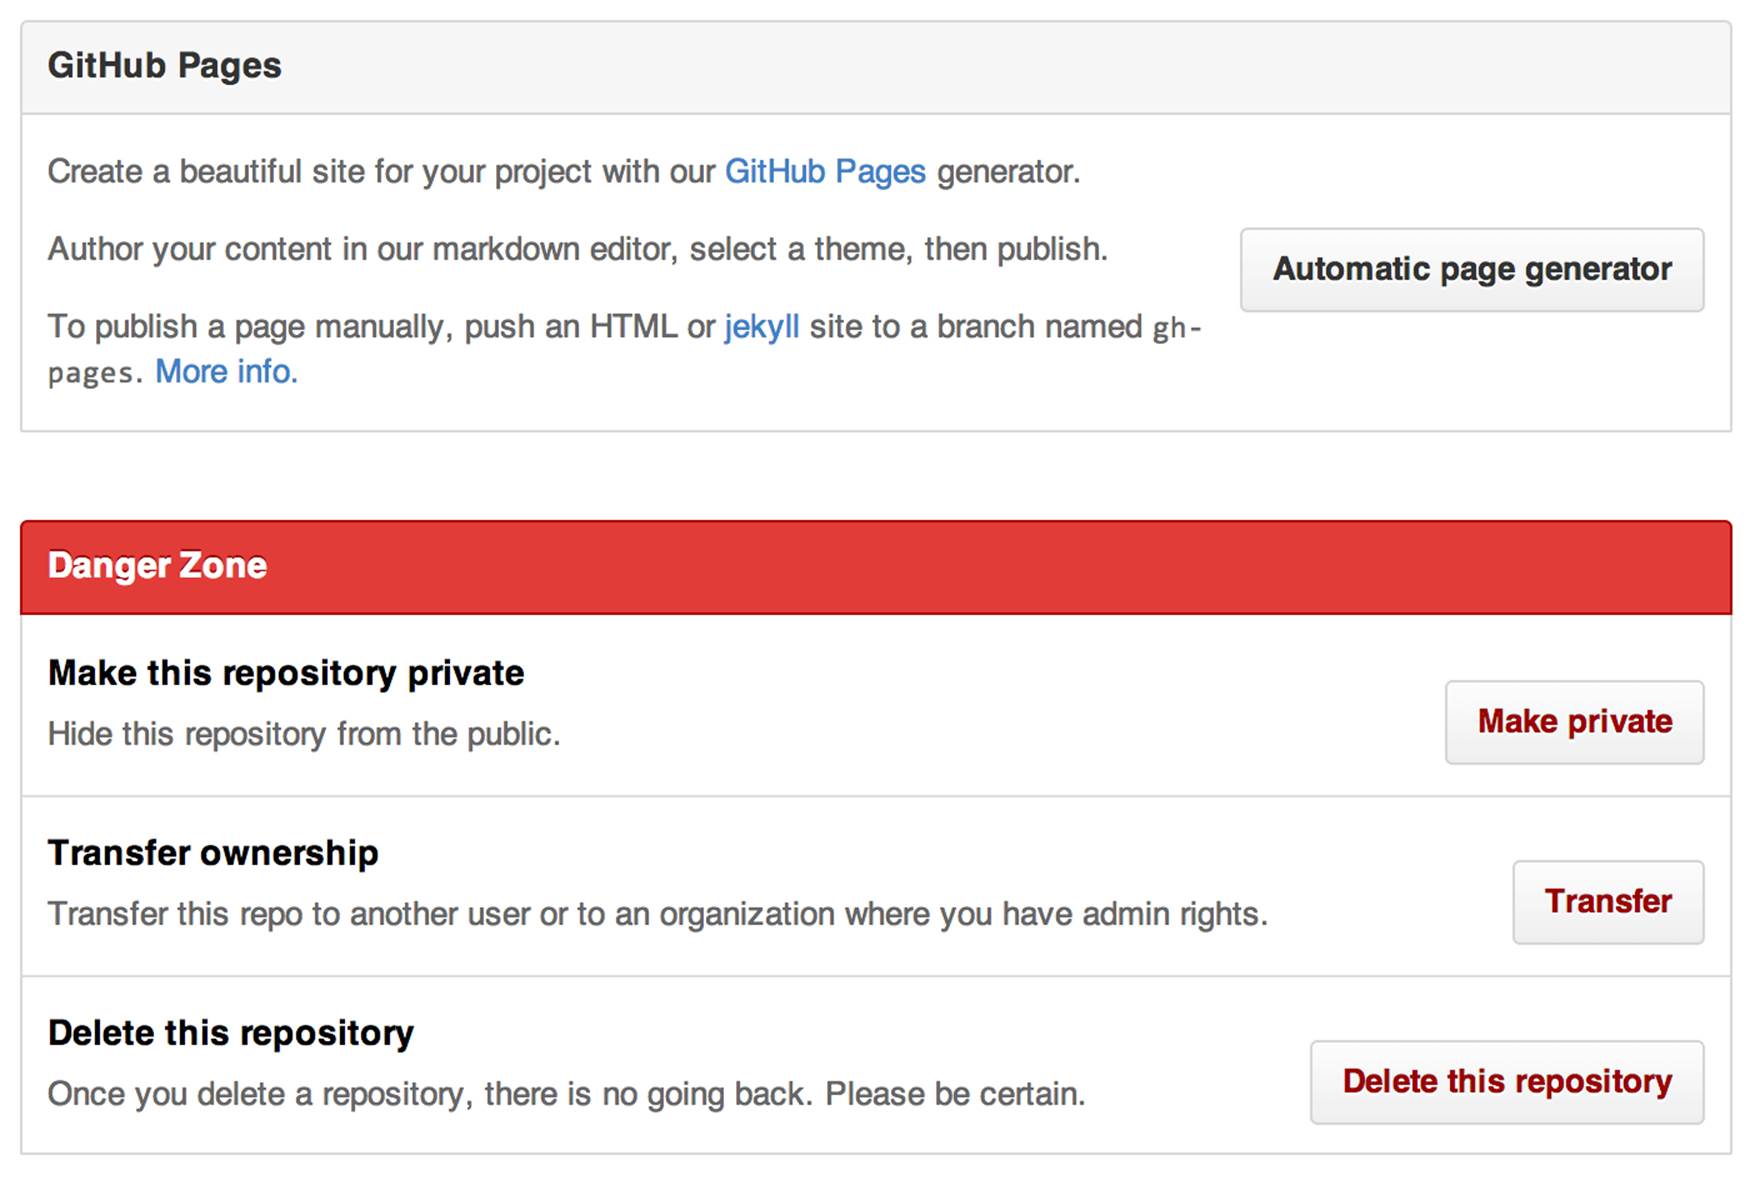
Figure 5-9. The Settings→Options screen (continued)
If you’d like to add a website to the project, click “Automatic page generator” in the GitHub Pages area to configure that.
Finally, we come to the “Danger Zone.” It allows you to change the accessibility of a project between private and public. It also gives you the option to transfer the ownership of the project to another user or organization and, if you really want, it allows you to delete the repository. Don’t worry about hitting the Delete button accidentally. If you click the Delete button, you’ll be asked to confirm that you really want to do that, as shown in Figure 5-10.
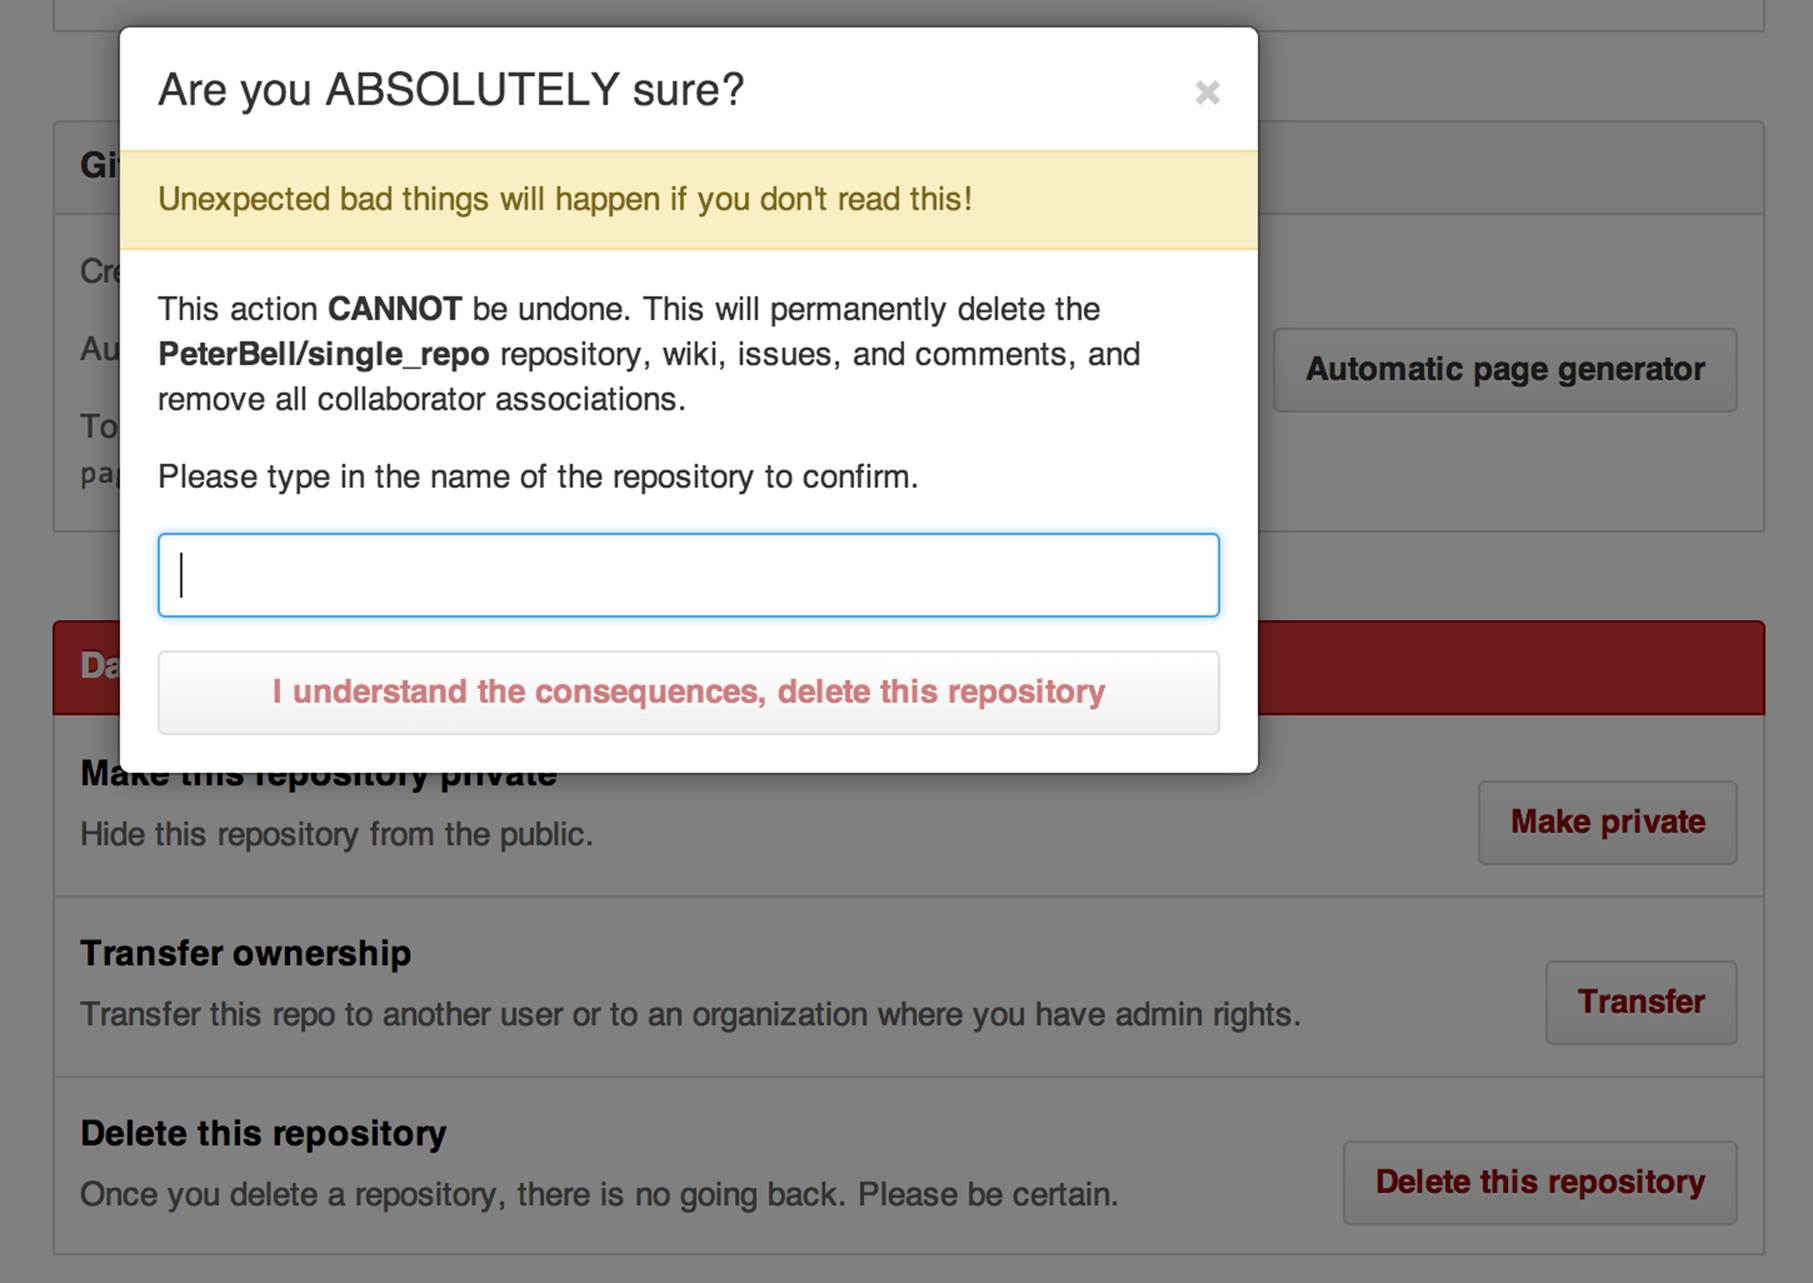
Figure 5-10. The Delete confirmation pop-up
Integrating with Other Systems
Sometimes you’ll want to connect GitHub to other pieces of software that you use—anything from continuous integration servers that regularly run automated tests, to project management or bug tracking software. There are three ways of connecting software to a GitHub repository.
One option is the GitHub API. Go to http://developer.github.com, as shown in Figure 5-11, and click the API link at the top of the page to learn how to use the GitHub API to do pretty much anything with a repository automatically.
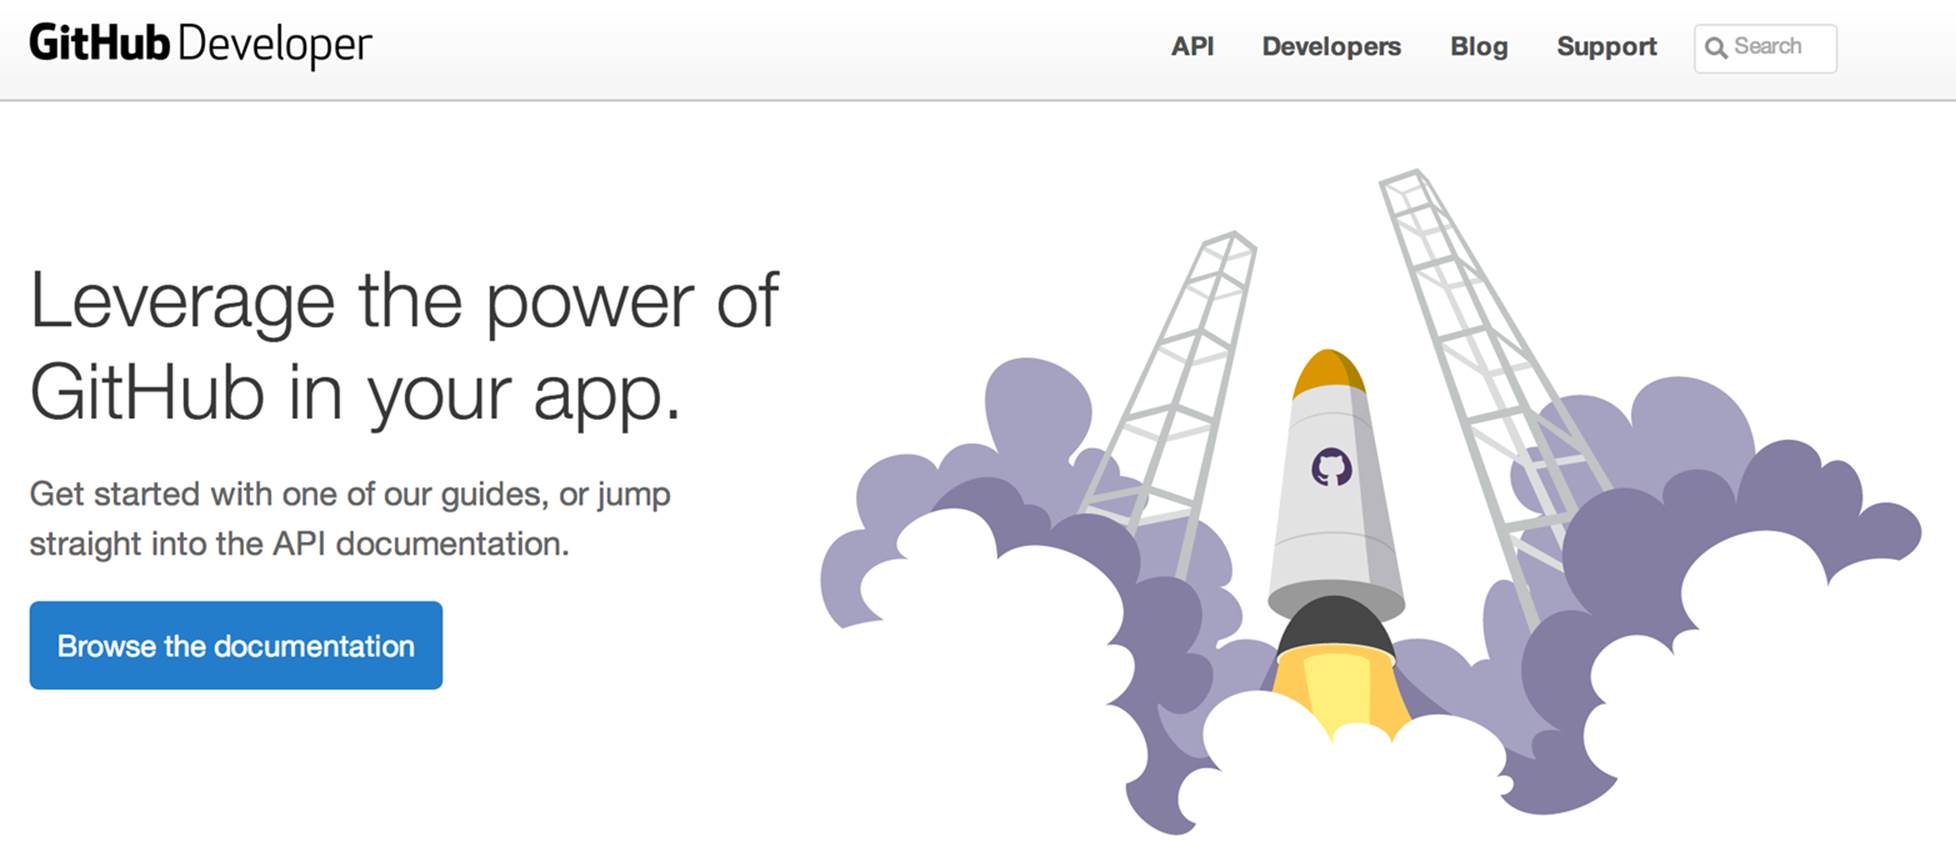
Figure 5-11. The GitHub developer page
The API allows your developers to query and change almost anything they want with a repository, but sometimes they’ll want to just be notified when a specific action occurs. For example, they might want their program to get notified every time someone adds a new issue or pushes work up to GitHub. If they want to have notifications automatically sent to their project, they should be using the Webhooks option that can be configured by going to Settings → Webhooks & Services, as shown in Figure 5-12.
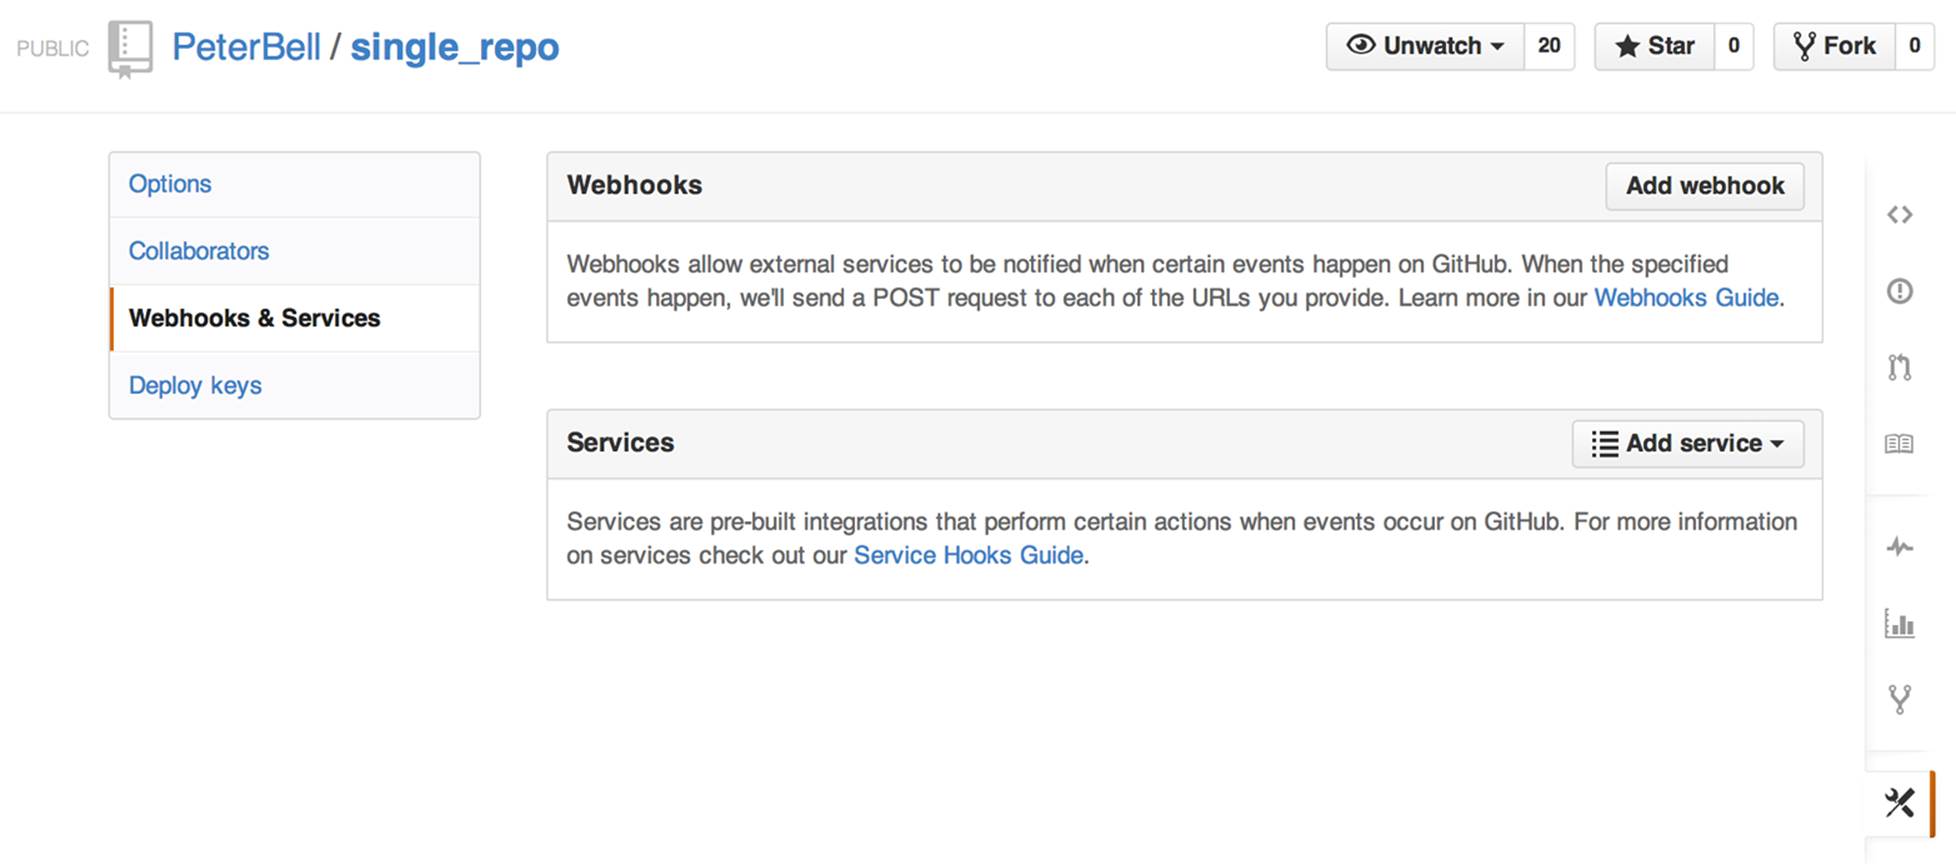
Figure 5-12. The Webhooks & Services page
Clicking the Add webhook button toward the top-right corner of the screen takes you to the “Add webhook” screen, as shown in Figure 5-13.
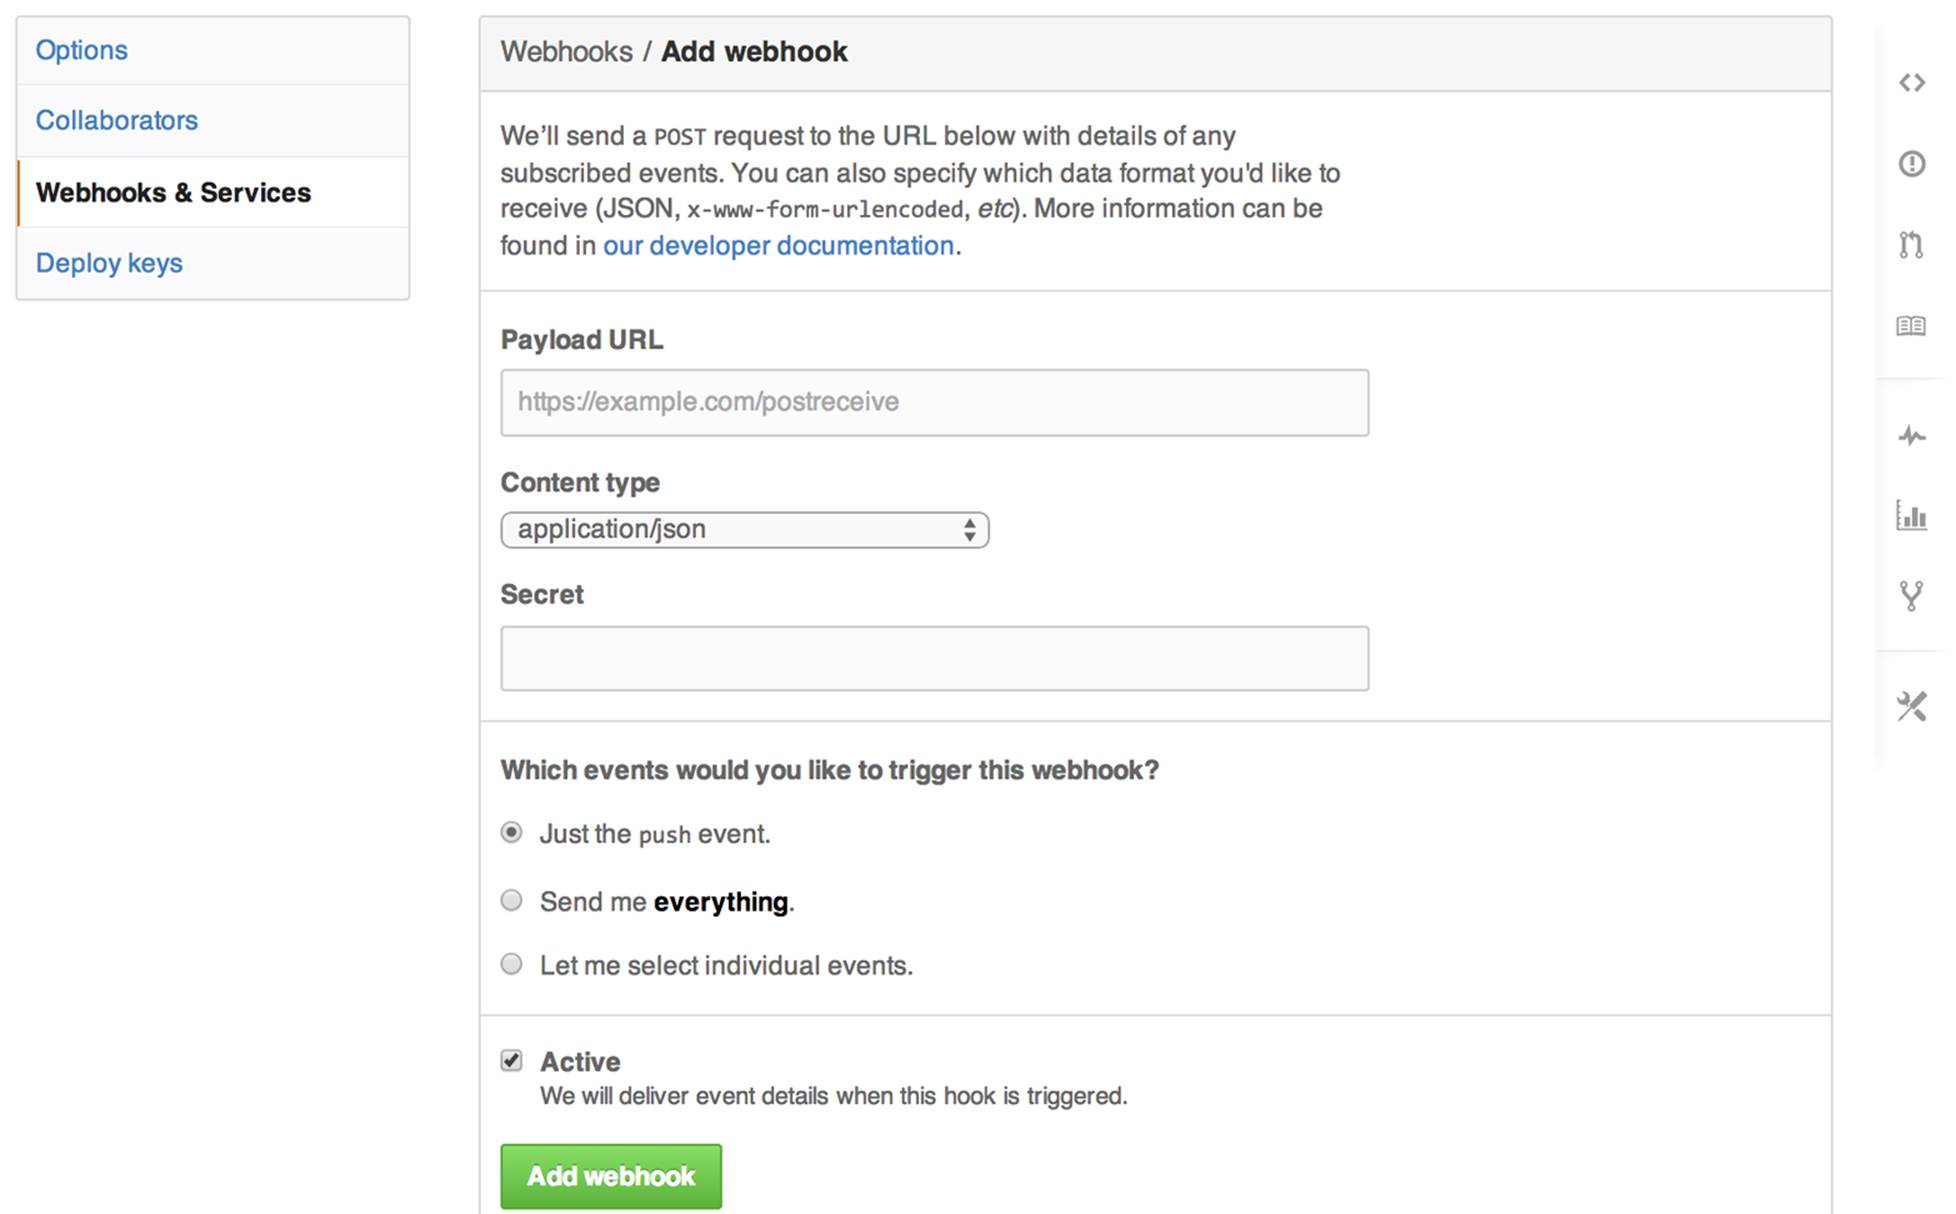
Figure 5-13. The “Add webhook” screen
This screen allows you to tell GitHub to send a notification to your custom software every time a particular type of event occurs. You need to provide the URL that your software will be listening on, the kind of content you want delivered, an optional secret (so that not just anyone can send fake information to that URL), and what kinds of events you’d like to have the software be notified about. If your developers are implementing a custom integration, they’ll run you through exactly how they’d like to have the webhook(s) configured.
The final integration option is one that doesn’t require developers. Go to Settings → Webhooks & Services, and click the “Add service” link. A drop-down list will appear, similar to Figure 5-14.
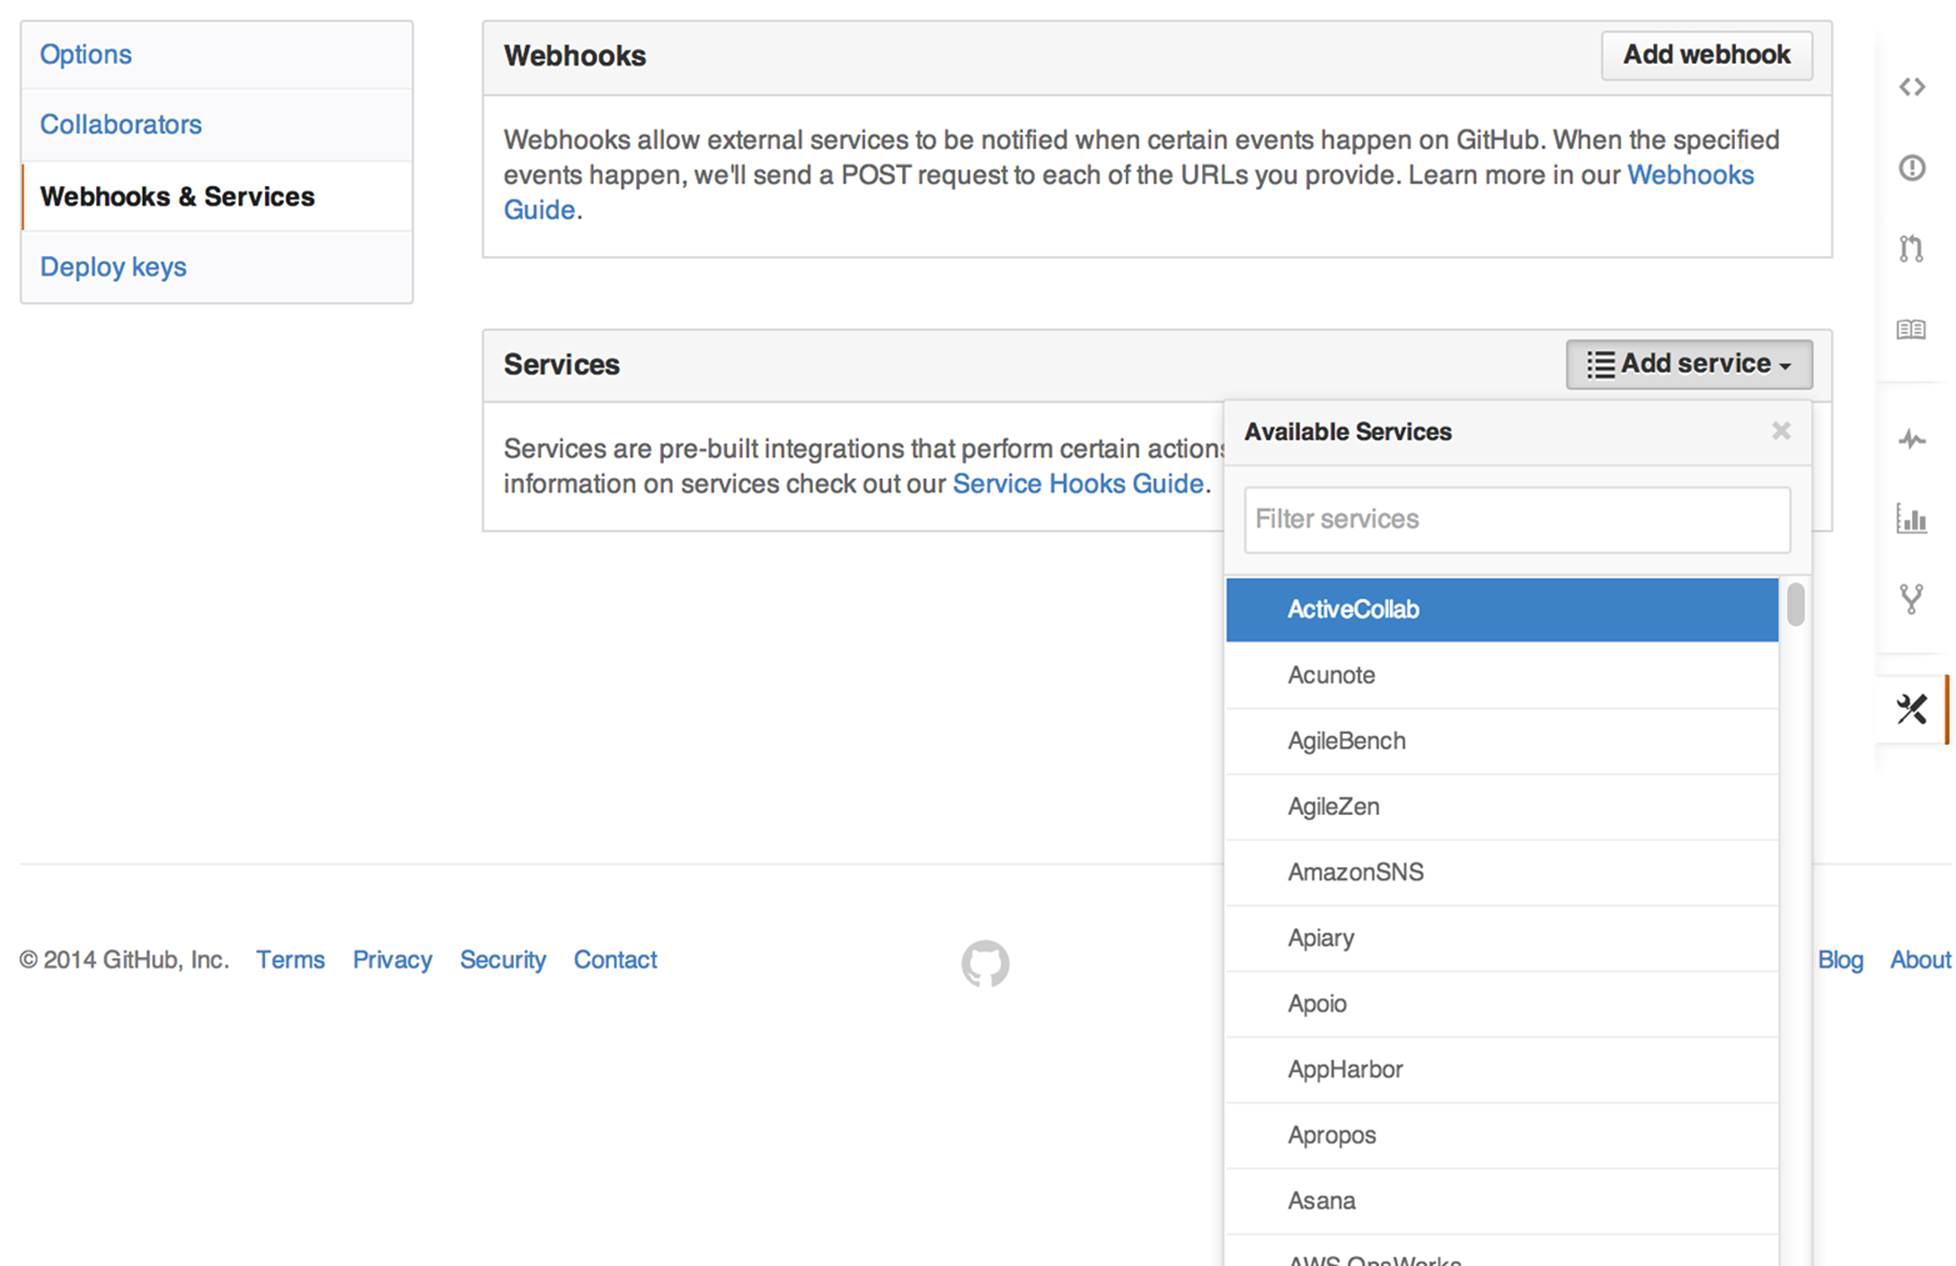
Figure 5-14. The “Add service” drop-down list
If you’re using popular software with a prewritten integration, start typing the name of the software into the “Filter services” text box and fairly quickly you should see the name of the software. Click the name to display a screen that tells you what you need to do to integrate with that software.
For example, let’s say you wanted to integrate with Basecamp. Start typing “Basecamp,” select Basecamp from the list, and you’ll see a screen like Figure 5-15 asking you to enter the URL of your Basecamp project and the credentials that you want GitHub to use to log in.
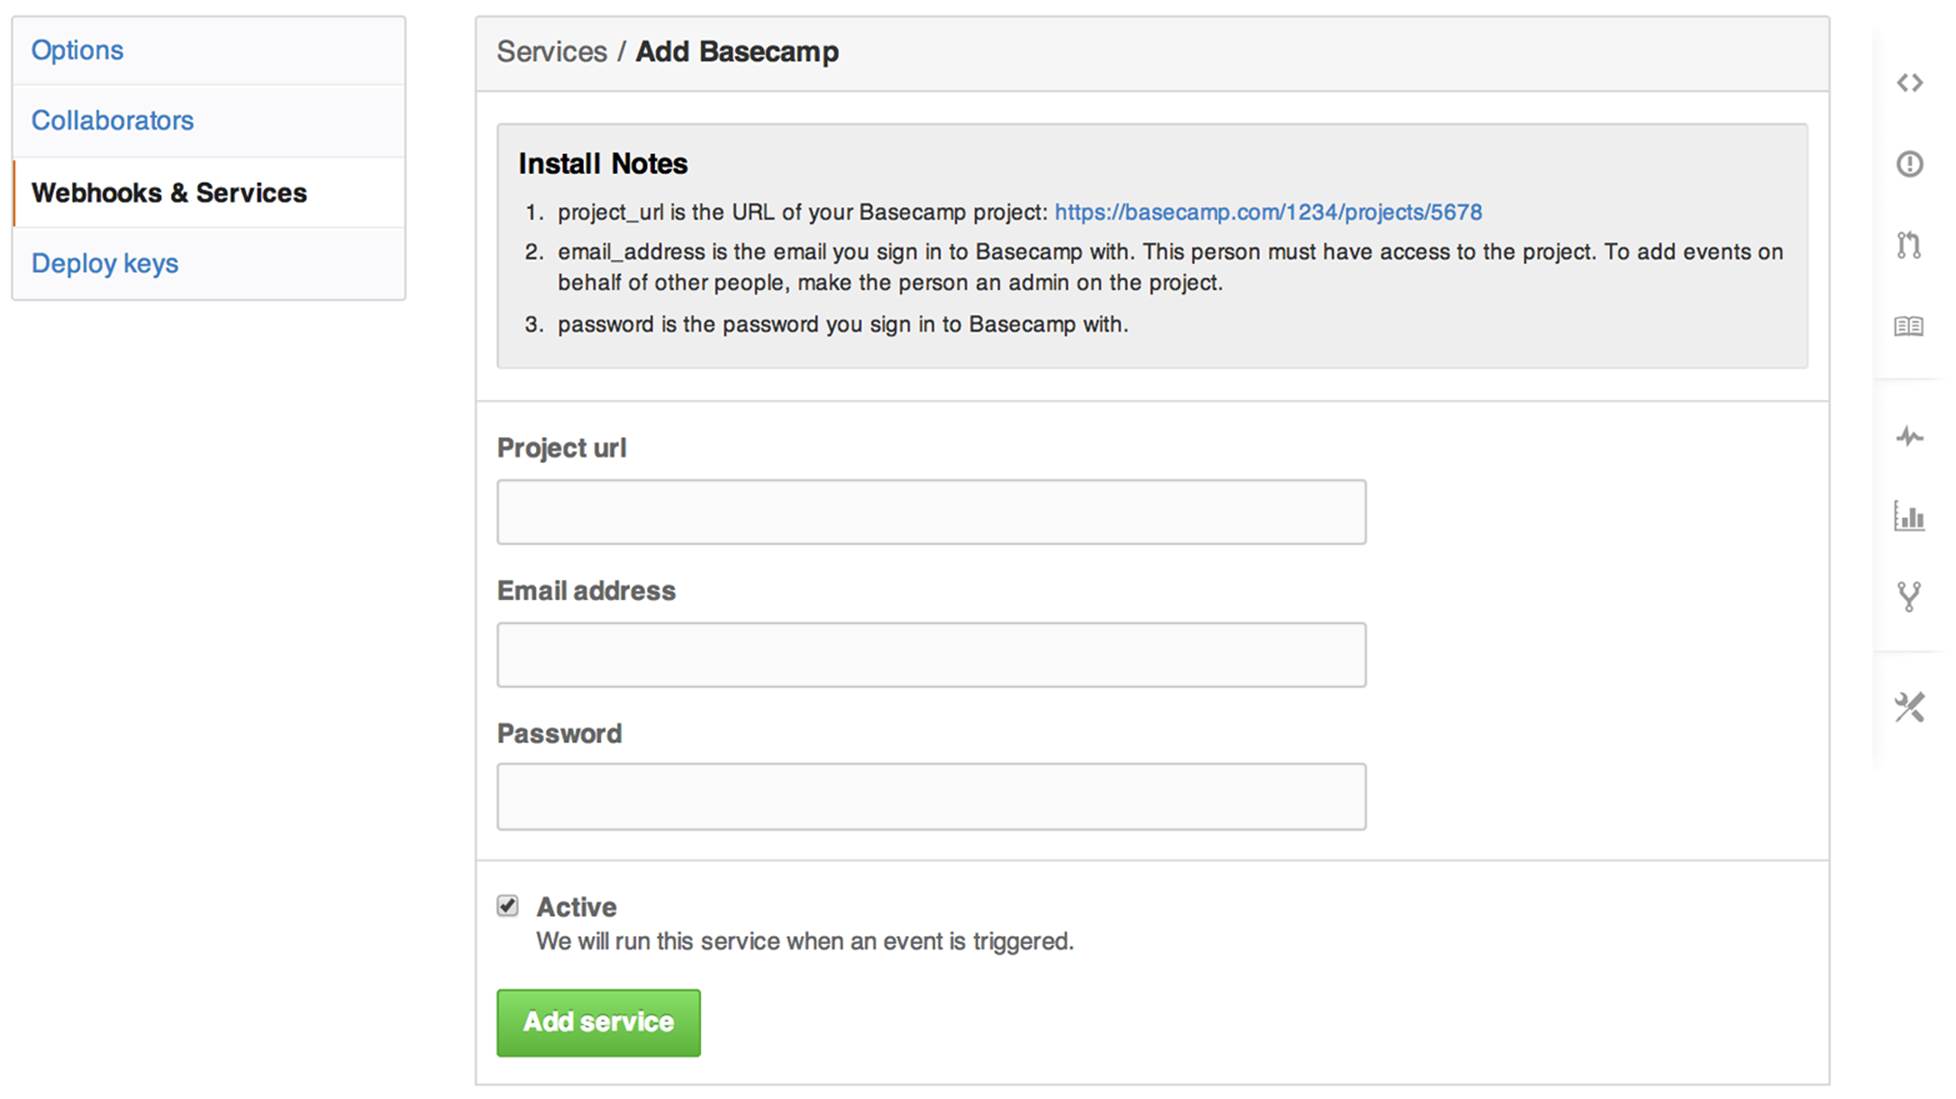
Figure 5-15. Integrating GitHub with Basecamp
Each integration is different—both in terms of what information you need to provide to connect to the third-party software and in terms of the functionality provided by the integration. As you can see in Figure 5-16, the install notes for integrating with Asana are quite different than those for integrating with Basecamp.
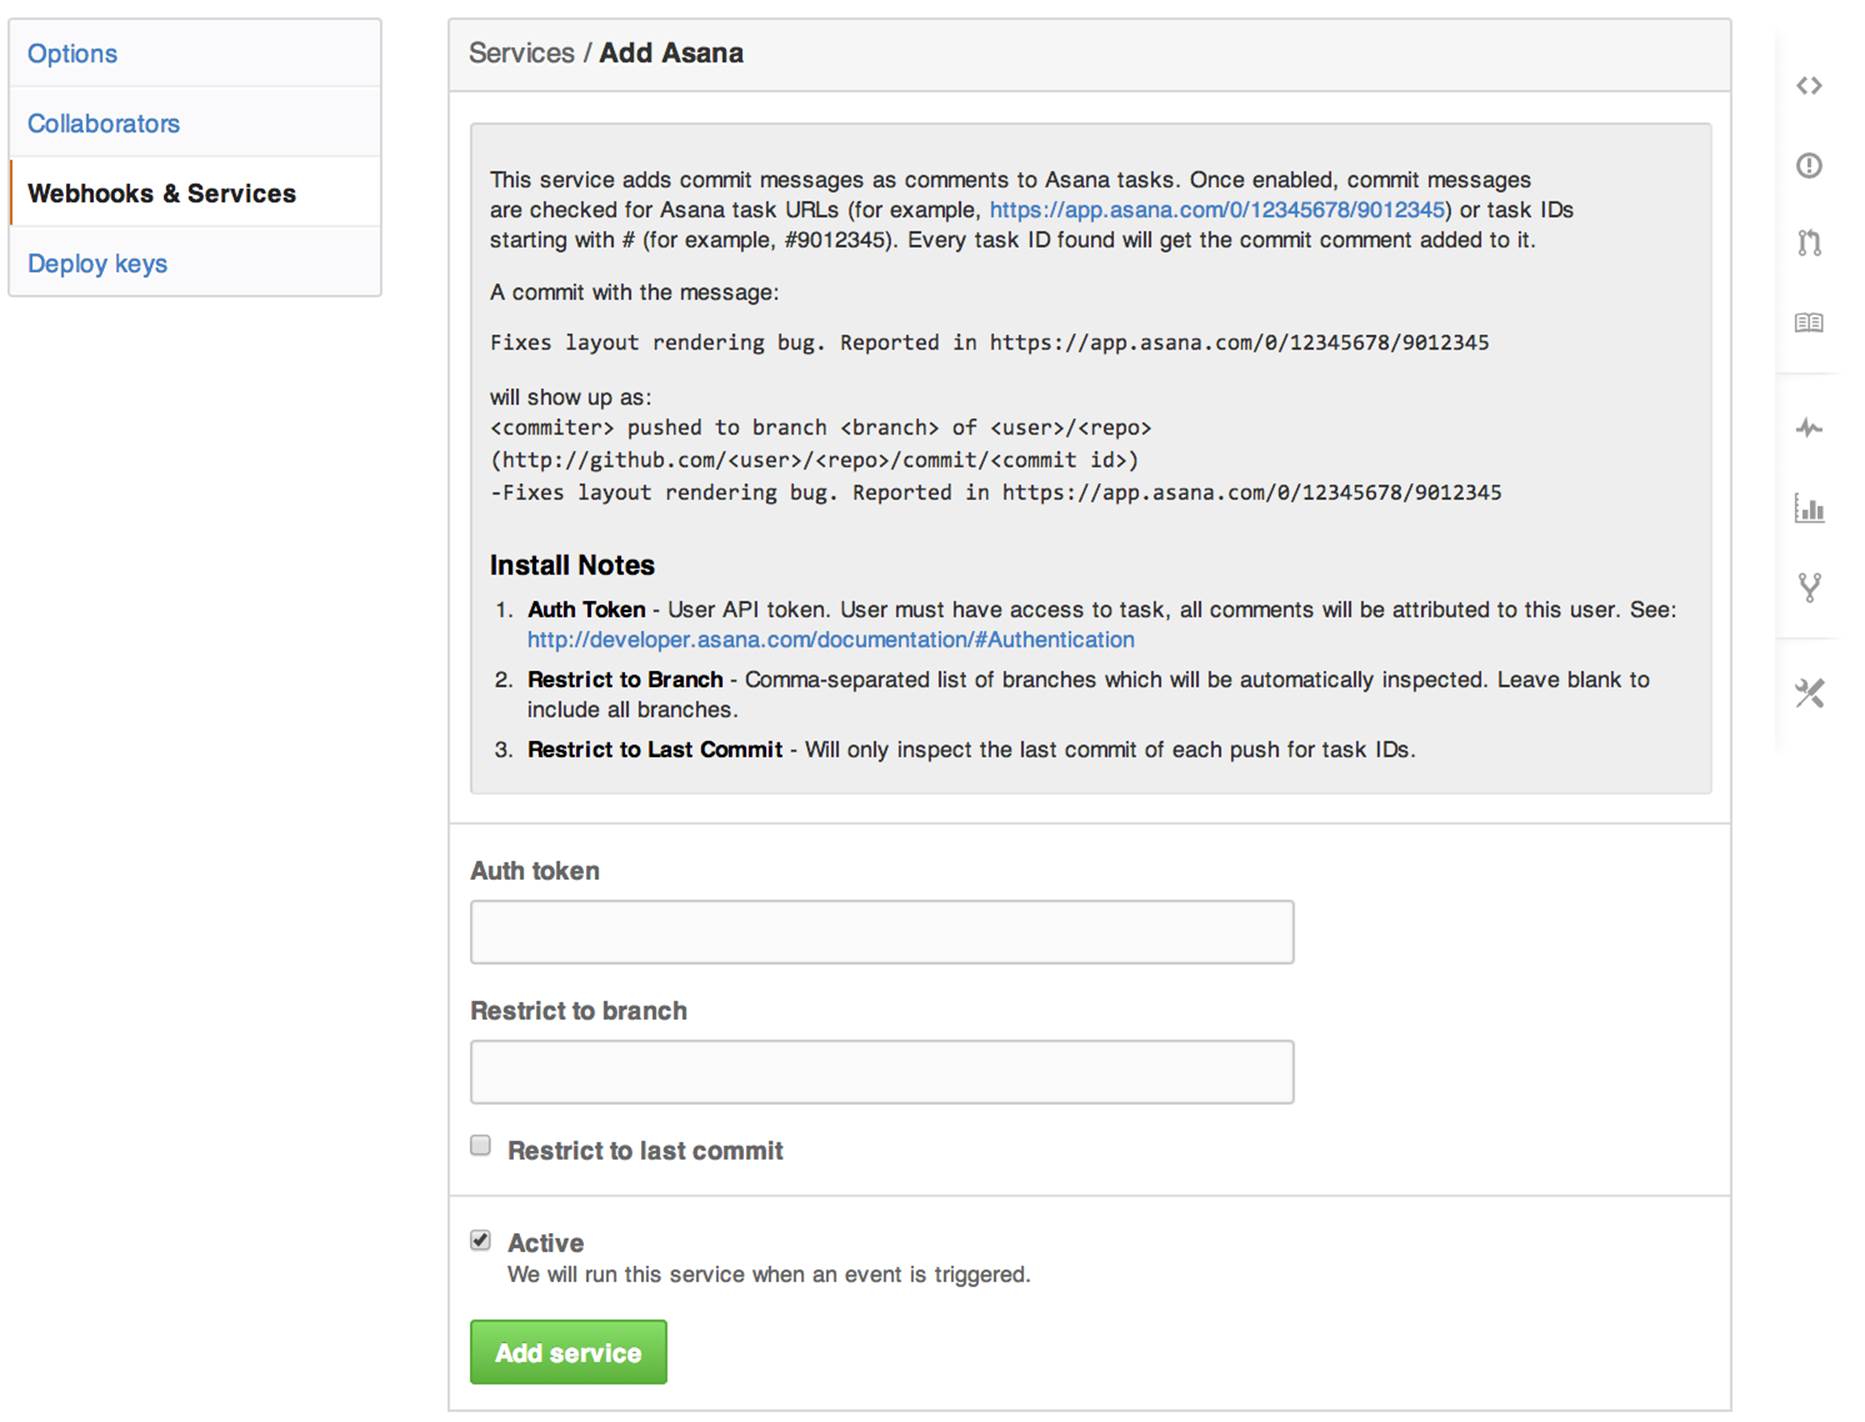
Figure 5-16. Integrating GitHub with Asana
“Deploy keys” is the last tab in the Settings section for a GitHub repository. Clicking the link displays a page similar to Figure 5-17.
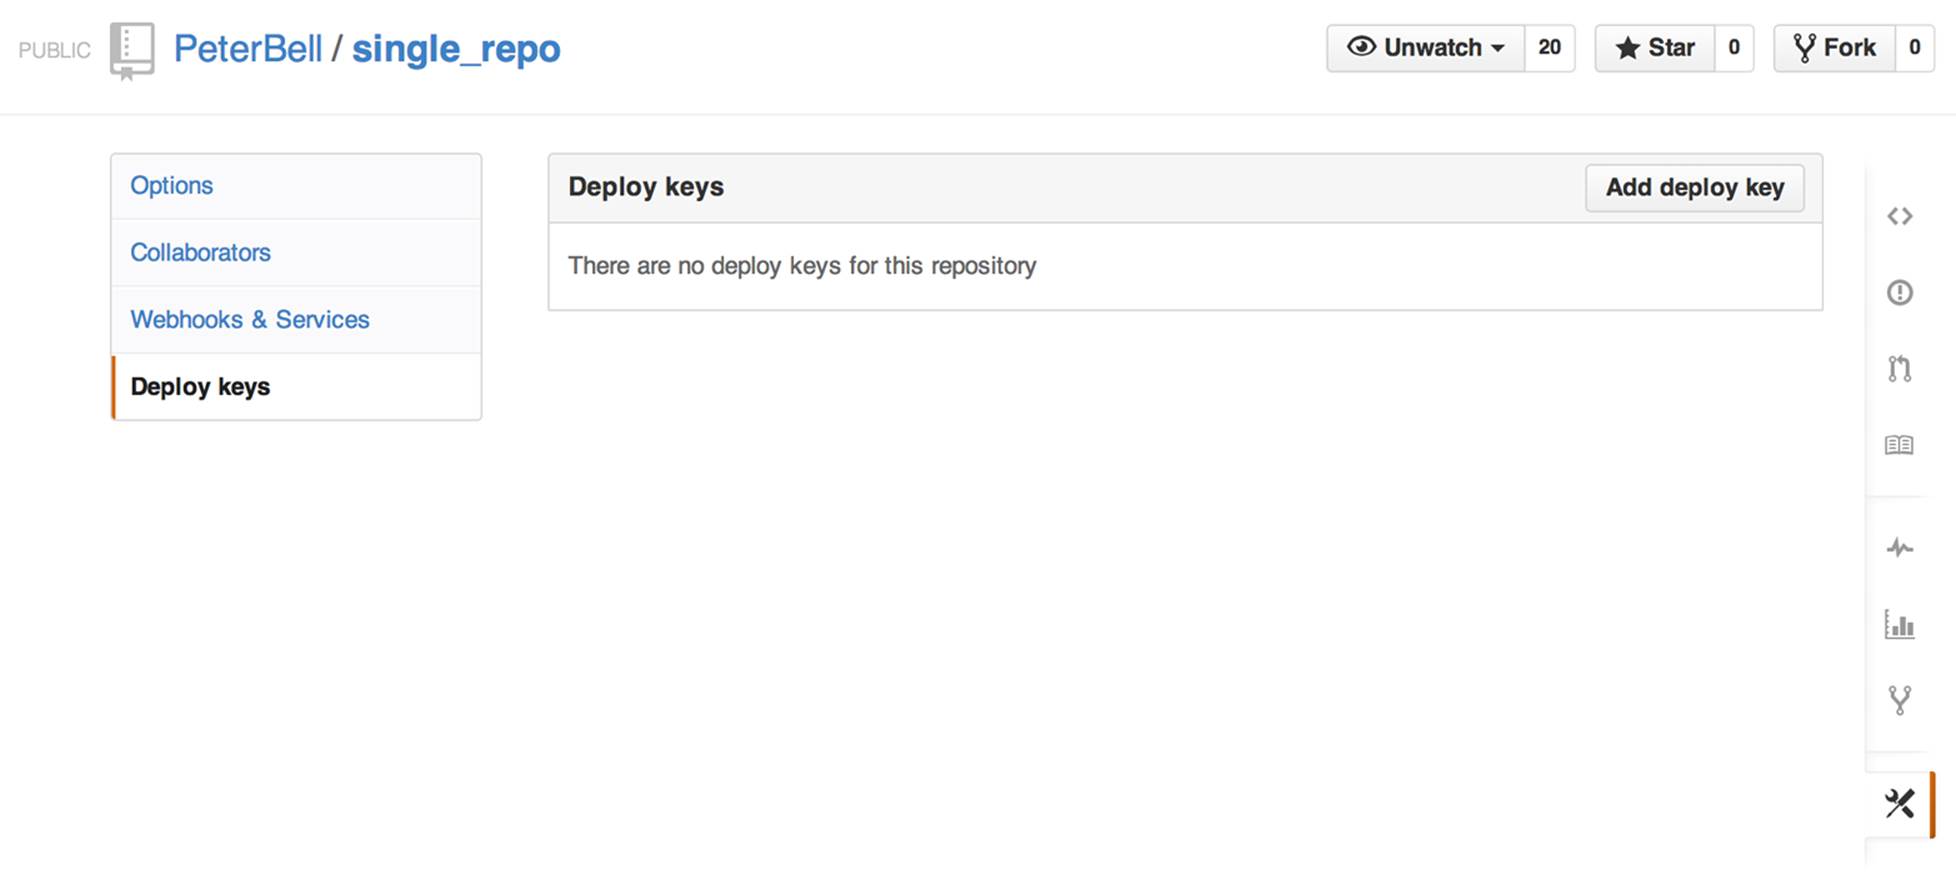
Figure 5-17. Configuring deploy keys
In addition to other people needing access to your repository, sometimes you’ll want to provide the ability for other software to connect to it. For example, your development team will probably create an automated build system that will allow them to just click a button to deploy the latest changes from GitHub to your production server.
If they do that, the build system will need the ability to access the repository. There are a number of ways of providing that access. One option is to create a machine account. This is where you create a new GitHub user just for your build machine and add that user as a collaborator. That’s a particularly good approach if your build system needs access to a number of different repositories.
Another option is just to create a deploy key. A deploy key is an SSH key (a Secure Shell key) that is created to allow a particular piece of software to access a single repository on GitHub. Don’t worry about this too much, but if your development team asks you to set up a deploy key, just ask them to email you the public SSH key and to give you a name for the key (e.g., “build server”), and then you can use that information to fill out the “Add deploy key” screen, as shown in Figure 5-18.
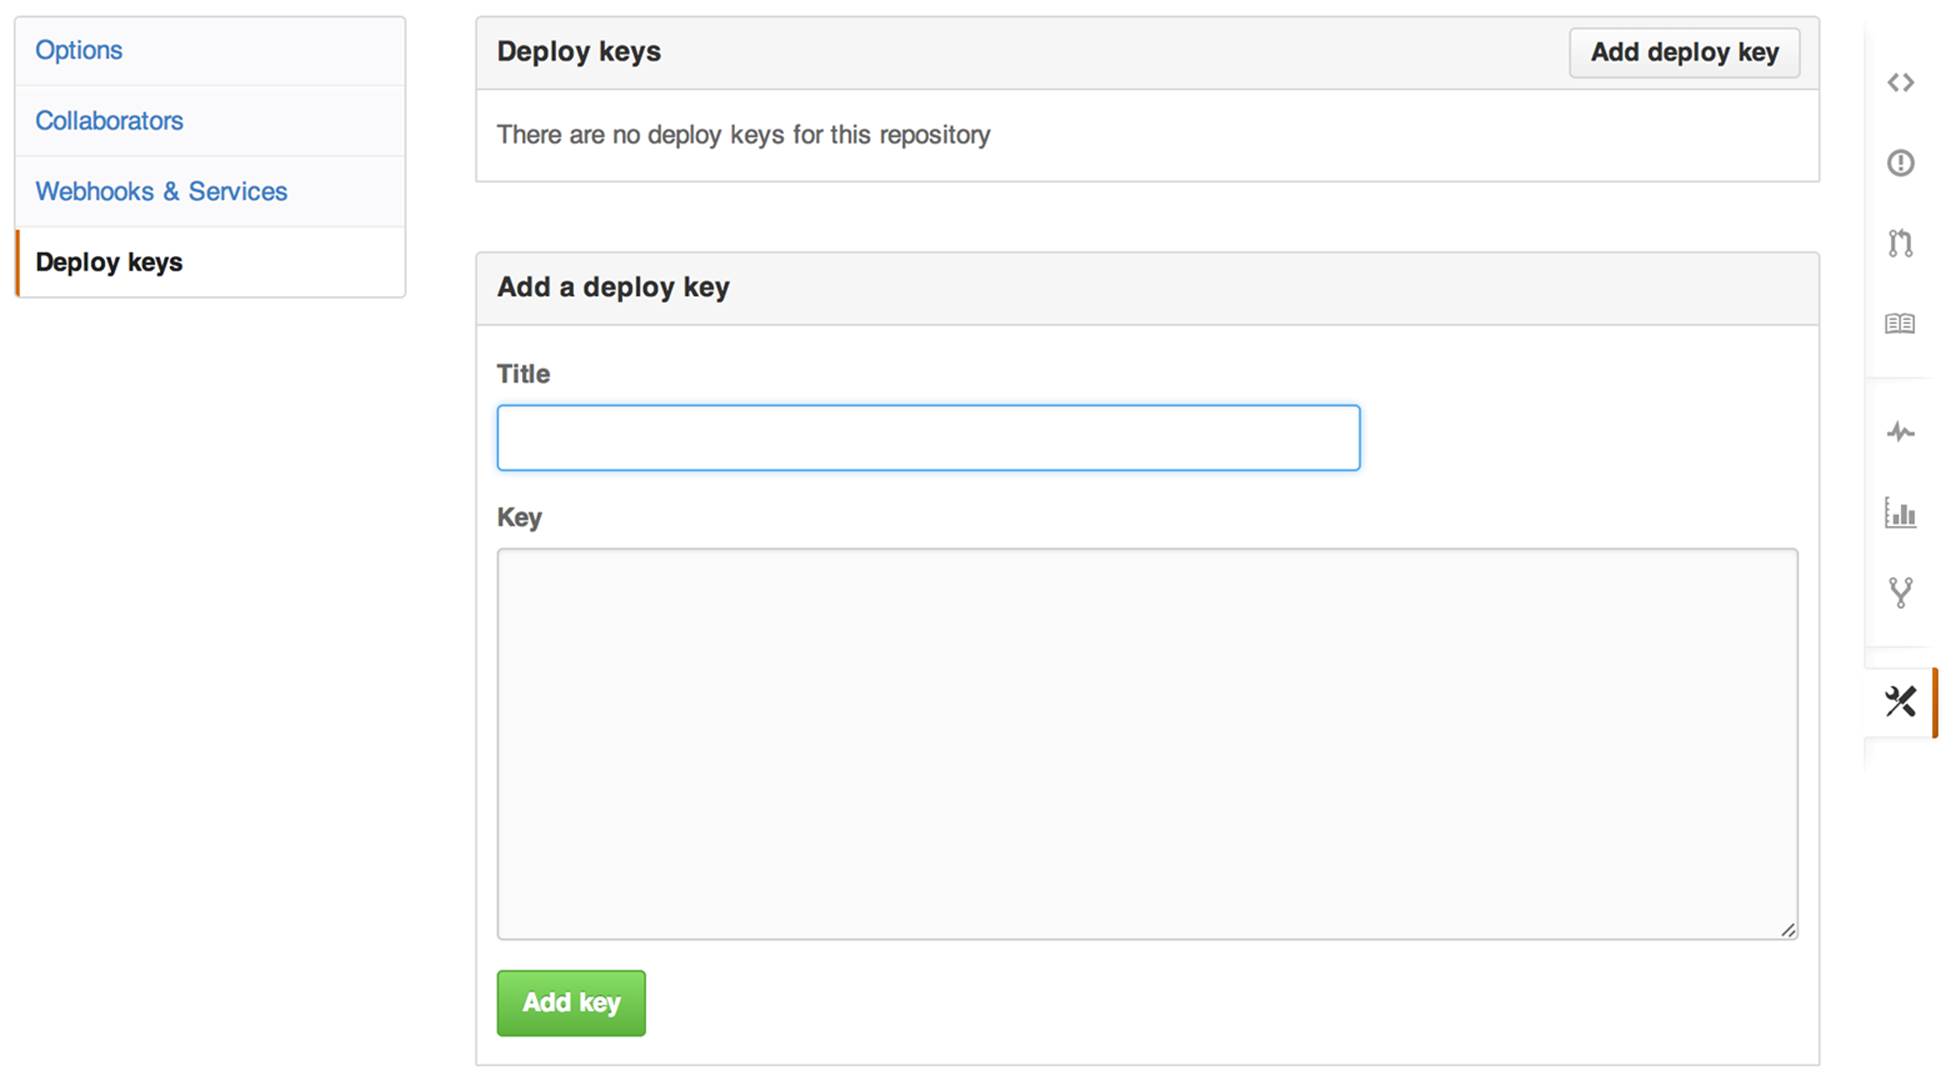
Figure 5-18. Adding a deploy key to a GitHub repo
Personal Versus Organizational
When you create a repository, the first question you need to answer is whether you should add the repository to your personal user account or whether you should add it to an organization instead.
If you are creating a personal project (whether for free or for profit), you probably want to just create it under your personal GitHub account. However, if you’re creating a project that you know you will want to be owned and/or managed by an entity other than yourself—whether a not-for-profit or a corporation—you should probably create an organization first and then create the project under the organization so you can easily transfer ownership of the project over time.
This isn’t the most important decision. You can always transfer the ownership of a repository, so if in doubt, feel free to just create the repo under your user account. However, if you know that you’re going to be building a project for an organization, you might want to create the organization first.
Creating an Organization
To create an organization, log in to GitHub, click the + sign to the right of your username at the top right of the page, and from the drop-down list shown in Figure 5-19, click the “New organization” option.

Figure 5-19. The first step in adding a new organization
Clicking the link will take you to a page similar to Figure 5-20 that will allow you to create a new organization.
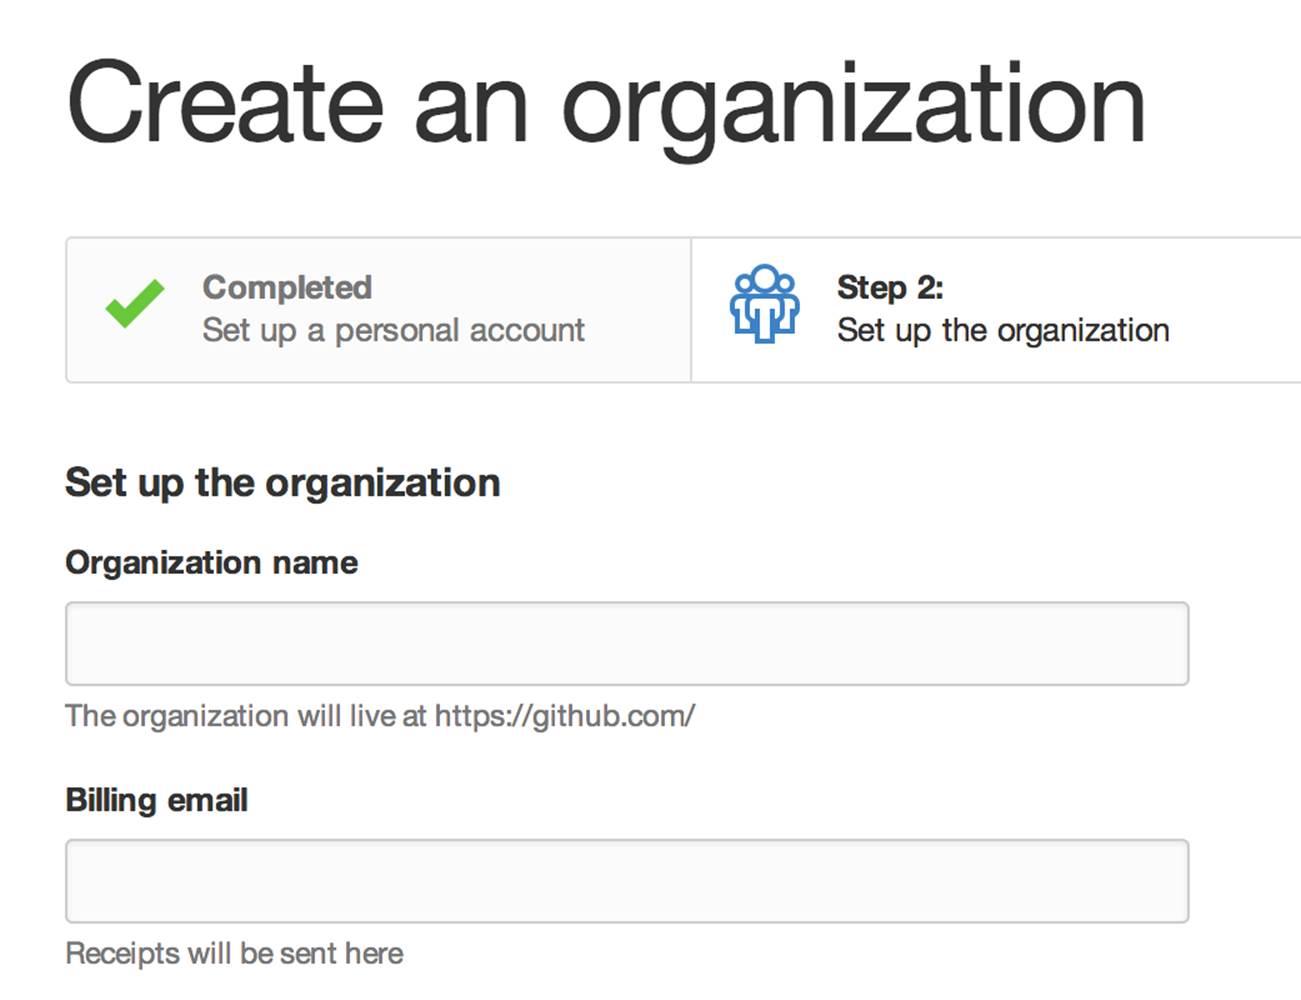
Figure 5-20. Creating a new organization
Start by giving the organization a name and entering the email address for the billing contact. You’ll then want to select a plan. If all of your projects are openly accessible, you can create an open source organization for free. If you want to host private repositories, you’ll need at least a bronze plan that will allow you to host up to 10 private repositories (and unlimited public repositories) for $25 a month.
If you choose to create an organization that can host private repositories, you’ll be asked for either credit card or PayPal information to make the monthly payments.
Once you’ve created an organization, the next thing you’ll want to do is set up some teams.
Managing Teams
If you create a repository under your user account, you can just add collaborators directly to a project. However, if you create a repository under an organization and you want to allow other people to access it, you’ll have to create teams.
By default, when you create an organization, GitHub will create a team called “Owners” and you’ll be assigned to that team. If you want to allow other people access to the project, you’ll have to either add them to the Owners team for the organization or you’ll need to create a new team.
Most of the time you’ll want to create a new team with limited permissions. I’ll often create a team called “Collaborators” for people I want to work with on a project. If I’m within a larger organization, I might also create teams for business units or functions like marketing and legal.
To create a team, go to the organization home page and click the Teams link on the right side of the page, as shown in Figure 5-21.
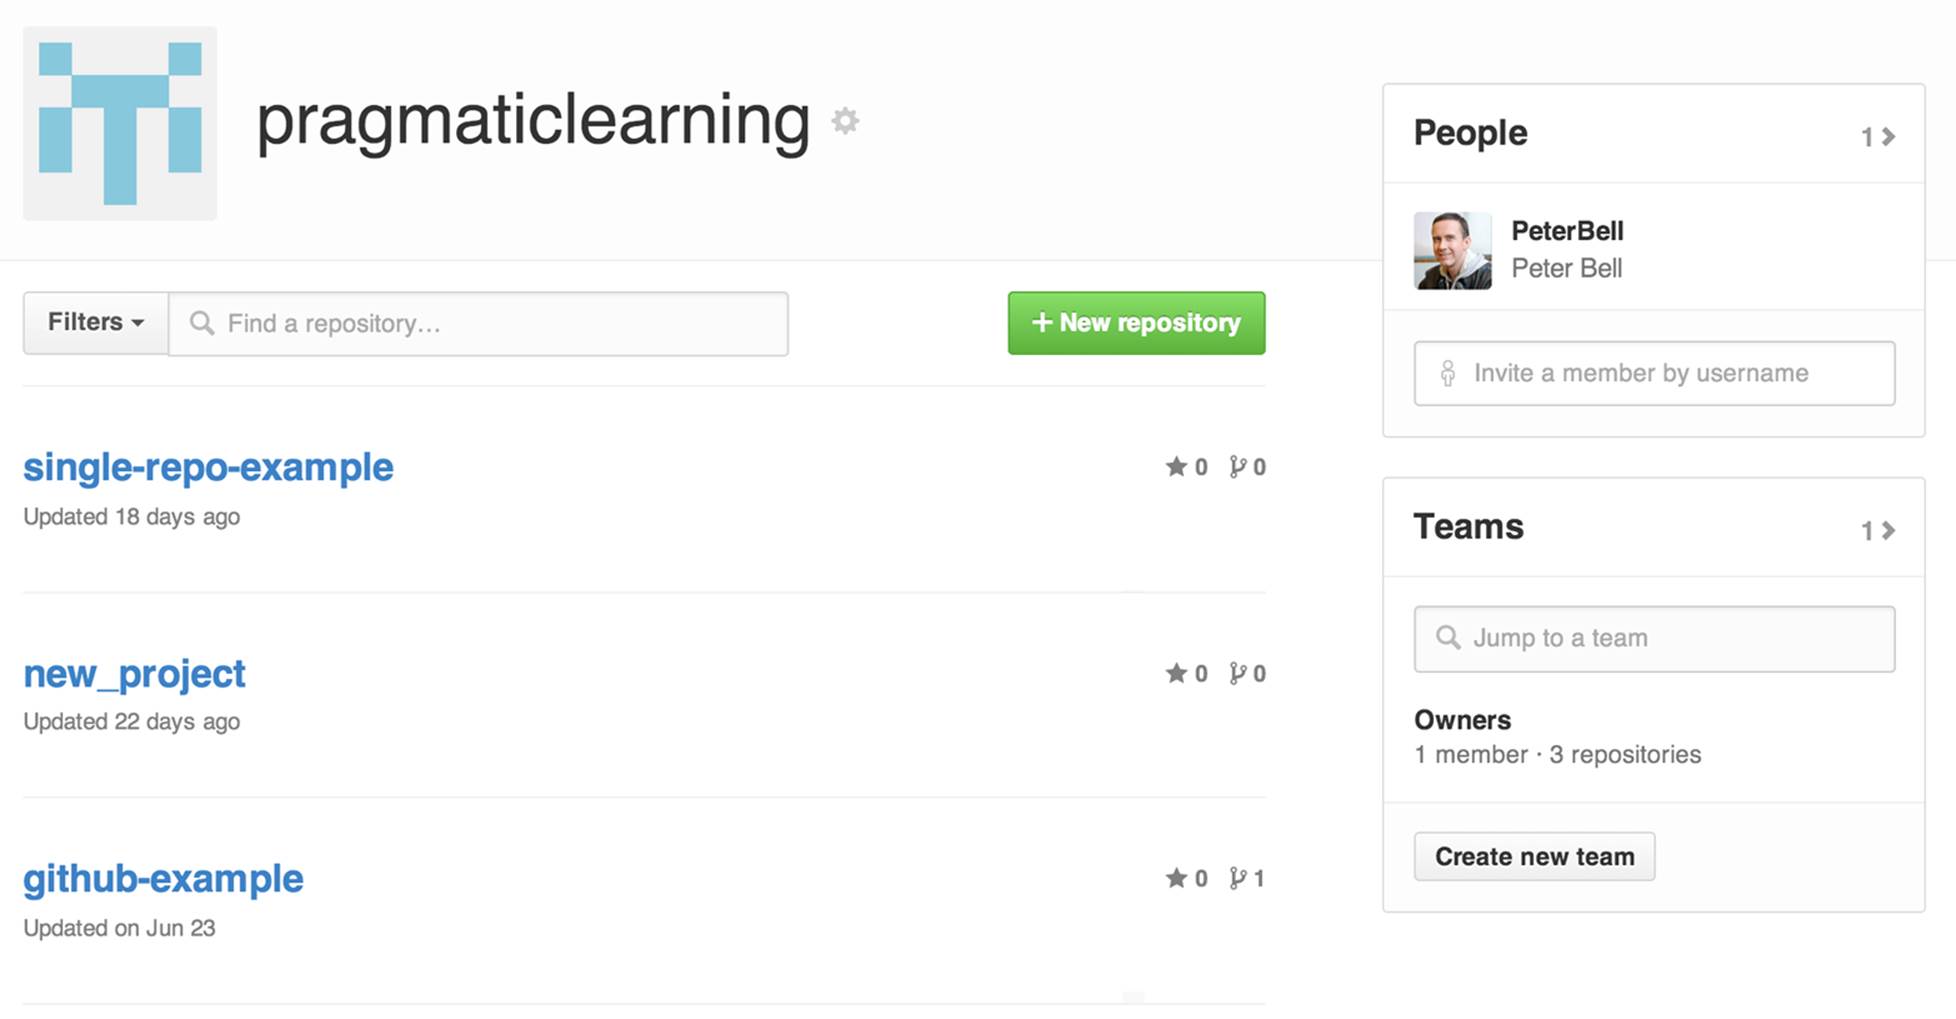
Figure 5-21. The organization home page
When you get to the Teams page, you should see a screen similar to Figure 5-22. It will show a list of all of the teams within your organization and a list of icons showing the members of each team.
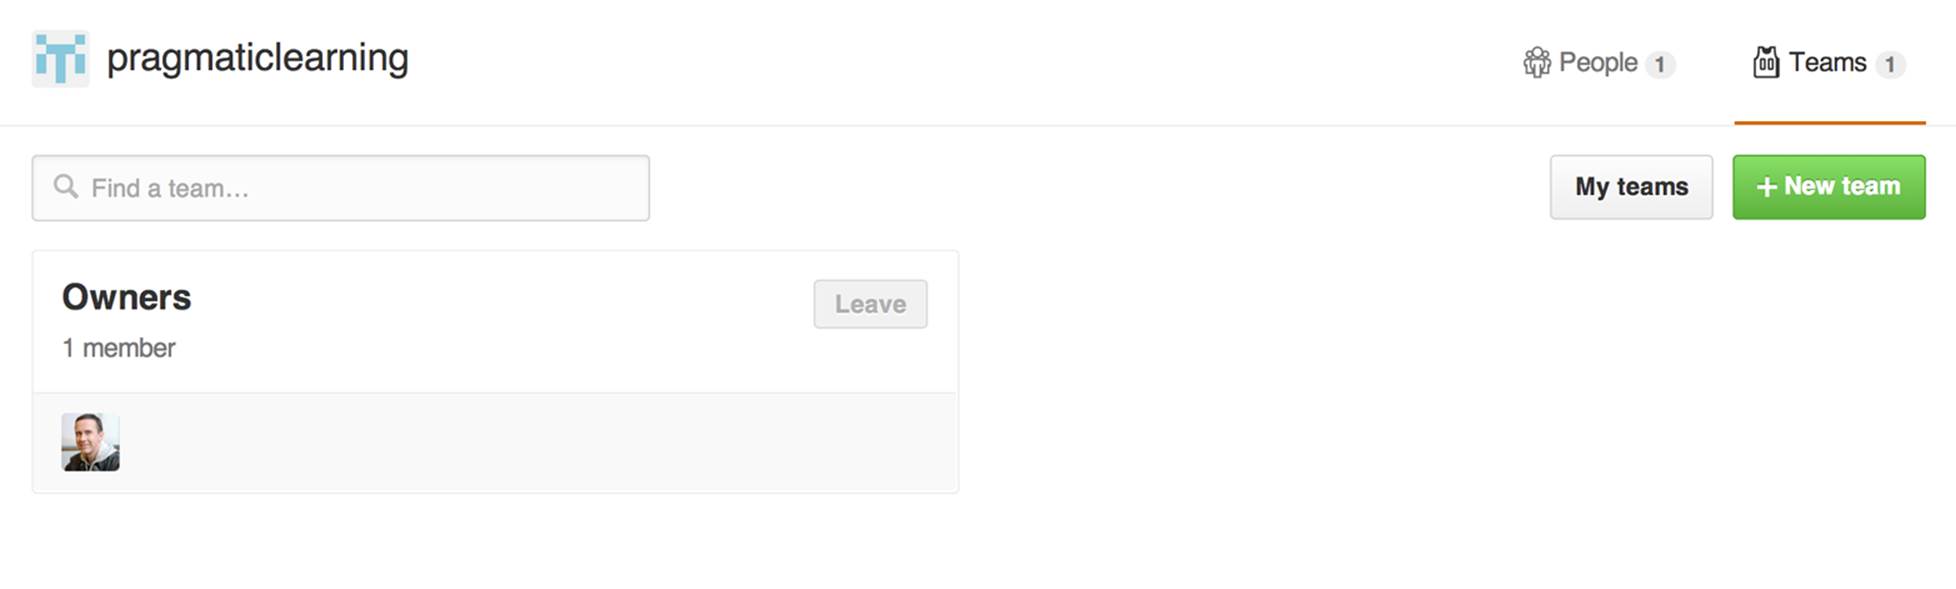
Figure 5-22. Viewing the teams within your organization
To create a new team, click the green “+ New Team” button at the top right of the content area. You’ll see a screen similar to Figure 5-23.
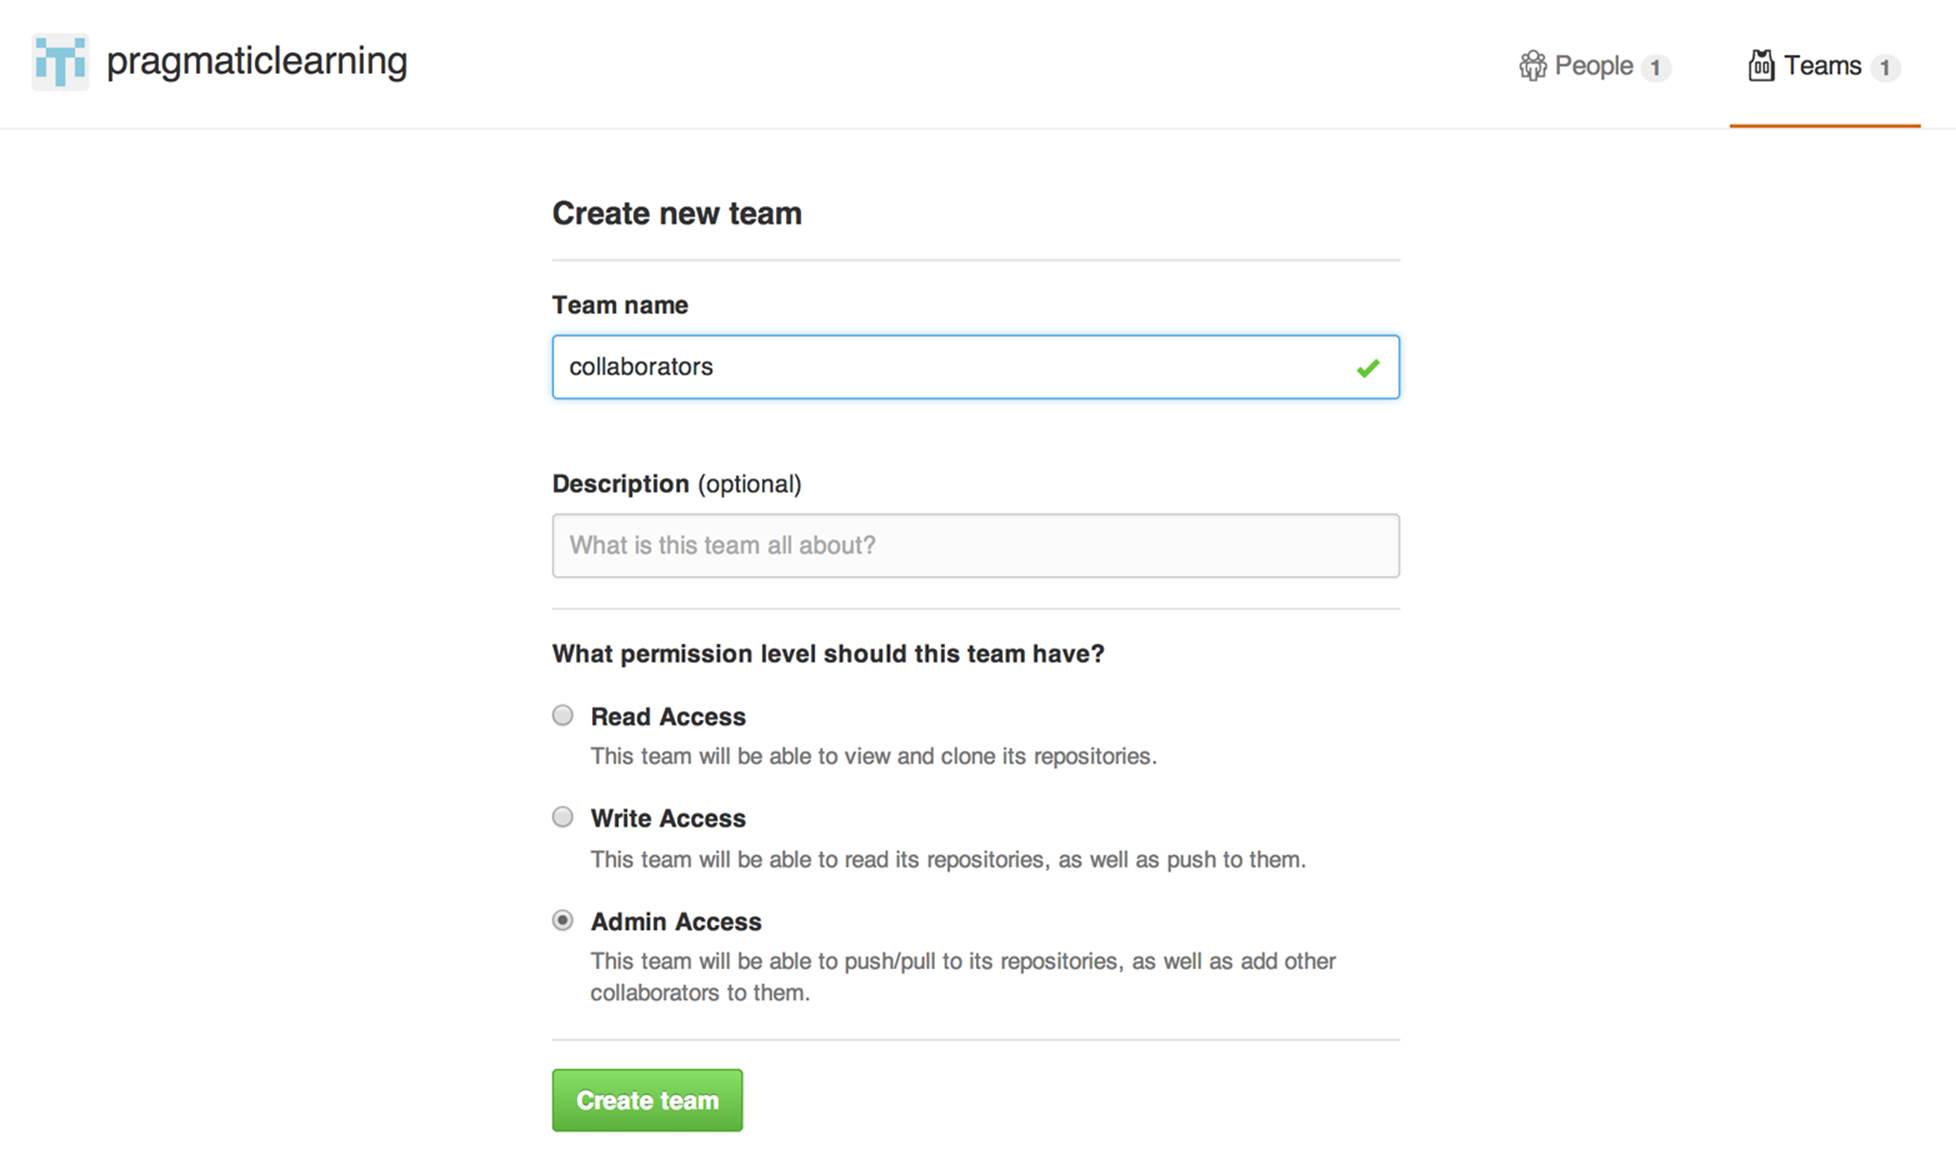
Figure 5-23. Adding a new team to an organization
Give your team a name. If you’re just working with a couple of developers on a single product, it might be something as simple as a “Collaborators.” If you are part of a larger organization, the name could be the business function or even the name of the project team: “mobile devs,” “API team,” etc.
You can add an optional description if the intent of the team wouldn’t be obvious to members of your organization, and then provide the team with read, write, or admin access. If you provide read access, they’ll be able to only view, clone, and use the software. If you provide write access, they’ll also be able to push to the repo. If you provide them with admin access, they’ll also be able to add additional collaborators to the projects to which they have access. Then click the “Create team” button.
Once you’ve created a team, the next step is to add members to the team. As shown in Figure 5-24, just start to enter the GitHub username for each person you want to add to the team, and the name will auto-complete.
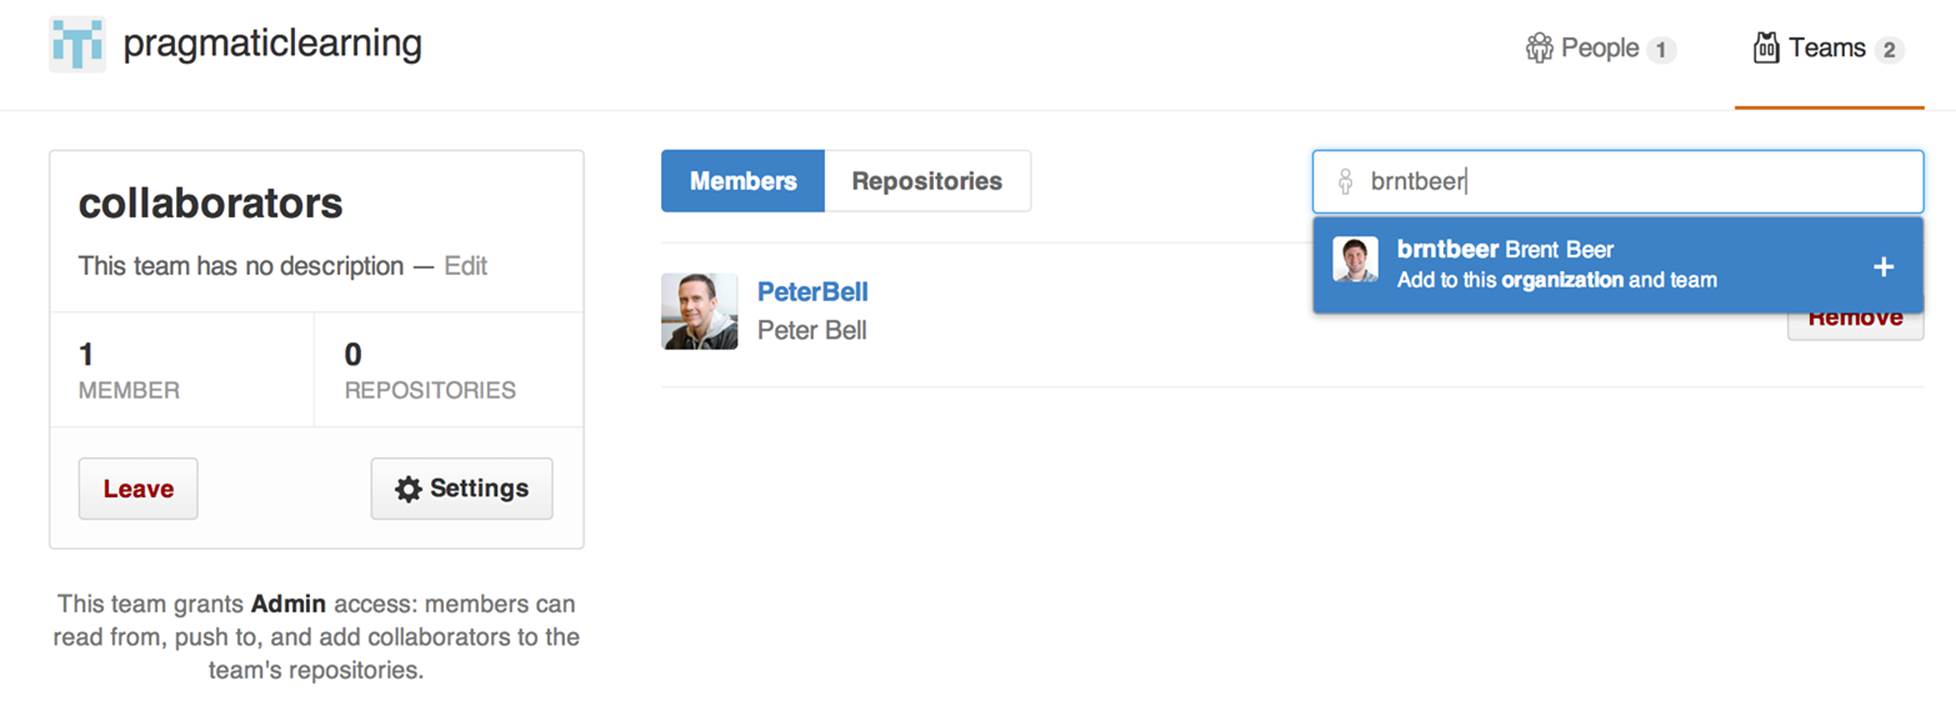
Figure 5-24. Adding a new user to a team
If you ever need to remove someone from a team, just click the team and then click the Remove button to the right of the username you want to delete. If you need to delete a team, on the Teams page, click the team you want to delete and you’ll see a screen similar to Figure 5-25.
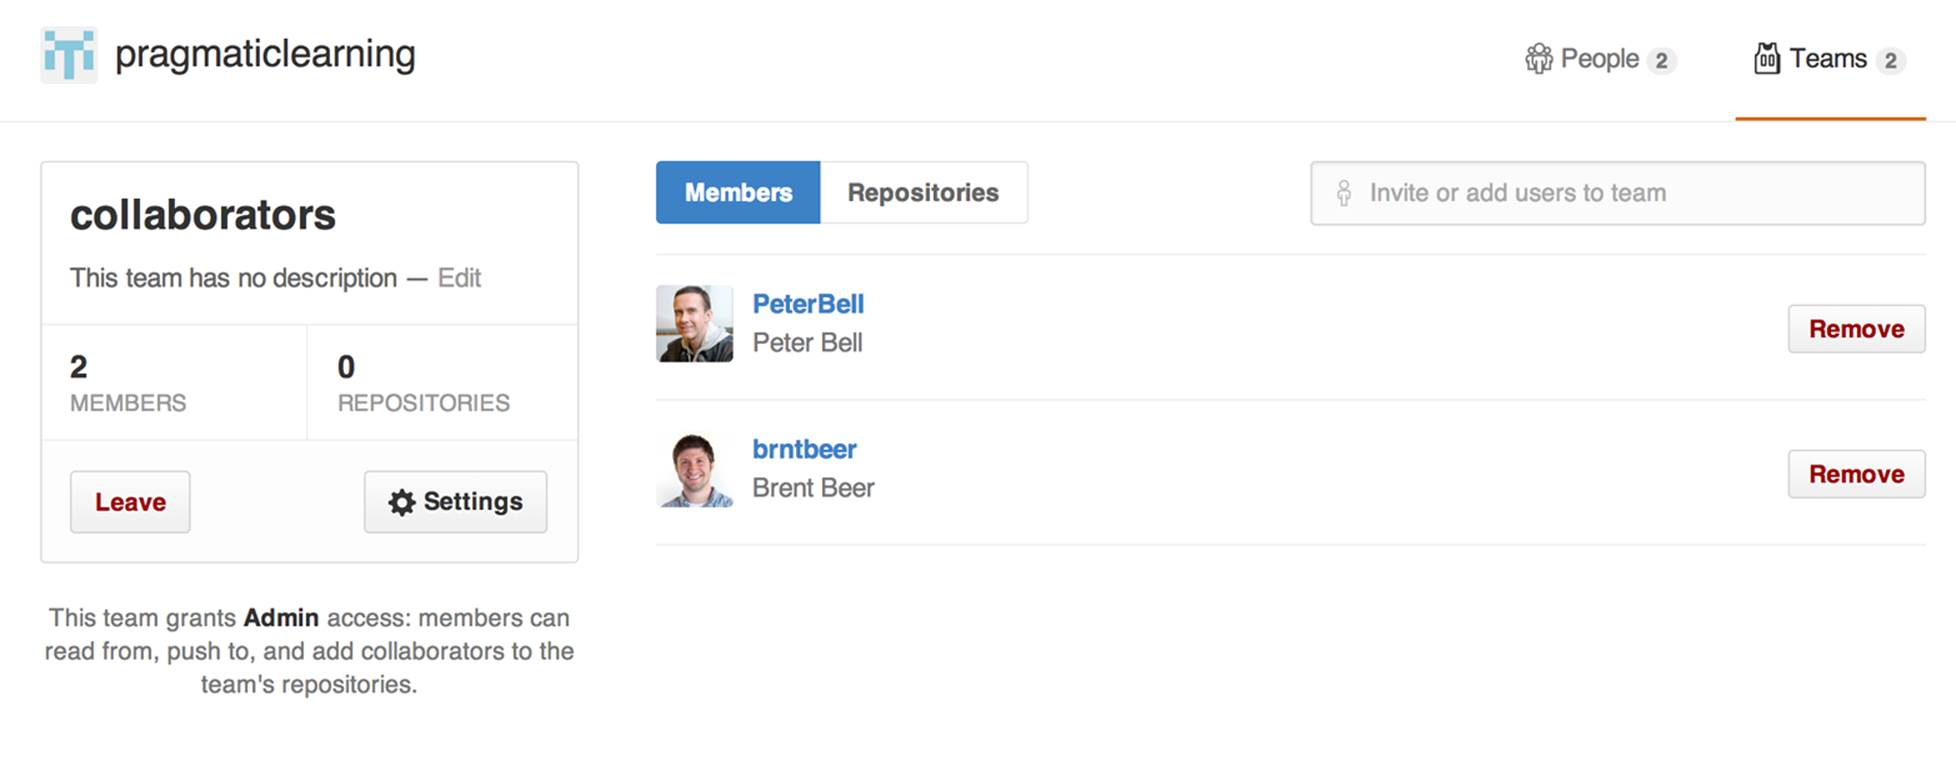
Figure 5-25. The team detail page
Click the Settings button on the left side of the screen and you’ll see a screen similar to Figure 5-26.
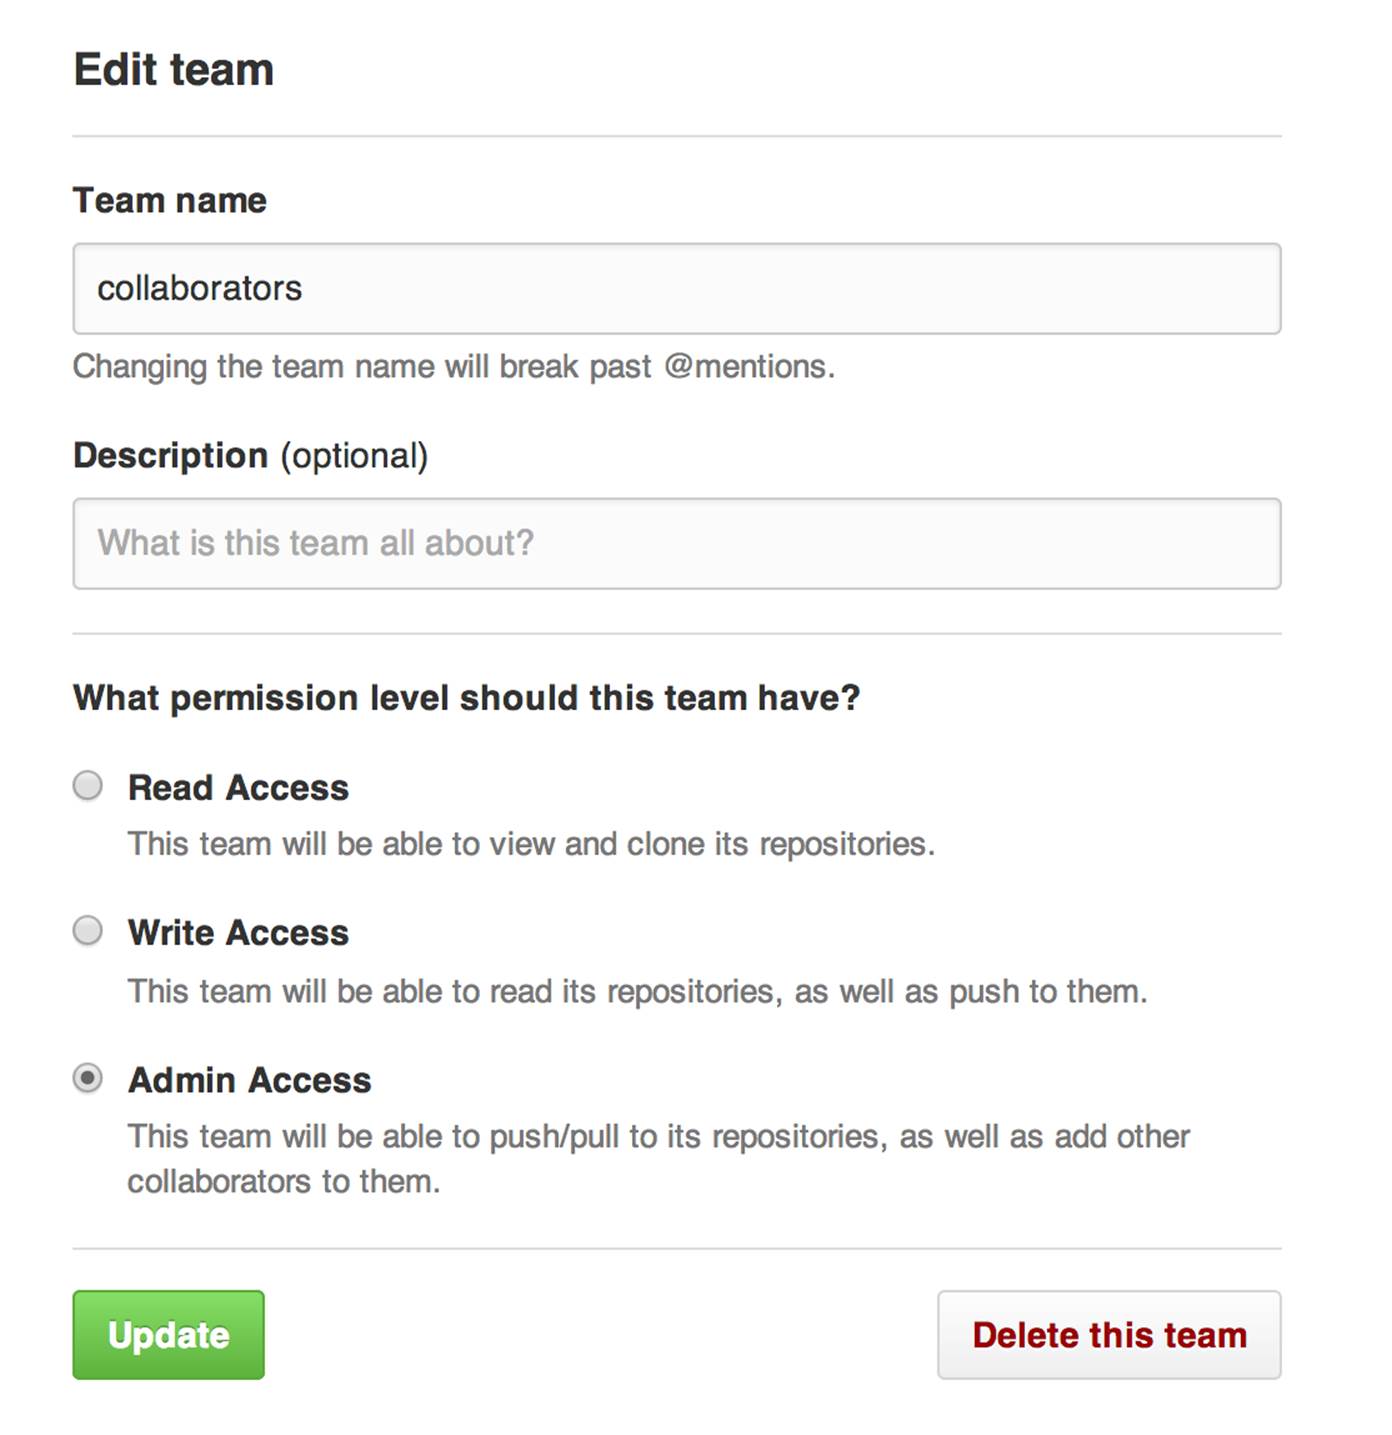
Figure 5-26. The team settings page
If you want to delete the team, click the “Delete this team” button at the bottom of the page. You’ll be asked whether you’re sure. Just click OK, and the team will be deleted.
Congratulations! If you’ve gotten this far in the book, you should be ready to do almost anything with a GitHub repo. You should be able to view the state of a project, edit the files in a project, collaborate with your team, and create and configure a new repository. In the next chapter, we’re going to look at how you can use the GitHub for Windows or GitHub for Mac desktop client to download a copy of a GitHub repository and to make some simple changes to it on your laptop.