Selenium Design Patterns and Best Practices (2014)
Appendix A. Getting Started with Selenium
If you are new to the Ruby programming language or new to Selenium WebDriver, there are just a couple of things you need to get your computer ready for testing. In this section, we will install some software prerequisites. At the end of the section, we will talk about Ruby class naming techniques so that it is easier to understand the test classes that we write.
Setting up the computer
There are multiple ways to develop and run Selenium WebDriver tests. Depending on the programming language you choose to use, different tools and Integrated Development Environments (IDE) will be available to you. In this book, we are using the Ruby programming language with the selenium-webdriver gem. However, this book was not intended to show how to write the most efficient Ruby programs, instead it is meant to show the best approaches to solve a given problem in general; it just happens that the examples that appear in this book are written in Ruby.
Note
As most proficient Ruby developers will notice, the syntax used in this book is technically correct but does not follow the standard Ruby paradigms. The Ruby code examples are deliberately overly verbose to help Ruby developers feel more at home.
All of the code and examples used for this book were chosen so that they would be as inexpensive (or free) for the reader as possible and anyone can follow the whole text with their favorite text editor of choice. This, however, means that we have to do a little work before we get started to be ready to write tests. The only prerequisites to get started are as follows:
· The Command Line Interface terminal
· The Internet connection
· The Ruby runtime environment
· The Firefox web browser
· The text editor of choice
Let's get started by adding these prerequisites to your computer.
Using Command Line Interface
The Command Line Interface (CLI) is one of the most powerful ways to interface with any OS. No matter what OS you have installed on your computer, you already have a powerful CLI toolset preinstalled. Let's take a look at different kinds of CLI terminals, based on the host OS.
Note
In the context of this book, the terms CLI and terminal are interchangeable.
Using the terminal on Windows
Microsoft Windows rarely requires the use of the terminal for day-to-day operations. Unlike Linux, most administrative tasks are completed in the Graphical User Interface (GUI), that is, it requires the user to click on things with the mouse. MS-DOS CLI is available on all versions of Windows. Recently, Microsoft has made a lot of improvements to the CLI; the improved tool is called PowerShell. Finally, if you are a fan of Linux-style CLI, you can install a Linux Terminal Emulator. Either option is completely valid for the purposes of this book, so you are free to choose the option that suits you best. Let's take a closer look at each option.
Using MS-DOS
Using MS-DOS is as simple as opening the terminal and starting to interact with it. Perform the following steps:
1. To open MS-DOS, click on the Start button in Windows, as shown here:
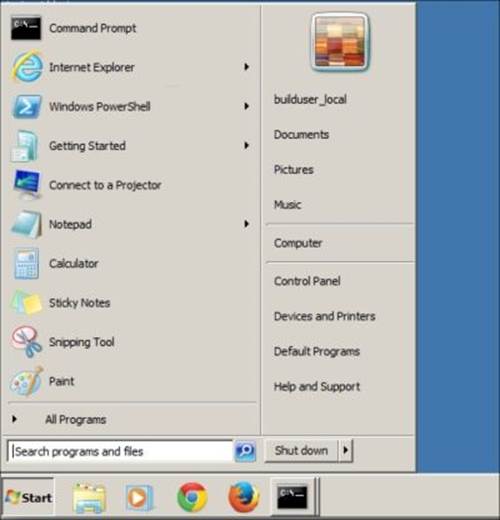
2. Locate the Run option application as shown here:
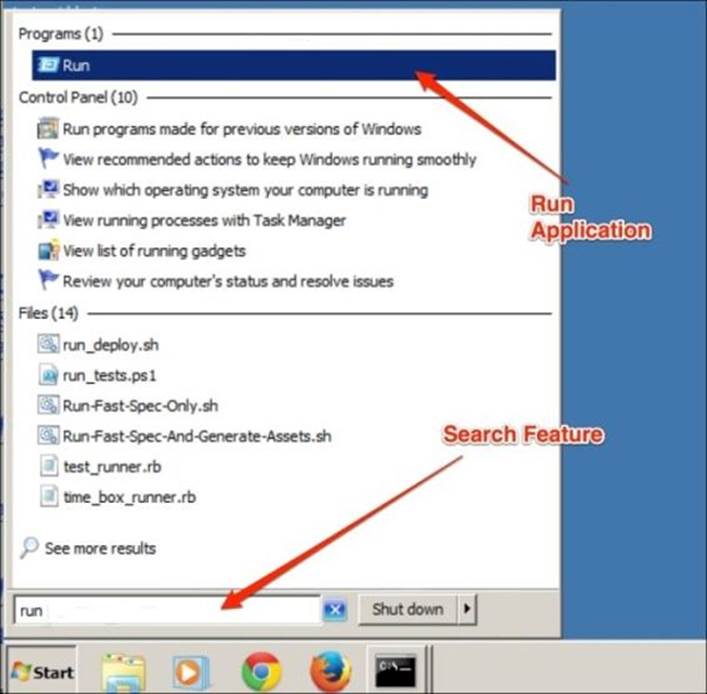
The preceding screenshot shows the Windows 7 interface, where the Run application is found with the search feature.
Note
A common Windows shortcut is to press the Windows + R on your keyboard.
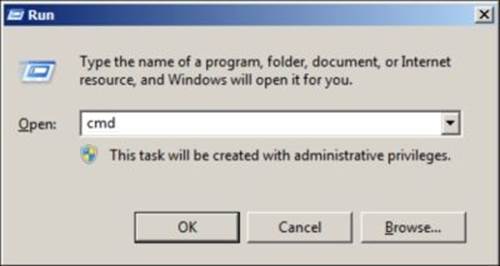
3. Next, type in cmd in the Run application and hit Enter:
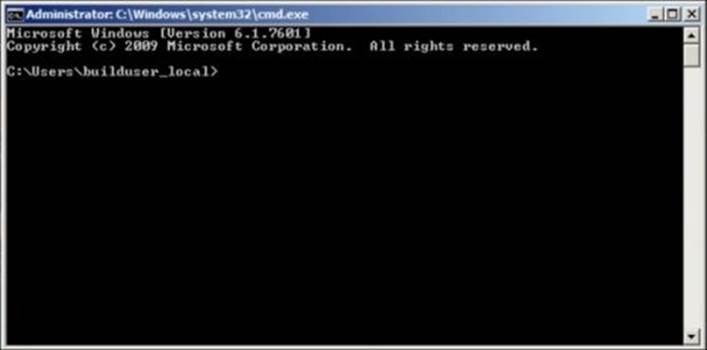
4. An MS-DOS window similar to the following one should open up:
Using PowerShell
Starting with Windows Vista, PowerShell is automatically included in the OS.
Note
If you are using an older version of Windows, you can download the PowerShell installer from http://technet.microsoft.com/en-us/library/hh847837.aspx.
PowerShell improves on a lot of problems that MS-DOS had, and now follows Linux's Bash style paradigm.
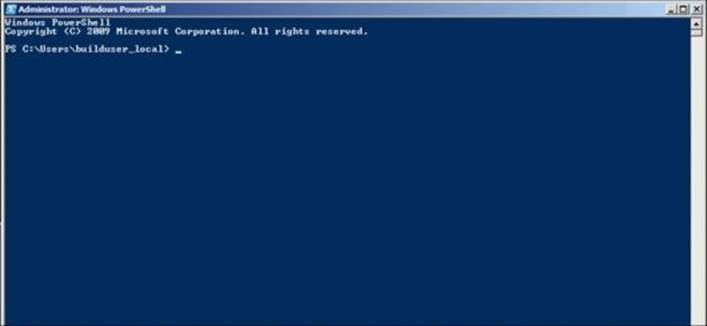
To open the PowerShell terminal, we will follow the same steps as shown in MS-DOS, but instead of typing in cmd, we will type in powershell. The PowerShell terminal, shown in the following screenshot, is very similar to the MS-DOS terminal:
Using the terminal emulator
CygWin is an opensource project to bring a Linux style CLI terminal to Windows. It is a good alternative to MS-DOS. You can download the CygWin installer from the project's website at https://www.cygwin.com/.
Using the terminal on Mac OS X
Mac OS X comes with a great CLI terminal application. It runs Bash shell by default, and anyone who is comfortable with Linux shell will find himself or herself comfortably at home with Terminal.app. To start using Terminal.app, navigate to the Applications directory and open theUtilities folder.
Tip
Command + Shift + U is the shortcut that will take you to the Utilities folder if you execute it within the finder.
Locate the Terminal.app and open it.

Using the terminal on Linux
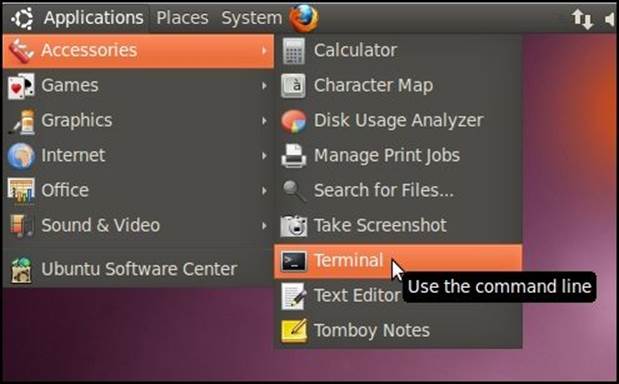
To open the Terminal app in Linux, we will simply open the Applications menu, locate the Accessories option, and click on Terminal.
Configuring the Ruby runtime environment
Once you have found the CLI Terminal in our application, you can continue with the Ruby runtime environment installation and configuration.
Installing Ruby
Some OSes come with Ruby preinstalled, such as Mac OSX and certain distributions of Linux. We can install or upgrade our version of Ruby by finding the appropriate installer on the Ruby project's website at https://ruby-lang.org/en/installation.
Note
The examples in this book require Ruby 1.9.3 or newer.
Installing the selenium-webdriver gem
The Ruby runtime environment uses Ruby gems (gems) as a package manager for all third-party libraries. This package manager is really easy to use and contains many great features. After the Ruby runtime is installed, all we have to do to install any gem is to run the following command in the terminal:
gem install selenium-webdriver
The preceding example will install all of the dependencies that Selenium WebDriver has along with the WebDriver gem. A helpful website that can provide a lot of information for any gem is located at http://rubygems.org. There we can find information about the gem, such as the names of the contributors, the project's main website, all of the released versions of the gem, and any dependencies that the gem has.
Installing Firefox
We will be using the Firefox browser for all of the examples in this book. All of the examples described here will work with any other browser that WebDriver supports. However, Firefox was chosen because it needs the least amount of out of the box setup. If you do not yet have Firefox installed on your computer, download it from http://mozilla.org.
Understanding test class naming
Unlike Java- or C-based programming languages, Ruby does not require the filename of a class to match the class contained inside. For example, the filename test1.rb can contain a class named Potato. Furthermore, a single file can contain multiple classes within it and Ruby compiler will not complain about it. With this setup, it is very easy to loose track of different pieces of code and classes. To reduce the complexity and confusion, there are several basic rules we can follow.
Note
Technically, these rules are more like suggestions, since the compiler will not prevent you from breaking them. Following them is advised, but not 100 percent necessary.
Naming files
It is a good idea to name the files as similar to the class that lives within it as possible. Since different test frameworks use different file naming conventions, we will adhere to the convention while at the same time clearly explaining what is contained inside the file.
For example, if we have a test that does a search for the word cheese on our website, we can name the file test_cheese_finder.rb or test_cheese_search.rb. Both examples clearly explain the intention of the test. We can still name the file test_curd_finder.rb, since it is both accepted by the compiler and expresses the intent of the test; however, not too many people will be able to find it when looking at a directory full of test files.
Tip
Since most Ruby developers do not use an IDE, there are some common practices, such as the one described previously, to make the development simpler to accomplish.
Naming classes
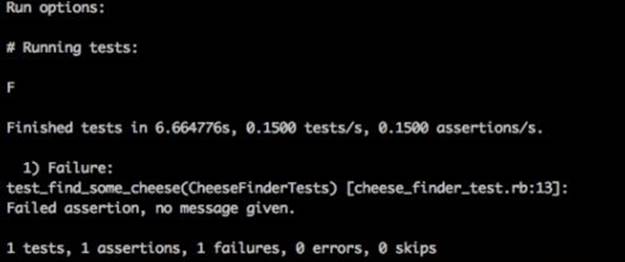
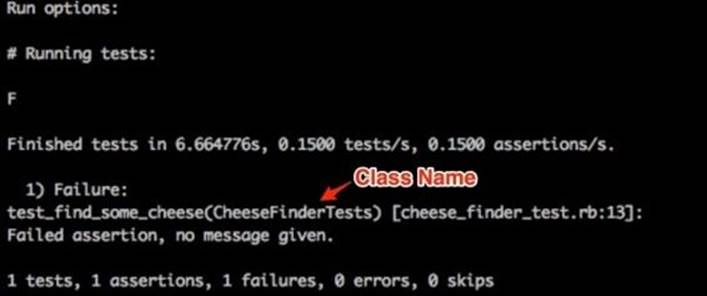
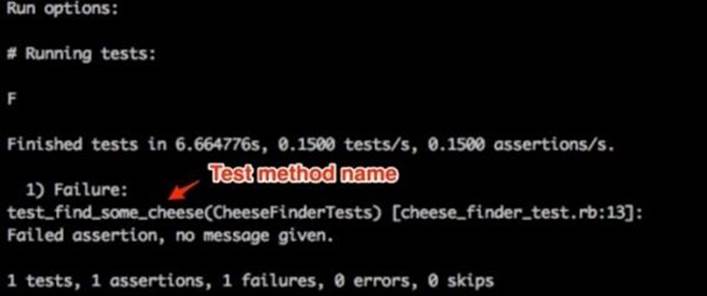
Similar to naming the files, naming the test class should be done in such a way that a test failure could be understood at a quick glance. For example, in Chapter 1, Writing the First Test, we have an intentional test failure that looks like this:
By looking at the failure message, we can identify the original intention of the test by the following three clues:
· The filename of the failure tells us that the tests contained inside will be testing the ability to find cheese on our website, as shown in the following screenshot:
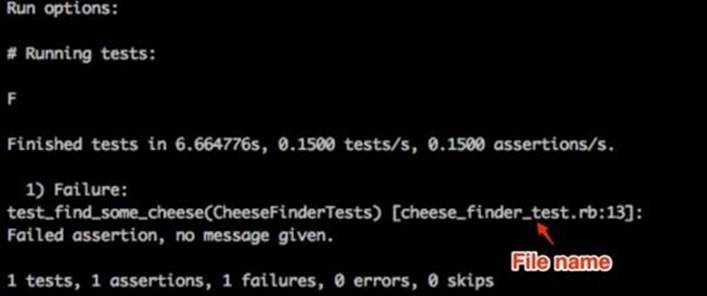
· The class name, shown with an arrow in the following screenshot, reinforces the idea conveyed by the filename:
· The test method name in the following screenshot shows that this particular test was testing the positive search result. If we wanted to test for negative search results, we would have named it test_cannot_find_cheese.
Understanding the namespace
Namespacing is a way of grouping logically related code together. Ruby modules are a great way to accomplish this, because they allow the declaration of classes within them. This allows us to have multiple classes with the same name within the same application without having a collision. It is similar to having two files with the same name in different directions.
When writing out the path to a class, Ruby uses the :: characters as a delimiter. For example, in Chapter 1, Writing the First Test, we are introduced to the Test::Unit framework for writing tests. All of the test classes inherit their behavior from the TestCase class in this framework. When the path to TestCase is fully written out, it looks like Test::Unit::TestCase. This statement gives us the following information:
· The TestCase class lives inside of the Unit module
· The Unit module lives within the Test namespace
Namespacing is a great way to sort our code in such a way that we can understand the intention of an object at a glance. It is similar to sorting the music collection by genre.
Showing object inheritance
The Test::Unit framework provides us with many great shortcuts when testing. For example, when we want to compare two numbers with each other and make sure they are equal, we can write our own comparison or we can use the assert method to do a comparison and display a meaningful failure message. Since we do not wish to write out every comparison by hand, we want our test class to inherit this behavior from the testing framework.
Note
For more information about objects, object-oriented programming, and inheritance, read Chapter 7, The Page Objects Pattern.
In Ruby, we declare object inheritance with the < character. This character shows the direction in which the inheritance is flowing; the < character shows the direction of inheritance, like an arrow. In the following test class declaration, we know that the CheeseFinderTest class will inherit all of its functionality from the TestCase class.
class CheeseFinderTests < Test::Unit::TestCase
Summary
In this section, we concluded the setup of our test machine. You also learned the location of the CLI terminal for the majority of operating systems. Also, we installed all of the necessary components that will allow us to follow all of the exercises in this book.
We also took the time to understand why our test classes are named the way they are. We covered the file and class naming conventions, and you also understand how Ruby does namespacing and declares inheritance.
We are now ready to start writing our tests!