Learning Web Application Development (2014)
Chapter 7. The Data Store
In the previous few chapters, we learned how to create basic servers using Node.js and how to communicate between our client and server using AJAX. One of the more interesting applications involved keeping track of the number of mentions of certain words on Twitter and displaying counts on the client.
One of the major problems with this application is that it stores all of its information in the Node.js program’s memory. That means that if we shut down our server process the word counts disappear with it. This is not the behavior that we want because we’ll often need to shut down our server to update it or, more commonly, our server may shut itself down due to a bug. When either of these things happen, we would like all of the counts that we’ve taken so far to remain intact.
To solve this problem, we’ll need to use some sort of data storage application that runs independently of our program. In this chapter, we’ll learn two different approaches to solving this problem using NoSQL data stores. Specifically, we’ll study Redis and MongoDB, and we’ll learn how to integrate them into our Node.js applications.
NoSQL Versus SQL
If you’ve studied databases, you’ve probably seen the acronym SQL (sometimes pronounced sequel), which stands for Structured Query Language. It’s a language that is used to ask questions of a database stored in a relational format. Relational databases store data as cells in tables, where the rows of the tables can easily be cross-referenced with other tables. For instance, a relational database might store a table of actors and actresses and a separate table of movies. A relational table can be used to map actors and actresses to the movies in which they star.
This approach has several advantages, but the primary reason that they are so widely used is because storing information in this way minimizes redundancy and, therefore, typically requires less space than alternative approaches. In the past this was an important feature, because storing large amounts of data was relatively expensive. In recent years, however, the price of storage has dropped dramatically and minimizing redundancy isn’t as important as it had been.
This shift has led researchers and engineers to rethink their assumptions about storing data and begin experimenting with storage in nonrelational formats. These new data storage solutions, sometimes referred to as NoSQL data stores, make a trade-off: sometimes they store redundant information in exchange for increased ease-of-use from a programming perspective. Furthermore, some of these data stores are designed with specific use cases in mind, such as applications where reading data needs to be more efficient than writing data.
Redis
Redis is a perfect example of a NoSQL data store. It is designed for fast access to data that is used regularly. It offers this speedup at the expense of reliability by storing data in memory instead of on disk. (Technically, Redis does flush data to disk periodically, but for the most part you can think of it as an in-memory data store.)
Redis stores information in a key-value format—you can think of this as being similar to the way JavaScript stores object properties. Because of this, it allows a developer to organize information into traditional data structures (hashes, lists, sets, etc.), which makes it feel like a natural extension to storing data in our programs. It is perfect for data that needs to be accessed quickly or for temporarily storing frequently accessed data (referred to as caching) to improve the response time of our applications.
We won’t explore these use cases in this book, but it’s a good idea to keep them in mind as you continue on your journey. Our use of Redis will be relatively straightforward—we simply want to store our Twitter count data independently of our Node.js server. To do this, we’ll use a key for each of the words, and each value will be an integer representing the number of times the word appears. Before we learn to do that programmatically, we’ll learn to interact with Redis on the command line.
Interacting with the Redis Command-Line Client
To keep a clean separation from our previous work, let’s start by re-cloning the node-dev-bootstrap project into our Projects directory as Chapter7. If you need a refresher on how to do this, you can look back at Chapter 6.
Once that’s done, enter the directory, fire up your virtual machine, and SSH into your guest. Because you’re rebuilding the machine from scratch, it will take some time:
hostname $ cd Projects/Chapter7
hostname $ vagrant up
...vagrant build stuff...
hostname $ vagrant ssh
Now we should be logged in to our virtual machine where Redis is already installed and configured. We can use the redis-cli command to start up the interactive Redis client:
vagrant $ redis-cli
redis 127.0.0.1:6379>
Storing data in Redis is as easy as using the set command. Here, we create a key for awesome and set its value to 0:
redis 127.0.0.1:6379> set awesome 0
OK
If all goes well, Redis should respond with “OK.” We can check the value of the key by using the get command:
redis 127.0.0.1:6379> get awesome
"0"
Once we have the value stored, we can manipulate it in numerous ways. Of course, we’re probably most interested in incrementing it by 1 when we see the word used in a tweet. Fortunately, it turns out that Redis has an incr command that does just that:
redis 127.0.0.1:6379> incr awesome
(integer) 1
redis 127.0.0.1:6379> incr awesome
(integer) 2
redis 127.0.0.1:6379> get awesome
"2"
The incr command is adding 1 to the value that is currently associated with the specified key (in this case, the key is awesome). To exit out of the interactive Redis client, we can type exit.
These three commands (set, get, and incr) are all we need to know to start storing our counts, but Redis offers a lot more than what I’ve shown you here. To get a taste of some of its other features, try out the outstanding interactive Redis tutorial, as shown in Figure 7-1.
Installing the Redis Module via a package.json File
At this point, we know how to create a key for each word and then increment the value interactively, but we’d like to be able to do it programmatically from our Node.js programs.
We’ll be working from our Twitter project from the last chapter, so copy our Twitter directory from our Chapter6/app directory into our Chapter7/app directory. You can use the cp command to do that from the command line, or you can do it through your normal GUI interface.
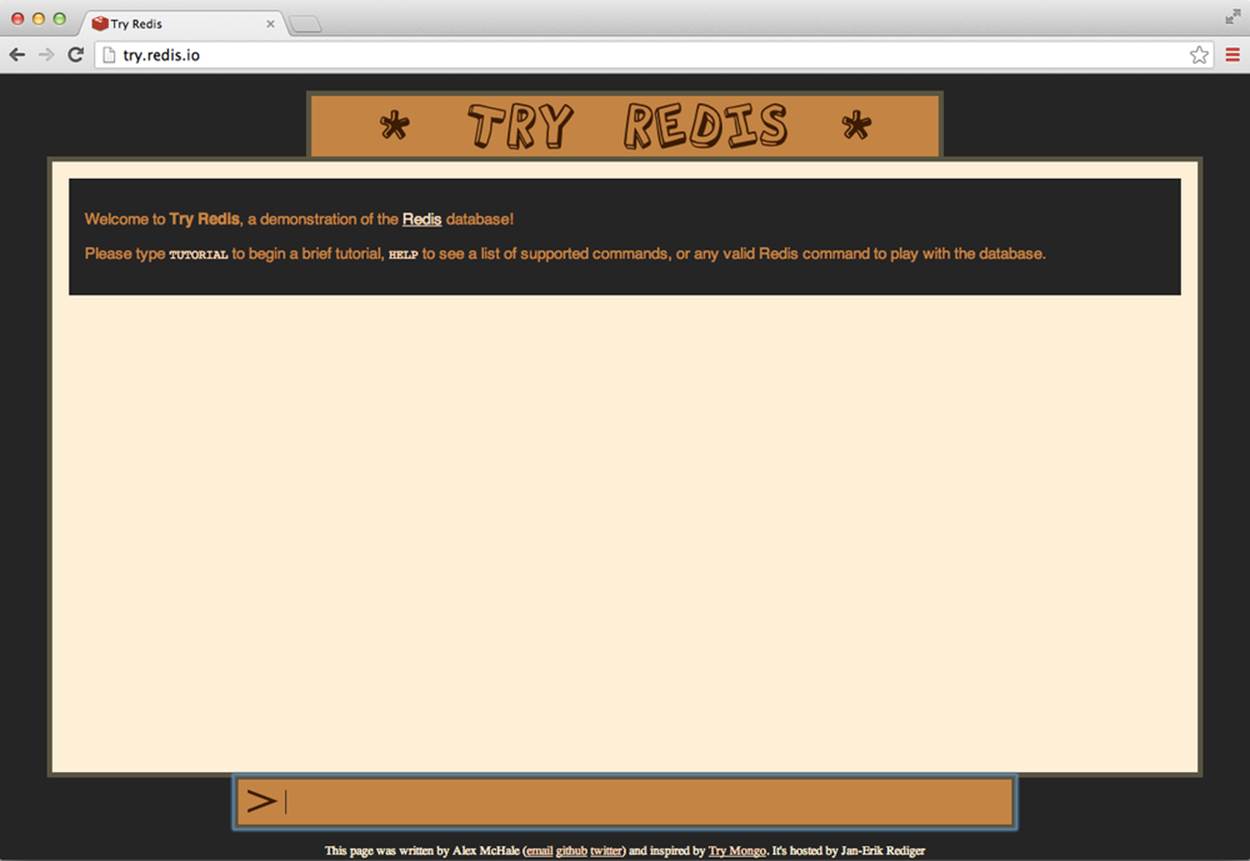
Figure 7-1. The home page of the interactive Redis tutorial
To get our Node.js program communicating with Redis, we’ll need to install the node-redis module. Previously, we used the npm command from the command line to install the ntwitter module. This makes sense when we’re just starting out, but as we move forward it’s going to be important to track our dependencies in a more formal way. To do this, we use a special file called package.json, which keeps track of several different aspects of our project, including its dependencies.
In your app directory, create a file called package.json, and copy the following content:
{
"name": "tutorial",
"description": "a tutorial on using node, twitter, redis, and express",
"version": "0.0.1",
"dependencies": {
"ntwitter": "0.5.x",
"redis": "0.8.x"
}
}
NOTE
NPM offers an interactive approach to build a package.json file, but it will ask you for a lot more information than this. If you want to give it a try, type npm init in your project’s directory.
As you can see, this specifies a few things about our project, including its dependencies (since node-redis is the recommended client for Node.js, it’s simply referred to as redis in NPM). We’ll use this in Chapter 8 to get our application and all of its dependencies deployed on Cloud Foundry. For now, however, using a package.json file simply has the advantage that it simplifies installation. Specifically, we can now install all dependencies by typing the following command on our guest machine:
vagrant $ cd app
vagrant $ npm install
Interacting with Redis in Our Code
On your host machine, use your text editor to open the tweet_counter.js file that we created in the previous chapter. It should be contained in the Twitter directory of your app folder. If you worked through the examples and the problems, your code is probably a little more in-depth than mine.Either way, you’ll want to follow my lead and modify your code so it imports and uses the redis module:
var ntwitter = require("ntwitter"),
redis = require("redis"), // require the redis module
credentials = require("./credentials.json"),
redisClient,
twitter,
// declare a counts objects to store the counts
counts = {};
twitter = ntwitter(credentials);
// create a client to connect to Redis
client = redis.createClient();
// initialize our counters
counts.awesome = 0;
twitter.stream(
"statuses/filter",
{ track: ["awesome", "cool", "rad", "gnarly", "groovy"] },
function(stream) {
stream.on("data", function(tweet) {
if (tweet.text.indexOf("awesome") >= -1) {
// increment the key on the client
client.incr("awesome");
counts.awesome = counts.awesome + 1;
}
});
}
);
module.exports = counts;
We use the incr function just like we did with the interactive Redis client. In fact, we can use any of the Redis commands in exactly the same way—the client exposes a function with the same name as the command.
We can run this code in the usual way. Let it run for a bit—it should be keeping track of the number of tweets containing the word “awesome” in Redis, and if we kept our setInterval code in there, we should see it printing out the values periodically. Once we’re satisfied that it has seen some tweets, we can verify that the counts are stored in Redis by stopping the program (with Ctrl-C) and then reconnecting with the redis-cli program. Once there, we can use the get command to see the stored value of the awesome key:
vagrant $ redis-cli
redis 127.0.0.1:6379> get awesome
(integer) "349"
TIP
If, at any time, you want to clear out the Redis data store, you can type flushall at the redis-cli prompt.
Initializing the Counts from the Redis Store
At this point, we’re storing the data while the program is running, but when we restart our server, we’re still reinitializing the counts object with 0. To completely solve our problem, we want to make it so our tweet counter gets initialized with the data that we’ve stored in Redis. We can use the get command to get the values before we start the stream. Like most things in Node, however, the get function is asynchronous, so we have to handle it a little carefully:
var ntwitter = require("ntwitter"),
redis = require("redis"), // require the redis module
credentials = require("./credentials.json"),
redisClient,
counts = {},
twitter;
twitter = ntwitter(credentials);
client = redis.createClient();
// the callback gets two arguments
client.get("awesome", function (err, awesomeCount) {
// check to make sure there's no error
if (err !== null) {
console.log("ERROR: " + err);
// exit the function
return;
}
// initialize our counter to the integer version
// of the value stored in Redis, or 0 if it's not
// set
counts.awesome = parseInt(awesomeCount,10) || 0;
twitter.stream(
"statuses/filter",
{ track: ["awesome", "cool", "rad", "gnarly", "groovy"] },
function(stream) {
stream.on("data", function(tweet) {
if (tweet.text.indexOf("awesome") >= -1) {
// increment the key on the client
client.incr("awesome");
counts.awesome = counts.awesome + 1;
}
});
}
);
});
module.exports = counts;
You’ll notice that the callback for get accepts two parameters: err and awesomeCount. The err parameter represents an error condition and will be set to an error object if there’s any kind of problem with the request. If there is no problem with the request, it will be set to null. Typically when we make a request to our data store, the first thing that we’ll do on the response is check for the error and handle it in some way. In the preceding case, we just print it out to let us know that there’s some sort of problem, but you’ll definitely want to handle errors more gracefully if your apps end up in production.
Next, you’ll see that we have to do some processing of the awesomeCount value. That’s because Redis stores all values as strings, so we have to convert the value to a number to do arithmetic operations on it in JavaScript. In this case, we use the global parseInt function, which extracts the number value from the string that Redis returns. The second parameter to parseInt is called the radix, and it means that we want the base-10 value of the number. If the value is not a number, parseInt returns the value NaN, which stands for—you guessed it—Not a Number.
Remember that || refers to JavaScript’s or operator. This operator will return the first value in a list of values that are not falsy, which refers to values like false or 0 or NaN. If all the values are falsy, this operator will return the last one.
Essentially this line of code translates to “use the awesomeCount value if it is defined, otherwise use 0.” This lets us initialize our code to 0 when awesome is not defined with a single line of code. At this point, you will probably want to generalize the code for all of the words that we’re tracking, but it’s helpful to learn one more Redis command first.
Using mget to Get Multiple Values
The get command is great for a single key-value pair, but what happens if we want to request the value associated with multiple keys? That’s almost as easy using the mget function. We can generalize our code as follows:
client.mget(["awesome", "cool"], function (err, results) {
if (err !== null) {
console.log("ERROR: " + err);
return;
}
counts.awesome = parseInt(results[0], 10) || 0;
counts.cool = parseInt(results[1], 10) || 0;
}
Using mget, we should be able to generalize this code to work for all of the words that we’re tracking.
Redis is great for simple data that can be stored as strings. This includes data that is stored as JSON objects. But if we want a little more control over our JSON data it’s better to use a data store that is designed with JSON in mind. MongoDB is a perfect example of such a data store.
MongoDB
MongoDB (or Mongo, for short) is a database that allows us to store data on disk, but not in a relational format. Instead, Mongo is a document-oriented database that conceptually allows us to store objects organized as collections in the JSON format. (Technically, MongoDB stores its data in the BSON format, but from our perspective we can think of it as JSON.) In addition, it allows us to interact with it completely in JavaScript!
Mongo can be used for more complex data storage needs, such as storing user accounts or comments in blog posts. It can even be used to store binary data like images! In our case, Mongo is perfect for storing Amazerrific to-do objects independently of our server.
Interacting with the MongoDB Command-Line Client
Like Redis, Mongo offers a command-line client that allows us to directly interact with the data store. You can fire up the Mongo client by typing mongo at the command line of your guest machine:
vagrant $ mongo
MongoDB shell version: 2.4.7
connecting to: test
>
TIP
You may see some start-up warnings when Mongo first launches, but that’s totally normal.
One immediate difference between Redis and Mongo is that we can interact with it using using JavaScript! For example, here we create a variable called card and store an object in it:
> var card = { "rank":"ace", "suit":"clubs" };
> card
{ "rank" : "ace", "suit" : "clubs" }
>
Likewise, we can create and manipulate arrays. Notice that in this example, we don’t complete our JavaScript statement before the end of each line. When we press Enter, Mongo responds with three dots letting us know that the previous statement was incomplete. Mongo will automatically execute the first full JavaScript statement:
> var clubs = [];
> ["two", "three", "four", "five"].forEach(
... function (rank) {
... cards.push( { "rank":rank, "suit":"clubs" } )
... });
> clubs
[
{
"rank" : "two",
"suit" : "clubs"
},
{
"rank" : "three",
"suit" : "clubs"
},
{
"rank" : "four",
"suit" : "clubs"
},
{
"rank" : "five",
"suit" : "clubs"
}
]
In other words, the Mongo command-line client works a little bit like the JavaScript console in Chrome. But those similarities end when we want to start storing data. Mongo organizes data as documents, which we can think of as JSON objects. It stores collections of documents in databases.We can see the databases in our MongoDB by using the show dbs command:
> show dbs
local 0.03125GB
The local db is always there. We can switch to a different database with the use command:
> use test
switched to db test
Once we’ve selected a database to use, we can access it through the db object. We can save objects to a collection by calling the save function on the collection. If the collection doesn’t already exist, Mongo will create it for us. Here, we save the card that we created earlier in our collection:
> show collections;
> db.cards.save(card);
> show collections;
cards
system.indexes
You’ll see that the cards collection doesn’t exist before we save an object to it. We can use the collection’s find function with no arguments to see what documents are stored:
> db.cards.find();
{ "_id" : ObjectId("526ddeea7ba2be67c95558d8"),"rank":"ace","suit":"clubs" }
In addition to rank and suit properties, a card also has an _id associated with it. For the most part, every document in a MongoDB collection has one of these associated with it.
In addition to saving a single item, we can also add multiple documents to the collection in one call to save. Here we do that with the clubs array that we created previously:
> db.cards.save(clubs);
> db.cards.find();
{ "_id" : ObjectId("526ddeea7ba2be67c95558d8"),"rank":"ace","suit":"clubs" }
{ "_id" : ObjectId("526ddeea7ba2be67c95558d9"),"rank":"two","suit":"clubs" }
{ "_id" : ObjectId("526ddeea7ba2be67c95558da"),"rank":"three","suit":"clubs" }
{ "_id" : ObjectId("526ddeea7ba2be67c95558db"),"rank":"four","suit":"clubs" }
{ "_id" : ObjectId("526ddeea7ba2be67c95558dc"),"rank":"five","suit":"clubs" }
We can also add more objects to the db:
>hearts = [];
> ["two", "three", "four", "five"].
... forEach(function (rank)
... { hearts.push( { "rank":rank, "suit":"hearts" } )
... });
> db.cards.save(hearts);
> db.cards.find();
{ "_id" : ObjectId("526ddeea7ba2be67c95558d8"),"rank":"ace","suit":"clubs" }
{ "_id" : ObjectId("526ddeea7ba2be67c95558d9"),"rank":"two","suit":"clubs" }
{ "_id" : ObjectId("526ddeea7ba2be67c95558da"),"rank":"three","suit":"clubs" }
{ "_id" : ObjectId("526ddeea7ba2be67c95558db"),"rank":"four","suit":"clubs" }
{ "_id" : ObjectId("526ddeea7ba2be67c95558dc"),"rank":"five","suit":"clubs" }
{ "_id" : ObjectId("526ddf0f7ba2be67c95558de"),"rank":"two","suit":"hearts" }
{ "_id" : ObjectId("526ddf0f7ba2be67c95558df"),"rank":"three","suit":"hearts" }
{ "_id" : ObjectId("526ddf0f7ba2be67c95558e0"),"rank":"four","suit":"hearts" }
{ "_id" : ObjectId("526ddf0f7ba2be67c95558e1"),"rank":"five","suit":"hearts" }
Once we have enough varying documents in our collection, we can retrieve them by creating queries from JSON objects that represent the properties of the documents we want to retrieve. For example, we can retrieve all card documents with a rank of two and store them in a variable calledtwos:
> var twos = db.cards.find({"rank":"two"});
> twos
{ "_id" : ObjectId("526ddeea7ba2be67c95558d9"),"rank":"two","suit":"clubs" }
{ "_id" : ObjectId("526ddf0f7ba2be67c95558de"),"rank":"two","suit":"hearts" }
Or we can select all the aces:
> var aces = db.cards.find({"rank":"aces"});
> aces
{ "_id" : ObjectId("526ddeea7ba2be67c95558d8"),"rank":"ace","suit":"clubs" }
We can also remove the elements from the collection by calling the remove method and sending in a query:
> db.cards.remove({"rank":"two"});
> db.cards.find();
{ "_id" : ObjectId("526ddeea7ba2be67c95558da"),"rank":"three","suit":"clubs" }
{ "_id" : ObjectId("526ddeea7ba2be67c95558db"),"rank":"four","suit":"clubs" }
{ "_id" : ObjectId("526ddeea7ba2be67c95558dc"),"rank":"five","suit":"clubs" }
{ "_id" : ObjectId("526ddf0f7ba2be67c95558df"),"rank":"three","suit":"hearts" }
{ "_id" : ObjectId("526ddf0f7ba2be67c95558e0"),"rank":"four","suit":"hearts" }
{ "_id" : ObjectId("526ddf0f7ba2be67c95558e1"),"rank":"five","suit":"hearts" }
Or we can remove all of the documents from the collection by calling remove with an empty query:
> db.cards.remove();
> db.cards.find();
>
Similar to Redis, MongoDB offers an interactive MongoDB tutorial, as shown in Figure 7-2, that you can try out in your web browser. I encourage you to work your way through this tutorial to learn a little more about Mongo’s functionality and types of queries that are available.

Figure 7-2. The home page of the interactive MongoDB tutorial
In the end, however, we won’t use many of the default Mongo commands in Node.js. Instead, we’ll model our data as objects using a Node.js module called Mongoose.
Modeling Data with Mongoose
Mongoose is a Node.js module that serves two primary purposes. First of all, it works as a client for MongoDB in the same way that the node-redis module works as a client for Redis. But Mongoose also serves as a data modeling tool, which allows us to represent documents as objects in our programs. In this section, we’ll learn the basics of data modeling and use Mongoose to create a data model for our Amazeriffic ToDos.
Models
A data model is simply an object representation of a collection of documents in a data store. In addition to specifying the fields that are in every document of a collection, it adds MongoDB database operations like save and find to the associated objects.
In Mongoose, a data model consists of a schema, which describes the structure of all of the objects that are of that type. For instance, suppose we wanted to create a data model for a collection of playing cards. We’d start by specifying the schema for a card—namely, explicitly declaring that every card has a rank and a suit. In our JavaScript file, this looks something like the following:
var CardSchema = mongoose.Schema({
"rank" : String,
"suit" : String
});
Once we create the schema, building a model is very easy. By convention, we use a capital letter for data model objects:
var Card = mongoose.model("Card", CardSchema);
Schemas can get more complicated. For example, we might build a schema for blog posts that contain dates and comments. In this example, the comments attribute represents an array of strings instead of a single one:
var BlogPostSchema = mongoose.Schema({
title: String,
body : String,
date : Date,
comments : [ String ]
});
What does a model do for us? Once we have a model, we can create an object of the model type very easily using JavaScript’s new operator. For example, this line of code creates the ace of spades and stores it in a variable called c1:
var c1 = new Card({"rank":"ace", "suit":"spades"});
Great, but couldn’t we have just as easily done that with this code?
var c2 = { "rank":"ace", "suit":"spades" };
The difference is that the Mongoose object allows us to interact with the database through some built-in functions!
// save this card to our data store
c1.save(function (err) {
if (err !== null) {
// object was not saved!
console.log(err);
} else {
console.log("the object was saved!");
}
});
We can also interact directly with the model to pull items out of the database using the find function that’s part of the data model. Like the find function in the interactive MongoDB client, this function takes in an arbitrary MongoDB query. The difference is that it restricts itself to the types that are defined by the model:
Card.find({}, function (err, cards) {
if (err !== null) {
console.log("ERROR: " + err);
// return from the function
return;
}
// if we get here, there was no error
Cards.forEach(function (card) {
// this will print all of the cards in the database
console.log (card.rank + " of " + card.suit);
});
});
We can also update elements by finding the appropriate one (via its _id or another query) and saving it again. For instance, suppose we wanted to change all of the cards that have the suit spades to hearts:
Card.find({"suit" : " hearts"}, function (err, cards) {
cards.forEach(function (card) {
// update the card to spades
card.suit = "spades";
// save the updated card
card.save(function (err) {
if (err) {
// object was not saved
console.log(err);
}
});
});
});
Last but not least, we can remove elements from the database by calling the remove function on the data model:
Card.remove({ "rank":"ace", "suit":"spades" }, function (err) {
if (err !== null) {
// object was not successfully removed!
console.log(err);
}
});
At this point, we’ve seen examples of the four major data store operations using Mongoose: create, read, update, and delete. But at this point, we haven’t actually seen Mongoose in an app yet! We’ll see that now.
Storing Amazeriffic ToDos
To start, we can copy our current version of Amazeriffic with the client and the server to our Chapter7 directory. We’ll need to set up a package.json file that includes Mongoose as a dependency:
{
"name": "amazeriffic",
"description": "The best to-do list app in the history of the world",
"version": "0.0.1",
"dependencies": {
"mongoose": "3.6.x"
}
}
Once we do that, we can run npm install to install the mongoose module. We can then add code to server.js to import the module:
var express = require("express"),
http = require("http"),
// import the mongoose library
mongoose = require("mongoose"),
app = express();
app.use(express.static(__dirname + "/client"));
app.use(express.urlencoded());
// connect to the amazeriffic data store in mongo
mongoose.connect('mongodb://localhost/amazeriffic');
Next, we’ll define our schema and subsequently our model for our to-do list items in our server code:
// This is our mongoose model for todos
var ToDoSchema = mongoose.Schema({
description: String,
tags: [ String ]
});
var ToDo = mongoose.model("ToDo", ToDoSchema);
// now we listen for requests
http.createServer(app).listen(3000);
We can update our todo get route to get the to-do items out of the database and return them:
app.get("/todos.json", function (req, res) {
ToDo.find({}, function (err, toDos) {
// don't forget to check for errors!
res.json(toDos);
});
});
Last but not least, we’ll update our post route to add an element to the database. This is a little interesting, because in order to maintain compatibility with the client we modified in Chapter 2, we’ll want to return an entire list of to-do items:
app.post("/todos", function (req, res) {
console.log(req.body);
var newToDo = new ToDo({"description":req.body.description,
"tags":req.body.tags});
newToDo.save(function (err, result) {
if (err !== null) {
console.log(err);
res.send("ERROR");
} else {
// our client expects *all* of the todo items to be returned,
// so we do an additional request to maintain compatibility
ToDo.find({}, function (err, result) {
if (err !== null) {
// the element did not get saved!
res.send("ERROR");
}
res.json(result);
});
}
});
});
Now we can run our server and connect through our browser. Keep in mind that we didn’t initialize our collection with any ToDos, so we’ll need to add elements before we see any to-do items show up in our app.
Summary
In this chapter, we learned how to store data independently of our application. We saw two data storage solutions that can be considered examples of NoSQL databases—Redis and MongoDB.
Redis is a key-value store. It offers a fast, flexible solution for storing simple data. The node-redis module allows us to interact with Redis in almost the same way we interact with Redis from the command line.
MongoDB is a more robust data storage solution that organizes databases into collections. As users of the database, we can think of it as storing data as JavaScript objects. Additionally, the command-line interface for Mongo can be used as a basic JavaScript interpreter that allows us to interact with our collections.
Mongoose is a Node.js module that allows us to interact with MongoDB, but it also allows us to build data models. In addition to specifying what all elements in a collection of data must look like, data models allow us to interact with the database through objects in our program.
More Practice and Further Reading
Poker API
If you followed along with the practice sections in the previous chapters, you’ve built a poker API that will accept poker hands and return the type of hand (e.g., a pair, a full house). It would be interesting to add code to your Express server that stores the result of every hand and their type in Redis or Mongo. In other words, make it so your app keeps track of every valid hand that is posted to your API along with the result. Don’t track the items that result in an error.
If you do that, you can set up a get route that responds with a JSON object that includes all of the posted hands. You may even want to make it so the get route returns only the five most recent hands.
If you want to make this example really interesting, try to find a library of playing card images, and have your client show images of the cards in the posted hand instead of the JSON objects or a text description. To do this, you can create an images subdirectory in the client part of your application and store the images there.
Other Database References
Database is a huge topic, worthy of several books’ worth of material. If you want to learn more about web app development and programming in general, it’s pretty essential that you eventually try to obtain a background in relational databases and SQL.
Coursera is a great place to take free, online classes in topics such as databases. In fact, it has a self-study course in databases taught by Jennifer Widom of Stanford University!
If you prefer books, Jennifer Widom is a coauthor (along with Hector Garcia-Molina and Jeffrey Ullman) of Database Systems: The Complete Book (Prentice Hall, 2008). It definitely follows a more academic approach to the topic, but I think it’s an excellent, readable introduction.
Another great book that covers different types of databases (including NoSQL databases) is Seven Databases in Seven Weeks by Eric Redmond and Jim Wilson (Pragmatic Bookshelf, 2012). In addition to covering Mongo and Redis, it also describes popular options such as PostgreSQL and Riak. It does a great job of describing the pros and cons of each database, along with various use cases.