From Zero to Blogger in 30 days (2015)
How to Use WordPress Plugins
One of the best things about WordPress is the ability to use plugins! Plugins are very special additions or add-ons to WordPress that lets it go from an old-fashioned static site to fabulous and impressive in a very short space of time. A plugin can take you from inactive to interactive, from nothing special to spectacular!
It is essentially software or an app that you add on to your instance of WordPress to make it do something you want it to do, or behave in a certain way.
One plugin may add a contact form, another clickable social media icons, another a discussion forum, or even a shopping cart. Honestly, there isn't enough room to explain all that plugins do for WordPress. It's what makes WordPress so special. Instead of buying or using bulky software, you can customize your WordPress instance to do what you want and need it to do.
So What Plugins Should You Install?
You don't actually need to install any plugins to get going. However, once you get more familiar with WordPress, adding new plugins will definitely help create a better site.
Most people do use some form of the following plugins on their site:
· SEO: A plugin that allows the owner of the site to make their WordPress more SEO friendly.
· Contact Forms: A plugin that allows you to insert a contact form on any page you desire.
· Backup: A plugin that helps you automatically back up your website or blog so that if something ever goes wrong you'll have it.
· Social Media: Most people have "like" buttons, "tweet" buttons and more on their blogs and websites today, and plugins make it easy to add them without knowing any code whatsoever.
· Security: Always add some sort of security to your blog or website to ensure safety from hackers. You may think no one cares about your little blog but these hackers are often not even people today, they are computer programs designed to find security holes and it can happen to the most obscure blog or website.
How to Install a Free WordPress Plugin Through WordPress
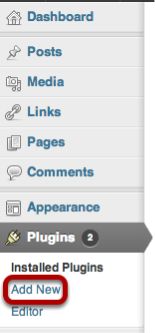
Most free plugins you hear people talking about will be available to download right from within your WordPress dashboard they are stored in what’s known as the WordPress repositary. To search for one, click Add New on the WordPress plugins menu.

Now you can enter your search term into the box before pressing Search Plugins. For this tutorial, we will be searching for and activating a contact form plugin.
You can search for anything you need, whether that's the exact name of a plugin someone told you about, or a type of plugin you need e.g. a Facebook posting plugin, an SEO plugin etc.
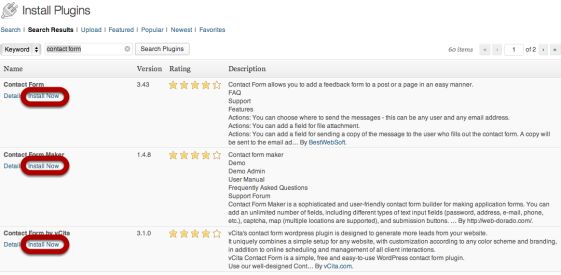
Now you'll see your search results. Simply read the names and descriptions on the list and click Install Now for the plugin you want to install and use. You'll be asked if you're sure you want to install the plugin, click OK.
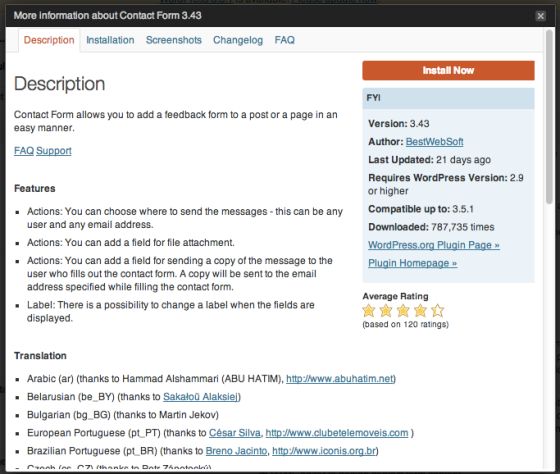
Alternatively you can click Details to view more info about any plugin before you choose to install it. Then you can either press the X button to go back to the search results, or Install Now.
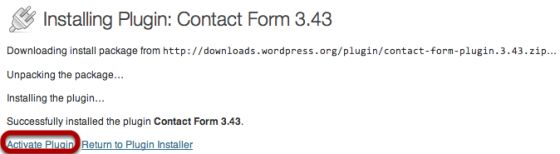
After you install a plugin, you'll see a screen like this. You won't be able to use your plugin until you click Activate Plugin.
Now that your plugin is installed and activated, you can go ahead and use it, or you can repeat the process to install further plugins.
Note that every plugin is designed differently. Many of them will add an option to the WordPress Settings menu. Many, however, will add their own options link.
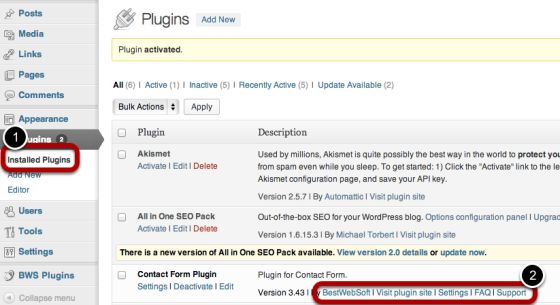
If you can't find a settings page for the particular plugin you just installed, click Installed Plugins from the WordPress plugins menu, and scroll down the list of plugins until you find a documentation link for the one you're interested in.
For the contact form plugin example, you can see it's now installed and showing up on our plugins list. Within that list there's also links to the plugin FAQ and support sites for more information.
How to Install a Free or Paid WordPress Plugin from a Zip File
Some plugins aren't available through the WordPress dashboard. This is true with paid plugins and some free plugins. Not to worry, it's still easy to install them!
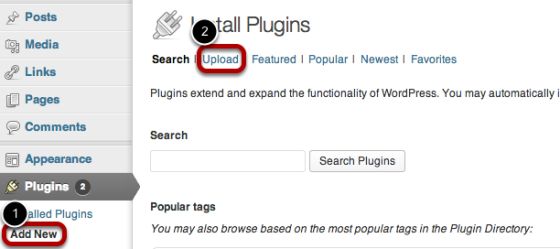
Simply download the plugin zip file from the developer and then click Add New in the WordPress plugins menu, like you did before. When you get to the search screen, click Upload instead of searching for a plugin.
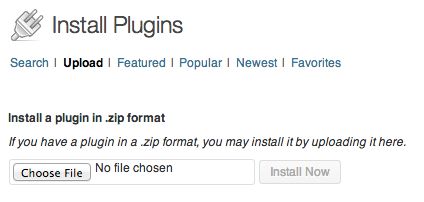
Next, click the Choose File button, and select the plugin file from its location on your hard drive.
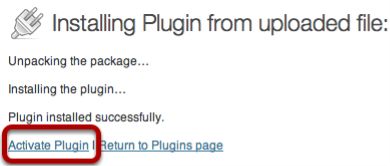
Like you did in the steps above, be sure to click Activate Plugin once your plugin zip file has uploaded.
Easy, right?! Now all you need to do is use your plugin like any other plugin. Some paid plugins may require you to enter a product key, so be sure to refer to their own documentation.
NOTE: It is important to pay attention to your installation of any plugin and read the writings on each plugin you may want to use. Some plugins do not play nice with each other so you'll need to pick and choose based on your theme and compatibility issues.
Updating Your WordPress Plugins
Bear in mind that things on the internet are always changing and being improved. WordPress plugins are no different, which is why you need to look out for plugin updates.
When updates are offered for your plugin, it is very important that you go ahead and upgrade as soon as possible. Do read all instructions and issues first, and get help if you need it, but most updates involve closing security loopholes as well as added functionality.
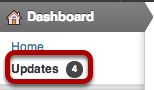
You will know if your plugin needs updating by looking in your Dashboard. In the example, there's a number "4" next to the Updates section. This shows that there are 4 updates available - this total number includes plugins, themes and your WordPress installation. Click the Updates button to see more.

Now you'll see exactly what needs updating on your WordPress installation. On the example website, you can see that there are only two themes that need updating. You can click the blue links, as highlighted above, to view more about these updates and check for any compatibility issues or security vulnerabilities.
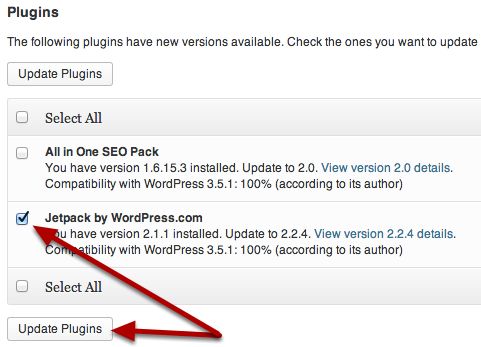
Now you can select which plugins you want to update.
IMPORTANT NOTE: Make sure you backup your WordPress installation before updating any of your plugins! Backing up is a good idea before you make any major changes on your site, because things can go wrong.
To update, select the checkbox next to the plugin name, and click the Update Plugins button. In this example, I am updating the Jetpack plugin.
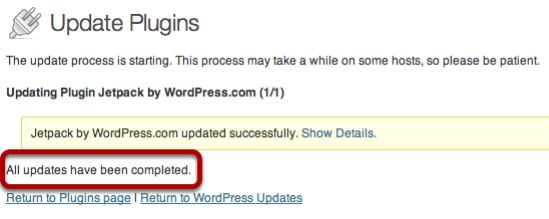
Now you'll see a page while the update is in progress. It's very important that you do not close this page or click away until you see the update completed message, as shown above.
Now your plugin has been updated - easy! You can go back and repeat this progress whenever you need to.
How to Use WordPress Widgets
Like plugins, widgets add superb functionality to your website, making it easier to change and add things without coding it yourself.
You may see a theme advertised as "widget ready". Really a widget is a plugin, but it's a special plugin designed to arrange how your site is laid out. For instance, widgets are used to add content to the sidebar, add a search bar, or other content that you can arrange, show, or remove from various areas of your website or blog.
Many widgets are already included with WordPress, but others are added when you install plugins.
You don't need to understand any code at all to use widgets in your WordPress site. There are many widgets that come with basic WordPress that you may not think of as widgets such as post categories, tags, site navigation, search boxes, and so on.
Also remember that a plugin sometimes adds widgets as well. They simply make your site more user friendly to anyone who visits by providing a clean layout to your content. What's really awesome is they're as easy to take away as they are to add. Don't like the look? Just uninstall it, or inactivate it.
Here's how to do it...
How to Access Widget Options

You can see widgets by going to your Dashboard, then Appearance, and then click on Widgets.
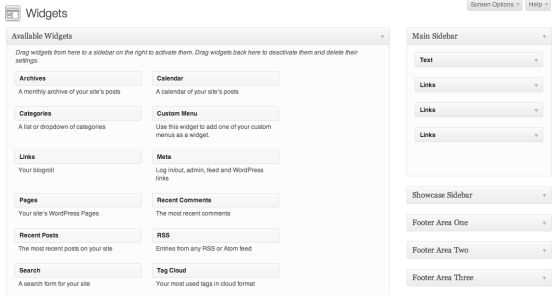
Now you can see what widgets you already have. Many themes give you a basic selection of widgets already added to your blog, but some will be blank.
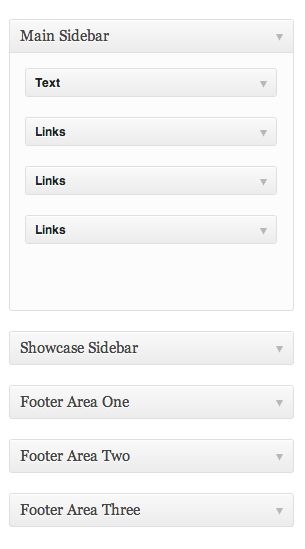
Let's take a closer look at that widget screen. On the right hand side, you'll see the different areas available for you to add widgets.
As you can see from this example, the theme we're using lets us add widgets to the main sidebar, as well as different footer areas. Your theme may have more or less widgets areas, but the sidebar is almost always included and this is the most popular place for adding widgets. This is what we'll focus on for in this section of the book.
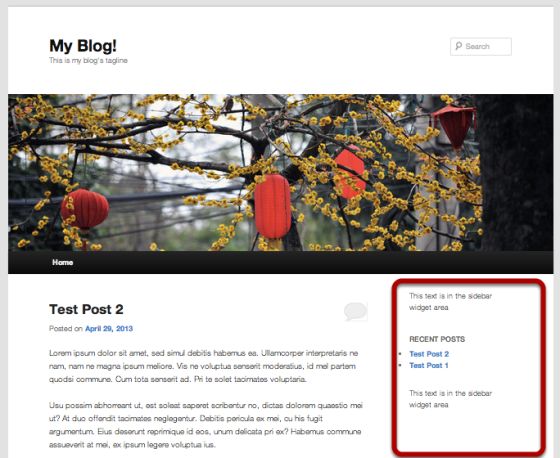
Not sure what the sidebar is? Here you can see it in the example - it runs all the way down the page to the right of the main blog content.
Different themes have different sidebars - some are on the left of the page instead of the right, some have more than one, and some may not have a sidebar at all (although this is rare).
How to Delete A Widget
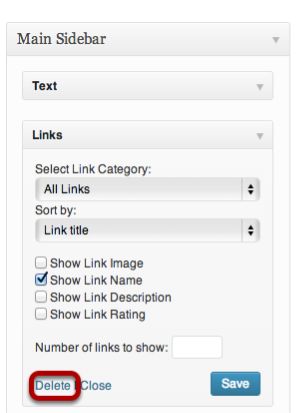
To remove any widget that's already there, first click the arrow next to the widget name, then press Delete.
How to Add New Widgets to Your Site
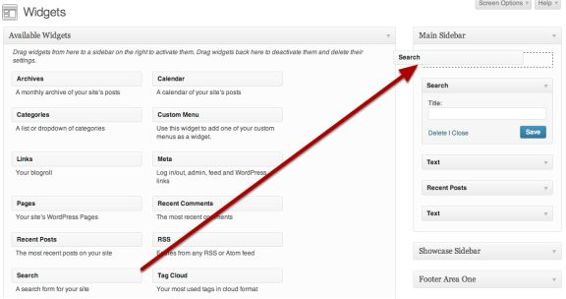
To add a new widget, select the type of widget you'd like from the Available Widgets section of the widget page, and drag it over to the area you want it to be placed. In this example, we'll be installing a search box widget.
Note, you can also click and drag the widgets around once they're already in the sidebar, if you want to reorder them.
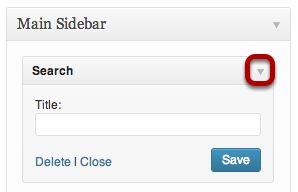
Next, click the arrow next to the widget name that you just installed, and you can configure the settings for that particular widget.
In this case, we are able to enter the title for the widget (e.g. "Search this Site"). When you're done, click Save.
You can always go back and edit the options again at a later date, or delete the widget, by clicking the grey arrow to expand the widget options.
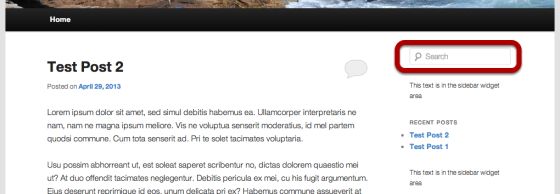
Continue adding and rearranging the widgets you want. Now you can see what they look like by visiting your site. As you can see, our search widget is now there!
Top 10 WordPress Security Tips
You cann install WordPress, add a post, page, theme and adjust the widgets… it’s now time to look at securing your WordPress website.
It would be hard to overstate the popularity of WordPress as a web publishing platform. Between the fully hosted blogs at WordPress.com and the self-hosted blog software that’s available for download WordPress.org, there are hundreds of millions of sites running on the WordPress platform. This makes WordPress a great resource for individuals and businesses looking to create their first websites.
But it also makes WordPress websites a popular target for hackers. Since having your website hacked can be devastating to your business, it’s important to make sure you’re doing everything you can to stay secure.
Here are the top 10 WordPress security tips you should consider. (Note that some of these tips will apply only if you host your own WordPress installation, but not if you use the services at WordPress.com.)
Keep Your WordPress Install Up To Date.
Sometimes the strongest security tips are also the easiest to implement. Every time you login to your WordPress dashboard, check the top of the screen to see if a new version of WordPress is available. Because security fixes to the underlying WordPress code are distributed through these updates, it’s important to make sure you’re always running the current version of the software. You should also make sure all your WordPress plugins are also up to date.

2. Make Backups.
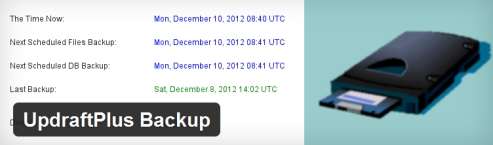
Having backups of your WordPress site not only provides protection in case your site is compromised, it also acts as an insurance policy in case something happens with your web host. It’s certainly possible to manage the backup process manually, but there are plugins you can use to make the process much easier, including UpdraftPlus Backup and Simple Backup. Make sure to keep those backup files in a secure location as well.
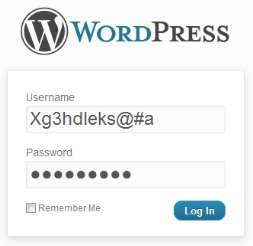
3. Don’t Use “Admin” or Your Email Address For Your Username.
Not all hacking consists of high-level computer manipulation; quite often WordPress sites are compromised by someone guessing the site administrator’s username and password. Unfortunately, if you use “admin” or your e-mail address for your username, then a hacker is already halfway towards reaching their goal. It’s much more secure if you make your username something that would be as difficult to guess as a strong password.
4. Limit The Number of Failed of Login Attempts.
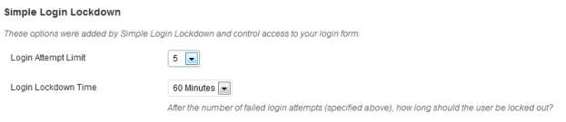
A persistent hacker may not be sufficiently dissuaded from attacking your site if they can simply use a “brute force” attack to try to guess your username and password. You can use a plugin like Simple Login Lockdown to detect failed logins from a particular IP address and significantly reduce the threat of these brute force attacks. This plugin will block an IP address from accessing your login page for one hour when there are five successive failed attempts -- although the lockout time and number of attempts can be changed.
5. Make Sure Your Themes are Secure.
Hackers should not be your only security concern. Given the seemingly endless number of sources for WordPress themes, you need to be confident that you’re not using a theme with any malicious code. You can use a plugin such asTheme Authenticity Checker to identify any potential he problematic code that may have been added to an otherwise valid theme.

6. Additional Login Authentication.
The Login Dongle plugin provides an additional layer of login protection. This plugin installs a bookmarklet in your browser, and asks you to create a secret challenge and response text. When you go to your login page, after entering your standard username and password, you then click the bookmark and fill in the proper response code before you can log in. This creates an additional level of authentication security for your blog.

7. Do a Security Scan.
Unfortunately, it won’t always be clear to you when you’ve been hacked. Sometimes hackers want to use your server space for activities that may not be apparent simply by viewing your site. You can use a plugin such as Exploit Scanner to automatically search through the files on your site for anything potentially suspicious.

8. Consider a Multi-Tiered Security Manager.
Wordfence Security is a multi-pronged security plugin that adds a firewall to your website, as well as virus scanning, real-time traffic analysis, the ability to see any changes to your core WordPress files, and many other functions. Wordfence is installed in my site and all my clients sites.

9. Secure Your wp-config.php File.
Your wp-config.php file contains very important information about your WordPress site, including details on the databases that contain all of your posts and comments. You can keep this file more secure by following the tutorial here.
Don’t give a hacker access to your private information in this file:
10. Protect Your WordPress Directories.
Finally, you can protect your underlying WordPress directories by adding the code “Options –indexes” to the very beginning of your .htaccess file. If you’ve never worked with a particular file before, then this is another one that you may wish to contact your web host or Webmaster for help on. You can also consult this tutorial.
WordPress provides you with the ability to make a powerful and professional website without spending a penny on software. Make sure to get the most out of your site by keeping it secure.
When Plugins go nuts…
If you use WordPress as your blogging software (and why wouldn’t you ;)) you’ll know all about the extended functionality you can add to you blog as via Plugins. As we are also talking about WordPress security, it’s only right that we should discuss that to do when plugins go wrong…
Plugin Mania
One of the first things I get asked when I hand over the key to a new WordPress blog is “what plugins do I need?”, which always leads to the conversation about what you want to use the plugins for.
Sometimes you don’t need a plugin at all as the functionality is in the theme. An example of this is “breadcrumb navigation”, if you use the Genesis framework this is a standard feature. If you use another theme (Thesis) it may not be a standard feature and you may have to code it in or use a plugin.
It can be a heady thing seeing the variety of plugins and knowing that there are free as well as premium plugins that will take your WordPress site beyond just blogging.
Coding or Plugins?
Coding every single time…. if you can’t add some code to your theme then talk to someone who can.
If you have no budget you can attempt it yourself, but be prepared to have to get an expert in if you wreck your blog :).
What do you do when plugins go nuts?
Plugin conflicts.
Too much of anything can be dangerous, moderation is best, except for when it comes to chocolate.. There are two things to keep in mind when installing plugins:
· Too many plugins can slow down your site and eat up bandwidth.
· Too many of the same plugin type can cause conflicts and clashes.
Even the best plugin can also let unexpected security risks slip through your “doors” — if they are not regularly updated.
Plugin developers provide new versions frequently. They provide updates to address glitches and bugs, but often the reason there’s an upgrade is because someone has discovered a security leak, or leak potential etc in the plugin’s coding. So to help prevent plugin conflict you need to update your plugins often.
How to De-bug Faulty Manual Plugin Installations
One of the most frequent causes of plugin conflict can be through manually installing a plugin via your FTP. Occasionally this manual upload process via FTP won’t work which can be incredibly frustrating. There are two things you can do to fix it…
Make sure your plugin is there – Open your FTP program again to make sure it’s actually in the right folder (wp-content/plugins). If it’s not there (it does happen!) upload it again.
If it is there breathe a sigh of relief and delete right from the server, then upload again
If it still doesn’t work, check out your unzipped plugin folder very thoroughly: Is there a second folder within the folder (“double wrapping”)? If so, delete the unsuccessful upload and start again, this time using the folder within the folder only.
Plugins: To Zip or Unzip?
Remember, if you’re manually uploading via WordPress, keep your plugin folder zipped.
If you’re uploading via FTP, unzip first (unless the plugin developer states otherwise). Remember to click “Activate”, once your plugin appears in your installed plugins page.
Read the instructions first when it comes to installing the plugins you want, it’s the difference between a perfect blog and a mess that you have to sort out over a day or so whilst you are trying to do other things.
Dealing with a plugin conflict
Not all plugins play nicely with each other! If you have a plugin conflict, deactivate the last plugin you installed and chill out for a moment.
· Is the plugin essential?
· Is it vital, will your whole world fall apart without it?
If so then the next step is deactivate all of the plugins and then reactivate them one by one to see which one is causing the grief. Can you live without that plugin? If so, un-install it and delete it. As I recently found out even un-installing and deleting some plugins isn’t enough to get rid of them and the hassle they have caused! In which case you need to pick up the phone and call someone in as quite clearly it’s a plugin gone rogue.
Of course there can be other reasons why plugins go nuts
Too many of the same types of plugin can cause problems. Do you really need 6 different versions of stats on your blog? Or 4 different SEO plugins? Choose one type and stick with it. When you change plugins for one thing often, you undo the work that you have already done. Some SEO related plugins take a little while to kick in and if you are not using them correctly then they may never deliver the results that you think they will. Installing another SEO plugin on top of that is not the cure ![]()
Incorrectly configured plugins may be a pain, again read the instructions, and dare I say it… do as you are advised.
Publishing Your Content
After all the hard work of setting up your business blog, it now comes down to the most important reason of having a blog in the first place - getting your content, your message out to the world.
For some, this is an easy process. For many others however, publishing useful and unique content regularly can be severely daunting. Distinguishing yourself from other business bloggers takes a bit of understanding of who your core readers are.
Put some time aside to research your audience and find out what they would like to read about. Here are some considerations to bear in mind when publishing your content:
· Should I make my posts educational, newsworthy, informational, entertaining and debatable or, a combination of all those?
· How long should my posts be?
· Should I consider blogging partnerships (like getting guest bloggers to write unique content for your blog)?
The initial excitement of publishing a blog can quickly dissipate when your “content well” starts to dry up. So where do you turn to for ideas and inspiration to get readers queuing up to read your work? Well, let’s start with how you can categorize your content in a way that could potentially skyrocket your readership:
· The infamous Top 10 lists
· How-To information
· Reviews
· Interview someone within your business niche
· Present relevant business case-studies
· Latest trends and newsworthy information
· Recommend other business blogs that might be of interest to your readers
But all the above may be rendered useless if you can’t get to a source for inspiration. So here are some of the best places to visit when you need to get those creative juices flowing:
· News sites – CNN, Yahoo News, Google News are just some of many News websites available to spark an interesting idea for a blog post. Dig into News stories and press releases to see what is significant for your blog. Cast your opinion on it and you’ve just got yourself a new post. But don’t stop there.
Look for News sites that are specific to your industry as well. For example, if you’re blogging about finance, head on over to Bloomberg Financial News and get ideas from there. About.com is another site that covers a gamut of topics that makes for such a great source for content ideas.
· Online Groups / Social Networking sites / Forums – Message board forums, Facebook Groups and Yahoo Groups are a wealth of information. Your potential readers and customers could be lurking within these groups, freely exchanging the kind of information a market research company would pay thousands of dollars for.
Don’t ignore forums that are relevant to your industry. Like social networking sites and online groups, forums attract the kind of audience that could be interested in the information you are offering.
· Social Bookmarking Services – Like social networking sites, social bookmarking services are all the rage today. These services allow users to rate and recommend topics that are popular with them. They are a portal into the hottest and latest trends as deemed by public opinion.
Visit sites such as Technorati.com, Delicious, StumbleUpon.com, Reddit.com and Digg.com to get blogging ideas. While there are a great number of other social bookmarking sites springing up onto the web quite regularly, those are the most referred to by professional bloggers for research.
· High Traffic Sites – Another fantastic source of blogging ideas can be found at high traffic sites such as Alexa.com, Amazon.com, Ebay.com, Craigslist.org and Wikipedia.org. A wealth of ideas can be mined just from sifting through these sites’ categories.
· Article Directories – Article directories offer you the option of re-printing the articles of your choice on your blog. This can come in handy if you’re having an off day but need something to whet the appetite of your readers. Even if you don’t intend to publish any of those articles, use them as a source of ideas for writing your next post.
Some of the more popular directories are EzineArticles.com, GoArticles.com and ArticleCity.com. These articles are free to re-print but, read the terms on these sites on how to go about re-printing them. I don’t recommend doing this, but I do recommend curating content from these sources, see the content curation section.
· Some Other Sources – Another idea-generating method is to look out for what people are searching for and decide if you could blog about these search terms. Visit popular sites like Google Zeitgeist and MetaCrawler.com for this purpose. You can use keywords tools like WordTracker.com.
Try searching for ideas using blog search engines as well. Try Technorati.com and AllTop.com for potential ideas.
The next step is to create a folder on your desktop for ideas. Call it an idea bank, call it resources or inspiration. Choose a name that will remind you the purpose on the content inside. My folder is called Inspiration.
There’s also a brilliant online tool that will help you collate your inspiration and populate an idea bank online. It’s called Evernote. In this section I’m going to show you how to set up and use Evernote.
What’s Evernote got to do with my website?
Once your website is set up you’ll need to manage it and create a constant stream of content to grow an audience. Evernote is an easy way to remember your daily to-do lists, your memories or just your daily reminders.
Evernote allows you to store everything you want to remember in your account. It’s then synced across all your devices, from your smartphone to computer to tablets. This makes it easier to capture, browse edit or search your notes from anywhere. This means your time is used more efficiently and you’re more productive.
When you are stuck for an idea Evernote is a great starting point. When you need to add your sources to a post, then Evernote is a place to link them together so you don’t lose them.
This guide serves as an overview and introduction to using Evernote the how to get your account set up.
What is Evernote?
With Evernote you can create lists, reminders, images, web pages and much more. Evernote is a free application that allows you to capture all your ideas and experiences and access them from anywhere. You can make a note to remind you of something, record audio or capture a video.
You can use it to stay more organized. Or design and manage all your projects. Use Evernote to plan a trip. You can capture a moment you want to remember and easily find it later.
Evernote Premium
Although the basic Evernote system is free, there is an option to upgrade to a premium account for more storage space. For a few dollars a month or a small annual fee, you can get 1 GB of upload space each month. You can then store more notes, photos and files.

With the premium account, you can search smarter. With the upgrade, searching inside PDFs or other attached documents is easier. There is also the Related Notes feature that allows you to see your previous relevant notes while you create or view the new ones.
Premium loads notes faster on your mobile devices. And with the PinLock you get peace of mind with an added layer of protection on your mobile devices.
The language of Evernote:
Here are a few terms you need to know
· Note: A single item stored in Evernote.
· Notebook: A container for notes, where your notes are stored.
· Sync: This is the process of how your Evernote notes are kept up to date across all of your devices, including computers, phones and the Web.
· Account: This is simply the username and password you need so Evernote can identify your notes and make them available to you anywhere.
Install Evernote
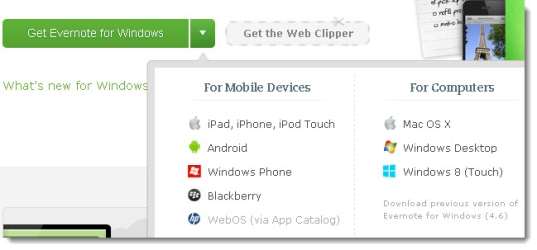
First you need to download the installation software. Open your web browser to the Evernote web site, http://evernote.com/. Evernote will detect the type of device you are using. So if you have a Mac or a PC you will be installing the right software for you device.
To download, click the “Get Evernote for Windows” button – or the dropdown arrow to change the device.
· For PC’s download the setup executable file. When the download finishes, double-click the file to launch the setup program. Click finish when the setup is complete.
· For Macs, click on the link to install.
To launch Evernote, click on the Evernote icon.
Log in to your account if you have already registered by entering your username and password. If you haven’t registered for an account, go to the “Get a free account now” button.

This link opens a new window so you can put your information in and choose a username and password. Go ahead & click the Register button when you are done. Your account is now created and you can immediately login.
Creating Your First Note
The most common form of content saved in Evernote is simple text. It can be as simple as a note to yourself or a part of a web page or email you want to remember. Here is how you create your first note with this type of content.
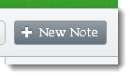
At the top of the main Evernote page is a button labeled “New Note”. Click this.
Evernote creates the new note with the cursor in the body of that note. Title it with whatever you like. Now you need to click anywhere in the main part of the note. Go ahead and begin typing here. You can change the style of the text font, increase or decrease the size of the font or even change the color while working on your note. There are options for bold, italicize or underline the text as well.
When you finish, Evernote automatically saves and synchronizes the new note to Evernote on the web. Your note can then be accessed from any device you have Evernote installed.
Understanding Evernote Sync
Evernote’s true power is in its synchronization ability. By synchronizing your notes to the Evernote on the Web, you are able to create and find your stuff on any web browser, mobile phone or any computer.
So basically, when you clip a recipe from the web on to your Mac, you can read it on your iPhone when you go the grocery story to get ingredients. That same recipe can be accessed from a friend’s Windows PC. Evernote on the web is continually updating all your devices with the most current versions of your notes.
Evernote automatically synchronizes your information every few minutes. If you want however, you can sync manually anytime by clicking the “Sync” button.
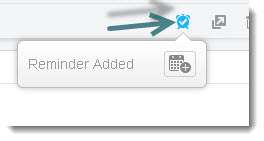
Reminders
Reminders let you keep track of your time-sensitive notes.
A reminder can be set for any note by clicking the Reminder icon on that note. You can also set a due date with the date picker.
Reminders will appear in your To-do list located at the top of your NoteList. You can sort them, put them in order, and edit them and much more
.
That’s the basics of installing Evernote onto your devices. Within the Evernote website you will find more information on using Evernote for different devices in the Knowledgebase section. Evernote is the perfect way to get and stay organized using any device anywhere you are.
Evernote is a great time saver, but it won’t do you any good if it’s unorganized.
Notebooks are the most common way users organize notes. They can be used to separate them by locations, purpose or categories.
Evernote gives you many ways to keep your notes organized, so that you can browse, search and remember in the way that works best for you.
When you create notes and put them into notebooks, Evernote creates a default notebook where all your notes are placed. You can add more notebooks and stacks of notebooks to completely organize your life and business.
Creating a New Notebook
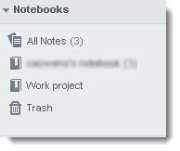
When you are ready to create a new notebook, click on Notebooks in the sidebar. This brings up the Notebook List.
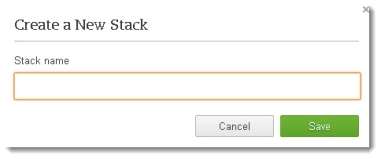
To create a new Notebook, click the “+ New Notebook” button. This creates an unnamed Notebook in your list. Give it a title and press enter.
You can begin adding notes immediately or at any time.
Tip: Try not to create too many notebooks. The idea of Evernote is to help you get organized, not to get overwhelmed.
Notebooks you might want to create: Business blogging ideas, Business or work, Bills, blogging schedule, holidays and dates of interest of target audience, Daily or any interest or business you are currently participating in or exploring.
Adding Notes to a Notebook
Click on the Notebook in the Notebook List you want to add notes to when you are ready to begin.
Click on the +New Note button to open the note pad. Enter your information. It will automatically be saved.
To Move a Note
Click on the Notes/All Notes in the sidebar. The Note list is displayed.
Click on the one you want to move. It will show up in the Note Editor.
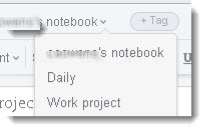
In the Note editor, click on the notebook drop-down list in the upper-left corner. All of your notebooks will show. Click on the one you want to move your note into. Evernote automatically saves and syncs the change.
Rename a Notebook
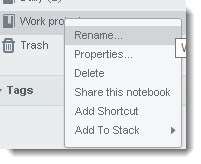
Sometimes you need to rename your notebooks for some reason. This can be done by selecting the one you want to change in the Notebook List. Right-click on to the notebook name. Then click on rename. Enter the new name in the box that opens..
Delete a Notebook
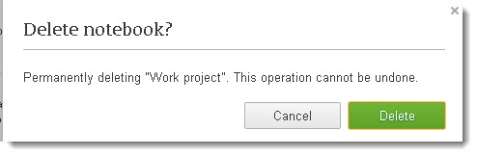
You can delete a notebook. Just remember that all the notes within that notebook will be moved to the Trash Notebook.
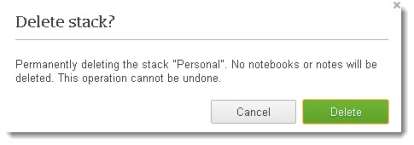
Click on the Notebook in the Notebook List. To delete it, control-click or right-click on it to bring up the menu. Click on Delete Notebook. A confirmation box appears. Click delete to remove the notebook.
Organize Your Notebooks
You can organize multiple notebooks by using Notebook Stacks.
Notebook Stacks are most often used for grouping similar topics or theme notebooks together. For example, you could create a Stack called School then add Notebooks for each child or each sport or other activity.
Notebook Stacks appear in your Notebook List as a notebook with a white banner with the name of the stack and how many notebooks it contains.
To create a Notebook Stack, click on Notebooks in the sidebar. Drag one notebook onto another notebook in the same category. A stack that has both notebooks is automatically created. Give the stack a name.
Add to a notebook to a Notebook Stack
Adding a notebook to an already created Stack by dragging and dropping the selected notebook to the Stack.
Delete a Notebook Stack
You can delete a Notebook Stack without deleting any of the notebooks or notes it has in it.
Control-click or Right-click on the Notebook Stack you want to delete. Click on delete from the menu. Click delete on the confirmation box.
Shortcuts
Shortcuts are another way to access the notes and notebooks you frequently use.
You can find shortcuts listed under the SHORTCUTS at the top of the sidebar. Shortcuts can be created for notebooks, notes, Notebook Stacks and Tags.
Add a shortcut by dragging and dropping the notebook anywhere on your shortcuts sidebar. Evernote allows you to have up to 250 shortcuts. To create multiple shortcuts at a time, hold the Shift key while clicking on the notebooks you want to select. Drag these anywhere into the shortcuts sidebar.
You can delete a shortcut by clicking on it and dragging it out of the shortcuts sidebar.
Evernote Notebooks User Tips
Forward reference material form you email inbox to your notebooks using your personalized Evernote account mailing address that can be found in your account info. Add the “@” symbol in front of your emails that you want associated to current or active projects.
Use the “@” in the front of your notebook name. This places the active notebooks at the top of your list.
Keep your travel plans organized by keeping itineraries, contact information, reservations and anything else need for your trip in a “Travel” notebook. Forward itineraries from you inbox or take pictures and put into your notebook.
Evernote Notebooks are the main tool users use to organize their notes in Evernote. The Evernote Notebook has features that let create a system of organization that works for you and keeps your content ideas in a safe place.
All materials on the site are licensed Creative Commons Attribution-Sharealike 3.0 Unported CC BY-SA 3.0 & GNU Free Documentation License (GFDL)
If you are the copyright holder of any material contained on our site and intend to remove it, please contact our site administrator for approval.
© 2016-2026 All site design rights belong to S.Y.A.