Teach Yourself VISUALLY Search Engine Optimization (2013)
Chapter 9. Using Search Engine Webmaster Tools
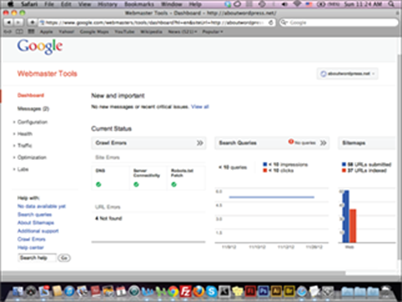
Google Webmaster Tools is one of the resources search engine optimization (SEO) experts use to track website performance, sitemap status, crawling errors, and links.
Add a Website to a Google Webmaster Account
Verify Your Website for Google Webmaster Tools
Submit a Sitemap on Google Webmaster Tools
Configure Google Webmaster Tools Settings
Check for Google Crawling Errors
Preview Your Website as Googlebots
Submit a Website to the Bing Webmaster
Use the Bing SEO Analyzer
Add a Website to a Google Webmaster Account
As with Google Analytics, you need to have a Google account to use Google Webmaster Tools. When you access Webmaster Tools, you can add one or more websites to your account, each with a separate dashboard and analytics. To add a website, you need to use the Add a Site link and then verify the website to identify that you are the owner. After you add your website to Webmaster Tools, it takes a few days for your site’s statistics to appear in your website account.
Add a Website to a Google Webmaster Account
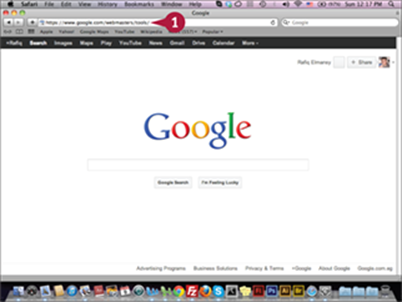
![]() Type www.google.com/webmasters/tools/ in your web browser and press
Type www.google.com/webmasters/tools/ in your web browser and press ![]() .
.
The Google Webmaster Tools sign in page appears.
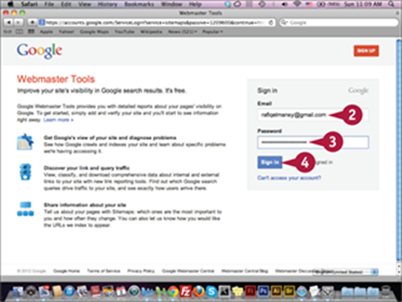
![]() Type your e-mail address.
Type your e-mail address.
![]() Type your password.
Type your password.
![]() Click Sign In.
Click Sign In.
Note: If you do not have a Google account, you can create one by clicking Sign Up.
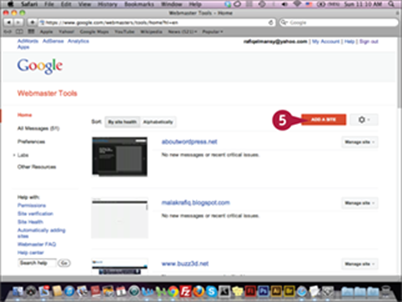
The Google Webmaster home page appears.
![]() Click Add a Site.
Click Add a Site.
The Add a site dialog box appears.
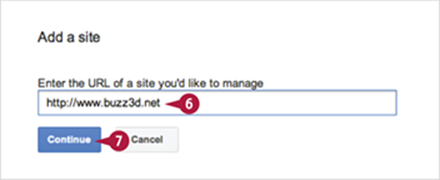
![]() Type your website URL; for example, www.buzz3d.net.
Type your website URL; for example, www.buzz3d.net.
![]() Click Continue to move forward with verifying your website.
Click Continue to move forward with verifying your website.
TIP
What is the different between Google Analytics and Google Webmaster Tools?
The initial different between Google Analytics and Google Webmaster Tools is Google Analytics focuses on showing website analytics related to traffic, the number of visitors, and the number of page views. Google Webmaster Tools is a group of tools you can use to analyze the website from a crawling point of view. That is, you can check for crawling errors, and how the Google bots interact with the website and show its content. You can also use Google Webmaster tools to set up how frequently your website will be crawled and to learn about different link types inside your site.
Verify Your Website for Google Webmaster Tools
One important process when adding your website to Webmaster Tools is verifying that you are the website owner. You can do this by downloading the verification HTML document and uploading it to the root path of your website on the server. First upload the file using an FTP application such as FireFTP or FileZilla. After uploading the document, return to the website verification page on Webmaster Tools and click Verify to verify your website. You will now be able to see statistics for the website and its crawling status on the website dashboard on Google Webmaster.
Verify Your Website for Google Webmaster Tools
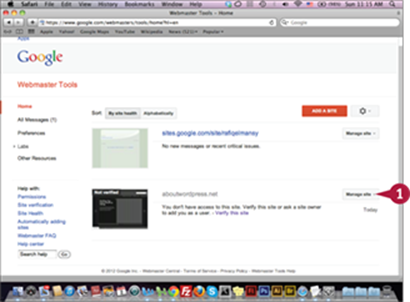
![]() Click Manage site next to aboutwordpress.net.
Click Manage site next to aboutwordpress.net.
The Manage site pop-up menu appears.
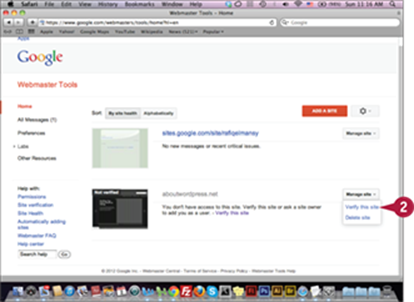
![]() Click Verify this site.
Click Verify this site.
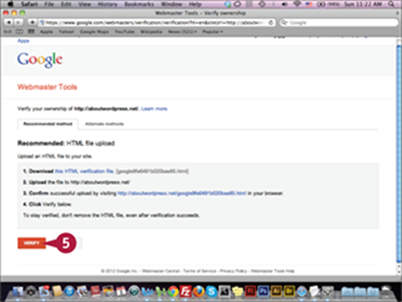
The Verify your ownership page appears.
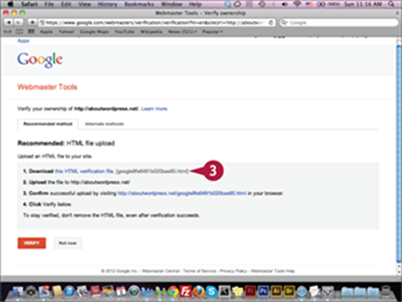
![]() Click the this HTML verification file link to download the file on your computer.
Click the this HTML verification file link to download the file on your computer.
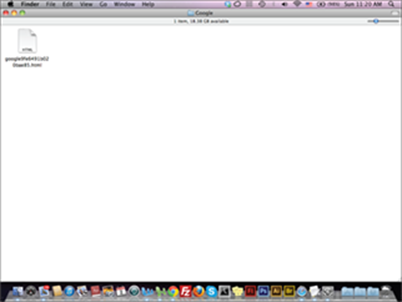
The document is saved on your computer. You can upload the document to your website server root folder by using any FTP application.
TIP
What are the site verification options?
The default verification of ownership option is to download the verification HTML document and upload it to your website server on the root path. You can access it here by typing www.name.com/Google_vertification_file.html. There are also three other methods. The first is using HTML tag: you need to add code to the website home page HTML. The second is using your Google Analytics account, and the third is providing Domain Name Provider information. In this method, you need to sign in using the domain registrar information. You can choose either the default method or one of the three alternatives to verify your website based on your knowledge and experience.
After you verify your website for Google Webmaster tools, you can view the website statistics on the dashboard that the Webmaster tools create for your website. You will need to wait for few days to allow Google Webmaster to collect the available information about your website and display it in the website dashboard. Unlike the Google Analytics tool that display updates about the website statistics on daily basis, the Google Webmaster tools website information takes around two to three days to appear on the dashboard.
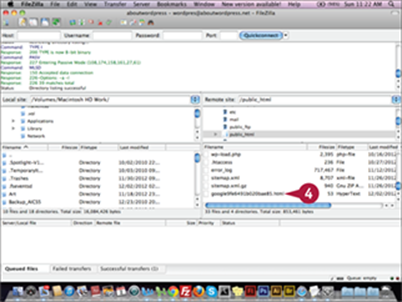
![]() Upload the document to your website’s root folder.
Upload the document to your website’s root folder.
You can click the Browser icon to go back to the verification page in Step 3.
![]() Click Verify.
Click Verify.
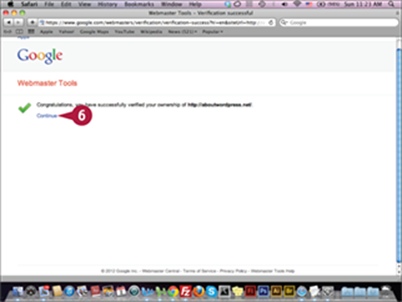
The successful verification page appears.
![]() Click Continue.
Click Continue.
The website dashboard appears.
TIPS
How do I delete a website from Google Webmaster Tools?
You can easily delete a website from the Google Webmaster Tools home page. All you need to do is click the Manage Site pop-up menu, click Delete Site, and then confirm your choice to remove the website.
What are the Compact and Comfortable views?
The Compact and Comfortable views are the two main types of website views on the Google Webmaster Tools home page. The Compact mode displays only the name of the website, and the Comfortable mode displays a preview of the website. In the Comfortable mode, a small Verified notice on the website thumbnail verifies the website’s status when verified.
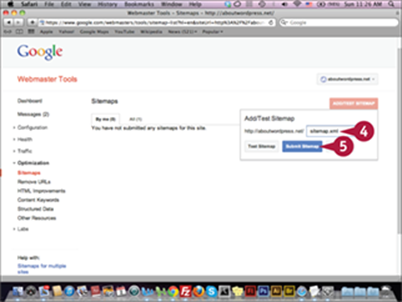
Submit a Sitemap to Google Webmaster Tools
Google Webmaster Tools allows you to submit one or more XML sitemaps. Theses sitemaps help the search engines crawl your website more efficiently to index its links. It also helps search engines update their information about your website’s keywords, images, categories, and more. To submit a website sitemap, upload it in XML to your website server. Next, add the sitemap path in Google Webmaster Tools. Then, submit the sitemap path through the Sitemap link in the left menu.
Submit a Sitemap to Google Webmaster Tools
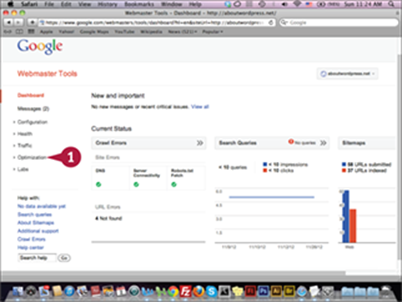
![]() Click Optimization under the Dashboard section.
Click Optimization under the Dashboard section.
The Optimization menu
expands.
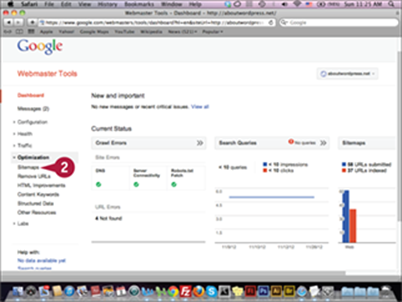
![]() Click Sitemaps.
Click Sitemaps.
The Sitemaps page appears.
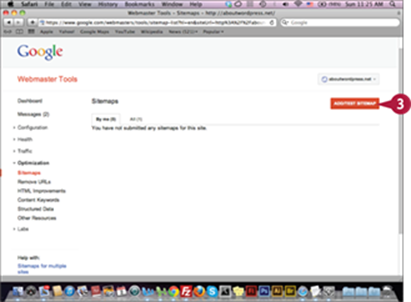
![]() Click Add/Test Sitemap.
Click Add/Test Sitemap.
The Sitemaps submission form appears.
![]() Type the path of the sitemap.
Type the path of the sitemap.
![]() Click Submit Sitemap.
Click Submit Sitemap.
A couple days after the sitemap is submitted, you will see its links indexed in the website dashboard. You can reach the sitemaps from the Sitemap link in the Optimization left menu.
TIPS
What is the Test Sitemap?
The Test Sitemap feature enables you to test a website by viewing the links indexed in the sitemap along with any errors. After you make sure the sitemap is acceptable, you can finish your test and then submit it for crawlers to index. With this feature, you do not have to wait until the sitemap is crawled to check for errors.
How much time does it take to index sitemap links?
It takes a few days to index its links. Typically, not all links are indexed due to crawler factors. Therefore, it is normal to find the number of indexed links less than the original sitemap links. The large difference can indicate a problem in the sitemap.
Configure Google Webmaster Tools Settings
You use Google Webmaster Tools Settings to configure crawling options for your website. You can target users in a specific country. You can also choose whether you want to include www. For example, you can set the domain name to http://website.com instead of www.website.com. Last, you can choose the crawling rate, which determines how frequently your website is crawled. You can let Google determine the crawling rate or you can set it manually.
Configure Google Webmaster Tools Settings
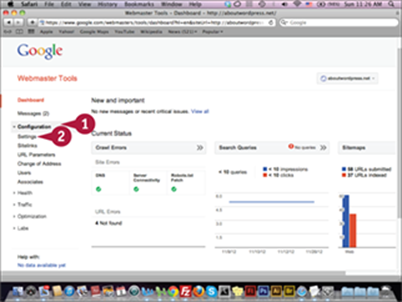
![]() Click Configuration under the Dashboard section.
Click Configuration under the Dashboard section.
The Configuration menu expands.
![]() Click Settings.
Click Settings.
The Settings page appears.
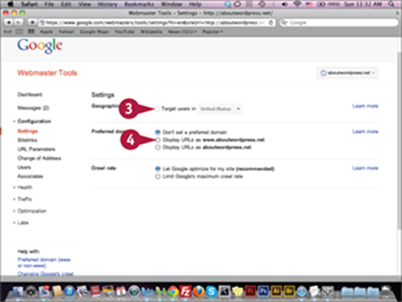
![]() Click to deselect the Target users in option (
Click to deselect the Target users in option (![]() changes to
changes to ![]() ).
).
![]() Click the Display URLs as www.aboutwordpress.net option (
Click the Display URLs as www.aboutwordpress.net option (![]() changes to
changes to ![]() ).
).
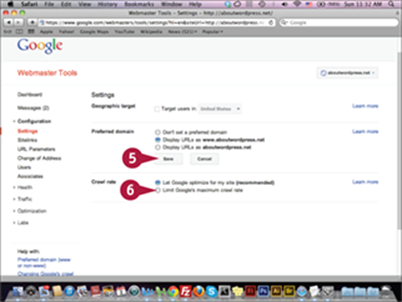
The Save button appears
![]() Click Save.
Click Save.
![]() Click the Limit Google’s maximum crawl rate option (
Click the Limit Google’s maximum crawl rate option (![]() changes to
changes to ![]() ).
).
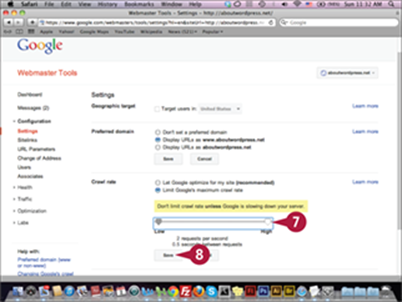
The crawl rate slider appears.
![]() Click and drag the slider to High.
Click and drag the slider to High.
![]() Click Save.
Click Save.
Your new settings are saved and applied to the website.
TIPS
Why should I choose a geographical target?
If your website is receiving traffic from a specific country, you want to set a geographical target for this country. The search engine will display your website more efficiently in the search results page for visitors from these countries.
What is the best crawling rate for my website?
A high crawling rate ensures fast crawling for your website updates, but it creates load on the server, slowing it down. Therefore, a high crawling rate is not recommended if you are running your website on a slow server. If you are not sure if your web server can handle this new rate, select the Let Google optimize for my site default option.
Check for Google Crawling Errors
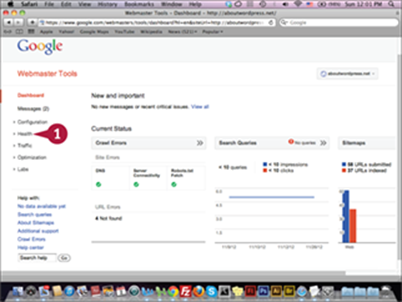
One of Google Webmaster Tools’ most important features is helping you find out and trace crawling errors. When search engine spiders crawl your website to index it, they may find errors or problems that prevent them from indexing it properly. These errors can be missing pages or pages crawlers cannot access. Also, Google Webmaster Tools can show you if there are any errors related to the server. Click Health under the Dashboard section to access the Crawl Errors page. Address the errors and then return to the Crawl Errors page and mark them as fixed.
Check for Google Crawling Errors

![]() Click Health under the Dashboard section.
Click Health under the Dashboard section.
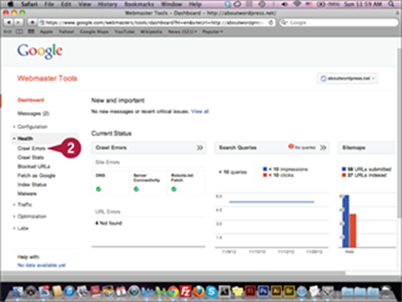
The Health menu expands.
![]() Click Crawl Errors.
Click Crawl Errors.
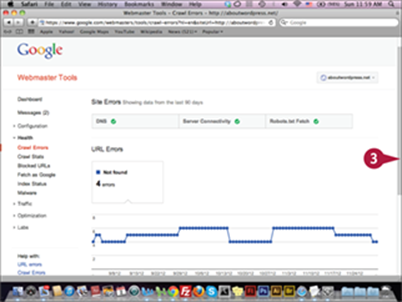
The Site Errors page appears.
![]() Scroll down to the URL Errors section.
Scroll down to the URL Errors section.
A The list of pages the crawler could not find appears.
TIPS
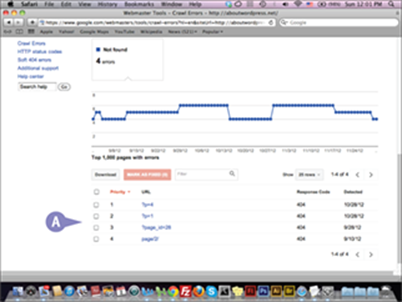
What is the 404 error?
The 404 (Not Found) error is a normal when you have a lot of traffic on your server. These errors are client-side errors. For example, they can occur when a browser cannot access a specific page, or if a user enters the wrong page URL, the 404 (Not Found) error appears.
What is the Crawler Stats page?
The Crawler Stats page shows you statistics for the search engine crawler, such as the number of pages crawled per day, the crawled content downloaded in kilobytes, and the time the crawler spends downloading a page in milliseconds. The faster the search bots crawl your website, the more content will be crawled and indexed in a shorter time.
Preview Your Website as Googlebots
Many factors affect how a search engine sees your website. Sometimes, the website looks correct to you but not in the search engine. The Google Webmaster Tools Fetch feature shows you your website the way Google sees it. You can fetch the website home page or any internal pages. To do this, open the Fetch page and add the path of the page that you would like to fetch, or just leave the fetch field blank to preview your website’s home page. After previewing the page, submit it to Google to index if it has not been indexed.
Preview Your Website as Googlebots
![]() Click Health under the Dashboard section.
Click Health under the Dashboard section.
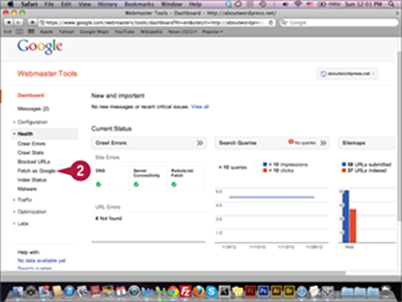
The Health menu expands.
![]() Click Fetch as Google.
Click Fetch as Google.

The Fetch as Google page appears.
![]() Type your web page path; for example, best-free-google-adsense-plugins-for-wordpress.
Type your web page path; for example, best-free-google-adsense-plugins-for-wordpress.
![]() Click Fetch.
Click Fetch.
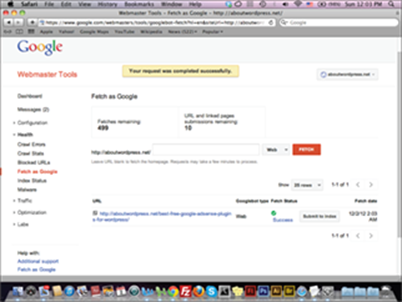
The Fetch results appear.
TIP
What are Sitelinks?
When the search engine displays your website in the search results page, it often displays the internal links from your website it deems useful to the user. These links are known as Sitelinks. You can view them from the Sitelinks link under the Configure menu in the website dashboard. While Google automatically chooses these links, you can choose to remove, or demote, specific links. For example, you may choose to remove the About us or Contact us page from displaying in the Sitelinks section and include only those links for useful content pages.
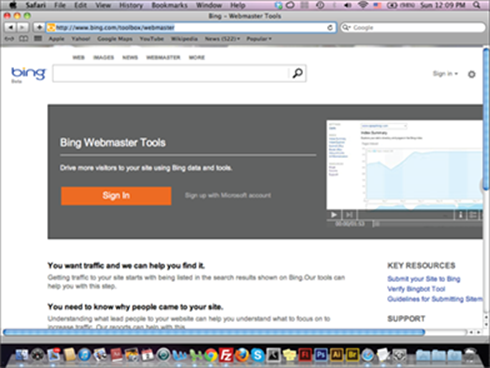
Submit a Website to the Bing Webmaster
Similar to Google Webmaster Tools, Bing Webmaster lets you add your website, submit sitemaps, and track website crawling data indexed by Bing crawlers. When you submit your website to Bing, it is crawled by both Bing and Yahoo crawlers because both search engines are linked together. It is important to consider your website indexing status on Bing’s search engine because it reflects traffic to your website from Bing and Yahoo search engine users. You can sign in to Bing Webmaster using your Microsoft username and password or you can create an account if you do not already have one.
Submit a Website to the Bing Webmaster
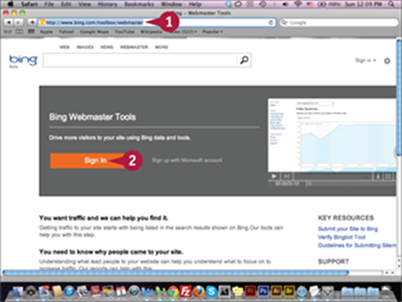
![]() Type www.bing.com/toolbox/webmaster in your web browser and press
Type www.bing.com/toolbox/webmaster in your web browser and press ![]() .
.
![]() Click Sign In, or create a new Microsoft account if you do not have one.
Click Sign In, or create a new Microsoft account if you do not have one.
The Bing Webmaster home
page appears.
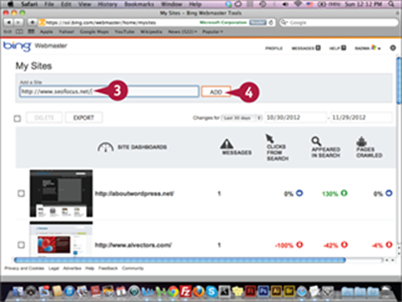
![]() Type your website URL.
Type your website URL.
![]() Click Add.
Click Add.
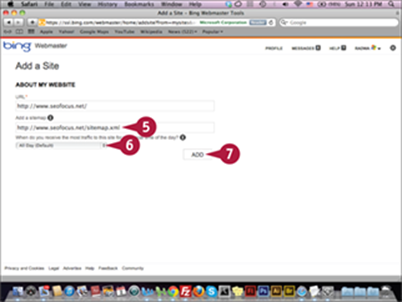
The Add a Site page appears.
![]() Type your website sitemap path.
Type your website sitemap path.
![]() Click the pop-up menu and select All Day (Default).
Click the pop-up menu and select All Day (Default).
![]() Click Add.
Click Add.
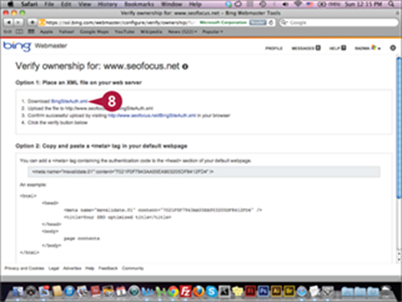
The Verify ownership page appears.
![]() Click BingSiteAuth.xml to download the site verification file.
Click BingSiteAuth.xml to download the site verification file.
TIPS
Can I delete an account from Bing Webmasters?
Yes, you can delete one or more websites from the Bing Webmaster home page. To do so, select the check boxes next to the sites that you would like to delete and click the Delete button. You can also export a list of the websites, their verification statuses, and the verification codes.
Can I add multiple users to Bing Webmaster?
Yes, you can add users to Bing Webmaster. Click the User link under Configure My Site. You will need to add the new user’s e-mail and the user’s access level: Read Only, Read/Modify, or Administrator. From this page, you can add multiple sites for the user to access.
Verifying your website is essential in the submission process, because it establishes the owner of the website. Only the owner and users added by the owner can display the website’s webmaster information or modify it. If you did not verify your website, you will receive an alert stating your website is not verified, and you need to verify its ownership. You can set the default verification method by uploading the verification XML file to your server and clicking Verify. You can always verify your website from the website dashboard by clicking Verify Ownership from the Configure My Site menu.
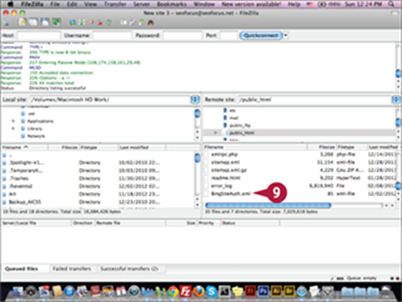
Note: You can use an FTP application, such as FireFTP, to upload the BingSiteAuth.xml to the server root folder by clicking the FireFTP application to open and login to the website FTP account.
![]() Click BingSiteAuth.xml and drag to the website root folder in the server using the FTP application.
Click BingSiteAuth.xml and drag to the website root folder in the server using the FTP application.
Note: You have to sign in to the server FTP to navigate to the root folder.
After the file is uploaded, you can confirm by visiting its path using the browser.
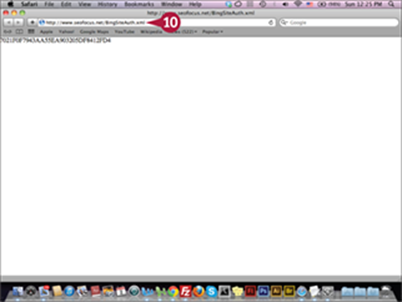
![]() Type www.seofocus.net/BingSiteAuth.xml in your browser and press
Type www.seofocus.net/BingSiteAuth.xml in your browser and press ![]() to confirm the upload.
to confirm the upload.
After confirming www.seofocus.net/BingSiteAuth.xml, close the web page and return to the Verify ownership page in Bing Webmaster tool.
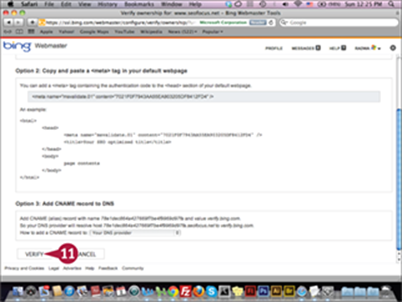
![]() Click Verify.
Click Verify.
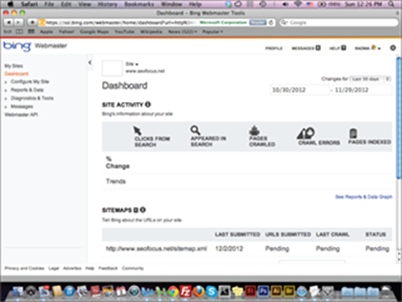
The website is verified and the website Dashboard page appears.
TIP
What other verification options are available in Bing Webmaster?
In addition to uploading the BingSiteAuth.xml file to your server, you can copy a Metadata line <meta name="msvalidate.01" content="7021F0F7943AA55EA903205DF8412FD4" /> and paste it after the opening of the <head> tag in the website home page HTML file. Another option is to add a CNAME (Canonical Name) to the website DNS (Domain Name System) to verify your ownership. The CNAME lets you add multiple services to your domain name IP (Internet Protocol), and the CNAME values to the domain name DNS. The latter option can be complicated and requires advanced skills.
Use the Bing SEO Analyzer
In the Diagnostics & Tools section, Bing provides a number of useful tools that can help you explore your website and optimize it. For example, Keyword Research allows you to explore the website keywords, and Markup Validation checks your website code for errors. Additionally, SEO Analyzer shows you how your website home page or internal pages are optimized for Bing search engine. It shows the errors appearing in your websites, so you can fix them, along with a preview of the website. You can also use SEO Analyzer recommendations to optimize your website for better indexing.
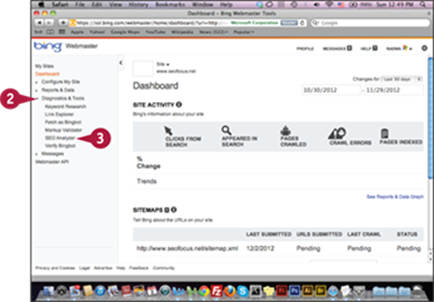
Use the Bing SEO Analyzer
![]() Click the website name on the Bing Webmaster home page.
Click the website name on the Bing Webmaster home page.
The website’s Dashboard page appears.
![]() Click Diagnostics & Tools under the Dashboard section.
Click Diagnostics & Tools under the Dashboard section.
![]() Click SEO Analyzer.
Click SEO Analyzer.
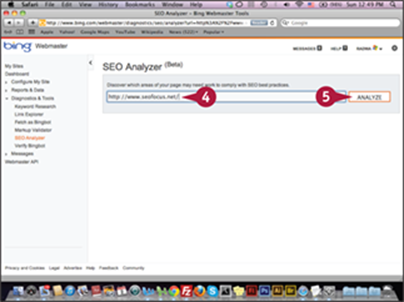
The SEO Analyzer page appears.
![]() Type your website URL.
Type your website URL.
![]() Click Analyze.
Click Analyze.
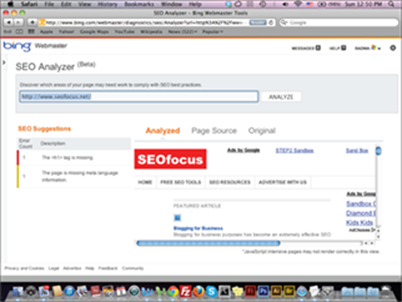
The website analysis results appear.
TIPS
How does the Keyword Research tool work?
In Bing Webmaster, you can analyze how your website appears in search results when a user types a specific keyword in the Bing search field. By using the Keyword Research tool, you can type the keyword and other information. The results show how many times your website appeared in the search results.
What is the Verify Bingbot?
When search engine crawlers visit your website, they use different Internet Protocol numbers. While you might block specific IPs from visiting your website, you do not want to block any search engine crawler IPs. This tool allows you to determine whether the IP is related to Bingbot by typing the IP and clicking Submit.
All materials on the site are licensed Creative Commons Attribution-Sharealike 3.0 Unported CC BY-SA 3.0 & GNU Free Documentation License (GFDL)
If you are the copyright holder of any material contained on our site and intend to remove it, please contact our site administrator for approval.
© 2016-2026 All site design rights belong to S.Y.A.