Citrix XenMobile Mobile Device Management (2014)
Chapter 4. XenMobile Device Manager Deployment
XenMobile Device Manager, also known as Zenprise Device Manager before the acquisition of Zenprise by Citrix, is one of the industry's leading Enterprise Mobility Management (EMM) solutions. The Device Manager server is responsible for enrolling, deploying policies, application, and content management on mobile devices. The Device Manager server is also capable of extensive reporting, remote support, and a Self-help portal for end users. In this chapter, we will cover the following topics:
· XenMobile DM software download
· XenMobile DM installation
· Active Directory Integration
Downloading the XenMobile™ DM software
In this section, we will download the XenMobile Device Manager software from the Citrix website. To download the XenMobile components; we need to follow these simple steps:
1. Go to the Citrix downloads portal that can be found at http://www.citrix.com/downloads.html.
2. Click on My Account and log in.
3. A Citrix account is mandatory to download any software from the Citrix download center. Register for a customer or a partner account at https://www.citrix.com/welcome/create-account.html.
4. Click on Downloads.
5. Select XenMobile as the Product and Product Software as the Download Type from the drop-down options.
6. Collapse XenMobile and click on XenMobile MDM Edition.
7. Download XenMobile Device Manager and its demo license that is available.
Installing XenMobile™ DM
In this section, we will install the XenMobile DM software that we downloaded.
Note
All prerequisites for XenMobile DM, as mentioned in Chapter 2, XenMobile™ Solution Deployment Prerequisites, should be met before installing the software.
Now, let's go ahead and start the software installation:
1. Double-click on the .exe file we downloaded.
2. Select the desired language at the Installer Language prompt.
3. Click on Next to proceed.
4. Click on I Agree on the License Agreement popup.
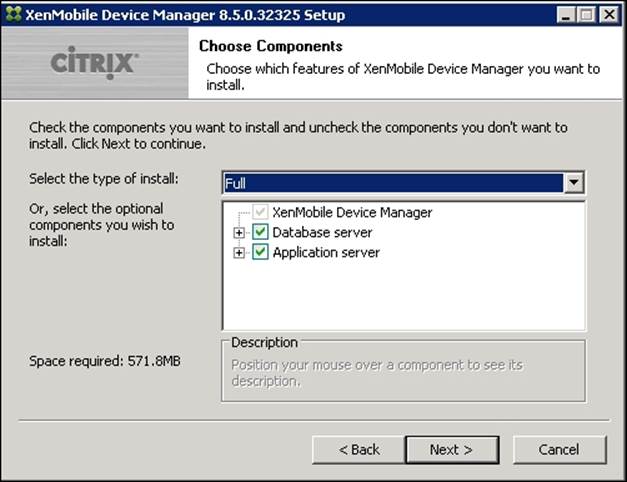
5. On the Choose Components screen, we can choose the components to be installed. The XenMobile DM has the PostgreSQL database server bundled with the software, which should be used only for testing or demonstration purposes (as per Citrix). Citrix suggests using Microsoft SQL server in production environments. In our demo, we will be using the PostgreSQL database server:
6. Click on Next.
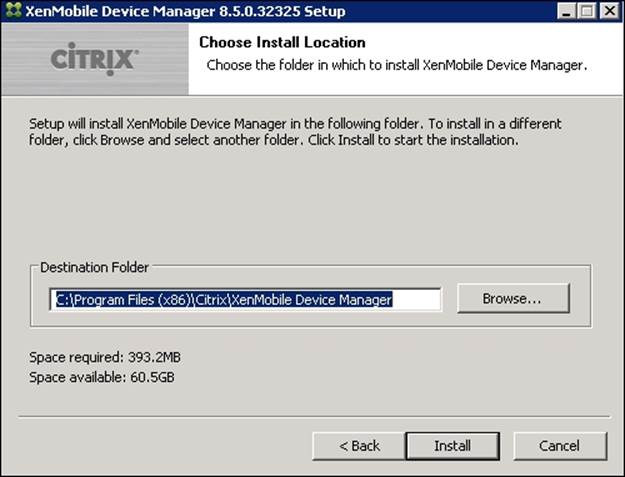
7. Under Choose Install Location, we will define the folder for the Device Manager installation. Then, click on Install:
8. After this, the installation will start. We can click on the Show details button to see the installation process.
Installing the XenMobile™ DM database
In this section, the installer leads us to the installation of the database for the XenMobile Device Manager. The steps are as follows:
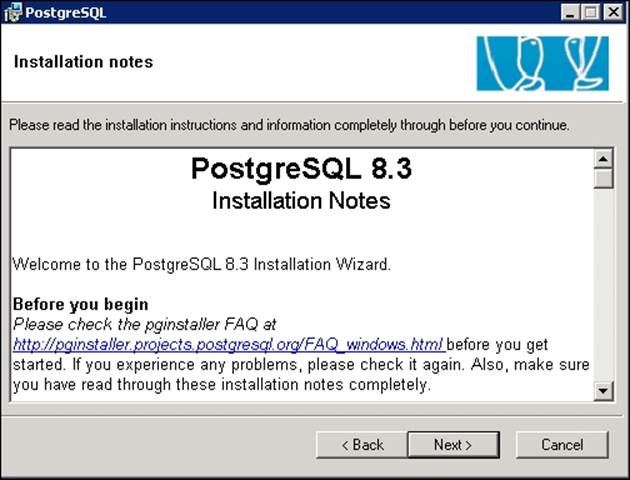
1. The PostgreSQL page marks the beginning of the database server installation procedure. In this section, we will install the various database services required by the XenMobile DM. Now, click on Next.
2. The Installation Notes section has instructions and information regarding PostgreSQL. Then, click on Next:
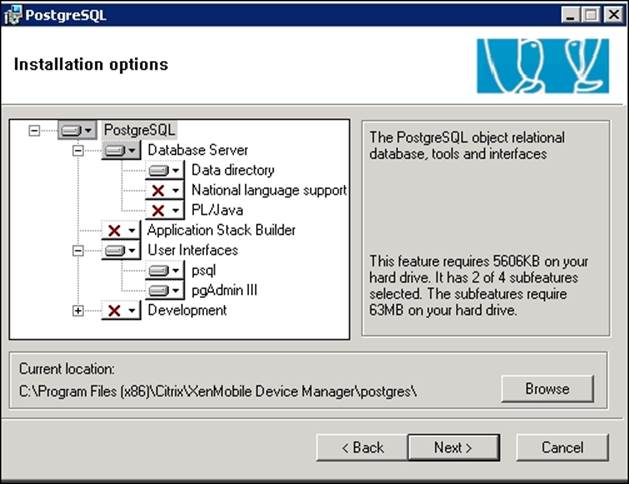
3. The Installation options section lists out the PostgreSQL components that we can choose to install. We can use the default selection as it contains all the components that will make the XenMobile DM server work fine. We can also select the PostgreSQLinstall folder on this screen. In our scenario, we will go ahead with the default settings. Then, click on Next.
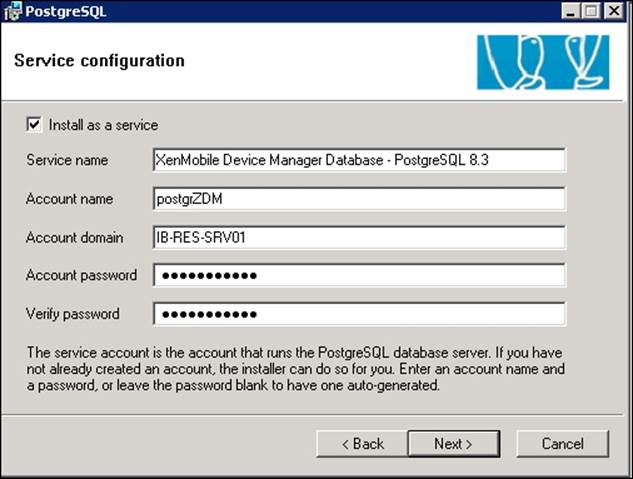
4. The Service configuration panel sets up a service and the service account for the PostgreSQL server. This section is divided into multiple sections as follows:
· Install as a service: This is autoselected. Check this box to install the XenMobile DM Database Service.
· Service name: This is the field with the name of the XenMobile DM database service. This section is autopopulated.
· Account name: This is the field with the account responsible for running the database server. This section is autopopulated.
· Account domain: This is the field where we enter the domain name (for example, teamxchange.in) or the hostname (for example, TX-XDM-SRV01) if the system is in a workgroup.
5. After entering the desired settings, click on Next.
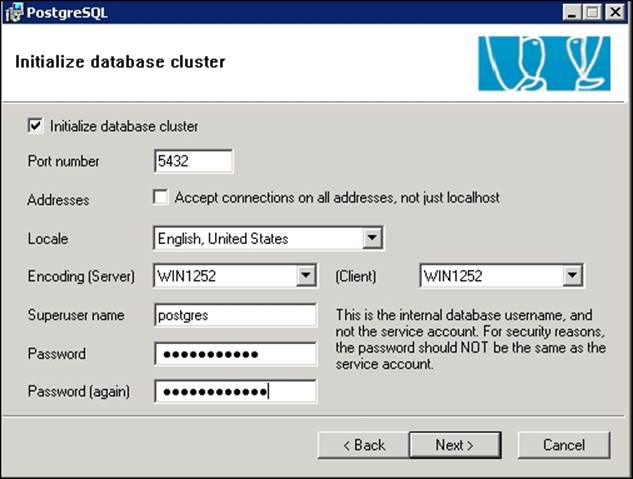
6. The Initialize database cluster section creates the internal PostgreSQL database user. It is mostly autopopulated; just enter the password to verify and click on Next.
Tip
Keep a note of all the usernames and passwords as they come in handy while troubleshooting or other database-related activities. The user created by the database is independent of the service user.
7. On Enable procedural languages, click on Next.
8. On Enable contrib modules, ensure Adminpack is selected and then click on Next.
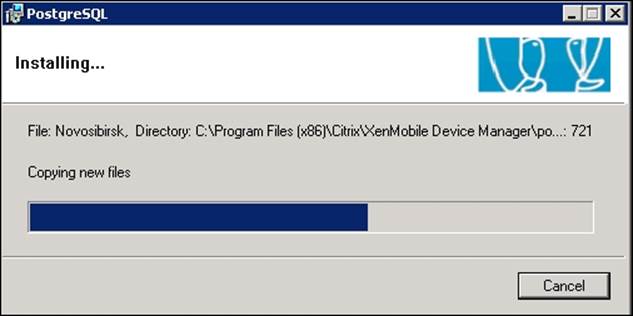
9. When we click on Next, the database installation will continue and the installation progress screen should appear as shown in the following screenshot:
10. Once the installation is completed, we will be greeted with the Congratulations page. Click on Finish.
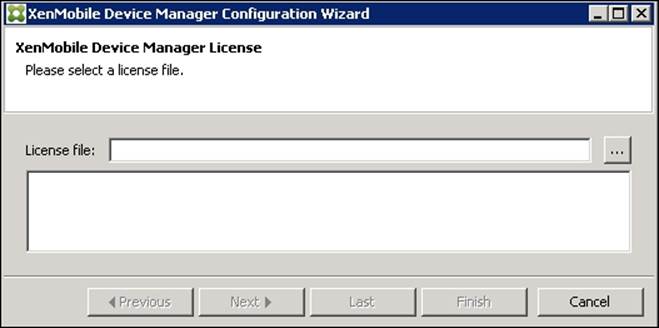
11. Now we will add the XenMobile DM license to use all the features and functionalities in the software. Upload the license file (.crt format) and click on Next.
12. The Configure database connection section connects the PostgreSQL Database super user created earlier with the Device Manager. All the fields are autopopulated except the password we chose for the super user. After entering the password, click onCheck the connection:

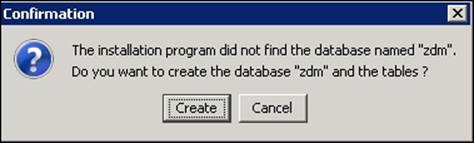
13. Once successfully connected, click on OK and it will prompt you to create a database named zdm. Then, click on Create.
14. On the Configure iOS usage screen, you can choose support for iOS devices. If you keep this option unchecked, you need to reinstall the Device Manager server to enable support for iOS devices:
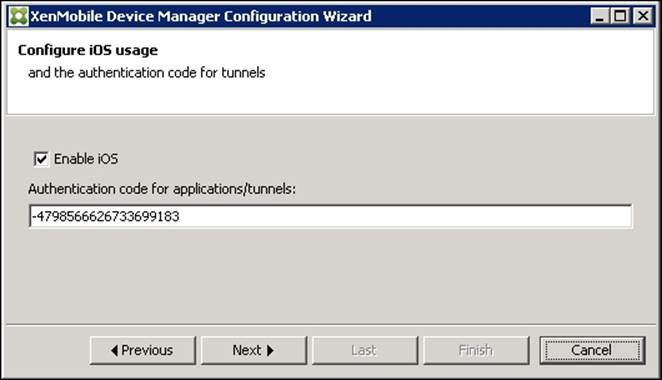
15. Keep a note of the authentication code that is provided here, as we will require it while setting up remote tunnels for iOS devices. In the next section of this installation, we will be setting up the XenMobile connectors and certificates.
Configuring XenMobile™ connector and certificate
In this section, we need to configure the server connectors. The XenMobile DM works on connectors to communicate between the Device Manager Agent and the Device Manager Server. The connectors are as follows:
· HTTP Connector: This allows unsecure connections over port 80
· HTTPS Connector (certificate-based): This allows secure connections over port 443 with a certificate
· HTTPS Connector: This allows a secure connection over port 8443 and is used for device enrollment
Once the server connectors are done, we perform the following steps:
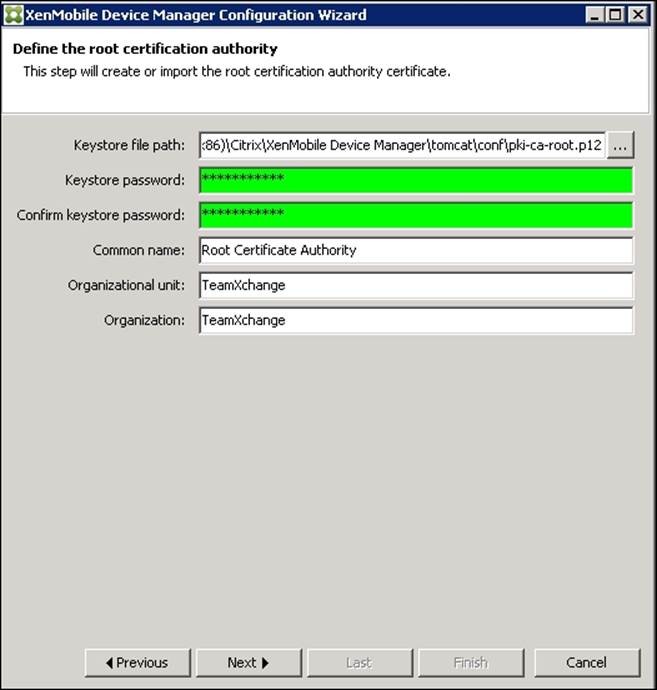
1. We need to upload the Root, Server, and the APNS certificates. An APNS certificate is a must to support iOS devices; the reference for this has been provided in Chapter 2, XenMobile™ Solution Deployment Prerequisites. If there are no existing Root or Server certificates, enter the desired password and click on Next. The session will automatically create one for future reference:
2. In the next section, we can define a range of ports used for Remote Support. In our scenario, we will go with the default option of 8081. Remote Support allows admins to remotely control devices and perform specific tasks on the device.
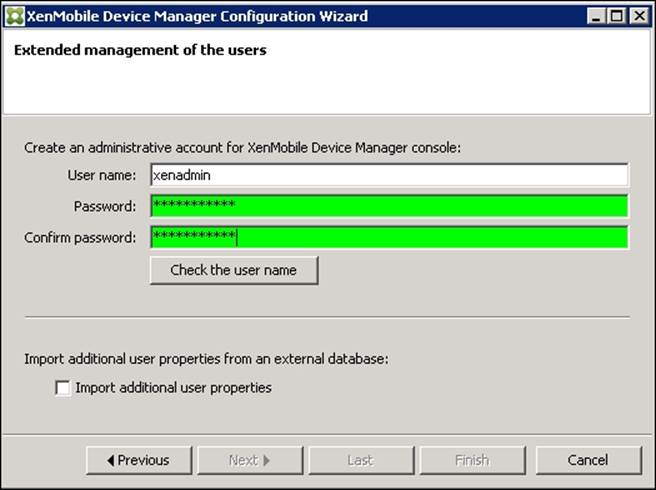
3. Enter a User name and Password for the XenMobile Device Manager admin console. The credentials entered here will be used to manage the XenMobile admin console.
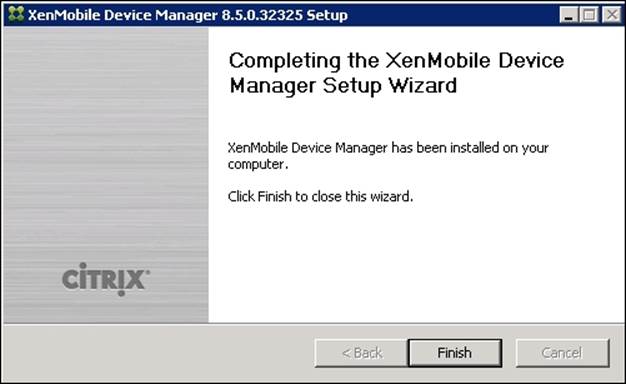
4. Click on Finish and reboot the server:
The XenMobile™ Device Manager admin console
Once the server is up, we will open up the browser and try to access the XenMobile Device Manager administrative console. Type https://ipaddress: 8443 /zdm for example, https://10.10.10.1:8443/zdm. This should open up the XenMobile Device Manager console as shown in the following screenshot:
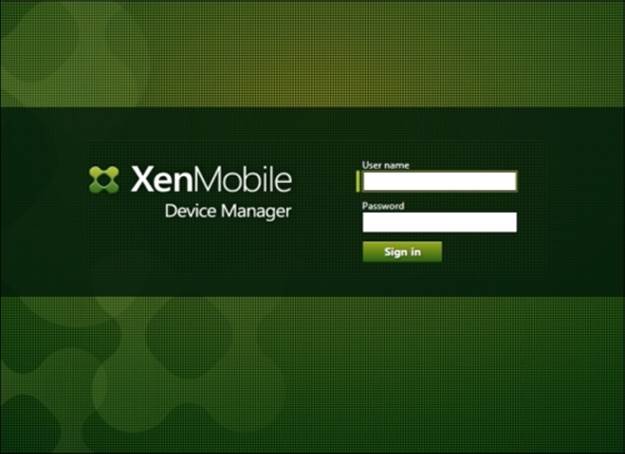
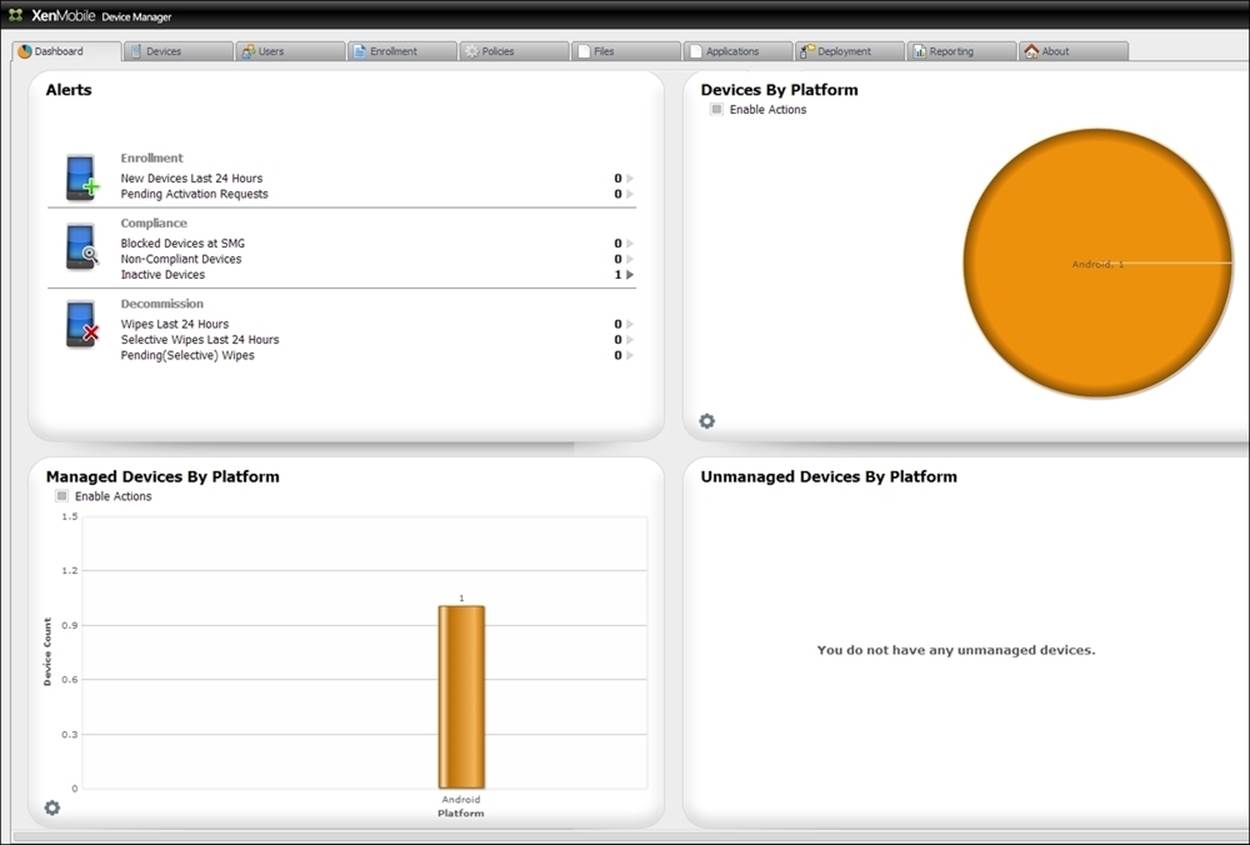
Log on to the admin console with the username and password set during the installation stage. The XenMobile Device Manager section is divided into 10 tabs for performing various activities as described in the following points:
· Dashboard: This tab gives you an overview of all the devices enrolled to the DM server based on their platform, which may be iOS, Android, Symbian, or Windows.
· Devices: This tab gives out detailed information regarding the devices enrolled. It also displays information about the user groups to which these enrolled devices belong to.
· Users: This tab has information regarding the XenMobile users and their respective roles such as administrator, user, support, or any other custom role.
· Enrollment: This tab has options to send device enrollment invitationsand the MDM client installation link, which can be sent to users via e-mail or SMS.
· Policies: This tab has various policies that can be applied to enrolled devices. It also has remote support tunneling options and SharePoint integration options to enable Mobile Content Management.
· Files: This tab is used to share files with the enrolled devices. We can also set read-only or hidden attributes on these files.
· Applications: This tab is used to deploy iOS or Android-based apps to the enrolled devices. These apps can be either internal (Enterprise Apps) or external (Play Store) apps.
· Deployment: This tab can be used to deploy packages containing policies, files, or applications to enrolled devices. These packages can be automated, for example, to deploy a set of policies as soon as a device is enrolled.
· Reporting: This tab contains various reports based on devices or applications, which can be generated to ensure a proper inventory.
· About: This section has details regarding the XenMobile DM server and its build. It also contains Device Manager License and APNS certificate information, which can be updated from here when required.
Integrating Active Directory
When we integrate XenMobile DM with Active Directory, it allows us to manage multiple users belonging to the same Active Directory group using the Device Manager. Integration with Active Directory enables users to enroll their devices using their Domain-based ID's and passwords. The XenMobile Device Manager server polls with the AD server using the LDAP protocol to check with the users and their passwords. The steps to integrate Active Directory are as follows:
1. Log on to Device Manager admin console.
2. Click on Options and select LDAP Configuration.
3. Click on New and select LDAP.
4. The integration page has some parameters that have to be defined to enable LDAP authentication. The parameters are as follows:
· Directory type: This field lets you to choose the type of directory used, for example, Microsoft Active Directory or others.
· Primary host [:Port]: This field lets you mention the IP address of the primary LDAP server (or Domain Controller) and the LDAP port (389/636/3268) being used. For example, 192.168.10.110:3268.
· Secondary host [:Port]: This field lets you mention the IP address of the secondary LDAP server and the LDAP port (389/636/3268) being used.
· Root context: This is the distinguished name of the domain. For example, for the domain teamxchange, the alias will be DC=TEAMXCHANGE,DC=IN.
· Users organization unit: This is the Active Directory OU to which the LDAP user belongs. This is an optional parameter.
· Groups organizational unit: This is the Active Directory group to which the LDAP user belongs. This is an optional parameter.
· Search user: This field lets you enter the complete username of the LDAP search user. For example, <ldap@teamxchange.com>. It is advisable to create a separate user for LDAP search purposes.
· Domain alias: This is the alias for the LDAP users' domain. For example, for the domain teamxchange.in, the alias will be teamxchange.
· XenMobile lockout limit: This parameter defines the number of failed attempts allowed to any user after which access to LDAP will be locked.
5. Kindly add the desired settings in the Directory connection parameters section as shown in the following screenshot:

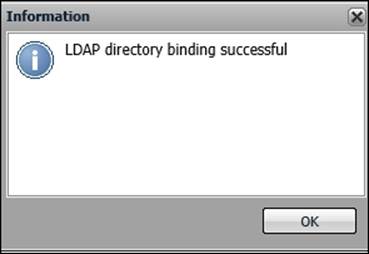
6. After entering all the required parameters, we need to click on Check. If the information provided is correct, it should give the following prompt:
7. Click on OK and then click on Next on the LDAP attributes import page.
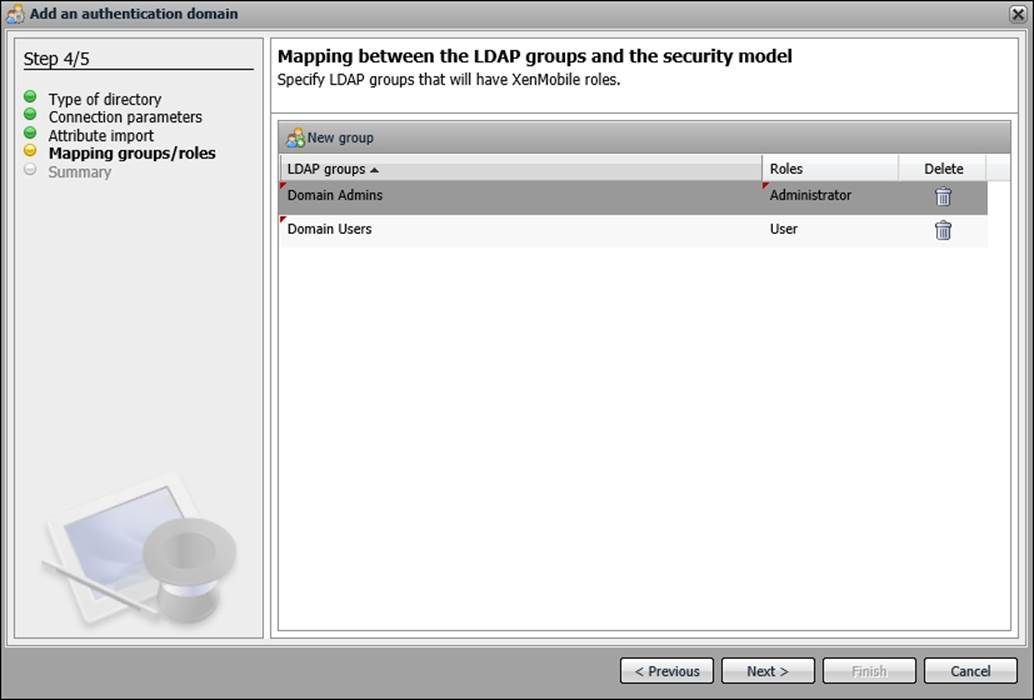
8. On the LDAP group and the Security Model Mapping page, you can choose which users have access to XenMobile and the users who have admin rights on the admin console. For example, Domain Admin can have Administrator roles and Domain Userscan be given User roles; alternatively, we can keep the default settings. Then, click on Next:
9. On the Summary page, we have the summary of all the settings that will be applied once we click on Finish.
Summary
As discussed in this chapter, we have successfully installed and configured the XenMobile Device Manager. Also, we learned the various settings for the XenMobile Console and the Active Directory integration procedure.
In the next chapter, we will be installing the App Controller server, which helps to deliver access to the Web, SaaS, and mobile-based applications.
All materials on the site are licensed Creative Commons Attribution-Sharealike 3.0 Unported CC BY-SA 3.0 & GNU Free Documentation License (GFDL)
If you are the copyright holder of any material contained on our site and intend to remove it, please contact our site administrator for approval.
© 2016-2026 All site design rights belong to S.Y.A.