Citrix XenMobile Mobile Device Management (2014)
Chapter 6. XenMobile Remote Support
Remote Support is one of the most sought-after features when it comes to MDM solutions. The Remote Support feature allows admins to remotely control and monitor enrolled devices and perform specific tasks. In this chapter, we will learn how to set up XenMobile Remote Support and control enrolled devices. The topics covered in this chapter are as follows:
· Installation prerequisites
· Installation of a Remote Support application
· Adding the Device Manager connection
Installation prerequisites
It's necessary that all installation prerequisites be met before proceeding with the installation. In this section, we will list the system prerequisites for installing the XenMobile Remote Support application.
Note
For a list of XenMobile Remote Support functionality, kindly refer to the document at http://support.citrix.com/proddocs/topic/cloudgateway/xmob-resupp-landing-con.html.
The following table lists the resources and minimum requirements for installing the Remote Support application:
|
Resources |
Minimum Requirements |
|
RAM |
512 MB Minimum |
|
Free Disk Space |
500 Mb |
|
Processor |
Dual Core Pentium 4-based or above |
|
Operating System |
Windows 7/8, Server 2003/2008 or above |
The XenMobile Remote Support application supports all the Windows Mobile-based and Android Samsung SAFE-based devices. Remote control of iOS devices is not yet supported.
Note
More details on Samsung SAFE and generic Android devices can be found at http://searchconsumerization.techtarget.com/definition/Samsung-for-Enterprise-SAFE.
Downloading the Software
To download the Remote Support application from the Citrix web portal, we need to perform the following steps:
1. Go to the Citrix Downloads portal, which can be found at http://www.citrix.com/downloads.html.
2. Click on My Account and log in.
Tip
A Citrix account is mandatory to download any software from the Citrix Download Center. Register for a Customer or a Partner account at https://www.citrix.com/welcome/create-account.html.
3. Click on Downloads.
4. Select XenMobile as the Product and Product Software as the Download Type from the drop-down options.
5. Collapse XenMobile and click on XenMobile Remote Support. Download the software.
Once both the hardware and software prerequisites have been met successfully, we can move ahead and start installing the product.
Installing a Remote Support application
Installation of the Remote Support application is pretty simple and self-explanatory. We can install the Remote Support application either on the XenMobile DM server or any other Windows OS as mentioned in the Installation Prerequisites section. We need to perform the following steps to successfully install the application:
1. Double-click on the XenMobileRemoteSupport-8.6.0.33286.exe file downloaded from the Citrix web portal.
2. Click on Next to continue with the Remote Support setup wizard.
3. Agree to the license agreement by clicking on I Agree.
4. Choose the location to install the software and click on Next.
5. Check the options for Add an icon to the desktop and Allow the user to save login and password and click on Next.
6. Click on Finish to complete the installation.
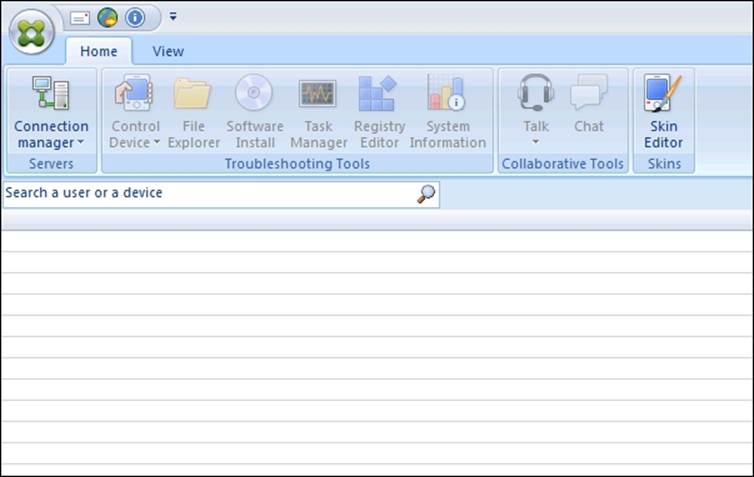
Once the preceding steps have been completed, the software should be installed on the computer and the Remote Support application should open up automatically as shown in the following screenshot:
Adding the Device Manager connection
A Device Manager connection allows the Remote Support application to communicate with the XenMobile Device Manager, which allows us to remotely access the enrolled devices.
The connection created in the Remote Support application communicates with the default Remote Support tunnel created by XenMobile and installed by the application itself. To locate the tunnel, log on to the XenMobile Device Manager web console and navigate to Policies | Android/Windows Mobile | Tunnels | RemoteSupport. In this section, we will create a Device Manager connection to establish Remote Support sessions. To do so, perform the following steps:
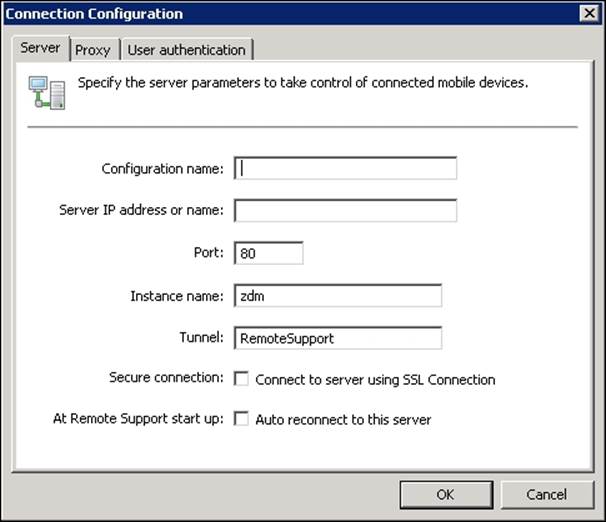
1. Open the Remote Support application and select New.
2. Next to Configuration name, enter a name for the connection.
3. Enter the IP address or the name of the Device Manager server.
4. Enter the Port number as defined in the RemoteSupport tunnel in the Device Manager web console (Policies | Android/Windows Mobile | Tunnels | RemoteSupport).
5. Leave the Instance name and Tunnel option as it is.
6. Check the box next to Connect to server using SSL Connection to ensure a secure communication.
7. The Proxy tab is used in case we have a proxy server in place, and the User Authentication tab binds this connection with a specific ID and password. In our case, we want admins to enter their individual credentials before logging in, so it's kept blank.
8. Click on OK and enter your XenMobile Admin credentials when prompted to establish the connection.
Once you are successfully connected, you can view the enrolled devices, users, and groups available in Device Manager from the Remote Support console. We can start a remote session by selecting the device and clicking on Control Device. The end user gets a prompt to allow the admin to remotely access the device. Once the access is granted, the session can be started.
Summary
In this chapter, we have covered the hardware and software prerequisites required to install the Remote Support application. Also, we have installed the Remote Support application and configured it to manage enrolled devices.
In the next chapter, we will learn how to enrol mobile devices and perform specific tasks such as revoking or wiping in case the device is lost or mishandled.
All materials on the site are licensed Creative Commons Attribution-Sharealike 3.0 Unported CC BY-SA 3.0 & GNU Free Documentation License (GFDL)
If you are the copyright holder of any material contained on our site and intend to remove it, please contact our site administrator for approval.
© 2016-2026 All site design rights belong to S.Y.A.