Citrix XenMobile Mobile Device Management (2014)
Chapter 7. Device Enrollment and Revoking Access
After having successfully implemented the XenMobile components, now we will start enrolling devices; iOS and Android-based devices will be used as examples in this chapter. While enrolling a device, an agent is installed on the device that communicates with the XenMobile server periodically and helps to update the policies and settings on the device that are applied from the server.
In this chapter, we will go through the various ways a device can be enrolled, using the XenMobile Device Manager. Also, there are some situations where an enrolled device is lost or compromised. In such situations, XenMobile gives us an option to remotely wipe the data on the device so that it's not misused. We will also learn how to wipe a device from the console to take care of such situations. The topics covered in this chapter are as follows:
· Enrolling devices
· Enrolling iOS devices
· Enrolling Android devices
· Revoking device access
· Wiping devices
· Self-help portals
Enrolling devices
There are multiple options for enrolling Android or iOS devices on the XenMobile Device Manager server. The steps to achieve the same are as follows:
1. To enrol a device, we need to log in to the XenMobile Device Manager web console and then navigate to the Enrollment tab.
2. Through the Enrollment tab, the administrator can send an Enrollment Invitation and MDM link to users by choosing their platform (Android, iOS, Symbian, or Windows Mobile) and the enrollment mode.
3. Once the invitation has been received, the user can go to the link and download the Worx Home app and enrol the device.

Enrolling iOS devices
In this section, we will enrol an iOS device with the XenMobile MDM server by installing the Worx Home agent. To do so, perform the following steps:
Note
Citrix Enroll is no longer required for enrolling iOS devices. Enrollment can now be done with Worx Home using the one step enrollment process. Read more at http://blogs.citrix.com/2013/11/12/xenmobile-end-of-standalone-enroll-application/.
1. Download the Worx Home app from the App Store at https://itunes.apple.com/us/app/worx-home-by-citrix/id434682528?mt=8.
2. Launch the Worx Home app and enter the XenMobile Device Manager Server URL, for example, mdm.teamxchange.in or the e-mail address of the user.
3. Now, enter the Username and Password for the user and tap on Sign On.
4. After successful authentication, the application should open up the Safari browser to complete the enrollment process. Once we click on Enroll, the application prompts us to accept and install the device profiles corresponding to the XenMobile server.
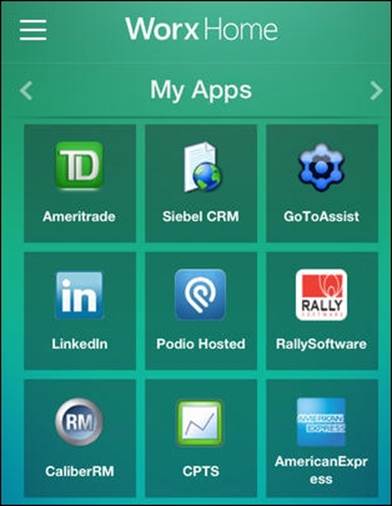
5. Once the profiles are successfully installed, we should be logged on the Worx Home app and be able to see the server-deployed apps, if any.
Enrolling Android devices
In this section, we will enrol Android devices with the XenMobile MDM server by installing the Worx Home agent. To do so, perform the following steps:
1. Download and install the Worx Home by Citrix app from the Google Play Store.
2. Launch the Worx Home app and enter the XenMobile Device Manager Server URL, for example, mdm.teamxchange.in or the e-mail address of the user.
3. Now, enter the Username and Password for the user and click on Sign On.
4. Select Activate when the Activate Device Administrator screen appears.
5. On successful authentication, we should be logged on to the Worx Home and should see the enrolled device on the XenMobile Device Manager console in the Devices tab.
Revoking device access
Administrators can block access to an enrolled device and mark its certificates as invalid, which will restrict the device from connecting to the Device Manager server or accessing corporate data. This can be helpful in scenarios where the user has left the organization and should not be allowed any further access to corporate data.
We can revoke a device by performing the following steps:
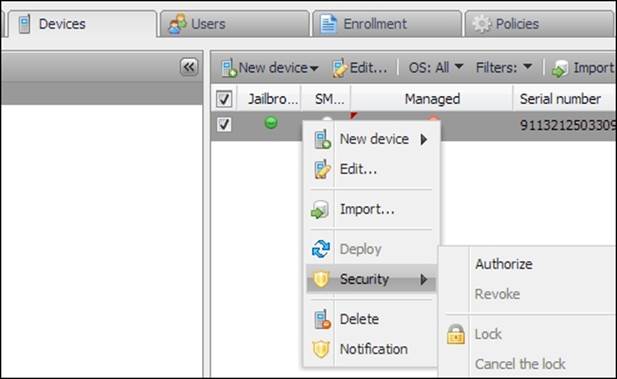
1. Log on to the XenMobile Device Manager console and navigate to the Devices tab.
2. Right-click on the enrolled device, select Security, and click on Revoke.

3. Click on Yes to accept the device revoke prompt.
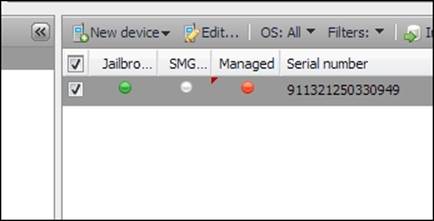
4. This should disconnect the device from the DM server and we should be able to see a red icon under Managed if the device has been successfully revoked.
5. Further, a revoked device can again be authorized by right-clicking on the device, navigating to Security, and then clicking on Authorize.
Authorize Device
Device wipe
Device wipe was always one of the most sought-after feature of MDM solutions. It provides the option to the administrator as well as end users, using Self-help portals, to wipe a lost or stolen device. Wipes are generally of two categories, listed as follows:
· Selective wipe: When this is performed, only the corporate data from the end user's device is deleted, leaving the personal data intact.
· Full wipe: When this is selected, a complete factory reset occurs, leading to the deletion of both company as well as personal data.
Tip
Wipe is an irreversible option and can lead to data loss; thus, it should be carried out with extreme caution.
To perform a device wipe, right-click on the enrolled device, navigate to Security, and then select Full wipe or Selective wipe.
The Self-help portal
XenMobile Device Manager integrates the Self- Help portal for users, allowing them to manage their devices. Using the Self-help portal, a user can enrol their device by sending an enrollment request on their device. The Self-help portal also allows users to locate their own devices or wipe the content residing on it, in case the device is lost or stolen. In such cases, the user can also opt to lock the device using the Self-help portal.
Any Active Directory-based user or XenMobile Device Manager user automatically gets access to the Self-help portal, which can be accessed at https://<device.manager.ip.address>:8443/zdm/
Summary
In this chapter, we have learned how administrators can send invitations to end users to get their devices enrolled, and how iOS-and Android-based devices can be enrolled with the XenMobile DM server. We also learned how to manage these devices by revoking them, and how to perform a selective and full device wipe.
In the next chapter, we will learn to manage applications using the XenMobile components.
All materials on the site are licensed Creative Commons Attribution-Sharealike 3.0 Unported CC BY-SA 3.0 & GNU Free Documentation License (GFDL)
If you are the copyright holder of any material contained on our site and intend to remove it, please contact our site administrator for approval.
© 2016-2026 All site design rights belong to S.Y.A.