Adobe After Effects CC Classroom in a Book (2017 release) (2017)
11. Using 3D Features
Lesson overview
In this lesson, you’ll learn how to do the following:
• Create a 3D environment in After Effects.
• Look at a 3D scene from multiple views.
• Create 3D text.
• Rotate and position layers along x, y, and z axes.
• Animate a camera layer.
• Add lights to create shadows and depth.
• Extrude 3D text in After Effects.
• Create a Cinema 4D layer to use in After Effects.
![]()
This lesson will take approximately an hour to complete. Download the project files for this lesson, following the instructions in the Getting Started section under “Accessing the lesson files and Web Edition,” if you haven’t already done so. As you work on this lesson, you’ll preserve the start files. If you need to restore the start files, download them from your Account page.

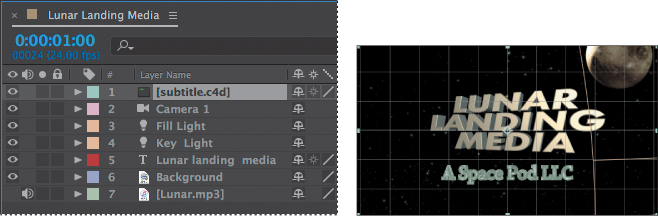
PROJECT: TITLE CARD FOR A PRODUCTION COMPANY
By clicking a single switch in the Timeline panel in After Effects, you can turn a 2D layer into a 3D layer, opening up a whole new world of creative possibilities. Maxon Cinema 4D Lite, included with After Effects, gives you even greater flexibility.
Getting started
Adobe After Effects can work with layers in two dimensions (x, y) or in three dimensions (x, y, z). So far in this book, you’ve worked primarily in two dimensions. When you specify a layer as three-dimensional (3D), After Effects adds the z axis, which lets you move the object forward and backward in space. By combining this depth with a variety of lights and camera angles, you can create animated 3D projects that take advantage of the full range of natural motion, lighting and shadows, perspective, and focusing effects. In this lesson, you’ll explore how to create and animate 3D layers. Then you’ll use Maxon Cinema 4D Lite (installed with After Effects) to add texture to 3D text for a title card for a fictional production company.
First, you’ll preview the final movie and then set up the project.
1. Make sure the following files are in the Lessons/Lesson11 folder on your hard disk, or download them from your Account page at www.peachpit.com now:
• In the Assets folder: Lunar.mp3, Space_Landscape.jpg
• In the Sample_Movies folder: Lesson_11.avi, Lesson11.mov
2. Open and play the Lesson11.avi sample movie in Windows Media Player or the Lesson11.mov sample movie in QuickTime Player to see what you will create in this lesson. When you are done, close Windows Media Player or QuickTime Player. You may delete the sample movies from your hard disk if you have limited storage space.
When you begin this lesson, restore the default application settings for After Effects. See “Restoring default preferences” on page 2.
3. Start After Effects, and then immediately hold down Ctrl+Alt+Shift (Windows) or Command+Option+Shift (Mac OS). When prompted, click OK to delete your preferences. Close the Start window.
After Effects opens to display an empty, untitled project.
4. Choose File > Save As > Save As.
5. In the Save Project As dialog box, navigate to the Lessons/Lesson11/Finished_Project folder. Name the project Lesson11_Finished.aep, and click Save.
6. Click the Create A New Composition button (![]() ) at the bottom of the Project panel.
) at the bottom of the Project panel.
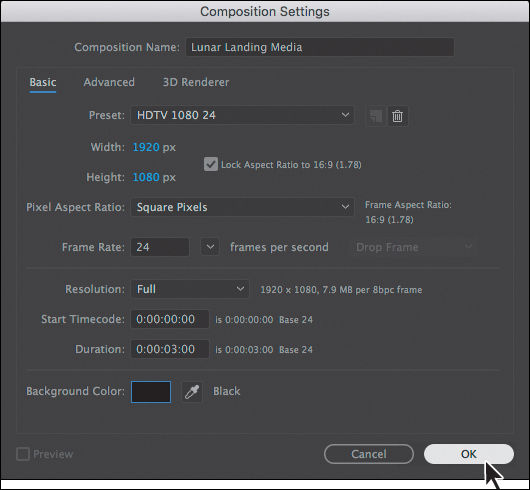
7. In the Composition Settings dialog box, do the following, and then click OK:
• Name the composition Lunar Landing Media.
• Choose HDTV 1080 24 from the Preset menu.
• Enter 3:00 for the Duration.
• Make sure the Background Color is black.
8. Choose File > Save.
Creating 3D text
In order to move something in 3D space, you need to make it a 3D object. Initially, any layer has only x (width) and y (height) dimensions, and can be moved only along those axes. But all you have to do to move a layer in three dimensions in After Effects is to turn on its 3D layer switch, which lets you manipulate the object along its z axis (depth). You’ll create text, and then make it 3D.
1. Click in the Timeline panel to make it active.
2. Select the Horizontal Type tool (![]() ) in the Tools panel.
) in the Tools panel.
After Effects adds the Character and Paragraph panels to the stack and opens the Character panel.
![]() Note
Note
If Futura PT is not available, install it using Typekit. Choose File > Add Fonts From Typekit, search for Futura PT, and sync it using Creative Cloud. Once you’ve synced the font, it will be available in all applications on your system.
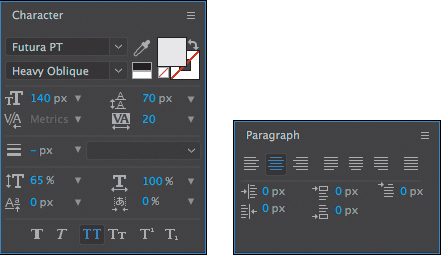
3. Make the Character panel wider, if necessary, and then select the following settings:
• Font: Futura PT
• Font Style: Heavy Oblique
• Fill Color: White
• Stroke: None
• Font Size: 140 px
• Leading: 70 px
• Tracking: 20%
• Vertical Scale: 65%
4. Select All Caps. (You may need to drag the bottom of the Character panel to extend it in order to see all settings.)
5. Open the Paragraph panel, and select the Center Text alignment option.
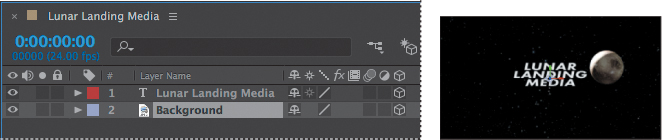
6. Click anywhere in the Composition panel and type Lunar Landing Media, with each word on its own line, as in the image on the next page.
7. Select the Selection tool (![]() ).
).
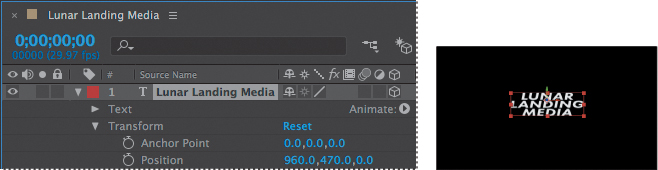
8. In the Timeline panel, expand the Transform properties for the Lunar Landing Media layer, and change the Position property to 960, 470.
The text is roughly centered in the composition.
9. In the Timeline panel, select the 3D Layer switch (![]() ) for the Lunar Landing Media layer to give it three dimensions.
) for the Lunar Landing Media layer to give it three dimensions.
Three 3D Rotation properties appear in the Transform group for the layer, and properties that previously supported only two dimensions now display a third value for the z axis. In addition, a new property group named Material Options appears.
When the layer is selected, a color-coded 3D axis appears over the layer’s anchor point in the Composition panel. The red arrow controls the x axis, the green arrow controls the y axis, and the blue arrow controls the z axis. At the moment, the z axis appears at the intersection of the x and y axes; it may be difficult to see against the black background. The letter x, y, or z appears when you position the Selection tool over the corresponding axis. When you move or rotate the layer while the pointer is over a particular axis, the layer’s movement is restricted to that axis.
10. Hide the properties for the Lunar Landing Media layer.
Using 3D views
Sometimes the appearance of 3D layers can be deceptive. For example, a layer might appear to be scaling smaller along its x and y axes when it’s actually moving along the z axis. You can’t always tell from the default view in the Composition panel. The Select View Layout pop-up menu at the bottom of the Composition panel lets you divide the panel into different views of a single frame, so you can see your work from multiple angles. You specify different views using the 3D View pop-up menu.
1. At the bottom of the Composition panel, click the Select View Layout pop-up menu, and choose 4 Views, if your screen is large enough to display them. Otherwise, choose 2 Views - Horizontal.
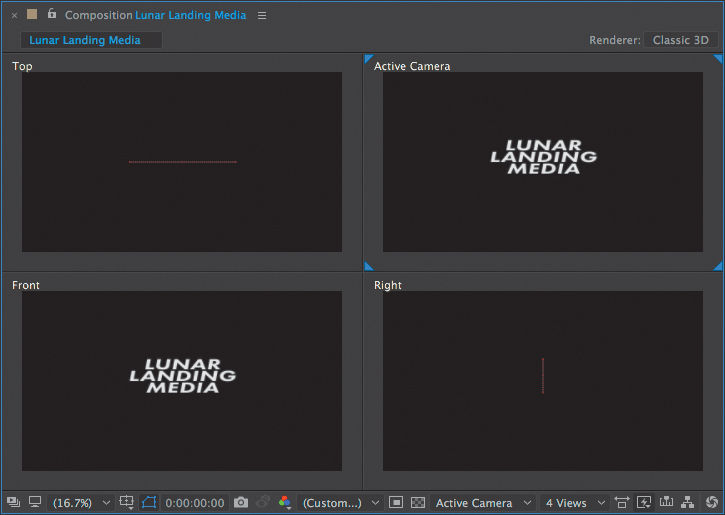
With 4 Views selected, the upper left quadrant displays the scene from the top (along the y axis). There, you can see the z axis, and it’s clear that the text layer has no depth. The lower left quadrant shows the view from the front. The upper right quadrant displays what the camera sees, but because there is no camera in the scene, it’s the same as the front view. The lower right quadrant shows the view from the right, as if you were observing it along the x axis.
With 2 Views - Horizontal selected, the left view shows the scene from the top, and the right shows the camera’s view (currently the front view).
2. Click the Front view to make it active. (Blue corner tabs appear around the active view.) Then, from the 3D View pop-up menu, choose Custom View 1 to see the scene from a different perspective. (If your Composition window displays only two views, click the Top view, and choose Custom View 1 from the 3D View pop-up menu.)
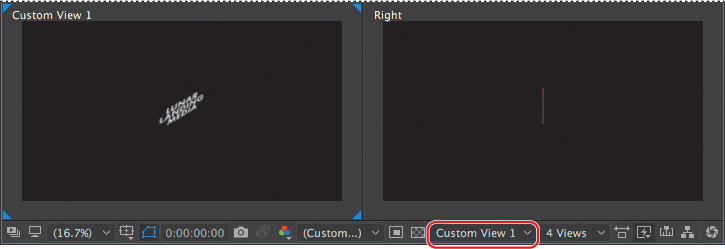
Viewing your 3D scene from different perspectives can help you align elements more accurately, view how layers are interacting with each other, and understand how objects, lights, and cameras are positioned in 3D space.
Importing a background
The text in your title card should appear to be moving in outer space. You’ll import an image to use as a background.
1. Double-click an empty area of the Project panel to open the Import File dialog box.
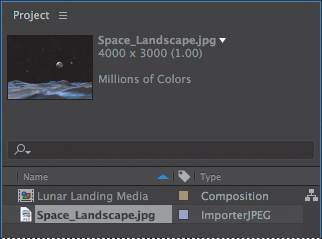
2. Navigate to the Lesson11/Assets folder, and double-click the Space_Landscape.jpg file.
3. Drag the Space_Landscape.jpg item into the Timeline panel, placing it at the bottom of the layer stack.
4. Rename the Space_Landscape.jpg layer Background.
5. In the Timeline panel, select the Background layer, and then click the 3D Layer switch (![]() ) to convert it to a 3D layer.
) to convert it to a 3D layer.
6. Make sure the Background layer is selected. Then, in the Right view in the Composition panel, drag the z-axis arrow (the blue arrow) to the right to move the Background layer further behind the text. Watch the other layers as you drag to see how the layer interacts with 3D space.
![]() Note
Note
If you’re displaying only two views, select the Active Camera view, and choose Right from the 3D View pop-up menu. Then complete step 6.
7. In the Timeline panel, press the P key to display the Position property for the Background layer. Change the Position to 960, 300, 150.
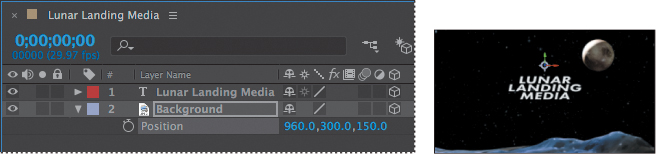
8. Press P to hide the Position property, and then choose File > Save to save your work so far.
Adding 3D lights
You’ve created a 3D scene, but it doesn’t yet look three-dimensional from the front. Adding light to a composition creates shadows that give depth to the scene. You’ll create two new lights for your composition.
Creating a light layer
In After Effects, a light is a type of layer that shines light on other layers. You can choose from among four different types of lights—Parallel, Spot, Point, and Ambient—and modify them with various settings. Lights, by default, are directed toward a point of interest, which is the focus area of the scene.
1. Deselect all layers so that the new layer you create will appear at the top of the layer stack.
2. Press the Home key, or move the current-time indicator to the beginning of the time ruler.
3. Choose Layer > New > Light.
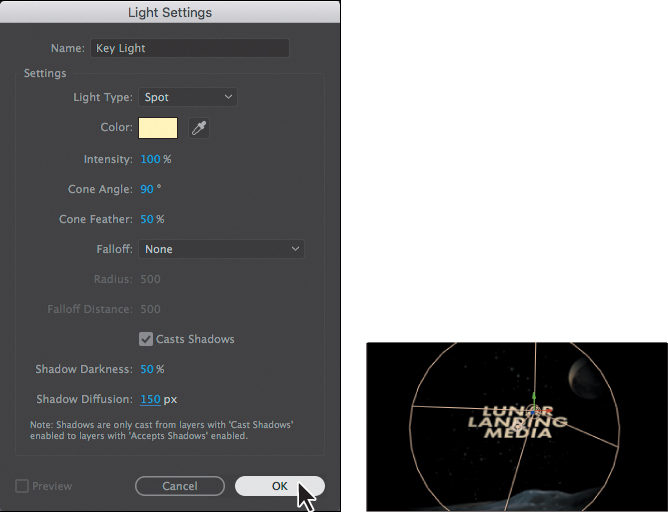
4. In the Light Settings dialog box, do the following:
• Name the layer Key Light.
• Choose Spot from the Light Type menu.
• Set Color to a light orange (R=255, G=235, B=195).
• Make sure Intensity is set to 100% and Cone Angle to 90 degrees.
• Make sure Cone Feather is set to 50%.
• Select the Casts Shadows option.
• Set Shadow Darkness to 50% and Shadow Diffusion to 150 pixels.
• Click OK to create the light layer.
In the Timeline panel, the light layer is represented by a light bulb icon (![]() ). In the Composition panel, a wireframe illustrates the light’s position, with a cross-hairs icon (
). In the Composition panel, a wireframe illustrates the light’s position, with a cross-hairs icon (![]() ) representing the point of interest.
) representing the point of interest.
Positioning the spotlight
The point of interest for this light is currently pointed at the center of the scene. Because that’s where the text layer is located, you don’t need to adjust it. However, you’ll change the light position so the scene looks less bleak.
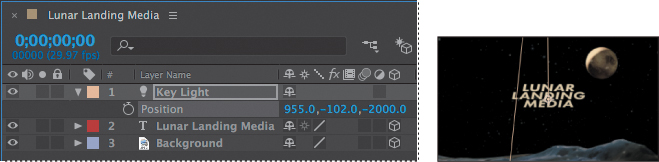
1. Select the Key Light layer in the Timeline panel, and press the P key to reveal the Position property for the light layer.
2. In the Timeline panel, type 955, –102, –2000 in the Position property. The light is now in front of and above the object, aiming down.
Creating and positioning the fill light
The key light gives the scene a moody look, but it’s still very dark. You’ll add a fill light to lighten the darker areas.
1. Choose Layer > New > Light.
2. In the Light Settings dialog box, do the following:
• Name the layer Fill Light.
• Choose Spot from the Light Type menu.
• Set the Color to a light blue (R=205, G=238, B=251).
• Set Intensity to 50% and Cone Angle to 90 degrees.
• Make sure Cone Feather is set to 50%.
• Deselect Casts Shadows.
• Click OK to create the light layer.

3. In the Timeline panel, select the Fill Light layer, and press the P key to reveal its Position property.
4. Change the position to 2624, 370, –1125.
The text stroke, stars, and moon highlight are all much brighter now.
5. Hide the open properties for all layers, and choose File > Save.
Casting shadows and setting material properties
The scene is looking better, with a mix of warm and cool colors. However, it still doesn’t look three-dimensional. You’ll change the Material Options properties to determine how the 3D layers interact with the lights and shadows.
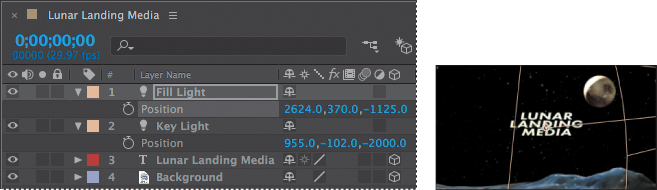
1. Select the Lunar Landing Media layer in the Timeline panel, and press the A key twice (AA) to reveal the Material Options properties for the layer.
The Material Options property group defines the surface properties of the 3D layer. You can also set shadow and light transmission values.
2. For Casts Shadows, click the word Off to toggle the setting on. (Make sure it says On, not Only.)
The text layer now casts shadows based on the lights in the scene.
3. Change the Diffuse value to 60% and the Specular Intensity to 60% so that the text layer reflects more of the light in the scene.
4. Increase the Specular Shininess to 15% to give the surface a more metallic shine.
5. Hide the properties for the Lunar Landing Media layer.
Adding a camera
You’ve already seen that you can view a 3D scene from different perspectives. You can also view 3D layers from various angles and distances using layers called cameras. When you set a camera view for your composition, you look at the layers as though you were looking through that camera. You can view a composition through the active camera or through a named, custom camera. If you have not created a custom camera, then the active camera is the same as the default composition view.
So far, you have been viewing this composition primarily from the Top, Right, and Custom View 1 angles. Currently, the Active Camera view doesn’t let you see your composition from any specific angle. To see everything you want to see, you’ll create a custom camera.
1. Deselect all layers, and then choose Layer > New > Camera.
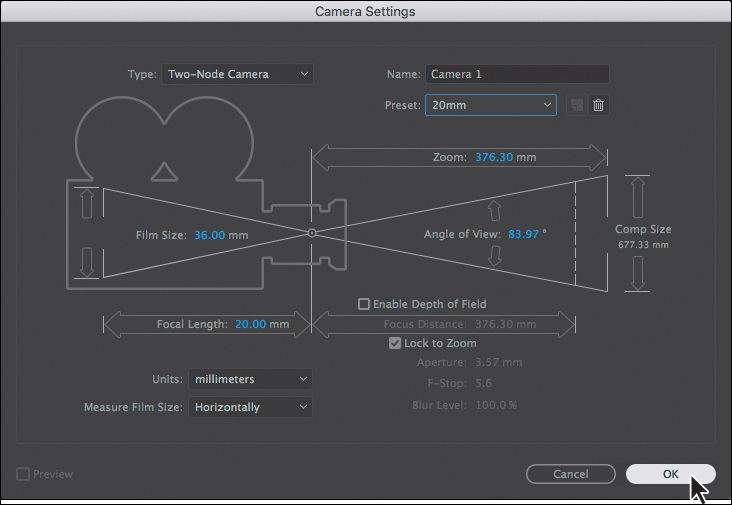
2. In the Camera Settings dialog box, choose 20mm from the Preset menu, and click OK.
![]() Tip
Tip
After Effects displays the wireframes for cameras by default. You can instruct After Effects to display wireframes only when cameras (or spotlights) are selected, or not at all. Choose View Options from the Composition panel menu, and then choose the options you want from the Camera Wireframes and Spotlight Wireframes menus. Then click OK.
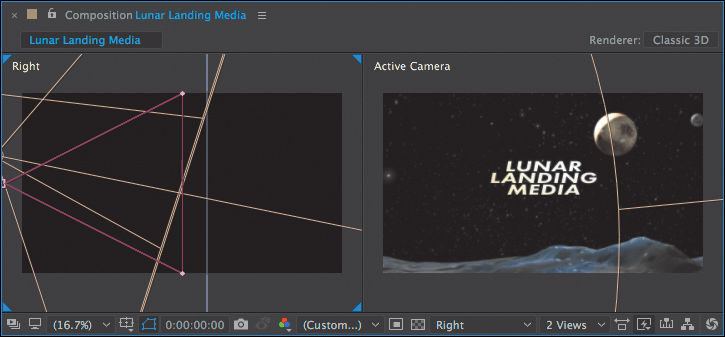
The Camera 1 layer appears at the top of the layer stack in the Timeline panel (with a camera icon next to the layer name), and the Composition panel updates to reflect the new camera layer’s perspective. The view should change slightly, because the 20mm preset shows a wider field of view than the default. If you didn’t notice the scene change, toggle the visibility of the Camera 1 layer to see it, and then make sure it’s visible.
3. Choose 2 Views - Horizontal from the Select View Layout pop-up menu at the bottom of the Composition panel. Change the view on the left to Right, and make sure the view on the right is set to Active Camera.
Like light layers, camera layers have a point of interest that can be used to determine what the camera looks at. By default, the camera’s point of interest is the center of the composition. That’s where your text currently is, so that point of interest works well.
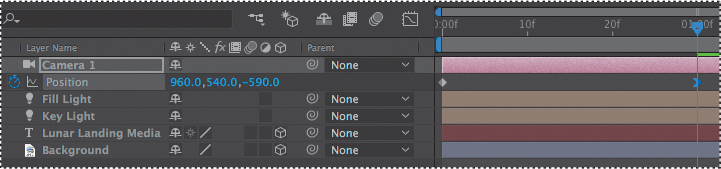
4. Make sure the current-time indicator is at the beginning of the time ruler. Select the Camera 1 layer, and press the P key to reveal the Position property for the layer. Create an initial keyframe by clicking the stopwatch icon (![]() ) next to the Position property.
) next to the Position property.
5. Set the z-axis value to –1000.
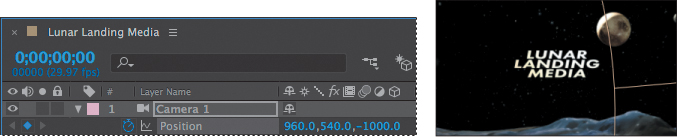
The camera moves slightly closer to the text.
6. Go to 1:00.
7. Change the z-axis value to –590.
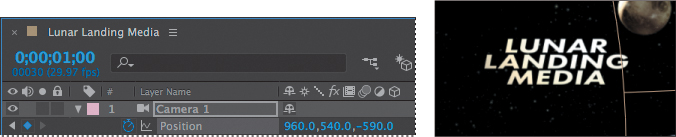
The camera moves much closer to the text.
8. Right-click (Windows) or Control-click (Mac OS) the second Position keyframe, and choose Keyframe Assistant > Easy Ease In.
9. Move the current-time indicator through the timeline to 1:00. As the camera moves through the scene, notice how the light reflects off the text layer and how the overall image is influenced by the wider camera lens.

10. Hide the Position property for the Camera 1 layer, and choose File > Save.
Extruding text in After Effects
Using the Cinema 4D renderer, you can extrude text and shapes within After Effects. You’ll use the Geometry Options properties to make the text a little more interesting.
1. Expand the Lunar Landing Media layer in the Timeline panel.
2. Next to Geometry Options (currently dimmed), click Change Renderer.
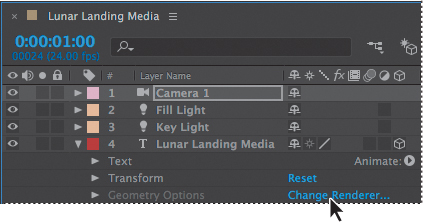
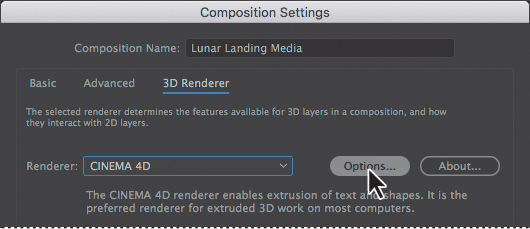
The Composition Settings dialog box opens, with the 3D Renderer tab active.
3. Choose Cinema 4D from the Renderer pop-up menu, and click Options.
4. Move the Quality slider to 32.
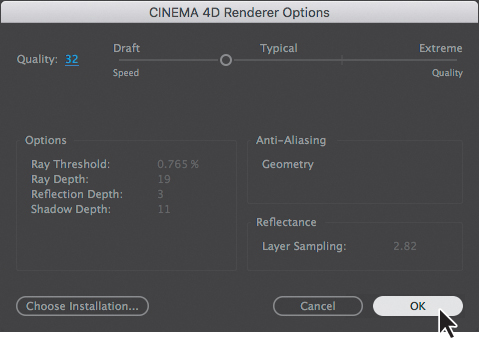
5. Click OK to close the Cinema 4D Renderer Options dialog box, and then click OK again to close the Composition Settings dialog box.
![]() Tip
Tip
To quickly open the options dialog box, click the wrench icon next to the renderer name at the top of the Composition panel.
The Cinema 4D renderer options include a single Quality value, which determines how the CINEMA 4D renderer draws 3D layers. A lower value results in faster rendering but lower rendering quality. Choose a Quality setting that balances rendering speed with the 3D rendering quality your project requires.
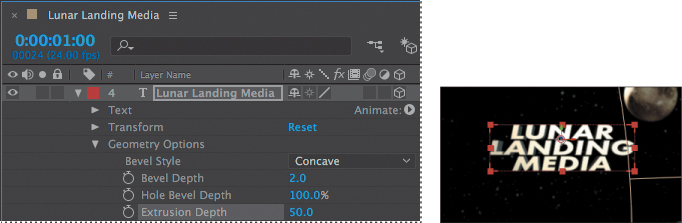
6. Expand Geometry Options for the Lunar Landing Media layer.
7. Choose Concave from the Bevel Style menu.
8. Change the Extrusion Depth to 50.
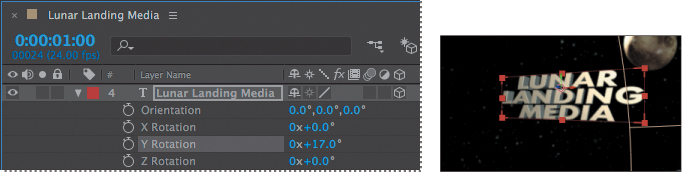
9. Select the Lunar Landing Media layer, and press R to reveal the Rotation properties.
It’s not obvious that you’ve extruded the text. You’ll adjust the text’s angle to show off the effect and to provide additional interest to the scene.
10. Change the Y Rotation to 17.
11. Hide all properties for the layer.
Working with Cinema 4D Lite
After Effects installs a version of Maxon Cinema 4D that lets motion graphic artists and animators insert 3D objects directly into an After Effects scene without pre-rendering passes and potentially complicated file exchanges. You can continue to edit 3D objects in Cinema 4D Lite after you’ve added them to your After Effects composition.
![]() Note
Note
After Effects uses a different coordinate numbering convention than other 3D applications. In After Effects, the upper left corner of the composition is considered 0, 0. In many 3D applications, including Maxon Cinema 4D, the center of the world (often the screen) is the origin, or 0, 0, 0 point. Additionally, the Y distance increases as the cursor moves down the screen in After Effects.
You’ll use Cinema 4D Lite to create a textured subtitle, which you’ll add to the After Effects scene below the main text.
Creating a new Cinema 4D layer
You can add a Cinema 4D layer to a composition in After Effects. When you add the layer, After Effects opens Cinema 4D Lite so you can create your 3D scene in a new C4D file. When you finish your work in Cinema 4D, save the file, and it will update automatically in After Effects. You can return to Cinema 4D to make additional changes to the layer.
1. Deselect all layers in the Timeline panel, and then choose Layer > New > Maxon Cinema 4D File. After Effects displays a Save As dialog box.
2. Name the file subtitle.c4d, and save it in the Lesson11/Finished_Project folder.
3. Click Save.
![]() Note
Note
You may be prompted to update Cinema 4D, or to register in order to access additional features. You can complete the exercise without doing either, but if you plan to use Cinema4D on your own projects, consider registering and updating the application.
Saving the file adds a C4D file to the Timeline panel, and After Effects opens the Cineware effect in the Effect Controls panel. Cineware creates and manages the link between After Effects and Cinema 4D.
Cinema 4D opens with an empty scene, displaying only the 3D grid.
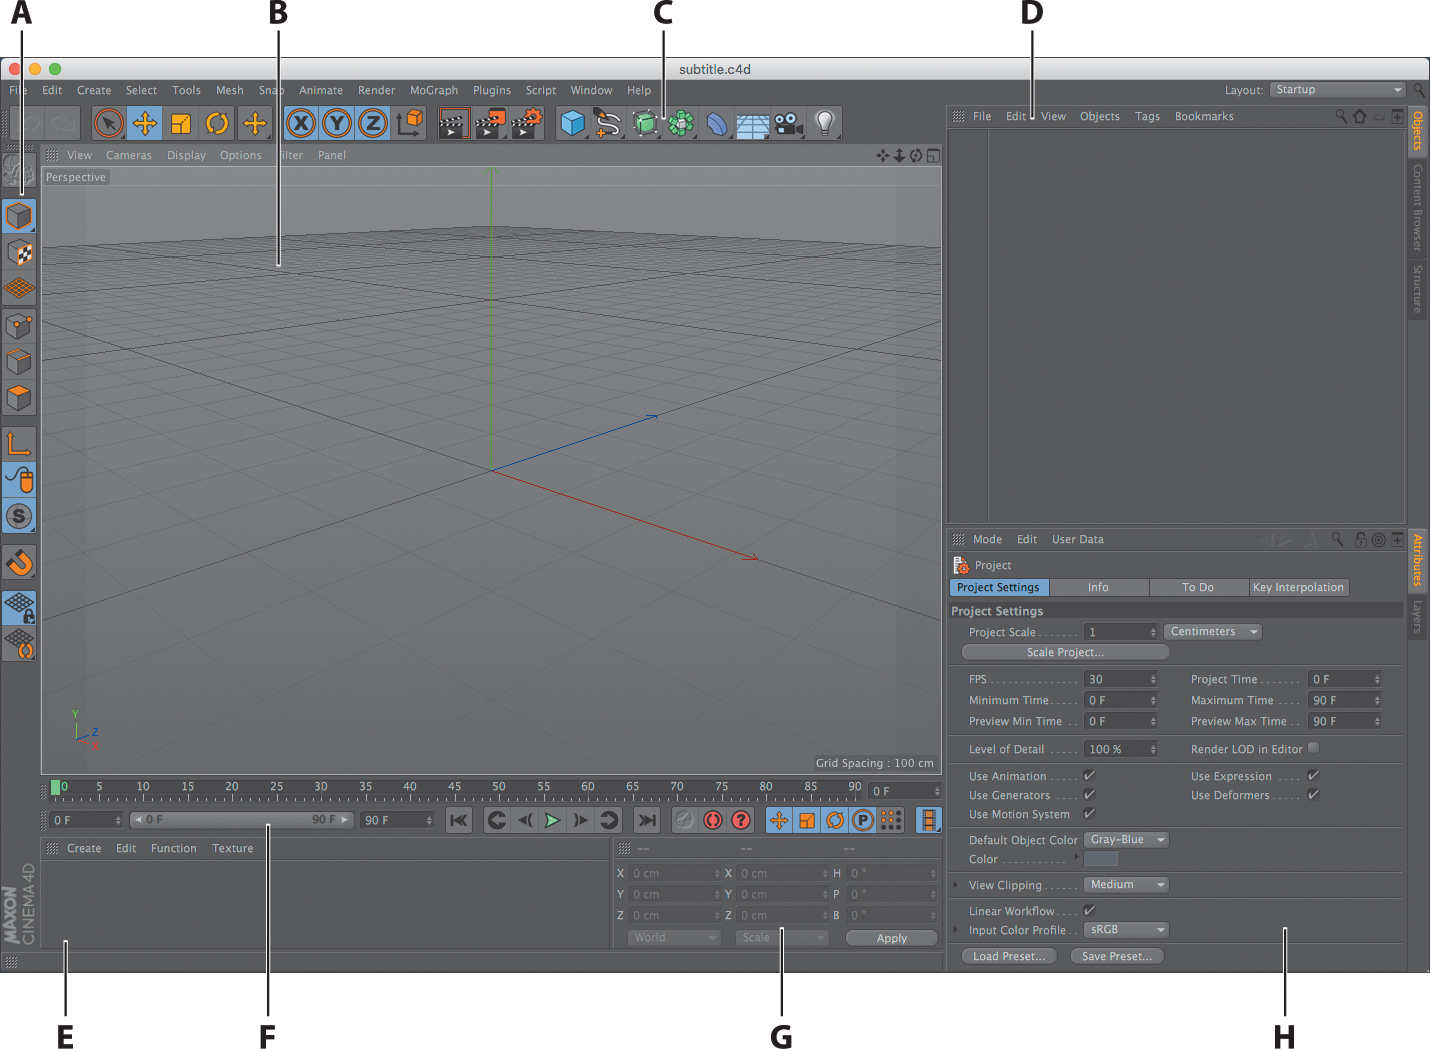
A. Modes icon palette
B. Viewport
C. Tools icon palette
D. Object Manager
E. Material Manager
F. Timeline
G. Coordinates Manager
H. Attribute Manager
Creating 3D text in Cinema 4D
You’ll start by creating the text.
1. In the Tools icon palette (below the menu bar), click and hold the triangle in the lower right corner of the Freehand icon to display its menu, and then select the Text tool.
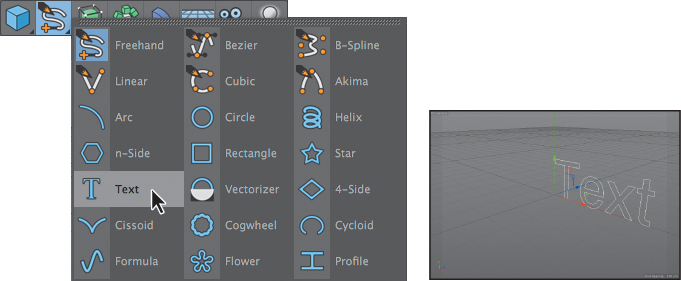
A basic text spline appears in the middle of the scene.
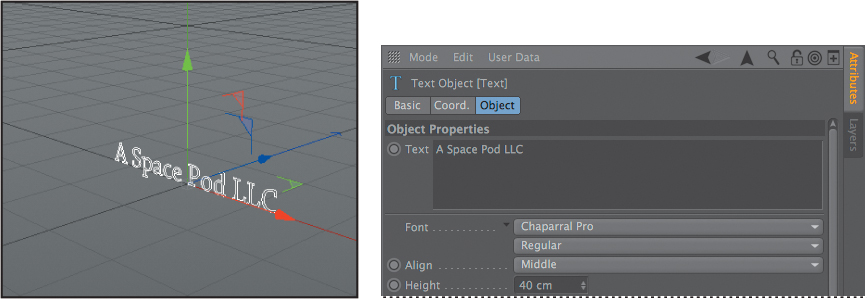
2. In the text box in the Attribute Manager, type A Space Pod LLC.
3. In the Attribute Manager, change the text settings as follows:
• Font: Chapparal Pro
• Align: Middle
• Height: 40 cm
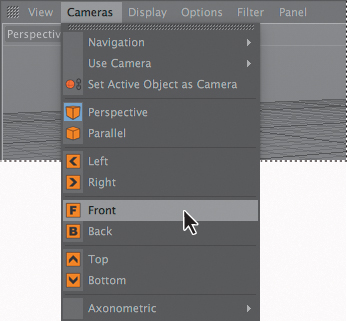
The view is currently from an angle. You want to see how the text looks from the front, so you’ll change the camera view.
4. Choose Front from the Cameras menu above the Viewport.
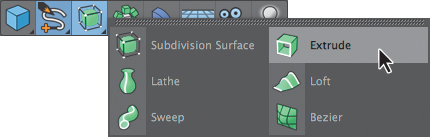
5. In the Tools icon palette, click and hold the triangle in the lower right corner of the Subdivision Surface icon to view its menu, and then select Extrude.
6. In the Object Manager, select the Text object, and then drag it to the middle column to the right of Extrude to parent it. You’ll know you’ve positioned it correctly when the cursor becomes a box with an arrow pointing down.
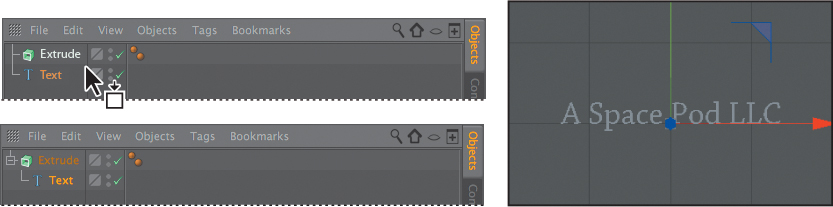
In the Object Manager, the Text object appears nested below the Extrude object, indicating the parent relationship. The text is now extruded, though you can’t tell because you’re viewing it from the front.
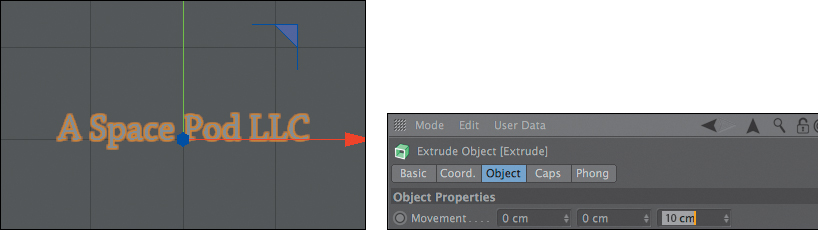
7. In the Object Manager, click the Extrude object to make it active (it turns bright orange).

8. In the Attribute Manager, select the Object tab, and then change the z-axis Movement value to 10 cm to reduce the extrusion depth.
Now, you’ll enhance the text further by beveling the edges and making some adjustments.
9. In the Attribute Manager, select the Caps tab, and do the following:
• Choose Fillet Cap from the Start menu.
• Increase the Steps value to 2.
• Decrease the Radius value to 3 cm.
• Choose Concave from the Fillet Type menu.

The changes you made give the text an interesting edge.
Adding texture to an object
Cinema 4D Lite comes with a number of preset surfaces you can apply to 3D objects. You’ll add a subtle water texture to the text.
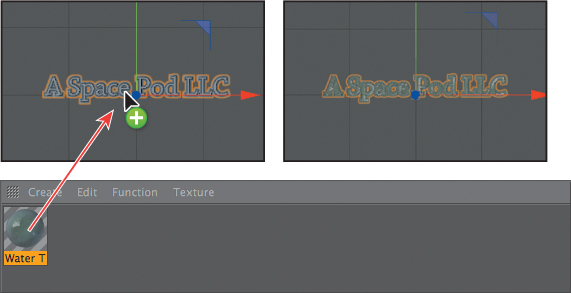
1. In the Materials Manager, click Create, and then choose Load Material Preset > Lite > Materials > Liquids >Water Turbulent.

2. In the Materials Manager, click the surface you just added, and drag it onto the text in the Viewport.
3. Choose File > Save.
Positioning the 3D object
Because you’ll use the Cinema 4D camera in After Effects, you can position the text in Cinema 4D using the full range of 3D tools. You’ll adjust the text in Cinema 4D so that it appears below the title text in After Effects and so that it tilts at the same angle as the other text.
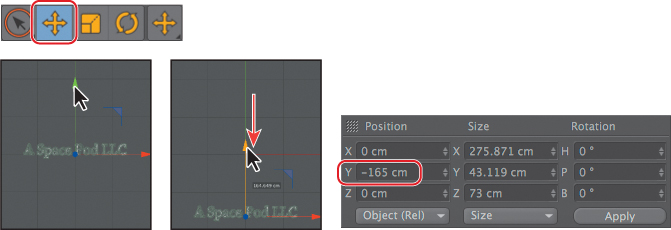
1. Select the Move tool in the Tools icon palette.
2. Drag the green arrow (the y axis) down until the Y value for Position in the Coordinates Manager is about -165 cm.
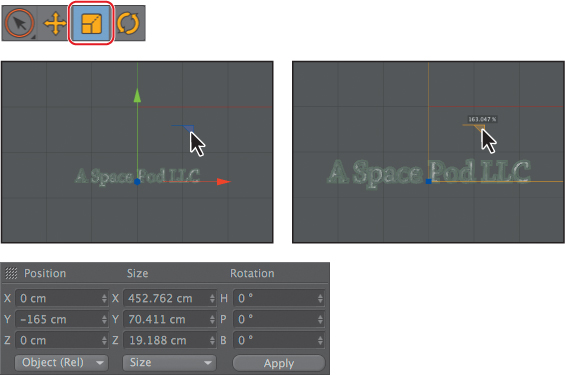
3. Select the Scale tool in the Tools icon palette.
4. Drag the blue triangle to the upper right until the tool tip displays approximately 163%. (The XYZ values in the Size column in the Coordinates Manager should be approximately 449 cm, 70 cm, and 21 cm.)
5. Choose File > Save to save the file so far.
6. Return to After Effects to see how the text is currently positioned in the scene.
The text looks pretty good, but its angle isn’t right. You’ll fix that next.
7. Return to Cinema 4D Lite.
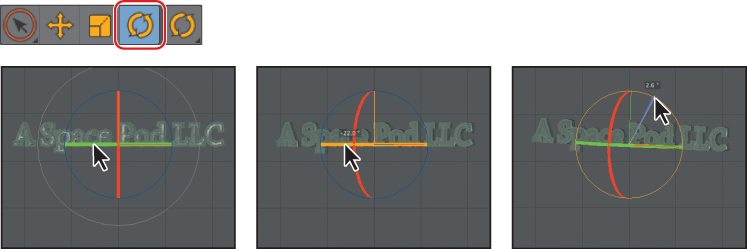
8. Select the Rotate tool in the Tools icon palette.
![]() Note
Note
Cinema 4D Lite displays values for the H (heading), P (pitch), and B (bank) axes for rotation.
9. Drag the green horizontal bar to the left so that the H rotation value is about -22.
10. Adjust the inner blue circle to tilt the right edge of the text down just a bit, so that the B rotation value is about 2.6°.
Integrating the C4D layer in After Effects
Now, you’ll return to After Effects to work with the 3D text in your project. You’ve already positioned the layer in Cinema 4D. In After Effects, you’ll animate its opacity.
1. Save your file in Cinema 4D Lite, and return to After Effects.
2. Select the subtitle.c4d layer in the Timeline panel to display the Cineware effect in the Effect Controls panel.
While you’re working with a Cinema 4D file in After Effects, you should usually choose Software or Standard (Draft) from the Renderer menu in the Cineware effect. However, when you prepare to render your final project, choose Standard (Final) from the Renderer menu.
The Software option uses a faster renderer that doesn’t include all the features of the file. The Standard (Final) option renders more slowly, but it gives you a better view of what the Cinema 4D file looks like. You’ll choose the Standard (Draft) option so that the grid doesn’t show.
3. In the Effect Controls panel, choose Standard (Draft) from the Renderer menu.
4. Make sure the current-time indicator is at 1:00 in the timeline so you can see the final camera view.
5. (Optional) If you’d like to adjust the text position, return to Camera 4D to tweak it, save the file, and return to After Effects again.
6. Press T to reveal the layer’s Opacity property, and then click the stopwatch icon (![]() ) to set a keyframe at 1:00.
) to set a keyframe at 1:00.
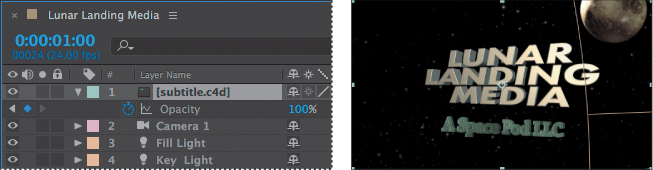
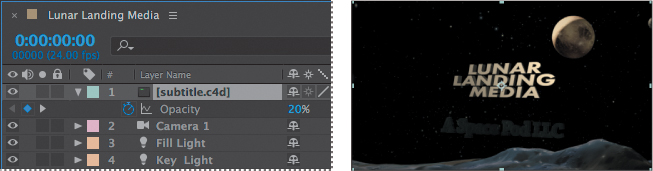
7. Return to the beginning of the timeline, and change the Opacity to 20%.
Finishing the project
As a final touch, you’ll add an audio file for the title card. You’re ready to import the audio file and prepare the file for rendering.
1. Select the Project tab, double-click an empty area of the Project panel, and then navigate to the Lesson11/Assets folder. Double-click the Lunar.mp3 file to import it.
2. Drag the Lunar.mp3 file from the Project panel to the bottom of the layer stack in the Timeline panel.
3. Select the subtitle.c4d layer in the Timeline panel.
4. Click the Effect Controls tab, and then, in the Effect Controls panel, choose Standard (Final) from the Renderer menu.
5. Choose File > Save, and then preview your movie.

You’ve created a simple 3D scene using After Effects and Cinema 4D Lite, but you’ve only just scratched the surface of what is possible. Experiment with your own projects to explore your options.
Review questions
1. What happens to a layer when you select its 3D Layer switch?
2. Why is it important to look at multiple views of a composition that contains 3D layers?
3. What is a camera layer?
4. What is a 3D light in After Effects?
Review answers
1. When you select a layer’s 3D Layer switch in the Timeline panel, After Effects adds a third axis, the z axis, to the layer. You can then move and rotate the layer in three dimensions. In addition, the layer takes on new properties that are unique to 3D layers, such as the Materials Options property group.
2. The appearance of 3D layers can be deceptive, depending on the view in the Composition panel. By enabling 3D views, you can see the true position of a layer relative to other layers in the composition.
3. You can view After Effects 3D layers from any number of angles and distances using layers called cameras. When you set a camera view for your composition, you look at the layers as though you were looking through that camera. You can choose between viewing a composition through the active camera or through a named, custom camera. If you have not created a custom camera, then the active camera is the same as the default composition view.
4. In After Effects, a light is a type of layer that shines light on other layers. You can choose from among four different types of lights—Parallel, Spot, Point, and Ambient—and modify them with various settings.