Take Control of FileVault (1.1) (2015)
Encrypt a Non-startup Volume
FileVault is strictly for startup volumes, but if you have other volumes attached to your Mac (whether internal, external or removable), Mac OS X can encrypt those as well, using the same underlying Core Storage technology. This chapter explains what’s different about encrypting a non-startup volume, shows you two ways to encrypt one, and also briefly discusses ways to encrypt the disks used by virtualization software such as Parallels or Fusion.
Learn about Encryption for Other Volumes
Encrypting non-startup volumes is quick and easy—you don’t even have to restart your Mac. However, because you’re not using FileVault as such, the rules are a bit different:
· No recovery key is created, so there’s nothing for Apple to store.
· You create a single password for the disk—unlike FileVault, you can’t have user-specific passwords.
· Because of the foregoing two items, it’s extra super ultra-critical that you don’t forget your password! Treat it with the utmost care.
· Find My Mac doesn’t work with non-startup volumes, so remote locking and wiping of those volumes is out of the question.
· If it so happens that the secondary drive you want to encrypt already contains an installation of Mac OS X, you can’t encrypt it unless that disk also includes a Recovery HD volume. (You may be able to add one after the fact; see Make Sure Your Destination Disk Has a Recovery HD Volume.)
Note: If you’re planning to encrypt a volume that will be used for a bootable duplicate (or clone) of your FileVault-encrypted drive, the methods I’m about to explain aren’t the ideal way to do so. For a better strategy, see Encrypt a Bootable Duplicate.
Keeping those qualifications in mind, you can encrypt a disk either the easy way (in the Finder) or the harder way (in Disk Utility). I explain both methods next.
Note: If you’re a real glutton for punishment, you can also encrypt a disk on the command line with the diskutil command. See Use diskutil, in “Appendix A: FileVault on the Command Line.”
Should You Use a Different Password?
Let’s say you encrypt a second internal disk in your Mac mini, or an external drive that you nearly always have connected to your iMac. How important is it to choose a unique password for that second disk? Is it safe to reuse your Mac’s login password?
Although I nearly always recommend against reusing passwords, in this particular instance I think it’s fine to use the same one—as long as it’s a great password!
The reason you should normally avoid using the same password in more than one place (such as accounts on multiple Web sites) is that someone who discovered or guessed one password would then be able to access your other accounts. Making each password unique limits the potential damage.
But in this case, considering FileVault’s robust security and the fact that an attacker would need physical access to your Mac (or disk), the real-world risk is vanishingly small, whereas the possibility of your forgetting additional passwords does pose a serious risk since there’d be no way for you to recover that data. Unless you have a credible, specific threat to your data that makes you extra paranoid, I think this is one case in which reusing passwords won’t hurt.
Encrypt a Volume in the Finder
In Mountain Lion and later, Apple includes a contextual menu item in the Finder that lets you encrypt any locally attached, mounted volume with just a few clicks—no need to open Disk Utility, fiddle in Terminal, or jump through any other hoops. Encryption works for internal and external hard drives, SSDs, flash drives, and even CDs and DVDs. (Sorry, you can’t encrypt network volumes.)
To encrypt a mounted volume:
1. Right-click (or Control-click) the volume icon in the Finder—for example, on the Desktop (Figure 15) or in the sidebar of a Finder window—and choose Encrypt “Volume Name” from the contextual menu.
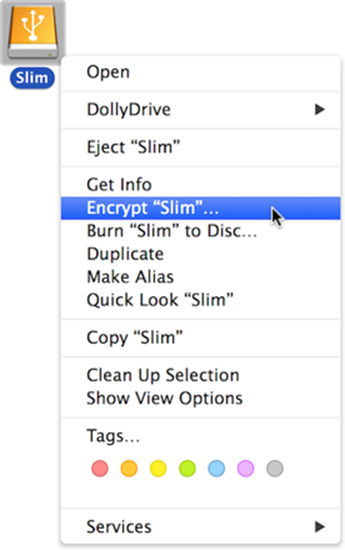
Figure 15: Use this contextual menu command to encrypt an external disk.
2. In the dialog that appears (Figure 16), enter and repeat a password. (As usual, you can come up with your own password manually, click the key ![]() icon to open Password Assistant, or use a password manager such as 1Password.)
icon to open Password Assistant, or use a password manager such as 1Password.)
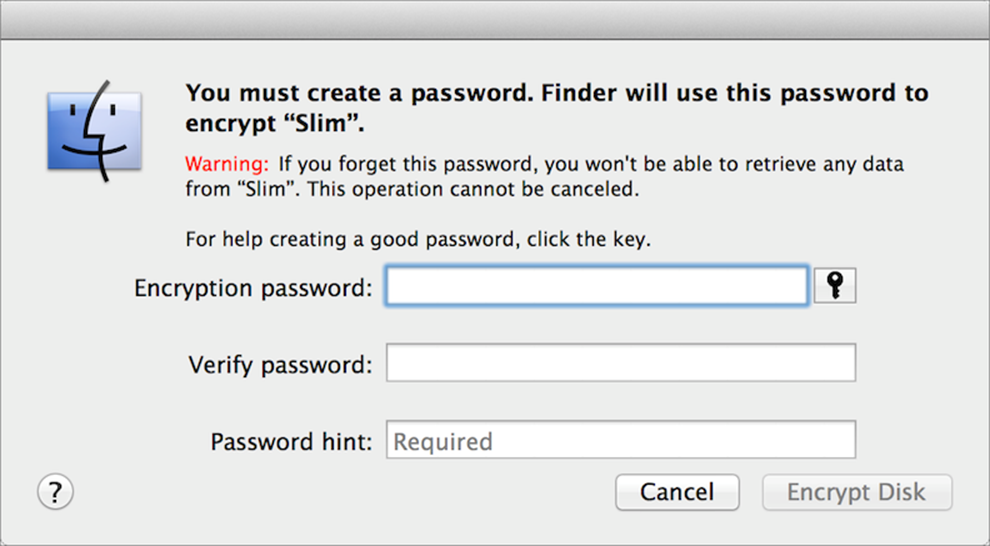
Figure 16: Fill in these fields—and remember, typing something in the Password Hint field is mandatory—to encrypt a volume.
3. You must type something in the Password Hint field—after all, you won’t have a recovery key to fall back on—but if you’re confident that you’ll remember the password and you don’t want to type a hint that might help out an attacker, just type No (or something similarly recalcitrant).
4. Click Encrypt Disk.
Mac OS X begins encrypting the disk immediately.
Note: The Finder provides no visual indication of its encryption or decryption progress. If you want to know how it’s coming along, you can use the diskutil cs list command—see Use diskutil, in “Appendix A: FileVault on the Command Line.”
The next time you restart or log in with that volume attached—or if you disconnect and reconnect it—Mac OS X will prompt you for the password before mounting it (Figure 17). Type the password and click Unlock to mount the volume.
Note: As with FileVault, once any user has unlocked an encrypted non-startup disk, it becomes available to all users and remains unlocked—even if you unmount and remount the disk—until you restart the Mac.
If you want the volume to mount automatically from now on, you can check Remember This Password in My Keychain before clicking Unlock. One example of when you would not want to do this is when encrypting a personal drive that you connect to a public or shared computer—say, the flash drive that you carry around to use in campus computer labs.
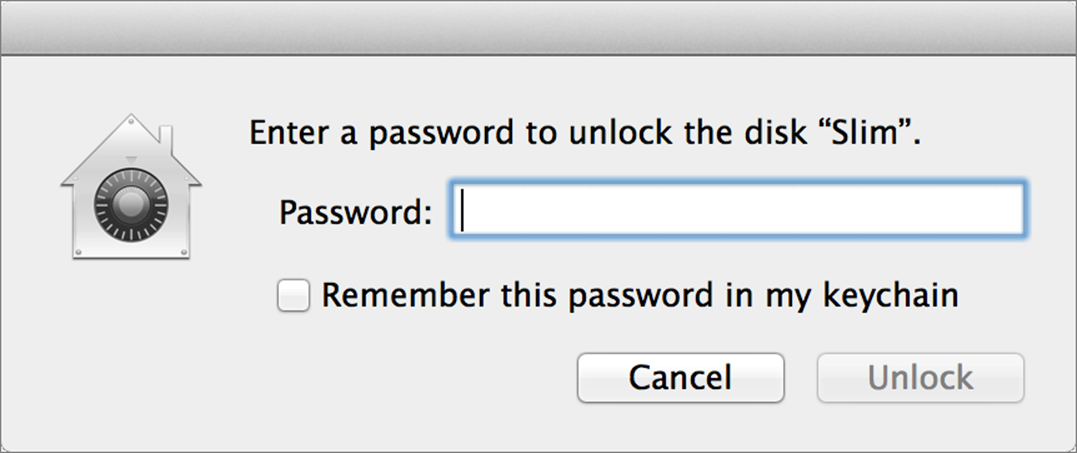
Figure 17: When you restart or reconnect an encrypted drive, you’re prompted to enter its password before it can mount.
To decrypt a volume in the Finder, right-click (or Control-click) it, choose Decrypt Volume Name from the contextual menu, and enter the password if prompted. It begins decrypting immediately.
Booting from an Encrypted Non-FileVault Disk
What if you were to encrypt a non-startup volume in the Finder and then later, without first decrypting it, install Mac OS X on that volume, or use it as the destination for a bootable duplicate? You’d end up with an encrypted boot volume that doesn’t use FileVault as such, which means it has no recovery key (in case you forget its password)—and you would be unable to have multiple, user-specific passwords to unlock it as you can with FileVault.
If you start your Mac from such a volume, you’ll see an EFI Login screen much like the one FileVault uses, except that in place of user accounts, you’d see Disk Password. Click this, enter the disk’s password, and your Mac should boot normally.
In other words, it works, but not quite the same as FileVault—and without FileVault’s extra safety nets.
Encrypt a Volume in Disk Utility
Disk Utility can also encrypt volumes, but only in the process of erasing them! That means it’s not a bad way to turn on encryption if you happen to be repartitioning an external drive, say—but unlike the Finder, Disk Utility can’t nondestructively convert an existing volume. (On the other hand, Disk Utility is way faster at encrypting a volume than the Finder because it knows there’s no data on the volume, so it doesn’t have to waste time encrypting empty blocks.)
To encrypt a volume in Disk Utility:
1. Open Disk Utility (in /Applications/Utilities).
2. Select a volume (indented under its parent disk name) in the list on the left.
3. Click Erase.
4. From the Format pop-up menu, choose Mac OS Extended (Journaled, Encrypted).
5. Click Erase.
6. In the dialog that appears, type and verify a password for the disk, optionally enter a hint, and click Erase.
Disk Utility erases the volume and encrypts it. When the disk mounts, you’ll be prompted to enter its password.
Use Encryption with a Virtual Machine
Virtualization software (such as VMware Fusion, Parallels Desktop, or VirtualBox) provides an easy way to run Windows on your Mac alongside Mac OS X. You can also use virtualization software to run a second copy of Mac OS X in its own window. For example, if your Mac is running Yosemite, you can install an older version of Mac OS X (such as Snow Leopard Server or Mavericks) in order to use software that’s incompatible with Yosemite, or you can install a beta version of the next release of OS X to test it without overwriting or interfering with your main operating system.
What does that have to do with FileVault? Potentially nothing, except in the trivial sense that if your entire disk is encrypted, then so are the virtual machine files that reside on it. But you can enable FileVault on a virtual machine, too (or instead)—either for additional protection or to solve a specific problem that encrypting your entire disk with FileVault would not.
For example, consider this scenario. Suppose you use a spare Mac mini as a server, and because you’re concerned that it could be stolen while you’re away, you want to protect it with FileVault. That’s fine, but if your Mac crashes and reboots itself—or if the power goes out and then comes back on—it will just sit there at the login screen (and cease to do its job as a server). Unless you’re physically present to enter your password, you won’t be able to get it back up and running.
How can you get around this? You could use a virtual copy of Mac OS X as your server and enable FileVault for the virtual machine only—not for your main startup disk. That way, if your Mac should crash or the power should cycle, you could log in remotely (using screen sharing via Back to My Mac, for instance) and enter your FileVault credentials in the virtualization software.
Admittedly, this is a highly unusual case, but if you needed to do something like this, now you know you could.
Note: Fusion and Parallels (but not VirtualBox) offer their own tools to encrypt a virtual machine if you so choose. I recommend against using both the virtualization software’s encryption and FileVault for a virtual machine, because performance will suffer. Pick one or the other. For Mac OS X guest operating systems, I’d go with FileVault.