Learning iCloud Data Management (2014)
Part II: Using the APIs
3. Introducing the APIs and the First Apps
This part of the book shows you how to take advantage of the data your users have placed in iCloud either directly or indirectly by using apps that synchronize their data with iCloud. These apps include Contacts, Reminders, and Calendar as well as iPhoto on OS X or Camera on iOS. iCloud makes this data available to users on all their devices. The opportunity for you as a developer is to build apps that let users take this data and work with it. Their contribution is their data; your contribution is an understanding of what they may want to do with their data. The apps from Apple provide powerful support for the most common tasks that people want to perform with their data, but there are literally thousands (make that hundreds of thousands) of apps that let people combine their data with your ways of working with it.
This chapter introduces the project you’ll be working on in this part of the book. You’ll see what it can do, and you’ll set it up with Xcode.
Getting Started as an Apple Developer
You’ll find documentation and tools on Apple’s Developer website at developer.apple.com. You need to register with an Apple ID for access to many parts of this content. You can use an existing Apple ID (such as one you’ve used in the App Store or iTunes) or you can create a new Apple ID that you will use with your developer’s hat on. There is no charge for an Apple ID.
Each Apple ID has an email address associated with it along with your identity. Apple confirms your identity automatically by sending an email to the email address you provide. When you reply, Apple knows that—at least at that moment—you are the person associated with that email address. You can change any part of this supporting information at any time by logging in to appleid.apple.com, as shown in Figure 3.1. You repeat the verification process if you change your email address.
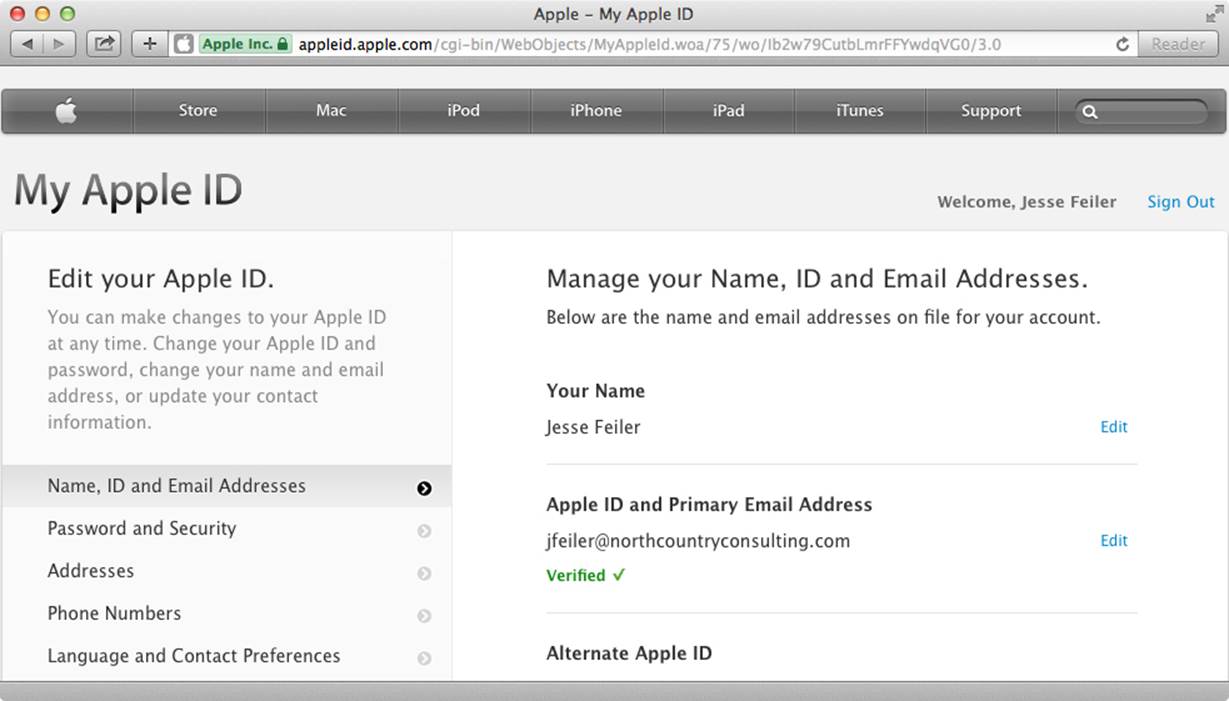
Figure 3.1 Configuring your Apple ID
To gain full access to developer resources on developer.apple.com, you need not only an Apple ID but also to register as a developer. You can find the details on developer.apple.com: they vary from country to country and they also change from time to time. There are separate programs for iOS and Mac developers; each costs $99 per year in the United States at the time of this writing. That fee covers access to the full site as well as two technical support incidents in which Apple engineers can help you with your code. There is an additional program for Safari developers, which is free.
In addition, there are specialized programs for in-house developers (the Enterprise Program) and for university-level teachers (the University Program). Rounding out the developer programs is the MFi Program, which is designed for manufacturers of accessories for the iOS devices. There are full details on developer.apple.com.
You can continue with this book with just an Apple ID (no charge), but you will need a developer registration in order to proceed to steps such as deploying your apps on iOS devices as well as creating entitlements to use iCloud. You may already have access to a developer account through the University Program or the Enterprise Program, so make inquiries before getting out your credit card.
As noted, many aspects of the developer programs are available without registration; however, from now on this book assumes that you have access to a developer account. Furthermore, this book assumes that you have downloaded and installed a current version of Xcode, the development tool—version Xcode 5 or later. If you have not used Xcode before, take a few moments to experiment with it. It comes complete with templates for projects that you can build and run either on the iOS simulator, your iOS devices, or on your Mac.
Looking at the APIs
As developers, we look at software very differently than users do. Of course, we’re users as well as developers, and we use Mail and Safari along with other users. We also have our own apps to work with, foremost among them Xcode, which is the integrated development environment (IDE) that we use to build apps. When it comes to user data (appointments, notes, contacts, and the like) we work with the application program interfaces (APIs) that are implemented in the frameworks that we use to build our apps.
Most of the APIs that relate to user data have a common architecture. They let you (that is, you as a developer, not you as a user) locate objects such as photos, add new ones, delete old ones, and modify the data. In this part of the book, we focus on AddressBook and Calendar: once you have built a project using both of those APIs, moving on to other APIs should be relatively easy (and you’ll do so throughout the book).
The APIs that are involved with the management of user data are found in the documentation section of developer.apple.com under the Data Management section, as you see in Figure 3.2. This section has a large selection of APIs in it. Note that the names of the APIs generally reflect the names they had when they were developed. Sometimes (as is the case with AddressBook) the consumer tools for using the data has a different name—Contacts. To avoid breaking existing code, the names of the API and its classes generally do not change.

Figure 3.2 Browsing the Data Management APIs
The APIs that relate to user data are
![]() AddressBook
AddressBook
![]() ALAsset (for photos and videos on iOS)
ALAsset (for photos and videos on iOS)
![]() Calendar and Reminders
Calendar and Reminders
As Lao-Tzu said, the journey starts with a small step, so at the beginning the focus will be on AddressBook as well as Calendar and Reminders.
Introducing the Built-In Data Apps
In this part, we build an app that lets you type in a brief message and send it to someone in your address book. You’ll be able to add reminders along with the message.
This app may seem like a reimplementation of a very small part of Mail, but it is an example of how you can combine the user’s data with functionality that you create. From this basic step that does, indeed, duplicate a small part of Mail, your app can grow so that in addition to your message, you can add a reminder to the message. That reminder will automatically be synced to all of the user’s devices (assuming that iCloud is enabled—that point won’t be repeated from this point on). The evolution of the app as described in this part demonstrates how adding specific functionality can make the app much more useful to users.
Keeping Up with Apple
There is another important aspect of this app. As noted in the Preface, you should already be familiar with Objective-C and the Cocoa and Cocoa Touch frameworks as well as how to use Xcode. This book is based on Xcode 5, OS X Mavericks (10.9), and iOS 7. Before 2012, Apple went to great lengths not to break code (generally a good idea) and not to force developers to adopt new technologies and ways of coding that they did not want to use. That is why, for example, many of the features of Objective-C 2.0, such as declared properties, released in October 2007 (just 4 months after the debut of the first iPhone), are not more widely used by developers.
When Automatic Reference Counting (ARC) was introduced in iOS 5 (2011), Apple’s guidance to developers was to use it for new projects as well as for major extensions to existing projects, but not to attempt to retrofit it onto old projects. This approach was necessary because of the developer tools available at the time, but it slowed the adoption of ARC.
In Xcode 4.4 (Summer 2012), Apple began to roll out a new approach to helping developers keep up to date. First of all, the default settings began to generate Xcode warnings when new features were not used. You can turn off the warnings or even ignore them, but now you are reminded that, for example, declared properties are in and instance variables are out. Furthermore, in the case of declared properties, Xcode takes care of creating backing variables for you based on the property declaration. The backing variable for myProperty is _myProperty by default, and you can reference it in your implementation file. You no longer need to write @synthesize statements because Xcode can generate them for you behind the scenes. All in all, to use a declared property, all you need is the property declaration: Xcode does the rest.
To further encourage the use of these new features, Xcode 4.4 adds two new commands to the Refactor submenu in the Edit menu. Both are self-explanatory: Convert to Objective-C ARC and Convert to Modern Objective-C Syntax. Both scan your project and suggest changes in the Version editor. You can go through comparing the before and after code and then decide if you want to save it.
With these new tools and the new approach to framework and tool changes, there is no reason to be concerned: if you knew Objective-C, you still know it, and the same goes for Xcode and the frameworks. Because this chapter introduces the book’s first app, as part of that introduction, a few points of the new styles are pointed out, and they are used without further comment throughout this book.
With Xcode 5, more simplifications have been made: specifically, the complete redesign of project settings and the addition of the Capabilities tab has made the process of configuring your app’s entitlements much easier. (You saw these features in Chapter 2, “Setting Up iCloud for Development.”) All of these initiatives have a common goal of pushing changes to the language and frameworks into developers’ apps sooner rather than later.
A good example of these changes is available in “View Controller Catalog for iOS” on developer.apple.com. This document shows the way in which the basics of Objective-C, Cocoa and Cocoa Touch, and Xcode evolve over time. It formerly was part of “View Controller Programming Guide for iOS” but was rewritten and published on its own in January 2012.
As people began to work with iPhone and iPad (people both within and outside Apple), they discovered new ways of working and new interface possibilities. Today, you can search the web for advanced techniques involving iOS views, including such complicated issues as placing a split view controller within a tab bar. You can find code examples that you can use.
Apple addressed these issues of advanced view techniques, and what had been an advanced topic became much simpler. Although the catalog is 70 pages long, you really only need to know two points:
![]() Apple now distinguishes between content view controllers and container view controllers such as split view controllers, tab bar controllers, and navigation bar controllers.
Apple now distinguishes between content view controllers and container view controllers such as split view controllers, tab bar controllers, and navigation bar controllers.
![]() If you use container view controllers, the order of containment is now specified clearly by Apple. If you use them, they must be used with the split view controller (if used) as the topmost view; then (if used) a tab bar controller and, within it, a navigation controller if you use it; and finally, content view controllers and page view controllers. The examples of placing split view controllers within tab bar controllers that you can find on the web may work, but they are now clear violations not just of the human interface guidelines but also of the order of containment, and they may not work in the future.
If you use container view controllers, the order of containment is now specified clearly by Apple. If you use them, they must be used with the split view controller (if used) as the topmost view; then (if used) a tab bar controller and, within it, a navigation controller if you use it; and finally, content view controllers and page view controllers. The examples of placing split view controllers within tab bar controllers that you can find on the web may work, but they are now clear violations not just of the human interface guidelines but also of the order of containment, and they may not work in the future.
Thus, something that was an advanced topic in view management as well as an unclearly defined topic has become a basic principle that can be expressed in two thoughts. Sometimes, working with the excitement of new technologies means observing (and participating in) the evolution of those technologies. Many of us find the most exciting part of this evolution to be the synthesis of different ideas that makes things easier. Unfortunately, this does mean that from time to time we need to revisit the basics because they have changed.
These changes can ripple through the APIs and development tools, but it is important to stress the point that you’re not back at the beginning. Many things are easier (and clearer), and occasionally you have a new way of working. Continuing with the issue of container views, you’ll note that in Xcode, some of the library objects that you drag into storyboards come complete with attached and connected container views. Together with the clear containment order from the catalog, this complex process is now simpler and very clearly documented. Your existing knowledge and skills are leveraged.
Fortunately, long-time Apple developers have observed that these changes are reasonably predictable. They revolve around Apple’s Worldwide Developers Conference (WWDC) that is held in June. WWDC typically includes details of new versions of iOS and OS X as well as Xcode. If there are cleanups to existing technologies (such as the view catalog), these typically happen with revised documentation in the first half of the year. New technologies are often announced at WWDC, and documentation pertaining to them is released at that time. As a result, if you want to keep up with Apple’s developer technologies once a year, log in to developer.apple.com a few weeks after WWDC to see the announcements, documentation, and videos. (Beginning in 2013, Apple released videos of the sessions on the same or next day to all registered developers.)
Finally, over time, the pace of the major changes slows down as Apple generalizes concepts and rewrites the basics with the goal of making OS X and iOS development simpler and easier to learn. (Of course, at the same time, the pace of other changes steps up. Read the unofficial Apple blogs to see what Apple may or may not be working on in the next few years.)
App Overview
Think of how this app can be used. It is based on the Broken Swings app built for Steve Peters, superintendent of recreation for the City of Plattsburgh, New York. A parks supervisor can use it on periodic inspections to note broken swings, trees that need pruning, or any other issue. The supervisor can use the app to send that information to a staff member. The reminder can be used to ensure the worker or the supervisor follows up on the issue. In the domain of a park, you can start to build an app that goes far beyond the generality of Mail. For example, instead of asking the supervisor to type in the problem, you can provide a checkbox set with these choices:
![]() Broken equipment
Broken equipment
![]() Pruning (tree)
Pruning (tree)
![]() Pruning (bush)
Pruning (bush)
![]() Water fountain
Water fountain
If the app is running on a device with a camera, the user can add a photo of the offending item. And if the device also has location capabilities, that, too, can be added to the email message.
This type of app is ideally suited to one of the iOS devices because it can be used in the field even by a large number of people. The email messages can go to a central address where someone can forward them or place them in a database.
This app lets you take advantage of iCloud without writing a single line of code: address book and calendar data is automatically synced across devices so that the possible recipients of the email message are on whatever device your user is using. Likewise, the reminder can be automatically added to all of the user’s devices using iCloud.
Thus, the simplest way of building a sophisticated iCloud app can be to build an app that uses iCloud-enabled built-in apps and their APIs.
Creating Separate Xcode Projects for iOS and OS X
The first step is to create a project and run it. For projects that will run on both iOS and OS X, it is common (but not required) to create a single Xcode project with two targets. For a project such as this first project, though, you will be letting iCloud do its work behind the scenes, so you do not need common code that will run on both operating systems. The code will be comparable, but you do not need to create a single project with two targets. Because this structure is a little simpler than the multitarget structure, these first apps will have two separate Xcode projects: one for iOS and one for OS X. (You’ll see how to build a single project with both an iOS and OS X app in Chapter 11, “Using Xcode Workspaces for Shared Development.”)
Note that this is one of the places where recent features of Xcode are demonstrated. Previously, Xcode templates that used two targets used scenarios such as one target for OS X and another for Spotlight support. Now, the two targets, at least for iCloud projects, can be iOS and OS X. That is a long-awaited goal that is now achieved.
In both the iOS and OS X Xcode projects, you will produce a (minimally) working version of the app using the graphical user interface of Xcode. The only typing involved in the creation of each project is typing in the name of the app (and, if you haven’t done so before, the name of your company). There is no code to type in for these projects, but rest assured there will be plenty to type in throughout the rest of the book.
Creating the iOS Xcode Project
As a general rule, the templates built into Xcode are the most up-to-date code you can find. If you are working from a previously downloaded sample, check to see if a new version has been created on developer.apple.com and also check the date of the most recent version. With the addition of the refactor commands in the Edit menu, it seems that the sample code can be updated more easily than before. If you’re working from your own older code, seriously consider at least refactoring it to use modern Objective-C syntax and ARC.
Bearing this in mind, the best way to start your new iOS app is to create a new iOS project using the Single View Application, as shown in Figure 3.3.
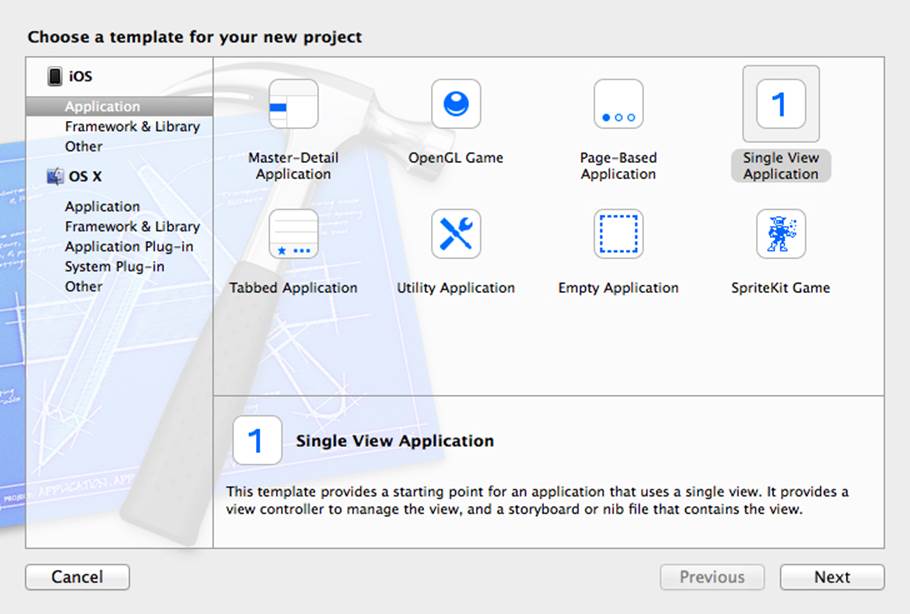
Figure 3.3 Using the Single View Application template
Select the options, as shown in Figure 3.4.
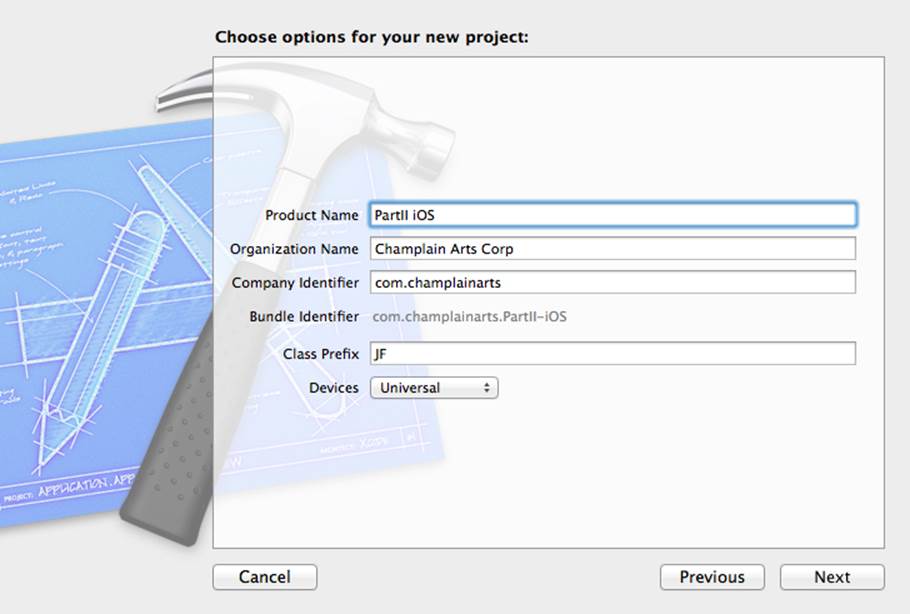
Figure 3.4 Selecting options
When requested, save the project. When the workspace window opens, as shown in Figure 3.5, choose Universal for Devices. The other settings are fine to leave as-is.
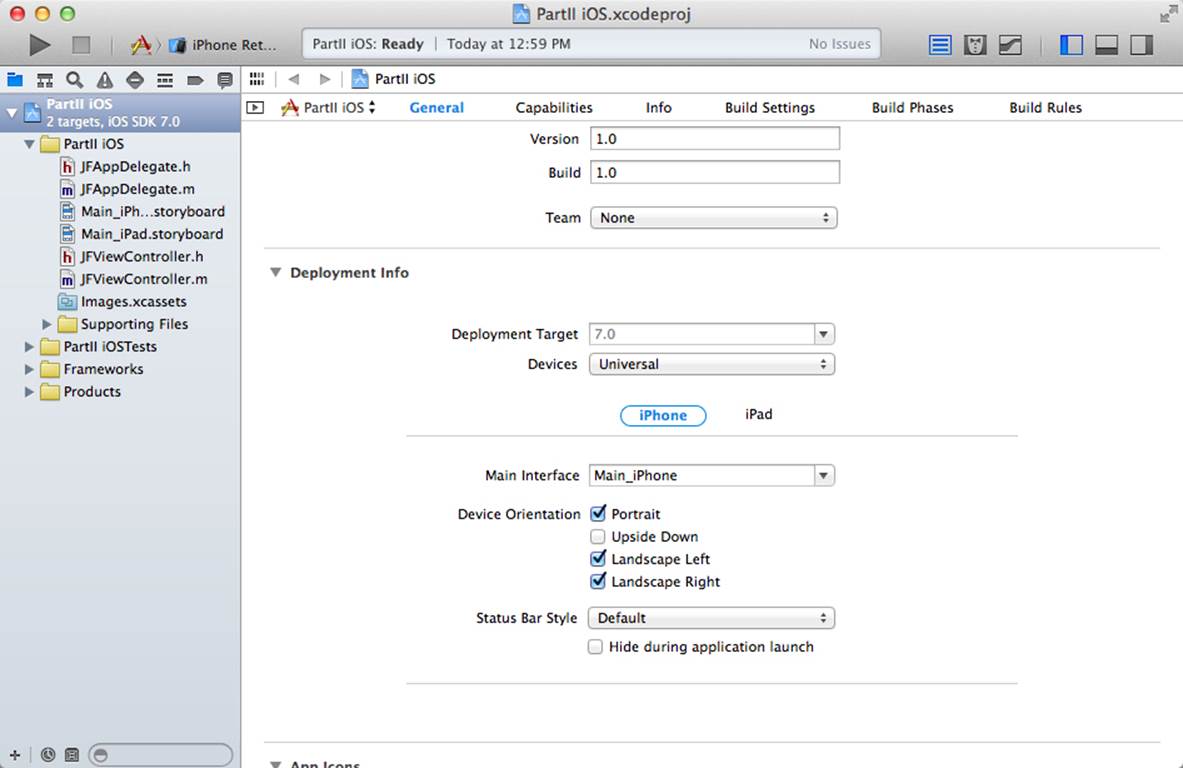
Figure 3.5 Choosing Universal for the Devices setting
Choose the iPhone simulator for your scheme (you can use any iPhone or iPad), and then click the Run button at the upper left of the workspace window to run your new project on the simulator. You should see no error messages, and, in fact, nothing except the blank simulator. Any other result indicates that there’s something wrong either with your Xcode installation or with some configuration within it. The Apple Developer Forums can be helpful here if you run into problems.
Now that you’ve verified that the template runs for you, the first steps you add to this project will let you enter some text into a text view. To make that happen, open the iPhone storyboard, and then drag a text view from the objects library into the storyboard, as shown in Figure 3.6.
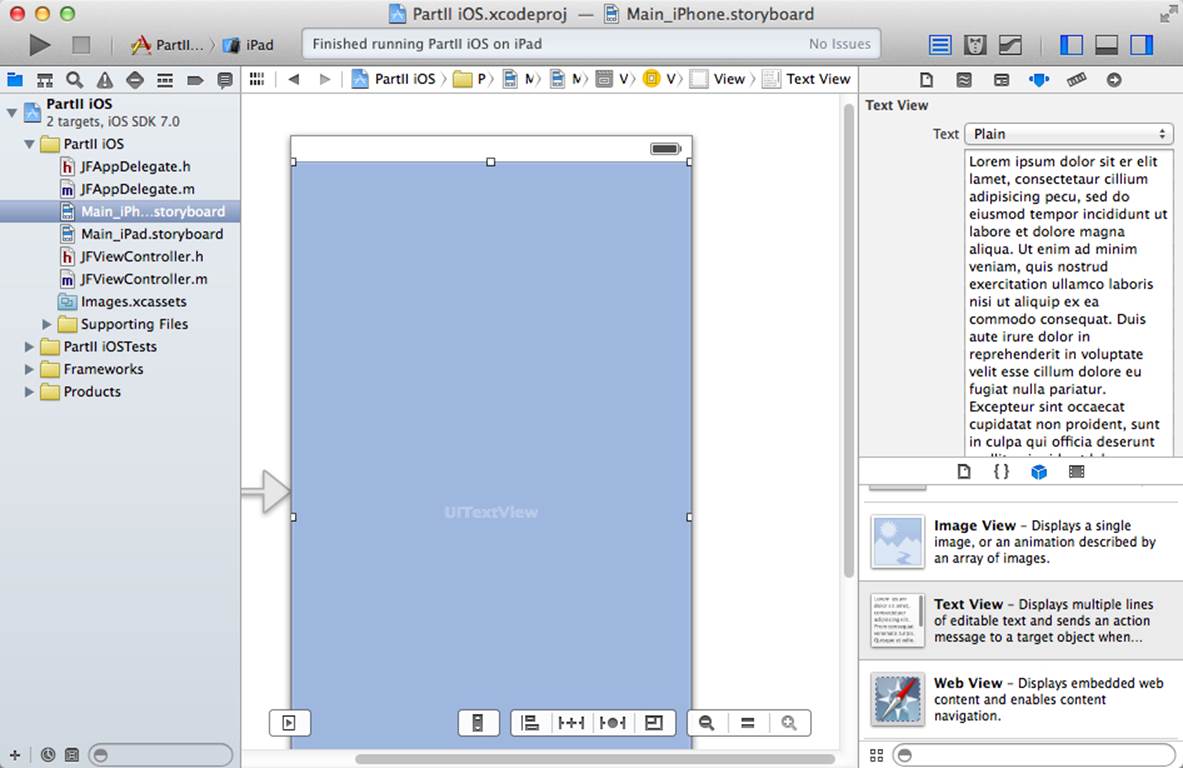
Figure 3.6 Adding a text view
Run the app now, and you’ll see your text view with placeholder text. As you see in Figure 3.7, you’ll be able to edit the text in the simulator. (Also note that Retina displays use pixel doubling; on the simulator, this may result in a double-size image.)
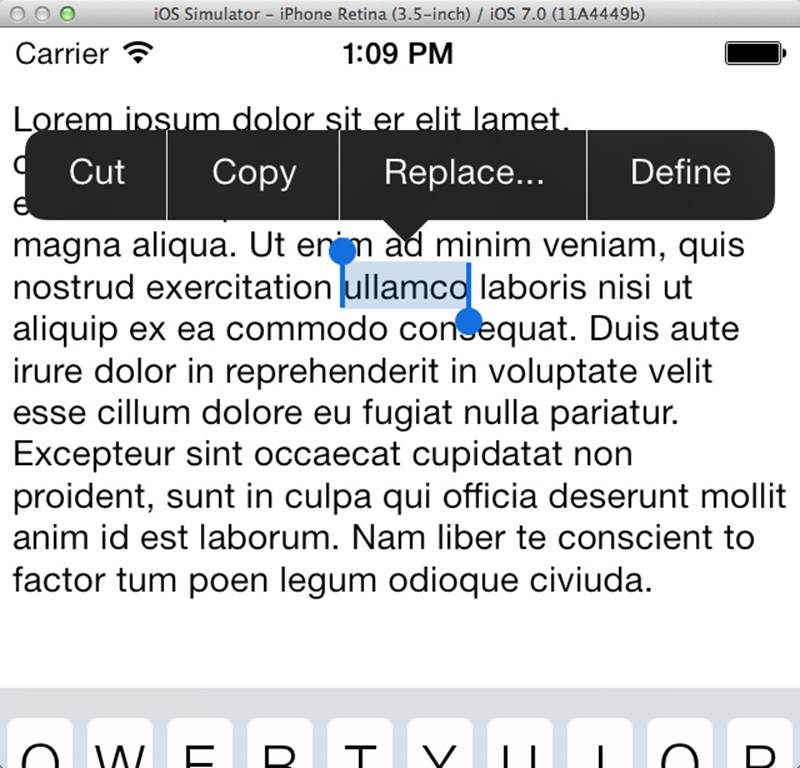
Figure 3.7 The text field is ready for use in the simulator.
Now you have an app that you can run; it contains a text field into which you can type text. You’ll want to do something with that text, so, as shown in Figure 3.8, add a button above the text field (you may have to do some rearranging). The reason you may need to add the button above the text field is that on the iPhone, the keyboard may pop up over the button as soon as you tap in the text view if the button is at the bottom of the screen.
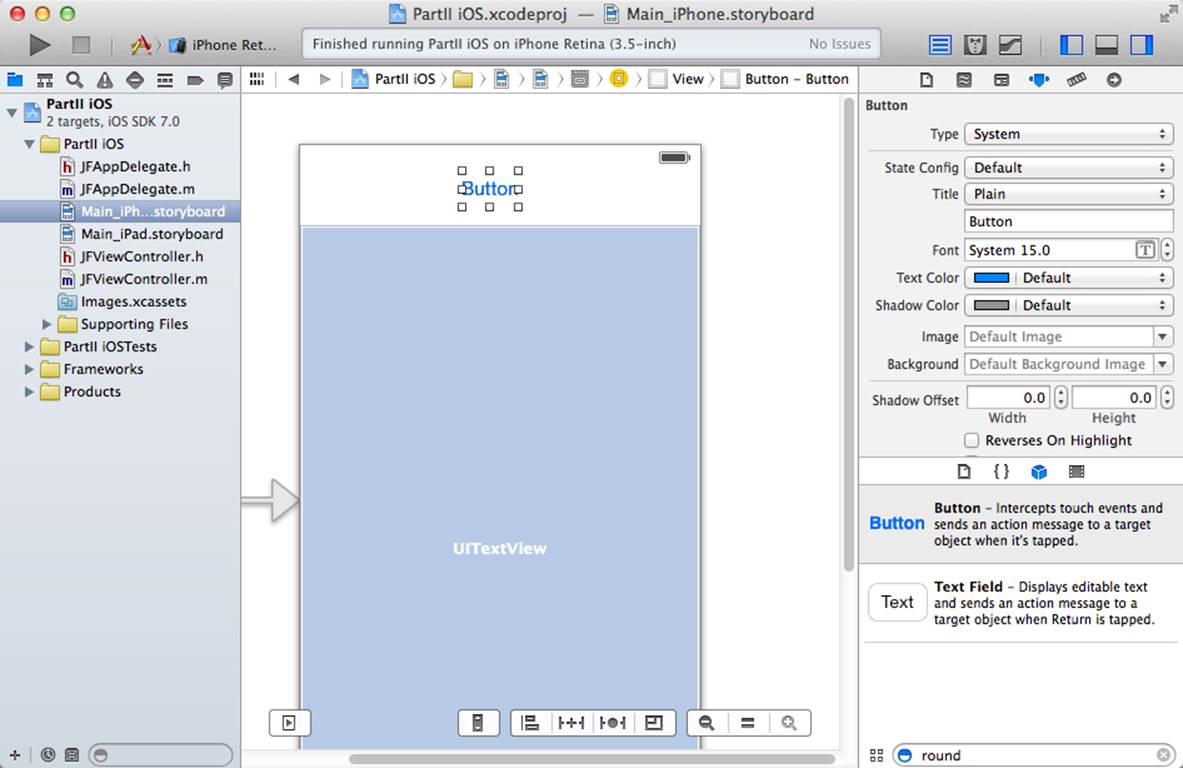
Figure 3.8 Adding a button
Note
You will notice in this chapter that the Xcode workspace window is changed from one figure to the next. That reflects the way many people work: the navigation area is sometimes critical, but at other times you can hide it and use the space for the code editor. Similarly, you may want to show or hide the utility area as you work.
Also, note that in many cases you see the iPhone storyboard in figures in this book. The reason for that is simple: the screen size is the smallest of the iOS devices, and so those storyboards reproduce best on the limited size of a printed page.
Creating the OS X Xcode Project
Now, you can turn your attention to creating a comparable OS X app. As is the case with the iOS app, you won’t be typing any code at this stage for an OS X app, but, as you’ll see, when you get into the functionality of the app, there are major similarities.
Begin by creating an OS X project in Xcode. In the OS X section of the New Product sheet, choose Application and Cocoa Application. (You do not have the variety of templates that you have with iOS.) Name the project PartII OS X, as shown in Figure 3.9. Do not choose any of the other options.
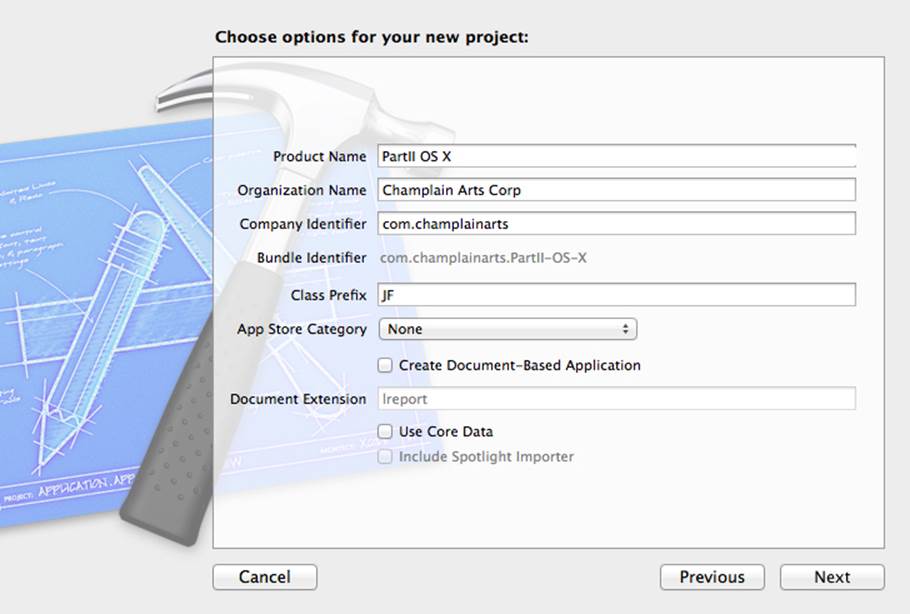
Figure 3.9 Using the Cocoa application template
As you did with the iOS project, start by attempting to run it. Again, you should see no errors or warnings, and not much of anything except the app’s empty window.
Because there are no storyboards in OS X projects, you use nib and xib files to build your interface graphically.
Note
nib files got their name when OS X was first developed at NeXT. nib is an acronym for NeXT Interface Builder. In a major restructuring of Interface Builder, nib files were implemented in a different format that relies on XML, and the file extension became .xib. Many people pronounce xib as “nib” for reasons of history as well as the difficulty of figuring out what the correct pronunciation would be.
On both operating systems, you can also create the interfaces programmatically, although the classes you use in your code are not identical. Open the MainMenu.xib file to begin editing the interface, as shown in Figure 3.10. The project template provides you with a window and a view.
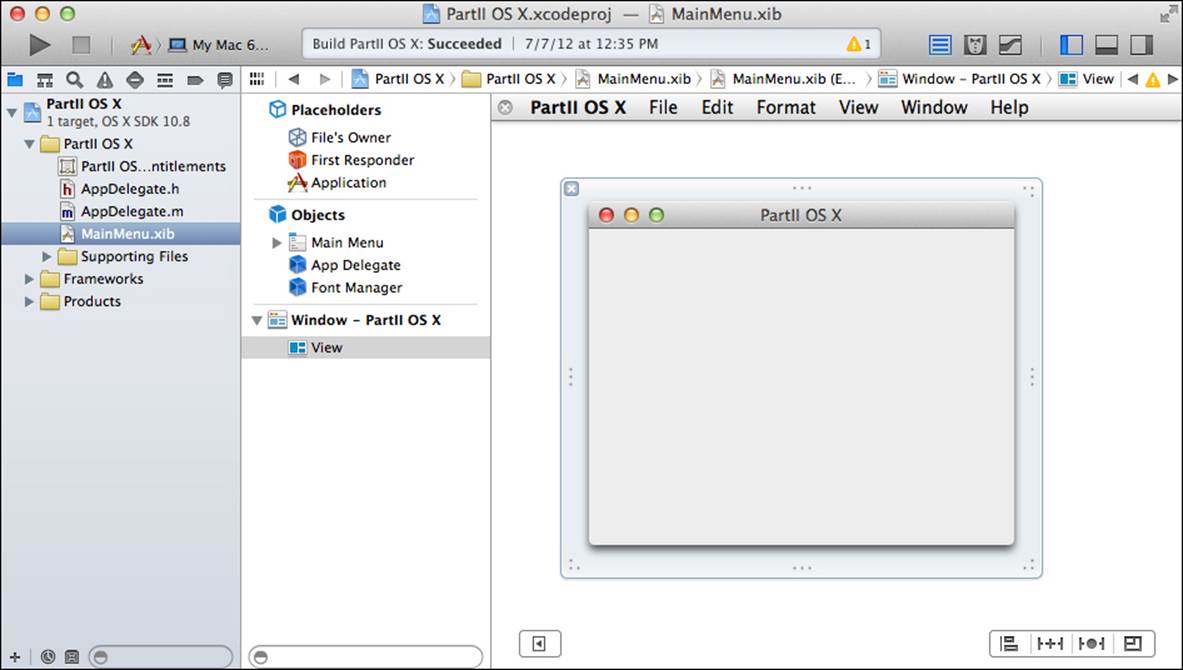
Figure 3.10 Opening the nib file
Explore the nib file. Just as you did for iOS, add a text view to the window’s view. (The objects in the OS X library are not always identical to those in the iOS library, but they are mostly similar.) Figure 3.11 shows the field added to the view.
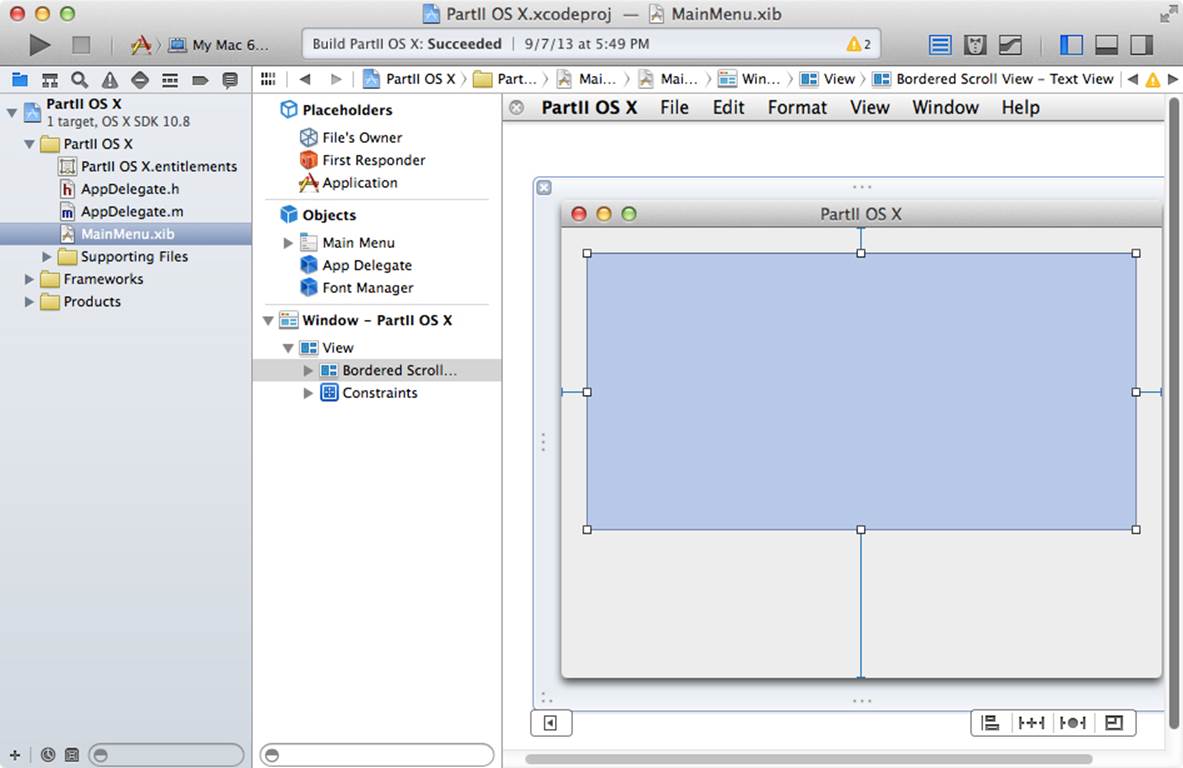
Figure 3.11 Adding a text view
Resize the text view and add a button, as you did for iOS. You should see the results shown in Figure 3.12.
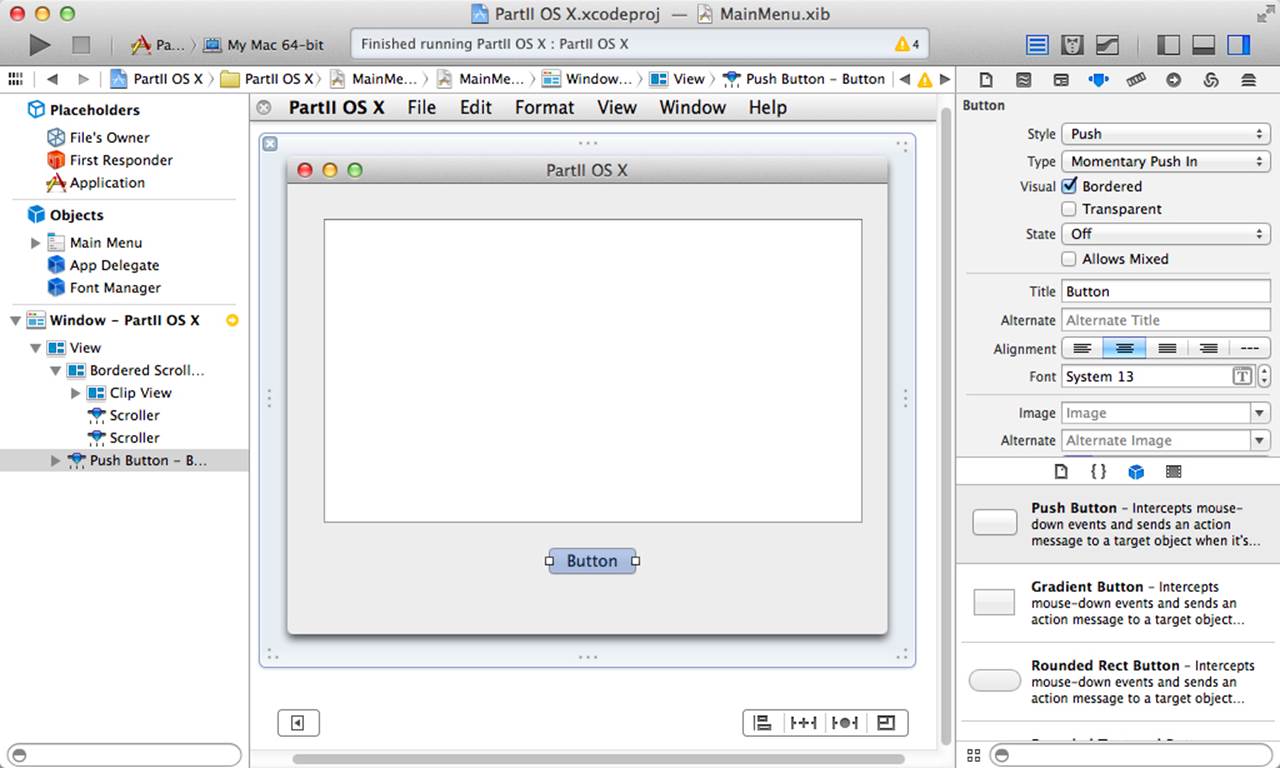
Figure 3.12 Resizing the field and adding a button
Now run the app. Figure 3.13 should match your results. (The app’s menu bar is not shown in Figure 3.12, but it’s there at the top of the screen.)
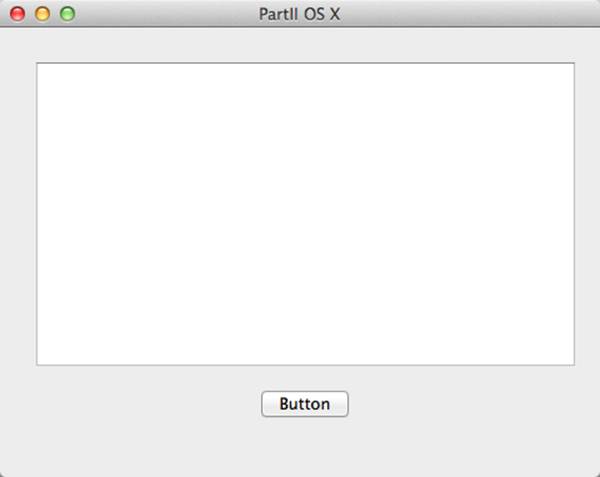
Figure 3.13 Running the app
Wiring Up the Interfaces
After the Xcode project is created, you can make whatever modifications are needed. Among the most common modifications are changes to the interface that become necessary as you add or modify functionality. In order to implement those changes, you generally have to connect the interface elements you have created graphically to the code that manipulates them and represents them in your project (that’s the “wiring up” part of the process).
There are two ways of doing this:
![]() You can use the graphical user interface of Interface Builder in Xcode.
You can use the graphical user interface of Interface Builder in Xcode.
![]() You can write code.
You can write code.
In general, the two techniques are interchangeable for basic interface structures. However, there are some cases in which you will have to write code to augment your Interface Builder work. In addition, as you talk with other developers, you will find that some prefer one technique over the other. The only absolutely clear guidance is to use whichever technique is most comfortable for you at any given moment. Furthermore, if you are having difficulties building an interface, if it’s possible to switch that particular part of the code from the graphical user interface of Interface Builder to code in your project, switching techniques may help you hone in on the problem. Both techniques are illustrated throughout this book in part because, regardless of your preferences, you’re going to have to use both techniques from time to time. (View Controller Catalog for iOS sample code referenced previously generally shows the storyboard and programmatic techniques together.)
This section shows how you can make the connection between interface elements and code in Interface Builder. This basic technique is almost identical on iOS and OS X. The graphical user interface lets you see the relationships between interface elements and code objects. In later chapters, you will sometimes see code-based connections. The underlying structure of connections is exactly what you see in the figures of this chapter, but sometimes, instead of drawing lines with the mouse, you achieve the same goal with code.
There is an additional technology for managing these connections—binding—that can be used on OS X. It is deliberately omitted in favor of using a technique that works on both iOS and OS X.
Wiring Up the iOS Interface
In iOS, the links between interface elements and your code are connections, and you can manage them with the Connections inspector in the utility area of Xcode if you are using Interface Builder. Perhaps the most common connection that you need is the link between the view property of a view controller’s code to a view in a storyboard. Without that link, those two pieces of functionality can’t come together. You may not notice this because, in much of the downloadable sample code from developer.apple.com and in the Xcode project templates, the connection is often made for you. Also, when you drag a view controller from the library onto the canvas, it comes with a view already created and connected to the controller. You can subsequently delete the view (perhaps to replace it with another), but the connection is made for you.
For the interface elements that you add, you’ll need to connect them. In Figure 3.8, you added a text view and a button. You’ll need a connection in order to extract the text the user has typed in from the text view. Notice in the document outline view at the left of Interface Builder that, by default, all of the views are named generically. In order to keep your sanity, make it a practice to rename any view you’ll be working with. Figure 3.14 shows the text view selected and renamed using the Label field in the Identity inspector. As soon as you leave the field, the name is changed in the document outline as you see in Figure 3.14.
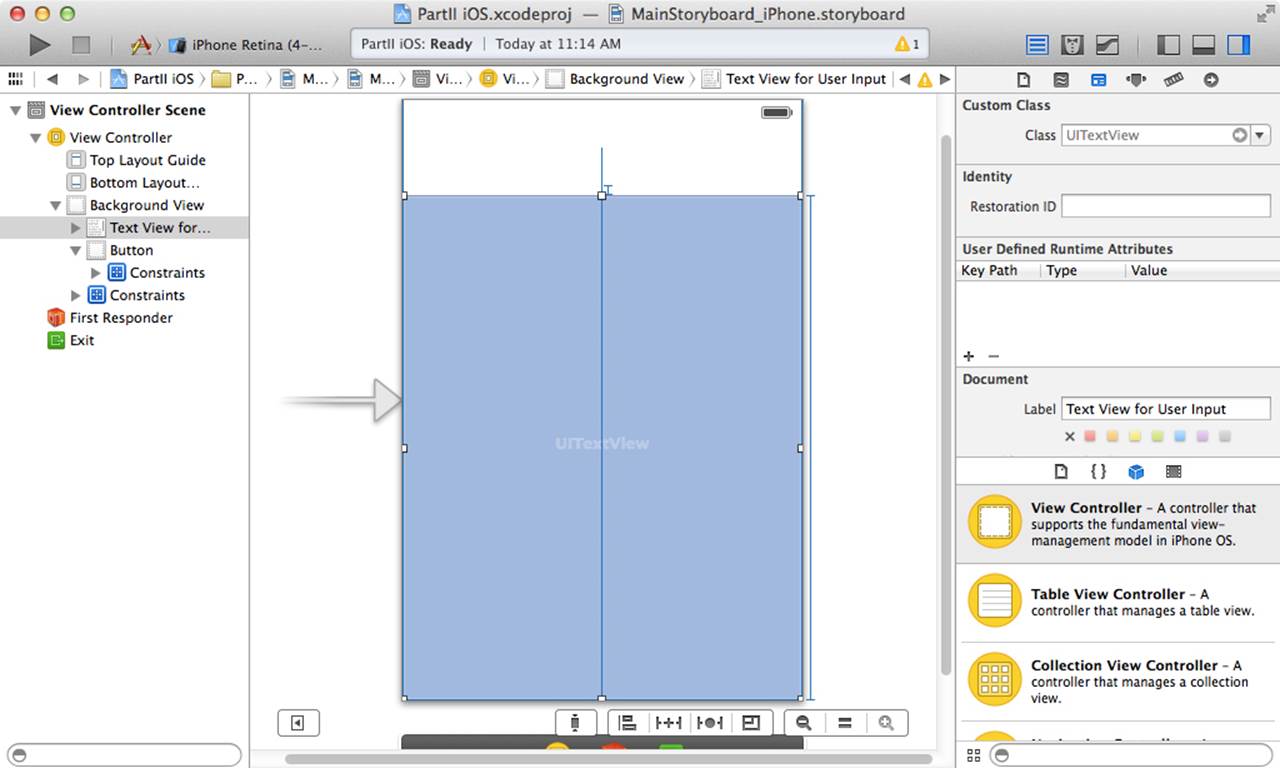
Figure 3.14 Naming the text view
Using the Assistant, open ViewController.h next to your storyboard. Select the text view either in the document outline or on the canvas. Holding down the Control key, draw a line from the text view to the interface in ViewController.h. When you release the mouse button, you’ll be able to specify that this is a new outlet, and you can provide a name for it, such as userTextView. The storage type is typically weak: use strong for the top-level view in a view controller. Your actions result in a new property declaration for your view controller:
@property (weak, nonatomic) IBOutlet UITextView *userTextView;
Back in Interface Builder, you will see that you have made the connection to the new userTextView property in the referencing outlets section of the Connections inspector, as shown in Figure 3.15.
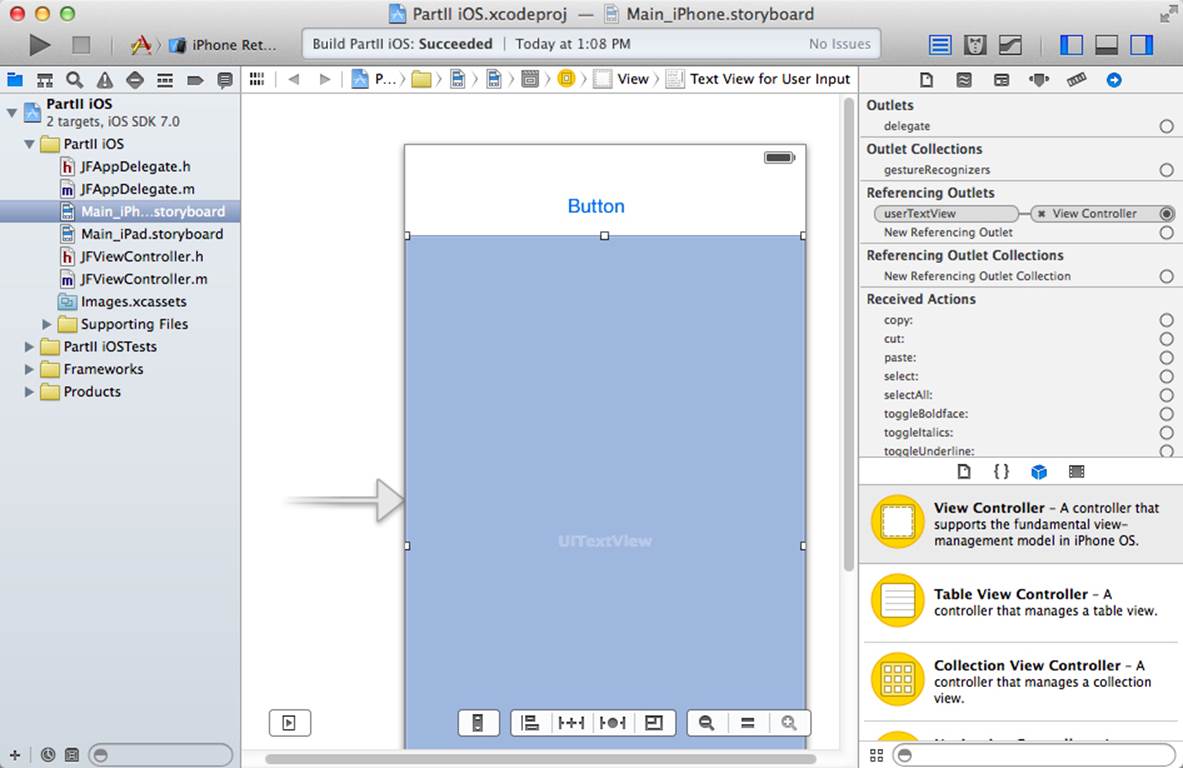
Figure 3.15 The connection is made.
Now that you have created the connection, you can use a similar technique to create an action that will access the text when the button is tapped. Control-drag from the button to the interface of ViewController.h. This time, instead of choosing an outlet from the pop-up menu, choose an action. Name it tapButton. By default, the action for a button is Touch Up Inside and the argument is Sender: both of these can remain, as can the id type. This means that all you need to do is make sure the pop-up menu is set to Action and that you have provided a meaningful name. (As you can tell from the name of the action, the action that actually starts things moving is the release of the button.)
This has created the following line of code in View Controller.h:
- (IBAction)tapButton:(id)sender;
Xcode has also created a shell of the action for you in ViewController.m. It will be called when the button is tapped. You can now proceed to add the code to that action that will retrieve the user’s text:
- (IBAction)tapButton:(id)sender { //1
NSLog (@" %@", _userTextView.text); //2
} //3
This code is a combination of your implementation and the code generated by Xcode as you created the action graphically.
1, 3 These are the lines that Xcode created for you.
2 This line is the only line you need to write for this example. You extract the text from the text view and display it in the log. By connecting the field to the declared property in Interface Builder, you can now access it whenever you want. In practice, although some of your action methods may consist of a single line of code, in many cases they involve much more complex code.
Wiring Up the OS X Interfaces
Although the process of wiring up the OS X interfaces is quite similar to iOS, there are three minor differences between the connections on OS X and those on iOS:
![]() Instead of a text view, you may want to use a text field (NSTextField). This is because text views on OS X are very powerful, but if you’re used to dealing with text fields on iOS, the added power and complexity of a text view isn’t necessary for the example app that you’re building here. By default, the text view in the library for OS X is embedded in a scroll view. It is generally easiest to open the scroll view in the document outline to reveal the embedded text view and then connect it to the AppDelegate.
Instead of a text view, you may want to use a text field (NSTextField). This is because text views on OS X are very powerful, but if you’re used to dealing with text fields on iOS, the added power and complexity of a text view isn’t necessary for the example app that you’re building here. By default, the text view in the library for OS X is embedded in a scroll view. It is generally easiest to open the scroll view in the document outline to reveal the embedded text view and then connect it to the AppDelegate.
![]() NSTextView on OS X is a descendant of NSText. UITextView on iOS is not. To get the content of an NSTextView, you use the string property; to get the content of a UITextView on iOS, you use the text method.
NSTextView on OS X is a descendant of NSText. UITextView on iOS is not. To get the content of an NSTextView, you use the string property; to get the content of a UITextView on iOS, you use the text method.
These are the lines of code Xcode will create for you in AppDelegate.h as you attach a button and a text field:
#import <Cocoa/Cocoa.h>
@interface JFAppDelegate : NSObject <NSApplicationDelegate>
@property (assign) IBOutlet NSWindow *window;
@property (weak) IBOutlet NSTextField *userTextField;
- (IBAction)tapButton:(id)sender;
@end
And these are the lines of code created in AppDelegate.m. You must enter the body of tapButton:
]);
#import "JFAppDelegate.h"
@implementation JFAppDelegate
- (void)applicationDidFinishLaunching:(NSNotification *)aNotification
{
// Insert code here to initialize your application
}
- (IBAction)tapButton:(id)sender {
NSLog (@" %@", [_userTextField stringValue]);
}
@end
Chapter Summary
When a user turns on iCloud (and the corresponding options), contact, reminder, and calendar data automatically populates all of the user’s devices through iCloud. Along with the data, photos, music, and videos may also be shared.
As a developer, you can add value to a user’s data by massaging it and combining it in new ways. The basic APIs let you access the user’s data in your app. Other shared data, such as music, iBooks, and videos, are generally not available through public APIs but instead are managed by iTunes and iBooks.
In this chapter, you’ve seen an overview of the user data that is automatically synced through iCloud. In order to start building apps for this part of the book, you have seen how to build an iOS and an OS X app that let a user enter data and then retrieve it. That’s the building block for a sample app. In the next chapter, you’ll see how to take the data the user has entered and email it to someone in the user’s address book.
Exercises
1. If you are relatively new to Xcode and Cocoa or Cocoa Touch, experiment with the interfaces of the sample app to make them look better and behave differently.
2. Add a date picker to the app by dragging it out of the library and putting it in the app’s interface. Create a property for it and extract the date in the tapButton method, just as you did for the text view. There are date pickers in both Cocoa and Cocoa Touch, but they look different.
3. Add a second button. One button will extract the text view data and post it to the log, as it does now. The other will do the same for the date picker. This multibutton/multifield interface will be built on throughout this book.
4. If you have followed through the examples in this chapter, you have been working with the iPhone storyboard. If you change the schema to the iPad simulator, you won’t see anything because the iPad storyboard is blank. Build the storyboard in the same way you did for the iPhone storyboard, but consider the fact that the iPad screen is much larger. Think about how you will let users take advantage of that screen.
5. Do you have an app in mind that you can build based on this chapter’s apps? If so, think it through so that you can work on it in this part of the book. Remember, the app will let users enter some data, email to someone in their address book, and post a reminder through iCloud to all their devices. How could you use that basic functionality?
All materials on the site are licensed Creative Commons Attribution-Sharealike 3.0 Unported CC BY-SA 3.0 & GNU Free Documentation License (GFDL)
If you are the copyright holder of any material contained on our site and intend to remove it, please contact our site administrator for approval.
© 2016-2026 All site design rights belong to S.Y.A.