iPad All-in-One For Dummies, 7th Edition (2015)
Book V. Using iPad to Get Organized
Chapter 2. Making Notes
In This Chapter
![]() Opening a blank note and entering text
Opening a blank note and entering text
![]() Creating a new note
Creating a new note
![]() Finding, sharing, and deleting a note
Finding, sharing, and deleting a note
![]() Displaying the Notes List
Displaying the Notes List
![]() Printing a note
Printing a note
Notes is a preinstalled app that you can use to do everything from jotting down notes at meetings to maintaining to-do lists. It isn’t a robust word processor like Apple Pages or Microsoft Word by any means, but for taking notes on the fly or dictating a poem using the Dictation feature (not available on the original iPad or iPad 2) while you sit and sip a cup of tea on your deck, it’s a useful option.
In this chapter, you discover how to enter and edit text in Notes and manage notes by navigating among them, searching for content, sharing, deleting, and printing them.
Making Notes
Notes are pretty simple to create — kind of like grabbing a sticky notepad, jotting down your thoughts, pulling off the note and sticking it somewhere, and starting to write the next one. You can even use Siri to create a note and the Dictation feature to speak your note contents. You can use the included editing tools to select, cut, copy, and paste. Notes are saved for you in a list of notes so that you can easily find the one you need (covered in the “Finding Notes” section, later in this chapter), and they can be synced across iOS devices and your Mac.
Opening a blank note and entering text
If you have no stored notes, Notes opens with a new, blank note displayed. (If you have used Notes before, it opens to the last note you worked on. If that’s the case, tap the New Note button in the top-right corner to create a new, blank note.)
Here are the steps to get going with Notes:
1. Tap the Notes app icon on the Home screen.
Depending on how you have your iPad oriented, you see the screen shown in Figure 2-1 (portrait) or Figure 2-2 (landscape).
2. Tap the blank page.
The onscreen keyboard, shown in Figure 2-3, appears.
3. Tap keys on the keyboard to enter text.
If you’re using a third-generation (or later) iPad or an iPad mini, tap the Dictation key — see Figure 2-3 — and speak your text using iPad’s speech recognition feature).
For more about Dictation, see Book I, Chapter 3.
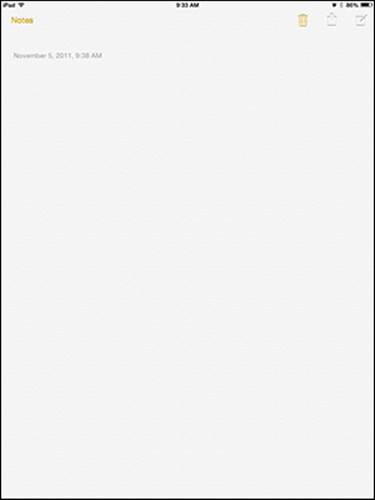
Figure 2-1: This clean page format avoids clutter.
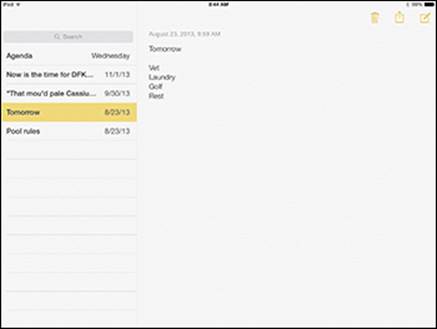
Figure 2-2: Landscape orientation shows you the current note and a list of saved notes on the left.
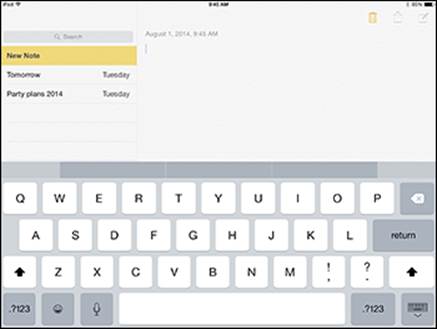
Figure 2-3: Use the onscreen keyboard or your Keyboard Dock or Bluetooth keyboard, if you have one.
Here are some tips for working with the virtual keyboard:
· ![]() Enter numbers or symbols. Tap the keys labeled .?123 on either side of the keyboard. The numeric keyboard, shown in Figure 2-4, appears. When you want to return to the regular keyboard, tap either of the keys labeled ABC.
Enter numbers or symbols. Tap the keys labeled .?123 on either side of the keyboard. The numeric keyboard, shown in Figure 2-4, appears. When you want to return to the regular keyboard, tap either of the keys labeled ABC.
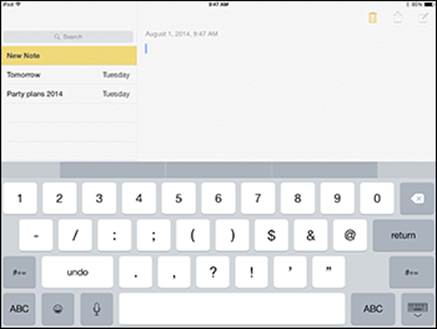
Figure 2-4: Use this alternative keyboard for numbers and many common symbols.
· Capitalize a letter. Tap the Shift key and then tap the letter.
If you turn on the Enable Caps Lock feature in Settings, you can also turn on Caps Lock by double-tapping the Shift key; tap the Shift key once to turn off the feature.
· Start a new paragraph or the next item in a list. Tap the Return key.
· Edit text. Tap to the right of the text you want to edit and tap the Delete key to delete text to the left of the cursor or enter new text.
· Change the default font. Go to the Notes Settings.
 Tap either of the keys labeled #+= to access more symbols, such as the percentage sign, the euro symbol, and additional bracket styles. Tapping and holding some of these keys displays alternative characters. This also works on some keys on the alphabetic and numeric keyboards. (For example, tapping and holding N gives you foreign language options such as the Spanish ñ, and pressing and holding the exclamation key on the numeric keyboard offers the upside-down exclamation point used in some languages.)
No need to save a note — it’s automatically kept until you delete it.
Creating a new note
If you have stored notes, when you open Notes, the most recently used note displays. If you then want to create a new note, it’s a simple procedure. To create a new note, tap the New Note button (the one that looks like a page with a pen on it) in the top-right corner. The current note is saved and a new, blank note appears (refer to Figures 2-1 and 2-2). Enter and edit text as described in the preceding section.
If your iPad is in portrait orientation and you want to display the list of saved notes beside the current note, tap the Notes button to view a list of notes.
Using copy and paste
Let’s face it, most of us don’t nail what we write on our first draft. That’s why, after you enter content into a note, you may want to modify it. The Notes app includes essential editing tools you’re familiar with from using word processors: Select, Copy, and Paste. You can use these to duplicate content or to cut and paste it from one part of a note to another.
To use the Copy and Paste tools, follow these steps:
1. With a note displayed, press and hold your finger on a word.
The selection tools, shown in Figure 2-5, appears.
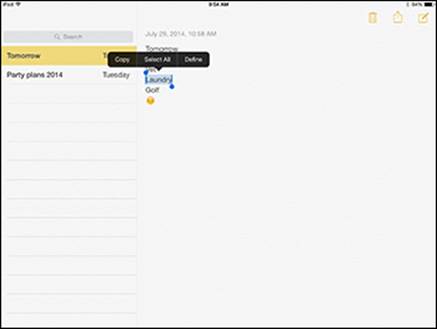
Figure 2-5: This menu provides selection and pasting tools.
2. Tap the Copy button.
3. Press and hold your finger in the document where you want to place the copied text.
4. On the menu that appears (see Figure 2-6), tap the Paste button.
The copied text appears.
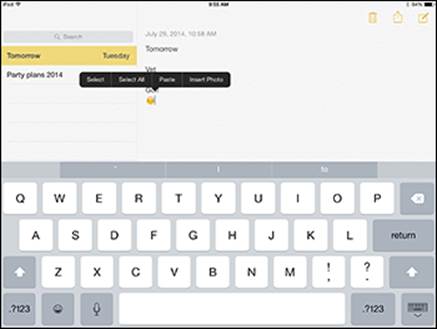
Figure 2-6: Use the press-and-hold method again to display the editing menu.
If you want to select all text in a note to either delete or copy it, tap the Select All button in the menu (refer to Figure 2-5). All text is selected, and you can select commands from the menu that appears to cut, copy, or paste the selected text.
To delete text, you can use the Select or Select All command and then press the Delete key on the onscreen keyboard.
Finding Notes
After you create a note, you need to find it if you want to view or edit it. You can scan the Notes List to find a note or use the Search tool. You can also swipe on the Notes pad to move among notes. The following sections help you find and move among notes you’ve created.
Displaying the Notes List
The Notes List contains all your notes listed chronologically by the last date/time you modified the note. This list isn’t available in portrait orientation, but it’s the list you need in order to see the notes you have stored. If you’re using landscape orientation, a list of notes appears by default on the left side of the screen.
If you’re using portrait orientation, you can display this list in portrait orientation by tapping the Notes button in the top-left corner of the screen; the Notes List appears, as shown in Figure 2-7. Tap any note in the list to display it.
The Notes List is also the Accounts List if you’ve enabled notes syncing in iCloud or other sharing sites in Settings.
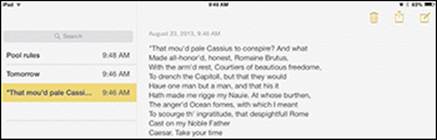
Figure 2-7: Tap the Notes button to display a list of saved notes.
Moving among notes
If you want to look for a note based on how long ago you created it, you should know that notes are stored with the most recently created or modified notes at the top of the Notes List. Older notes fall toward the bottom of the list. The date and/or time you last modified a note also appears in the Notes List to help you out.
It’s easy to move among notes you’ve created:
1. Tap the Notes app on the Home screen to open it.
2. With the Notes List displayed, tap a note to open it.
You can display the Notes List by either turning iPad to landscape orientation or tapping the Notes button in portrait orientation; see the preceding section for more on viewing the Notes List.
 Notes isn’t a file-management pro; it allows you to enter multiple notes with the same title, which can cause confusion. Be advised, and name your notes uniquely!
Remember that Notes names your note using the first line of text. If you want to rename a note, first display the note, tap at the end of the first line of text, and then tap the Delete key on your onscreen keyboard to delete the old title. Enter a new title; it’s reflected as the name of your note in the Notes List.
Searching Notes
If you’re not sure which note contains that very important item, you can search to locate a note that contains certain text. The Search feature lists only notes that contain your search criteria; however, it highlights only the first instance of the word or words that you enter within a note.
The Spotlight Search feature in iPad also locates notes that match any search term you enter there, along with many other types of content. See Book I, Chapter 2, for more about the Search feature.
Follow this procedure to use the Notes Search feature:
1. Tap the Notes app on the Home screen to open it.
2. Either hold the iPad in landscape orientation or tap the Notes button in portrait orientation to display the Notes List. (Refer to Figure 2-7.)
3. Tap in the Search field at the top of the Notes List. (See Figure 2-8.)
The onscreen keyboard appears.
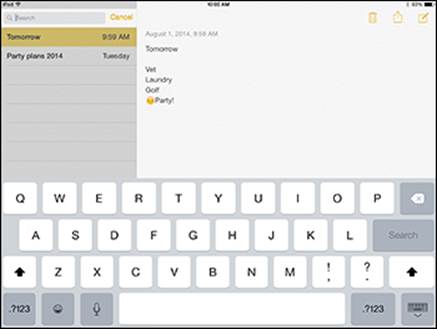
Figure 2-8: Enter search terms using the onscreen keyboard or Keyboard Dock.
4. Begin to enter the search term.
All notes that contain matching words appear on the list, as shown in Figure 2-9.
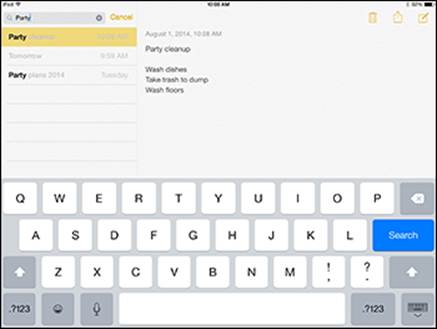
Figure 2-9: The Search feature narrows the results by words that match your entry.
5. Tap a note to display it and then locate the instance of the matching word, which is highlighted with a yellow background. Tap the item again to highlight subsequent occurrences of the search term.
Sharing a Note
Today, it’s all about sharing content. If you want to share what you wrote with a friend or colleague, or even access your note on your main computer to move it over into a word-processing program and flesh it out, you can easily share the contents of a note by following these steps:
1. With a note displayed, tap the Share button on the top of the screen.
2. In the pop-up menu that appears, tap Mail.
You can also share using AirDrop by tapping that button and then tapping on the nearby device you want to send the note to at this point.
3. In the email form that appears (see Figure 2-10), type one or more email addresses in the appropriate fields.
At least one email address must appear in the To, Cc, or Bcc field.
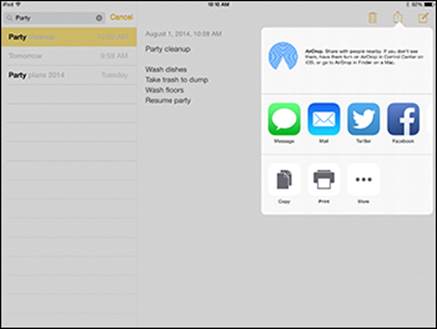
Figure 2-10: Enter addressees; use Bcc if you don’t want that recipient to be visible to others.
4. If you need to make changes to the subject or message, tap in either area and make the changes by using either the onscreen keyboard or the Dictation key (on a third-generation or later iPad) to speak your changes.
5. Tap the Send button.
Your email is sent.
If you want to print a note in Step 2, tap Print rather than Mail. Complete the Printer Options dialog by designating an AirPrint–enabled wireless printer (or a shared printer on a network that you can access using AirPrint) and indicating how many copies to print; then tap Print.
To cancel an email message and return to Notes without sending it, tap the Cancel button in the email form and then tap Delete Draft on the menu that appears. To leave a message but save a draft so that you can finish and send it later, tap Cancel and then tap Save Draft. The next time you tap the Mail button with the same note displayed in Notes, your draft appears.
Deleting Notes
Over time, notes can accumulate, making it harder to find the note you need in the long list that displays. There’s no sense in letting your Notes List get cluttered or leaving old content around to confuse you. When you’re done with a note, delete it. Follow these steps:
1. Tap the Notes app on the Home screen to open it.
2. With the iPad in landscape orientation, tap a note in the Notes List to open it.
3. Tap the Trash Can icon at the top of the screen, as shown in Figure 2-11.
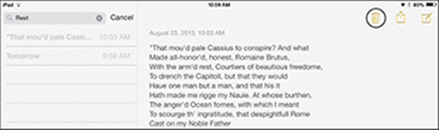
Figure 2-11: With a note displayed, tap the Trash Can button to delete it.
4. Tap the Delete Note button that appears. (See Figure 2-12.)
The note is deleted.
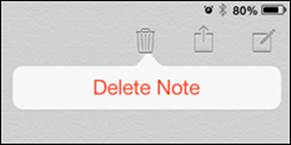
Figure 2-12: Go ahead; delete whatever you don’t need with a tap of this button.
Notes is a nice little app, but it’s limited. It offers very few formatting tools and only one font for your text. You can’t paste pictures into it. (Actually, you can, but what appears is the filename, not the image.) So if you’ve made some notes and want to graduate to building a more robust document in a word processor, you have a couple of options. One way is to use the Pages word-processor application for iPad, which comes with newer iPads, and copy your note (using the Copy and Paste feature discussed earlier in this chapter). Alternatively, you can send the note to yourself in an email. Open the email and copy and paste the text into a full-fledged word processor, and you’re good to go.
If you want to move beyond Notes and use a note-taking app that lets you write with a stylus, check out PaperDesk for iPad ($3.99) or Penultimate (free) in the App Store. Both make drawing and writing handwritten notes easy and fun. Pogo Sketch and Pogo Stylus are two good stylus tools to check out (at www.tenonedesign.com).