iPad All-in-One For Dummies, 7th Edition (2015)
Book V. Using iPad to Get Organized
Chapter 5. Managing Contacts
In This Chapter
![]() Adding contacts
Adding contacts
![]() Syncing contacts with iCloud
Syncing contacts with iCloud
![]() Adding social media info
Adding social media info
![]() Specifying related people
Specifying related people
![]() Adding a ringtone and photo to a contact
Adding a ringtone and photo to a contact
![]() Sharing contacts
Sharing contacts
![]() Using Maps to view a contact’s location
Using Maps to view a contact’s location
![]() Deleting a contact
Deleting a contact
Contacts is the iPad equivalent of the address book on your cellphone. In fact, if you own an iPhone, it’s similar to your Contacts app. The Contacts app on iPad is simple to set up and use, and it has some powerful little features beyond simply storing names, addresses, and phone numbers.
For example, you can pinpoint a contact’s address in the iPad Maps application. You can use your contacts to quickly address emails, messages, and tweets. If you store a contact record that includes a website, you can use a link in Contacts to view that website instantly. And, of course, you can easily search for a contact by a variety of criteria, including people related to you by family ties or mutual friends, or by groups you create.
In this chapter, you discover the various features of Contacts, including how to save yourself time by syncing your email contacts lists to your iPad instantly.
Populating Your Contacts with Information
The Contacts app’s sole purpose is to store contact information and make it available to you, but first you have to make that information available to the Contacts app. You can do it by manually adding records one at a time, by syncing via iTunes, syncing contacts with other accounts such as your Gmail or Yahoo! email, or pushing your contacts to other devices via iCloud to transfer your contacts instantly.
 If you have access to or can set up a lightweight directory server (LDIF or LDAP), you can import the contacts stored in such a directory. You can do this by choosing Settings⇒Mail, Contacts, Calendars and then tapping Add Account. Choose Other and then, under Contacts, tap Add LDAP Account.
Adding contacts
You can, of course, enter your contacts the old-fashioned way, by typing their names, addresses, phone numbers, and other information in a contact form.
Follow these steps to create a new contact record:
1. Tap the Contacts app icon on the Home screen to open the application.
If you haven’t yet entered a contact, you see a blank address book with the Add (plus) icon at the top of the Contacts List, as shown in Figure 5-1.
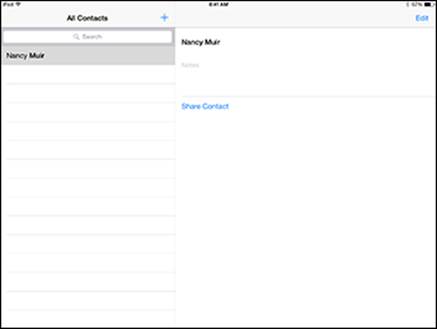
Figure 5-1: Tap to add a new contact.
2. Tap the Add button (the + button).
A blank Info page opens, and the onscreen keyboard displays, as you can see in Figure 5-2.
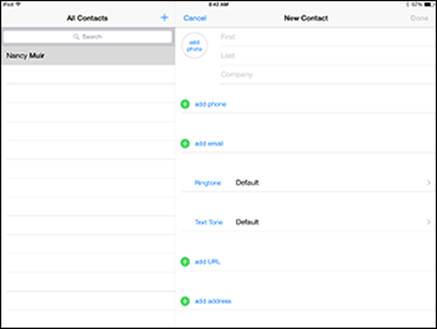
Figure 5-2: Enter as much information about your contact as you want.
3. Enter some contact information.
Enter a first name in the First field, for example. To create a contact, only a first name, last name, or company name is required.
To scroll down the contact page and see more fields, swipe upward on the page.
If you’re entering a phone number that requires a pause, such as when you access an outside line from your workplace, insert a comma into the number at the spot where the pause must occur. This comma produces a one-second pause. You can also enter a period (.) in the number to pause until you tap Dial to continue. If you sync this contact information to your phone via iTunes, it’s then set up to dial correctly.
4. (Optional) To add information such as a mailing or street address, tap the related Add field, which opens additional entry fields.
5. (Optional) To add another information field such as Nickname or Job Title, tap Add Field toward the bottom of the pane. In the Add Field dialog that appears (see Figure 5-3), choose a field to add.
You may have to swipe your finger upward to view all available fields.
If your contact’s name is difficult for you to pronounce, add the Phonetic First Name (or Phonetic Last Name) field to that person’s record.

Figure 5-3: Round out a contact’s information by adding information fields.
6. Tap the Done button when you finish making entries.
The new contact appears in your address book. Figure 5-4 shows an address book with several entries added.
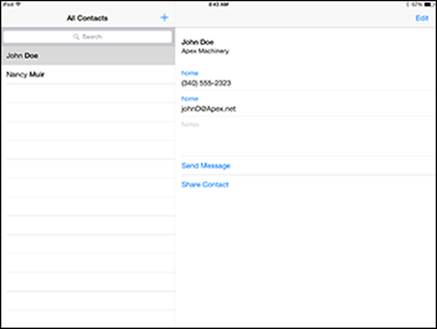
Figure 5-4: A list of contacts, arranged alphabetically.
If you’ve set up a Lightweight Directory Access Protocol (LDAP) account on iPad to connect with your organization’s directory service, you may be able to access its directories via Contacts. See Book III, Chapter 1, for more about setting up an LDAP account.
If you want to add multiple email addresses to a contact so that you can easily send email to all of that contact’s email addresses, enter a work email address in the steps above, and another Add Email field titled Other opens. Tap the pop-up and enter an appropriate title; then enter another email address there. Another Other field opens, and so on. Simply enter all email addresses you want included for that contact and then tap Done.
 A new feature in iOS 8 allows you to create a new contact from contents of an email such as an email signature. If that information isn’t already in your Contacts app, a banner appears at the top of the message offering you the option of adding the person to Contacts.
Syncing contacts with iCloud
You can use your iCloud account to sync contacts from your iPad to iCloud to back them up. These also become available to your iCloud email account, if you set one up. Note that these steps can also be used for Google and Exchange accounts through the Mail, Contacts, Calendars section of Settings.
Follow these steps to sync your contacts:
1. Tap Settings on the Home screen and then tap iCloud.
2. In the iCloud settings shown in Figure 5-5, tap Contacts to sync contacts.
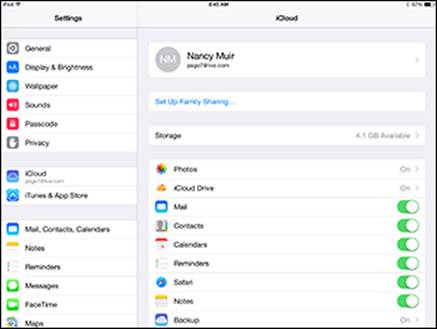
Figure 5-5: Choose what to sync through iCloud here.
3. Tap Merge (see Figure 5-6) to merge your iPad Contacts contents with iCloud.
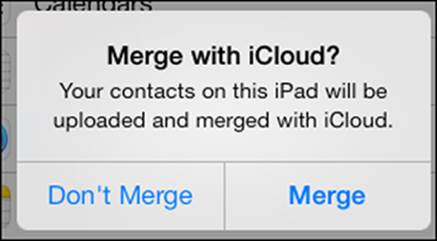
Figure 5-6: Merge your iPad Contacts contents with iCloud.
If you don’t use a server-based syncing method with accounts such as iCloud, Google, or Exchange, you can use iTunes to automatically sync contacts among all your Apple devices and even a Windows PC. See Book I, Chapter 5, for more about making iTunes settings to specify how your contacts are synced in iTunes.
You can use the iTunes Wi-Fi sync feature in the General pane in Settings to sync with iTunes wirelessly from a computer connected to the same Wi-Fi network.
Assigning a Photo to a Contact
It’s always helpful to associate a face with a name. In Contacts, you can do just that by adding a person’s photo to his contact record. You can add photos from various sources, such as
· The Photos app’s albums
· Digital cameras
· Email attachments
· iPad’s camera
· Photo collections stored on your computer or in iCloud (see Book II, Chapter 6, for more about working with the Photos app)
Follow these steps to add a stored photo to a contact record:
1. With Contacts open, tap the contact to whose record you want to add a photo.
2. Tap the Edit button.
3. On the Info page that appears, tap Add Photo.
4. Tap Choose Photo from the popover (see Figure 5-7).
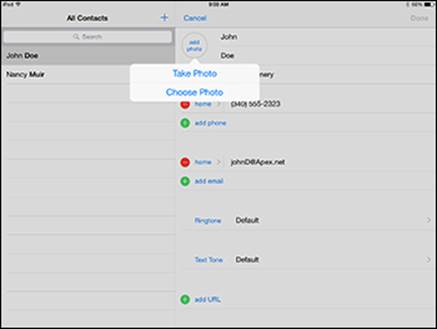
Figure 5-7: Choose the location of the photo you want to include.
5. In the Photo Albums popover that appears, tap Camera Roll or My Photo Stream, Photo Library, or any photo album you might have created yourself, depending on where the photo is stored.
You can also choose Take Photo to take that contact’s photo on the spot.
6. In the photo album that appears, tap a photo to select it.
The dialog shown in Figure 5-8 appears. If you want to modify the photo, move the image around in the frame with your finger, or shrink or expand it by pinching your fingers inward or outward, respectively.
7. Tap the Use button to use the photo for this contact.
The photo appears on the contact’s Info page, as shown in Figure 5-9.
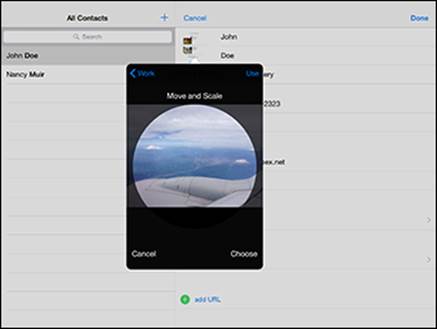
Figure 5-8: Select or edit the photo you want to include.
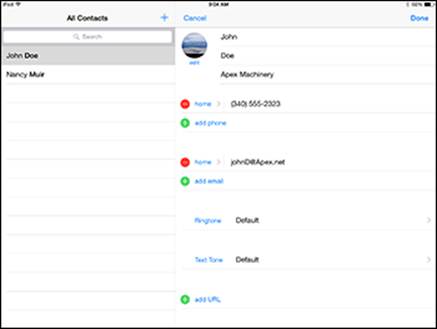
Figure 5-9: A photo displayed with a contact in iPad.
8. Tap Done to save changes to the contact.
To edit a photo you’ve added to a contact record, simply display the contact information and tap Edit. Tap Edit under the photo and then choose Edit Photo from the menu that appears, and then, in the dialog that appears (refer to Figure 5-8), use the described gestures for moving and scaling the image with your fingers. Tap Use when you’re done to save the changed figure.
If you want a more powerful contact-management app, check out Contacts Journal – iPad Edition. It syncs with your Contacts app content and can also sync with a computer contact-management program such as Outlook. The most helpful aspect of Contacts Journal for road warriors is that it maintains a record of whom you’ve visited and when you’ve emailed those people.
Adding Twitter or Facebook Information
You can add Twitter and Facebook information to a contact so that you can quickly tweet (send a short message) to contacts using Twitter or post a message to your contact’s Facebook account.
To specify Facebook or Twitter account information for a contact, first be sure that you’ve activated and set up a User Name and Password for your Facebook and/or Twitter accounts under Settings. Then follow these steps:
1. With Contacts open, tap a contact.
2. Tap the Edit button.
3. Scroll down and tap Social Profile.
4. In the list that appears (see Figure 5-10), enter a Twitter label.
If you want to create a different social networking field, tap Add Social Profile. A Facebook field appears. You can also tap again to get a Flickr account, and then a LinkedIn account, and so on.
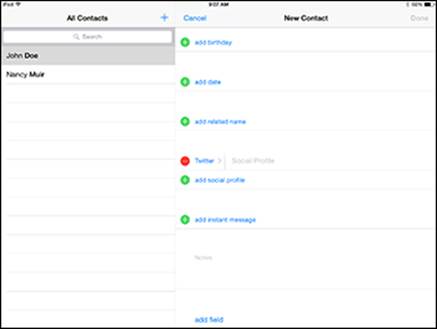
Figure 5-10: Choose Twitter to begin composing a tweet.
5. Tap Done.
The information is saved.
The account now displays whenever you select the contact, as shown in Figure 5-11. You can send a tweet, a Facebook post, or other message by simply tapping the username for a service and choosing the appropriate command (such as Tweet).
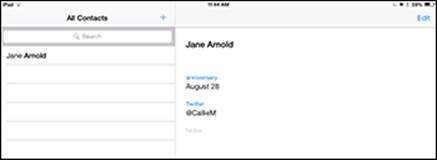
Figure 5-11: Your contact is now associated with the appropriate social network.
If you prefer to add Facebook information instead of Twitter, tap Add Social Profile just under the Twitter field in Step 5 and enter the contact’s Facebook information. (You can also click the Add Social Profile link again and choose Flickr, LinkedIn, Myspace, Sina Welbo, or Add Custom Service in the fields that appear.)
Designating Related People
You can quickly designate a relation — such as your mother, assistant, friend, or manager — in a contact record if the person is saved to Contacts. To add a relationship to a contact, follow these steps:
1. Tap a contact and then tap Edit.
2. Scroll down the record and tap Add Related Name.
A new field, labeled Mother, appears (see Figure 5-12). You can tap a field name such as Mother, and a list of other possible relationships appears.
3. Enter the contact name for the contact’s relationship or tap the Information icon to the right of the field.
A list of your contacts appears, from which you can choose the person.
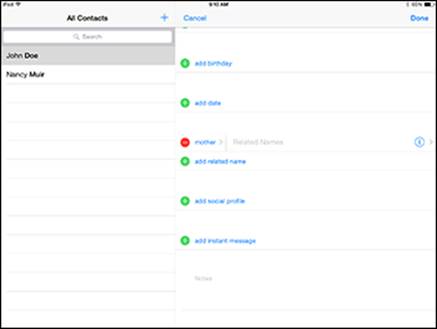
Figure 5-12: This field defaults to Mother, of course.
4. Tap Add Related Name again.
A new blank field for Father appears (see Figure 5-13). Tap the Information button and select the relationship you want.
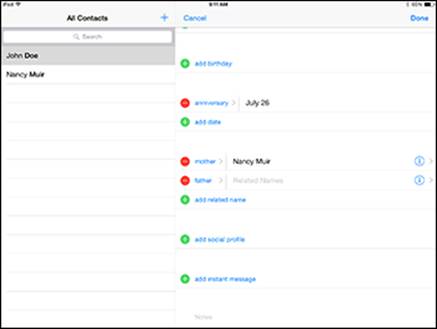
Figure 5-13: You can make someone a friend, an assistant, and a spouse, if you want!
After you add a relation to a contact record, whenever you select the person on the Contacts main screen, all related people for that contact are listed.
Setting Ringtones and Text Tones
If you want to hear a unique tone whenever you receive a FaceTime call or a text from a particular contact, you can set up this feature in Contacts. For example, if you want to be sure that you know instantly when your spouse, a sick friend, or your boss is calling, set a unique tone for that person by following these steps:
1. Tap to add a new contact or select a contact from the list of contacts, and tap Edit.
2. Tap the Ringtone field.
If you want to assign Text Tones, make that choice in this step. A list of tones appears (see Figure 5-14). You can also tap Buy More Tones at the top of this list to buy additional ringtones from Apple or a variety of third-party sites, or even create your own.
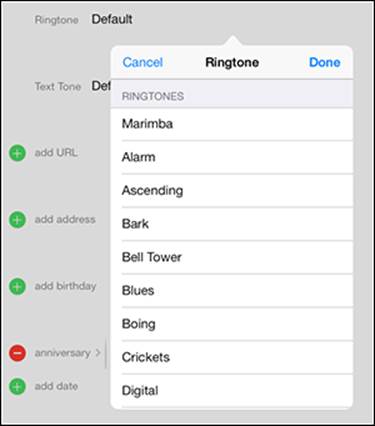
Figure 5-14: Choose from these available ringtones.
3. Tap a tone to preview it.
4. When you hear a tone you like, tap Done.
5. Tap Done again to close the contact form.
If your Apple devices are synced via iCloud, setting a unique ringtone for an iPad contact also sets it for your iPhone, iPod touch, and Mac for FaceTime, and Messages. See Book I, Chapter 5, for more about iCloud.
You can set a custom tone for FaceTime calls and text messages through Settings⇒Sounds. You can also create your own custom ring/text tones in GarageBand on a Mac or iOS device, with any of several ringtone-maker apps, or by using the contents of your iTunes Library on either a Mac or PC.
Finding Contacts
You can use the Spotlight Search feature to find a contact in the Contacts app by looking for that person’s first or last name or a company name. This feature on the iPad is much like every search feature you’ve ever used. It’s somewhat simple in comparison to others because you can search only for names and because no advanced search techniques are available.
You can also use Siri or the Spotlight Search feature to locate contacts that match specified search criteria. Swipe down from near the top of any Home screen to display the Spotlight screen.
Follow these steps to search for a contact:
1. With Contacts open, tap in the Search field at the top of the left page (see Figure 5-15).
The onscreen keyboard opens.
Figure 5-15: Easily search for contacts.
2. Type the first letter of either the first or last name, or the company name.
All matching results appear, as shown in Figure 5-16. In the example, typing J displays Jane Arnold and Ted And Joan Stier in the results, which both have J as the first letter in either their first or last names.
3. Tap a contact’s name in the results to display that person’s information on the page on the right (see Figure 5-16).
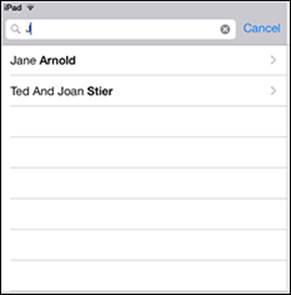
Figure 5-16: Search results narrow as you type.
You can search by phone number, website, or address in Contacts as well as by name.
If you’ve entered many contacts, you can use the alphabetical listing that appears along the right side of Contacts to locate a contact: Tap and drag to scroll the list of contacts on the All Contacts page on the left.
Using Contacts beyond the Contacts App
Contacts isn’t simply a static database of names and addresses. After you’ve entered contact information into the app, you can use the information to reach out to people in several useful ways. You can jump to a contact’s website to see what she, or her company, is up to online; use a contact’s email information to quickly send an email message; share the contact information with somebody else; or find the physical address of the contact by using the iPad Maps app.
Visiting a contact’s website
Everybody (well, almost everybody) now has a website, so whether your contact is a person or an international conglomerate, you’re likely to find an associated website that you might want to access now and then. You can access it from your iPad by using the Contacts app.
If you entered information in the Home Page field of a contact record, the text you entered automatically becomes a link to that person’s website. With Contacts open, tap a contact to display the person’s contact information on the page at the right and then tap the link in the Home Page field, as shown in Figure 5-17.
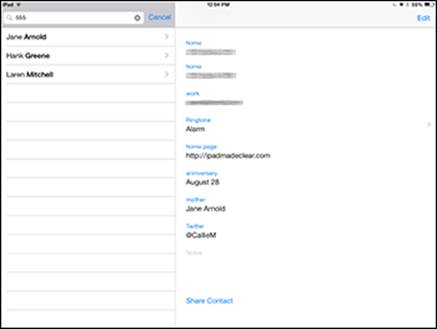
Figure 5-17: Tap to go to a web page related to a contact.
The Safari browser opens with the web page displayed.
 You aren’t returned directly to Contacts after you follow a link to a website. You have to tap the Home button and then tap the Contacts app icon again to reenter the application. Or you can use the multitasking feature to get back to Contacts by double-tapping the Home button and choosing Contacts from the icons that appear along the bottom of the screen. However, if you have the Multitasking Gestures setting turned on in the General pane of Settings, you can do the four-finger swipe to the left to return to the app you just left and keep swiping to go to the apps on the multitasking bar in sequence.
Addressing emails using contacts
If you’ve entered an email address for a contact, the address automatically converts to a link in the record that allows you to open an email form and send a message. This shortcut is handy for getting in touch. Note that the steps outlined here also work for creating Messages or placing Facetime calls.
First, be sure that you’ve entered an email address in the contact’s record and then follow these steps:
1. Tap the Contacts app icon on the Home screen to open Contacts.
2. Tap a contact’s name to display her contact information on the page on the right, and then tap the email address link labeled Work, as in the example shown in Figure 5-18.
Note that people you’ve contacted recently are displayed along the top of the multitasking screen, which you get to by double-pressing the Home button. When you tap a recent contact, any available methods of connecting with her in her record, including Messages or Facetime, are listed; just tap a button to make the connection.

Figure 5-18: Tap to open a new email message.
The New Message form appears with the contact’s email address already entered, as shown in Figure 5-19. The title bar of this form initially reads New Message but changes to the specific title as you type on the Subject line.
3. Tap in a field and use the onscreen keyboard to enter a subject and a message.
4. Tap the Send button.
The message is sent.
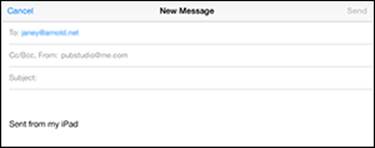
Figure 5-19: A new email message form.
Sharing contacts
After you’ve entered contact information, you can share it with others in an email message. Sharing is especially handy when you store locations in Contacts, such as your favorite restaurant or movie theater.
Here’s how to share your contacts’ information:
1. With Contacts open, tap a contact name to display its information.
2. On the information page, tap the Share Contact button.
If you want, you can select AirDrop, and then tap the name of a device near to you to send the contact information wirelessly to that device.
3. In the popover that appears, shown in Figure 5-20, tap Mail or Message.
The New Message form appears. Both the email and message form let you enter a message and include the contact information as an attachment to be sent to the recipient. Figure 5-21 shows the email form.
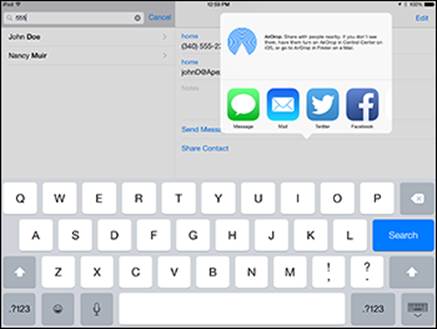
Figure 5-20: Easily share contact information with others.
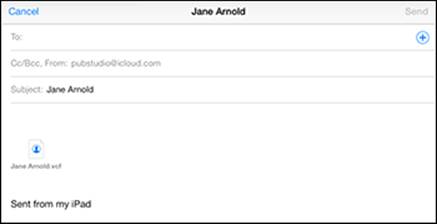
Figure 5-21: Fill out the email form to share your contact.
4. On the email New Message form, use the onscreen keyboard to enter the recipient’s email address.
Note: If the person’s information is saved in Contacts, you just have to type his or her name here.
5. Enter information in the Subject field.
6. If you like, enter a message.
7. Tap the Send button.
The message goes to your recipient with the contact information attached as a .vcf file (in the vCard format, commonly used to transmit contact information).
Someone who receives a vCard containing contact information simply clicks the attached file to open it. At that point, the recipient can perform various actions (depending on the recipient’s email or contact-management program) to save the content. Other iPhone, iPod touch, or iPad users can easily import .vcf records into their own Contacts apps.
Viewing a Contact’s Location in Maps
If you’ve entered a person’s street address in Contacts, you have a shortcut for viewing that person’s location in the Maps app. Once again, this is useful for places you need to visit for the first time, such as several clients’ offices on that next business trip.
Follow these steps to pinpoint your contacts in the iPad Maps app:
1. To open the Contacts app, tap its icon on the Home screen.
2. Tap the contact you want to view to display her information.
3. Tap the address.
Maps opens and displays a map of the address, as shown in Figure 5-22.
You can use information stored in Contacts to access more than your friends’ addresses. You can also save information about your favorite restaurant or movie theater, or any other location, and then use Contacts to jump to the associated website in the Safari browser or to the address in Maps.
After you jump to a contact’s location in Maps, you may want to use the features of Maps to display different views, determine the condition of traffic on that route, or calculate the route between two locations. For more about using the Maps application, see Book III, Chapter 2.
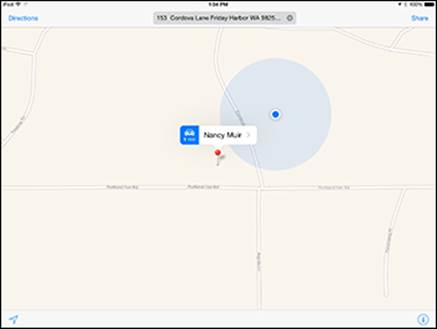
Figure 5-22: Tap the information bar to view more details in the Maps app.
Deleting Contacts
Remember that iPad’s storage capacity is limited compared to your typical computer. Though a contact record is tiny compared to a TV show, there’s no sense keeping lots of old records around when you no longer need them. When you need to remove a name or two from your Contacts, doing so is easy.
Follow these steps to delete contacts on your iPad:
1. With Contacts open, tap the contact you want to delete.
2. On the information pane on the right, tap the Edit button.
3. Drag your finger upward to scroll down (if necessary) and then tap Delete Contact at the bottom, as shown in Figure 5-23.
A confirmation alert appears.
4. Tap Delete Contact to confirm the deletion.
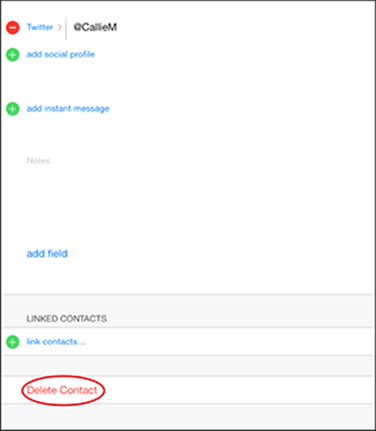
Figure 5-23: Tap Delete Contact to get rid of an unwanted contact.
All materials on the site are licensed Creative Commons Attribution-Sharealike 3.0 Unported CC BY-SA 3.0 & GNU Free Documentation License (GFDL)
If you are the copyright holder of any material contained on our site and intend to remove it, please contact our site administrator for approval.
© 2016-2026 All site design rights belong to S.Y.A.