iPad For Seniors For Dummies, 8th Edition (2016)
Part III. Having Fun and Consuming Media
Chapter 13. Getting the Most Out of Video Features
Get ready to …
· Capture Your Own Videos with the Built-in Cameras
· Play Movies, Podcasts, or TV Shows with Videos
· Turn on Closed Captioning
· Go to a Movie Chapter
· Share Your Favorite Videos
Using the Videos app, you can watch downloaded movies or TV shows, as well as media you’ve synced from iCloud or your Mac or PC.
In addition, all iPads (except the original iPad) sport two video cameras you can use to capture your own videos. You can take advantage of the rear-facing iSight camera, which can record video in 1080p high definition (HD), with video stabilization to prevent those wobbly video moments. You can also benefit from the Retina display on fourth-generation and later iPads to watch videos with super-high resolution, which simply means that those videos will look very, very good.
By downloading the iMovie app (a more limited version of the longtime mainstay on Mac computers), you add the capability to edit those videos.
In this chapter, I explain all about shooting and watching video content from a variety of sources. For practice, you may want to refer to Chapter 8 first to purchase or download one of many available free TV shows or movies, and see Chapter 9 for help with downloading the iMovie app.
Capture Your Own Videos with the Built-in Cameras
1. To capture a video, tap the Camera app on the Home screen. The Camera app opens.
 On all iPads except the original iPad, two video cameras can capture video from either the front or back of the device and make it possible for you to edit the videos with third-party video apps or share them with others. (See more about this topic in the next task.)
2. Tap the row of words below the Capture button on the right side and slide up to switch from the still camera to the video camera (see Figure 13-1).
3. If you want to switch between the front and back cameras, tap the icon near the top-right corner of the screen (refer to Figure 13-1).
4. Tap the red Record button shown in Figure 13-1 to begin recording the video. (This button turns into a red square when the camera is recording, as shown in Figure 13-2).
5. When you’re finished, tap the Record button again. Your new video is listed in the bottom-left corner of the screen.
6. Tap the video to play it, share it, or delete it. In the future, you can find and play the video in your Camera Roll when you open the Photos app.
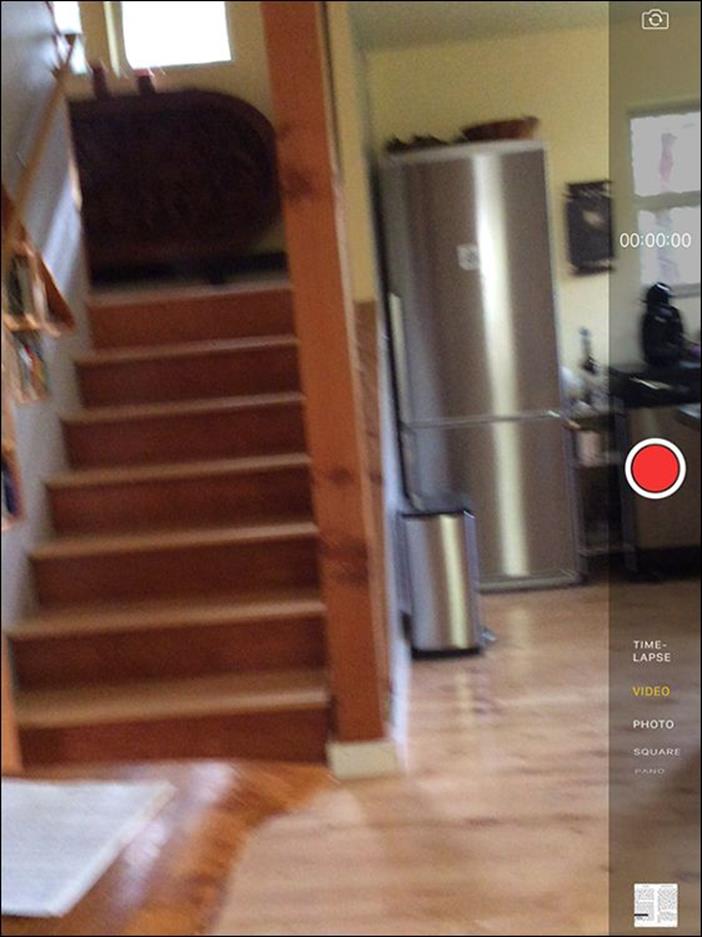
Figure 13-1

Figure 13-2
 Before you start recording, remember that when you’re holding the iPad in portrait orientation, the camera lens is in the top-right corner of the back. You could easily put your fingers directly over the lens!
At the announcement of the latest version of iPad Air and iPad mini, Apple called attention to two great apps that help you edit your videos. Replay (a free app) and Pixelmator are both designed to take full advantage of the new A9 processor chip and offer a stunning array of video editing features. Check them out in the App Store.
Play Movies, Podcasts, or TV Shows with Videos
1. When you first open the Videos app by tapping its button on the Home screen, you may see a relatively blank screen with a note that reads you don’t have any videos on your iPad and a link to the iTunes Store. After you’ve purchased TV shows and movies or rented movies from the iTunes Store (see Chapter 8 to find out how) or other sources, you’ll see tabs listing the different kinds of content you own. Tap the Videos app icon on the Home screen to open the application.
2. On a screen like the one shown in Figure 13-3, tap the appropriate category at the top of the screen (TV Shows or Movies, depending on the content you’ve downloaded).
3. Tap an item to open it. A description appears, as shown in Figure 13-4. Details about TV Shows include Episodes, Details, and Related tabs; Movies contain Details, Chapters, and Related tabs.
4. For a TV show, tap the Episodes tab to display episodes, each of which has a Play button; for a movie, the Play button appears no matter which tab is selected. When you tap the Play button for the content you want to watch, the movie, TV show, or podcast begins playing. (If you see a small cloud-shaped icon instead of a Play button, tap it if you want to download the content from iCloud rather than stream it.) The progress of the playback is displayed on the Progress bar (see Figure 13-5), showing how many minutes you’ve viewed and how many remain. If you don’t see the bar, tap the screen once to display it briefly, along with a set of playback tools at the bottom of the screen.
5. With the playback tools displayed, take any of these actions:
· Tap the Pause button to pause playback.
· Tap either Go to Previous Chapter or Go to Next Chapter to move to a different location in the video playback.
· Tap the circular button on the Volume slider and drag the button left or right to decrease or increase the volume, respectively.
6. To stop the video and return to the information screen, tap the Done button to the left of the Progress bar.

Figure 13-3
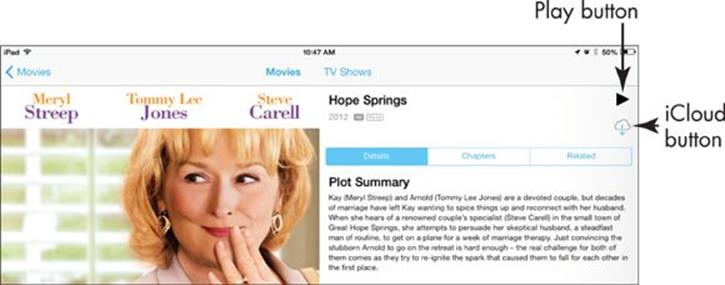
Figure 13-4
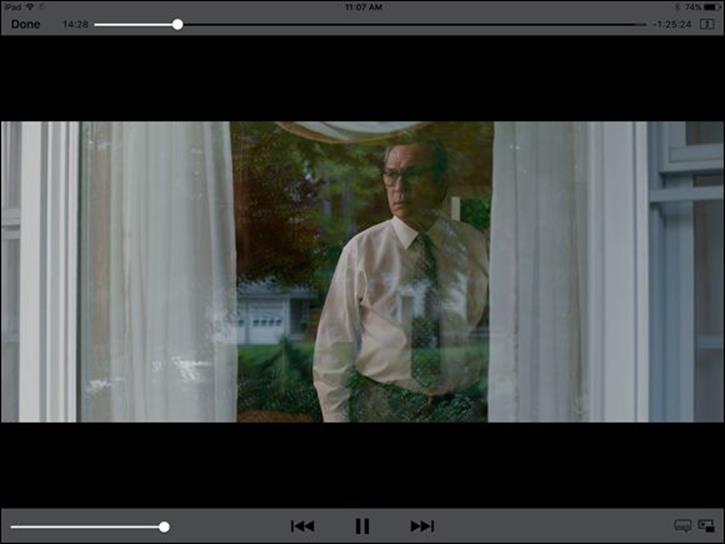
Figure 13-5
If you’ve watched a video and stopped it partway, it opens by default to the last location that you viewed. To start a video from the beginning, tap and drag the circular button on the Progress bar all the way to the left.
If your controls disappear during playback, just tap the screen to make them reappear.
If you like to view things on a bigger screen, you can use the iPad’s AirPlay feature to send your iPad movies and photos to your TV via the Apple Digital AV Connector (a $39.95 accessory) or Apple TV (a device that costs $99). Depending on your TV model, you may need the Composite connector (for virtually any analog set rather than the Digital AV Connector, which is used only for HD TV).
Turn on Closed Captioning
1. iTunes and the iPad offer support for closed captioning and subtitles. If a movie you purchased or rented has either closed captioning or subtitles, you can turn on this feature in iPad. Look for the “CC” logo on media you download to use this feature; be aware that video you record won’t have this capability. Begin by tapping the Settings icon on the Home screen.
2. Tap General ⇒ Accessibility. On the screen that appears, tap Subtitles & Captioning (see Figure 13-6).
3. On the menu that appears on the right side of the screen, tap the Closed Captions + SDH On/Off button to turn on the feature. Now when you play a movie that supports closed captioning, you can tap the Audio and Subtitles button to the right of the playback controls to manage this feature.
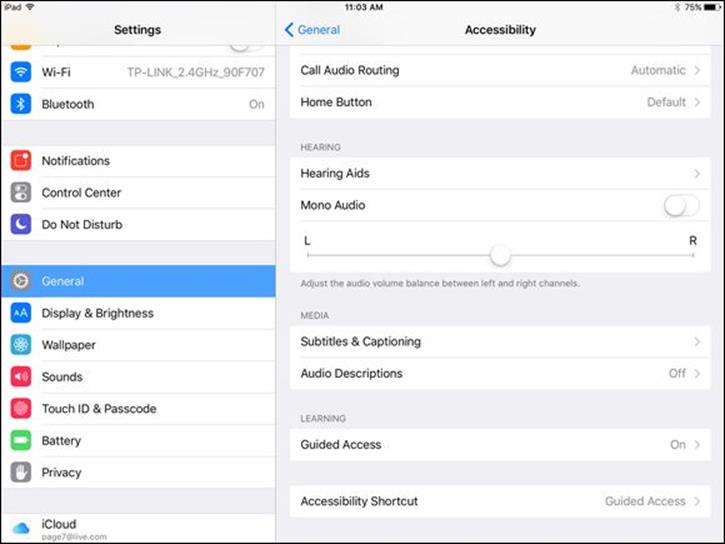
Figure 13-6
Go to a Movie Chapter
1. Tap the Videos app icon on the Home screen.
2. Tap the Movies tab, if it isn’t already displayed.
3. Tap the title of the movie you want to watch. Information about the movie is displayed (refer to Figure 13-4).
4. Tap the Chapters tab. A list of chapters is displayed, as shown in Figure 13-7.
5. Tap a chapter to play it.

Figure 13-7
You can also use the playback tools to go back one chapter or forward one chapter. See the “Play Movies, Podcasts, or TV Shows with Videos” task earlier in this chapter for more information.
If you buy a video using iTunes, sync to download it to your iPad and then delete it from your iPad, it’s still saved in your iTunes library. You can sync your computer and iPad again to download the video once more at no additional charge. Remember, however, that rented movies are gone with the wind when you delete them.
The iPad has much smaller storage capacity than your typical computer, so downloading lots of TV shows or movies can fill its storage area quickly. If you don’t want to view an item you’ve downloaded again, delete it to free up space. With your TV Shows or Movies displayed, tap Edit. Tap the Delete button on an item and then tap Delete in the confirmation that appears.
Share Your Favorite Videos
1. You can share your opinion about a video by using Mail, Twitter, or Facebook. Tap the Videos app to open it and then tap the Store button.
2. Find and tap a video that you want to share.
3. In the information screen shown in Figure 13-8, tap the Share icon (a box with an arrow at the top of it at the top of the screen).
4. In the resulting menu, tap Mail, Twitter, or Facebook to use one of these methods of sharing your enthusiasm for the item (see Figure 13-9). Note that you can also share the item as a reminder or note to yourself.
5. In the form that appears, enter a recipient in the To: field and add to the message, if you like. If you chose to post to your Facebook page, enter your message in the Facebook form.
6. Tap the appropriate Send button to send your recommendation by your preferred method.
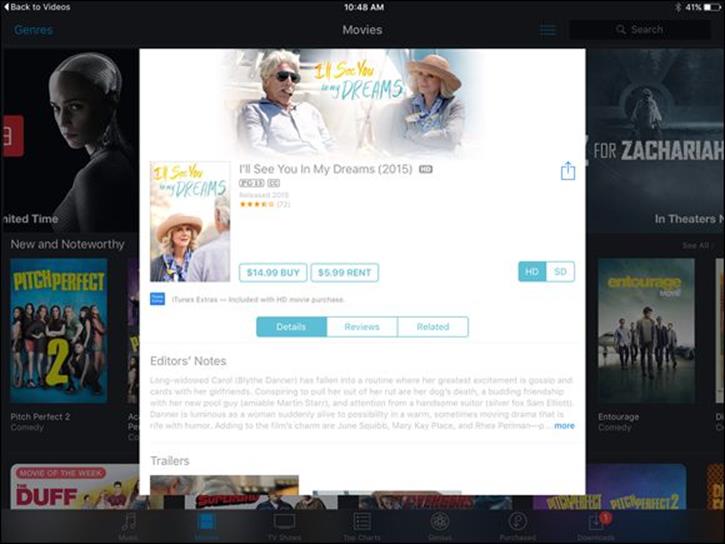
Figure 13-8
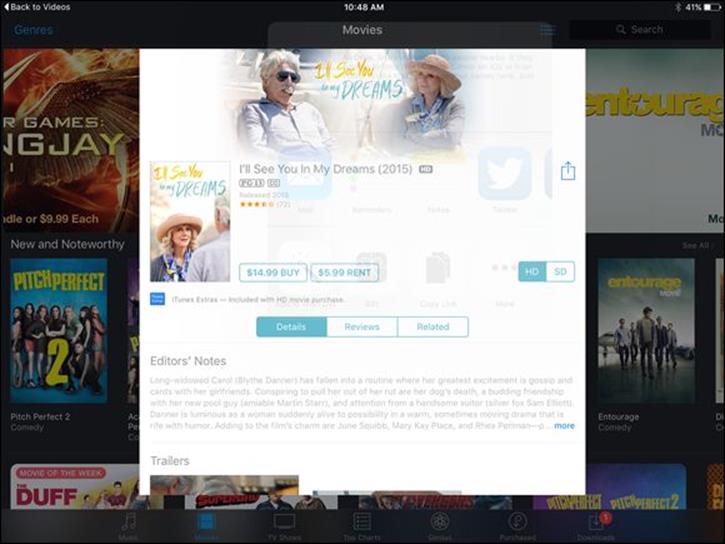
Figure 13-9
When you’re viewing information about a video in the iTunes Store, you can tap the Related tab to find information about other movies or TV shows watched by those who watched this one.