iPad For Seniors For Dummies, 8th Edition (2016)
Part IV. Managing Your Life and Your iPad
Chapter 18. Managing Contacts
Get ready to …
· Add a Contact
· Sync Contacts with iCloud
· Assign a Photo to a Contact
· Add Twitter or Facebook Information
· Designate Related People
· Set Ringtones for Contacts
· Search for a Contact
· Go to a Contact’s Website
· Address Email Using Contacts
· Share a Contact
· View a Contact’s Location in Maps
· Delete a Contact
Contacts is the iPad equivalent of the dog-eared address book that used to sit by your home phone. The Contacts app is simple to set up and use, and it has some powerful features beyond simply storing names, addresses, and phone numbers.
You can pinpoint a contact’s address in the iPad’s Maps application, for example. You can use your contacts to address emails, Facebook messages, and tweets quickly. If you store a contact record that includes a website, you can use a link in Contacts to view that website instantly. And, of course, you can easily search for a contact by a variety of criteria, including people related to you by family ties and mutual friends, or by groups that you create.
In this chapter, you discover the various features of Contacts, including how you can save yourself time by syncing many email contacts lists to your iPad instantly.
Add a Contact
1. Tap the Contacts app icon on the Home screen to open the app. If you haven’t entered any contacts yet, you see a blank address book (except for your own contact information, which may have been added when you set up your iPad), like the one shown in Figure 18-1.
2. Tap the Add button, which has a plus sign (+) on it. A blank New Contact page opens (see Figure 18-2), and the onscreen keyboard displays.
3. Enter any contact information you want. (You only have to enter first name, last name, or company to create a contact.)
4. To scroll down the contact page and see more fields, flick up on the page with your finger.
5. If you want to add information such as a mailing or street address, you can tap the related Add field, which opens additional entry fields.
6. To add another information field, such as Nickname or Job Title, tap Add Field toward the bottom of the screen. In the Add Field pop-up menu that appears (see Figure 18-3), choose a field to add.
7. Tap the Done button when you finish making entries. The new contact appears in your address book. Figure 18-4 shows an address book with entries added.
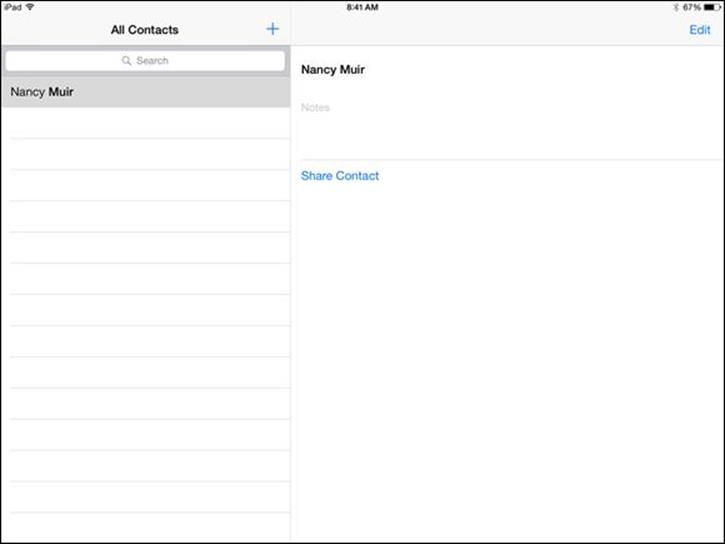
Figure 18-1
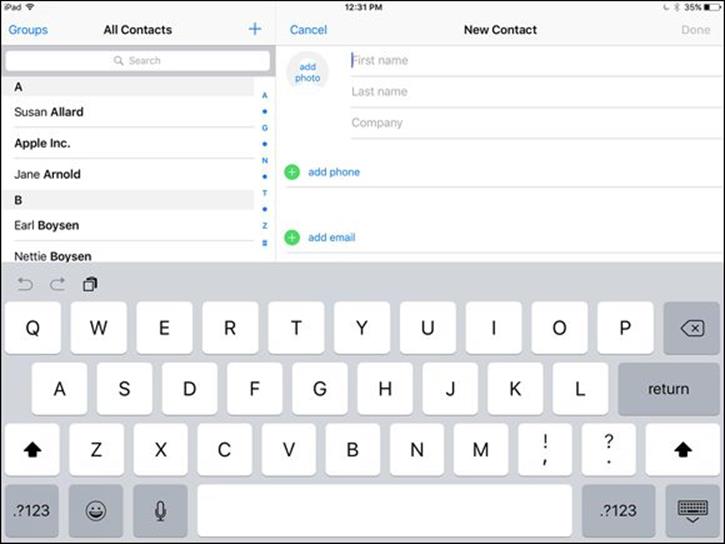
Figure 18-2
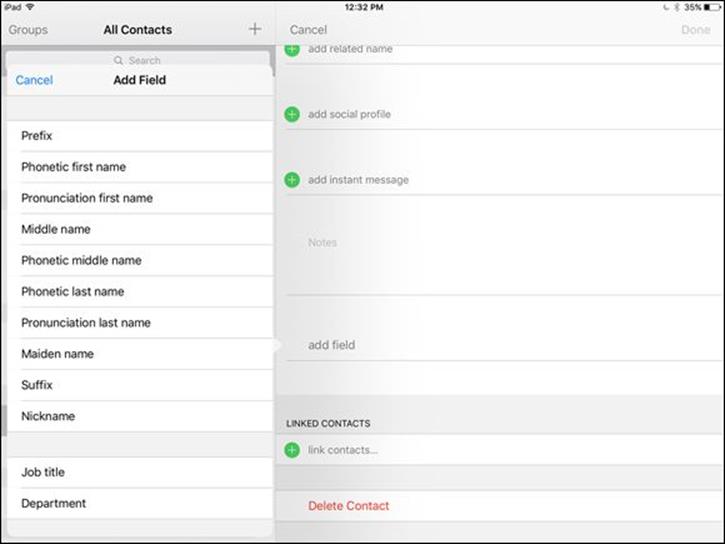
Figure 18-3
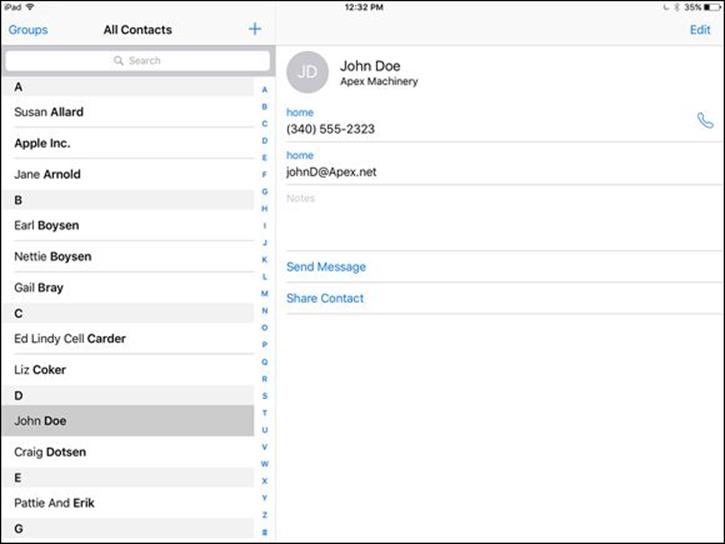
Figure 18-4
 If your contact has a name that’s difficult for you to pronounce, consider adding the Phonetic First Name or Phonetic Last Name field, or both, to that person’s record (refer to Step 6).
If you want to add multiple email addresses to a contact so that you can easily send email to all of that contact’s email addresses, enter a work email address in the preceding steps and then tap the Add email field, enter an appropriate title, and then enter another email address. Another Other field opens, and so on. Simply enter all email addresses you want to include for that contact and then tap Done.
Sync Contacts with iCloud
1. You can use your iCloud account to sync contacts from your iPad and various services such as an email account to back them up. These contacts also become available to your iCloud email account, if you set one up. Tap Settings on the Home screen and then tap iCloud.
2. In the iCloud settings shown in Figure 18-5, make sure the On/Off switch for Contacts is set to On to sync contacts.
3. In the Merge Contacts dialog that appears, tap Merge (see Figure 18-6) to merge your iPad Contacts with iCloud.
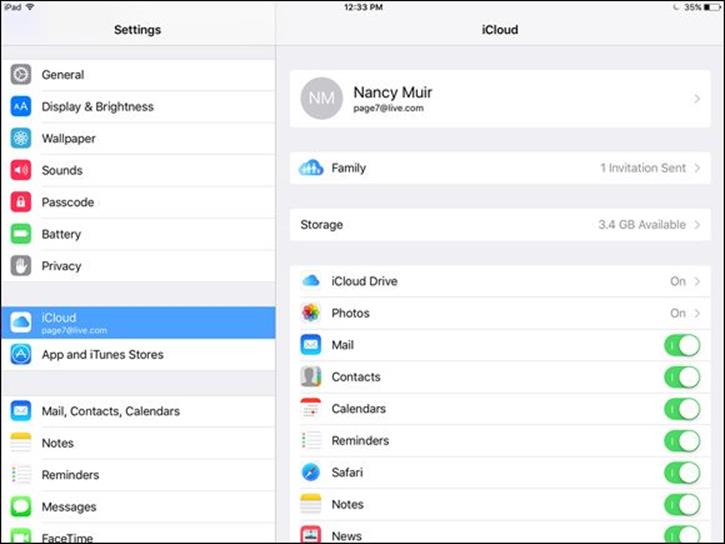
Figure 18-5
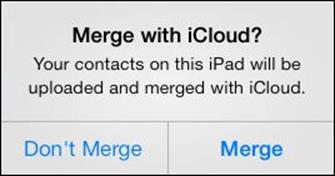
Figure 18-6
You can use the iTunes Wi-Fi sync feature in iPad’s Settings under General to sync with iTunes wirelessly from a computer connected to the same Wi-Fi network.
Assign a Photo to a Contact
1. With Contacts open, tap a contact to whose record you want to add a photo.
2. Tap the Edit button.
3. In the settings that appear, tap Add Photo.
4. In the pop-up menu that appears (see Figure 18-7), tap Choose Photo to choose an existing photo from the Photos Gallery. You can also choose Take Photo to take that contact’s photo on the spot using iPad’s camera.
5. If you select Choose Photo in Step 4, in the Photos pop-up menu that appears, choose a source for your photo (such as Recently Added or All Photos).
6. In the photo album that appears, tap a photo to select it. The screen shown in Figure 18-8 appears.
7. Tap the Use button to use the photo for this contact. The photo appears on the contact’s details (see Figure 18-9).
8. Tap Done to save changes to the contact.
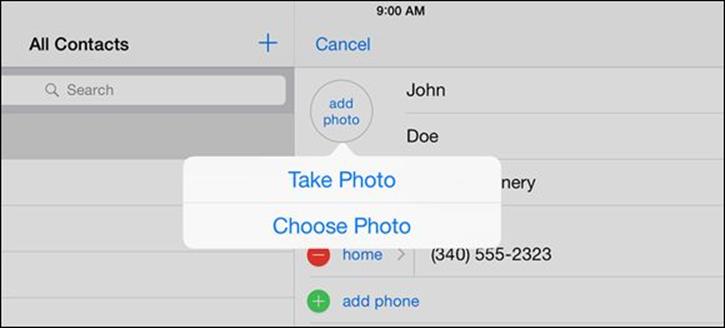
Figure 18-7
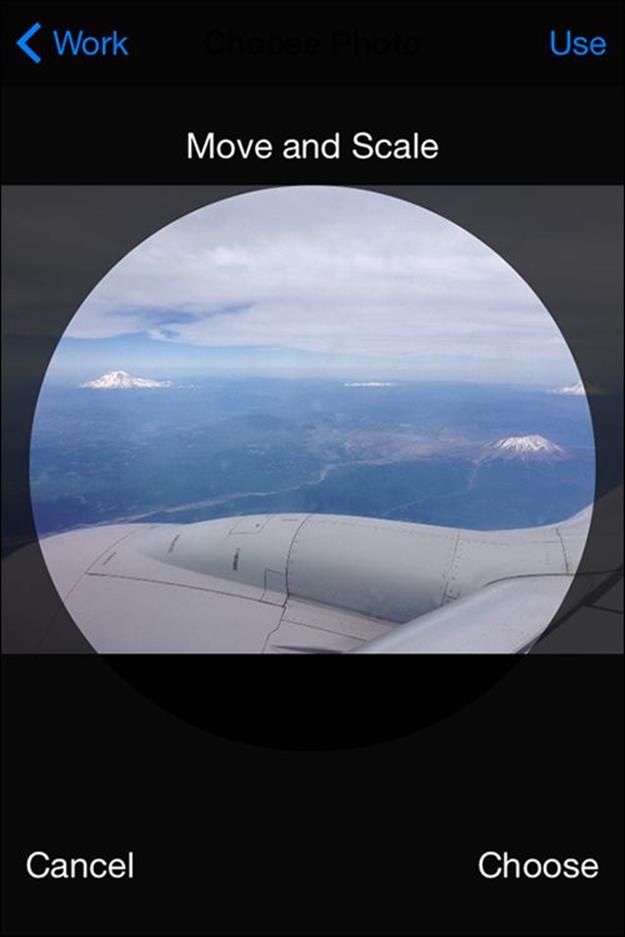
Figure 18-8
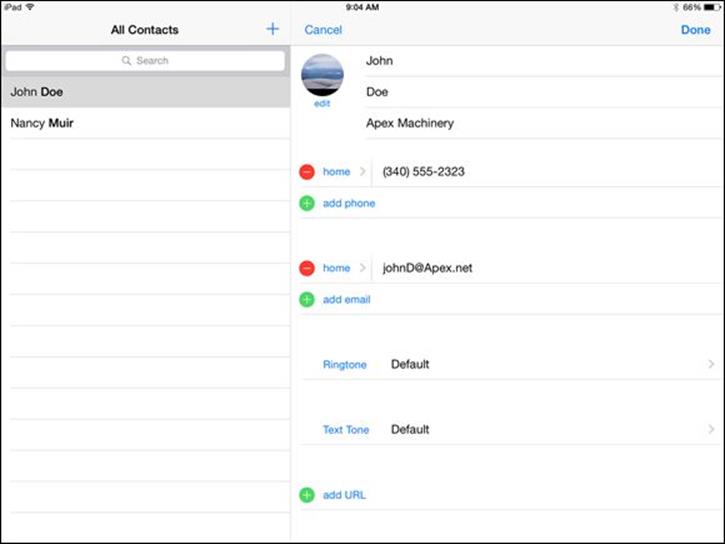
Figure 18-9
While you’re choosing a photo in Step 6, you can modify the photo before saving it to the contact information. You can unpinch your fingers on the screen to expand the photo. You can also move the photo around the selected area with your finger to focus on a particular section and then tap the Use button to use the modified version.
Add Twitter or Facebook Information
1. You can add Twitter information to a contact so that you can quickly follow contacts via Twitter or enter Facebook account information so that you can go to your contact’s Facebook page. With Contacts open, tap a contact.
2. Tap the Edit button.
3. Scroll down and tap Add Social Profile.
4. In the Twitter field that appears (see Figure 18-10), enter a Twitter handle.
5. If you want to create a different social networking field, tap Add Social Profile or tap the word Twitter to display other social network options and tap one, such as Facebook or LinkedIn. The new field appears for you to enter information.
6. Tap Done, and the information is saved. The account is now displayed when you select the contact, as shown in Figure 18-11, and you can send a Twitter, Facebook, or other message simply by tapping the username for a service and choosing the appropriate command (such as Tweet).
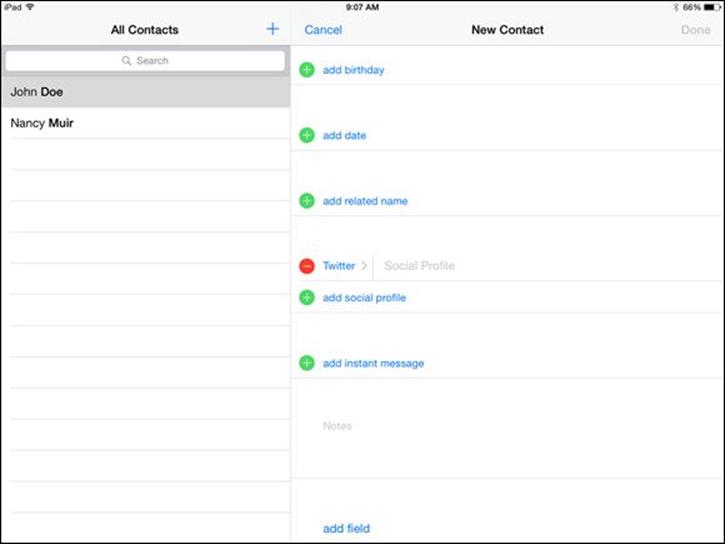
Figure 18-10
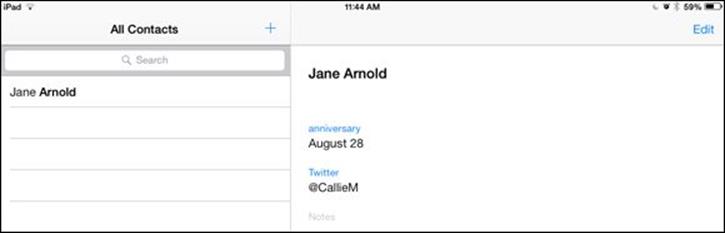
Figure 18-11
Designate Related People
1. You can quickly designate family relations in a contact record if those people are saved to Contacts. Tap a contact and then tap Edit.
2. Scroll down the record, and tap Add Related Name. A new field labeled Mother appears (see Figure 18-12).
3. Enter the contact name for your mother, or tap the Information icon to the right of the field to see a list of your contacts from which you can choose your mother.
4. Tap Add Related Name again, and a new blank field titled Father appears (see Figure 18-13). You can tap a field name such as Mother or Father and a list of other possible relationships appears. Tap the relationship you want to add.
5. Tap Done to save the edits.
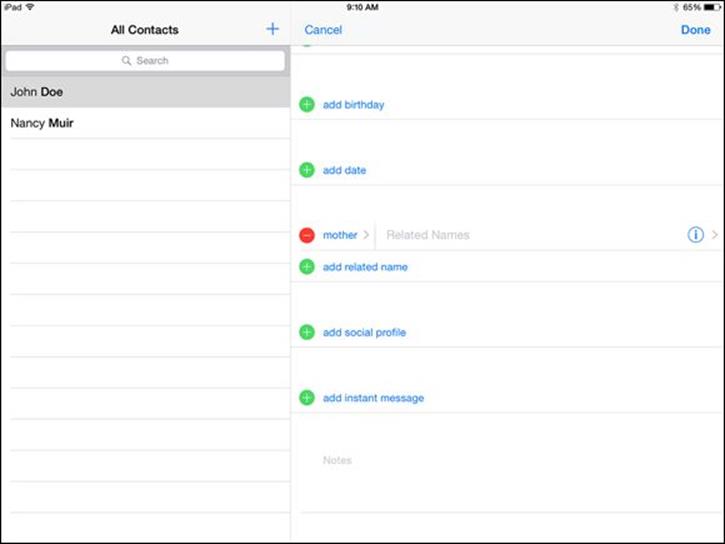
Figure 18-12
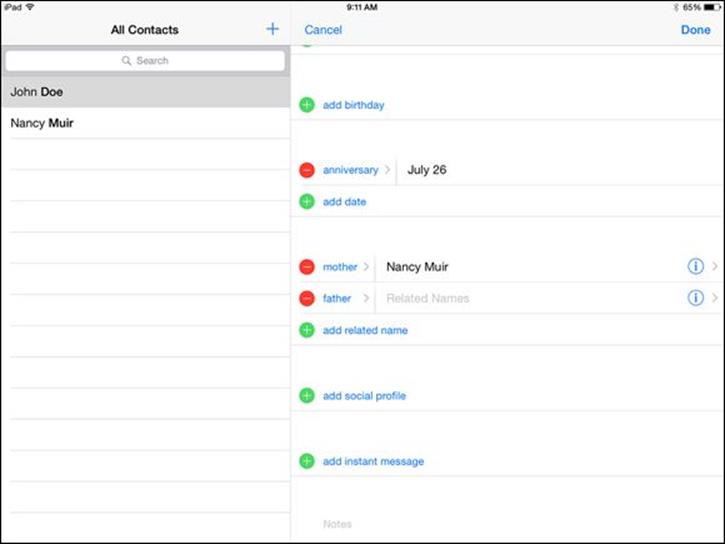
Figure 18-13
After you add relations to a contact record, when you select the person in the Contacts main screen, all the related people for that contact are listed there.
Set Ringtones for Contacts
1. If you want to hear a unique tone when you receive a text or a FaceTime call from a particular contact, you can set up this feature in Contacts. If you want to be sure that you know instantly when your spouse, sick friend, or boss is calling, set a unique tone for that person. Tap to add a new contact or select a contact in the list of contacts and then tap Edit.
2. Tap the Ringtone field, and a list of tones appears (see Figure 18-14). (Note that you can also tap Text Tone and perform this same procedure for incoming texts.) You can scroll to the top of the list of tones and tap Buy More Tones to buy additional ringtones from Apple.
3. Tap a tone, and it previews.
4. When you hear a tone that you like, tap Done.
5. Tap Done again to close the contact form.
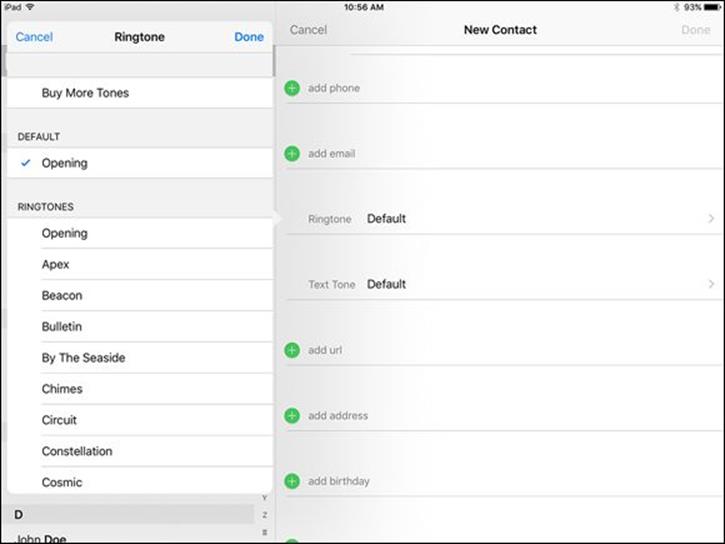
Figure 18-14
You can set a custom tone for FaceTime calls by tapping Settings ⇒ Sounds.
If your Apple devices are synced via iCloud, setting a unique ringtone for an iPad contact also sets it for your iPhone and iPod touch, as well as for FaceTime on a Mac. See Chapter 3 for more about iCloud.
Search for a Contact
1. With Contacts open, tap the Search field at the top of the left pane. The onscreen keyboard opens (see Figure 18-15).
2. Type the first letter of the contact’s first or last name or the contact’s company. All matching results appear, as shown in Figure 18-16. In this example, pressing J displays Jane Arnold and Ted and Joan in the results, all of which have J as the first letter of the first or last part of the name.
3. Tap a contact in the results to display that person’s information in the pane on the right (refer to Figure 18-16).
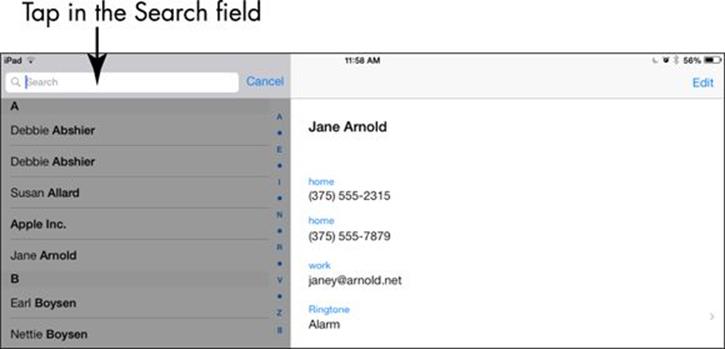
Figure 18-15
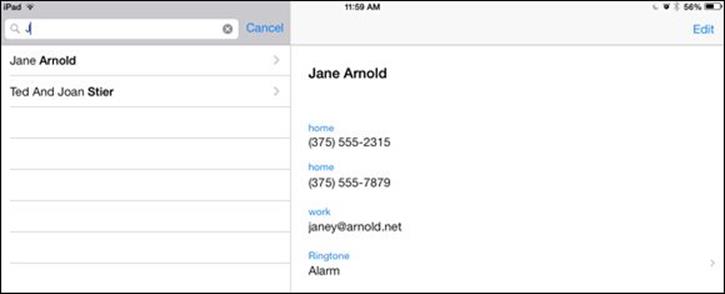
Figure 18-16
You can search by phone number, website, or address in Contacts as well as by name.
If you’ve entered many contacts, you can also use the alphabetical listing that appears along the right side of All Contacts to locate a record. Also, you can tap and drag to scroll down the list of contacts on the All Contacts pane on the left.
Go to a Contact’s Website
1. If you entered website information in the Home Page field of a contact record, it automatically becomes a link in the contact’s record. Open a contact record.
2. Tap a contact’s name to display the person’s contact information on the pane at the right and then tap the website link in the Home Page field (see Figure 18-17). The Safari browser opens, with the web page displayed.
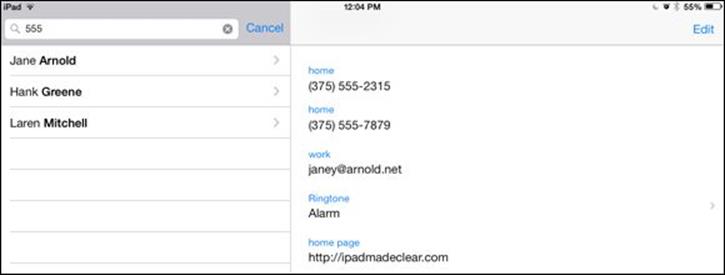
Figure 18-17
You can’t go directly back to Contacts after you follow a link to a website. You have to press the Home button and then tap the Contacts app icon again to re-enter the application, or use the multitasking feature by double-pressing the Home button and choosing Contacts from the icons that appear along the bottom of the screen. However, if you have Multitasking Gestures turned on in Settings in the General category, you can do the four-finger swipe to the right to return to the app you just left and keep swiping to go to other open apps.
Address Email Using Contacts
1. If you entered an email address for a contact, the address automatically becomes a link in the contact’s record. Tap the Contacts app icon on the Home screen to open Contacts.
2. Tap a contact’s name to display the person’s contact information on the pane at the right and then tap the email address link (labeled Work in the example shown in Figure 18-18). The New Message form appears, as shown in Figure 18-19. Initially, the title bar of this dialog reads New Message, but as you type a subject, New Message changes to the specific title.
3. Tap in a field and use the onscreen keyboard to enter a subject and message.
4. Tap the Send button. The message goes on its way!
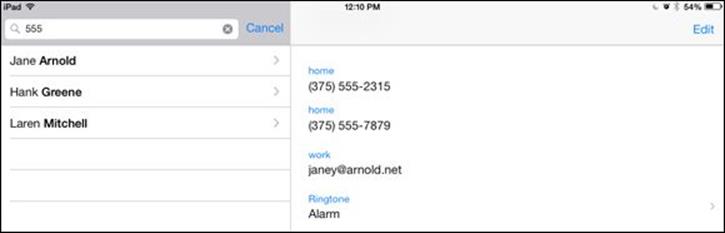
Figure 18-18
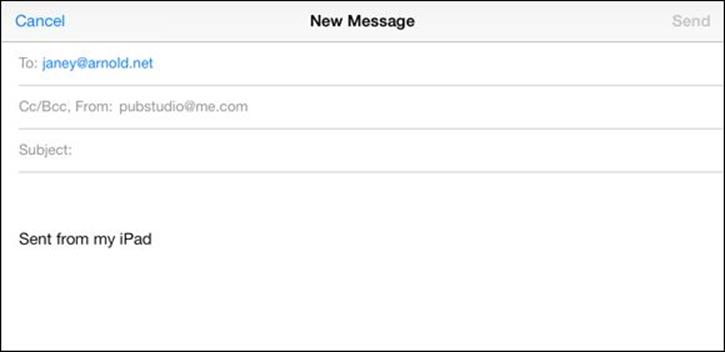
Figure 18-19
Share a Contact
1. After you’ve entered contact information, you can share it with others via an email message. With Contacts open, tap a contact name to display its information.
2. On the Info page, tap Share Contact (refer to Figure 18-4).
3. In the pop-up menu that appears, shown in Figure 18-20, tap Mail. The New Message form appears, as shown in Figure 18-21.
4. Use the onscreen keyboard to enter the recipient’s email address. Note: With the person saved in Contacts, you just have to type his name here.
5. Modify the information in the Subject field, if you like.
6. Enter a message and then tap the Send button. The message goes to your recipient with the contact information attached as a .vcf file. (This vCard format is commonly used to transmit contact information.)

Figure 18-20
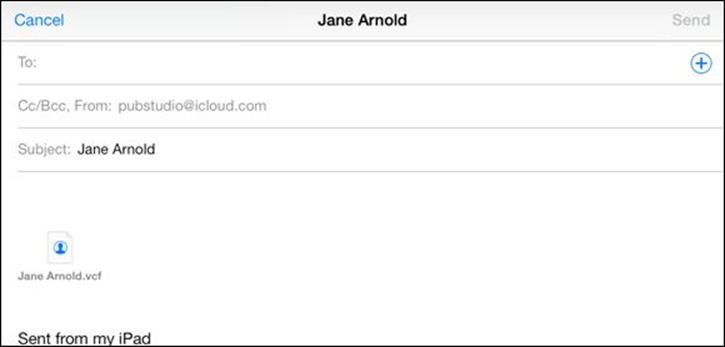
Figure 18-21
When somebody receives a vCard containing contact information, she needs only to click (or tap) the attached file to open it. At this point, depending on the recipient’s email or contact management program, she can perform various actions to save the content. Other Mac, iPhone, iPod touch, or iPad users can easily import .vcf records into their own Contacts apps. Even PC and Android users can do this if their contact management programs support .vcf records.
In Step 3, you can select AirDrop and then tap the name of a device near to you to send the contact information to that device wirelessly. This works with other recent iPads, iPhones (version 5 or later), and Macs that run OS X Yosemite or later.
View a Contact’s Location in Maps
1. If you’ve entered a person’s address in Contacts, you have a shortcut for viewing that person’s location in the Maps application. Tap the Contacts app icon on the Home screen to open it.
2. Tap the contact you want to view to display his information.
3. Tap the address. Maps opens and displays a map to the address (see Figure 18-22).
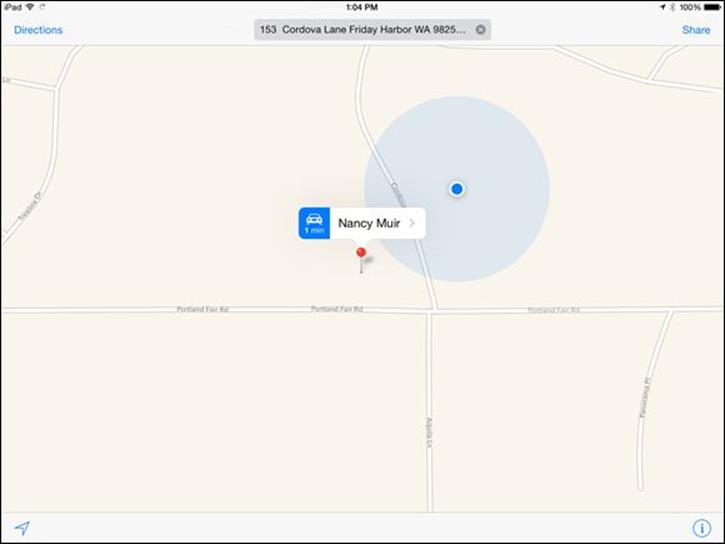
Figure 18-22
This task works with more than just your friends’ addresses. You can save information for your favorite restaurant, movie theater, or any other location and then use Contacts to jump to the associated website in the Safari browser or to the address in Maps. For more about using Safari, see Chapter 5. For more about the Maps application, see Chapter 15.
Delete a Contact
1. When you want to remove a name or two from your Contacts list, it’s easy to do. With Contacts open, tap the contact you want to delete.
2. Tap the Edit button in the top-right corner of the screen (refer to Figure 18-4).
3. On the screen that appears, drag your finger upward to scroll down and then tap the Delete Contact button at the bottom (see Figure 18-23). The confirming dialog shown in Figure 18-24 appears.
4. Tap the Delete Contact button to confirm the deletion.
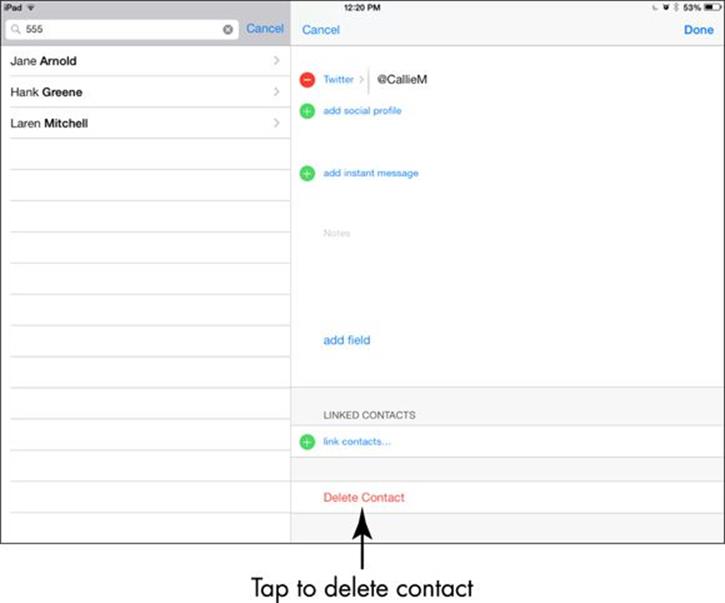
Figure 18-23
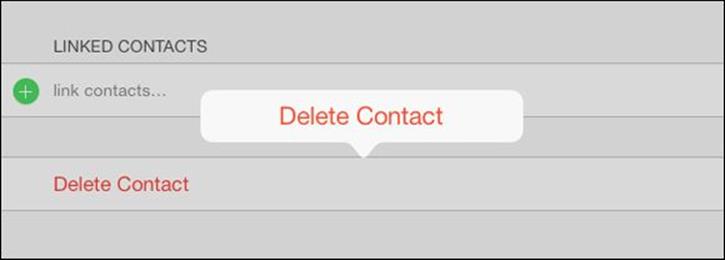
Figure 18-24
 During this process, if you change your mind before you tap Delete Contact, tap the Cancel button in Step 4. But be careful: After you tap Delete, there’s no going back!