Teach Yourself VISUALLY iPhoto for iPad (2013)
Chapter 9: Using Brush Effects
iPhoto’s brush effects provide a palette of powerful and subtle tools for fixing, improving, and transforming photos. You can use them to fix small blemishes and problems in photos; to subtly improve photos to add color, contrast, and impact; and to enhance the mood with soft focus and selective color effects. Brush effects are easy to understand, but you may need to practice with them to create the best possible results.
Understanding Brush Effects
Manage Brush Effects
Zoom for Fine Control
Repair a Photo
Remove Red Eye
Make Colors Pop
Remove Color Selectively
Add Emphasis and Lighten a Photo
Add Impact and Darken a Photo
Sharpen Parts of a Photo
Create Soft Dreamy Effects
Edit Matching Areas
Erase Brush Effects
Understanding Brush Effects
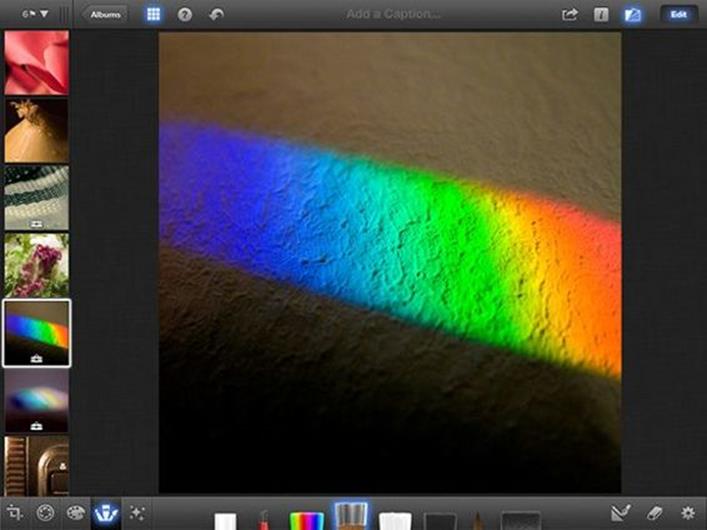
You can apply brush effects to parts of a photo by “painting” them with a finger. You can set the intensity of each effect to make it more or less obvious. You can also paint with an eraser to remove the strokes. Many effects support “layered” painting. The effects get stronger and more obvious the more times you brush an area.
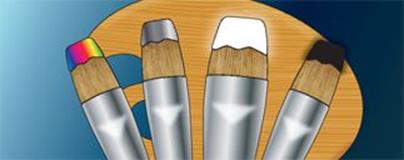
The effects appear as a set of animated brushes that fold out from the bottom of the screen. When you begin painting, the brush tips move to the bottom of the screen. Select a different effect by tapping a different brush.
Using Brush Effects
Brush effects are perfect for quick fixes and subtle creative enhancement. iPhoto’s other editing tools can fix obvious problems or apply a dramatic transformation. You can use the brush effects to create more subtle improvements. Because you may want to “paint” an entire image, you can also apply a brush effect to all of a photo with a single tap, and set the intensity of the effect with a slider. The brushes can be tricky to work with. When you “paint” with an effect it may take a few goes to create the effect you want, so do not be afraid to experiment and practice.
Understanding the Repair Brush
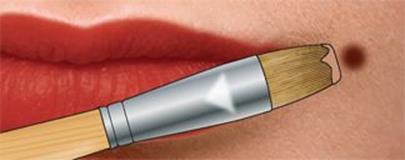
You can use the Repair brush to remove minor skin blemishes. The brush works by copying color and texture and softening detail. To use it, “paint” around the blemish you want to remove but avoid crossing important lines in the image. If you make the painted area too big, the brush creates a waxy and unnatural look.
Work with Color
The Saturate and Desaturate brushes are similar to the Color slider introduced in Chapter 8. You can use the Saturate brush to pop colors and make them stronger, and the Desaturate brush to make colors less intense. You can set the intensity of both effects with a hidden slider, and apply an all-over saturate or desaturate effect. Subtly increasing the saturation improves most photos and is particularly useful for portraits. Too much saturation looks garish and unnatural. You can use the Desaturate brush to create special effects, including selective color — where most of a photo is black-and-white, and only the subject is in color — and vintage or romantic looks with muted colors.

Lighten and Darken a Photo
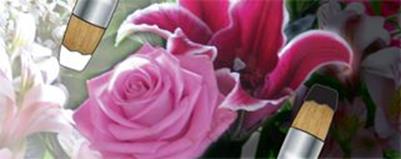
You can use the lighten and darken brushes to make parts of a photo lighter or darker. As with the Saturate and Desaturate brushes, you can control the intensity with a slider and apply the effect to the entire photo with a couple of taps. You can use both effects to “relight” a photo after you take it, making some areas brighter to emphasize them or darkening other areas to add impact or enhance the mood. These simple effects can create subtle and powerful results.
Undo, Erase, and Control Brush Effects
Hidden options give you more power. You can “paint” with the eraser to remove an effect from parts of a photo. You can use a “detect edges” feature to force an effect to work on areas with matching color and lighting. You can also apply an effect to a photo with a single tap, control the intensity of an effect, remove individual effects, and zoom into a photo to work on small areas with a finer brush. These options are easy to work with - after you know where to find them.

Create Artistic Effects
Because you have almost infinite control over the location and intensity of each brush stroke, you can use brush effects very creatively. Most photos look better with brighter colors and improved contrast, and the brushes are good for these simple improvements. You can also create effects that transform the impact of a photo. You can make a foreground subject stand out from the background, add a dreamy atmosphere, darken the mood, and so on. Chapter 11 has some examples. The possibilities are limited only by your imagination.
Manage Brush Effects
You can get better results if you explore important settings for each effect before you begin brushing. You can access the settings through a popover.
Tap the settings (gear) icon to display the popover. Different brushes have different options. You can erase the strokes for a single effect or for all effects, as described later in this chapter. Some brushes also give you an intensity slider, an option to view strokes, and a one-tap option to apply the effect to the entire image.
Manage Brush Effects
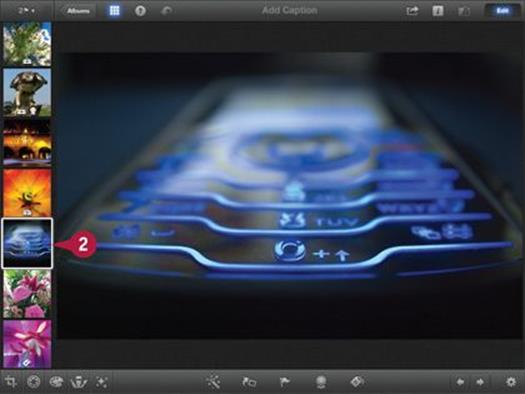
![]() Launch iPhoto.
Launch iPhoto.
![]() Tap a thumbnail to select a photo for editing.
Tap a thumbnail to select a photo for editing.
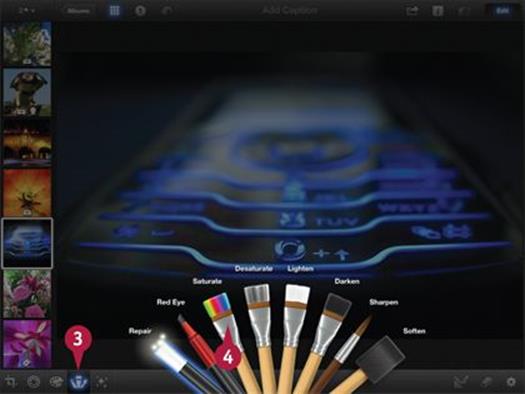
![]() Tap the Brush Effects icon (
Tap the Brush Effects icon (![]() ).
).
iPhoto displays a selection of brushes and dims the edit area.
![]() Tap a brush to select it.
Tap a brush to select it.
Note: This example uses the Saturate brush.
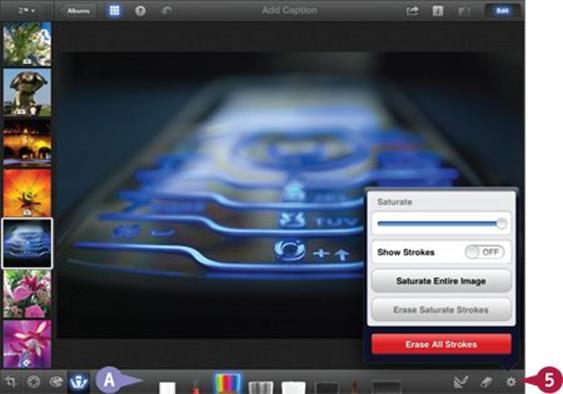
A iPhoto moves the brushes to the bottom of the screen, and highlights the brush you selected.
![]() Tap the settings (gear) icon (
Tap the settings (gear) icon (![]() ) to reveal the settings popover for the brush.
) to reveal the settings popover for the brush.
Note: All brushes have different settings.
Note: If you dragged the thumbnail grid to the other side of the screen as described in Chapter 4, the settings (gear) icon appears on the left instead of the right.
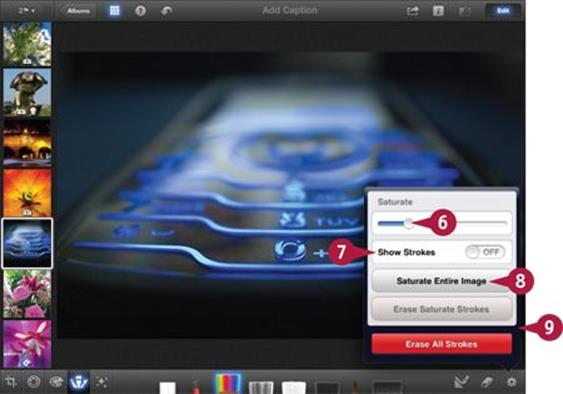
![]() Drag the strength slider (where available) to change how much each stroke modifies the image.
Drag the strength slider (where available) to change how much each stroke modifies the image.
![]() Tap Show Strokes to see which areas you have stroked with the brush.
Tap Show Strokes to see which areas you have stroked with the brush.
![]() Tap Entire Image to automatically apply strokes to the entire photo.
Tap Entire Image to automatically apply strokes to the entire photo.
![]() Tap Erase Strokes to remove the strokes for this brush, and Erase All Strokes to erase all effects for every brush.
Tap Erase Strokes to remove the strokes for this brush, and Erase All Strokes to erase all effects for every brush.
TIPS
What does Show Strokes do?
When you select Show Strokes and begin brushing, iPhoto displays your strokes in red. You can instantly see where you have applied an effect. You can use this feature to avoid blotches created by imprecise brushing.
Does the effect strength slider affect each stroke?
The slider sets the strength of all strokes. You cannot apply some strokes with one strength, move the slider, and apply more strokes with a different strength. However, most of the brushes support layering — brush an area three or four times, and the effect gets stronger with each stroke.
Zoom for Fine Control
In some editing packages you can set the size of a brush for coarser or finer effects. iPhoto does not have this feature, but you can paint with a “smaller” and more detailed brush by zooming into a photo. You can also pan around the photo to work with different areas.
To zoom, use the standard pinch-zoom gesture. To pan, drag the image with two fingers. (Dragging with one finger applies the brush, so you must use a different gesture for panning.)
Zoom for Fine Control
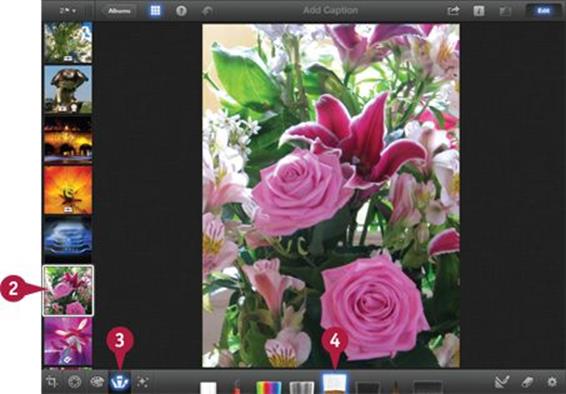
![]() Launch iPhoto.
Launch iPhoto.
![]() Tap a thumbnail to select a photo for editing.
Tap a thumbnail to select a photo for editing.
![]() Tap the Brush Effects icon (
Tap the Brush Effects icon (![]() ).
).
![]() Tap any brush to select it.
Tap any brush to select it.
Note: This example uses the lighten brush, but you can zoom and pan with any brush.
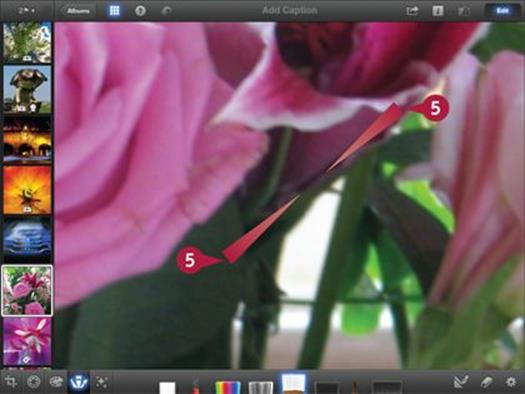
![]() Pinch out to zoom into the photo.
Pinch out to zoom into the photo.
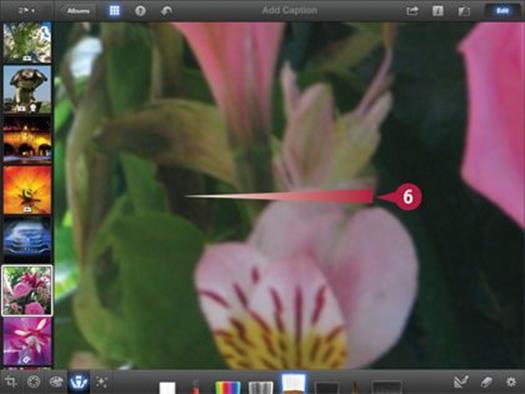
![]() Drag with two fingers to move the zoomed area.
Drag with two fingers to move the zoomed area.
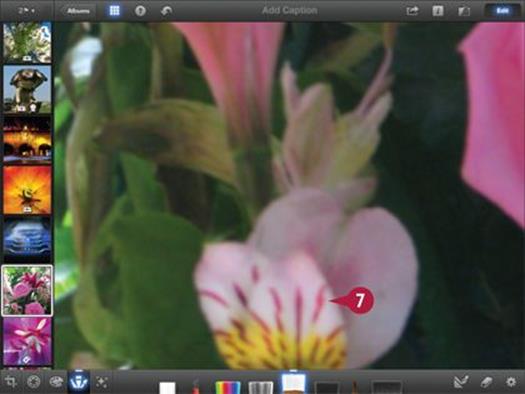
![]() Apply the brush to the zoomed photo.
Apply the brush to the zoomed photo.
Note: Because the photo is zoomed the effective brush area is smaller, giving you finer control and making it easier to keep the effect within a small area without blotching or smudging.
TIPS
Can I zoom out to simulate the effect of a bigger brush?
iPhoto always fits a photo to the size of the preview area. You cannot zoom out further to make the photo smaller and the brush bigger. So there is no way to paint with very large brushes.
What is the maximum zoom factor?
You can zoom most photos by a factor of 3 to 4. The maximum zoom depends on the size and the resolution of the original photo. This zoom factor gives you enough resolution for fine edits.
Repair a Photo
Photos — and subjects — often have blemishes. You can use the Repair brush to fix minor skin blemishes and improve the look of your photo.
The Repair brush can be tricky to work with. If you apply thick strokes at the standard resolution, the brush creates unattractive waxy blurs. For good results, zoom the photo first and work with the smallest possible strokes. Tap the undo icon to undo individual strokes if you make a mistake.
Repair a Photo
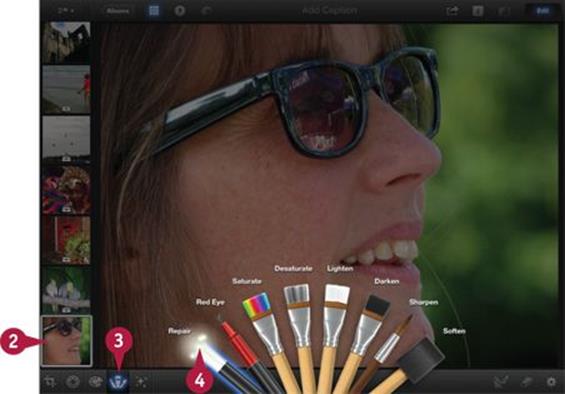
![]() Launch iPhoto.
Launch iPhoto.
![]() Tap a thumbnail to select a photo for editing.
Tap a thumbnail to select a photo for editing.
![]() Tap the Brush Effects icon (
Tap the Brush Effects icon (![]() ).
).
![]() Tap the Repair brush to select it.
Tap the Repair brush to select it.
Note: If you have already applied the Crop, Exposure, Color, or Effects tools, iPhoto “peels back” the photo to reveal a fresh view.
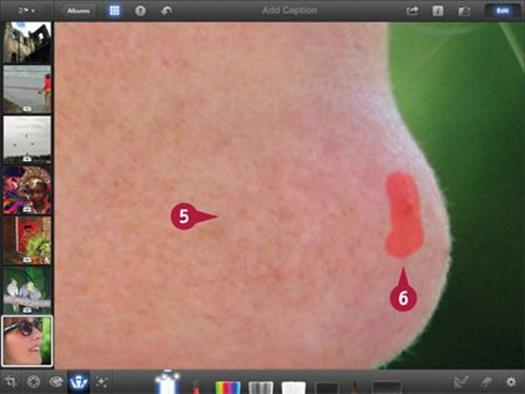
![]() Pinch-zoom and drag to select the area of the photo you want to improve.
Pinch-zoom and drag to select the area of the photo you want to improve.
Note: For good results, always zoom in.
![]() Carefully apply the brush to part of the portrait.
Carefully apply the brush to part of the portrait.
Note: The red brush stroke fades almost immediately and iPhoto shows the repaired area under it.
Note: Try to use small strokes or dots on areas with similar lighting. Do not stroke across shadows or highlights. Try to follow the natural contours of the face.
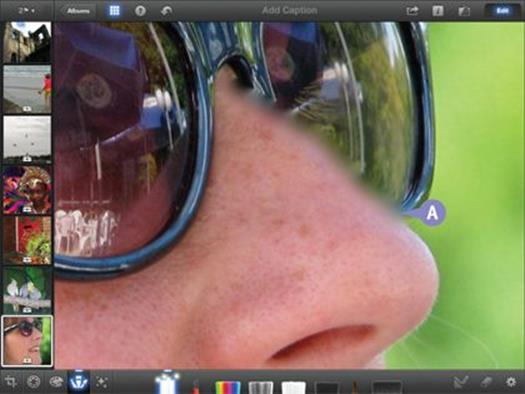
A Do not stroke across lines, details, or edges, because the repair brush smudges them.
Note: If you make a mistake, tap the undo icon (![]() ).
).
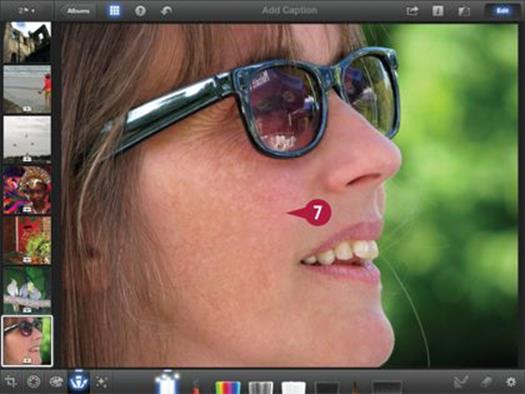
![]() Zoom out when done to check your changes.
Zoom out when done to check your changes.
Note: This example shows repairs to the, nose, cheeks, and chin.
Note: The finished repair should be realistic without waxy smoothness or blurred details. Keep some imperfections for a more natural look.
Note: This example deliberately over-repairs the nose to show how too much retouching can look unrealistic.
TIPS
What does the repair brush do?
The brush paints detail from the surrounding photo into each stroke. The detail is softened and blurred, making the result smoother. If you paint with very coarse strokes, you can clearly see the blurring effect.
How can I get good results with this brush?
Try to paint along lines and areas with similar lighting, creating a result that keeps the light and shade of the original. Do not brush across details. Human eyes are very sensitive to the structure and lighting of faces. If you change the look too much you can distort the original, making it unnatural and unbelievable.
Remove Red Eye
Red eye is a striking and unwelcome effect that can appear in photos taken with a budget camera. As the name suggests, subjects appear to have sinister red eyes. Cameras produce it when an on-camera flash unit is too close to the lens and reflects light from inside the eye.
You can try to remove red eye with the Red Eye brush, but sometimes it does not work very well. To use it, simply tap each pupil. If your photo has enough resolution, you can also try to remove red eye with the Desaturate brush.
Remove Red Eye
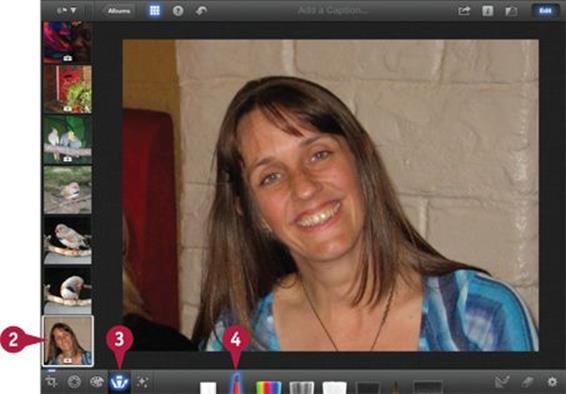
![]() Launch iPhoto.
Launch iPhoto.
![]() Tap a thumbnail with red eye to select it for correction.
Tap a thumbnail with red eye to select it for correction.
![]() Tap the Brush Effects icon (
Tap the Brush Effects icon (![]() ).
).
![]() Tap the Red Eye brush to select it.
Tap the Red Eye brush to select it.
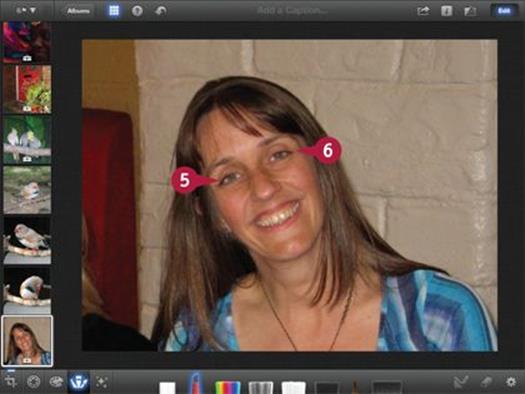
![]() Tap the pupil of one eye to apply the brush.
Tap the pupil of one eye to apply the brush.
Note: The brush displays a brief expanding circle animation if you tap the pupil correctly. If you miss the pupil it displays a circle and shakes it from side to side.
![]() Repeat for the pupil of the other eye.
Repeat for the pupil of the other eye.
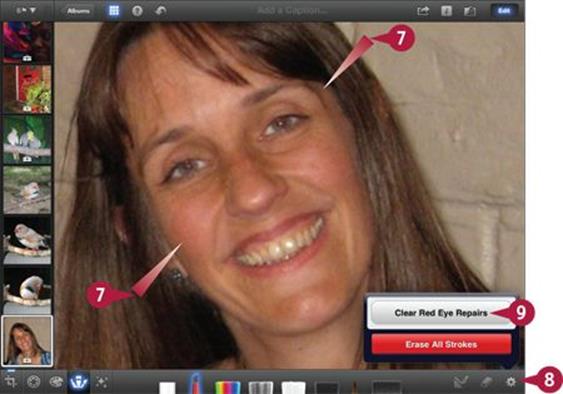
![]() Pinch-zoom to the biggest possible size to check the results.
Pinch-zoom to the biggest possible size to check the results.
Note: The brush inserts a dark circle over the pupil, but often misses some areas and removes the highlights from the eyes.
![]() If you do not like the result, tap the settings (gear) icon (
If you do not like the result, tap the settings (gear) icon (![]() ).
).
![]() Tap Clear Red Eye Repairs.
Tap Clear Red Eye Repairs.
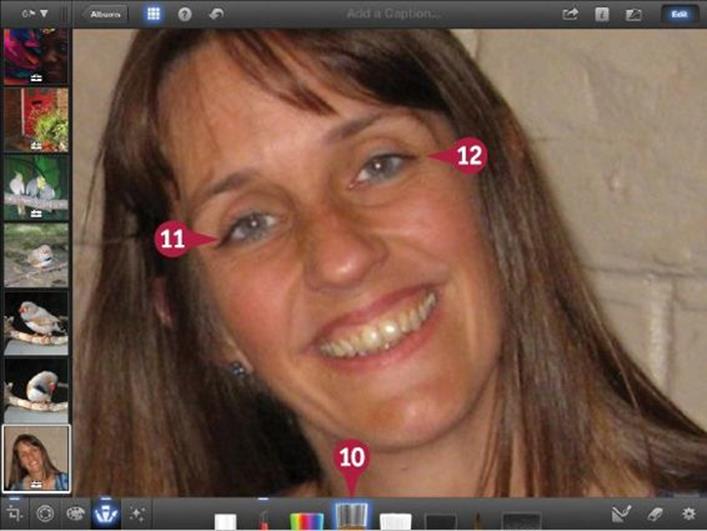
![]() Tap the Desaturate brush to select it.
Tap the Desaturate brush to select it.
![]() Very carefully tap and drag slightly over the pupil of one eye.
Very carefully tap and drag slightly over the pupil of one eye.
![]() Repeat for the other eye.
Repeat for the other eye.
Note: If you make a mistake, tap the undo icon (![]() ).
).
Note: Often, as in this example, the brush is too big for the pupil. This technique may remove some of the color from the iris and the rest of the eye.
TIPS
How can I get more accurate results?
Sometimes you can get cleaner edges around the pupil if you turn on the Detect Edges feature which is described toward the end of this chapter in the section “Edit Matching Areas.” But unfortunately fixing red eye is difficult, and it may not be possible to get a perfect result.
How can I avoid red eye when taking a photo?
Some cameras trigger the flash twice to narrow the pupils of your subjects’ eyes and make red eye unlikely. If you have a separate handheld flash, try moving it away from the camera lens. You can also try bouncing light off the ceiling. A few smaller cameras work well if you hold your finger close to the flash when it fires, diffusing the light.
Make Colors Pop
You can use the Saturate brush to make colors pop in your photo. The brush has the same effect as the saturation slider in the color editor, but you can “paint” the effect into a photo for extra control. Many photos look good with some subtle extra saturation, especially portraits and landscapes.
Because you can saturate some areas while leaving others unchanged, you can use this brush to add saturation and avoid the artifacts that can appear if you saturate an entire photo. You can use this effect to highlight some parts of a photo, making the entire image more appealing.
Make Colors Pop
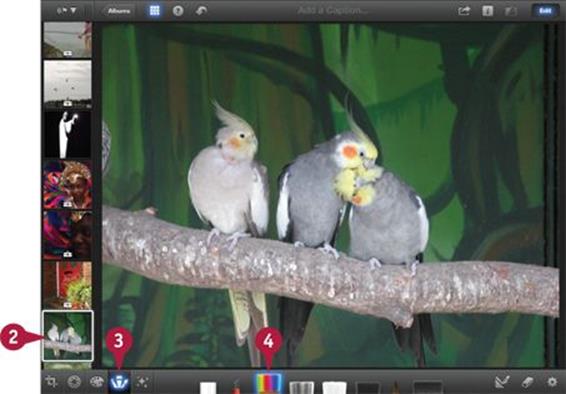
![]() Launch iPhoto.
Launch iPhoto.
![]() Tap a thumbnail to select a photo for editing.
Tap a thumbnail to select a photo for editing.
![]() Tap the Brush Effects icon (
Tap the Brush Effects icon (![]() ).
).
![]() Tap the Saturate brush to select it.
Tap the Saturate brush to select it.
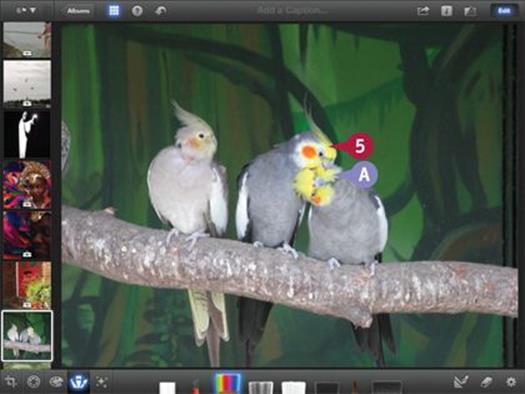
![]() Brush over an area or feature to highlight it.
Brush over an area or feature to highlight it.
A iPhoto increases the color intensity, drawing attention to the area.
Note: The effect can be subtle. Tap the settings (gear) icon (![]() ) and use the strength slider to make it more or less obvious.
) and use the strength slider to make it more or less obvious.
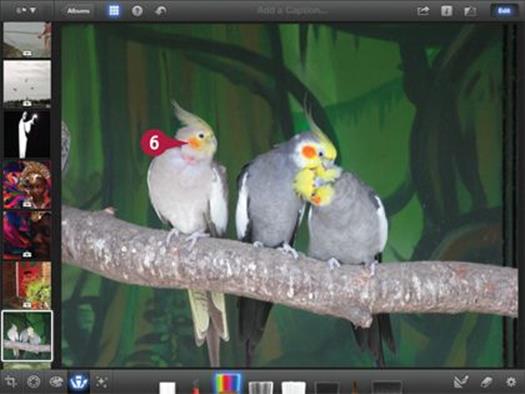
![]() Brush further areas to make them more prominent and to highlight other parts of the photo.
Brush further areas to make them more prominent and to highlight other parts of the photo.
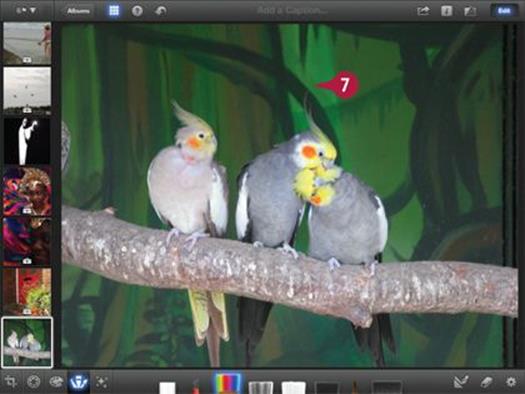
![]() For a more complex effect, brush along lines or edges to lead viewers to the features you want to emphasize.
For a more complex effect, brush along lines or edges to lead viewers to the features you want to emphasize.
Note: This example is slightly exaggerated to demonstrate the effect.
TIPS
When would I paint saturation into a photo?
Faces in portraits often look better with slightly enhanced color, but be careful not to overdo the effect and make your subjects bright orange instead of a healthy warm pink. Generally, you can draw attention to parts of a photo by making the colors stronger. Often this means popping the foreground, but you can try different possibilities to see which works best.
How can I get finer control?
If your fingers are wide you can pinch-zoom to expand the photo for finer control. You can also paint more finely with an optional iPad stylus, available at affordable prices (less than $10) from many online stores. The stylus tip is thinner than a finger and gives you very accurate control.
Remove Color Selectively
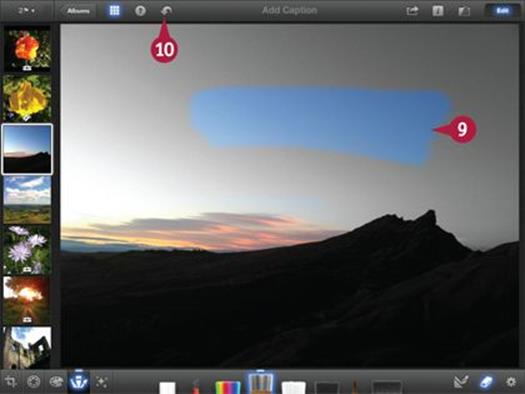
You can use the desaturate brush to tone down the colors in parts of a photo. Desaturation is more of a creative effect than saturation. You can use it to highlight a subject by removing some of the color from the background, or to add atmosphere by fading colors deliberately.
This example removes one color from a photo. For a more striking and complex effect, you can use the same tool to remove all colors except those in or around your subject.
Remove Color Selectively
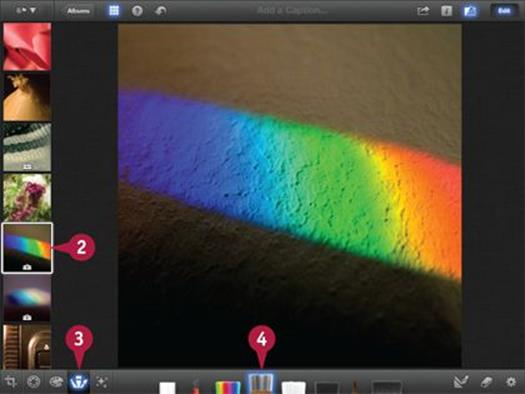
![]() Launch iPhoto.
Launch iPhoto.
![]() Tap a thumbnail to select a photo for editing.
Tap a thumbnail to select a photo for editing.
![]() Tap the Brush Effects icon (
Tap the Brush Effects icon (![]() ).
).
![]() Tap the Desaturate brush to select it.
Tap the Desaturate brush to select it.
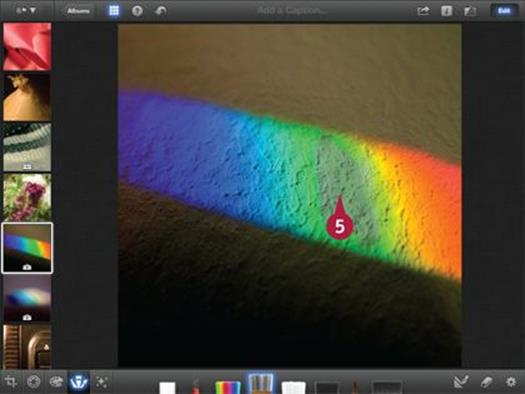
![]() Stroke with the brush to remove color from an area.
Stroke with the brush to remove color from an area.
Note: Optionally, you can tap the settings (gear) icon (![]() ) to show the effect settings and use the strength slider to make the effect stronger or weaker.
) to show the effect settings and use the strength slider to make the effect stronger or weaker.
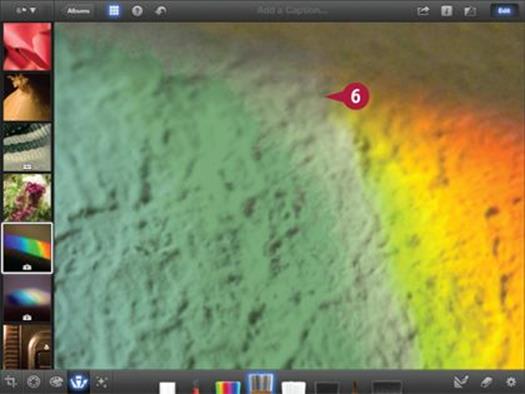
![]() Pinch-zoom and drag to apply a smaller brush to important edges in the photo.
Pinch-zoom and drag to apply a smaller brush to important edges in the photo.
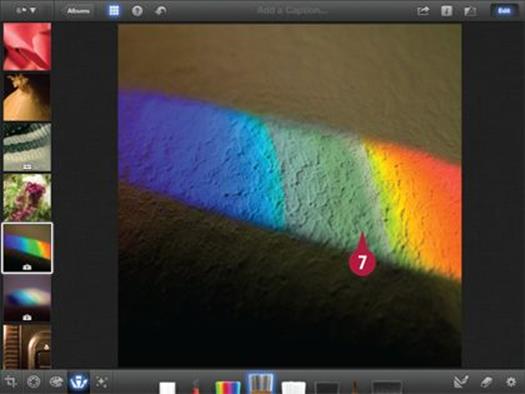
![]() Zoom out again to check your work.
Zoom out again to check your work.
Note: This example is a demonstration. For a more typical application use the effect to remove color on or around a model.
Note: As this example shows, unfortunately the effect may not be strong enough to remove all color.
TIPS
Why would I deliberately remove color?
Chapter 11 has some examples of creative editing. Color removal can create some very striking effects, but you can also use it for more natural results. Weaker colors can suggest a gentler mood, especially when combined with effects like vignetting, which is also described in Chapter 11.
How can I select areas more precisely?
The Edit Matching Areas option described later in this chapter works well with the saturation and desaturation tools. It remembers the first color you tap and works on areas with a similar color. For example, if you tap the sky and drag your finger down onto a landscape, the brush stops working outside the blue areas. This makes color selection very easy.
Add Emphasis and Lighten a Photo
You can use the lighten brush to make parts of your photo lighter. Creatively, you can “relight” your photo after you take it to bring out areas in shadow. You can also use the brush correctively to improve the exposure of a photo, but use the exposure editor introduced in Chapter 8 first because it creates a more obvious result.
The lighten effect is too subtle for dramatic corrections, but you can use it to emphasize parts of a photo by making them slightly brighter. This catches the viewer’s eye even when the edit is too subtle to be obvious.
Add Emphasis and Lighten a Photo
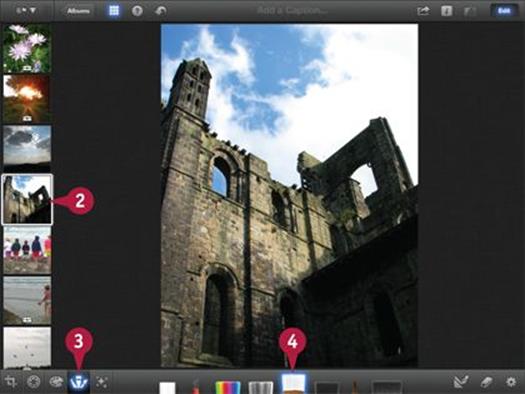
![]() Launch iPhoto.
Launch iPhoto.
![]() Tap a thumbnail to select a photo for editing.
Tap a thumbnail to select a photo for editing.
![]() Tap the Brush Effects icon (
Tap the Brush Effects icon (![]() ).
).
![]() Tap the Lighten brush to select it.
Tap the Lighten brush to select it.
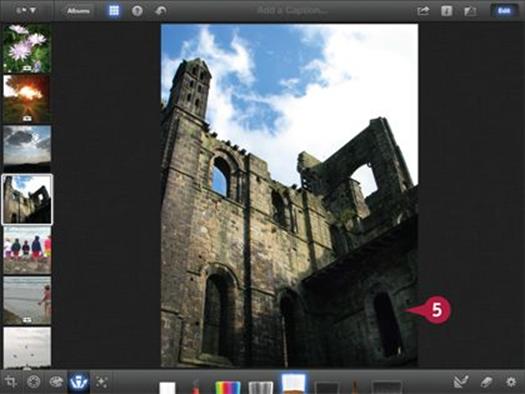
![]() To create a highlight effect, brush around an area or feature.
To create a highlight effect, brush around an area or feature.
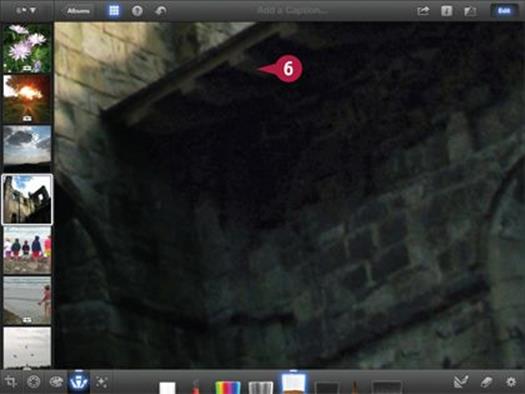
![]() For more complex effects, zoom and pan to “relight” a feature or area, carefully keeping the effect inside the lines that define it.
For more complex effects, zoom and pan to “relight” a feature or area, carefully keeping the effect inside the lines that define it.
Note: This example lightens the area under the overhang.
Note: Because the area is very dark, the result is slightly blotchy. The lighten effect can only lift the brightness of areas that have good detail in the shadows.
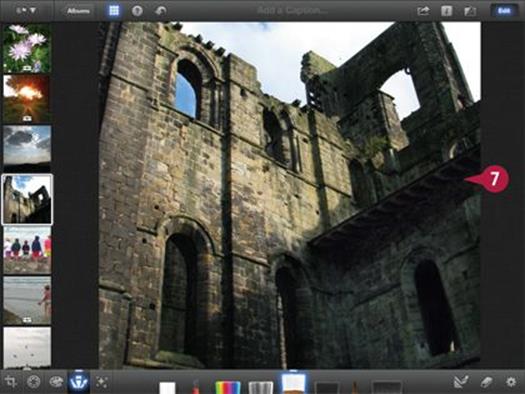
![]() Zoom out to check your work.
Zoom out to check your work.
Note: This example brightens the area under the overhang, and also the corner and window to the left, bringing out some of the details lost in shadow in the original.
TIPS
Can I relight very dark areas?
The lighten brush has a limited range. You can use it to throw some virtual light on darker parts of a photo, but you cannot relight areas that are so dark they have no detail.
What can I do with this effect?
Newspaper and advertising photos often use a version of this effect to add a halo around a portrait or part of a landscape. If you brush around an object, it appears to pop out of the photo. The effect works particularly well against a dark sky.
Add Impact and Darken a Photo
You can use the darken brush to darken parts of your photo and place it into virtual shadow. Like the lighten brush, the effect is subtle. But if you apply the brush to a photo and then compare it with an unedited version, you can see that it can make a big difference to the mood of the photo.
You can use the brush to add extra contrast and “bite” to areas as well as darken them. Use it when a photo is slightly overlit and you want to give it more weight, depth, and impact.
Add Impact and Darken a Photo
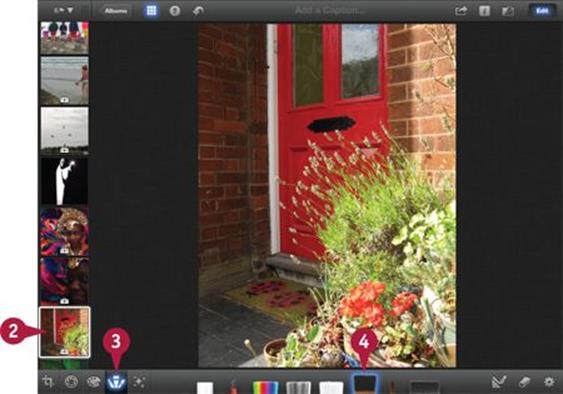
![]() Launch iPhoto.
Launch iPhoto.
![]() Tap a thumbnail to select a photo for editing.
Tap a thumbnail to select a photo for editing.
![]() Tap the Brush Effects icon (
Tap the Brush Effects icon (![]() ).
).
![]() Tap the Darken brush to select it.
Tap the Darken brush to select it.
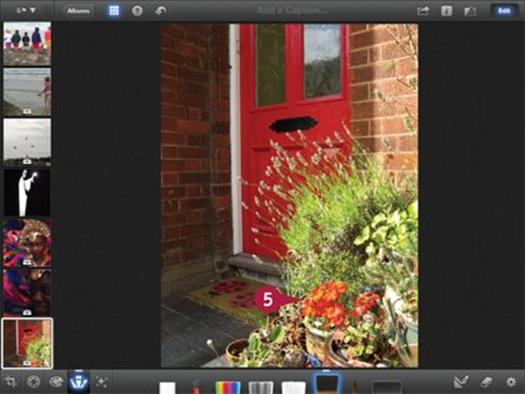
![]() Brush an area to darken it.
Brush an area to darken it.
Note: The flowers and plants in this example are slightly overexposed. Darkening them adds contrast and subtly enhances their impact.
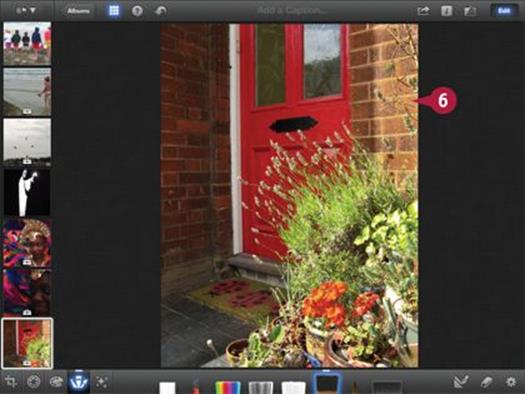
![]() Darken a wider area to enhance the effect.
Darken a wider area to enhance the effect.
Note: In this example, darkening the wall and the flowers gives weight and impact to the right-hand side of the photo and balances the shadows around the door.
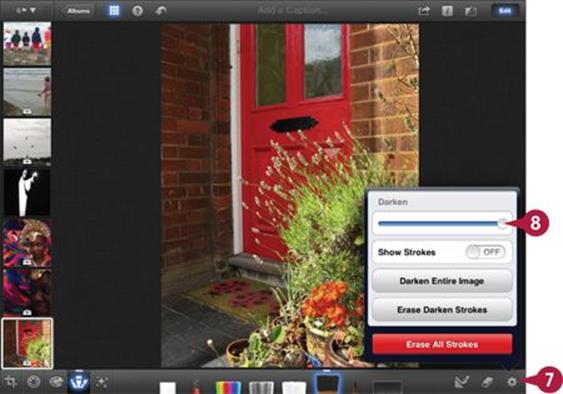
![]() Tap the settings (gear) icon (
Tap the settings (gear) icon (![]() ) to display the effect settings.
) to display the effect settings.
![]() The default slider setting is around 75%. Drag it to the right to make the effect stronger.
The default slider setting is around 75%. Drag it to the right to make the effect stronger.
Note: The slider resets itself to 75% every time you use this brush.
TIPS
When would I darken a photo?
Photographers often darken and lighten areas deliberately to enhance the impact of a photo. You can darken the area around a portrait to make the subject stand out more. This effect also works well if you darken an entire photo and use the erase brush to remove the darken effect from the point of interest.
How can I make the effect darker still?
Applying the effect to an entire photo usually makes it dark enough. If you want to create an even darker result, you can save a version of the photo to the camera roll, reload it, and continue brushing. For details see Chapter 11.
Sharpen Parts of a Photo
You can use the sharpen brush to add sharpness selectively. Sharpening a photo is another way to make an area stand out. You can also combine the effect with the soften brush for a more powerful and striking result.
The sharpen brush is subtle and the effect can be difficult to see. For good results use it on areas with plenty of fine detail, such as hair. The effect makes lines and edges stand out, but it needs clean and sharp edges to work with.
Sharpen Parts of a Photo
![]() Launch iPhoto.
Launch iPhoto.
![]() Tap a thumbnail to select a photo for editing.
Tap a thumbnail to select a photo for editing.
![]() Tap the Brush Effects icon (
Tap the Brush Effects icon (![]() ).
).
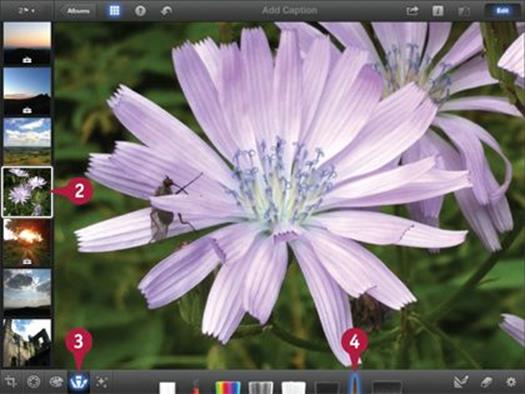
![]() Tap the Sharpen brush to select it.
Tap the Sharpen brush to select it.
Note: This example demonstrates the effect on a zoomed photo to emphasize it.
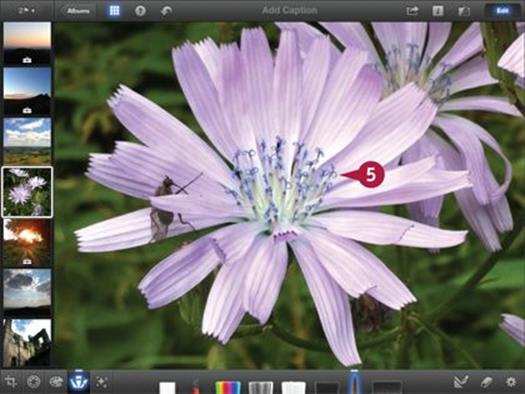
![]() Brush an area to sharpen it and highlight the details.
Brush an area to sharpen it and highlight the details.
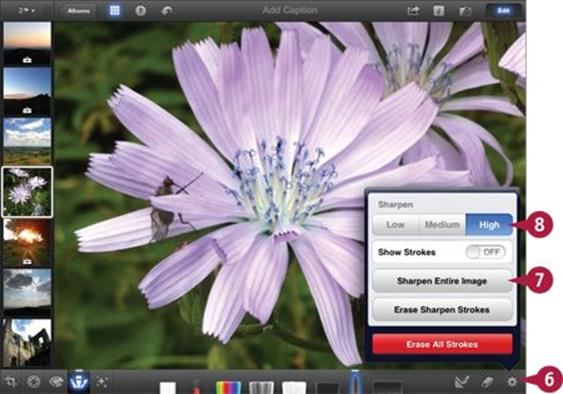
![]() Tap the settings (gear) icon (
Tap the settings (gear) icon (![]() ) to show the settings popover.
) to show the settings popover.
![]() Tap Sharpen Entire Image to apply the effect to the entire photo.
Tap Sharpen Entire Image to apply the effect to the entire photo.
![]() Tap the strength buttons to select the intensity of the effect.
Tap the strength buttons to select the intensity of the effect.
Note: Unlike the other effects, sharpen can look good applied to a whole photo, but it can also enhance noise and grain.
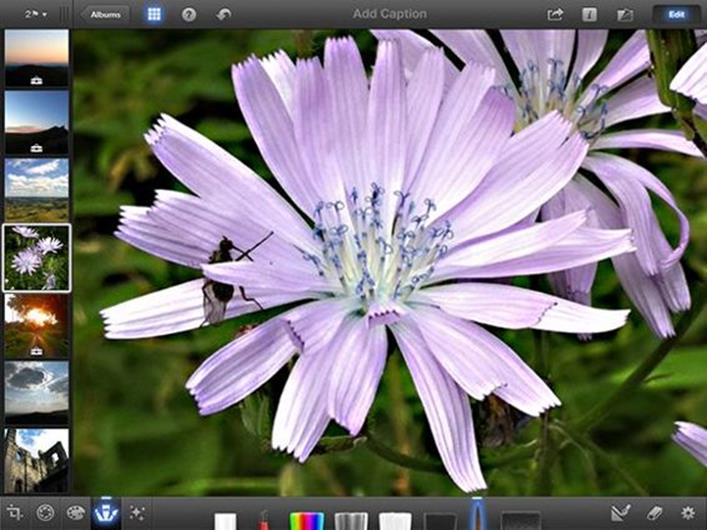
iPhoto sharpens the entire image, highlighting all the details.
Note: Sharpening the entire image always creates a more intense effect than applying the sharpen brush.
TIPS
Why does this effect do nothing?
To highlight the effect, tap the original/edited button and compare your changes with the original photo. You should see that the painted areas are clearer and sharper. If not, try a different photo with cleaner edges. At extreme settings you may see a subtle bright halo around objects, especially against a plain background.
Can I correct a blurred photo?
You cannot fix a badly blurred photo. The sharpen effect needs edges to work with, and a badly blurred photo does not have them. The blur is “burned into” the photo, and no tool or effect can remove it. However, you can improve the impact of a slightly soft photo by giving it more bite and clarity.
Create Soft Dreamy Effects
You can use the soften brush to deliberately blur your photo. You can often improve a portrait by blurring the area around it. Features such as hair and clothes can also look good if you soften them.
This brush supports layering. Areas become softer as you brush them over and over. You can typically brush four or five times before the effect reaches a maximum. You can use this feature to create soft-focus areas, or to improve the skin on a portrait without making it look waxy and unrealistic.
Create Soft Dreamy Effects
![]() Launch iPhoto.
Launch iPhoto.
![]() Tap a thumbnail to select a photo for editing.
Tap a thumbnail to select a photo for editing.
![]() Tap the Brush Effects icon (
Tap the Brush Effects icon (![]() ).
).
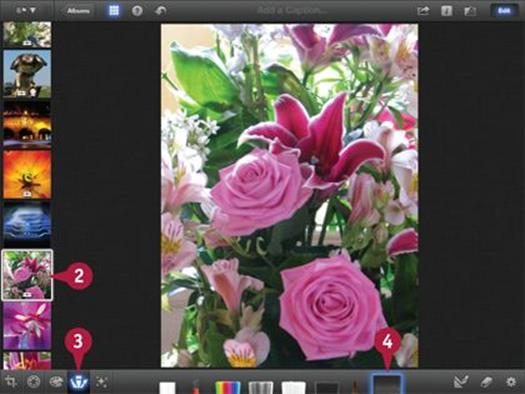
![]() Tap the Soften brush to select it.
Tap the Soften brush to select it.
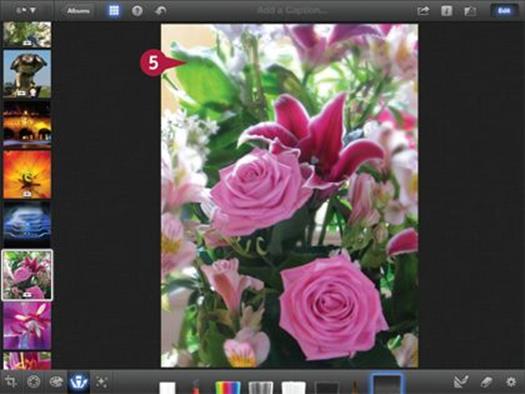
![]() Brushing around the edges of a photo often creates a good look.
Brushing around the edges of a photo often creates a good look.
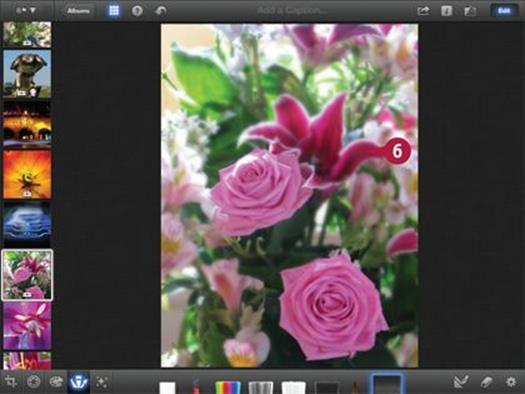
![]() For a more extreme effect, brush everywhere except for the areas you want to highlight.
For a more extreme effect, brush everywhere except for the areas you want to highlight.
Note: This example brushes around and between the roses, making them stand out.
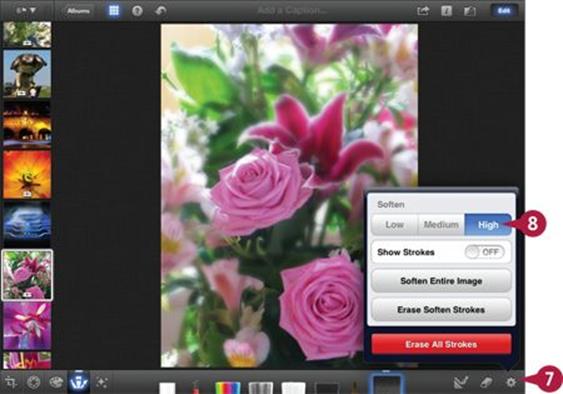
![]() Tap the settings (gear) icon (
Tap the settings (gear) icon (![]() ) to show the settings popover.
) to show the settings popover.
![]() Tap the strength buttons to vary the intensity of the effect.
Tap the strength buttons to vary the intensity of the effect.
Note: The Soften Entire Image option does not look good, even at the weakest setting.
TIPS
Why is the Soften Entire Image effect so strong?
Softening the entire image is like applying multiple strokes to all of it. This option works well on some of the brushes, but the softening effect is too strong to be useful on most photos — it simply blurs the entire image.
Is this effect similar to soft focus?
Photographers create soft-focus effects by shooting through layers of crinkled plastic wrap or smearing transparent gel on glass in front of the lens. The soften brush can create similar results, but you must apply it selectively to create a convincing result.
Edit Matching Areas
The Edit Matching Areas option works like an assistant that remembers the color and texture of the area you first tap. If you drag your finger onto some other color, the assistant disables the current brush.
You can use this feature to trap an effect inside an area. If your fingers are wide, it can be difficult to avoid painting over boundaries, creating smeared results. The Matching Areas option helps keep your edits clean and precise.
Edit Matching Areas
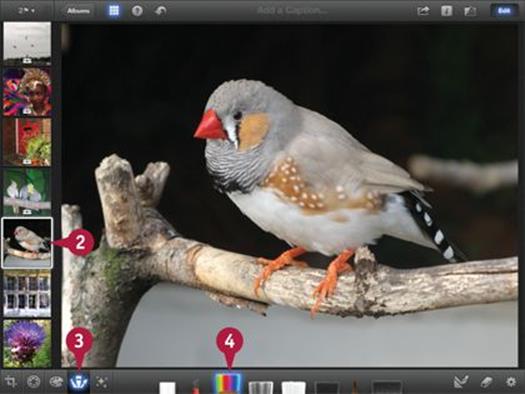
![]() Launch iPhoto.
Launch iPhoto.
![]() Tap a thumbnail to select a photo for editing.
Tap a thumbnail to select a photo for editing.
![]() Tap the Brush Effects icon (
Tap the Brush Effects icon (![]() ).
).
![]() Tap any brush to select it.
Tap any brush to select it.
Note: This example uses the Saturate brush, but the effect works with any brush you select.
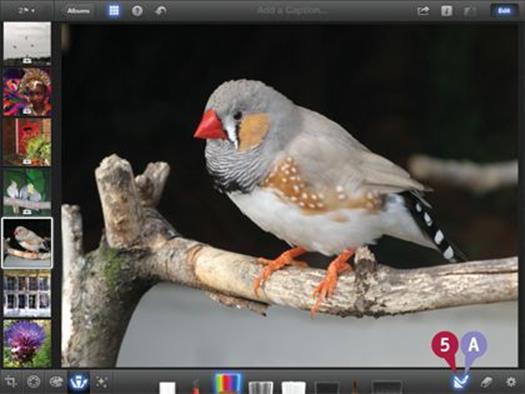
![]() Tap the Detect Edges icon (
Tap the Detect Edges icon (![]() ).
).
A iPhoto highlights the icon.
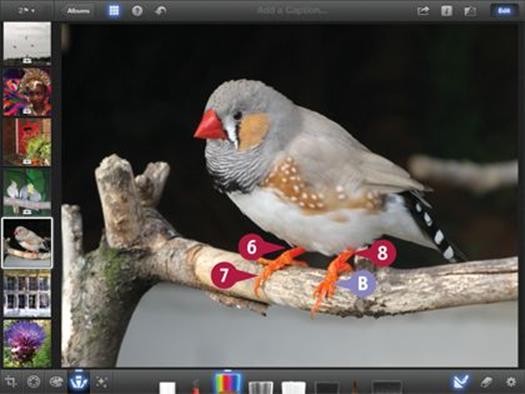
![]() Tap on or inside an area with a distinct color.
Tap on or inside an area with a distinct color.
![]() Without lifting your finger, brush around the area.
Without lifting your finger, brush around the area.
![]() Repeat for similar areas in the photo.
Repeat for similar areas in the photo.
B iPhoto “traps” the brush effect inside an area with a color that matches your tap.
Note: Colored areas often have bright edges and the effect does not detect them accurately, so the “trapped” area may be slightly too small.
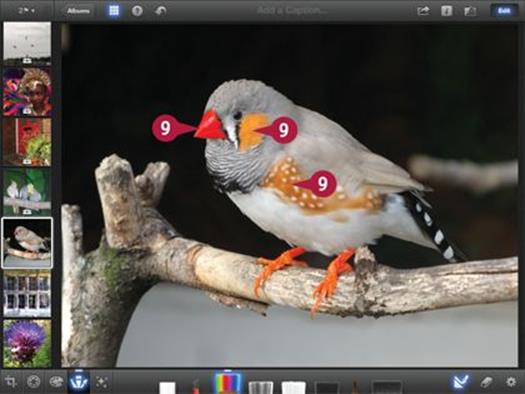
![]() Repeat for other areas you want to edit.
Repeat for other areas you want to edit.
Note: You can tap any other brushes to select them and they will all “trap” an effect in the same way.
TIPS
When would I use this feature?
The best way to explore this feature is to experiment with it. It can be quirky and unpredictable, and it can also work very well indeed. Try it whenever you want to apply any brush effect to a limited area. It may or may not do what you need. When it does, it can save you a lot of time.
Why is it not working?
This option works well on areas with clean and distinct colors and sharp edges. More complex textures and edges with distinct colors can confuse it. For more accurate control over edges, zoom into your photo and paint around the difficult edges by hand. You can then zoom out and apply a wider brush to the areas in between.
Erase Brush Effects
The brush effects give the best results with practice, persistence, and skill. Fortunately, you can undo and redo changes until you create the result you want by tapping the undo icon. You can also remove all the strokes for a single effect or for all effects, as described in the section “Manage Brush Effects.”
But you may also want to correct brush strokes by hand. You can use the Undo brush to remove some or all of a brush effect. It cancels the effect of an existing stroke. You can “paint” it on your photo until you create the result you want.
Erase Brush Effects
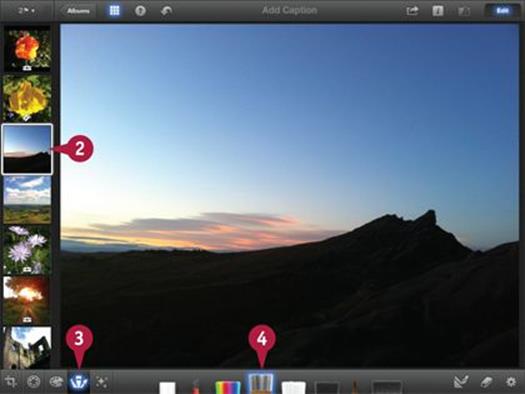
![]() Launch iPhoto.
Launch iPhoto.
![]() Tap a thumbnail to select a photo for editing.
Tap a thumbnail to select a photo for editing.
![]() Tap the Brush Effects icon (
Tap the Brush Effects icon (![]() ).
).
![]() Tap the Soften brush to select it.
Tap the Soften brush to select it.
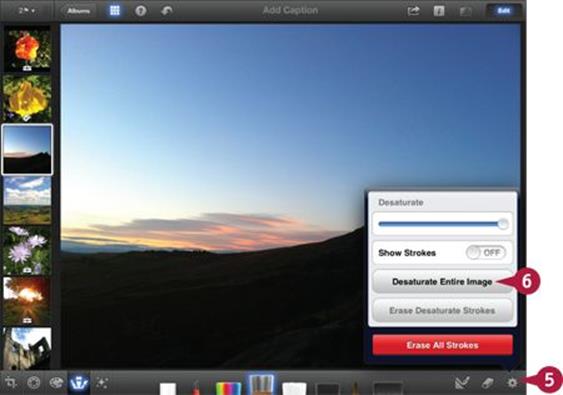
![]() Tap the settings (gear) icon (
Tap the settings (gear) icon (![]() ) to show the effect settings popover.
) to show the effect settings popover.
![]() Tap Desaturate Entire Image.
Tap Desaturate Entire Image.
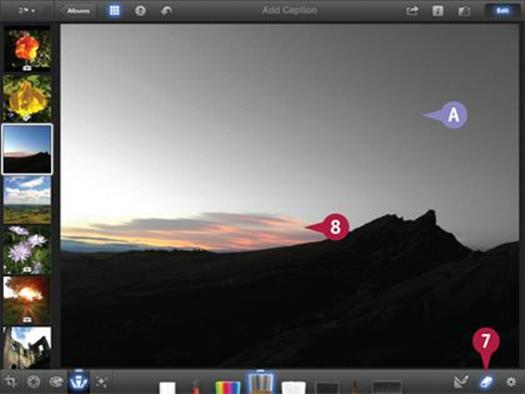
A iPhoto removes the colors from the image.
![]() Tap the Undo brush icon (
Tap the Undo brush icon (![]() ).
).
![]() Brush an area to remove the effect.
Brush an area to remove the effect.
Note: In this example, brushing restores color to a selected part of the sky.
![]() Brush a different area “by accident.”
Brush a different area “by accident.”
![]() Tap the undo icon (
Tap the undo icon (![]() ).
).
iPhoto undoes the effect of the Undo brush and restores the original effect.
Note: Use this option if you make a mistake with the Undo brush (![]() ).
).
TIPS
Is the Undo brush a corrective or creative tool?
You can use it either way — there are many applications. One option is to zoom into a photo and make very small corrections around lines and edges. But you can also use it creatively, as demonstrated in this section.
Does the Undo brush have an intensity setting?
No, nor does it support layering. If you brush over an existing effect, it completely removes that effect. You cannot use it to tone down an effect or to make it less intense.
All materials on the site are licensed Creative Commons Attribution-Sharealike 3.0 Unported CC BY-SA 3.0 & GNU Free Documentation License (GFDL)
If you are the copyright holder of any material contained on our site and intend to remove it, please contact our site administrator for approval.
© 2016-2025 All site design rights belong to S.Y.A.