Practical Auto Layout: Beginning Auto Layout Techniques for iOS8 (2015)
Chapter 11. Working with Images in Auto Layout
We've worked a lot with solid colors. Many apps use images, not solids. Photos and illustrations give apps a polish that is often impossible with more simple colors. Images present new problems. While scaling a solid rectangle is easy, scaling a picture distorts it if you are not careful. In this chapter we'll look at how to work with images on the storyboard and auto layout. We'll also work with the lauchscreen.xib, an iOS8 improvement which efficiently lays out introductory screens for your app.
Make a New Project
Making a new project called SwiftAspectRatio using Swift as the language and setting the device to Universal. When loaded, make sure all orientations are checked on. Usually you will have to check on Upside Down:

The Assets Folder
Xcode contains a useful tool for managing image assets. In the file navigator, you will find the Images.xcassets folder. Open it and select the icon group. This is where you store all the app icon images for all devices. Notice the captions below the blank squares. Wore than place to store pictures, the assets folder intelligently uses the right picture. If a device is a standard resolution it will use a standard resolution image. If retina, it will use a retina image. In the case of the icon you can even specify size classes if you wish.
There are naming and type conventions for your files. You need to use either .jpg or .png images, preferably .png. Your low resolution image will be the name of the image. For example you might have a image of a skyline named skyline.png or skyline.jpg. A retina image would have a suffix@2x. Our skyline image would have a filename skyline@2x.png or skyline@2x.jpg.
For this lesson, we'll need some photos added to the assets folder. Go to the book downloads site at http://makeapppie.com/palbook/ to download these images.

Click the images.xcassets folder in Xcode. From where you downloaded the two photos in Finder, drag the photos to the assets.

Making a Launch Screen
One of the cool and underused features of Xcode 6 is the lauchscreen.xib which makes a launch screen with auto layout. We'll use this to explore backgrounds while making an adaptable launch screen for any device. Click on the launchScreen.Xib.
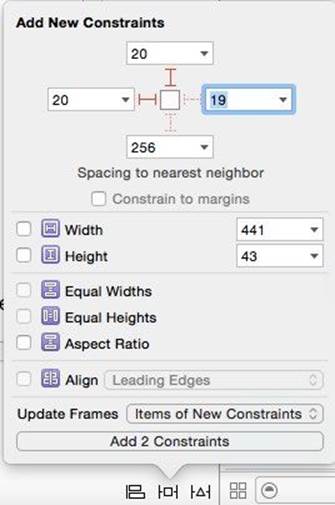
Click on the Large Label SwiftAspectRatioLayout. In the resolver, clear the constraints for this label. Using the pin menu, set the label 20 points up and 20 points left. Select from Update frames to Items of New Constraints. Add the two constraints.
Change the object library to the media library.
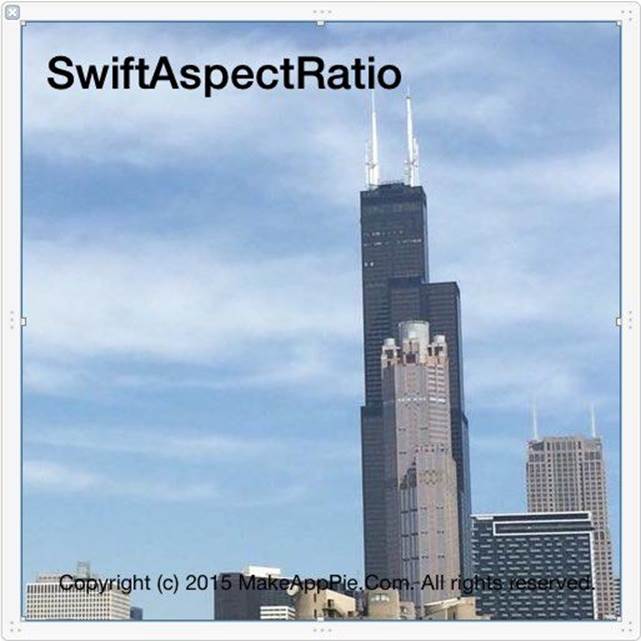
Drag the skyline picture into the storyboard. It will be too big for it. Drag it so you can see the upper left corner.
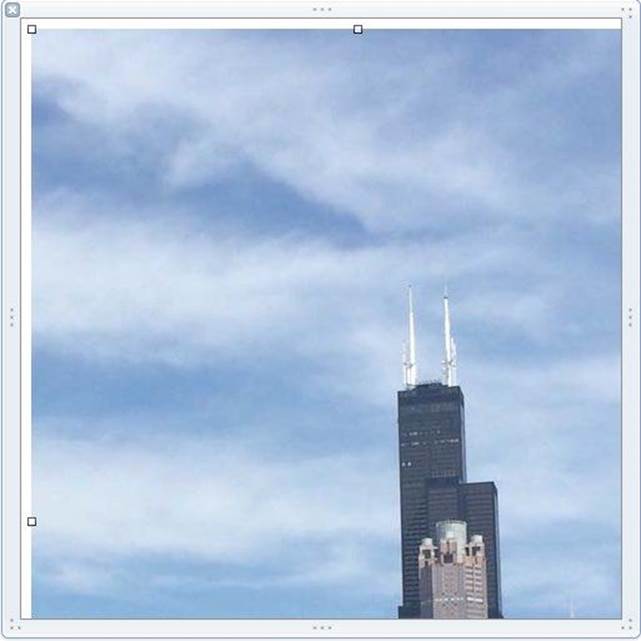
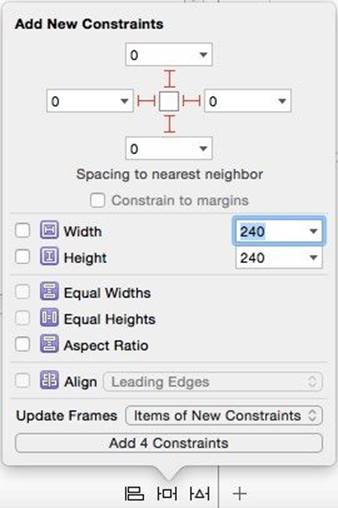
Using the pin menu, pin the image 0 points top, 0 points left, 0 points right and 0 points down making sure that Constrain to Margins is unchecked. Update the Frames for Items of new Constraints like this:
Our labels have disappeared since the image overlaps them. Move the image to the bottom of the display order. If the document outline is not open, click the  Icon. In the document outline, drag Skyline above the two labels.
This places it behind the labels on the storyboard. Our photo is now a background.
Open up the assistant editor. Click where it says either Automatic or Manual. Select Preview from the drop down menu. Click the plus on the bottom of the preview pane and add an iPad. Arrange your workspace like this by hiding the navigator to give your self a bit more room:
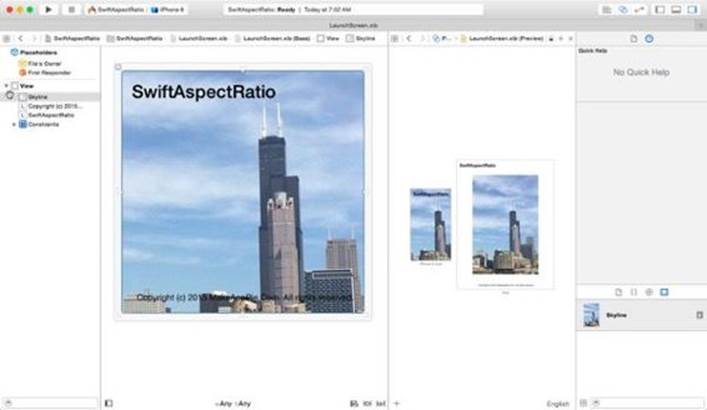
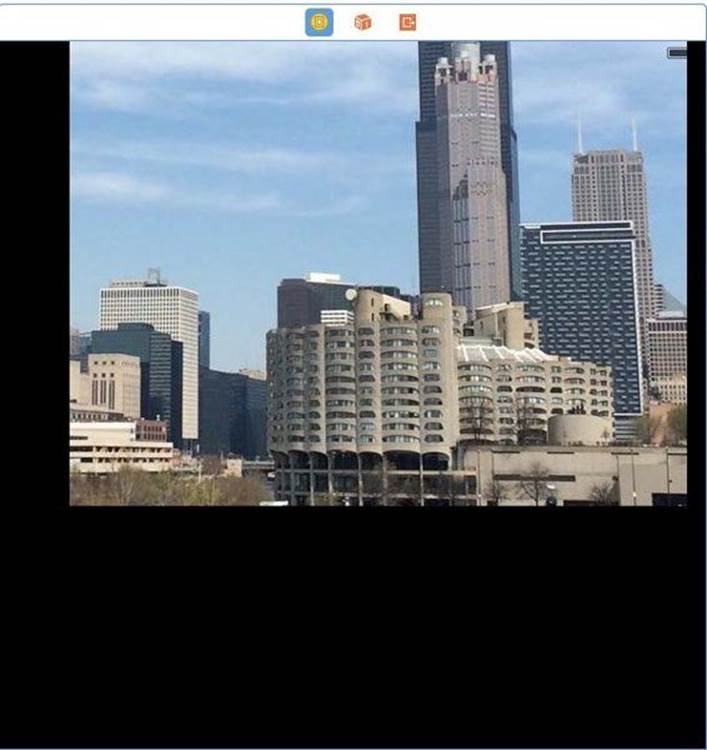
You'll notice the preview pane shows the skyline image on the iPad, but it does not completely cover the view.
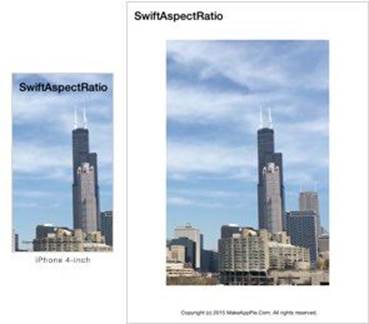
Select the Skyline. In the attributes inspector, you will fiend the View attributes. Currently, the image gets centered. Change from Center to Aspect Fill.

The previews change.
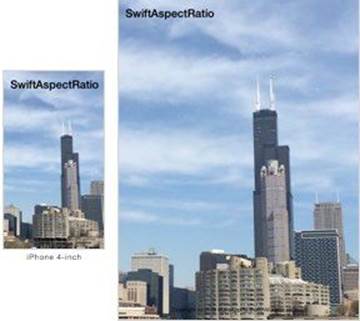
Using the rotation Icon next to the device name rotate the iPad and phone. They look good.
With that much space on the iPad, the title is too high. Using size classes we can change that for the iPad. Click the size class selector and select regular width, regular height.

Click on the title label. In the size inspector, change the constant to 200.
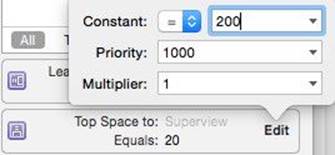
The new iPad version looks better.
Using Photos Smaller than the Superview
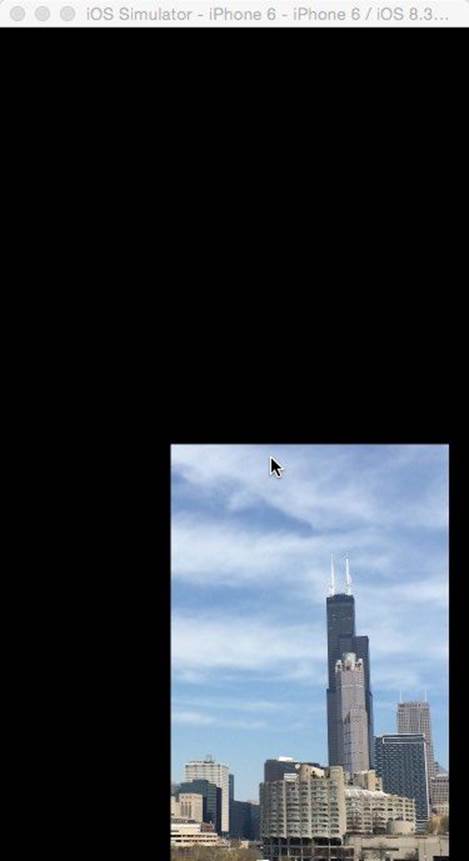
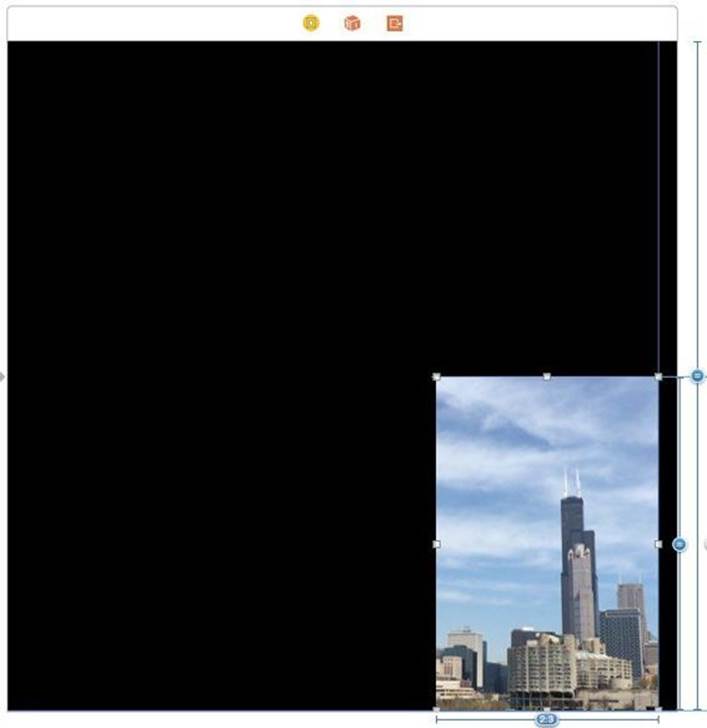
Now that we made the picture resize to cover the full view, We can do the same thing with a picture smaller than the view. Go to the storyboard. Make the background of the view Black. Once again drag the skyline to the storyboard. It is still extremely big.
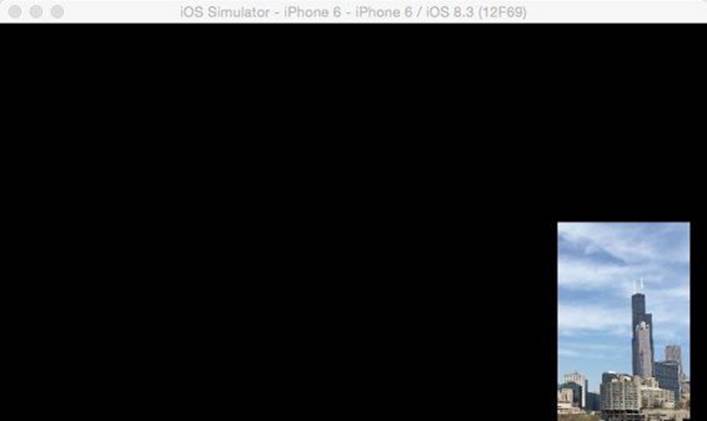
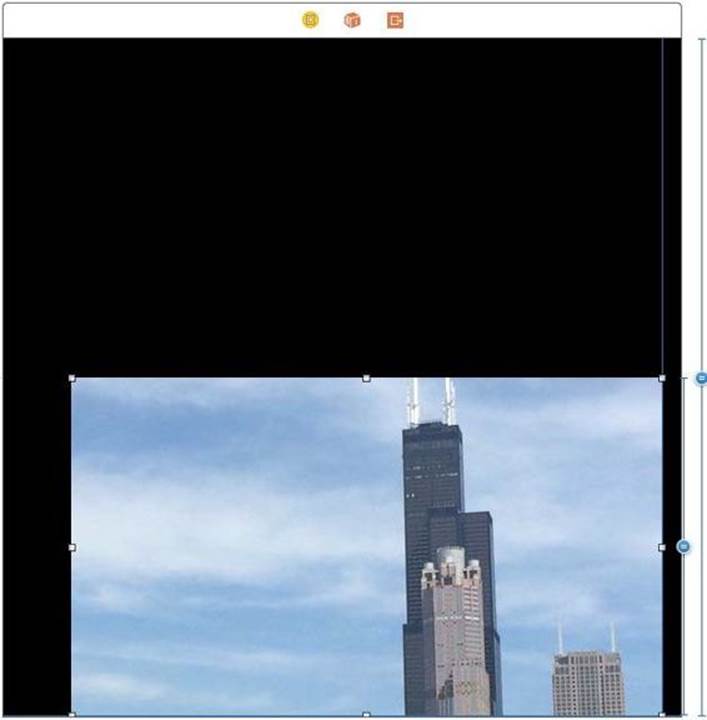
We'll pin the image to the lower right corner. Select the image and in the pin menu select 0 points right and 0 points bottom, this time leaving checked the Constrain to Margins. Do not update the frames yet. From the Image, control-drag to the black of the superview. In the menu that pops up, select Equal Heights.
Now go to the size inspector. Click Edit on the Equal Height to Superview. For the multiplier enter 1:2.

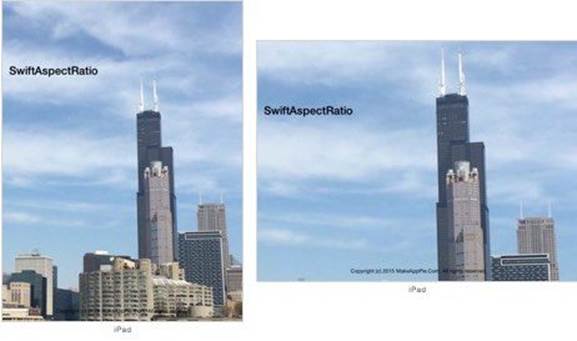
You should get something that looks like this in the preview:
If you get this instead,
Change the multiplier to 2:1 to get what we want.
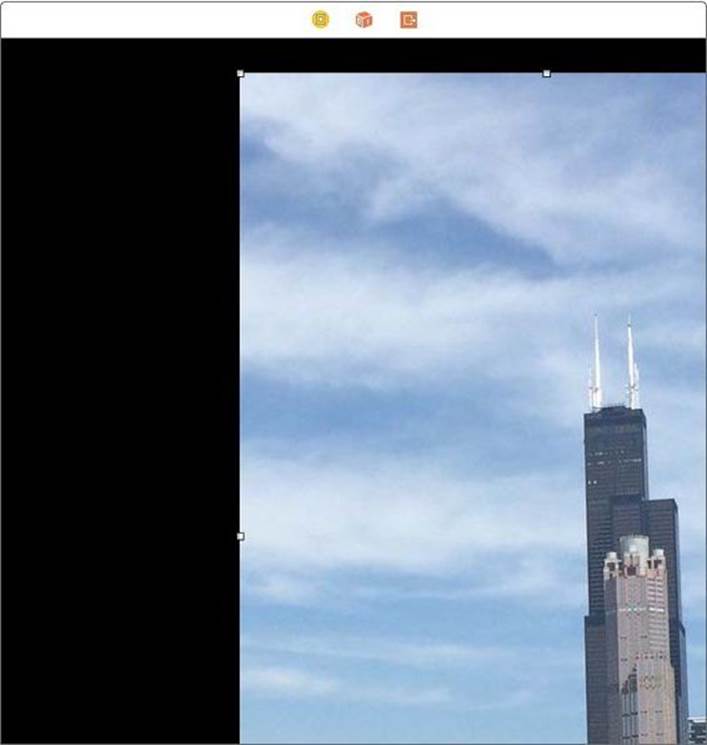
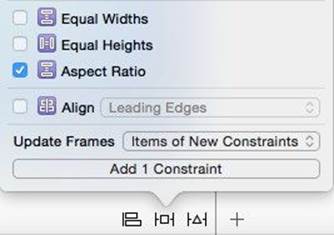
What we just did was pin the corner to the bottom corner of the view, then set the height of the picture to half the height of the view. This distorted or cropped the picture. As we did before, in the attribute inspector, select Aspect Fill. Not much changes. We need to set the aspect ratio on the view itself. With the image selected select Aspect Ratio and also Update Frame with new constraints in the pin menu.
Again nothing happens. Check in the size inspector for the aspect ratio,
![]()
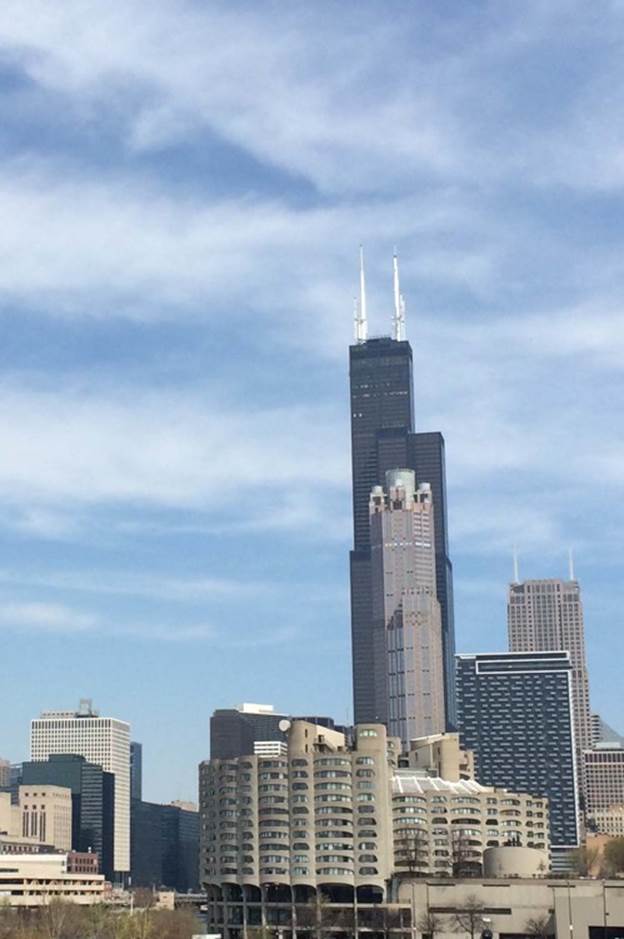
The aspect ratio constrained both sides based on the current height in the storyboard. You need to specify your original aspect ratio when you cropped it in your photo editing software. I cropped this picture with a 2:3 ratio. Click Edit for the aspect ratio. Change the aspect ratio to 2:3.
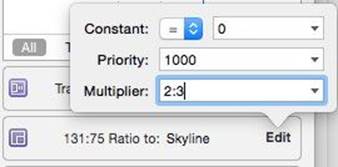
While I did all of this with auto layout, It is very important to have a photo that works well. I used an image from my iPhone camera that I reduced by half in a photo editing app for my retina image and another half for my non-retina image. I then cropped it to 2:3. Knowing your aspect ratio early in the process makes setting it in the app a lot easier. Since we know our numbers, we get this:
Build and run with the iPhone 6 in the simulator. You can rotate the image by clicking Command Left-Arrow.