MacBook in easy steps: Covers OS X Yosemite (10.10) (2015)
9
Digital Lifestyle
Leisure time, and how we use it, is a significant issue for everyone. This chapter shows how to make the most of your leisure time on your MacBook, using the new Photos app, iTunes for your musical needs and apps for making home movies, music and playing games.
Using the Photos App
Viewing Photos
Editing Photos
Sharing Photos
iTunes
Managing Your Music
Purchasing Music
Adding a Mobile Device
iMovie
GarageBand
Game Center
Using the Photos App

For a number of years the photo management and editing tool for OS X has been iPhoto. However, in Spring 2015 the Photos app was introduced. iPhoto can still be used, but the Photos app is designed to mirror the one used on iOS 8 devices and integrate more with iCloud, so that you can store all of your photos in the iCloud and then view and manage them on all of your Apple devices.
If you are using the Photos app, you can specify how it operates with iCloud in the iCloud System Preferences:
![]() Click on the System Preferences button
Click on the System Preferences button
![]()
![]() Click on the iCloud button in the System Preferences window
Click on the iCloud button in the System Preferences window

![]() Check On the Photos checkbox
Check On the Photos checkbox
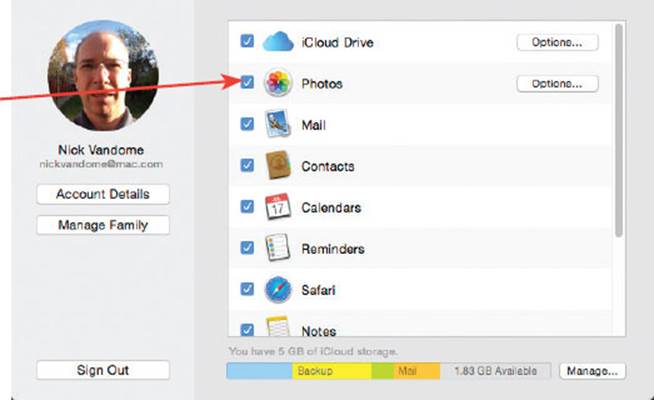
![]() Click on the Options button for Photos
Click on the Options button for Photos
![]()
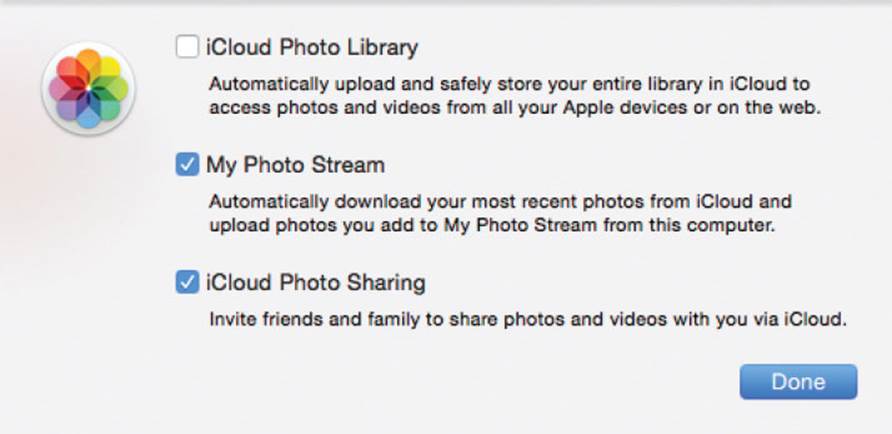
![]() Select the options for using iCloud with the Photos app. Click on the Done button
Select the options for using iCloud with the Photos app. Click on the Done button

Although the iPhoto app can still be used, it may at some point stop being supported by Apple, so it is better to migrate to the Photos app.
The iCloud options for the Photos app are: iCloud Photo Library, which uploads your entire photo library to the iCloud; My Photo Stream, which uploads photos that are added from the device you are using; and iCloud Photo Sharing, which enables you to share photos from the Photos app with family and friends.
Getting started with the Photos app
If you have previously used iPhoto, you can import your photo library into Photos when you start using it:
![]() Click on the Photos app in the Dock or from the Launchpad
Click on the Photos app in the Dock or from the Launchpad
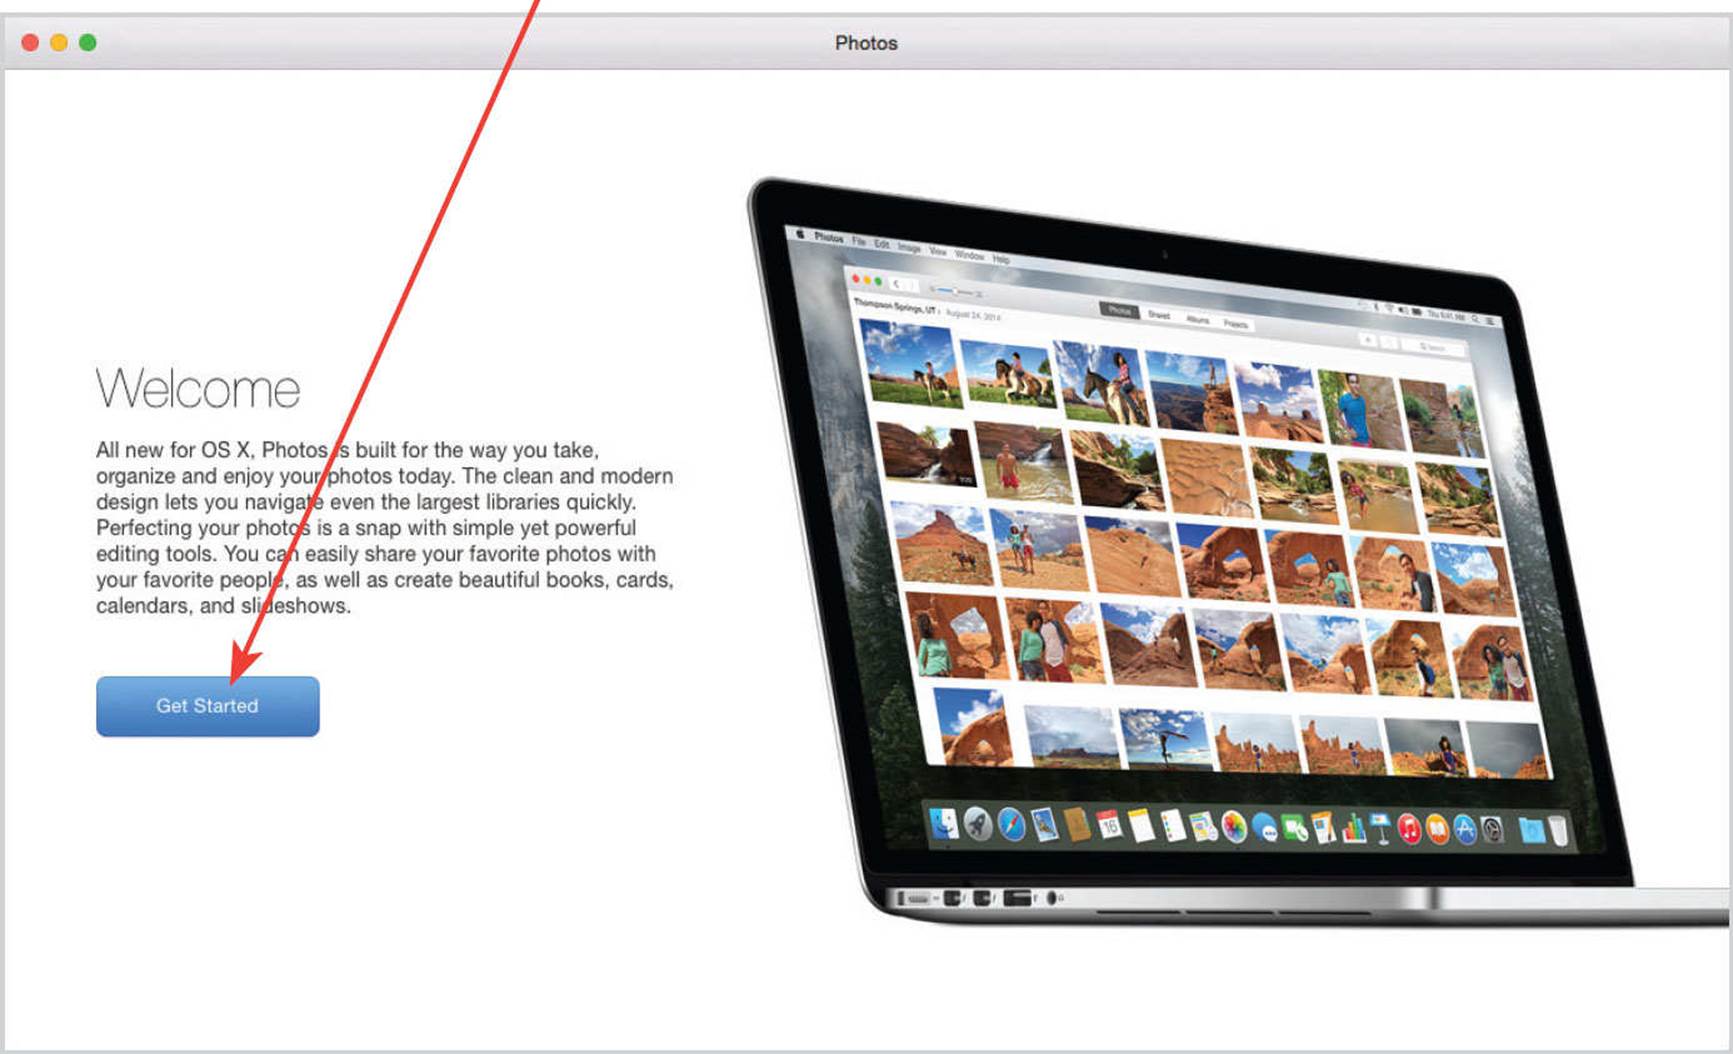
![]() Click on the Get Started button in the Welcome window
Click on the Get Started button in the Welcome window
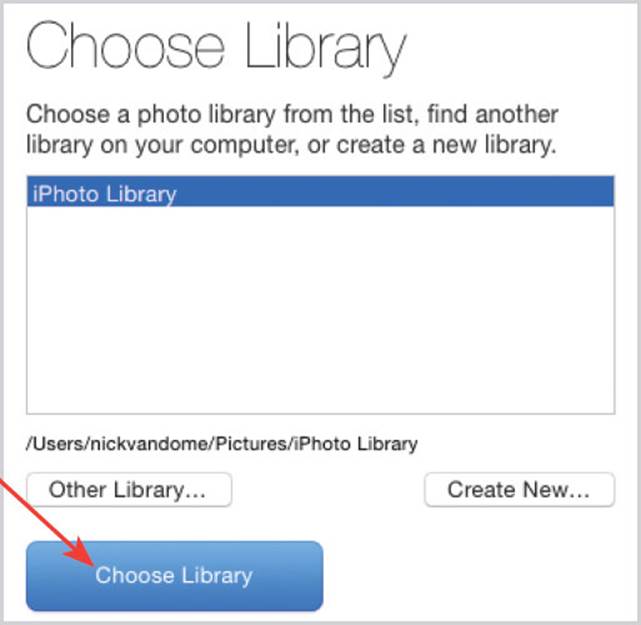
![]() Select the photo library that you want to import and click on the Choose Library button
Select the photo library that you want to import and click on the Choose Library button
![]() The photo library will be prepared so that you can use it with the Photos app
The photo library will be prepared so that you can use it with the Photos app

The Photos app is provided as part of a software update to OS X Yosemite. This can be accessed directly through the App Store or from the App Store button on the Apple Menu.
Viewing Photos
The Photos app can be used to view photos according to years, collections, moments or at full size. This enables you to view your photos according to dates and times at which they were taken.
![]() Click on these buttons at the top of the Photos window to move between years, collections and moments
Click on these buttons at the top of the Photos window to move between years, collections and moments
![]()
![]() Click on the left-hand button in Step 1 to move to Years view
Click on the left-hand button in Step 1 to move to Years view

![]() Click and hold on a thumbnail in Years view to enlarge it
Click and hold on a thumbnail in Years view to enlarge it

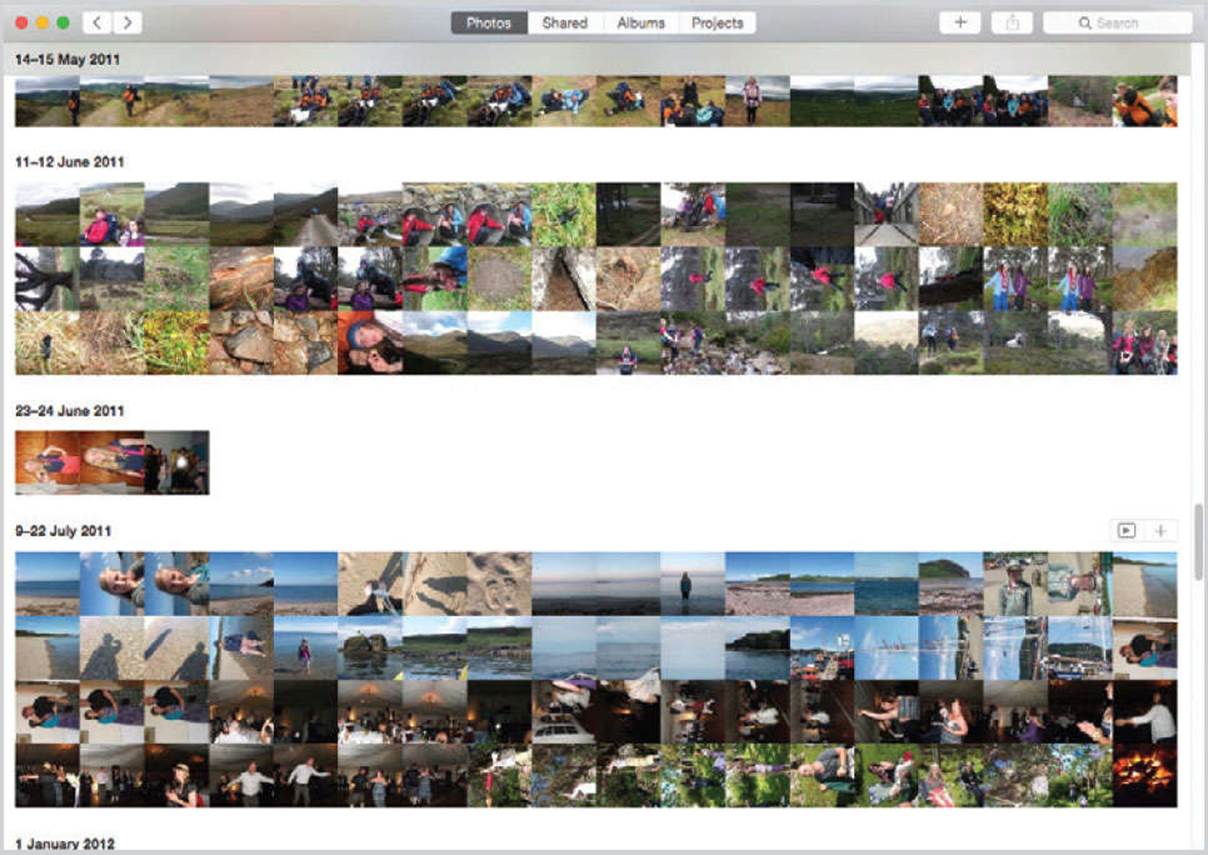
![]() Click on a photo within the Years section to view the Collections. This displays groups of photos (Moments) taken at the same location
Click on a photo within the Years section to view the Collections. This displays groups of photos (Moments) taken at the same location

Photos can be imported into the Photos app by selecting File > Import from the Menu bar and navigating to the required location within the Finder. This can be used to import photos from your Mac or an external device connected with an USB cable, such as a digital camera, a card reader or a pen drive.
Click on the Photos tab at the top of the Photos app window to view your photos in Years, Collections, Moments or full size.
![]()
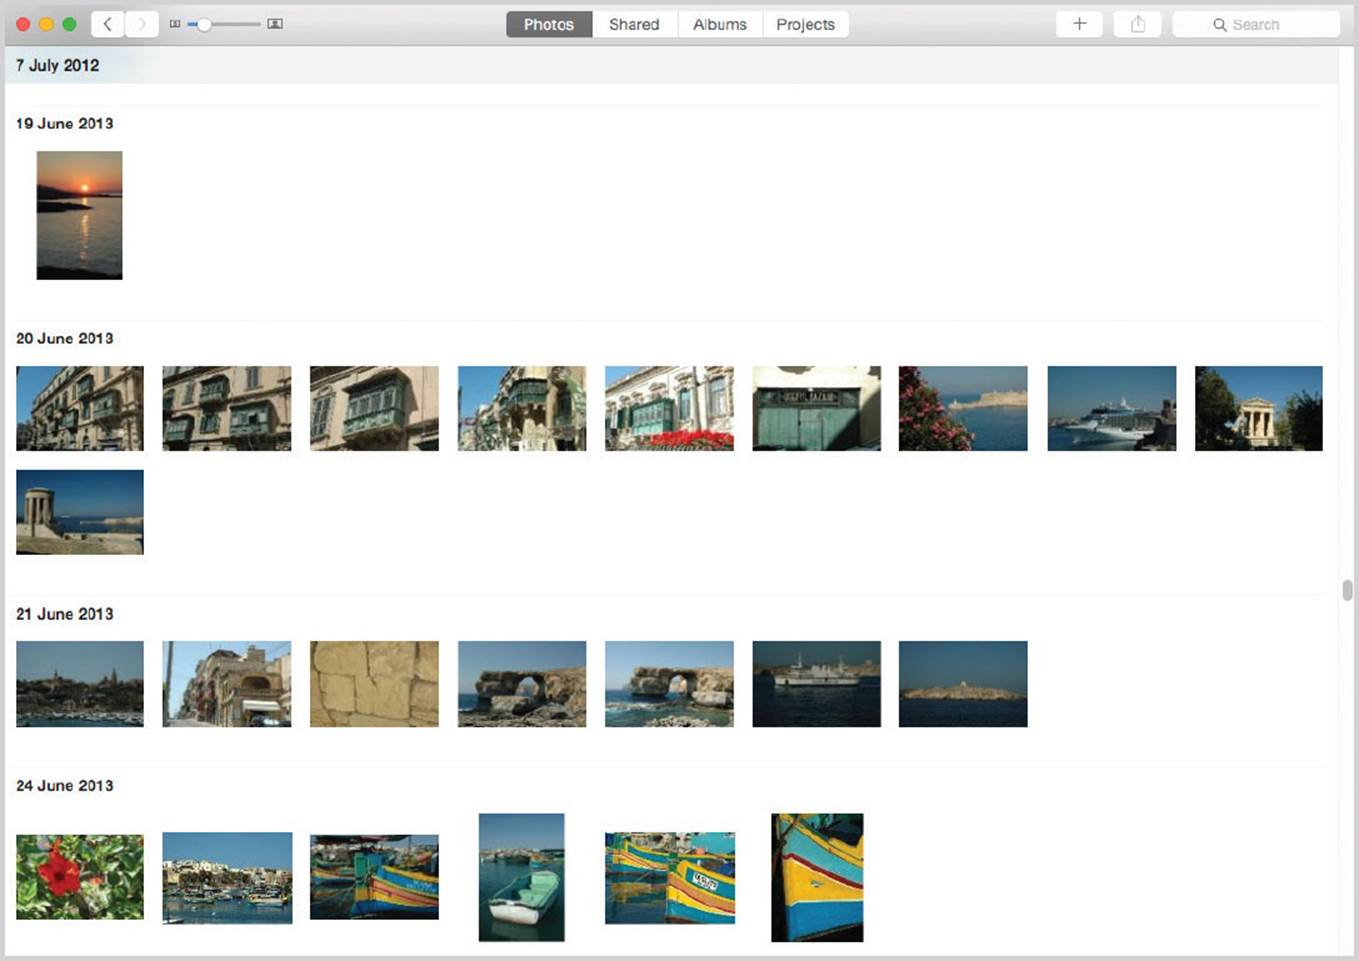
![]() Click on a photo within the Collections section to view specific Moments. This displays photos taken at the same time in the same location
Click on a photo within the Collections section to view specific Moments. This displays photos taken at the same time in the same location
![]() Double-click on a photo in the Collections or Moments section to view it at full size
Double-click on a photo in the Collections or Moments section to view it at full size
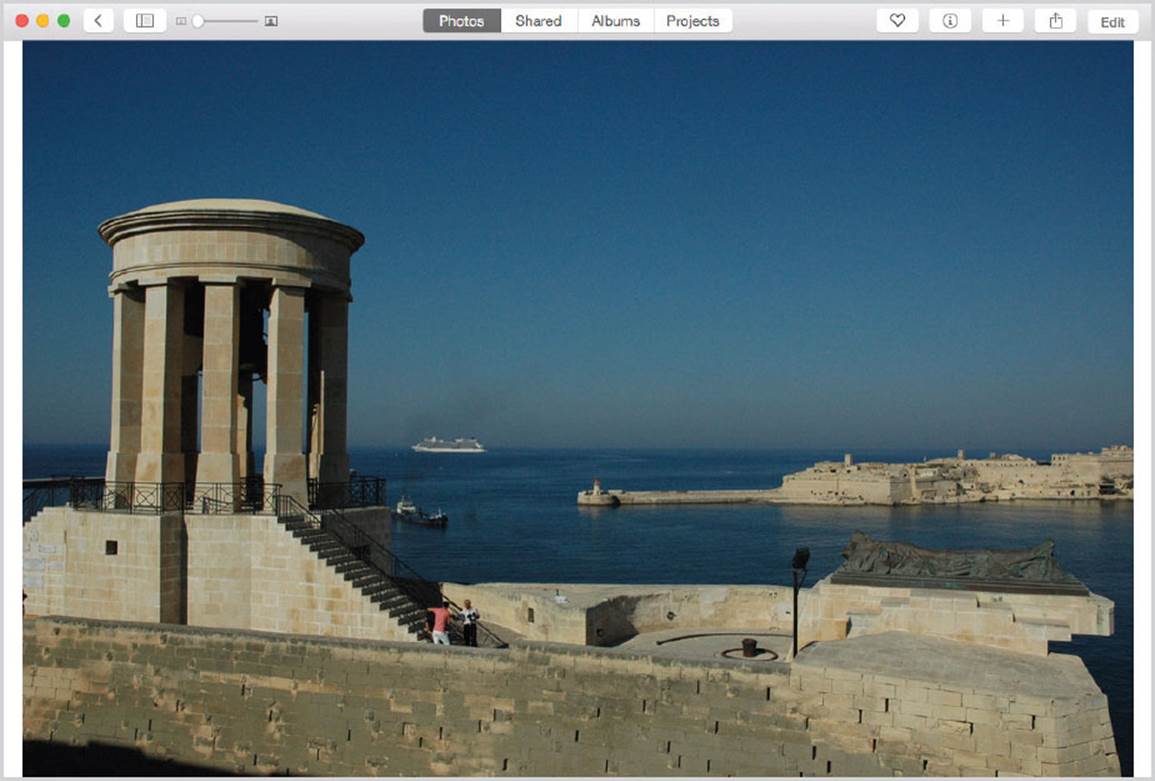
![]() For a photo being displayed at full size use these buttons, from left to right, to: add it as a favorite, view information about it, add a new album and create items, share the photo or edit it
For a photo being displayed at full size use these buttons, from left to right, to: add it as a favorite, view information about it, add a new album and create items, share the photo or edit it
![]()
Drag this slider to change the magnification of the photo, or photos, being displayed, in Moments, or at full size view.
![]()
Rollover a photo in Collections or Moments view and click on the left-hand icon below to view the relevant photos as a slideshow.
![]()
Editing Photos
The Photos app has a range of editing options so that you can fine-tune the appearance of your photos. To do this:
![]() Open a photo at full size and click on the Edit button
Open a photo at full size and click on the Edit button
![]()
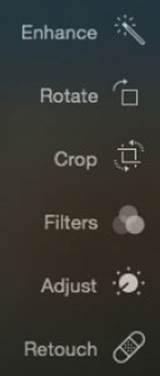
![]() The editing options include: Enhance, for auto color correction; Rotate for rotating the image; Crop for cropping the image to remove areas you do not want; Filters, for adding effects to the whole image (see Step 3); Adjust, for manual color editing (see Step 4); and Retouch, for removing unwanted items in an image
The editing options include: Enhance, for auto color correction; Rotate for rotating the image; Crop for cropping the image to remove areas you do not want; Filters, for adding effects to the whole image (see Step 3); Adjust, for manual color editing (see Step 4); and Retouch, for removing unwanted items in an image
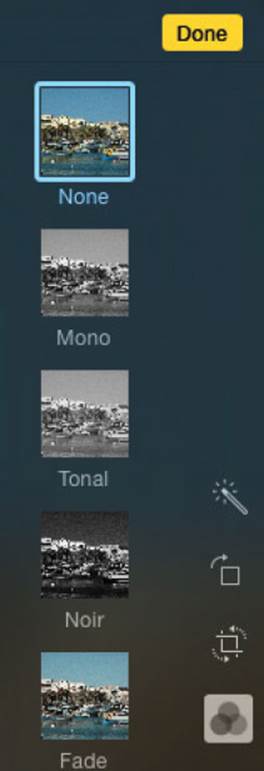
![]() Click on the Filters button and click on one of the filter effects to apply it to the whole image. Click on the Done button to apply the effect
Click on the Filters button and click on one of the filter effects to apply it to the whole image. Click on the Done button to apply the effect
![]() Click on the Adjust button to apply color editing manually. Drag the white bar to apply the adjustments for the required item. Click on the Add button to apply the changes
Click on the Adjust button to apply color editing manually. Drag the white bar to apply the adjustments for the required item. Click on the Add button to apply the changes
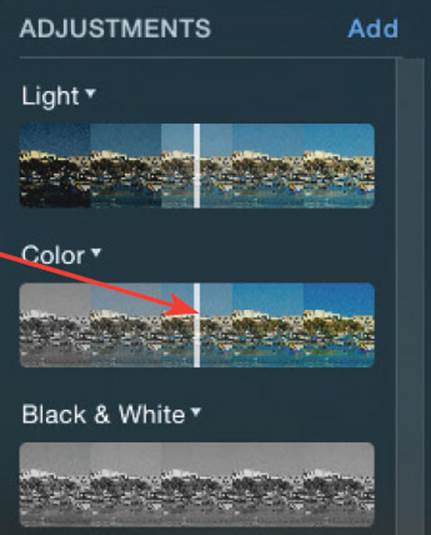

Do not overdo color adjustments as this can create an unnatural effect (unless this is what you are aiming for, as it can be effective in its own right).
Sharing Photos
Individual photos can be shared with the Photos app. Shared albums can also be created and shared using iCloud.
To share specific a photo:
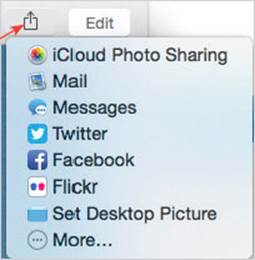
![]() Select it in Moments or open it at full size. Click on this button and select one of the sharing options
Select it in Moments or open it at full size. Click on this button and select one of the sharing options
![]()
![]() To share a photo via iCloud, select the iCloud Photo Sharing option in Step 1
To share a photo via iCloud, select the iCloud Photo Sharing option in Step 1

![]() Select an existing shared album or click on the New Shared Album button to create a new shared album
Select an existing shared album or click on the New Shared Album button to create a new shared album
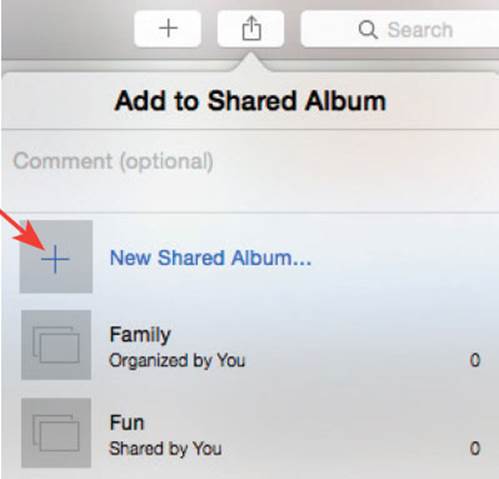
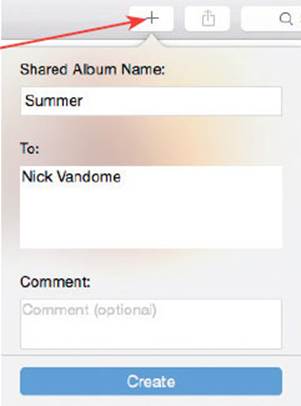
![]() Shared albums can also be created in the Shared section. Click here, enter the details for the album and the email address of the recipient and click on the Create button. Photos can then be added by selecting them from the main Photos window
Shared albums can also be created in the Shared section. Click here, enter the details for the album and the email address of the recipient and click on the Create button. Photos can then be added by selecting them from the main Photos window
In order to use iCloud Photo Sharing, this has to be enabled in the iCloud System Preferences, as shown here.
When you share an album with someone they will be sent an email notification.
iTunes
Music is one of the areas that has revived Apple’s fortunes in recent years, primarily through the music player on the iPod, iPhone and iPad, and iTunes and the iTunes music store, where music can be bought online. iTunes is a versatile app but its basic function is to play a music CD. To do this:
![]() Click on this button on the Dock and insert the CD in an external CD/DVD drive
Click on this button on the Dock and insert the CD in an external CD/DVD drive

![]() By default, iTunes will open and display this window. Click No if you just want to play the CD
By default, iTunes will open and display this window. Click No if you just want to play the CD

![]() Click on the CD name
Click on the CD name
![]() Click on this button to play the whole CD
Click on this button to play the whole CD
![]()
![]() Click on the Import CD button if you want to copy the music from the CD onto your hard drive
Click on the Import CD button if you want to copy the music from the CD onto your hard drive

Never import music and use it for commercial purposes as this would be a breach of copyright.
Managing Your Music
iTunes has a variety of ways to display and manage your music:
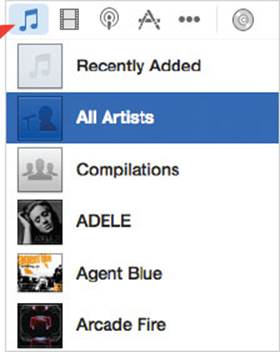
![]() Click on the Music button to see the iTunes categories, within a drop-down menu
Click on the Music button to see the iTunes categories, within a drop-down menu
![]()
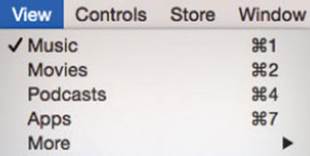
![]() Select View from the iTunes menu bar to display the left-hand sidebar. Click on the Music button to view all of your music content
Select View from the iTunes menu bar to display the left-hand sidebar. Click on the Music button to view all of your music content
![]() Click on these buttons to view the details of your music according to these headings
Click on these buttons to view the details of your music according to these headings
![]()
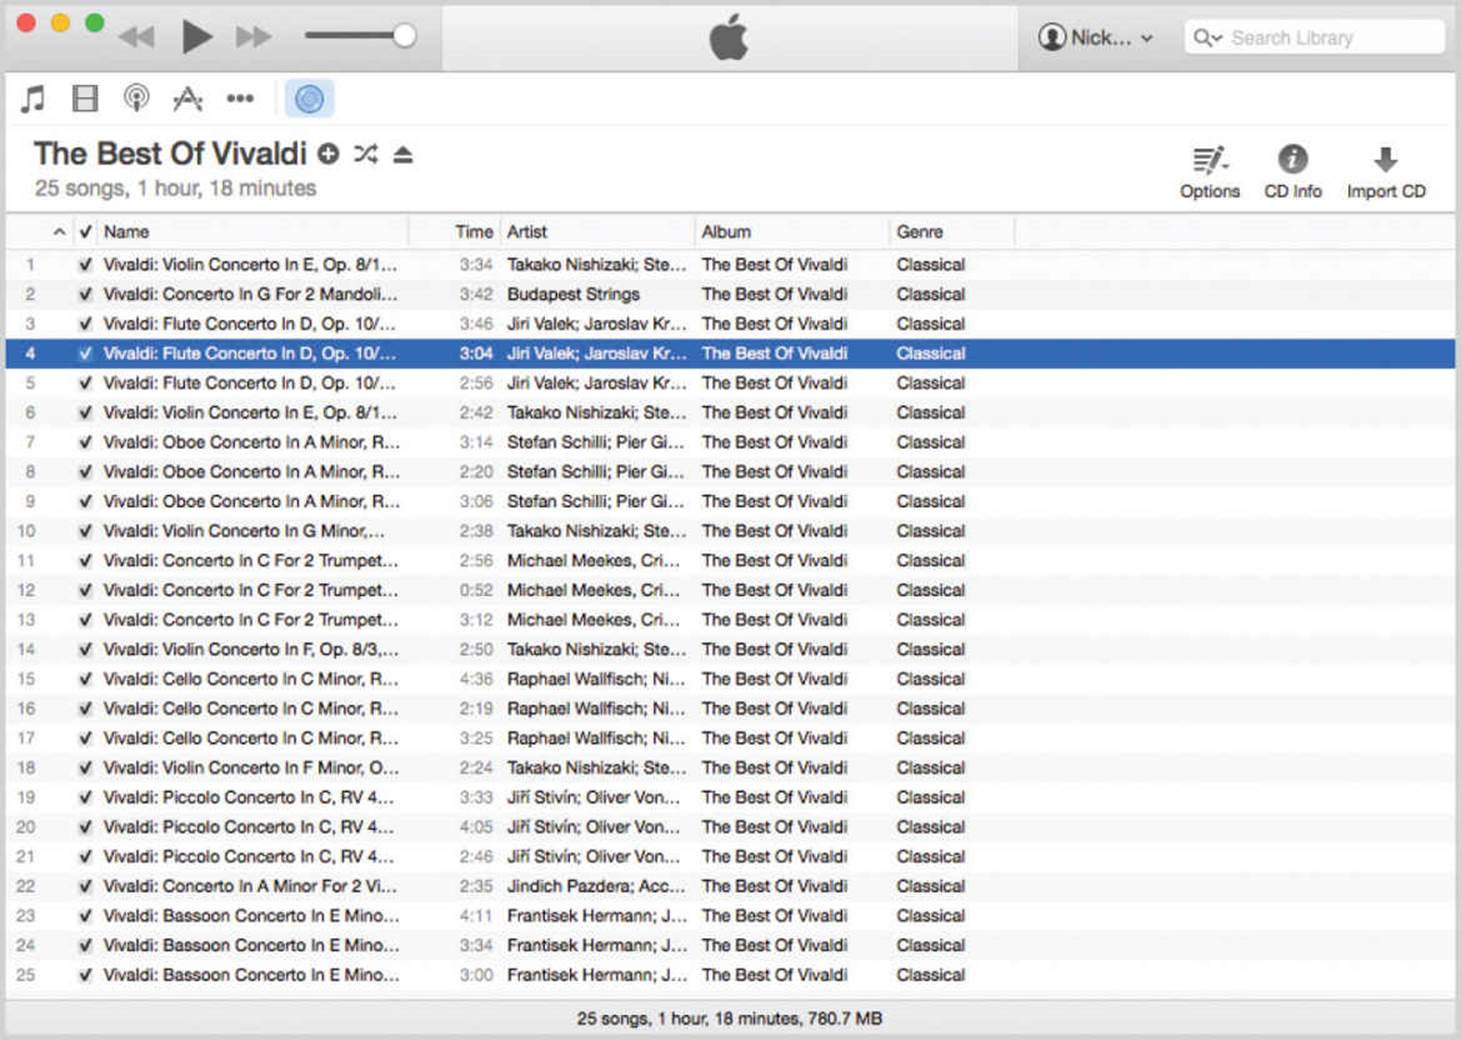
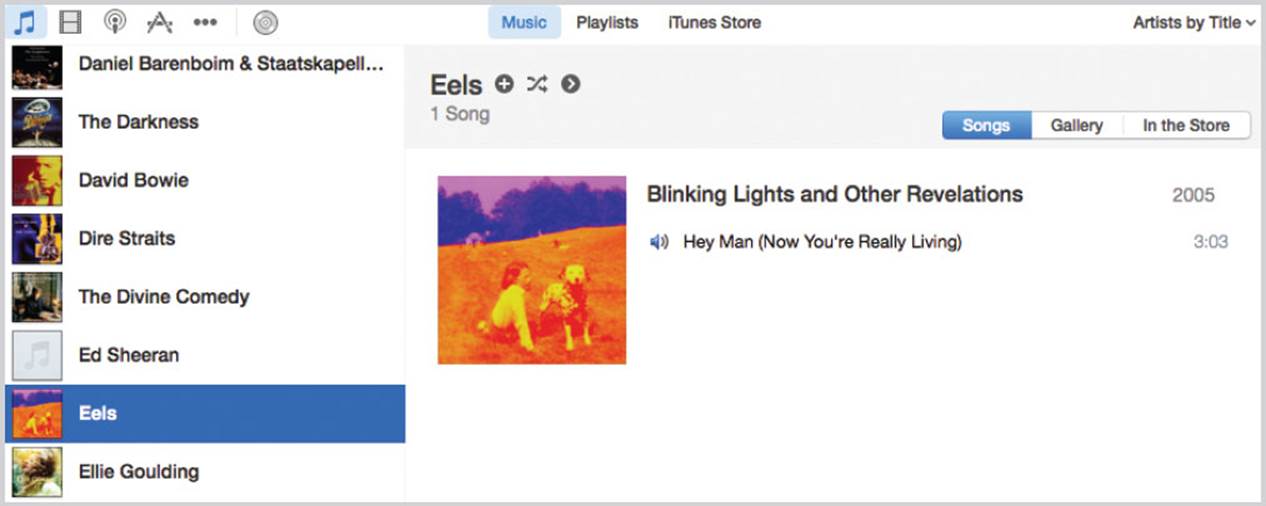
![]() Within any of the categories in Step 3, click on an item to view the songs within it. Double-click on a track to start playing it
Within any of the categories in Step 3, click on an item to view the songs within it. Double-click on a track to start playing it
![]() When a song is playing it is displayed at the top of the iTunes window, along with controls to move to the next or previous track, pause and play the track and adjust the volume
When a song is playing it is displayed at the top of the iTunes window, along with controls to move to the next or previous track, pause and play the track and adjust the volume

iTunes can also be used to manage movies, TV shows, podcasts and audiobooks that have been bought and downloaded from the iTunes Store.
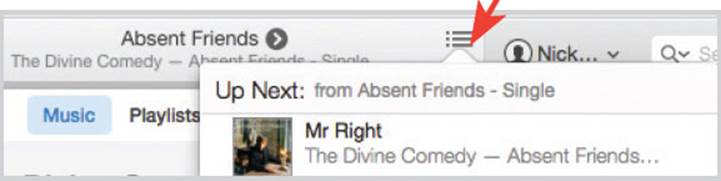
Click on this button on the top toolbar when an album is playing to view all of the tracks that will play.
Purchasing Music
As well as copying music from CDs into iTunes, it is also possible to download a vast selection of music from the iTunes online store. To do this:
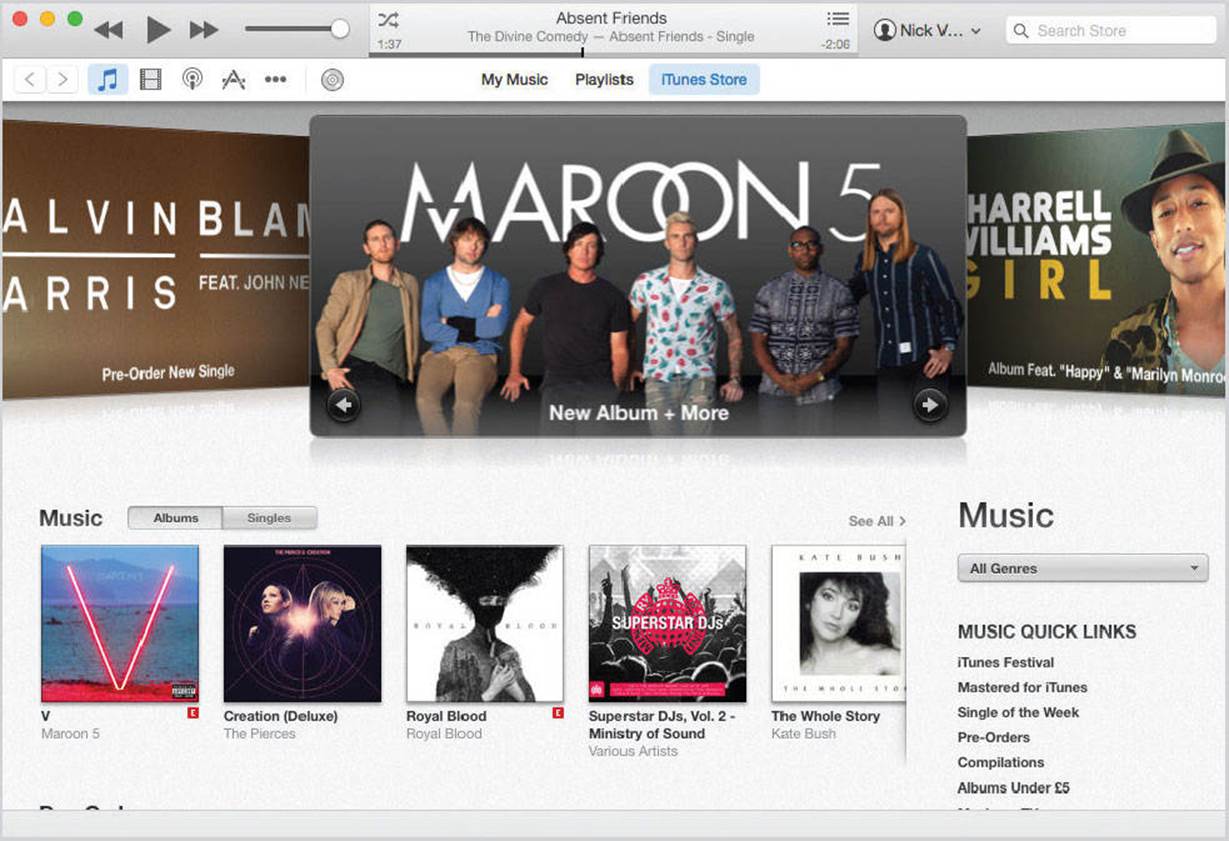
![]() Click on the iTunes Store link to access the online store
Click on the iTunes Store link to access the online store
![]()
![]() Navigate around the iTunes store using the tabs along the top of the iTunes window
Navigate around the iTunes store using the tabs along the top of the iTunes window
![]() To find a specific item, enter the details in the Search box at the top right-hand corner of the iTunes window
To find a specific item, enter the details in the Search box at the top right-hand corner of the iTunes window

![]() Details of the item are displayed within the Store
Details of the item are displayed within the Store

![]() Click on the Price button to purchase the item
Click on the Price button to purchase the item
Never use illegal music download sites. Apart from the legal factor, they are much more likely to contain viruses and spyware.
To buy music from the iTunes Store you must have an Apple ID and account.
Adding a Mobile Device
With the iPhone, iPad and iPod, Apple has secured a significant foothold in the mobile digital device market. These can also be used in conjunction with a MacBook and iTunes so that you can load your digital devices with content from your MacBook, such as music, videos and books. To do this (this example is for an iPod, but the same applies to iPhones and iPads):
![]() Connect your iPod to the Mac with the supplied USB cable
Connect your iPod to the Mac with the supplied USB cable
![]() iTunes will open automatically and display details about the attached iPod
iTunes will open automatically and display details about the attached iPod
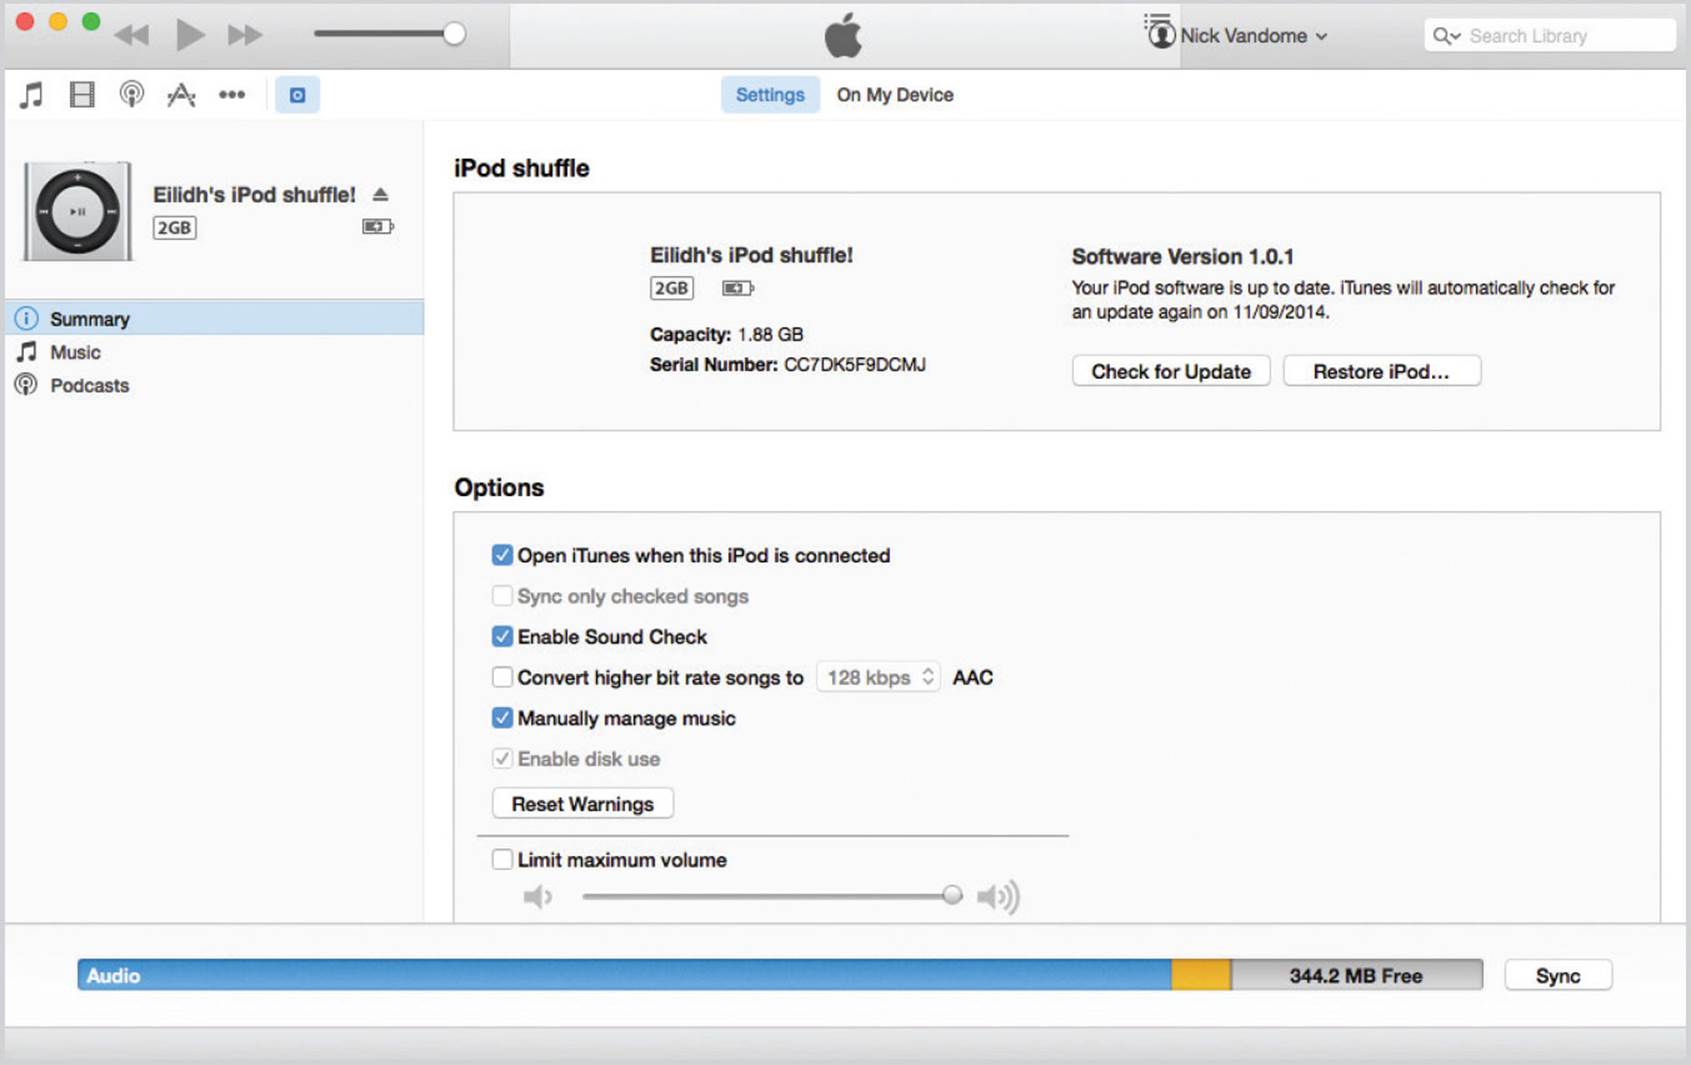
![]() If the iPod and its details are not displayed, click on this button at the top of the iTunes window
If the iPod and its details are not displayed, click on this button at the top of the iTunes window

![]() Select File > Sync from the iTunes Menu bar or click on the Sync button to synchronize iTunes and your iPod
Select File > Sync from the iTunes Menu bar or click on the Sync button to synchronize iTunes and your iPod
![]()
iPods come in a variety of models, colors, sizes and disk capacity. iPhones and iPads can also be added to your Mac and managed in the same way.
iMovie
For home movie buffs, iMovie offers options for downloading, editing and publishing your efforts:
![]() Click on this button on the Dock or from the Launcher
Click on this button on the Dock or from the Launcher

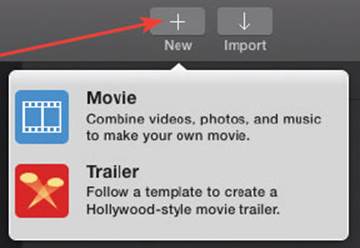
![]() Click on the Import Media button to download video clips into iMovie
Click on the Import Media button to download video clips into iMovie

![]() Select a location from which to download clips. This can be from a video camera, a removable device such as a pen drive, or on your Mac
Select a location from which to download clips. This can be from a video camera, a removable device such as a pen drive, or on your Mac
![]() Once you have downloaded video clips, click on the New button to start your video project
Once you have downloaded video clips, click on the New button to start your video project
![]() Click on the Theme for your project and click on the Create button
Click on the Theme for your project and click on the Create button
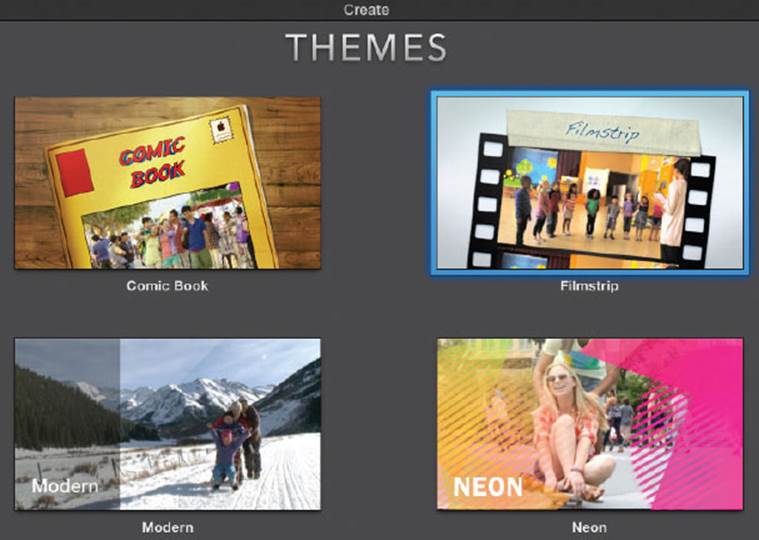
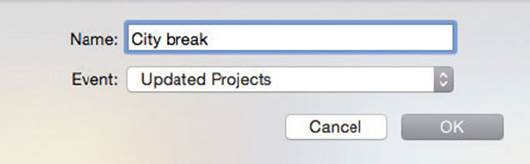
![]() Give your project a name and click on the OK button
Give your project a name and click on the OK button
Video cameras can be connected with a USB or Thunderbolt cable. If you have a video camera with a FireWire cable you will need a FireWire adapter.
In the past, Apple produced an app called iDVD for creating artistic presentations from your own home moves. However, this has now been discontinued, but other DVD-creation apps can be obtained in the App Store.
The name of a project is used for the opening title, but this can be changed by double-clicking on it.
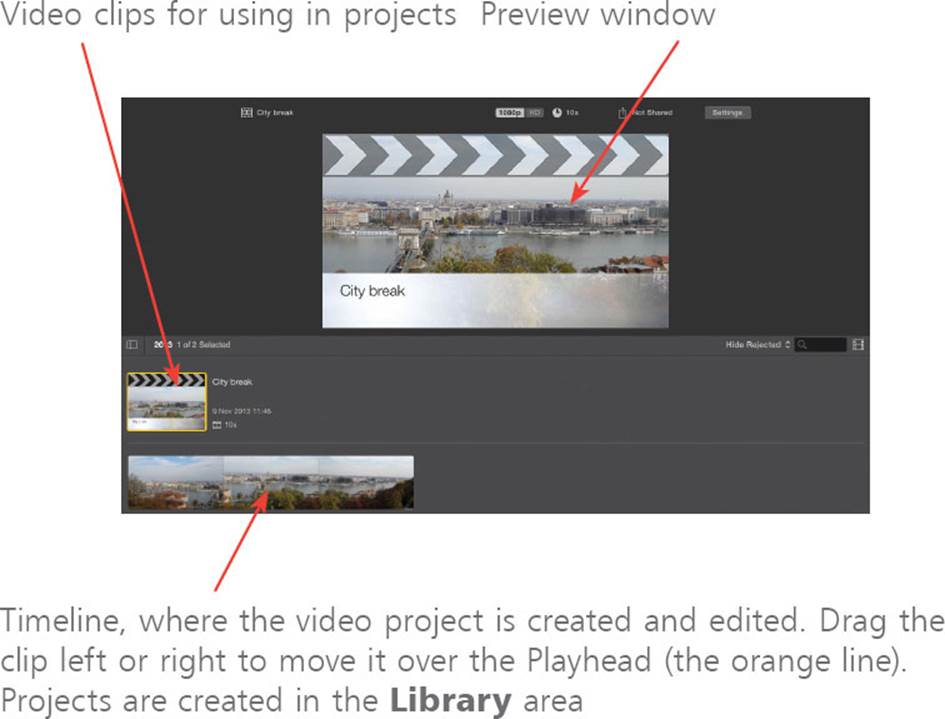
![]() The video clip selected in Step 3 is added to the iMovie editing window
The video clip selected in Step 3 is added to the iMovie editing window
![]() Click on the Enhance button to apply editing enhancements to your video project
Click on the Enhance button to apply editing enhancements to your video project

![]() Click on these buttons for options that can be applied to video clips
Click on these buttons for options that can be applied to video clips
![]()
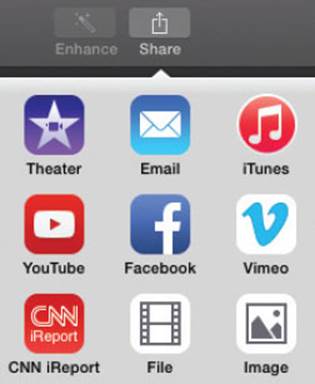
![]() Click on the Share button to share a complete movie in a variety of ways
Click on the Share button to share a complete movie in a variety of ways
Click on a clip on the timeline to trim it by dragging at either end of the yellow box that appears around it.
The Theater area displays items that have been shared via iCloud. This can be used to view all of your iCloud video content. Click on this button to access it.
![]()
GarageBand
For those who are as interested in creating music as listening to it, GarageBand can be used for this very purpose. It can take a bit of time and practice to become fully proficient with GarageBand but it is worth persevering with if you are musically inclined and want to compose your own. To use GarageBand:
![]() Click on this icon on the Dock or within the Launcher
Click on this icon on the Dock or within the Launcher

![]() Click on the New Project button
Click on the New Project button

![]() Select an instrument group and click on the Choose button
Select an instrument group and click on the Choose button
![]()

![]() Select an instrument within the group
Select an instrument within the group

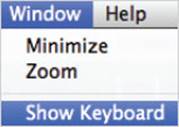
![]() Select Window > Show Keyboard from the menu bar to display the keyboard for inputting music
Select Window > Show Keyboard from the menu bar to display the keyboard for inputting music
![]() Click on this button to start recording a track, using the keyboard
Click on this button to start recording a track, using the keyboard
![]()
GarageBand can appear quite complex at first and it takes a little time to feel comfortable with it.
![]() Click on the keyboard to record the music
Click on the keyboard to record the music

Click on the arrows at either end of the keyboard to access the other sections of it.
![]() The track is placed on the GarageBand timeline
The track is placed on the GarageBand timeline

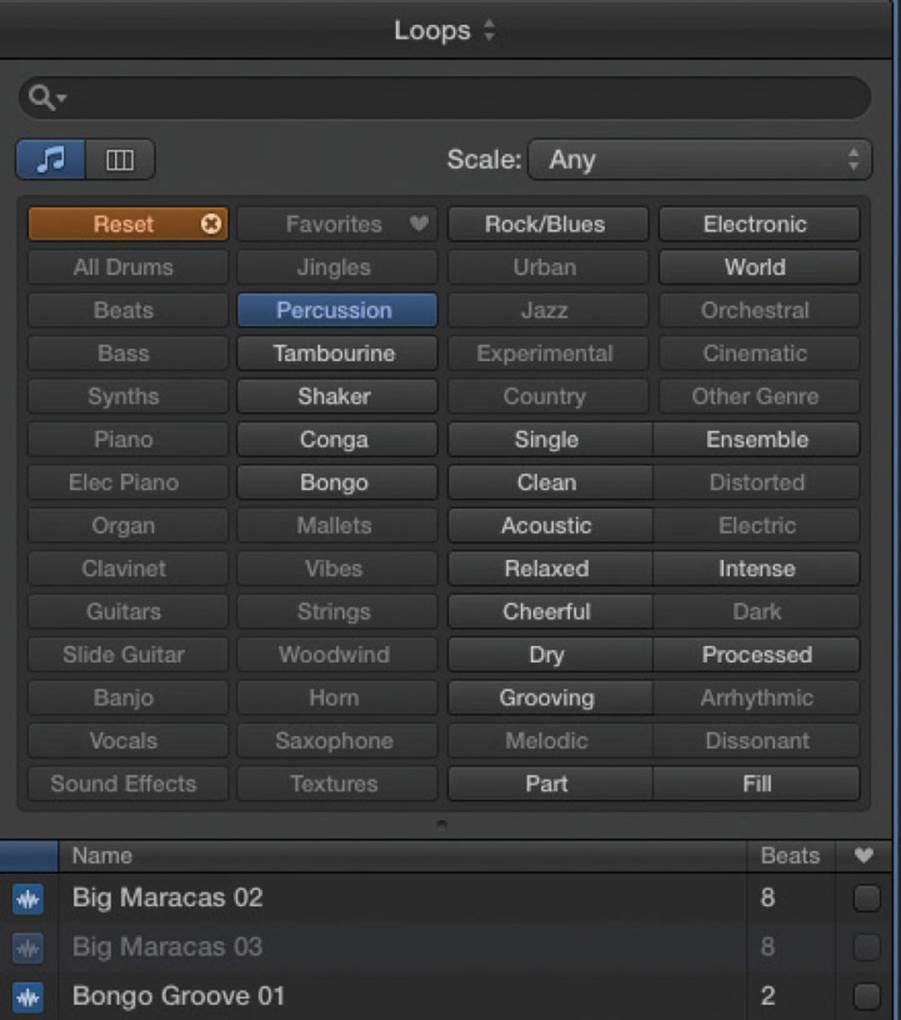
![]() Click on this button to view a list of pre-recorded music loops
Click on this button to view a list of pre-recorded music loops
![]()
![]() A list of loops is displayed. Select a style and an instrument. The available loops are displayed underneath the Name tab
A list of loops is displayed. Select a style and an instrument. The available loops are displayed underneath the Name tab
![]() Select a loop and drag it onto the timeline to add it to your song
Select a loop and drag it onto the timeline to add it to your song
![]() The completed song is shown in the timeline. This can consist of several separate tracks
The completed song is shown in the timeline. This can consist of several separate tracks
Click and drag on tracks on the timeline to move their position.
Game Center
Playing games is one of the most popular pastimes on computers and OS X Yosemite gives you ample opportunity to indulge this with the Game Center. To start playing games:
![]() Click on this icon in the Launchpad
Click on this icon in the Launchpad

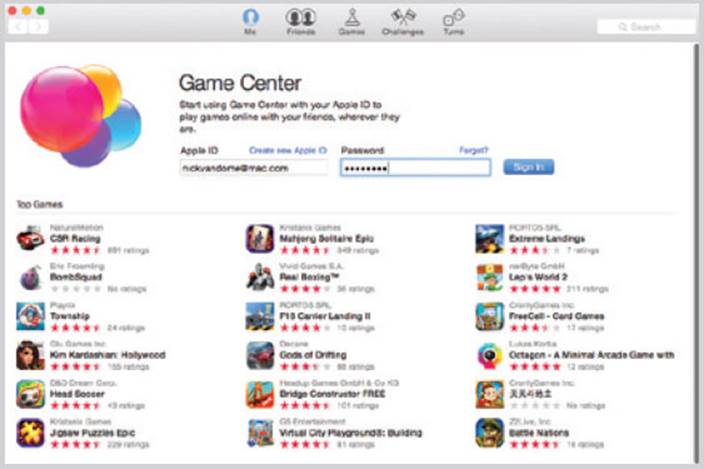
![]() Enter your Apple ID details and click on the Sign In button (or, if you do not have an Apple ID, click on the Create Apple ID button)
Enter your Apple ID details and click on the Sign In button (or, if you do not have an Apple ID, click on the Create Apple ID button)
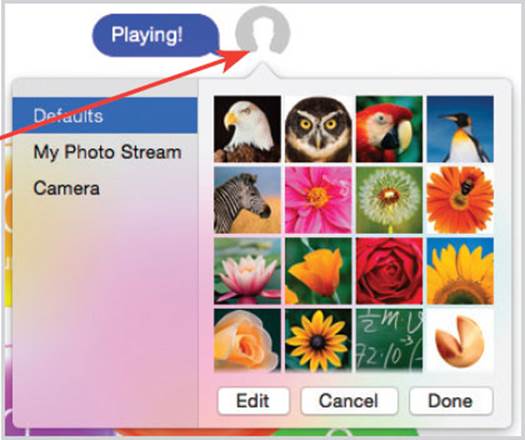
![]() You can select your own user name and also add a photo for other gamers to see, by clicking on the Me icon and selecting a photo from the default menu or select one from your own photos
You can select your own user name and also add a photo for other gamers to see, by clicking on the Me icon and selecting a photo from the default menu or select one from your own photos
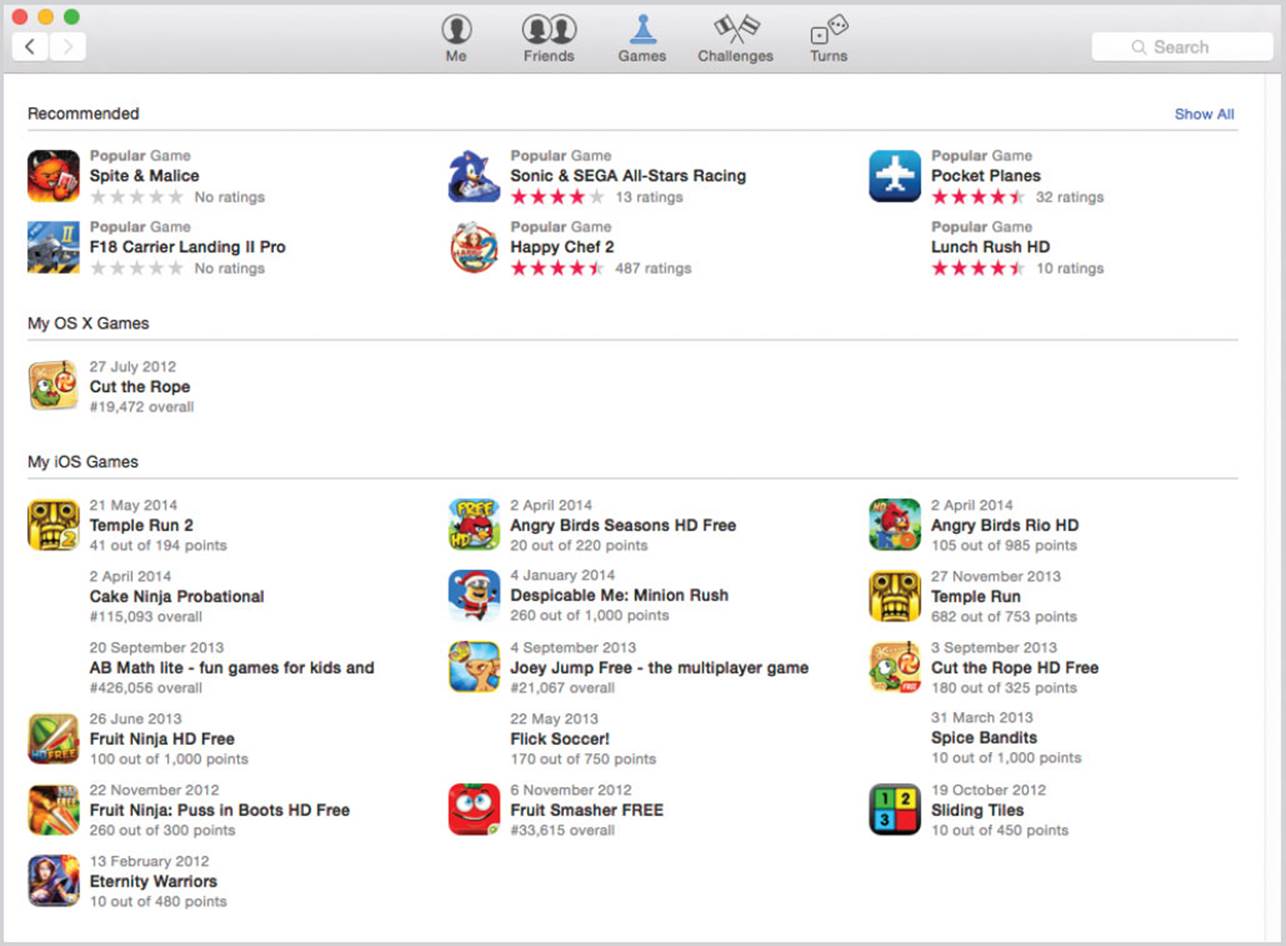
![]() Click on Games button on the top toolbar
Click on Games button on the top toolbar

![]() Your current games are displayed in the Game Center, including any that you have downloaded on any Apple devices such as iPads, iPhones or iPod Touches
Your current games are displayed in the Game Center, including any that you have downloaded on any Apple devices such as iPads, iPhones or iPod Touches
Click on a game to view details about your gaming history and other people’s achievements.