Sparrow iOS Game Framework Beginner's Guide (2014)
Chapter 11. Integrating Third-party Services
In the previous chapter, we polished our game by adding additional scenes and ironing out some of the quirks. After a game is over, it can now be restarted. Now that our game is pretty much finished, we need to apply some finishing touches, which will not influence the game directly, but its distribution and the experience the player has. If the user wants to play with their friends, we wouldn't need to implement a server and the networking mechanics by ourselves. There are services that take care of these problems; one of them is Apple Game Center.
In this chapter, we will integrate third-party services into our game. The following are the topics we will cover in this chapter:
· Getting the word out to potential testers
· The basic Game Center integration
· Showing different platforms for analytics
Getting word out to potential testers
Distributing to potential testers can be a daunting task. First, we would need to get the Unique Device Identifier (UDID) of each and every test device. We would then need to compile a special build that is restricted to only run on the devices whose UDID we provide in the provisioning profile used in the build. We would then need to send this special build to these testers, which they need to install using iTunes. After the beta testers have installed the application, we don't have any insight on how long they actually used the application and if the application crashes, they need to sync their device with iTunes and search for the crash report on the hard drive and send it to the developer. It's much better for the application to crash in the hand of beta testers than in the hands of actual customers.
For a long time, TestFlight has provided an easy solution for both collecting UDIDs and installing apps on your tester's devices. TestFlight provides an application for mobile devices that directly installs the application on the device instead of the user manually having to do so. TestFlight also has a web application that manages all of the devices, collects crash reports, and tracks the session.
The company behind TestFlight was acquired by Apple in February 2014, the result of which is that their SDK isn't allowed to be integrated into applications any more. The distribution component of TestFlight is still available for the time being.
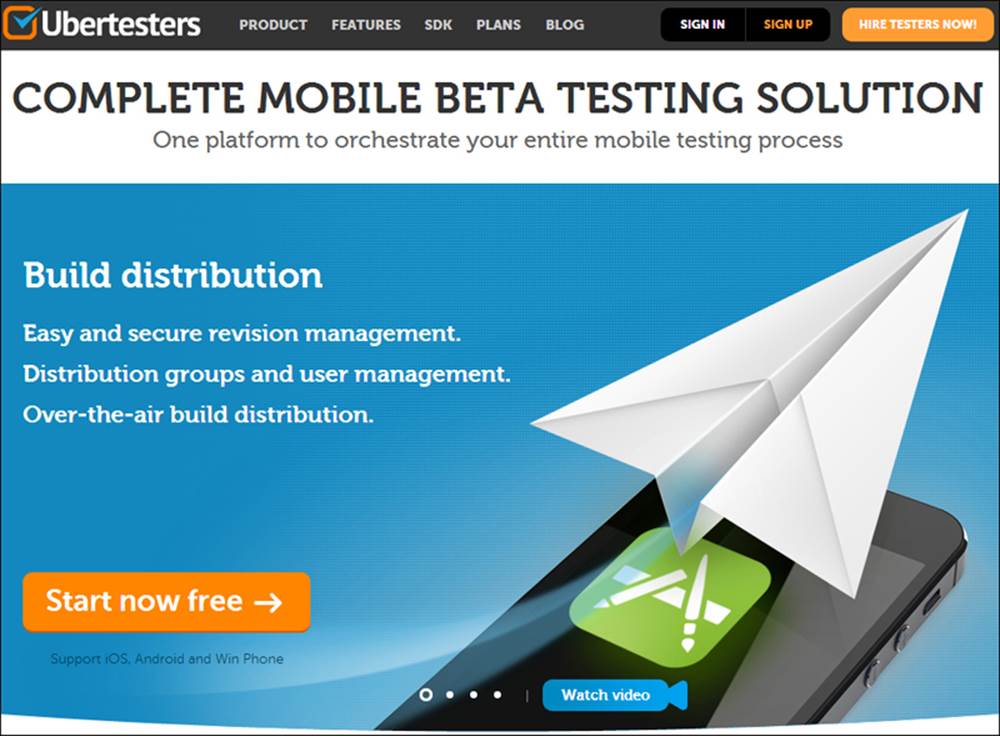
Ubertesters is a very similar service that helps us to collect UDIDs of devices and helps testers to use our application. At the time of writing this book, Ubertesters is still in beta. While Ubertesters is a paid service, they do provide a free plan which only requires registering an account with them. The following is a screenshot of the Ubertesters website:
Registering at Ubertesters
In order to distribute our game with Ubertesters, we first need to register an account at http://beta.ubertesters.com/sign_up. Enter all the necessary data in the input fields.
We then need to create our own organization, where we can add our first application. Ubertesters guides us through this process when we register for the first time.
Let's call our application "Pirate Game" and choose iOS as its platform. Now, we are going to add our own devices; this is as simple as opening the URL http://beta.ubertesters.com in our mobile Safari browser following the instructions on the screen. This installs the Ubertesters app on our device and collects the UDID of the device.
After this, we see the device we just registered on the Ubertesters web interface where we get relevant data of the device such as the device name, its model, operating system, screen resolution, its locale, and the UDID.
It is also possible to set up over-the-air distribution, which means allowing testers to download the build from your site. Instructions for this setup can be found at this link: http://aaronparecki.com/articles/2011/01/21/1/how-to-distribute-your-ios-apps-over-the-air.
Integrating Ubertesters
Before we can get some beta testers, we need to integrate the Ubertesters SDK into our game. Only packages with the SDK integrated can be made available for testers.
Time for action – integrating Ubertesters
Use the following steps to integrate Ubertesters:
1. Open our Xcode project if it's not already open.
2. Download the Ubertesters SDK from http://ubertesters.com/sdk/ubertesters.sdk.ios.zip.
3. Extract the contents from the downloaded file somewhere on the hard drive.
4. Drag the extracted contents into the project file. They should be at the root level right at the same level as Products, Frameworks, and Resources.
5. Switch to the project configuration by clicking on the project's name in the project navigator. Inside the General tab, scroll down to Linked Frameworks and Libraries.
6. Add the following libraries by clicking on the plus button, selecting the correct library, and clicking on Add:
· AdSupport.framework
· CoreImage.framework
· SystemConfiguration.framework
· CoreTelephony.framework
· CoreLocation.framework
· CoreMotion.framework
7. Switch to the Info tab inside the project configuration.
8. Add a new key inside Custom iOS Target Properties by selecting any item and clicking on the plus button.
9. Call this key ubertesters_project_id.
10. As its value, use the ID from the Ubertesters website from the application from the SDK Integration tab.
11. Switch to AppDelegate.m.
12. Import the Ubertesters header file, using the following line of code:
#import <UbertestersSDK/Ubertesters.h>
13. Initialize the Ubertesters SDK by updating the didFinishLaunchingWithOptions method, as shown in the following code:
14.- (BOOL)application:(UIApplication *)application didFinishLaunchingWithOptions:(NSDictionary *)launchOptions
15.{
16. CGRect screenBounds = [UIScreen mainScreen].bounds;
17. _window = [[UIWindow alloc] initWithFrame:screenBounds];
18.
19. _viewController = [[SPViewController alloc] init];
20.
21. // Enable some common settings here:
22. //
23. // _viewController.showStats = YES;
24. // _viewController.multitouchEnabled = YES;
25. // _viewController.preferredFramesPerSecond = 60;
26.
27. [Ubertesters initialize];
28.
29. [_viewController startWithRoot:[Game class] supportHighResolutions:YES doubleOnPad:YES];
30.
31. [_window setRootViewController:_viewController];
32. [_window makeKeyAndVisible];
33.
34. return YES;
}
35. Run the example.
When we start the example, we don't see any visible changes (refer to the following screenshot), which is an indicator that everything worked as we expected it to:
What just happened?
To get started, we opened our Xcode project, which is what we did in step 1.
Then, we downloaded the Ubertesters SDK and extracted the contents of the downloaded file. In step 4, we dragged the contents of the extracted file into the project itself. It should be on the root level directly below the project file itself on the same level asSparrow, Classes, Other Sources, Resources, Frameworks, and Products.
In order to make the Ubertesters SDK work, we need to link against a variety of frameworks. In step 5, we switched to the general configuration by clicking on the General tab, where we can find the linked frameworks and libraries right at the bottom of the page. We added all the frameworks described in step 6.
Then, we added an entry to the PLIST file of the application itself. This can be done in the Info tab. We selected any entry under Custom iOS Target Properties and clicked on the plus button next to it. We then set the key name for this property, which we namedubertesters_project_id. We already have the project ID; we got it when we registered our application on Ubertesters. In the web interface of Ubertesters, this ID can be retrieved by clicking on Projects, then on our project (Pirate Game), and after this, on the SDK Integration tab on the left-hand side. These steps are necessary so that Ubertesters knows the application we registered in the web interface belongs to our game.
To use the SDK, we imported the Ubertesters SDK header file and initialized the SDK itself. This all happened inside the AppDelegate file in steps 11 to 13. We added the initialization of the SDK to where the application launches inside didFinishLaunchingWithOptions.
When we ran the example, there wasn't any visible change and the game ran as expected. When running the game on the actual device, it may take a bit longer to load, as the Ubertesters SDK checks against an Internet connection at startup. For production builds (for example, an App Store release), it is not recommended for the SDK to be included; the SDK should be included for the builds that are specifically going to beta testers.
Creating a build for beta testers
Now that we have integrated the Ubertesters SDK in our game, we can create a special build for our beta testers, which at the moment is just us, or more specifically, our own device.
Time for action – creating a build for beta testers
Us the following steps to create a special build for beta testers:
1. Log in to the provisioning portal at https://developer.apple.com/account/ios/certificate/certificateList.action.
2. In Identifiers, click on App IDs. Add a new one by clicking the plus button.
3. From App ID Description, choose PirateGame.
4. Set an App ID Prefix of your choice. All of the available prefixes will be shown as a drop-down list, where the default is Team ID. If you are unsure which one to use, use the default one.
5. In the Bundle ID input box, put in the bundle ID of our game. If you haven't chosen one, it's time to do so now. Make sure that the bundle ID is the same as Bundle identifier in the App-Info.plist file of our application. It is recommended that you use a reverse-domain name. Click on Continue and then Done to finish the process.
6. Show all devices by clicking on All in the Devices tab.
7. Add a new device by clicking on the plus button.
8. In UDID, enter the UDID of our device. This can be retrieved from the Ubertesters web application.
9. In Provisioning Profiles, select Distribution and add a new one by clicking the button with the plus icon.
10. Select Ad Hoc as the distribution type and click on Continue.
11. Select App ID we had created in step 5 and click on Continue.
12. If there isn't a certificate available, you will be asked to create a new certificate in the next step and select App Store and Ad hoc. Follow the instructions to generate the certificate. If there are already certificates available, you will be asked to choose one of them.
13. Open the newly created certificate and select the device we just added.
14. Generate the updated certificate.
15. In the Xcode project, select iOS Device as the target. This can be done through the build menu, where the product and the target are being displayed.
16. In the menu, select Product and click on Archive.
17. Open the Xcode organizer by clicking on Window and selecting Organizer.
18. Select the latest build and click on Distribute.
19. On the window that pops up, select Save for Enterprise or Ad Hoc Deployment. Confirm by clicking on Next.
20. Select the provisioning profile we created earlier.
21. Click on Export and save the package somewhere on the hard drive.
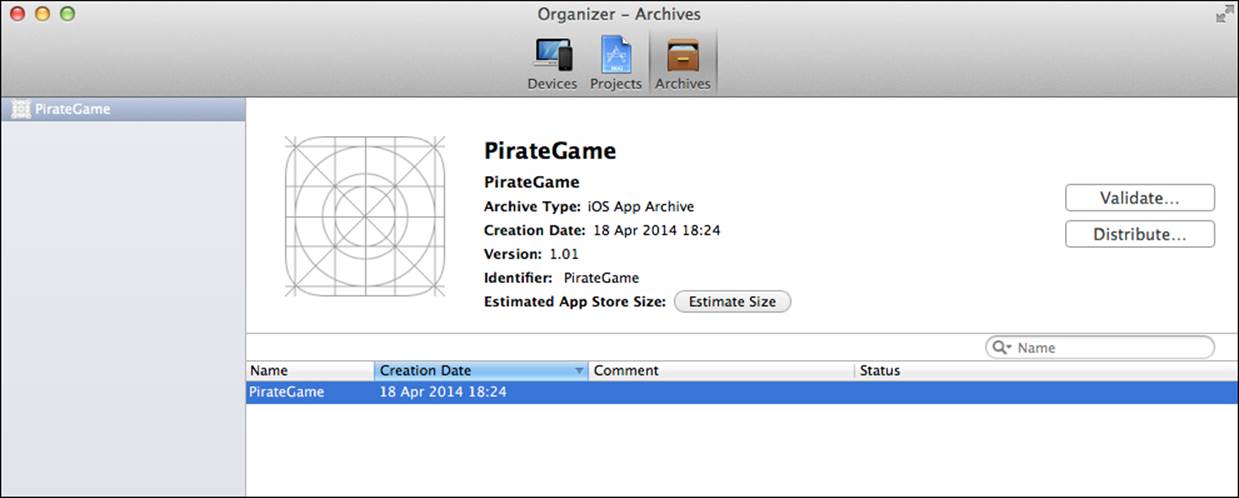
After we created the build, we return to the Xcode organizer, where we can either distribute the build again or validate it, as shown in the following screenshot:
What just happened?
To create a special build for testers, we created an ad-hoc distribution profile just for our game. This is something we have to do just once per application, but not per build.
To create certificates, we needed the provisioning portal from the Apple developer member center. It consists of the following three tasks:
· Creating an App ID: This identifies our game (steps 2 to 5)
· Adding a new device: A distribution certificate can hold a number of target devices, which need to be added before the distribution certificate is created (steps 6 to 9)
· Creating a distribution certificate: This is used to sign the special build (steps 10 to 14)
Now that the certificate is generated, we created the build with the help of this certificate. We needed to select the iOS Device (or the name of the connected iOS device—if there is one). We selected a product to create an archive which we did in step 16. After the archive is created, we can select it from the Xcode organizer. We wanted to distribute this build, so that's why we clicked on the button with the Distribute label in step 18.
As we wanted an ad hoc deployment, we selected this option. Ad hoc deployment means that we are distributing our applications to a known number of devices, while a distribution build—such as for the Apple App Store—means the application can be installedon any number of devices that got the application from the Apple App Store. When we had the option to select a provisioning profile, we chose the one we created earlier. By clicking on Export, we got an IPA file that we had put in a safe place for the moment.
Deploying an application
Our special build is now finished, so we can go ahead and deploy our game using the Ubertesters web interface.
Time for action – deploying an application
To deploy the application, perform the following steps:
1. Log in to Ubertesters at http://beta.ubertesters.com/sign_in.
2. Click on Projects from the top menu.
3. Click on Upload revision and choose the special build we created earlier.
4. We can now enter a revision title and a description.
5. Select the revision we just uploaded.
6. Click on Start to allow this revision to be installed on the target devices.
7. On our registered device, we can now install our game.
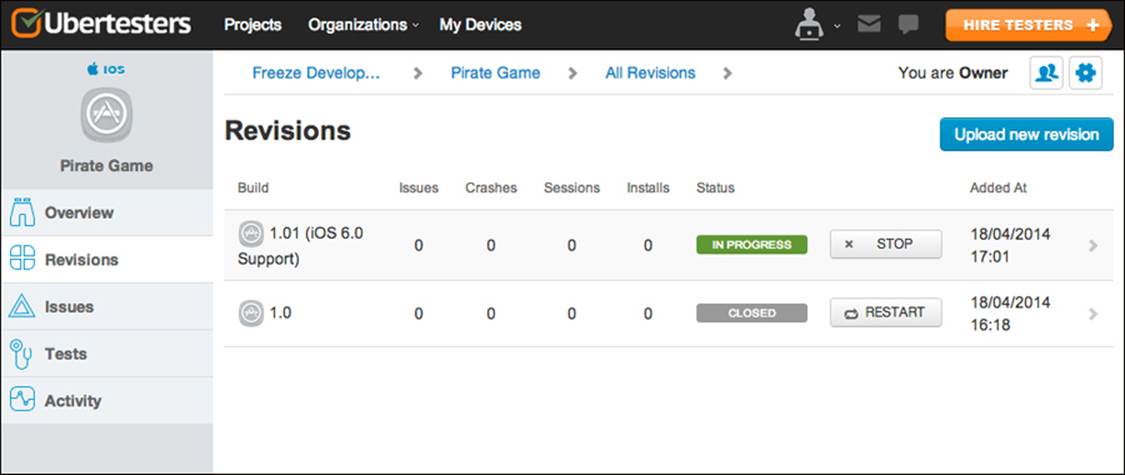
On the web interface, we can track the installations of our application, as shown in the following screenshot:
What just happened?
To deploy the application using Ubertesters, we logged in to Ubertesters first. When we see all the available projects, we can upload a new revision for each of the projects. At the moment, we only have one project.
After the revision is uploaded, we can optionally set a title and a description for the build. The following two things need to be considered when uploading a build:
· The Ubertesters SDK needs to be integrated in the application.
· The bundle version must be different for each uploaded revision. This setting can be found in the Info.plist file.
Before the application can be installed on the target devices, we need to start the process, which we did using the Start button. The testing phase can be stopped and restarted for every revision.
When we open the Ubertesters app in our registered device, we can now download our game. When our game is installed, we can run the game just as we expect it to.
Explaining Game Center
Game Center is a social media feature by Apple that allows leaderboards, achievements, and matchmaking. In a way, it's very similar to Steam for desktop platforms. Naturally, Game Center only works on iOS devices.
Integrating Game Center authentication
The first thing we need to do is authenticate Game Center to be able to use its features.
Time for action – integrating Game Center authentication
Use the following steps to integrate Game Center authentication:
1. Open our Xcode project if it's not already open.
2. Add GameKit.framework to the list of frameworks to be linked.
3. Switch to AppDelegate.m.
4. Import the GameKit header file using the following line of code:
#import <GameKit/GameKit.h>
5. Update the didFinishLaunchingWithOptions method to look like the following piece of code:
6. - (BOOL)application:(UIApplication *)application didFinishLaunchingWithOptions:(NSDictionary *)launchOptions
7. {
8. CGRect screenBounds = [UIScreen mainScreen].bounds;
9. _window = [[UIWindow alloc] initWithFrame:screenBounds];
10.
11. _viewController = [[SPViewController alloc] init];
12.
13. [Ubertesters initialize];
14.
15. [_viewController startWithRoot:[Game class] supportHighResolutions:YES doubleOnPad:YES];
16.
17. [GKLocalPlayer localPlayer].authenticateHandler = ^(UIViewController *viewController, NSError *error) {
18. if ([GKLocalPlayer localPlayer].authenticated) {
19. NSLog(@"Already authenticated");
20. } else if(viewController) {
21. [[Sparrow currentController] presentViewController:viewController animated:YES completion:nil];//present the login form
22. } else {
23. NSLog(@"Problem while authenticating");
24. }
25. };
26.
27. [_window setRootViewController:_viewController];
28. [_window makeKeyAndVisible];
29.
30. return YES;
}
31. Run the example. If we are not authenticated yet, we should get a dialog to log in to Game Center:
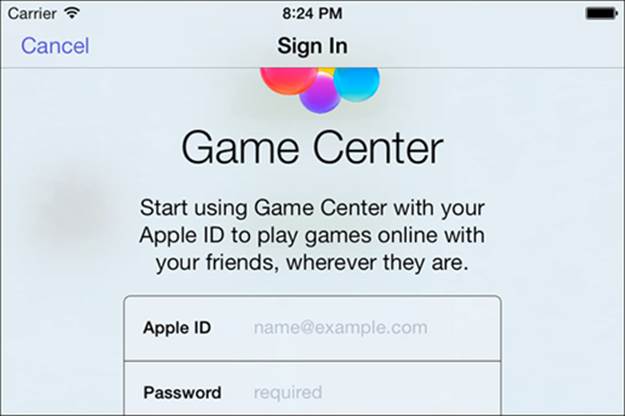
What just happened?
To integrate Game Center, we linked the GameKit framework.
The next thing we did is update the AppDelegate class, and once more, it's the method that handles everything once the application has finished launching. In step 4, we needed to import the GameKit header.
In the next step, we authenticated Game Center right after we started the view controller with the Game class. The localPlayer returns the active player who interacts with the device.
We added an authentication handler that is called once Game Center is authenticated. If the player is already authenticated, we are just going to log in. The same happens if there is an error when the authentication fails.
If the player is not authenticated, we show the Game Center view controller through the current view controller from Sparrow.
Game Center is handled through iTunes Connect. The workflow is described at https://developer.apple.com/library/ios/documentation/LanguagesUtilities/Conceptual/iTunesConnectGameCenter_Guide/Introduction/Introduction.html.
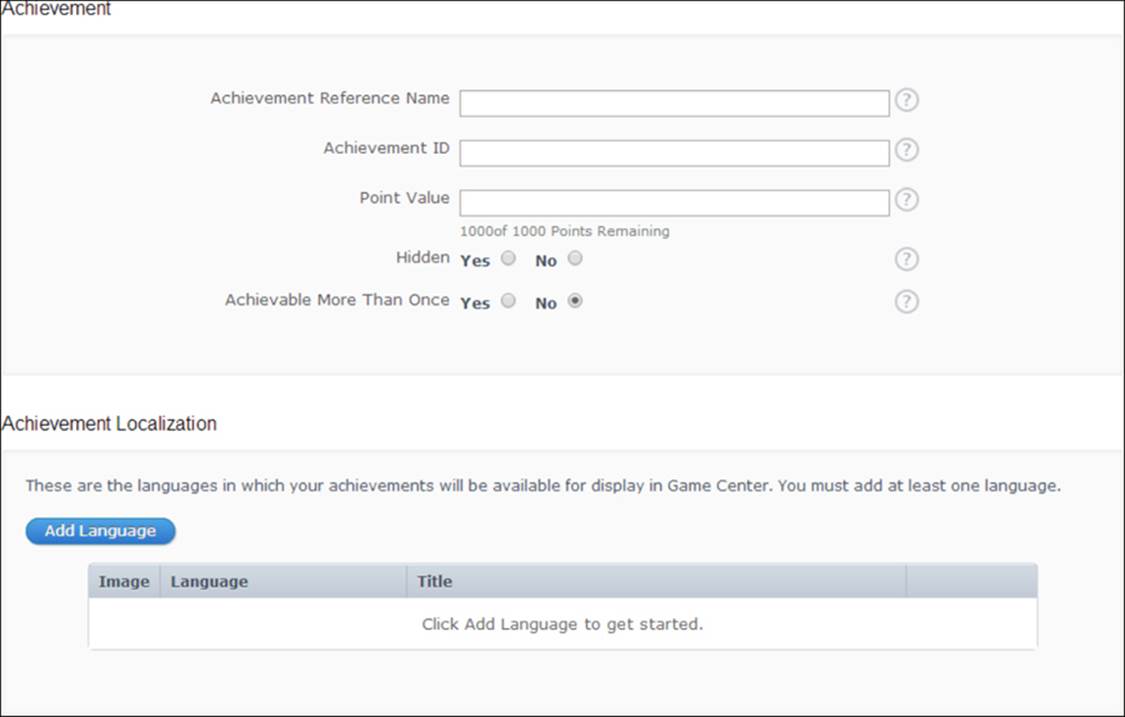
If we want to use achievements in our game, we need to add all of our achievements in the iTunes Connect window shown in the following screenshot:
We would need a piece of code similar to the following code to set an achievement:
GKAchievement *achievement = [[GKAchievement alloc] initWithIdentifier: @"sankALotOfShips"];
if (achievement) {
achievement.percentComplete = 100;
[achievement reportAchievementWithCompletionHandler:^(NSError *error) {
if (error != nil) {
NSLog(@"Error in reporting achievements: %@", error);
}
}];
}
Let's assume we have an achievement called sankALotOfShips, which—as the name suggests—should be shown if our ship sank a whole lot of ships.
We retrieved the achievements and if the achievement exists, we set the achievement to be complete by simply adjusting the percentComplete property to 100. We then reported the updated achievement. If there was an error, we logged it to the console.
To learn more about achievements in Game Center, take a look at https://developer.apple.com/library/ios/documentation/NetworkingInternet/Conceptual/GameKit_Guide/Achievements/Achievements.html.
Have a go hero
Game Center has quite a big arsenal of things to do. The following are some suggestions of what could be done:
· Currently, we only log if the player is already authenticated or the authentication failed because the player canceled the authentication. This can be improved with some basic error handling.
· Game Center also provides leaderboards. As our game is very much highscore-based or gold-based to be more accurate, you could try to utilize this functionality to add leaderboards to our game. If you are not too afraid about performing some refactoring, you might even want to introduce a highscore-based system that doesn't rely on gold. This is definitely a harder, but a more balanced way to go, as the player shouldn't be punished for using in-game currency to upgrade their gear. Take a look at the official Apple documentation at https://developer.apple.com/library/ios/documentation/NetworkingInternet/Conceptual/GameKit_Guide/LeaderBoards/LeaderBoards.html to learn more about leaderboards.
· Since the preceding task is definitely much more difficult and a bit far fetched, you can try to use matchmaking abilities to let two players battle against each other. This will lead to a major refactoring of the existing code though. A good starting point will be to take a look at the matchmaking documentation at https://developer.apple.com/library/ios/documentation/NetworkingInternet/Conceptual/GameKit_Guide/MatchmakingwithGameCenter/MatchmakingwithGameCenter.html.
An overview of analytics services
Some basic analytics are most likely provided by a beta distribution service (as Ubertesters in our case). When you have a paid app in the Apple App Store, it is often necessary to have detailed information, such as how many in-app purchases there were and accurate details about play sessions.
Analytics are usually a paid service; in most cases, there is either a free or a trial version. Let's take a look at two analytics services.
Flurry analytics
Flurry is a service that has been around for a few years and provides support for multiple platforms. It provides the following features:
· Geographical data of users
· Crash analytics
· Play session statistics
Flox
Flox is a service made by Gamua, the guys behind the Sparrow framework. Flox is a relatively new service which is available at http://gamua.com/flox/.
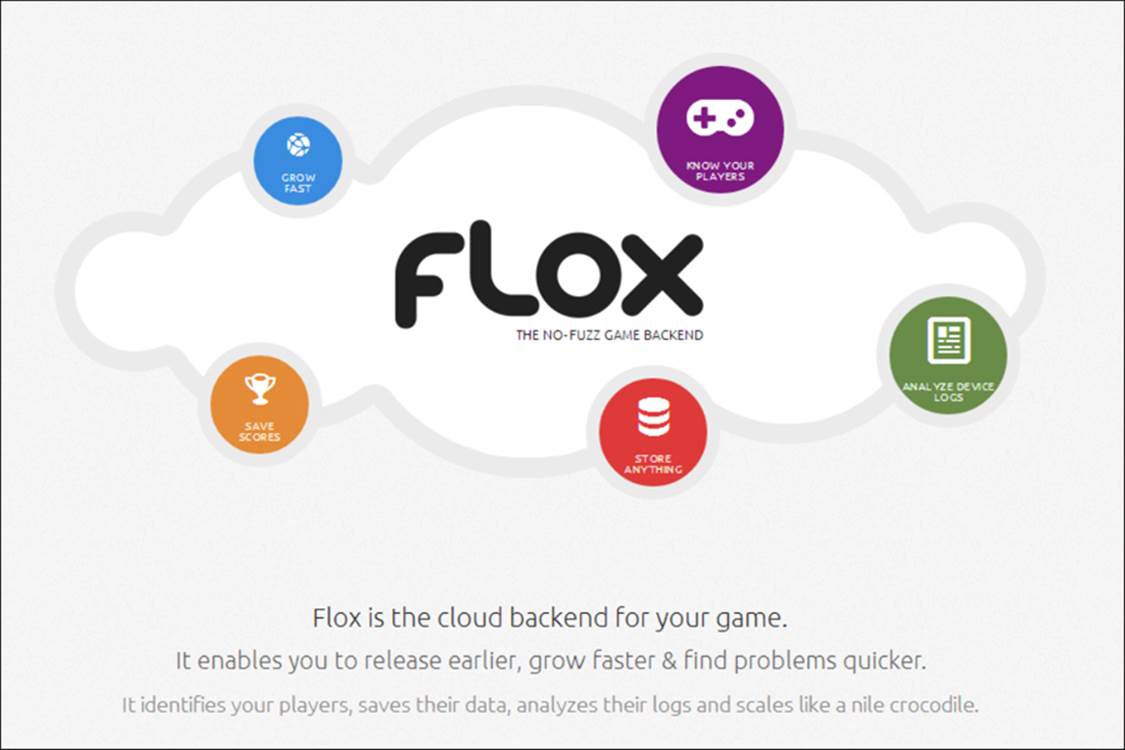
Flox provides the following features:
· Remote logging
· Leaderboards
· Save games
· Session and user statistics
The Objective-C headers are available at https://github.com/Gamua/Flox-ObjC. It even offers Game Center integration.
Let's take a look at what Flox integration would look like. The next step after registering on the Flox service is to create a game. We get its game ID and its game key.
After integrating the Flox SDK into our game, we will need to initialize Flox inside our application delegate (AppDelegate.m), using the following code:
[Flox startWithGameID:@"gameID" key:@"gameKey" version:@"1.0"];
After this, we can dispatch events that will show up in the Flox web interface:
[Flox logEvent:@"GameStarted"];
If we wanted to use leaderboards through Flox, we will need to create the leaderboard itself using the web interface. If we want to load all scores from the leaderboards, the following piece of code will set us up:
[Flox loadScoresFromLeaderboard:@"default" timeScope:FXTimeScopeAllTime onComplete:^(NSArray *scores, NSError *error)
{
NSLog(@"So much scores. Got %d", (int)scores.count);
}];
To save to the leaderboards, we can use the following piece of code:
[Flox postScore:World.gold ofPlayer:@"playerName" toLeaderboard:@"default"];
Pop quiz
Q1. What is Ubertesters?
1. It allows private applications for beta testers to be distributed
2. It is a platform to search for beta testers
3. It is an online magazine that tests mobile applications
Q2. What is Game Center?
1. Apple's solution for a game's social features such as achievements and high score lists
2. A publisher for mobile games
3. Games that work on multiple platforms
Q3. What does an analytics platform usually provide?
1. Private data of users
2. Anonymous play sessions
3. Statistical data
Summary
In this chapter, we learned about integrating third-party services into our game, especially to distribute our game and integrate it with Apple's Game Center.
Our game is now finished. Of course, there are a lot of things that we could still add or update, but all in all, we mastered the process of creating a playable game during the course of this book while learning about the Sparrow framework as well as distributing our application and creating game assets.