C# 6.0 and the .NET 4.6 Framework (2015)
PART VI
Introducing the .NET Base Class Libraries
CHAPTER 22
ADO.NET Part II: The Disconnected Layer
The previous chapter gave you a chance to examine the connected layer and the foundational components of ADO.NET, which allow you to submit SQL statements to a database using the connection, command, and data reader objects of your data provider. In this chapter, you will learn about the disconnected layer of ADO.NET. Using this facet of ADO.NET lets you model database data in memory, within the calling tier, by leveraging numerous members of the System.Data namespace (most notably, DataSet, DataTable, DataRow, DataColumn, DataView, and DataRelation). By doing so, you can provide the illusion that the calling tier is continuously connected to an external data source; the reality is that the caller is operating on a local copy of relational data.
![]() Note As mentioned in the introduction of the previous chapter, the Entity Framework (EF) is gaining momentum and is seeing increased adoption. I will cover EF in the next chapter, but it’s still important to know how ADO.NET works at its core, since EF (and the other .NET object-relational mappers [ORMs]) are built on top of ADO.NET. While it is possible to use this disconnected aspect of ADO.NET without ever making a literal connection to a relational database, you will most often obtain populated DataSet objects using the data adapter object of your data provider. As you will see, data adapter objects function as a bridge between the client tier and a relational database. Using these objects, you can obtain DataSet objects, manipulate their contents, and send modified rows back for processing. The end result is a highly scalable data-centric .NET application.
Note As mentioned in the introduction of the previous chapter, the Entity Framework (EF) is gaining momentum and is seeing increased adoption. I will cover EF in the next chapter, but it’s still important to know how ADO.NET works at its core, since EF (and the other .NET object-relational mappers [ORMs]) are built on top of ADO.NET. While it is possible to use this disconnected aspect of ADO.NET without ever making a literal connection to a relational database, you will most often obtain populated DataSet objects using the data adapter object of your data provider. As you will see, data adapter objects function as a bridge between the client tier and a relational database. Using these objects, you can obtain DataSet objects, manipulate their contents, and send modified rows back for processing. The end result is a highly scalable data-centric .NET application.
This chapter will also illustrate some data-binding techniques, using the context of a Windows Forms GUI desktop application, and examine the role of a strongly typed DataSet. You will also update the AutoLotDAL.dll data library you created in Chapter 21 with a new namespace that uses the disconnected layer of ADO.NET. Last but not least, you will learn about the role of LINQ to DataSet, which allows you to apply LINQ queries to your in-memory data cache.
![]() Note You will learn about various data-binding techniques for Windows Presentation Foundation and ASP.NET applications later in this book.
Note You will learn about various data-binding techniques for Windows Presentation Foundation and ASP.NET applications later in this book.
Understanding the Disconnected Layer of ADO.NET
As you saw in the previous chapter, working with the connected layer allows you to interact with a database using the primary connection, command, and data reader objects. You can use this handful of classes to select, insert, update, and delete records to your heart’s content (as well as invoke stored procedures or perform other data operations [e.g., DDL to create table and DCL to grant permissions]). However, you have seen only part of the ADO.NET story. Recall that you can use the ADO.NET object model in a disconnected manner.
Using the disconnected layer, it is possible to model relational data using an in-memory object model. Far beyond simply modeling a tabular block of rows and columns, the types within System.Data allow you to represent table relationships, column constraints, primary keys, views, and other database primitives. After you model the data, you can apply filters, submit in-memory queries, and persist (or load) your data in XML and binary formats. You can do all of this without ever making a literal connection to a DBMS (which is why it’s called a disconnected layer) by loading data from a local XML file or manually building a DataSet in code.
![]() Note In Chapter 23, you will examine the ADO.NET Entity Framework, which builds upon the concepts found in the disconnected layer examined here.
Note In Chapter 23, you will examine the ADO.NET Entity Framework, which builds upon the concepts found in the disconnected layer examined here.
You could use the disconnected types without ever connecting to a database, but you will typically still use connection and command objects. In addition, you will leverage a specific object, the data adapter (which extends the abstract DbDataAdapter class), to fetch and update data. Unlike the connected layer, data obtained with a data adapter is not processed using data reader objects. Rather, data adapter objects use DataSet objects (or more specifically, the DataTable objects in a DataSet) to move data between the caller and data source. The DataSet type is a container for any number of DataTable objects, each of which contains a collection of DataRow and DataColumn objects.
The data adapter object of your data provider handles the database connection automatically. In an effort to increase scalability, data adapters keep the connection open for the shortest amount of time possible. After the caller receives the DataSet object, the calling tier is completely disconnected from the database and left with a local copy of the remote data. The caller is free to insert, delete, or update rows from a given DataTable, but the physical database is not updated until the caller explicitly passes a DataTable in the DataSet to the data adapter for updating. In a nutshell, DataSets allow the clients to pretend they are always connected; however, they actually operate on an in-memory database (see Figure 22-1).
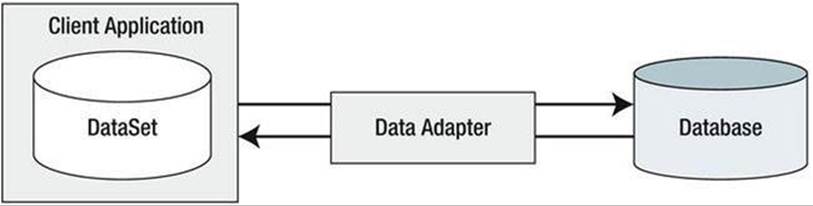
Figure 22-1. Data adapter objects move DataSets to and from the client tier
Given that the centerpiece of the disconnected layer is the DataSet class, the first task of this chapter is to learn how to manipulate a DataSet manually. Once you can do this, you will have no problem manipulating the contents of a DataSet retrieved from a data adapter object.
Understanding the Role of the DataSet
As noted previously, a DataSet is an in-memory representation of relational data. More specifically, a DataSet is a class type that internally maintains three strongly typed collections (see Figure 22-2).
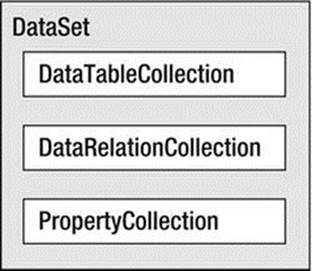
Figure 22-2. The anatomy of a DataSet
The Tables property of the DataSet allows you to access the DataTableCollection that contains the individual DataTables. Another important collection used by the DataSet is DataRelationCollection. Given that a DataSet is a disconnected version of a database schema, you can use it to represent the parent-child relationships programmatically between its tables. For example, you can create a relation between two tables to model a foreign key constraint using the DataRelation type. You can add this object to theDataRelationCollection with the Relations property. At this point, you can navigate between the related tables as you search for data. You will see how to do this later in the chapter.
The ExtendedProperties property provides access to the PropertyCollection object, which allows you to associate any extra information to the DataSet as name-value pairs. This information can be literally anything, even if it has no bearing on the database data itself. For example, you can associate your company’s name to a DataSet, which can then function as in-memory metadata. Other examples of extended properties might include time stamps, an encrypted password that must be supplied to access the contents of the DataSet, a number representing a data refresh rate, and so forth.
![]() Note The DataTable and DataColumn classes also support the ExtendedProperties property.
Note The DataTable and DataColumn classes also support the ExtendedProperties property.
Key Properties of the DataSet
Before exploring too many other programmatic details, let’s take a look at some core members of the DataSet. Table 22-1 describes some additional properties of interest beyond the Tables, Relations, and ExtendedProperties properties.
Table 22-1. Properties of the DataSet
|
Property |
Meaning in Life |
|
CaseSensitive |
Indicates whether string comparisons in DataTable objects are case sensitive (or not). The default is false (string comparisons are not case sensitive by default). |
|
DataSetName |
Represents the friendly name of this DataSet. Typically, you establish this value as a constructor parameter. |
|
EnforceConstraints |
Gets or sets a value indicating whether constraint rules are followed when attempting any update operations (the default is true). |
|
HasErrors |
Gets a value indicating whether there are errors in any of the rows in any of the DataTables of the DataSet. |
|
RemotingFormat |
Allows you to define how the DataSet should serialize its content (binary or XML, which is the default). |
Key Methods of the DataSet
The methods of the DataSet work in conjunction with some of the functionality provided by the aforementioned properties. In addition to interacting with XML streams, the DataSet provides methods that allow you to copy the contents of your DataSet, navigate between the internal tables, and establish the beginning and ending points of a batch of updates. Table 22-2 describes some core methods.
Table 22-2. Select Methods of the DataSet
|
Methods |
Meaning in Life |
|
AcceptChanges() |
Commits all the changes made to this DataSet since it was loaded or the last time AcceptChanges() was called. |
|
Clear() |
Completely clears the DataSet data by removing every row in each DataTable. |
|
Clone() |
Clones the structure, but not the data, of the DataSet, including all DataTables, as well as all relations and any constraints. |
|
Copy() |
Copies both the structure and data for this DataSet. |
|
GetChanges() |
Returns a copy of the DataSet containing all changes made to it since it was last loaded or since AcceptChanges() was called. This method is overloaded so that you can get just the new rows, just the modified rows, or just the deleted rows. |
|
HasChanges() |
Gets a value indicating whether the DataSet has changes, including new, deleted, or modified rows. |
|
Merge() |
Merges this DataSet with a specified DataSet. |
|
ReadXml() |
Allows you to define the structure of a DataSet object and populate it with data, based on XML schema and data read from a stream. |
|
RejectChanges() |
Rolls back all the changes made to this DataSet since it was created or since the last time AcceptChanges() was called. |
|
WriteXml() |
Allows you to write out the contents of a DataSet into a valid stream. |
Building a DataSet
Now that you have a better understanding of the role of the DataSet (and some idea of what you can do with one), create a new Console Application project named SimpleDataSet and import the System.Data namespace. Within the Main() method, define a new DataSet object that contains three extended properties that represent a time stamp, a unique identifier (represented as a System.Guid type), and your company’s name, as follows (you also need to add using static System.Console;):
using static System.Console;
static void Main(string[] args)
{
WriteLine("***** Fun with DataSets *****\n");
// Create the DataSet object and add a few properties.
var carsInventoryDS = new DataSet("Car Inventory");
carsInventoryDS.ExtendedProperties["TimeStamp"] = DateTime.Now;
carsInventoryDS.ExtendedProperties["DataSetID"] = Guid.NewGuid();
carsInventoryDS.ExtendedProperties["Company"] =
"Mikko’s Hot Tub Super Store";
FillDataSet(carsInventoryDS);
PrintDataSet(carsInventoryDS);
ReadLine();
}
![]() Note A GUID (aka a globally unique identifier) is a statically unique 128-bit number.
Note A GUID (aka a globally unique identifier) is a statically unique 128-bit number.
A DataSet object is not terribly interesting until you insert any number of DataTables. Therefore, the next task is to examine the internal composition of the DataTable, beginning with the DataColumn type.
Working with DataColumns
The DataColumn type represents a single column within a DataTable. Collectively speaking, the set of all DataColumn types bound to a given DataTable represents the foundation of a table’s schema information. For example, if you were to model the Inventory table of theAutoLot database (see Chapter 21), you would create four DataColumns, one for each column (CarID, Make, Color, and PetName). After you create your DataColumn objects, you typically add them into the columns collection of the DataTable type (using the Columnsproperty).
Based on your background, you might know that you can assign a given column in a database table a set of constraints (e.g., configured as a primary key, assigned a default value, or configured to contain read-only information). Also, every column in a table must map to an underlying data type. For example, the Inventory table’s schema requires that the CarID column map to an integer, while Make, Color, and PetName map to an array of characters. The DataColumn class has numerous properties that allow you to configure precisely these things. Table 22-3provides a rundown of some core properties.
Table 22-3. Properties of the DataColumn
|
Properties |
Meaning in Life |
|
AllowDBNull |
You use this property to indicate whether a row can specify null values in this column. The default value is true. |
|
AutoIncrement AutoIncrementSeed AutoIncrementStep |
You use these properties to configure the autoincrement behavior for a given column. This can be helpful when you want to ensure unique values in a given DataColumn (such as a primary key). By default, a DataColumn does not support autoincrement behavior. |
|
Caption |
This property gets or sets the caption you want to display for this column. This allows you to define a user-friendly version of a literal database column name. |
|
ColumnMapping |
This property determines how a DataColumn is represented when a DataSet is saved as an XML document using the DataSet.WriteXml() method. You can specify that the data column should be written out as an XML element, an XML attribute, simple text content, or ignored altogether. |
|
ColumnName |
This property gets or sets the name of the column in the Columns collection (meaning how it is represented internally by the DataTable). If you do not set the ColumnName explicitly, the default values are Column with (n+1) numerical suffixes (e.g., Column1, Column2, and Column3). |
|
DataType |
This property defines the data type (e.g., Boolean, string, or float) stored in the column. |
|
DefaultValue |
This property gets or sets the default value assigned to this column when you insert new rows. |
|
Expression |
This property gets or sets the expression used to filter rows, calculate a column’s value, or create an aggregate column. |
|
Ordinal |
This property gets the numerical position of the column in the Columns collection maintained by the DataTable. |
|
ReadOnly |
This property determines whether this column is read-only, once a row has been added to the table. The default is false. |
|
Table |
This property gets the DataTable that contains this DataColumn. |
|
Unique |
This property gets or sets a value indicating whether the values in each row of the column must be unique or if repeating values are permissible. If you assign a column a primary key constraint, then you must set the Unique property to true. |
Building a DataColumn
To continue with the SimpleDataSet project (and illustrate the use of the DataColumn), assume you would like to model the columns of the Inventory table. Given that the CarID column will be the table’s primary key, you will configure this DataColumn object as read-only, unique, and non-null (using the ReadOnly, Unique, and AllowDBNull properties). Next, update the Program class with a new method named FillDataSet(), which you use to build four DataColumn objects. Note this method takes a DataSet object as its only parameter.
static void FillDataSet(DataSet ds)
{
// Create data columns that map to the
// "real" columns in the Inventory table
// of the AutoLot database.
var carIDColumn = new DataColumn("CarID", typeof (int))
{
Caption = "Car ID",
ReadOnly = true,
AllowDBNull = false,
Unique = true,
};
var carMakeColumn = new DataColumn("Make", typeof (string));
var carColorColumn = new DataColumn("Color", typeof (string));
var carPetNameColumn = new DataColumn("PetName", typeof (string))
{ Caption = "Pet Name"};
}
Notice that when you configure the carIDColumn object, you assign a value to the Caption property. This property is helpful because it allows you to define a string value for display purposes, which can be distinct from the literal database table column name (column names in a literal database table are typically better suited for programming purposes [e.g., au_fname] than display purposes [e.g., Author First Name]). Here, you set the caption for the PetName column for the same reason, because Pet Name looks nicer than PetName to the end user.
Enabling Autoincrementing Fields
One aspect of the DataColumn you can choose to configure is its ability to autoincrement. You use an autoincrementing column to ensure that when a new row is added to a given table, the value of this column is assigned automatically, based on the current step of the increase. This can be helpful when you want to ensure that a column has no repeating values (e.g., a primary key).
You control this behavior using the AutoIncrement, AutoIncrementSeed, and AutoIncrementStep properties. You use the seed value to mark the starting value of the column; you use the step value to identify the number to add to the seed when incrementing. Consider the following update to the construction of the carIDColumn DataColumn:
static void FillDataSet(DataSet ds)
{
var carIDColumn = new DataColumn("CarID", typeof (int))
{
Caption = "Car ID",
ReadOnly = true,
AllowDBNull = false,
Unique = true,
AutoIncrement = true,
AutoIncrementSeed = 1,
AutoIncrementStep = 1
};
}
Here, you configure the carIDColumn object to ensure that, as rows are added to the respective table, the value for this column is incremented by 1. You set the seed at 1, so this column would be numbered 1, 2, 3, 4, and so forth.
Adding DataColumn Objects to a DataTable
The DataColumn type does not typically exist as a stand-alone entity; however, you do typically insert it into a related DataTable. For example, create a new DataTable object (fully detailed in a moment) and insert each DataColumn object in the columns collection using theColumns property, like so:
static void FillDataSet(DataSet ds):
{
...
// Now add DataColumns to a DataTable.
var inventoryTable = new DataTable("Inventory");
inventoryTable.Columns.AddRange(new[]
{carIDColumn, carMakeColumn, carColorColumn, carPetNameColumn});
}
At this point, the DataTable object contains four DataColumn objects that represent the schema of the in-memory Inventory table. However, the table is currently devoid of data, and the table is currently outside of the table collection maintained by the DataSet. You will deal with both of these shortcomings, beginning by populating the table with data using DataRow objects.
Working with DataRows
As you have seen, a collection of DataColumn objects represents the schema of a DataTable. In contrast, a collection of DataRow objects represents the actual data in the table. Thus, if you have 20 rows in the Inventory table of the AutoLot database, you can represent these records using 20 DataRow objects.
Table 22-4 documents some (but not all) of the members of the DataRow type.
Table 22-4. Key Members of the DataRow Type
|
Members |
Meaning in Life |
|
HasErrors GetColumnsInError() GetColumnError() ClearErrors() RowError |
The HasErrors property returns a Boolean value indicating whether there are errors in a DataRow. If so, you can use the GetColumnsInError() method to obtain the offending columns and GetColumnError() to obtain the error description. Similarly, you can use the ClearErrors()method to remove each error listing for the row. The RowError property allows you to configure a textual description of the error for a given row. |
|
ItemArray |
This property gets or sets all the column values for this row using an array of objects. |
|
RowState |
You use this property to pinpoint the current state of the DataRow in the DataTable containing the DataRow, using values of the RowState enumeration (e.g., a row can be flagged as new, modified, unchanged, or deleted). |
|
Table |
You use this property to obtain a reference to the DataTable containing this DataRow. |
|
AcceptChanges() RejectChanges() |
These methods commit or reject all changes made to this row since the last time AcceptChanges() was called. |
|
BeginEdit() EndEdit() CancelEdit() |
These methods begin, end, or cancel an edit operation on a DataRow object. |
|
Delete() |
This method marks a row you want to remove when the AcceptChanges() method is called. |
|
IsNull() |
This method gets a value indicating whether the specified column contains a null value. |
Working with a DataRow is a bit different from working with a DataColumn; you cannot create a direct instance of this type because there is no public constructor.
// Error! No public constructor!
DataRow r = new DataRow();
Instead, you obtain a new DataRow object from a given DataTable. For example, assume you want to insert two rows in the Inventory table. The DataTable.NewRow() method allows you to obtain the next slot in the table, at which point you can fill each column with new data using the type indexer. When doing so, you can specify either the string name assigned to the DataColumn or its (zero-based) ordinal position.
static void FillDataSet(DataSet ds)
{
...
// Now add some rows to the Inventory Table.
DataRow carRow = inventoryTable.NewRow();
carRow["Make"] = "BMW";
carRow["Color"] = "Black";
carRow["PetName"] = "Hamlet";
inventoryTable.Rows.Add(carRow);
carRow = inventoryTable.NewRow();
// Column 0 is the autoincremented ID field,
// so start at 1.
carRow[1] = "Saab";
carRow[2] = "Red";
carRow[3] = "Sea Breeze";
inventoryTable.Rows.Add(carRow);
}
![]() Note If you pass the DataRow’s indexer method an invalid column name or ordinal position, you will receive a runtime exception.
Note If you pass the DataRow’s indexer method an invalid column name or ordinal position, you will receive a runtime exception.
At this point, you have a single DataTable containing two rows. Of course, you can repeat this general process to create a number of DataTables to define the schema and data content. Before you insert the inventoryTable object into your DataSet object, you should check out the all-important RowState property.
Understanding the RowState Property
The RowState property is useful when you need to identify programmatically the set all rows in a table that have changed from their original value, have been newly inserted, and so forth. You can assign this property any value from the DataRowState enumeration, as shown in Table 22-5.
Table 22-5. Values of the DataRowState Enumeration
|
Value |
Meaning in Life |
|
Added |
The row has been added to a DataRowCollection, and AcceptChanges() has not been called. |
|
Deleted |
The row has been marked for deletion using the Delete() method of the DataRow, and AcceptChanges() has not been called. |
|
Detached |
The row has been created but is not part of any DataRowCollection. A DataRow is in this state immediately after it has been created, but before it is added to a collection. It is also in this state if it has been removed from a collection. |
|
Modified |
The row has been modified, and AcceptChanges() has not been called. |
|
Unchanged |
The row has not changed since AcceptChanges() was last called. |
When you manipulate the rows of a given DataTable programmatically, the RowState property is set automatically. For example, add a new method to your Program class, which operates on a local DataRow object, printing out its row state along the way, like so:
private static void ManipulateDataRowState()
{
// Create a temp DataTable for testing.
var temp = new DataTable("Temp");
temp.Columns.Add(new DataColumn("TempColumn", typeof(int)));
// RowState = Detached.
var row = temp.NewRow();
WriteLine($"After calling NewRow(): {row.RowState}");
// RowState = Added.
temp.Rows.Add(row);
WriteLine($"After calling Rows.Add(): {row.RowState}");
// RowState = Added.
row["TempColumn"] = 10;
WriteLine($"After first assignment: {row.RowState}");
// RowState = Unchanged.
temp.AcceptChanges();
WriteLine($"After calling AcceptChanges: {row.RowState}");
// RowState = Modified.
row["TempColumn"] = 11;
WriteLine($"After first assignment: {row.RowState}");
// RowState = Deleted.
temp.Rows[0].Delete();
WriteLine($"After calling Delete: {row.RowState}");
}
![]() Note Remember to add using static System.Console; to the top of your code file for this example (and all other examples where you are using the console).
Note Remember to add using static System.Console; to the top of your code file for this example (and all other examples where you are using the console).
The ADO.NET DataRow is smart enough to remember its current state of affairs. Given this, the owning DataTable is able to identify which rows have been added, updated, or deleted. This is a key feature of the DataSet because when it comes time to send updated information to the data store, only the modified data is submitted.
Understanding the DataRowVersion Property
Beyond maintaining the current state of a row with the RowState property, a DataRow object maintains three possible versions of the data it contains using the DataRowVersion property. When a DataRow object is first constructed, it contains only a single copy of data, represented as the current version. However, as you programmatically manipulate a DataRow object (using various method calls), additional versions of the data spring to life. Specifically, you can set the DataRowVersion to any value of the related DataRowVersion enumeration (see Table 22-6).
Table 22-6. Values of the DataRowVersion Enumeration
|
Value |
Meaning in Life |
|
Current |
This represents the current value of a row, even after changes have been made. |
|
Default |
This is the default version of DataRowState. For a DataRowState value of Added, Modified, or Deleted, the default version is Current. For a DataRowState value of Detached, the version is Proposed. |
|
Original |
This represents the value first inserted into a DataRow or the value the last time AcceptChanges() was called. |
|
Proposed |
This is the value of a row currently being edited because of a call to BeginEdit(). |
As suggested in Table 22-6, the value of the DataRowVersion property is dependent on the value of the DataRowState property in many cases. As mentioned previously, the DataRowVersion property will be changed behind the scenes when you invoke various methods on theDataRow (or, in some cases, the DataTable) object. Here is a breakdown of the methods that can affect the value of a row’s DataRowVersion property:
· If you call the DataRow.BeginEdit() method and change the row’s value, the Current and Proposed values become available.
· If you call the DataRow.CancelEdit() method, the Proposed value is deleted.
· After you call DataRow.EndEdit(), the Proposed value becomes the Current value.
· After you call the DataRow.AcceptChanges() method, the Original value becomes identical to the Current value. The same transformation occurs when you call DataTable.AcceptChanges().
· After you call DataRow.RejectChanges(), the Proposed value is discarded, and the version becomes Current.
Yes, this is a bit convoluted, not least because a DataRow might or might not have all versions at any given time (you’ll receive runtime exceptions if you attempt to obtain a row version that is not currently tracked). Regardless of the complexity, given that the DataRow maintains three copies of data, it becomes simple to build a front end that allows an end user to alter values, change his or her mind and roll back values, or commit values permanently. You’ll see various examples of manipulating these methods over the remainder of this chapter.
Working with DataTables
The DataTable type defines many members, many of which are identical in name and functionality to those of the DataSet. Table 22-7 describes some core members of the DataTable type beyond Rows and Columns.
Table 22-7. Key Members of the DataTable Type
|
Member |
Meaning in Life |
|
CaseSensitive |
Indicates whether string comparisons within the table are case sensitive. The default value is false. |
|
ChildRelations |
Returns the collection of child relations for this DataTable (if any). |
|
Constraints |
Gets the collection of constraints maintained by the table. |
|
Copy() |
A method that copies the schema and data of a given DataTable into a new instance. |
|
DataSet |
Gets the DataSet that contains this table (if any). |
|
DefaultView |
Gets a customized view of the table that might include a filtered view or a cursor position. |
|
ParentRelations |
Gets the collection of parent relations for this DataTable. |
|
PrimaryKey |
Gets or sets an array of columns that function as primary keys for the data table. |
|
TableName |
Gets or sets the name of the table. This same property might also be specified as a constructor parameter. |
To continue with the current example, you can set the PrimaryKey property of the DataTable to the carIDColumn DataColumn object. Be aware that the PrimaryKey property is assigned a collection of DataColumn objects to account for a multicolumned key. In this case, however, you need to specify only the CarID column (being the first ordinal position in the table), like so:
static void FillDataSet(DataSet ds)
{
...
// Mark the primary key of this table.
inventoryTable.PrimaryKey = new [] { inventoryTable.Columns[0] };
}
Inserting DataTables into DataSets
At this point, your DataTable object is complete. The final step is to insert the DataTable into the carsInventoryDS DataSet object using the Tables collection, like this:
static void FillDataSet(DataSet ds)
{
...
// Finally, add our table to the DataSet.
ds.Tables.Add(inventoryTable);
}
Now update your Main() method to call FillDataSet(), passing in your local DataSet object as an argument. Next, pass the same object into a new (yet to be written) helper method named PrintDataSet(), as follows:
static void Main(string[] args)
{
WriteLine("***** Fun with DataSets *****\n");
...
FillDataSet(carsInventoryDS);
PrintDataSet(carsInventoryDS);
ReadLine();
}
Obtaining Data in a DataSet
The PrintDataSet() method simply iterates over the DataSet metadata (using the ExtendedProperties collection) and each DataTable in the DataSet, printing out the column names and row values using the type indexers. Add a using for System.Collections to the top of the file for the DictionaryEntry type.
static void PrintDataSet(DataSet ds)
{
// Print out the DataSet name and any extended properties.
WriteLine($"DataSet is named: {ds.DataSetName}");
foreach (DictionaryEntry de in ds.ExtendedProperties)
{
WriteLine($"Key = {de.Key}, Value = {de.Value}");
}
WriteLine();
// Print out each table using rows and columns.
foreach (DataTable dt in ds.Tables)
{
WriteLine($"=> {dt.TableName} Table:");
// Print out the column names.
for (var curCol = 0; curCol < dt.Columns.Count; curCol++)
{
Write($"{dt.Columns[curCol].ColumnName}\t");
}
WriteLine("\n----------------------------------");
// Print the DataTable.
for (var curRow = 0; curRow < dt.Rows.Count; curRow++)
{
for (var curCol = 0; curCol < dt.Columns.Count; curCol++)
{
Write($"{dt.Rows[curRow][curCol]}\t");
}
WriteLine();
}
}
}
If you run your program now, you’ll see the following output (your timestamp and GUID value will differ, of course):
***** Fun with DataSets *****
DataSet is named: Car Inventory
Key = TimeStamp, Value = 7/24/2015 6:41:09 AM
Key = DataSetID, Value = 11c533ed-d1aa-4c82-96d4-b0f88893ab21
Key = Company, Value = Mikko’s Hot Tub Super Store
=> Inventory Table:
CarID Make Color PetName
----------------------------------
1 BMW Black Hamlet
2 Saab Red Sea Breeze
Processing DataTable Data Using DataTableReader Objects
Given your work in Chapter 21, you should notice that the manner in which you process data using the connected layer (e.g., data reader objects) and the disconnected layer (e.g., DataSet objects) is quite different. Working with a data reader typically involves establishing a while loop, calling the Read() method, and using an indexer to pluck out the name-value pairs. On the other hand, DataSet processing typically involves a series of iteration constructs to drill into the data within the tables, rows, and columns (remember that DataReader requires an open database connection so that it can read the data from the actual database).
DataTables support a method named CreateDataReader(). This method allows you to obtain the data within a DataTable using a data reader–like navigation scheme (the data reader will now read data from the in-memory DataTable, not from the actual database, so there’s no database connection involved here). The major benefit of this approach is that you now use a single model to process data, regardless of which layer of ADO.NET you use to obtain it. Assume you have authored a new method in your Program class named PrintTable(), as follows:
static void PrintTable(DataTable dt)
{
// Get the DataTableReader type.
DataTableReader dtReader = dt.CreateDataReader();
// The DataTableReader works just like the DataReader.
while (dtReader.Read())
{
for (var i = 0; i < dtReader.FieldCount; i++)
{
Write($"{dtReader.GetValue(i).ToString().Trim()}\t");
}
WriteLine();
}
dtReader.Close();
}
Notice that the DataTableReader works identically to the data reader object of your data provider. A DataTableReader can be an ideal choice when you need to pump out the data within a DataTable quickly, without needing to traverse the internal row and column collections. Now assume you have updated the previous PrintDataSet() method to invoke PrintTable(), rather than drilling into the Rows and Columns collections.
static void PrintDataSet(DataSet ds)
{
// Print out any name and extended properties.
WriteLine($"DataSet is named: {ds.DataSetName}");
foreach (DictionaryEntry de in ds.ExtendedProperties)
{
WriteLine($"Key = {de.Key}, Value = {de.Value}");
}
WriteLine();
//Print out each table using data reader
foreach (DataTable dt in ds.Tables)
{
WriteLine($"=> {dt.TableName} Table:");
// Print out the column names.
for (int curCol = 0; curCol < dt.Columns.Count; curCol++)
{
Write($"{dt.Columns[curCol].ColumnName.Trim()}\t");
}
WriteLine("\n----------------------------------");
// Call our new helper method.
PrintTable(dt);
}
}
When you run the application, the output is identical to that shown previously. The only difference is how you access the DataTable’s contents internally.
Serializing DataTable/DataSet Objects As XML
DataSets and DataTables both support the WriteXml() and ReadXml() methods. WriteXml() allows you to persist an object’s content to a local file (as well as into any System.IO.Stream-derived type) as an XML document. ReadXml() allows you to hydrate the state of aDataSet (or DataTable) from a given XML document. In addition, DataSets and DataTables both support WriteXmlSchema() and ReadXmlSchema() for saving or loading an *.xsd file.
To test this for yourself, update your Main() method to call the following helper function (notice that you pass a DataSet as the sole parameter):
static void SaveAndLoadAsXml(DataSet carsInventoryDS)
{
// Save this DataSet as XML.
carsInventoryDS.WriteXml("carsDataSet.xml");
carsInventoryDS.WriteXmlSchema("carsDataSet.xsd");
// Clear out DataSet.
carsInventoryDS.Clear();
// Load DataSet from XML file.
carsInventoryDS.ReadXml("carsDataSet.xml");
}
If you open the carsDataSet.xml file (which you will find under the \bin\Debug folder of your project), you will find that each column in the table has been encoded as an XML element.
<?xml version="1.0" standalone="yes"?>
<Car_x0020_Inventory>
<Inventory>
<CarID>1</CarID>
<Make>BMW</Make>
<Color>Black</Color>
<PetName>Hamlet</PetName>
</Inventory>
<Inventory>
<CarID>2</CarID>
<Make>Saab</Make>
<Color>Red</Color>
<PetName>Sea Breeze</PetName>
</Inventory>
</Car_x0020_Inventory>
If you were to double-click the generated *.xsd file (also found in your \bin\Debug folder) within Visual Studio, you will open the IDE’s XML schema editor (see Figure 22-3).
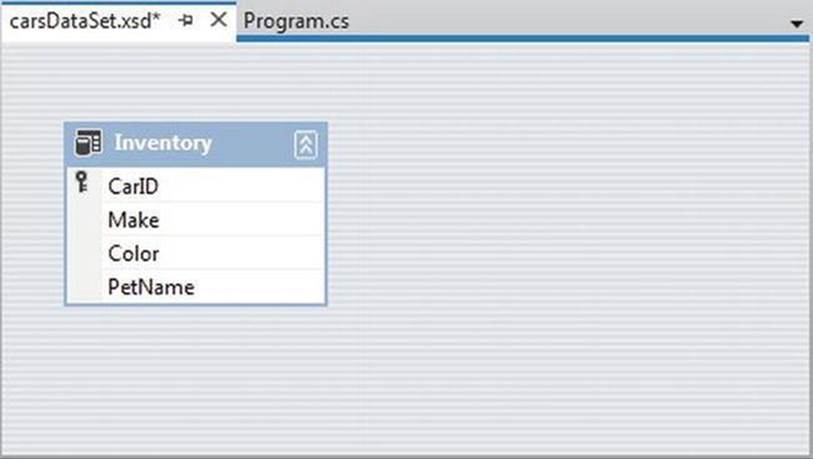
Figure 22-3. The XSD editor of Visual Studio
![]() Note Chapter 24 will introduce you to the LINQ to XML API, which is the preferred manner for manipulating XML data in the .NET platform.
Note Chapter 24 will introduce you to the LINQ to XML API, which is the preferred manner for manipulating XML data in the .NET platform.
Serializing DataTable/DataSet Objects in a Binary Format
It is also possible to persist the contents of a DataSet (or an individual DataTable) as a compact binary format. This can be especially helpful when a DataSet object needs to be passed across a machine boundary (in the case of a distributed application). One drawback of XML data representation is that its descriptive nature can result in a good deal of overhead.
To persist DataTables or DataSets in a binary format, set the RemotingFormat property to SerializationFormat.Binary. At this point, you can use the BinaryFormatter type (see Chapter 20) as expected. Consider the following final method of the SimpleDataSet project (don’t forget to import the System.IO and System.Runtime.Serialization.Formatters.Binary namespaces):
static void SaveAndLoadAsBinary(DataSet carsInventoryDS)
{
// Set binary serialization flag.
carsInventoryDS.RemotingFormat = SerializationFormat.Binary;
// Save this DataSet as binary.
var fs = new FileStream("BinaryCars.bin", FileMode.Create);
var bFormat = new BinaryFormatter();
bFormat.Serialize(fs, carsInventoryDS);
fs.Close();
// Clear out DataSet.
carsInventoryDS.Clear();
// Load DataSet from binary file.
fs = new FileStream("BinaryCars.bin", FileMode.Open);
var data = (DataSet)bFormat.Deserialize(fs);
}
If you call this method from Main(), you can find the *.bin file in your bin\Debug folder. Figure 22-4 shows the contents of the BinaryCars.bin file.
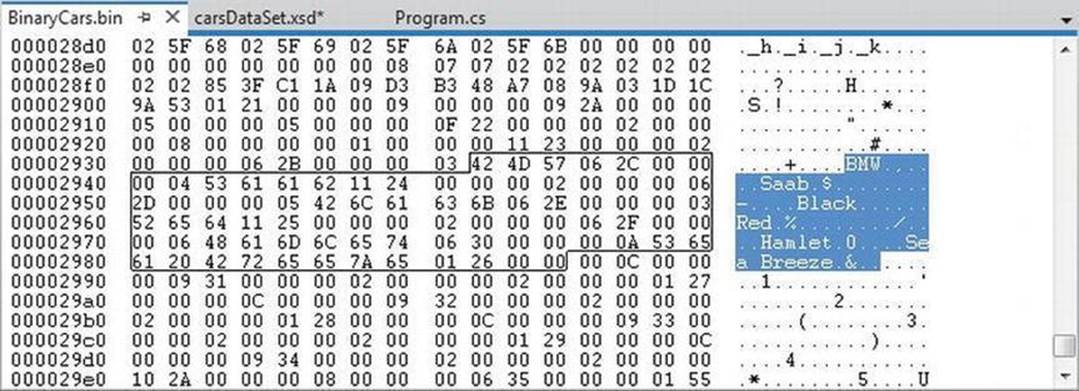
Figure 22-4. A DataSet saved to a binary format
![]() Source Code You can find the SimpleDataSet application in the Chapter 22 subdirectory.
Source Code You can find the SimpleDataSet application in the Chapter 22 subdirectory.
Binding DataTable Objects to Windows Forms GUIs
So far, you have examined how to create, hydrate, and iterate over the contents of a DataSet object manually using the inherit object model of ADO.NET. While understanding how to do so is quite important, the .NET platform ships with numerous APIs that have the ability to bind data to user interface elements automatically.
For example, the original GUI toolkit of .NET, Windows Forms, supplies a control named DataGridView that includes the built-in ability to display the contents of a DataSet or DataTable object using only a few lines of code. ASP.NET (.NET’s web development API) and the Windows Presentation Foundation API also support the notion of data binding. You will learn to bind data to WPF and ASP.NET GUI elements later in this book; however, in this chapter, you will use Windows Forms because it is a fairly simple and straightforward programming model.
![]() Note The next example assumes you have some experience using Windows Forms to build graphical user interfaces. If this is not the case, you might want to open the solution and follow along or return to this section after you have read Appendix A.
Note The next example assumes you have some experience using Windows Forms to build graphical user interfaces. If this is not the case, you might want to open the solution and follow along or return to this section after you have read Appendix A.
Your next task is to build a Windows Forms application that will display the contents of a DataTable object within its user interface. Along the way, you will also examine how to filter and change table data. You will also learn about the role of the DataView object.
Begin by creating a new Windows Forms project workspace named WindowsFormsDataBinding. Rename your initial Form1.cs file to the more fitting MainForm.cs using the Solution Explorer. Change the text of the form to Windows Forms Data Binding using the Properties window. Next, use the Visual Studio Toolbox to drag a DataGridView control located in the Data tab (renamed to carInventoryGridView using the (Name) property of the Properties window) onto the designer surface. You might notice that when you first add the DataGridViewon the designer, you activate a context menu that allows you to connect to a physical data source. For the time being, ignore this aspect of the designer because you will be binding your DataTable object programmatically. Finally, add a descriptive Label to your designer for information purposes. Figure 22-5 shows one possible look and feel.
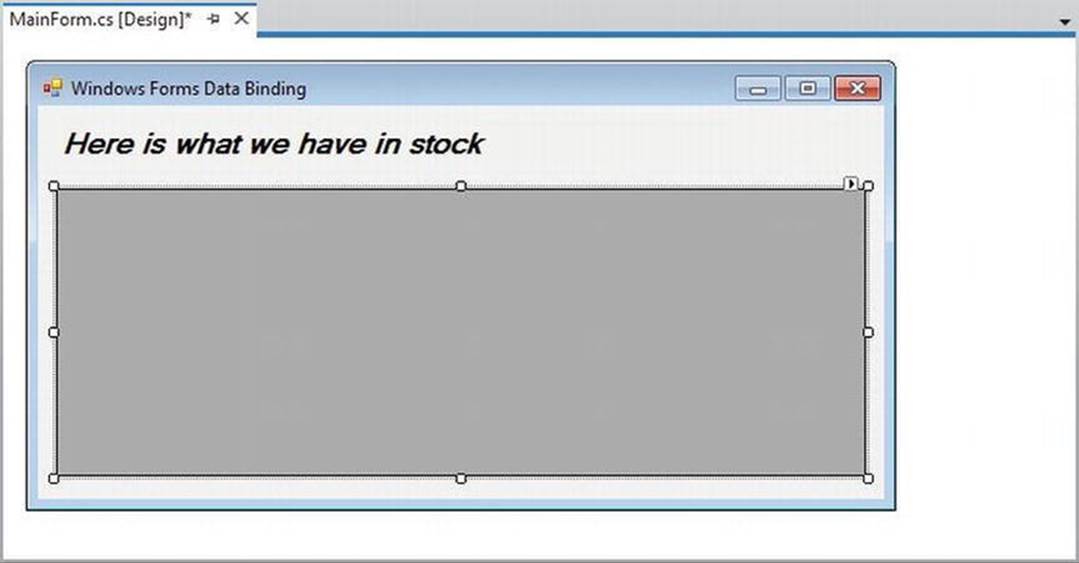
Figure 22-5. The initial GUI of your Windows Forms application
Hydrating a DataTable from a Generic List<T>
Similar to the previous SimpleDataSet example, the WindowsFormsDataBinding application will construct a DataTable that contains a set of DataColumns representing various columns and rows of data. This time, however, you will fill the rows using a generic List<T> member variable. First, insert a new C# class into your project (named Car), which you define as follows:
public class Car
{
public int Id { get; set; }
public string PetName { get; set; }
public string Make { get; set; }
public string Color { get; set; }
}
Within the default constructor of your main form, populate a List<T> member variable (named listCars) with a set of new Car objects, like so:
public partial class MainForm : Form
{
// A collection of Car objects.
List<Car> listCars = null;
public MainForm()
{
InitializeComponent();
// Fill the list with some cars.
listCars = new List<Car>
{
new Car { Id = 1, PetName = "Chucky", Make = "BMW", Color = "Green" },
new Car { Id = 2, PetName = "Tiny", Make = "Yugo", Color = "White" },},
new Car { Id = 3, PetName = "Ami", Make = "Jeep", Color = "Tan" },
new Car { Id = 4, PetName = "Pain Inducer", Make = "Caravan", Color = "Pink" },
new Car { Id = 5, PetName = "Fred", Make = "BMW", Color = "Green" },
new Car { Id = 6, PetName = "Sidd", Make = "BMW", Color = "Black" },
new Car { Id = 7, PetName = "Mel", Make = "Firebird", Color = "Red" },
new Car { Id = 8, PetName = "Sarah", Make = "Colt", Color = "Black" },
};
}
}
Next, add a new member variable named inventoryTable of type DataTable to your MainForm class type, like so:
public partial class MainForm : Form
{
// A collection of Car objects.
List<Car> listCars = null;
// Inventory information.
DataTable inventoryTable = new DataTable();
...
}
Now add a new helper function to your class named CreateDataTable() and call this method within the default constructor of the MainForm class.
void CreateDataTable()
{
// Create table schema.
var carIDColumn = new DataColumn("Id", typeof(int));
var carMakeColumn = new DataColumn("Make", typeof(string));
var carColorColumn = new DataColumn("Color", typeof(string));
var carPetNameColumn = new DataColumn("PetName", typeof (string))
{ Caption = "Pet Name"};
inventoryTable.Columns.AddRange(
new[] { carIDColumn, carMakeColumn,carColorColumn, carPetNameColumn });
// Iterate over the array list to make rows.
foreach (var c in listCars)
{
var newRow = inventoryTable.NewRow();
newRow["Id"] = c.Id;
newRow["Make"] = c.Make;
newRow["Color"] = c.Color;
newRow["PetName"] = c.PetName;
inventoryTable.Rows.Add(newRow);
}
// Bind the DataTable to the carInventoryGridView.
carInventoryGridView.DataSource = inventoryTable;
}
The method implementation begins by creating the schema of the DataTable by creating four DataColumn objects (for the sake of simplicity, you don’t need to bother auto-incrementing the ID field or set it as a primary key). After you do this, you can add them to the column collection of the DataTable member variable. You map the row data from your List<Car> collection into the DataTable using a foreach iteration construct and the native ADO.NET object model.
However, notice that the final code statement within the CreateDataTable() method assigns the inventoryTable to the DataSource property of the DataGridView object. This single property is all you need to set to bind a DataTable to a Windows FormsDataGridView object. Under the hood, this GUI control reads the row and column collections internally, much like what happens with the PrintDataSet() method of the SimpleDataSet example. At this point, you should be able to run your application and see the DataTablewithin the DataGridView control, as shown in Figure 22-6.
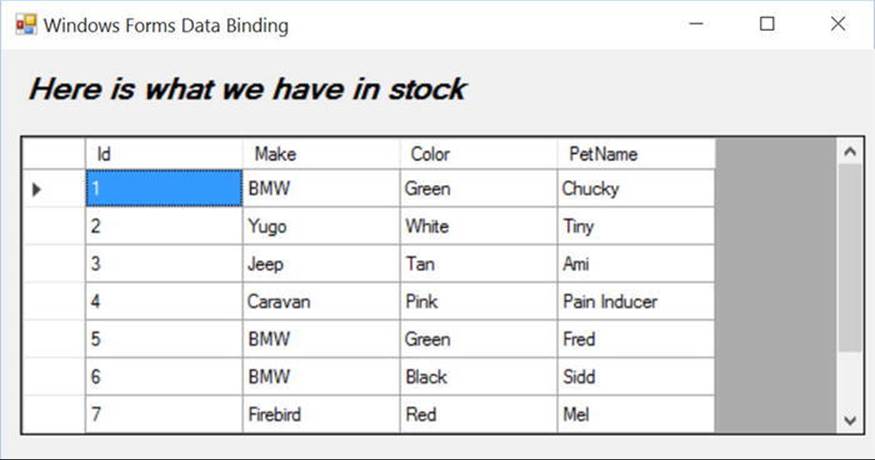
Figure 22-6. Binding a DataTable to a Windows Forms DataGridView
Deleting Rows from a DataTable
Now, assume you would like to update your graphical interface to allow the user to delete a row from the in-memory DataTable that is bound to the DataGridView. One approach is to call the Delete() method of the DataRow object that represents the row to terminate. In this case, you specify the index (or DataRow object) representing the row to remove. To allow the user to specify which row to delete, add a TextBox (named txtCarToRemove) and a Button control (named btnRemoveCar) to the current designer. Figure 22-7 shows one possible UI update (note this example wraps the two controls in a GroupBox control, illustrating how they are related).
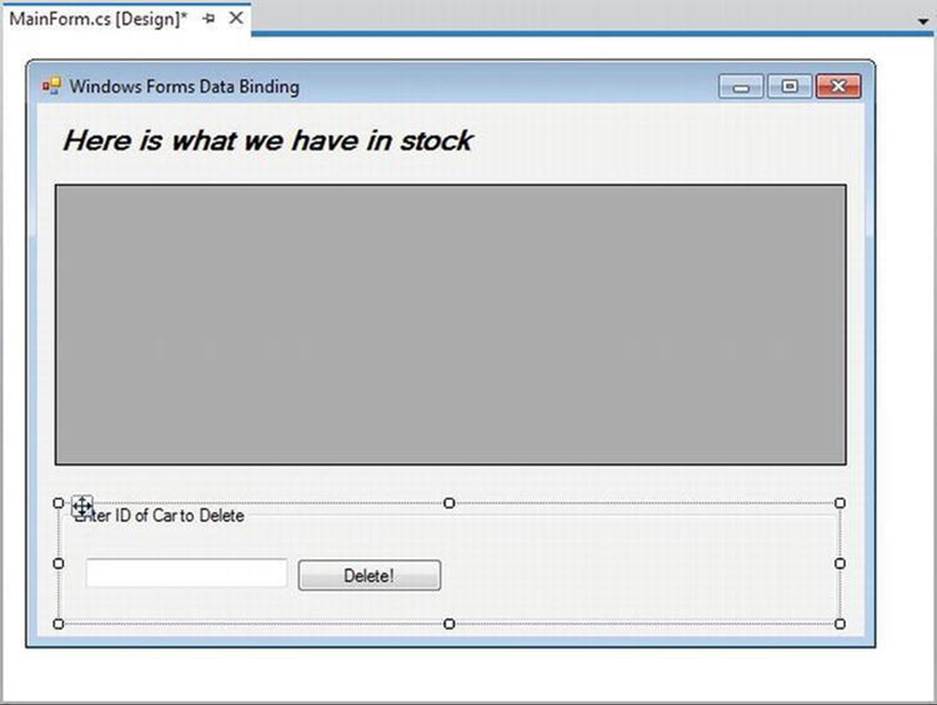
Figure 22-7. Updating the UI to enable removal of rows from the underlying DataTable
The following logic behind the new Button’s Click event handler removes the user-specified row, based on the ID of a car, from your in-memory DataTable. The Select() method of the DataTable class allows you to specify a search criteria, which is modeled after normal SQL syntax. The return value is an array of DataRow objects that matches the search criteria.
// Remove this row from the DataRowCollection.
private void btnRemoveCar_Click (object sender, EventArgs e)
{
try
{
// Find the correct row to delete.
DataRow[] rowToDelete = inventoryTable.Select($"Id={int.Parse(txtCarToRemove.Text)}");
// Delete it!
rowToDelete[0].Delete();
inventoryTable.AcceptChanges();
}
catch (Exception ex)
{{
MessageBox.Show(ex.Message);
}
}
You should now be able to run your application and specify a car ID to delete from the DataTable. As you remove DataRow objects from the DataTable, you will notice that the grid’s UI is updated immediately; this occurs because it is bound to the state of the DataTable object.
Selecting Rows Based on Filter Criteria
Many data-centric applications require the need to view a small subset of a DataTable’s data, as specified by some sort of filtering criteria. For example, assume you want to see only a certain make of automobile from the in-memory DataTable (e.g., only BMWs). You’ve already seen how the Select() method of the DataTable class allows you to find a row to delete; however, you can also use this method to grab a subset of records for display purposes.
To see this in action, update your UI again, this time allowing users to specify a string that represents the make of the automobile they want to see (see Figure 22-8) using a new TextBox (named txtMakeToView) and a new Button (named btnDisplayMakes).
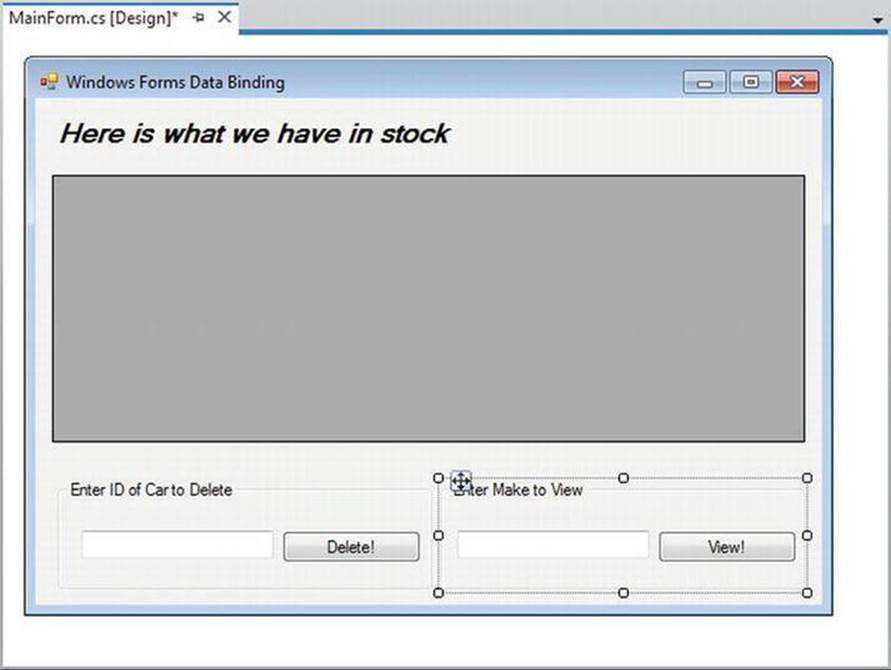
Figure 22-8. Updating the UI to enable row filtering
The Select() method has been overloaded a number of times to provide different selection semantics. At its most basic level, the parameter sent to Select() is a string that contains some conditional operation. To begin, observe the following logic for the Click event handler of your new button:
private void btnDisplayMakes_Click(object sender, EventArgs e)
{
// Build a filter based on user input.
string filterStr = $"Make=’{txtMakeToView.Text}’";
// Find all rows matching the filter.
DataRow[] makes = inventoryTable.Select(filterStr);
// Show what we got!
if (makes.Length == 0)
MessageBox.Show("Sorry, no cars...", "Selection error!");
else
{
string strMake = null;
for (var i = 0; i < makes.Length; i++)
{
strMake += makes[i]["PetName"] + "\n";
}
// Now show all matches in a message box.
MessageBox.Show(strMake,$"We have {txtMakeToView.Text}s named:");
}
}
}
Here, you begin by building a simple filter based on the value in the associated TextBox. If you specify BMW in the filter text box, it will create a filter equivalent to Make = ’BMW’. When you send this filter to the Select() method, you get back an array of DataRow types that represent each row that matches the filter (see Figure 22-9).
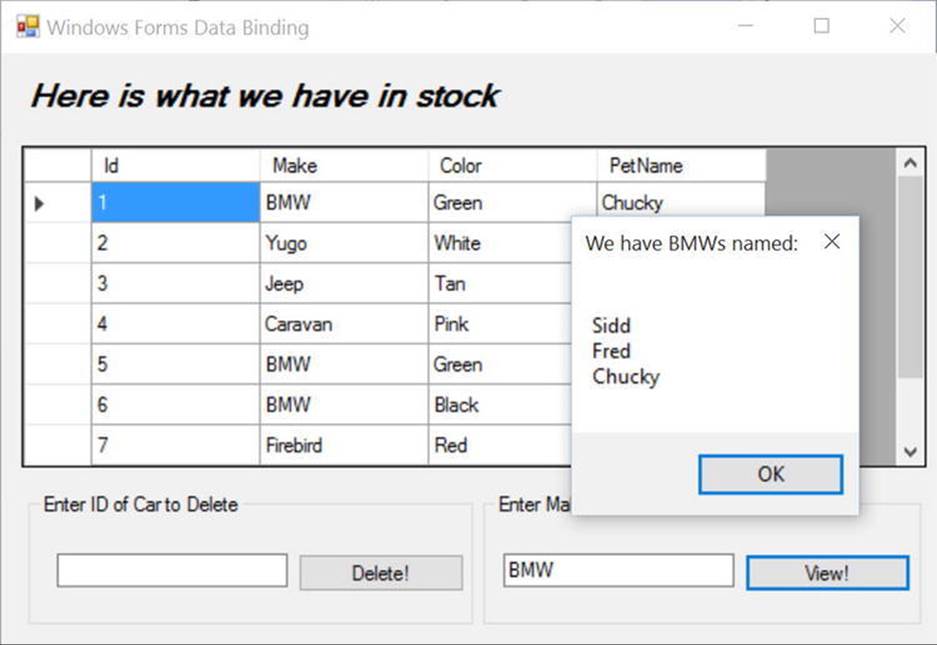
Figure 22-9. Displaying filtered data
Again, the filtering logic is based on standard SQL syntax. For example, assume you want to obtain the results of the previous Select() invocation alphabetically, based on the pet name. In terms of SQL, this translates into a sort based on the PetName column. Fortunately, theSelect() method has been overloaded to send in a sort criterion.
// Sort by PetName.
makes = inventoryTable.Select(filterStr, "PetName");
Call Select(), as shown here, if you want the results in descending order:
// Return results in descending order.
makes = inventoryTable.Select(filterStr, "PetName DESC");
In general, the sort string contains the column name, followed by ASC (ascending, which is the default) or DESC (descending). If necessary, you can separate multiple columns by commas. Finally, understand that a filter string can be composed of any number of relational operators. For example, assume you want to find all cars with an ID greater than 5. This helper function lets you accomplish that:
private void ShowCarsWithIdGreaterThanFive()
{
// Now show the pet names of all cars with ID greater than 5.
DataRow[] properIDs;
string newFilterStr = "ID > 5";
properIDs = inventoryTable.Select(newFilterStr);
string strIDs = null;
for(int i = 0; i < properIDs.Length; i++)
{
DataRow temp = properIDs[i];
strIDs += $"{temp["PetName"]} is ID {temp["ID"]}\n";
}
MessageBox.Show(strIDs, "Pet names of cars where ID > 5");
}
Updating Rows Within a DataTable
The final aspect of the DataTable you should be aware of is the process of updating an existing row with new values. One approach is to first obtain the row (or rows) that matches a given filter criterion using the Select() method. Once you obtain the DataRow (or DataRows) in question, modify them accordingly. For example, assume you have a new Button on your form named btnChangeMakes that (when clicked) searches the DataTable for all rows where Make is equal to BMW. Once you identify these items, you change the Make from BMW to Yugo, as so:
// Find the rows you want to edit with a filter.
private void btnChangeMakes_Click(object sender, EventArgs e)
{
// Make sure user has not lost his or her mind.
if (DialogResult.Yes !=
MessageBox.Show("Are you sure?? BMWs are much nicer than Yugos!",
"Please Confirm!", MessageBoxButtons.YesNo)) return;
// Build a filter.
string filterStr = "Make=’BMW’";
// Find all rows matching the filter.
DataRow[] makes = inventoryTable.Select(filterStr);
// Change all Beemers to Yugos!
for (int i = 0; i < makes.Length; i++)
{
makes[i]["Make"] = "Yugo";
}
}
Working with the DataView Type
A view object is an alternative representation of a table (or set of tables). For example, you can use Microsoft SQL Server to create a view for your Inventory table that returns a new table containing automobiles only of a given color. In ADO.NET, the DataView type allows you to extract a subset of data programmatically from the DataTable into a stand-alone object.
One great advantage of holding multiple views of the same table is that you can bind these views to various GUI widgets (such as the DataGridView). For example, one DataGridView might be bound to a DataView showing all automobiles in the Inventory, while another might be configured to display only green automobiles.
To see this in action, update the current UI with an additional DataGridView type named dataGridYugosView and a descriptive Label. Next, define a member variable named yugosOnlyView of type DataView.
public partial class MainForm : Form
{
// View of the DataTable.
DataView yugosOnlyView;
...
}
Now create a new helper function named CreateDataView() and call this method within the form’s default constructor immediately after the DataTable has been fully constructed, as shown here:
public MainForm()
{
...
// Make a data table.
CreateDataTable();
// Make a view.
CreateDataView();
}
Here is the implementation of this new helper function. Notice that the constructor of the DataView has been passed the DataTable that you will use to build the custom set of data rows.
private void CreateDataView()()
{
// Set the table that is used to construct this view.
yugosOnlyView = new DataView(inventoryTable);
// Now configure the views using a filter.
yugosOnlyView.RowFilter = "Make = ’Yugo’";
// Bind to the new grid.
dataGridYugosView.DataSource = yugosOnlyView;
}
As you can see, the DataView class supports a property named RowFilter, which contains the string representing the filtering criteria used to extract matching rows. After you establish your view, set the grid’s DataSource property accordingly. Figure 22-10 shows the completed Windows Forms data-binding application in action.
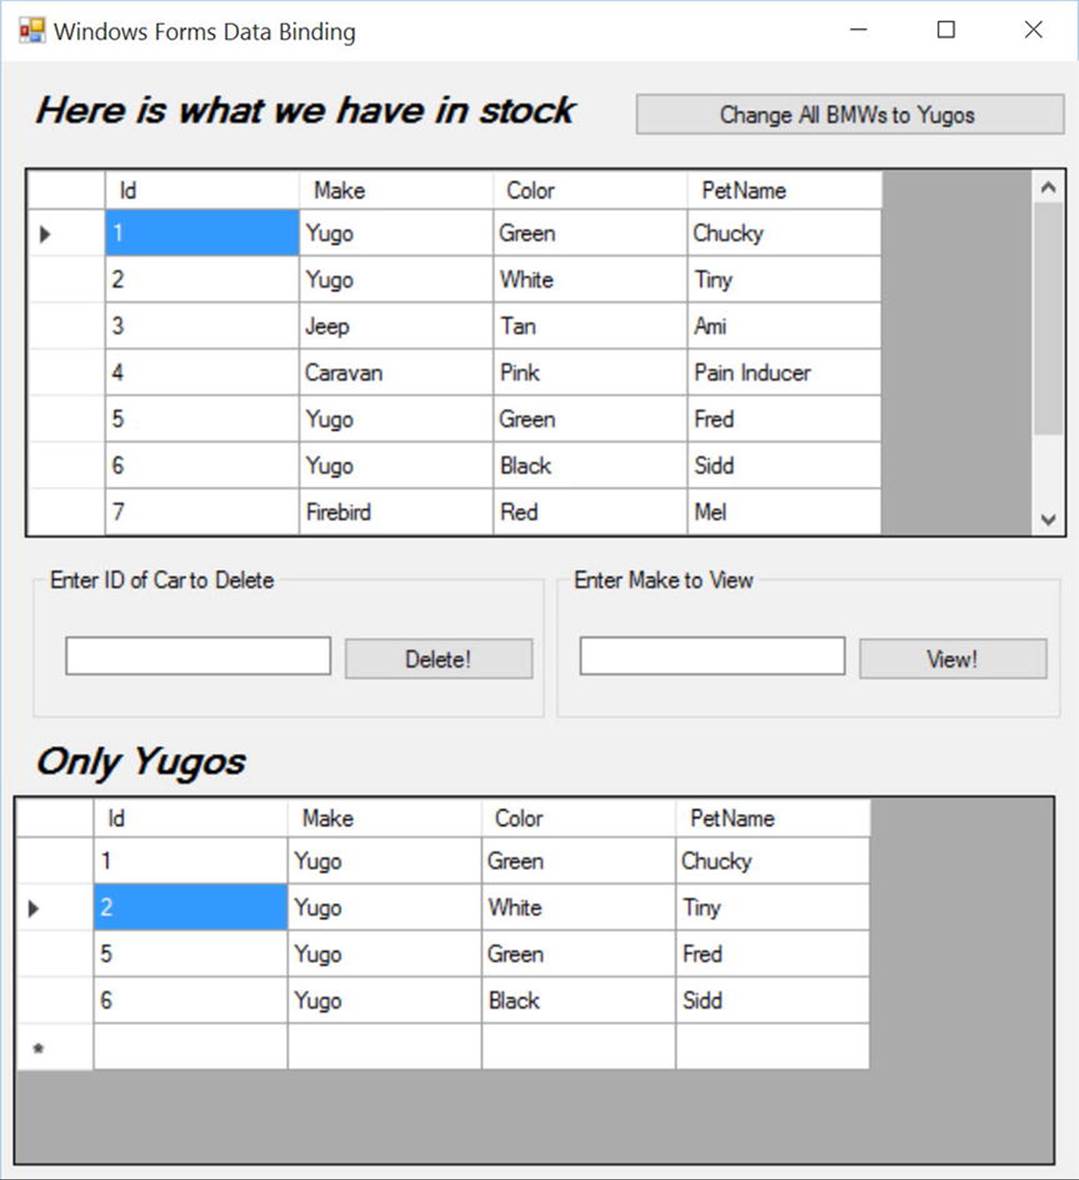
Figure 22-10. Displaying a unique view of your data
![]() Source Code You can find the WindowsFormsDataBinding project in the Chapter 22 subdirectory.
Source Code You can find the WindowsFormsDataBinding project in the Chapter 22 subdirectory.
Working with Data Adapters
Now that you understand the ins and outs of manipulating ADO.NET DataSets manually, it’s time to turn your attention to the topic of data adapter objects. A data adapter is a class used to fill a DataSet with DataTable objects; this class can also send modified DataTables back to the database for processing. Table 22-8 documents the core members of the DbDataAdapter base class, the common parent to every data adapter object (e.g., SqlDataAdapter and OdbcDataAdapter).
Table 22-8. Core Members of the DbDataAdapter Class
|
Members |
Meaning in Life |
|
Fill() |
Executes a SQL SELECT command (as specified by the SelectCommand property) to query the database for data and loads the data into a DataTable. |
|
SelectCommand InsertCommand UpdateCommand DeleteCommand |
Establishes the SQL commands that you will issue to the data store when the Fill() and Update() methods are called. |
|
Update() |
Executes SQL INSERT, UPDATE, and DELETE commands (as specified by the InsertCommand, UpdateCommand, and DeleteCommand properties) to persist DataTable changes to the database. |
Notice that a data adapter defines four properties: SelectCommand, InsertCommand, UpdateCommand, and DeleteCommand. When you create the data adapter object for your particular data provider (e.g., SqlDataAdapter), you can pass in a string that represents the command text used by the SelectCommand’s command object.
Assuming each of the four command objects has been properly configured, you can then call the Fill() method to obtain a DataSet (or a single DataTable, if you so choose). To do so, you have the data adapter execute the SQL SELECT statement specified by theSelectCommand property.
Similarly, if you want to persist a modified DataSet (or DataTable) object back to the database, you can call the Update() method, which will use any of the remaining command objects, based on the state of each row in the DataTable (you’ll learn more about this in a bit).
One of the strangest aspects of working with a data adapter object is that you are never required to open or close a connection to the database. Rather, the underlying connection to the database is managed on your behalf. However, you will still need to supply the data adapter with a valid connection object or a connection string (which you will use to build a connection object internally) to inform the data adapter exactly which database you want to communicate with.
![]() Note A data adapter is agnostic by nature. You can plug in different connection objects and command objects on the fly and fetch data from a diverse variety of databases. For example, a single DataSet could contain table data obtained from SQL Server, Oracle, and MySQL database providers.
Note A data adapter is agnostic by nature. You can plug in different connection objects and command objects on the fly and fetch data from a diverse variety of databases. For example, a single DataSet could contain table data obtained from SQL Server, Oracle, and MySQL database providers.
A Simple Data Adapter Example
The next step is to add new functionality to the data access library assembly (AutoLotDAL.dll) you created in Chapter 21. You will begin by creating a simple example that fills a DataSet with a single table using an ADO.NET data adapter object.
Create a new Console Application project named FillDataSetUsingSqlDataAdapter and import the System.Data, System.Data.SqlClient, and System.Collections namespaces into your initial C# code file. Now update your Main() method as follows (you might need to change the connection string based on how you created the AutoLot database in Chapter 21):
static void Main(string[] args)
{
WriteLine("***** Fun with Data Adapters *****\n");
// Hard-coded connection string.
string connectionString = "Integrated Security = SSPI;Initial Catalog=AutoLot;" +
@"Data Source=(local)\SQLEXPRESS2014";
// Caller creates the DataSet object.
DataSet ds = new DataSet("AutoLot");
// Inform adapter of the Select command text and connection.
SqlDataAdapter adapter =
new SqlDataAdapter("Select * From Inventory", connectionString);
// Fill our DataSet with a new table, named Inventory.
adapter.Fill(ds, "Inventory");
// Display contents of DataSet.
PrintDataSet(ds);
ReadLine();
}
Notice that you construct the data adapter by specifying a string literal that will map to the SQL SELECT statement. You will use this value to build a command object internally, which you can obtain later using the SelectCommand property.
Next, notice that it is the job of the caller to create an instance of the DataSet type, which is passed into the Fill() method. Optionally, you can pass the Fill() method as a second argument a string name that you use to set the TableName property of the new DataTable (if you do not specify a table name, the data adapter will simply name the table, Table). In most cases, the name you assign a DataTable will be identical to the name of the physical table in the relational database; however, this is not required.
![]() Note The Fill() method returns an integer that represents the number of rows returned by the SQL query.
Note The Fill() method returns an integer that represents the number of rows returned by the SQL query.
Finally, notice that you do not explicitly open or close the connection to the database anywhere in the Main() method. You preprogram the Fill() method of a given data adapter to open and then close the underlying connection before returning from the Fill() method. Therefore, when you pass the DataSet to the PrintDataSet() method (implemented earlier in this chapter and included here for your reference), you are operating on a local copy of disconnected data, incurring no round-trips to fetch the data.
static void PrintDataSet(DataSet ds)
{
// Print out any name and extended properties.
WriteLine($"DataSet is named: {ds.DataSetName}");
foreach (DictionaryEntry de in ds.ExtendedProperties)
{
WriteLine($"Key = {de.Key}, Value = {de.Value}");
}
WriteLine();
foreach (DataTable dt in ds.Tables)
{
WriteLine($"=> {dt.TableName} Table:");
// Print out the column names.
for (int curCol = 0; curCol < dt.Columns.Count; curCol++)
{
Write(dt.Columns[curCol].ColumnName + "\t");
}
WriteLine("\n----------------------------------");
// Print the DataTable.
for (int curRow = 0; curRow < dt.Rows.Count; curRow++)
{
for (int curCol = 0; curCol < dt.Columns.Count; curCol++)
{
Write(dt.Rows[curRow][curCol].ToString().Trim() + "\t");
}
WriteLine();
}
}
}
Mapping Database Names to Friendly Names
As mentioned previously, database administrators tend to create table and column names that are less than friendly to end users (e.g., au_id, au_fname, or au_lname). The good news is that data adapter objects maintain an internal strongly typed collection (namedDataTableMappingCollection) of System.Data.Common.DataTableMapping objects. You can access this collection using the TableMappings property of your data adapter object.
If you so choose, you can manipulate this collection to inform a DataTable which display names it should use when asked to print its contents. For example, assume you want to map the table name Inventory to Current Inventory for display purposes. For example, assume you want to display the CarID column name as Car ID (note the extra space) and the PetName column name as Name of Car. To do so, add the following code before calling the Fill() method of your data adapter object (be sure to import the System.Data.Common namespace to gain the definition of the DataTableMapping type):
static void Main(string[] args)
{
...
// Now map DB column names to user-friendly names.
DataTableMapping tableMapping =
adapter.TableMappings.Add("Inventory", "Current Inventory");
tableMapping.ColumnMappings.Add("CarId", "Car Id");
tableMapping.ColumnMappings.Add("PetName", "Name of Car");
dAdapt.Fill(ds, "Inventory");
...
}
If you were to run this program again, you would find that the PrintDataSet() method now displays the friendly names of the DataTable and DataRow objects, rather than the names established by the database schema.
***** Fun with Data Adapters *****
DataSet is named: AutoLot
=> Current Inventory Table:
Car ID Make Color Name of Car
----------------------------------
1 VW Black Zippy
2 Ford Rust Rusty
3 Saab Black Mel
4 Yugo Yellow Clunker
5 BMW Black Bimmer
6 BMW Green Hank
7 BMW Pink Pinkey
![]() Source Code You can find the FillDataSetUsingSqlDataAdapter project in the Chapter 22 subdirectory.
Source Code You can find the FillDataSetUsingSqlDataAdapter project in the Chapter 22 subdirectory.
Adding Disconnected Functionality to AutoLotDAL.dll
To illustrate the process of using a data adapter to push changes in a DataTable back to the database for processing, you will now update the AutoLotDAL.dll assembly created in Chapter 21 to include a new namespace (named AutoLotDisconnectedLayer). This namespace contains a new class, InventoryDALDC, that uses a data adapter to interact with a DataTable. You can continue working in your AutoLotDAL project. In the downloaded code for the chapter, the next example is in AutoLotDAL (Version Two).
Defining the Initial Class Type
Add a new folder using the Project ![]() New Folder menu option. Name this folder DisconnectedLayer. In this new folder, insert a new class named InventoryDALDC (for DisConnected) using the Project
New Folder menu option. Name this folder DisconnectedLayer. In this new folder, insert a new class named InventoryDALDC (for DisConnected) using the Project ![]() Add Class menu option. Next, add public to the class type in your new code file. Import the System.Data.SqlClient namespaces.
Add Class menu option. Next, add public to the class type in your new code file. Import the System.Data.SqlClient namespaces.
Unlike the connection-centric InventoryDAL type, this new class doesn’t need to provide custom open/close methods because the data adapter handles the details automatically.
Begin by adding a custom constructor that sets a private string variable representing the connection string. Also, define a private SqlDataAdapter member variable, which you configure by calling a (yet to be created) helper method called ConfigureAdapter(), which takes aSqlDataAdapter output parameter.
namespace AutoLotDAL2.DisconnectedLayer
{
public class InventoryDALDC
{
// Field data.
private string _connectionString;
private SqlDataAdapter _adapter = null;
public InventoryDALDC(string connectionString)
{
_connectionString = connectionString;
// Configure the SqlDataAdapter.
ConfigureAdapter(out _adapter);
}
}
}
Configuring the Data Adapter Using the SqlCommandBuilder
When you use a data adapter to modify tables in a DataSet, the first order of business is to assign the UpdateCommand, DeleteCommand, and InsertCommand properties with valid command objects (until you do so, these properties return null references).
Configuring the command objects manually for the InsertCommand, UpdateCommand, and DeleteCommand properties can entail a significant amount of code, especially if you use parameterized queries. Recall from Chapter 21 that a parameterized query allows you to build a SQL statement using a set of parameter objects. Thus, if you were to take the long road, you could implement ConfigureAdapter() to create three new SqlCommand objects manually, each of which contains a set of SqlParameter objects. At this point, you could set each object to the UpdateCommand, DeleteCommand, and InsertCommand properties of the adapter.
Visual Studio provides several designer tools to take care of this mundane and tedious code on your behalf. These designers differ a bit based on which API you use (e.g., Windows Forms, WPF, or ASP.NET), but their overall functionality is similar. You’ll see examples of using these designers throughout this book, including some Windows Forms designers later in this chapter.
You won’t need to author the numerous code statements to configure a data adapter fully at this time; instead, you can take a massive shortcut by implementing ConfigureAdapter() like this:
private void ConfigureAdapter(out SqlDataAdapter adapter)
{
// Create the adapter and set up the SelectCommand.
adapter = new SqlDataAdapter("Select * From Inventory", _connectionString);
// Obtain the remaining command objects dynamically at runtime
// using the SqlCommandBuilder.
var builder = new SqlCommandBuilder(adapter);
}
To simplify the construction of data adapter objects, each of the Microsoft-supplied ADO.NET data providers provides a command builder type. The SqlCommandBuilder automatically generates the values contained within the SqlDataAdapter’s InsertCommand,UpdateCommand, and DeleteCommand properties, based on the initial SelectCommand. The benefit here is that you do not need to build all the SqlCommand and SqlParameter types by hand.
Here’s an obvious question at this point: how is a command builder able to build these SQL command objects on the fly? The short answer is metadata. When you call the Update() method of a data adapter at runtime, the related command builder will read the database’s schema data to autogenerate the underlying insert, delete, and update command objects.
Obviously, doing so requires additional round-trips to the remote database; this means it will hurt performance if you use the SqlCommandBuilder numerous times in a single application. Here, you minimize the negative effect by calling your ConfigureAdapter() method at the time the InventoryDALDC object is constructed, retaining the configured SqlDataAdapter for use throughout the object’s lifetime.
In the previous code snippet, you did not use the command builder object (SqlCommandBuilder, in this case) beyond passing in the data adapter object as a constructor parameter. As odd as this might seem, this is all you must do (at a minimum). Under the hood, this type configures the data adapter with the remaining command objects.
While you might love the idea of getting something for nothing, you should understand that command builders come with some critical restrictions. Specifically, a command builder is able only to autogenerate SQL commands for use by a data adapter if all the following conditions are true:
· The SQL SELECT command interacts with only a single table (e.g., no joins).
· The single table has been attributed with a primary key.
· The table must have a column or columns representing the primary key that you include in your SQL SELECT statement.
Based on the way you constructed your AutoLot database, these restrictions pose no problem. However, in a more industrial-strength database, you will need to consider whether this type is at all useful (if not, remember that Visual Studio will autogenerate a good deal of the required code using various database designer tools, as you will see later).
Implementing GetAllInventory()
Now that your data adapter is ready to go, the first method of your new class type will use the Fill() method of the SqlDataAdapter object to fetch a DataTable representing all records in the Inventory table of the AutoLot database, like so:
public DataTable GetAllInventory()
{
DataTable inv = new DataTable("Inventory");
_adapter.Fill(inv);
return inv;
}
Implementing UpdateInventory()
The UpdateInventory() method is simple, as shown here:
public void UpdateInventory(DataTable modifiedTable)
{
_adapter.Update(modifiedTable);
}
Here, the data adapter object examines the RowState value of each row of the incoming DataTable. Based on this value (e.g., RowState.Added, RowState.Deleted, or RowState.Modified), the correct command object is leveraged behind the scenes.
Setting Your Version Number
Great! At this point, the logic of the second version of your data access library is complete. You are not required to do so, but set the version number of this library to 2.0.0.0, just for good housekeeping. As described in Chapter 14, you can change the version of a .NET assembly by double-clicking the Properties node of your Solution Explorer and then clicking the Assembly Information button located in the Application tab. In the resulting dialog box, set the Major number of the assembly version to the value of 2 (see Chapter 14 for more details). After you do this, recompile your application to update the assembly manifest.
![]() Source Code You can find the AutoLotDAL2 project in the Chapter 22 subdirectory.
Source Code You can find the AutoLotDAL2 project in the Chapter 22 subdirectory.
Testing the Disconnected Functionality
At this point, you can build a front end to test your new InventoryDALDC class. Once again, you will use the Windows Forms API to display your data on a graphical user interface. Create a new Windows Forms application named InventoryDALDisconnectedGUI, change your initialForm1.cs file to MainForm.cs using the Solution Explorer, and set the Text property of the form to Simple GUI Front End to the Inventory Table. After you create the project, set a reference to your updated AutoLotDAL.dll assembly (be sure you pick version 2.0.0.0!) and import the following namespace:
using AutoLotDAL2.DisconnectedLayer;
The design of the form consists of a single Label, DataGridView (named inventoryGrid), and Button control (named btnUpdateInventory), which you configure to handle the Click event. Here is the definition of the form:
public partial class MainForm : Form
{
InventoryDALDC _dal = null;
public MainForm()
{
InitializeComponent();
string cnStr =
@"Data Source=(local)\SQLEXPRESS2014;Initial Catalog=AutoLot;" +
"Integrated Security=True;Pooling=False";
// Create our data access object.
_dal = new InventoryDALDC(cnStr);
// Fill up our grid!
inventoryGrid.DataSource = _dal.GetAllInventory();
}
private void btnUpdateInventory_Click(object sender, EventArgs e)
{
// Get modified data from the grid.
DataTable changedDT = (DataTable)inventoryGrid.DataSource;
try
{
// Commit our changes.
_dal.UpdateInventory(changedDT);
inventoryGrid.DataSource = _dal.GetAllInventory();
}
catch(Exception ex)
{
MessageBox.Show(ex.Message);
}
}
}
After you create the InventoryDALDC object, you can bind the DataTable returned from GetAllInventory() to the DataGridView object. When the user clicks the Update button, you extract the modified DataTable from the grid (with the DataSource property) and pass it into your UpdateInventory() method.
That’s it! After you run this application, add a set of new rows to the grid and update/delete a few others. Assuming you click the Button control, you will see your changes have persisted into the AutoLot database. Because of the way data binding works with Windows Forms, you need to reset the DataSource on the Grid for the changes to show up immediately. As you will see when you build applications with Windows Presentation Foundation (WPF), the Observable pattern fixes this behavior.
![]() Source Code You can find the updated InventoryDALDisconnectedGUI project in the Chapter 22 subdirectory.
Source Code You can find the updated InventoryDALDisconnectedGUI project in the Chapter 22 subdirectory.
Multitabled DataSet Objects and Data Relationships
So far, all of this chapter’s examples have operated on a single DataTable object. However, the power of the disconnected layer shines through when a DataSet object contains numerous interrelated DataTables. In this case, you can define any number of DataRelation objects in the DataSet’s DataRelation collection to account for the interdependencies of the tables. The client tier can use these objects to navigate between the table data without incurring network round-trips.
![]() Note Rather than updating AutoLotDAL.dll to account for the Customers and Orders tables, this example isolates all the data access logic within a new Windows Forms project. However, intermixing UI and data logic in a production-level application is not recommended. The final examples of this chapter leverage various database design tools to decouple the UI logic from the data logic code.
Note Rather than updating AutoLotDAL.dll to account for the Customers and Orders tables, this example isolates all the data access logic within a new Windows Forms project. However, intermixing UI and data logic in a production-level application is not recommended. The final examples of this chapter leverage various database design tools to decouple the UI logic from the data logic code.
Begin this example by creating a new Windows Forms application named MultitabledDataSetApp. The GUI is simple enough (note I changed the name of my initial Form1.cs file to MainForm.cs and the text property to AutoLot Database Manipulator). In Figure 22-11,you can see three DataGridView widgets (dataGridViewInventory, dataGridViewCustomers, and dataGridViewOrders) that hold the data retrieved from the Inventory, Customers, and Orders tables of the AutoLot database. In addition, the initial Button(named btnUpdateDatabase) submits all changes entered within the grids to the database for processing using data adapter objects.
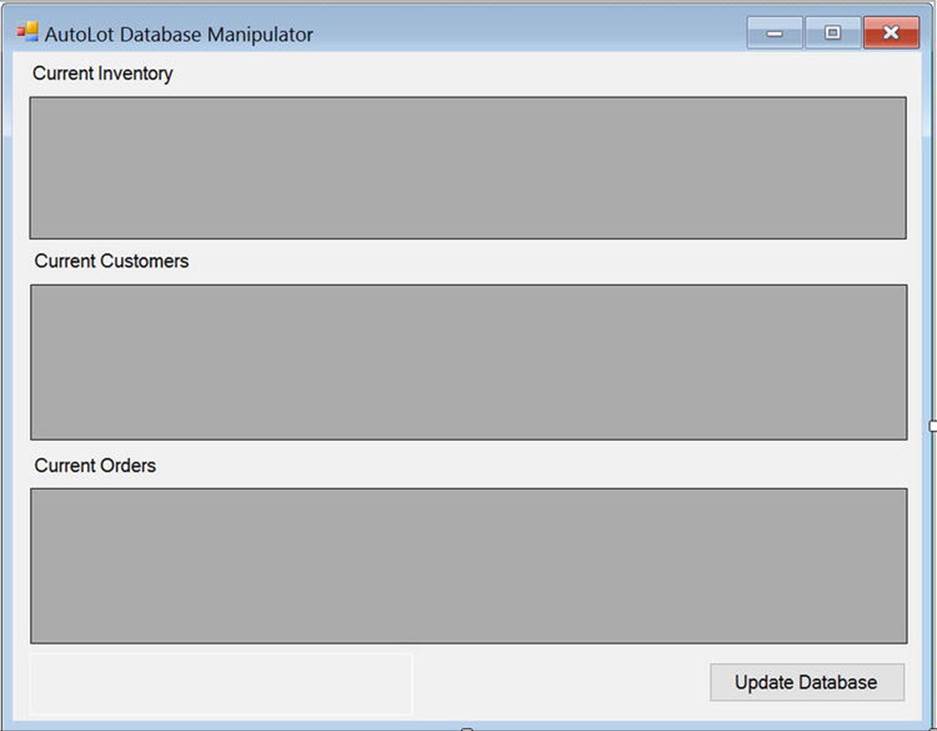
Figure 22-11. The initial UI will display data from each table of the AutoLot database
Prepping the Data Adapters
To keep the data access code as simple as possible, the MainForm will use command builder objects to autogenerate the SQL commands for each of the three SqlDataAdapters (one for each table). Here is the initial update to the Form-derived type (don’t forget to import theSystem.Data.SqlClient namespace):
public partial class MainForm : Form
{
// Form wide DataSet.
private DataSet _autoLotDs = new DataSet("AutoLot");
// Make use of command builders to simplify data adapter configuration.
private SqlCommandBuilder _sqlCbInventory;
private SqlCommandBuilder _sqlCbCustomers;
private SqlCommandBuilder _sqlCbOrders;
// Our data adapters (for each table).
private SqlDataAdapter _invTableAdapter;
private SqlDataAdapter _custTableAdapter;
private SqlDataAdapter _ordersTableAdapter;
// Form wide connection string.
private string _connectionString;
...
}
The constructor does the grunt work of creating your data-centric member variables and filling the DataSet. This example assumes you have authored an App.config file that contains the correct connection string data (and that you have referencedSystem.Configuration.dll and imported the System.Configuration namespace), as in this example:
<configuration>
<startup>
<supportedRuntime version="v4.0" sku=".NETFramework,Version=v4.6" />
</startup>
<connectionStrings>
<add name ="AutoLotSqlProvider" connectionString =
"Data Source=(local)\SQLEXPRESS2014;
Integrated Security=SSPI;Initial Catalog=AutoLot"
/>
</connectionStrings>
</configuration>
Also note that you include a call to a private helper function, BuildTableRelationship(), as follows:
public MainForm()
{
InitializeComponent();
// Get connection string.
_connectionString =
ConfigurationManager.ConnectionStrings["AutoLotSqlProvider"]
.ConnectionString;
// Create adapters.
_invTableAdapter = new SqlDataAdapter(
"Select * from Inventory", _connectionString);
_custTableAdapter = new SqlDataAdapter(
"Select * from Customers", _connectionString);
_ordersTableAdapter = new SqlDataAdapter(
"Select * from Orders", _connectionString);
// Autogenerate commands.
_sqlCbInventory = new SqlCommandBuilder(_invTableAdapter);
_sqlCbOrders = new SqlCommandBuilder(_ordersTableAdapter);
_sqlCbCustomers = new SqlCommandBuilder(_custTableAdapter);
// Fill tables in DataSet.
_invTableAdapter.Fill(_autoLotDs, "Inventory");
_custTableAdapter.Fill(_autoLotDs, "Customers");
_ordersTableAdapter.Fill(_autoLotDs, "Orders");
// Build relations between tables.
BuildTableRelationship();
// Bind to grids
dataGridViewInventory.DataSource = _autoLotDs.Tables["Inventory"];
dataGridViewCustomers.DataSource = _autoLotDs.Tables["Customers"];
dataGridViewOrders.DataSource = _autoLotDs.Tables["Orders"];
}
Building the Table Relationships
The BuildTableRelationship() helper function does the grunt work to add two DataRelation objects into the autoLotDS object. Recall from Chapter 21 that the AutoLot database expresses a number of parent-child relationships, which you can account for with the following code:
private void BuildTableRelationship()
{
//Create CustomerOrder data relation object.
DataRelation dr = new DataRelation("CustomerOrder",
_autoLotDs.Tables["Customers"].Columns["CustID"],
_autoLotDs.Tables["Orders"].Columns["CustID"]);
_autoLotDs.Relations.Add(dr);
// Create InventoryOrder data relation object.
dr = new DataRelation("InventoryOrder",
_autoLotDs.Tables["Inventory"].Columns["CarID"],
_autoLotDs.Tables["Orders"].Columns["CarID"]);
_autoLotDs.Relations.Add(dr);
}
Note that you establish a friendly string moniker with the first parameter when you create a DataRelation object (you’ll see the usefulness of doing so in just a minute). You also establish the keys used to build the relationship itself. Notice that the parent table (the second constructor parameter) is specified before the child table (the third constructor parameter).
Updating the Database Tables
Now that the DataSet has been filled with data from the data source, you can manipulate each DataTable locally. To do so, run the application and insert, update, or delete values from any of the three DataGridViews. When you are ready to submit the data back for processing, click the Update button. You should find it easy to follow along with the code behind the related Click event at this point.
private void btnUpdateDatabase_Click(object sender, EventArgs e)
{
try
{
_invTableAdapter.Update(_autoLotDs, "Inventory");
_custTableAdapter.Update(_autoLotDs, "Customers");
_ordersTableAdapter.Update(_autoLotDs, "Orders");
}
catch (Exception ex)
{
MessageBox.Show(ex.Message);
}
}
Now run your application and perform various updates. When you rerun the application, you should find that your grids are populated with the recent changes.
Navigating Between Related Tables
Now let’s look at how a DataRelation allows you to move between related tables programmatically. Extend your UI to include a new Button (named btnGetOrderInfo), a related TextBox (named txtCustID), and a descriptive Label (you can group these controls within aGroupBox for more visual appeal).
Figure 22-12 shows one possible UI of the application.
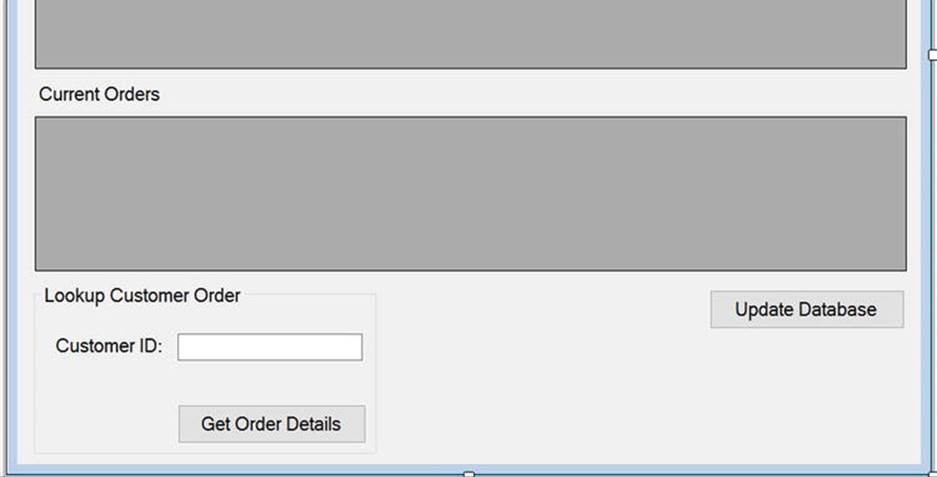
Figure 22-12. The updated UI allows the user to look up customer order information
This updated UI lets the user enter the ID of a customer and retrieve all the relevant information about that customer’s order (e.g., name, order ID, and car order). This information will be formatted into a string type that is eventually displayed within a message box. Consider the following code behind the new Button’s Click event handler:
private void btnGetOrderInfo_Click(object sender, EventArgs e)
{
string strOrderInfo = string.Empty;
// Get the customer ID in the text box.
int custID = int.Parse(txtCustID.Text);
// Now based on custID, get the correct row in Customers table.
var drsCust = _autoLotDs.Tables["Customers"].Select($"CustID = {custID}");
strOrderInfo +=
$"Customer {drsCust[0]["CustID"]}: {drsCust[0]["FirstName"].ToString().Trim()} {drsCust[0]["LastName"].ToString().Trim()}\n";
// Navigate from customer table to order table.
var drsOrder = drsCust[0].GetChildRows(_autoLotDs.Relations["CustomerOrder"]);
// Loop through all orders for this customer.
foreach (DataRow order in drsOrder)
{
strOrderInfo += $"----\nOrder Number: {order["OrderID"]}\n";
// Get the car referenced by this order.
DataRow[] drsInv = order.GetParentRows(_autoLotDs.Relations["InventoryOrder"]);
// Get info for (SINGLE) car info for this order.
DataRow car = drsInv[0];
strOrderInfo += $"Make: {car["Make"]}\n";
strOrderInfo += $"Color: {car["Color"]}\n";
strOrderInfo += $"Pet Name: {car["PetName"]}\n";
}
MessageBox.Show(strOrderInfo, "Order Details");
}
Figure 22-13 shows one possible output when specifying a customer ID with the value of 3 (your output may differ based on the data within your AutoLot database tables).
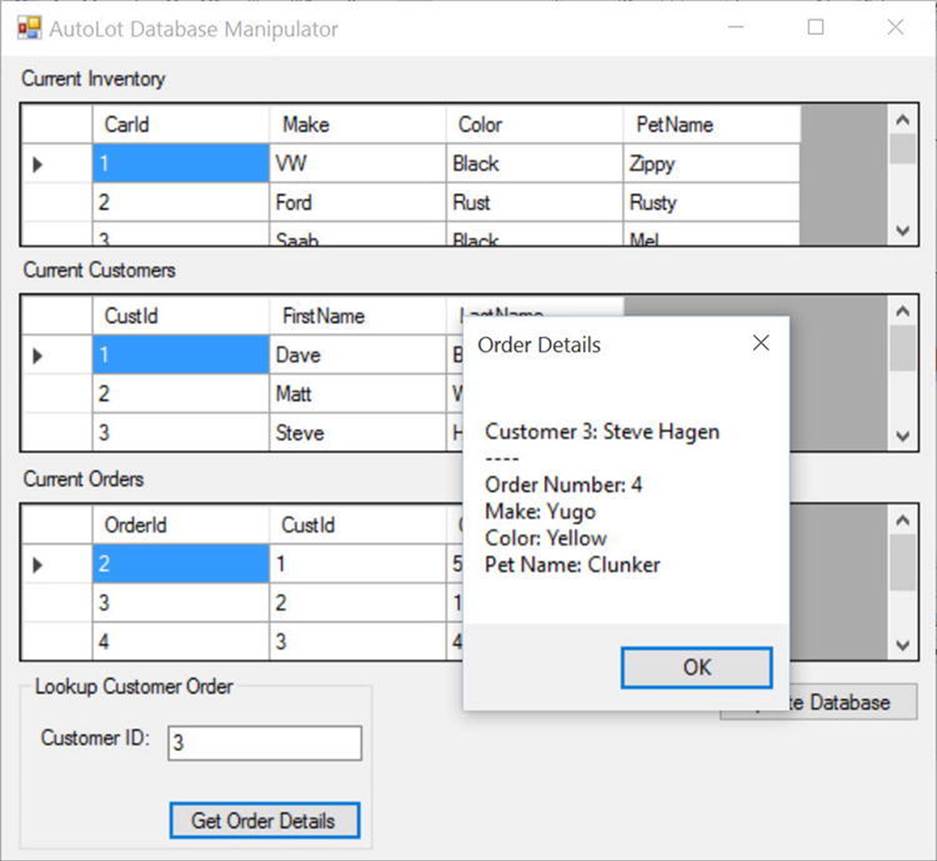
Figure 22-13. Navigating data relations
This previous example should probably convince you of the usefulness of the DataSet class. Given that a DataSet is completely disconnected from the underlying data source, you can work with an in-memory copy of data and navigate around each table to make any necessary updates, deletes, or inserts without incurring any round-trips to the database. After you finish this, you can submit your changes to the data store for processing. The end result is a scalable and robust application.
![]() Source Code You can find the MultitabledDataSetApp project in the Chapter 22 subdirectory.
Source Code You can find the MultitabledDataSetApp project in the Chapter 22 subdirectory.
The Windows Forms Database Designer Tools
All the examples thus far have involved a fair amount of elbow grease in the sense that you had to author all data access logic by hand. While you did offload a good amount of this code to a .NET code library (AutoLotDAL.dll) for reuse in later chapters of the book, you still had to create the various objects of your data provider manually before interacting with the relational database. The next task in this chapter is to look at how you use various Windows Forms database designer tools, which can produce a good deal of data access code on your behalf.
One way you can use these integrated tools is to use the designers supported by the Windows Forms DataGridView control. The problem with this approach is that the database designer tools will embed all the data access code directly into your GUI code base! Ideally, you want to isolate all this designer- generated code in a dedicated .NET code library, so you can easily reuse your database access logic across multiple projects.
Nevertheless, it might be helpful to begin with an examination of how you can use the DataGridView control to generate the required data access code, given that this approach does have some usefulness in small-scale projects and application prototypes. After this point, you will learn how to isolate the same designer-generated code into a third version of AutoLotDAL.dll.
Visually Designing the DataGridView
The DataGridView control has an associated wizard that can generate data access code on your behalf. Begin by creating a new Windows Forms application project named DataGridViewDataDesigner. Rename the initial form to MainForm.cs using the Solution Explorer, set Text toWindows Forms Data Wizards, and then add an instance of the DataGridView control (named inventoryDataGridView) to your initial form. When you select your DataGridView control, an inline editor should open to the right side of the control (if not, just click the small “triangle” button found on the upper right of the control). From the Choose Data Source drop-down box, select the Add Project Data Source link (see Figure 22-14).
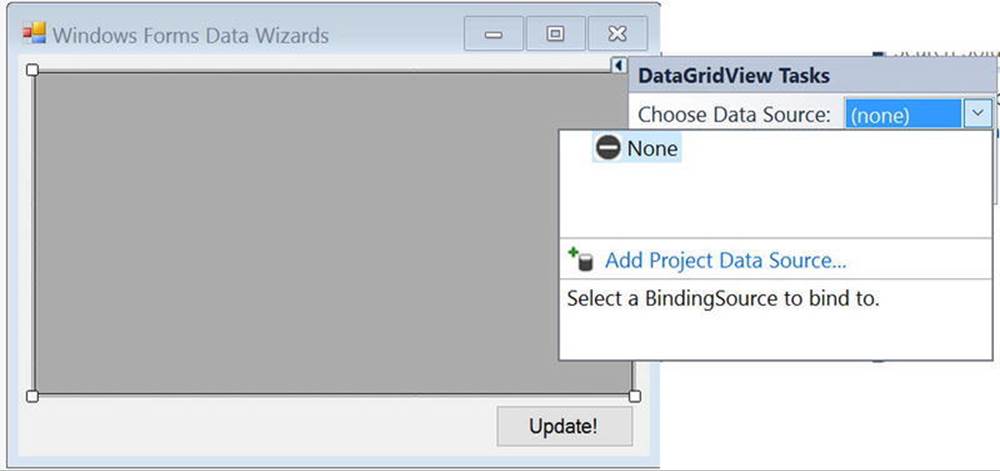
Figure 22-14. The DataGridView editor
This launches the Data Source Configuration Wizard. This tool guides you through a series of steps that allow you to select and configure a data source, which you can then bind to the DataGridView. The first step of the wizard asks you to identify the type of data source you want to interact with. Select Database (see Figure 22-15) and click the Next button.

Figure 22-15. Selecting the type of data source
The next step (which will differ slightly based on your selection in step 1) asks what type of database model to use. You will see the Dataset database model only if you’ve added the Entity Framework to your project. Pick the Dataset database model (see Figure 22-16).
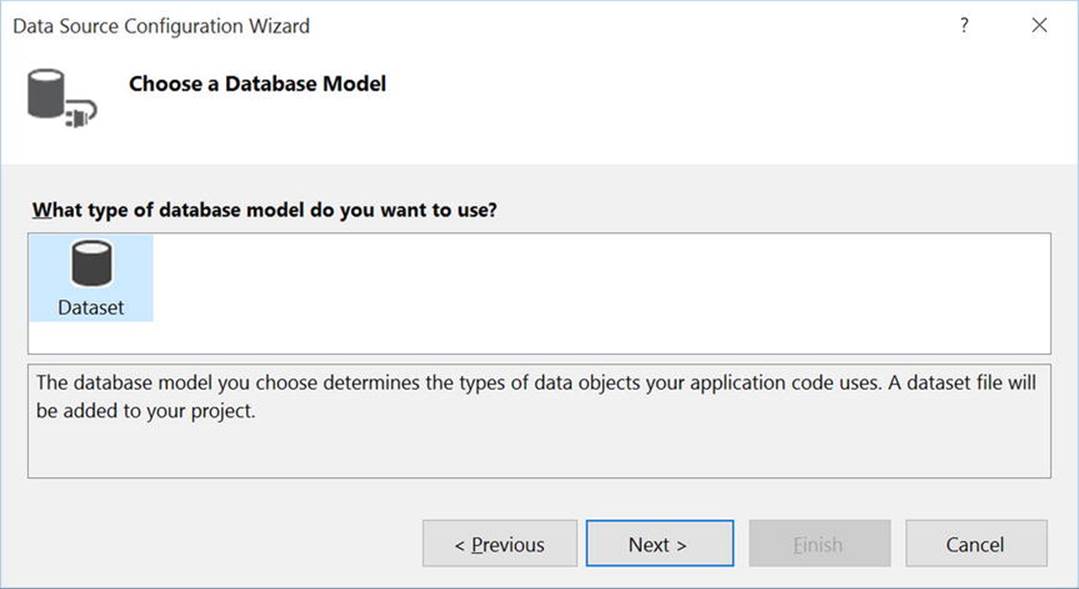
Figure 22-16. Choosing the database model
The next step allows you to configure your database connection. If you have a database currently added to Server Explorer, you should find it listed automatically in the drop-down list. If this is not the case (or if you ever need to connect to a database you have not previously added to Server Explorer), click the New Connection button. Figure 22-17 shows the result of selecting the local instance of AutoLot.
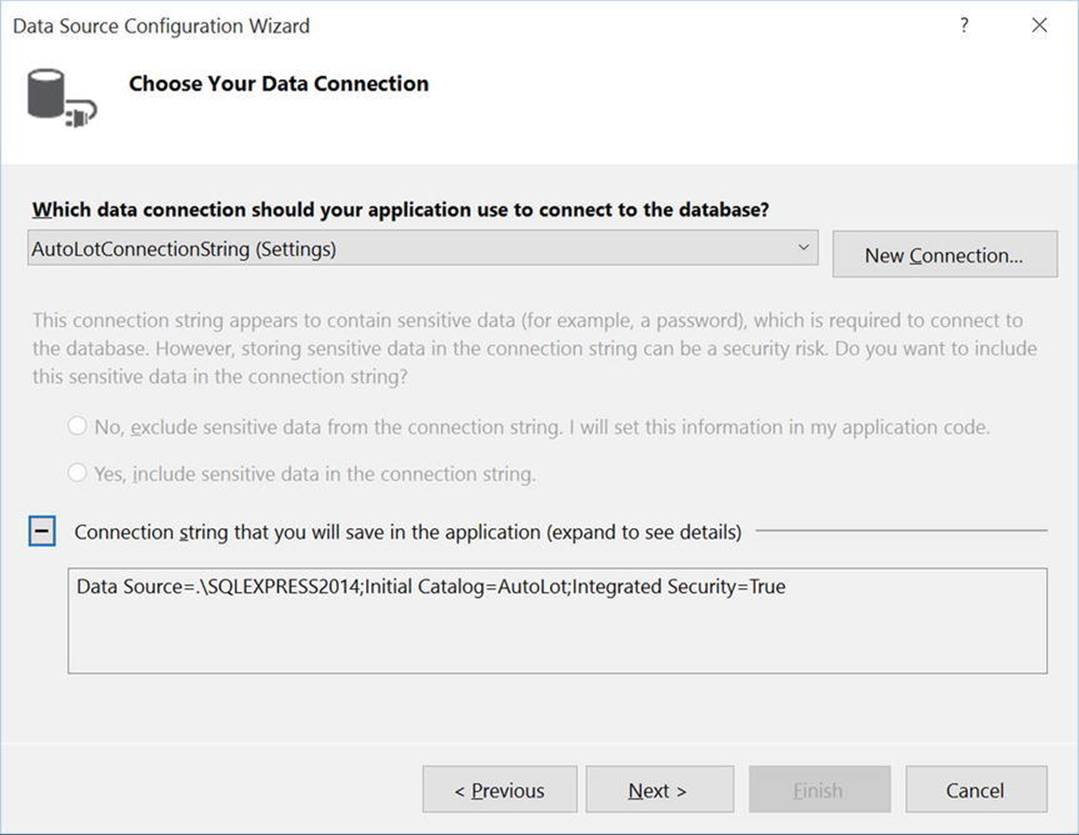
Figure 22-17. Choosing the database
In the wizard’s next step, you will be asked if you would like to save the connection string in an application configuration file as in Figure 22-18. Elect to save your connection string and then click the Next button.
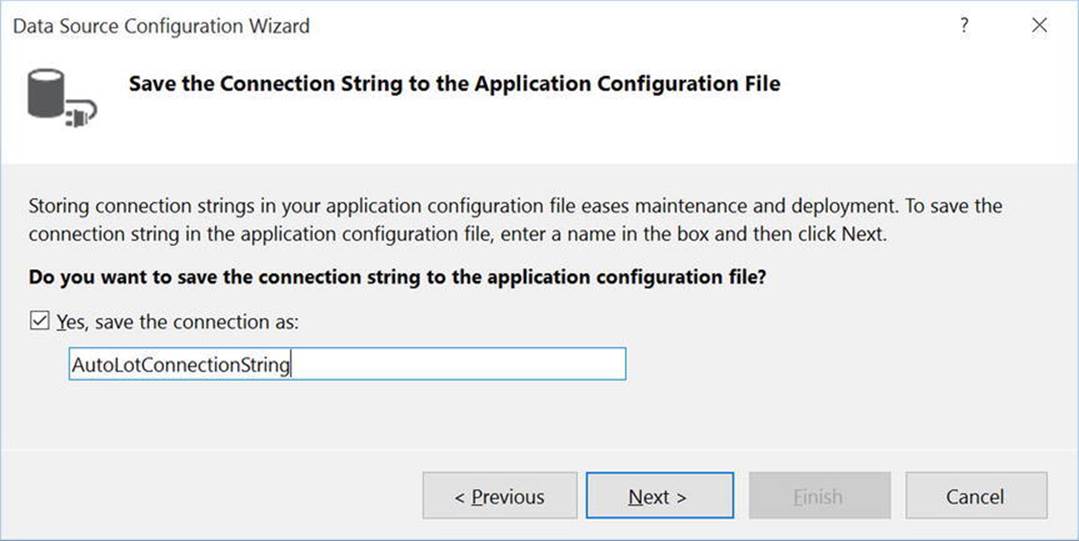
Figure 22-18. Saving the connection string in the app.config file
In the final step, you select the database objects that will be accounted for by the autogenerated DataSet and related data adapters. While you could select each of the data objects of the AutoLot database, here you concern yourself only with the Inventory table. Given this, change the suggested name of the DataSet to InventoryDataSet (see Figure 22-19), check the Inventory table, and click the Finish button.
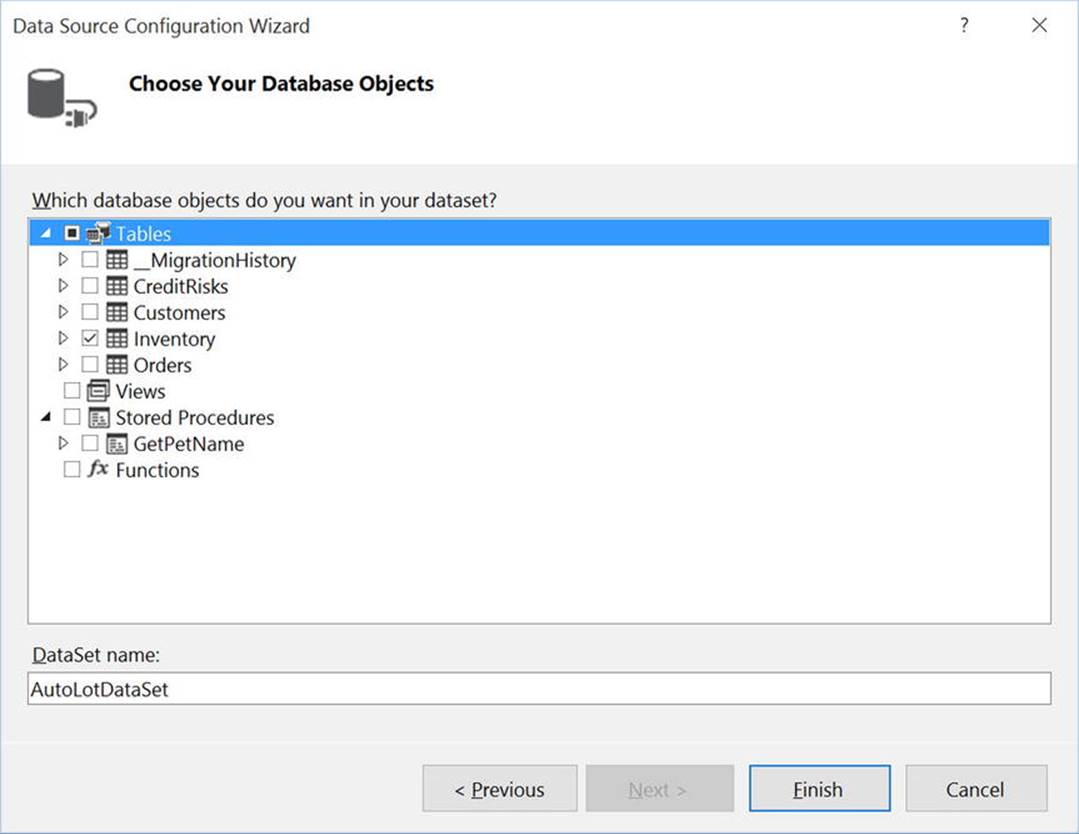
Figure 22-19. Selecting the Inventory table
After you do this, you will see that the visual designer has been updated in many ways. The most noticeable change is that the DataGridView displays the schema of the Inventory table, as illustrated by the column headers. Also, you will see three components on the bottom of the form designer (in a region dubbed the component tray): a DataSet component, a BindingSource component, and a TableAdapter component (see Figure 22-20).
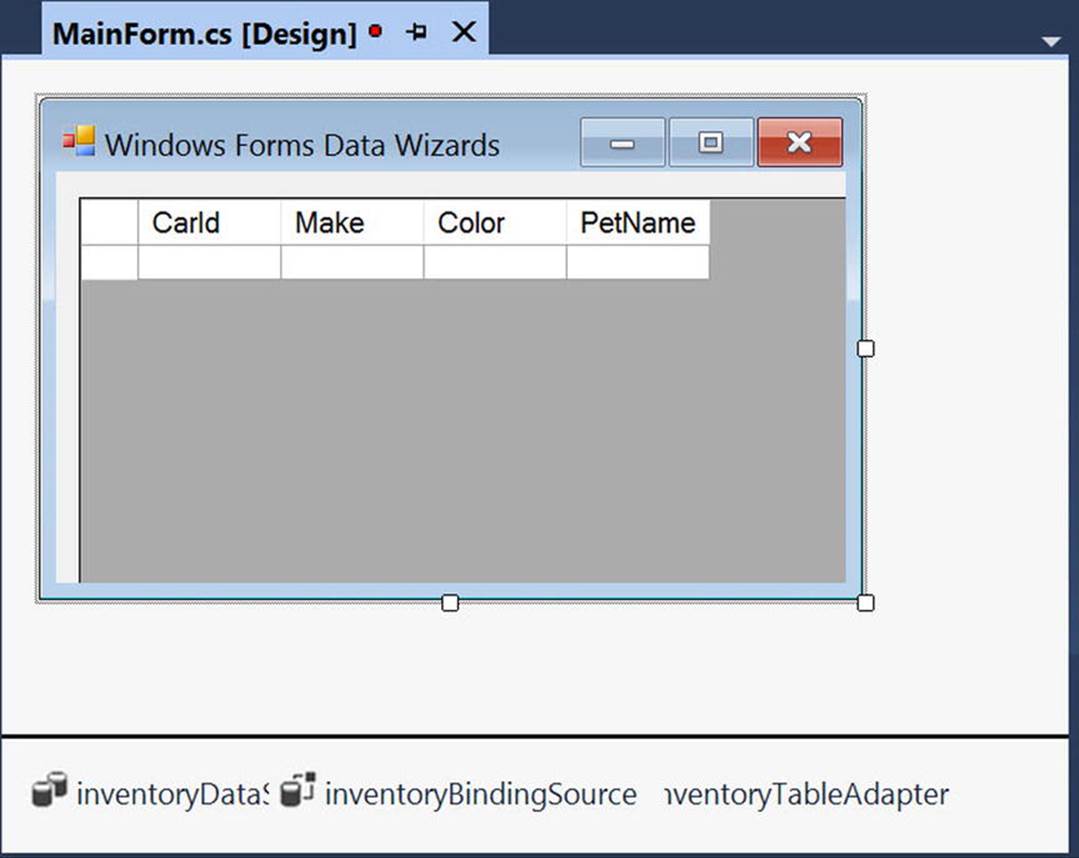
Figure 22-20. Your Windows Forms project, after running the Data Source Configuration Wizard
At this point, you can run your application, and lo and behold, the grid is filled with the records of the Inventory table! Of course, there is no magic to speak of in this case. The IDE has authored a good amount of code on your behalf and set up the grid control to use it. Let’s dig into some of this autogenerated code.
The Generated App.config File
If you examine your Solution Explorer, you will find your project now contains an App.config file that contains a <connectionStrings> element that has been given a somewhat peculiar name, as shown here:
<?xml version="1.0" encoding="utf-8" ?>
<configuration>
<configSections>
</configSections>
<connectionStrings>
<add name="DataGridViewDataDesigner.Properties.Settings.AutoLotConnectionString"
connectionString="Data Source=.\SQLEXPRESS2014;Initial Catalog=AutoLot;Integrated Security=True"
providerName="System.Data.SqlClient" />
</connectionStrings>
<startup>
<supportedRuntime version="v4.0" sku=".NETFramework,Version=v4.6" />
</startup>
</configuration>
The autogenerated data adapter object (which you will learn more about momentarily) uses the lengthy value, "DataGridViewDataDesigner.Properties.Settings.AutoLotConnectionString".
Examining the Strongly Typed DataSet
In addition to your configuration file, the data wizard tools generated what is termed a strongly typed DataSet. This term describes a custom class that extends DataSet and exposes a number of members that allow you to interact with the database using a more intuitive object model. For example, strongly typed DataSet objects contain properties that map directly to the database table names. Thus, you can use the Inventory property to nab the rows and columns directly, rather than having to drill into the collection of tables using the Tables property.
If you insert a new class diagram file into your project, you’ll notice that the wizard has created a class named InventoryDataSet. This class defines a handful of members, the most important of which is a property named Inventory (see Figure 22-21).

Figure 22-21. The Data Source Configuration Wizard created a strongly typed DataSet
If you double-click the InventoryDataSet.xsd file within Solution Explorer, you will load the Visual Studio Dataset Designer (you’ll learn more details about this designer momentarily). If you right-click anywhere within this designer and select the View Code option, you will notice the following fairly empty partial class definition:
partial class InventoryDataSet {
}
If necessary, you can add custom members to this partial class definition; however, the real action takes place within the designer-maintained file, InventoryDataSet.Designer.cs. If you open this file using Solution Explorer, you will see that InventoryDataSet extends theDataSet parent class. Consider the following partial code, with comments added for clarity:
// This is all designer-generated code!
public partial class InventoryDataSet : global::System.Data.DataSet
{
// A member variable of type InventoryDataTable.
private InventoryDataTable tableInventory;
// Each constructor calls a helper method named InitClass().
public InventoryDataSet()
{
...
this.InitClass();
...
}
// InitClass() preps the DataSet and adds the InventoryDataTable
// to the Tables collection.
private void InitClass()
{
this.DataSetName = "InventoryDataSet";
this.Prefix = "";
this.Namespace = "http://tempuri.org/InventoryDataSet.xsd";
this.EnforceConstraints = true;
this.SchemaSerializationMode =
global::System.Data.SchemaSerializationMode.IncludeSchema;
this.tableInventory = new InventoryDataTable();
base.Tables.Add(this.tableInventory);
}
// The read-only Inventory property returns
// the InventoryDataTable member variable.
public InventoryDataTable Inventory
{
get { return this.tableInventory; }
}
}
Notice that your strongly typed DataSet has a member variable that is a strongly typed DataTable; in this case, the class is named InventoryDataTable. The constructor of the strongly typed DataSet class makes a call to a private initialization method named InitClass(), which adds an instance of this strongly typed DataTable to the Tables collection of the DataSet. Last but not least, notice that the implementation of the Inventory property returns the InventoryDataTable member variable.
Examining the Strongly Typed DataTable
Now return to the class diagram file and open up the Nested Types node on the InventoryDataSet icon. Here you will see the strongly typed DataTable class named InventoryDataTable and a strongly typed DataRow class named InventoryRow.
The InventoryDataTable class (which is the same type as the member variable of the strongly typed DataSet you examined) defines a set of properties that are based on the column names of the physical Inventory table (CarIDColumn, ColorColumn, MakeColumn, andPetNameColumn), as well as a custom indexer and a Count property to obtain the current number of records.
More interestingly, this strongly typed DataTable class defines a set of methods that allow you to insert, locate, and delete rows within the table using strongly typed members (an attractive alternative to navigating the Rows and Columns indexers manually). For example,AddInventoryRow() lets you add a new record row to the table in memory, FindByCarID() lets you do a lookup based on the primary key of the table, and RemoveInventoryRow() lets you remove a row from the strongly typed table (see Figure 22-22).
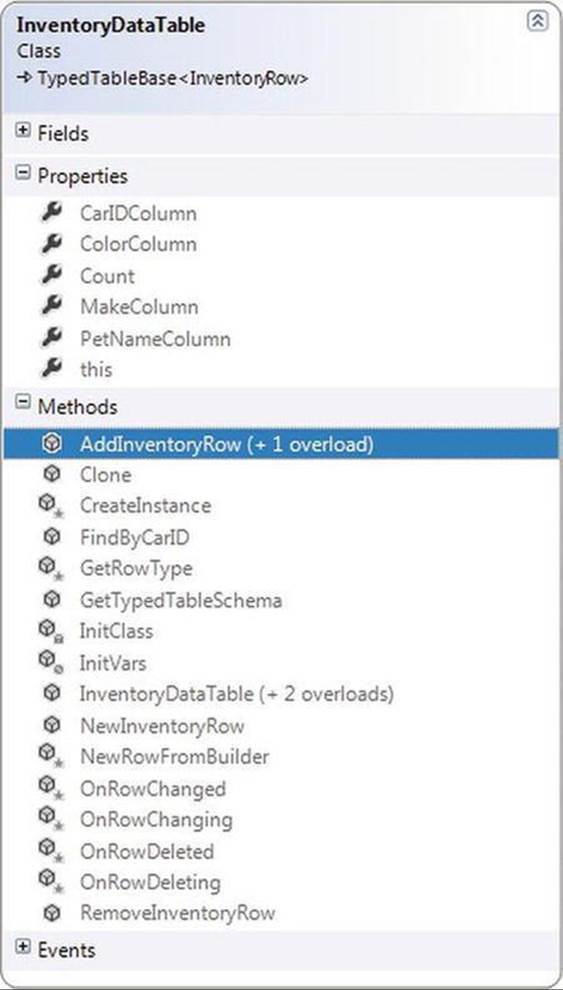
Figure 22-22. The strongly typed DataTable is nested in the strongly typed DataSet
Examining the Strongly Typed DataRow
The strongly typed DataRow class, which is also nested in the strongly typed DataSet, extends the DataRow class and exposes properties that map directly to the schema of the Inventory table. Also, the data designer tool has created a method (IsPetNameNull()) that will perform a check on whether this column has a value (see Figure 22-23).
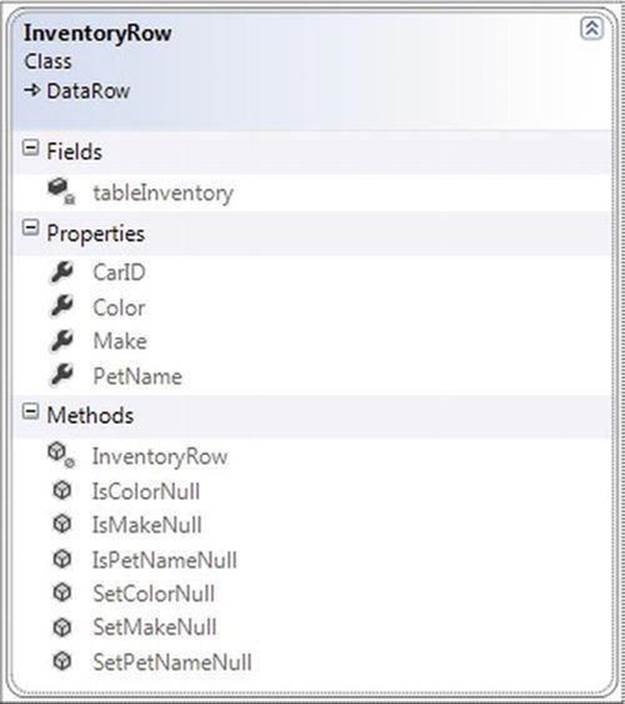
Figure 22-23. The strongly typed DataRow
Examining the Strongly Typed Data Adapter
Strong typing for your disconnected types is a solid benefit of using the Data Source Configuration Wizard, given that creating these classes by hand would be tedious (but entirely possible). This same wizard was kind enough to generate a custom data adapter object that can fill and update the InventoryDataSet and InventoryDataTable objects in a strongly typed manner. Locate the InventoryTableAdapter on the visual class designer and examine the generated members in Figure 22-24.
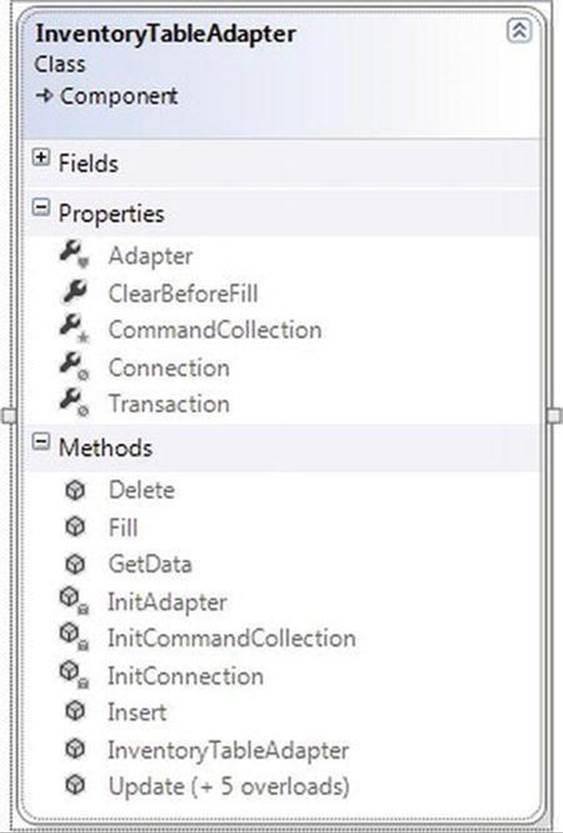
Figure 22-24. A customized data adapter that operates on the strongly typed DataSet and DataTable
The autogenerated InventoryTableAdapter type maintains a collection of SqlCommand objects (which you can access using the CommandCollection property), each of which has a fully populated set of SqlParameter objects. Furthermore, this custom data adapter provides a set of properties to extract the underlying connection, transaction, and data adapter objects, as well as a property to obtain an array representing each command type.
Completing the Windows Forms Application
If you examine the Load event handler of the form-derived type (in other words, if you view the code for MainForm.cs and locate the MainForm_Load() method), you will find that the Fill() method of the custom table adapter is called upon startup, passing in the customDataTable maintained by the custom DataSet.
private void MainForm_Load(object sender, EventArgs e)
{
this.inventoryTableAdapter.Fill(this.inventoryDataSet.Inventory);
}
You can use this same custom data adapter object to update changes to the grid. Update the UI of your form with a single Button control (named btnUpdateInventory). Next, handle the Click event and author the following code within the event handler:
private void btnUpdateInventory_Click(object sender, EventArgs e)
{
try
{
// Save changes with the Inventory table back to the database.
this.inventoryTableAdapter.Update(this.inventoryDataSet.Inventory);
}
catch(Exception ex)
{
MessageBox.Show(ex.Message);
}
// Get fresh copy for grid.
this.inventoryTableAdapter.Fill(this.inventoryDataSet.Inventory);
}
Run your application again; add, delete, or update the records displayed in the grid; and click the Update button. When you run the program again, you will find your changes are present and accounted for.
Great! This example shows how helpful the DataGridView control designer can be. It lets you work with strongly typed data and generates a majority of the necessary database logic on your behalf. The obvious problem is that this code is tightly connected to the window that uses it. Ideally, this sort of code belongs in your AutoLotDAL.dll assembly (or some other data access library). However, you might wonder how to harvest the code generated using the DataGridView’s associated wizard in a Class Library project, given that there is no form designer by default.
![]() Source Code You can find the DataGridViewDataDesigner project in the Chapter 22 subdirectory.
Source Code You can find the DataGridViewDataDesigner project in the Chapter 22 subdirectory.
Isolating Strongly Typed Database Code into a Class Library
Fortunately, you can activate the data design tools of Visual Studio from any sort of project (UI-based or otherwise) without the need to copy and paste massive amounts of code between projects. You can see this in action by adding more functionality to AutoLotDAL.dll. You can continue working with your existing project. In the downloaded code for the chapter, the code for the next section is in a separate project named AutoLotDAL3.dll.
Create a new folder named DataSets in the project, and insert a new strongly typed DataSet class (named AutoLotDataSet.xsd) into your new folder using the Project ![]() Add New Item menu option (to quickly find the DataSet project type, select the Data section of the New Item dialog; see Figure 22-25).
Add New Item menu option (to quickly find the DataSet project type, select the Data section of the New Item dialog; see Figure 22-25).
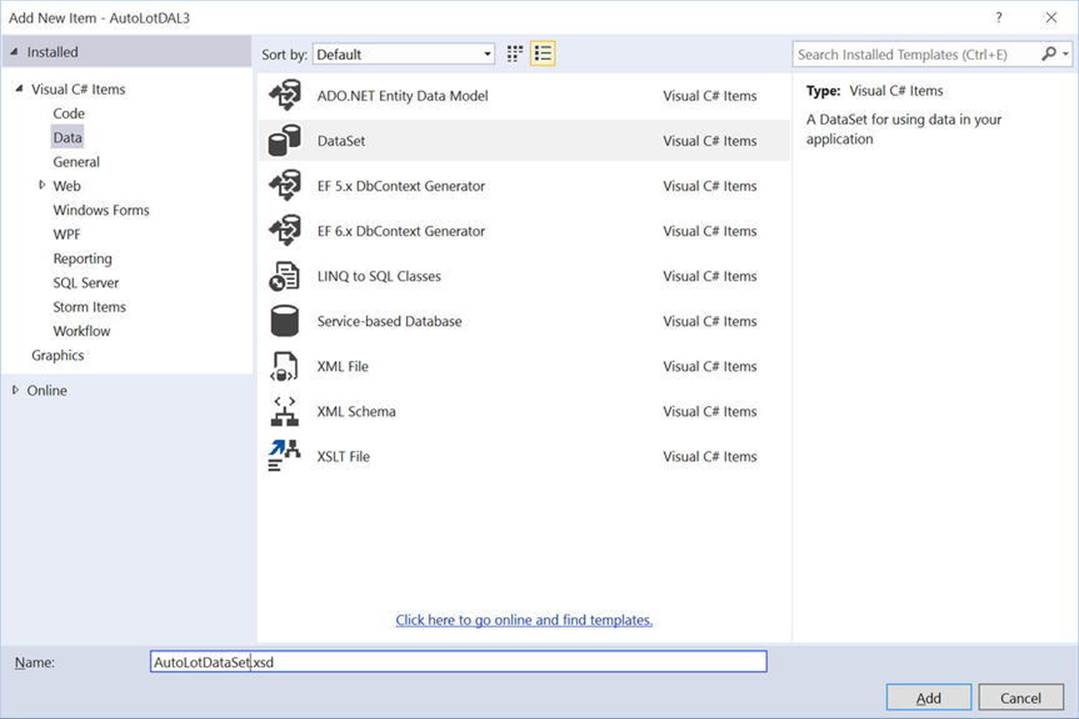
Figure 22-25. Inserting a new strongly typed DataSet
This opens a blank Dataset Designer surface. At this point, you can use the Server Explorer to connect to a given database (you should already have a connection to AutoLot) and then drag and drop each table and stored procedure you want in the DataSet onto the design surface. InFigure 22-26, you can see the custom aspects of AutoLot are accounted for, and their relationships are realized automatically (this example does not drag over the CreditRisk table).

Figure 22-26. Your custom strongly typed types, this time within a Class Library project
Viewing the Generated Code
The DataSet designer created the same sort of code that the DataGridView wizard did in the previous Windows Forms example. However, this time you account for the Inventory, Customers, and Orders tables, as well as the GetPetName stored procedure, so you have many more generated classes. Basically, each database table you drag onto the designer surface gives you DataTable, DataRow, and data adapter classes contained in a strongly typed DataSet.
The strongly typed DataSet, DataTable, and DataRow classes will be placed into the root namespace of the project (AutoLotDAL). The custom table adapters will be placed within a nested namespace. You can view all the generated types most easily by using the Class View tool, which you open from the Visual Studio View menu (see Figure 22-27).

Figure 22-27. The autogenerated strongly typed data of the AutoLot database
For the sake of completion, you might want use the Visual Studio Properties editor (see Chapter 14 for details) to set the version of this latest incarnation of AutoLotDAL.dll to 3.0.0.0.
![]() Source Code You can find the AutoLotDAL3 project in the Chapter 22 subdirectory.
Source Code You can find the AutoLotDAL3 project in the Chapter 22 subdirectory.
Selecting Data with the Generated Code
At this point, you can use your strongly typed data within any .NET application that needs to communicate with the AutoLot database. To make sure you understand the basic mechanics, create a Console Application project named StronglyTypedDataSetConsoleClient. Next, add a reference to your latest-and-greatest version of AutoLotDAL3.dll and import the AutoLotDAL3.DataSets, AutoLotDAL3.DataSets.AutoLotDataSetTableAdapters, and static System.Console namespaces into your initial C# code file.
Here is a Main() method that uses the InventoryTableAdapter object to retrieve all data in the Inventory table. Notice that you do not need to specify a connection string because that information is now part of the strongly typed object model. After you fill the table, you print the results using a helper method named PrintInventory(). Note that you can manipulate the strongly typed DataTable just as you do a “normal” DataTable using the Rows and Columns collections.
class Program
{
static void Main(string[] args)
{
Console.WriteLine("***** Fun with Strongly Typed DataSets *****\n");
// Caller creates the DataSet object.
var table = new AutoLotDataSet.InventoryDataTable();
// Inform adapter of the Select command text and connection.
var adapter = new InventoryTableAdapter();
// Fill our DataSet with a new table, named Inventory.
adapter.Fill(table);
PrintInventory(table); Console.ReadLine();
}
static void PrintInventory(AutoLotDataSet.InventoryDataTable dt)
{
// Print out the column names.
for (int curCol = 0; curCol < dt.Columns.Count; curCol++)
{
Write(dt.Columns[curCol].ColumnName + "\t");
}
WriteLine("\n----------------------------------");
// Print the DataTable.
for (int curRow = 0; curRow < dt.Rows.Count; curRow++)
{
for (int curCol = 0; curCol < dt.Columns.Count; curCol++)
{
Write(dt.Rows[curRow][curCol] + "\t");
}
WriteLine();
}
}
}
Inserting Data with the Generated Code
Now assume you want to insert new records using this strongly typed object model. The following helper function adds two new rows to the current InventoryDataTable and then updates the database using the data adapter. You add the first row manually by configuring a strongly typed DataRow; you add the second row by passing in the needed column data, which allows the DataRow to be created in the background automatically.
public static void AddRecords(
AutoLotDataSet.InventoryDataTable table,
InventoryTableAdapter adapter)
{
try
{
// Get a new strongly typed row from the table.
AutoLotDataSet.InventoryRow newRow = table.NewInventoryRow();
// Fill row with some sample data.
newRow.Color = "Purple";
newRow.Make = "BMW";
newRow.PetName = "Saku";
// Insert the new row.
table.AddInventoryRow(newRow);
// Add one more row, using overloaded Add method.
table.AddInventoryRow("Yugo", "Green", "Zippy");
// Update database.
adapter.Update(table);
}
catch (Exception ex)
{
WriteLine(ex.Message);
}
}
The Main() method can invoke this method; doing so updates the database table with these new records.
static void Main(string[] args)
{
...
// Add rows, update, and reprint.
AddRecords(table, adapter);
table.Clear();
adapter.Fill(table);
PrintInventory(table);
Console.ReadLine();
}
Deleting Data with the Generated Code
Deleting records with this strongly typed object model is also simple. The autogenerated FindByXXXX() method (where XXXX is the name of the primary key column) of the strongly typed DataTable returns the correct (strongly typed) DataRow using the primary key. Here is another helper method that deletes the two records you just created:
private static void RemoveRecords(
AutoLotDataSet.InventoryDataTable table, InventoryTableAdapter adapter)
{
try
{
AutoLotDataSet.InventoryRow rowToDelete = table.FindByCarId(1);
adapter.Delete(rowToDelete.CarId, rowToDelete.Make, rowToDelete.Color,
rowToDelete.PetName);
rowToDelete = table.FindByCarId(2);
adapter.Delete(rowToDelete.CarId, rowToDelete.Make, rowToDelete.Color,
rowToDelete.PetName);
}
catch (Exception ex)
{
WriteLine(ex.Message);
}
}
If you call this from your Main() method and reprint the table, you should find these two test records are no longer displayed.
![]() Note If you want to make this example more flexible, you can gather data from the user using the Console class.
Note If you want to make this example more flexible, you can gather data from the user using the Console class.
Invoking a Stored Procedure Using the Generated Code
Let’s look at one more example of using the strongly typed object model. In this case, you create a final method that invokes the GetPetName stored procedure. When the data adapters for the AutoLot database were created, there was a special class created namedQueriesTableAdapter, which, as the name implies, encapsulates the process of invoking stored procedures in the relational database. This final helper function displays the name of the specified car when called from Main():
public static void CallStoredProc()
{
try
{
var queriesTableAdapter = new QueriesTableAdapter();
Write("Enter ID of car to look up: ");
string carID = ReadLine() ?? "0";
string carName = "";
queriesTableAdapter.GetPetName(int.Parse(carID), ref carName);
WriteLine($"CarID {carID} has the name of {carName}");
}
catch(Exception ex)
{
Console.WriteLine(ex.Message);
}
}
At this point, you know how to use strongly typed database types and package them up into a dedicated class library. You can find more aspects of this object model to play around with, but you should be in a perfect position to dig deeper if that interests you. To wrap things up for this chapter, you will learn how to apply LINQ queries to an ADO.NET DataSet object.
![]() Source Code You can find the StronglyTypedDataSetConsoleClient project in the Chapter 22 subdirectory.
Source Code You can find the StronglyTypedDataSetConsoleClient project in the Chapter 22 subdirectory.
Programming with LINQ to DataSet
You have seen in this chapter that you can manipulate the data within a DataSet in three distinct manners:
· By using the Tables, Rows, and Columns collections
· By using data table readers
· By using strongly typed data classes
When you use the various indexers of the DataSet and DataTable type, you can interact with the contained data in a straightforward but loosely typed manner. Recall that this approach requires you to treat the data as a tabular block of cells, as in this example:
static void PrintDataWithIndxers(DataTable dt)
{
// Print the DataTable.
for (int curRow = 0; curRow < dt.Rows.Count; curRow++)
{
for (int curCol = 0; curCol < dt.Columns.Count; curCol++)
{
Write(dt.Rows[curRow][curCol + "\t");
}
WriteLine();
}
}
The CreateDataReader() method of the DataTable type offers a second approach, where you can treat the data in the DataSet as a linear set of rows to be processed in a sequential manner. This allows you to apply a connected data reader programming model to a disconnectedDataSet.
static void PrintDataWithDataTableReader(DataTable dt)
{
// Get the DataTableReader type.
DataTableReader dtReader = dt.CreateDataReader();
while (dtReader.Read())
{
for (int i = 0; i < dtReader.FieldCount; i++)
{
Write($"{dtReader.GetValue(i)}\t");
}
WriteLine();
}
dtReader.Close();
}
Finally, you can use a strongly typed DataSet to yield a code base that allows you to interact with data in the object using properties that map to the column names in the relational database. Using strongly typed objects allows you to author code such as the following:
static void AddRowWithTypedDataSet()
{
InventoryTableAdapter invDA = new InventoryTableAdapter();
AutoLotDataSet.InventoryDataTable inv = invDA.GetData();
inv.AddInventoryRow("Ford", "Yellow", "Sal");
invDA.Update(inv);
}
While all of these approaches have their place, the LINQ to DataSet API provides yet another option to manipulate DataSet data using LINQ query expressions.
![]() Note You use the LINQ to DataSet API to apply LINQ queries only to DataSet objects returned by a data adapter, but this has nothing to do with applying LINQ queries directly to the database engine. Chapter 23 will introduce you to the ADO.NET Entity Framework, which provides a way to represent SQL queries as LINQ queries.
Note You use the LINQ to DataSet API to apply LINQ queries only to DataSet objects returned by a data adapter, but this has nothing to do with applying LINQ queries directly to the database engine. Chapter 23 will introduce you to the ADO.NET Entity Framework, which provides a way to represent SQL queries as LINQ queries.
Out of the box, the ADO.NET DataSet (and related types such as DataTable and DataView) do not have the necessary infrastructure to be a direct target for a LINQ query. For example, the following method (which uses types in the AutoLotDisconnectedLayer namespace) results in a compile-time error:
static void LinqOverDataTable()
{
// Get a DataTable of data.
InventoryDALDC dal = new InventoryDALDC(
@"Data Source=(local)\SQLEXPRESS2014;Initial Catalog=AutoLot;Integrated Security=True");
DataTable data = dal.GetAllInventory();
// Apply a LINQ query to the DataSet?
var moreData = from c in data where (int)c["CarID"] > 5 select c;
}
If you were to compile the LinqOverDataTable() method, the compiler would inform you that the DataTable type provides a query pattern implementation. Similar to the process of applying LINQ queries to objects that do not implement IEnumerable<T>, ADO.NET objects must be transformed into a compatible type. Understanding how to do so requires examining the types of System.Data.DataSetExtensions.dll.
The Role of the DataSet Extensions Library
The System.Data.DataSetExtensions.dll assembly, which is referenced by default in all Visual Studio projects, augments the System.Data namespace with a handful of new types (see Figure 22-28).
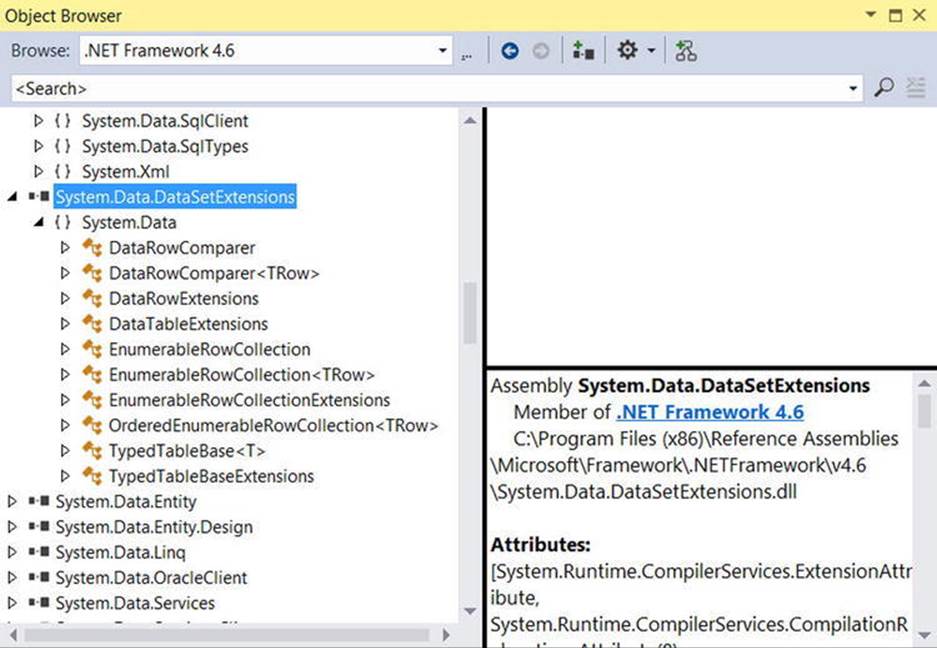
Figure 22-28. The System.Data.DataSetExtensions.dll assembly
The two most useful types by far are DataTableExtensions and DataRowExtensions. These classes extend the functionality of DataTable and DataRow by using a set of extension methods (see Chapter 12). The other key class is TypedTableBaseExtensions, which defines extension methods that you can apply to strongly typed DataSet objects to make the internal DataTable objects LINQ aware. All of the remaining members within the System.Data.DataSetExtensions.dll assembly are pure infrastructure, and they are not intended to be used directly in your code base.
Obtaining a LINQ-Compatible DataTable
Now let’s look at how you use the DataSet extensions. Assume you have a new C# Console Application project named LinqToDataSetApp. Add a reference to the latest-and-greatest version (3.0.0.0) of the AutoLotDAL.dll assembly and update your initial code file with the following logic:
using System;
...
// Location of strongly typed data containers.
using AutoLotDAL3.DataSets;
// Location of strongly typed data adapters.
using AutoLotDAL3.DataSets.AutoLotDataSetTableAdapters;
using static System.Console;
namespace LinqToDataSetApp
{
class Program
{
static void Main(string[] args)
{
WriteLine("***** LINQ over DataSet *****\n");
// Get a strongly typed DataTable containing the current Inventory
// of the AutoLot database.
AutoLotDataSet dal = new AutoLotDataSet();
InventoryTableAdapter tableAdapter = new InventoryTableAdapter();
AutoLotDataSet.InventoryDataTable data = tableAdapter.GetData();
// Invoke the methods that follow here!
ReadLine();
}
}
}
When you want to transform an ADO.NET DataTable (including a strongly typed DataTable) into a LINQ-compatible object, you must call the AsEnumerable() extension method defined by the DataTableExtensions type. This returns anEnumerableRowCollection object that contains a collection of DataRows.
You can then use the EnumerableRowCollection type to operate on each row using basic DataRow syntax (e.g., indexer syntax). Consider the following new method of your Program class, which takes a strongly typed DataTable, obtains an enumerable copy of the data, and prints out each CarID value:
static void PrintAllCarIDs(DataTable data)
{
// Get enumerable version of DataTable.
EnumerableRowCollection enumData = data.AsEnumerable();
// Print the car ID values.
foreach (DataRow r in enumData)
{
WriteLine($"Car ID = {r["CarID"]}");
}
}
At this point, you have not applied a LINQ query; however, the point here is that the enumData object can now be the target of a LINQ query expression. Again, notice that the EnumerableRowCollection contains a collection of DataRow objects because you are applying a type indexer against each subobject to print out the value of the CarID column.
In most cases, you do not need to declare a variable of type EnumerableRowCollection to hold the return value of AsEnumerable(). Rather, you can invoke this method from within the query expression itself. Here is a more interesting method of the Program class, which obtains a projection of CarID + Makes from all entries in the DataTable where the color is black (if you don’t have any black autos in your Inventory table, you update this LINQ query as necessary):
static void ShowRedCars(DataTable data)
{
// Project a new result set containing
// the ID/color for rows where Color = Red.
var cars = from car in data.AsEnumerable()
where
(string)car["Color"] == "Black"
select new
{
ID = (int)car["CarID"],
Make = (string)car["Make"]
};
WriteLine("Here are the red cars we have in stock:");
foreach (var item in cars)
{
WriteLine($"-> CarID = {item.ID} is {item.Make}");
}
}
The Role of the DataRowExtensions.Field<T>() Extension Method
One undesirable aspect of the current LINQ query expression is that you use numerous casting operations and DataRow indexers to gather the result set, which could result in runtime exceptions if you attempt to cast to an incompatible data type. To inject some strong typing into your query, you can use the Field<T>() extension method of the DataRow type. Doing so lets you increase the type safety of your query because the compatibility of data types is checked at compile time. Consider the following update:
var cars = from car in data.AsEnumerable()
where
car.Field<string>("Color") == "Black"
select new
{
ID = car.Field<int>("CarID"),
Make = car.Field<string>("Make")
};
In this case, you can invoke Field<T>() and specify a type parameter to represent the underlying data type of the column. As an argument to this method, you pass in the column name itself. Given the additional compile-time checking, you should consider it a best practice to useField<T>() (rather than the DataRow indexer) when you process the roles of a EnumerableRowCollection.
Beyond the fact that you call the AsEnumerable() method, the overall format of the LINQ query is identical to what you already saw in Chapter 13. Given this, there is no reason to repeat the details of the various LINQ operators here. If you would like to see additional examples, you can look up the topic “LINQ to DataSet Examples” in the .NET Framework 4.5 SDK documentation.
Hydrating New DataTables from LINQ Queries
It is also possible to populate the data of a new DataTable easily, based on the results of a LINQ query and provided that you are not using projections. When you have a result set where the underlying type can be represented as IEnumerable<T>, you can call theCopyToDataTable<T>() extension method on the result, as in this example:
static void BuildDataTableFromQuery(DataTable data)
{
var cars = from car in data.AsEnumerable()
where car.Field<int>("CarID") > 5
select car;
// Use this result set to build a new DataTable.
DataTable newTable = cars.CopyToDataTable();
// Print the DataTable.
for (int curRow = 0; curRow < newTable.Rows.Count; curRow++)
{
for (int curCol = 0; curCol < newTable.Columns.Count; curCol++)
{
Write(newTable.Rows[curRow][curCol].ToString().Trim() + "\t");
}
WriteLine();
}
}
![]() Note It is also possible to transform a LINQ query to a DataView type by using the AsDataView<T>() extension method.
Note It is also possible to transform a LINQ query to a DataView type by using the AsDataView<T>() extension method.
You might find this technique helpful when you want to use the result of a LINQ query as the source of a data-binding operation. Recall that the DataGridView of Windows Forms (as well as an ASP.NET or WPF grid control) supports a property named DataSource. You could bind a LINQ result to the grid as follows:
// Assume myDataGrid is a GUI-based grid object.
myDataGrid.DataSource = (from car in data.AsEnumerable()
where car.Field<int>("CarID") > 5
select car).CopyToDataTable();
This wraps up the examination of the disconnected layer of ADO.NET. Using this aspect of the API, you can fetch data from a relational database, munch on the data, and return it for processing while keeping the database connection open for the shortest possible amount of time.
![]() Source Code You can find the LinqToDataSetApp example in the Chapter 22 subdirectory.
Source Code You can find the LinqToDataSetApp example in the Chapter 22 subdirectory.
Summary
This chapter dove into the details of the disconnected layer of ADO.NET. As you saw, the centerpiece of the disconnected layer is the DataSet. This type is an in-memory representation of any number of tables and any number of optional interrelationships, constraints, and expressions. The beauty of establishing relations on your local tables is that you can programmatically navigate between them while disconnected from the remote data store.
You also examined the role of the data adapter type in this chapter. Using this type (and the related SelectCommand, InsertCommand, UpdateCommand, and DeleteCommand properties), the adapter can resolve changes in the DataSet with the original data store. You also learned how to navigate the object model of a DataSet using the brute-force manual approach, as well as with strongly typed objects, which the Dataset Designer tools of Visual Studio typically generate.
You wrapped up by looking at one aspect of the LINQ technology set named LINQ to DataSet. This allows you to obtain a queryable copy of the DataSet, which can receive well-formatted LINQ queries.
All materials on the site are licensed Creative Commons Attribution-Sharealike 3.0 Unported CC BY-SA 3.0 & GNU Free Documentation License (GFDL)
If you are the copyright holder of any material contained on our site and intend to remove it, please contact our site administrator for approval.
© 2016-2026 All site design rights belong to S.Y.A.