C# 6.0 and the .NET 4.6 Framework (2015)
PART VI
Introducing the .NET Base Class Libraries
CHAPTER 24
Introducing LINQ to XML
As a .NET developer, you are bound to encounter XML-based data in numerous places. Application and web-based configuration files store information as XML. Windows Presentation Foundation uses an XML-based grammar (XAML) to represent desktop GUIs. ADO.NET DataSets can easily save out (or load in) data as XML. Even Windows Communication Foundation stores numerous settings as the well-formatted string called XML.
Although XML is indeed everywhere, programming with XML has historically been tedious, verbose, and complex if you are not well versed in a great number of XML technologies (XPath, XQuery, XSLT, DOM, SAX, etc.). Since the inception of the .NET platform, Microsoft has provided a specific assembly, named System.Xml.dll, devoted to programming with XML documents. Within this binary are a number of namespaces and types to various XML programming techniques, as well as a few .NET-specific XML APIs such as the XmlReader/XmlWriterclasses.
These days, most .NET programmers prefer to interact with XML data using the LINQ to XML API. As you will see in this chapter, the LINQ to XML programming model allows you to capture the structure of an XML data in code and provides a much simpler way to create, manipulate, load, and save XML data. While you could use LINQ to XML as little more than a simpler way to create XML documents, you can also easily incorporate LINQ query expressions into the mix to quickly query a document for information.
A Tale of Two XML APIs
When the .NET platform was first introduced, programmers were able to manipulate XML documents using the types within the System.Xml.dll assembly. Using the contained namespaces and types, you were able to generate XML data in memory and save it to disk storage. As well, the System.Xml.dll assembly provided types allowing you to load XML documents into memory, search an XML document for specific nodes, validate a document against a given schema, and other common programming tasks.
While this original library has been used successfully in many .NET projects, working with these types was a bit cumbersome (to put it politely), as the programming model bore no relationship to the structure of the XML document itself. For example, assume you needed to build an XML file in memory and save it to the file system. If you were to use the types of System.Xml.dll, you might author code like the following (if you want to follow along, create a new Console Application project named LinqToXmlFirstLook and import the System.Xml namespace):
private static void BuildXmlDocWithDOM()
{
// Make a new XML document in memory.
XmlDocument doc = new XmlDocument();
// Fill this document with a root element
// named <Inventory>.
XmlElement inventory = doc.CreateElement("Inventory");
// Now, make a subelement named <Car> with
// an ID attribute.
XmlElement car = doc.CreateElement("Car");
car.SetAttribute("ID", "1000");
// Build the data within the <Car> element.
XmlElement name = doc.CreateElement("PetName");
name.InnerText = "Jimbo";
XmlElement color = doc.CreateElement("Color");
color.InnerText = "Red";
XmlElement make = doc.CreateElement("Make");
make.InnerText = "Ford";
// Add <PetName>, <Color>, and <Make> to the <Car>
// element.
car.AppendChild(name);
car.AppendChild(color);
car.AppendChild(make);
// Add the <Car> element to the <Inventory> element.
inventory.AppendChild(car);
// Insert the complete XML into the XmlDocument object,
// and save to file.
doc.AppendChild(inventory);
doc.Save("Inventory.xml");
}
If you were to call this method, you would be able to see that the Inventory.xml file (located in the bin\Debug folder) contains the following data:
<Inventory>
<Car ID="1000">
<PetName>Jimbo</PetName>
<Color>Red</Color>
<Make>Ford</Make>
</Car>
</Inventory>
While this method works as expected, a few observations are in order. First, the programming model of System.Xml.dll is Microsoft’s implementation of the W3C Document Object Model (DOM) specification. Under this model, an XML document is created from the bottom up. First you create a document, then you create subelements, and finally you add the elements to the document. To account for this in code, you need to author quite a bit of function calls off the XmlDocument and XmlElement classes (among others).
For this example, it took 16 lines of code (not including code comments) to build even this simple XML document. If you needed to build a more complex document with the System.Xml.dll assembly, you could end up with a great deal of code. While you could certainly streamline this code, by building nodes via various looping or decision constructs, the fact remains that the body of code has little visual indicators regarding the final XML tree.
LINQ to XML As a Better DOM
The LINQ to XML API is an alternative manner to create, manipulate, and query XML documents, which uses a much more functional approach than the System.Xml DOM model. Rather than building an XML document by assembling elements individually and updating the XML tree through a set of function calls, you can author top-down code such as the following:
private static void BuildXmlDocWithLINQToXml()
{
// Create an XML document in a more "functional" manner.
XElement doc =
new XElement("Inventory",
new XElement("Car", new XAttribute("ID", "1000"),
new XElement("PetName", "Jimbo"),
new XElement("Color", "Red"),
new XElement("Make", "Ford")
)
);
// Save to file.
doc.Save("InventoryWithLINQ.xml");
}
Here, you are using a new set of types from the System.Xml.Linq namespace, specifically XElement and XAttribute. If you were to call this method, you would find the same XML data has been created, this time with much less fuss and bother. Notice how, through some careful indentation, your source code has the same overall structure of the resulting XML document. This is useful in and of itself, but also notice that you have a much smaller body of code than the previous example (based on how you space your code, you saved about ten lines!)
Here, you have not made use of any LINQ query expressions but have simply used the types of the System.Xml.Linq namespace to generate an in-memory XML document, which is then saved to file. Effectively, you have used LINQ to XML as a better DOM. As you will see later in this chapter, the classes of System.Xml.Linq are LINQ-aware and can be the target for the same sort of LINQ queries you learned about in Chapter 12.
As you learn more about LINQ to XML, you will most likely find it much easier to work with than the initial XML libraries of .NET. This is not to say you will never use the namespaces of the original System.Xml.dll library; however, chances are that the times you will opt to useSystem.Xml.dll for new projects will be significantly reduced.
VB Literal Syntax As a Better LINQ to XML
Before you begin your formal examination into LINQ to XML as seen through C#, I do want to briefly mention that the Visual Basic language takes the functional approach of this API to the next level. In VB, you can define XML literals, which allow you to assign an XElement to a stream of inline XML markup, directly in code. Assuming you had a VB project, you could build the following method:
Public Class XmlLiteralExample
Public Sub MakeXmlFileUsingLiterals()
’ Notice that we can inline XML data
’ to an XElement.
Dim doc As XElement =
<Inventory>
<Car ID="1000">
<PetName>Jimbo</PetName>
<Color>Red</Color>
<Make>Ford</Make>
</Car>
</Inventory>
’ Save to file.
doc.Save("InventoryVBStyle.xml")
End Sub
End Class
After the VB compiler processes the XML literal, it will map the XML data into the correct underlying LINQ to XML object model. In fact, when you are working with LINQ to XML within a VB project, the IDE already understands that your XML literal syntax is just a shorthand notation for the related code. In Figure 24-1, notice how you can apply the dot operator to the </Inventory> end tag and see the same members as you would find if you apply the dot operator to a strongly typed XElement.

Figure 24-1. VB XML literal syntax is a shorthand notation for working with the LINQ to XML object model
Although this book is about the C# programming language, few developers can argue that VB’s XML support is quite awesome. Even if you are the sort of developer who can’t imagine using a language from the BASIC family for your data-to-day development, I encourage you to check out VB literal syntax using the .NET Framework 4.6 SDK documentation. You could find yourself isolating your XML data- manipulation routines to a dedicated *.dll, just so you can use VB to do so!
Members of the System.Xml.Linq Namespace
Somewhat surprisingly, the core LINQ to XML assembly (System.Xml.Linq.dll) defines a small number of types in three distinct namespaces, specifically System.Xml.Linq, System.Xml.Schema, and System.Xml.XPath (see Figure 24-2).
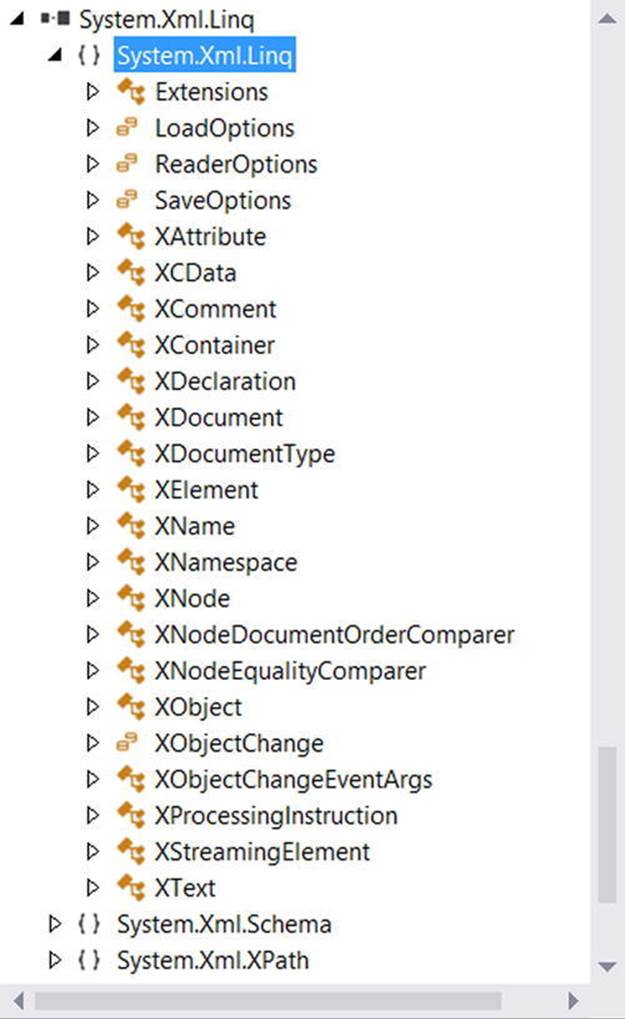
Figure 24-2. The namespaces of System.Xml.Linq.dll
The core namespace, System.Xml.Linq, contains a manageable set of classes that represent various aspects of an XML document (its elements and their attributes, XML namespaces, XML comments, processing instructions, etc.). Table 24-1 documents the core members ofSystem.Xml.Linq.
Table 24-1. Select Members of the System.Xml.Linq Namespace
|
Member of System.Xml.Linq |
Meaning in Life |
|
XAttribute |
Represents an XML attribute on a given XML element. |
|
XCData |
Represents a CDATA section in the XML document. Information in a CDATA section represents data in an XML document that must be included but does not conform to the rules of XML grammars (for example, script code). |
|
XComment |
Represents an XML comment. |
|
XDeclaration |
Represents the opening declaration of an XML document. |
|
XDocument |
Represents the entirety of an XML document. |
|
XElement |
Represents a given element within an XML document, including the root element. |
|
XName |
Represents the name of an XML element or XML attribute. |
|
XNamespace |
Represents an XML namespace. |
|
XNode |
Represents the abstract concept of a node (element, comment, document type, processing instruction, or text node) in the XML tree. |
|
XProcessingInstruction |
Represents an XML processing instruction. |
|
XStreamingElement |
Represents elements in an XML tree that supports deferred streaming output. |
Figure 24-3 shows how the inheritance chain of the key class types.
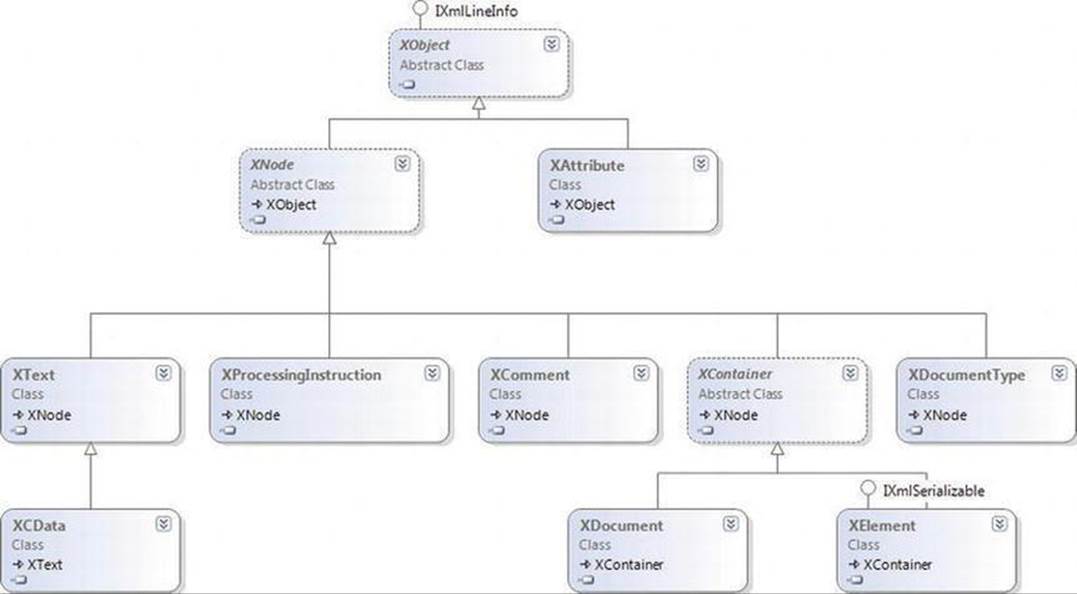
Figure 24-3. The LINQ to XML core class hierarchy
The LINQ to XML Axis Methods
In addition to the X* classes, System.Xml.Linq defines a class named Extensions, which (of course) defines a set of extension methods that typically extend IEnumerable<T>, where T is some descendant of XNode or XContainer. Table 24-2 documents some of the important extension methods to be aware of (as you will see, these are useful when you want to work with LINQ queries).
Table 24-2. Select Members of the LINQ to XML Extensions Class
|
Member of Extensions |
Meaning in Life |
|
Ancestors<T>() |
Returns a filtered collection of elements that contains the ancestors of every node in the source collection. |
|
Attributes() |
Returns a filtered collection of the attributes of every element in the source collection. |
|
DescendantNodes<T>() |
Returns a collection of the descendant nodes of every document and element in the source collection. |
|
Descendants<T> |
Returns a filtered collection of elements that contains the descendant elements of every element and document in the source collection. |
|
Elements<T> |
Returns a collection of the child elements of every element and document in the source collection. |
|
Nodes<T> |
Returns a collection of the child nodes of every document and element in the source collection. |
|
Remove() |
Removes every attribute in the source collection from its parent element. |
|
Remove<T>() |
Removes all occurrences of a given node from the source collection. |
As you can tell from their names, these methods allow you to query a loaded XML tree to find elements, attributes, and their values. Collectively, these methods are termed axis methods, or simply axes. You can apply these methods directly to parts of a tree of nodes or use them to build more elaborate LINQ queries.
![]() Note The abstract XContainer class support a number of methods that are identically named to the members of Extensions. XContainer is the parent to both XElement and XDocument; therefore, they both support the same overall functionality.
Note The abstract XContainer class support a number of methods that are identically named to the members of Extensions. XContainer is the parent to both XElement and XDocument; therefore, they both support the same overall functionality.
You’ll see examples of using some of these axis methods over the chapter. However, here is a quick example:
private static void DeleteNodeFromDoc()
{
XElement doc =
new XElement("Inventory",
new XElement("Car", new XAttribute("ID", "1000"),
new XElement("PetName", "Jimbo"),
new XElement("Color", "Red"),
new XElement("Make", "Ford")
)
);
// Delete the PetName element from the tree.
doc.Descendants("PetName").Remove();
Console.WriteLine(doc);
}
If you were to invoke this method, you’d see the following “pruned” XML tree:
<Inventory>
<Car ID="1000">
<Color>Red</Color>
<Make>Ford</Make>
</Car>
</Inventory>
The Oddness of XName (and XNamespace)
If you examine the signatures of the LINQ to XML axis methods (or the identically named members of XContainer), you’ll notice that they typically require you to specify what looks to be an XName object. Consider the following signature of the Desendants() method defined byXContainer:
public IEnumerable<XElement> Descendants(XName name)
XName is “odd” in that you will never really directly use it in your code. In fact, since this class has no public constructor, you cannot make an XName object, as demonstrated here:
// Error! Can’t make XName objects!
doc.Descendants(new XName("PetName")).Remove();
If you were to view the formal definition of XName, you would see that this class defines a custom implicit conversion operator (see Chapter 11 for information of defining custom conversion operators), which will map a simple System.String to the correct XName object.
// We really make an XName in the background!
doc.Descendants("PetName").Remove();
![]() Note The XNamespace class also supports the same flavor of implicit string conversion.
Note The XNamespace class also supports the same flavor of implicit string conversion.
The good news is that you can use textual values to represent the names of elements or attributes when you work with these axis methods and allow the LINQ to XML API to map your string data to the necessary object types.
![]() Source Code The LinqToXmlFirstLook example can be found in the Chapter 24 subdirectory.
Source Code The LinqToXmlFirstLook example can be found in the Chapter 24 subdirectory.
Working with XElement and XDocument
Let’s continue the investigation of LINQ to XML with a new Console Application project named ConstructingXmlDocs. After you have created the project, import the System.Xml.Linq namespace into your initial code file. As you have already seen, XDocument represents the entirety of an XML document in the LINQ to XML programming model, as it can be used to define a root element and all contained elements, processing instructions, and XML declarations. Here is another example of building XML data using XDocument:
static void CreateFullXDocument()
{
XDocument inventoryDoc =
new XDocument(
new XDeclaration("1.0", "utf-8", "yes"),
new XComment("Current Inventory of cars!"),
new XProcessingInstruction("xml-stylesheet",
"href=’MyStyles.css’ title=’Compact’ type=’text/css’"),
new XElement("Inventory",
new XElement("Car", new XAttribute("ID", "1"),
new XElement("Color", "Green"),
new XElement("Make", "BMW"),
new XElement("PetName", "Stan")
),
new XElement("Car", new XAttribute("ID", "2"),
new XElement("Color", "Pink"),
new XElement("Make", "Yugo"),
new XElement("PetName", "Melvin")
)
)
);
// Save to disk.
inventoryDoc.Save("SimpleInventory.xml");
}
Again, notice that the constructor of the XDocument object is, in fact, a tree of additional LINQ to XML objects. The constructor called here takes as the first parameter an XDeclaration, followed by a parameter array of objects (recall, C# parameter arrays allow you to pass in a comma-delimited list of arguments, which are packaged as an array on your behalf):
public XDocument(System.Xml.Linq.XDeclaration declaration, params object[] content)
If you were to invoke this method from Main(), you’d see the following data in the SimpleInventory.xml file:
<?xml version="1.0" encoding="utf-8" standalone="yes"?>
<!--Current Inventory of cars!-->
<?xml-stylesheet href=’MyStyles.css’ title=’Compact’ type=’text/css’?>
<Inventory>
<Car ID="1">
<Color>Green</Color>
<Make>BMW</Make>
<PetName>Stan</PetName>
</Car>
<Car ID="2">
<Color>Pink</Color>
<Make>Yugo</Make>
<PetName>Melvin</PetName>
</Car>
</Inventory>
As it turns out, the default XML declaration for any XDocument is to use UTF-8 encoding, XML version 1.0, as a stand-alone document. Therefore, you could completely delete the creation of the XDeclaration object and end up with the same data; given that just about every document requires this same declaration, use of XDeclaration is typically not that common.
If you do not need to define processing instructions or a custom XML declaration, you can avoid the use of XDocument altogether and simply use XElement. Remember, XElement can be used to represent the root element of the XML document and all subobjects. Thus, you could generate a commented list of inventory items as so:
static void CreateRootAndChildren()
{
XElement inventoryDoc =
new XElement("Inventory",
new XComment("Current Inventory of cars!"),
new XElement("Car", new XAttribute("ID", "1"),
new XElement("Color", "Green"),
new XElement("Make", "BMW"),
new XElement("PetName", "Stan")
),
new XElement("Car", new XAttribute("ID", "2"),
new XElement("Color", "Pink"),
new XElement("Make", "Yugo"),
new XElement("PetName", "Melvin")
)
);
// Save to disk.
inventoryDoc.Save("SimpleInventory.xml");
}
The output is more or less identical, sans the custom processing instruction for a hypothetical style sheet.
<?xml version="1.0" encoding="utf-8"?>
<Inventory>
<!--Current Inventory of cars!-->
<Car ID="1">
<Color>Green</Color>
<Make>BMW</Make>
<PetName>Stan</PetName>
</Car>
<Car ID="2">
<Color>Pink</Color>
<Make>Yugo</Make>
<PetName>Melvin</PetName>
</Car>
</Inventory>
Generating Documents from Arrays and Containers
So far, you have been building XML documents using fixed hard-coded constructor values. More commonly, you will need to generate XElements (or XDocuments) by reading data from arrays, ADO.NET objects, file data, or whatnot. One way to map in-memory data to a newXElement is by using a set of standard for loops to move data into the LINQ to XML object model. While this is certainly doable, it is more streamlined to embed a LINQ query within the construction of the XElement directly.
Assume you have an anonymous array of anonymous classes (just to avoid the amount of code for this example; any array, List<T>, or other container would do here). You could map this data into an XElement as so:
static void MakeXElementFromArray()
{
// Create an anonymous array of anonymous types.
var people = new[] {
new { FirstName = "Mandy", Age = 32},
new { FirstName = "Andrew", Age = 40 },
new { FirstName = "Dave", Age = 41 },
new { FirstName = "Sara", Age = 31}
};
XElement peopleDoc =
new XElement("People",
from c in people select new XElement("Person", new XAttribute("Age", c.Age),
new XElement("FirstName", c.FirstName))
);
Console.WriteLine(peopleDoc);
}
Here, the peopleDoc object defines the root <People> element with the results of a LINQ query. This LINQ query creates new XElements based on each item in the people array. If this embedded query is a bit hard on the eyes, you could break things down into explicit steps, like so:
static void MakeXElementFromArray()
{
// Create an anonymous array of anonymous types.
var people = new[] {
new { FirstName = "Mandy", Age = 32},
new { FirstName = "Andrew", Age = 40 },
new { FirstName = "Dave", Age = 41 },
new { FirstName = "Sara", Age = 31}
};
var arrayDataAsXElements = from c in people
select
new XElement("Person",
new XAttribute("Age", c.Age),
new XElement("FirstName", c.FirstName));
XElement peopleDoc = new XElement("People", arrayDataAsXElements);
Console.WriteLine(peopleDoc);
}
Either way, the output is the same.
<People>
<Person Age="32">
<FirstName>Mandy</FirstName>
</Person>
<Person Age="40">
<FirstName>Andrew</FirstName>
</Person>
<Person Age="41">
<FirstName>Dave</FirstName>
</Person>
<Person Age="31">
<FirstName>Sara</FirstName>
</Person>
</People>
Loading and Parsing XML Content
The XElement and XDocument types both support Load() and Parse() methods, which allow you to hydrate an XML object model from string objects containing XML data or external XML files. Consider the following method, which illustrates both approaches:
static void ParseAndLoadExistingXml()
{
// Build an XElement from string.
string myElement =
@"<Car ID =’3’>
<Color>Yellow</Color>
<Make>Yugo</Make>
</Car>";
XElement newElement = XElement.Parse(myElement);
Console.WriteLine(newElement);
Console.WriteLine();
// Load the SimpleInventory.xml file.
XDocument myDoc = XDocument.Load("SimpleInventory.xml");
Console.WriteLine(myDoc);
}
![]() Source Code The ConstructingXmlDocs example can be found in the Chapter 24 subdirectory.
Source Code The ConstructingXmlDocs example can be found in the Chapter 24 subdirectory.
Manipulating an In-Memory XML Document
So, at this point, you have seen various ways in which LINQ to XML can be used to create, save, parse, and load XML data. The next aspect of LINQ to XML you need to examine is how to navigate a given document to locate and change specific items in the tree using LINQ queries and the LINQ to XML axis methods.
To do so, you will build a Windows Forms application that will display the data within an XML document saved on the hard drive. The GUI will allow the user to enter data for a new node, which will be added to the same XML document. Finally, you will provide a few ways for the user to perform searches on the document, via a handful of LINQ queries.
![]() Note Given that you have already built a number of LINQ queries in Chapter 12, I won’t bother to relist numerous queries here. If you are interested in seeing some additional LINQ to XML examples, look up the topic “Querying XML Trees” in the .NET Framework 4.6 SDK documentation.
Note Given that you have already built a number of LINQ queries in Chapter 12, I won’t bother to relist numerous queries here. If you are interested in seeing some additional LINQ to XML examples, look up the topic “Querying XML Trees” in the .NET Framework 4.6 SDK documentation.
Building the UI of the LINQ to XML App
Create a Windows Forms application named LinqToXmlWinApp and change the name of your initial Form1.cs file to MainForm.cs (using the Solution Explorer). The GUI of this window is quite simple. On the left of the window, you have a TextBox control (namedtxtInventory), which has the Multiline property set to true and the ScrollBars property set to Both.
Beyond that, you have one group of simple TextBox controls (txtMake, txtColor, and txtPetName) and a Button (btnAddNewItem), which will allow the user to add a new entry to the XML document. Finally, you have another group of controls (a TextBox namedtxtMakeToLookUp and a final Button named btnLookUpColors), which allows the user to query the XML document for a set of specified nodes. Figure 24-4 shows one possible layout.
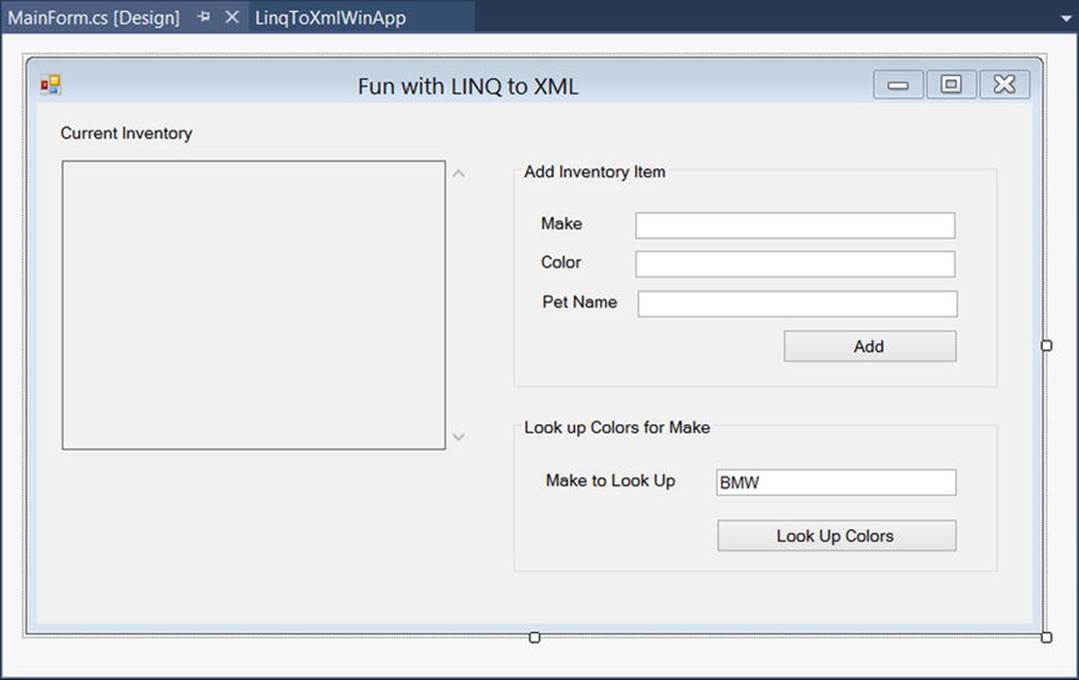
Figure 24-4. The GUI of the LINQ to XML application
Handle the Click event for each button to generate the event handler methods. Also handle the Load event of the form. You will implement these handlers in a bit, so leave them empty for now.
Import the Inventory.xml File
The downloadable code for this book contains a file named Inventory.xml within the solution code for this example. It supports a set of entries within the root <Inventory> element. Import this file into your project by selecting the Project Add Existing Item menu option. As you look at the data, you will see the root element defines a set of <Car> elements, each of which is defined similar to the following:
<Car carID ="0">
<Make>Ford</Make>
<Color>Blue</Color>
<PetName>Chuck</PetName>
</Car>
Before you continue, be sure you select this file in the Solution Explorer, and then, using the Properties window, set the Copy to Output Directory property to Copy Always. This will ensure the data is deployed to your \bin\Debug folder when you compile the application.
Defining a LINQ to XML Helper Class
To isolate the LINQ to XML data, insert a new class to your project named LinqToXmlObjectModel. This class will define a set of static methods that encapsulate some LINQ to XML logic. First, define a method that returns a populated XDocument based on the contents of theInventory.xml file (be sure to import the System.Xml.Linq and System.Windows.Forms namespaces into this new file).
public static XDocument GetXmlInventory()
{
try
{
XDocument inventoryDoc = XDocument.Load("Inventory.xml");
return inventoryDoc;
}
catch (System.IO.FileNotFoundException ex)
{
MessageBox.Show(ex.Message);
return null;
}
}
The InsertNewElement() method (shown in the following) receives the values of the Add Inventory Item TextBox controls to place a new node into the <Inventory> element using the Descendants() axis method. After this is done, you will save the document.
public static void InsertNewElement(string make, string color, string petName)
{
// Load current document.
XDocument inventoryDoc = XDocument.Load("Inventory.xml");
// Generate a random number for the ID.
Random r = new Random();
// Make new XElement based on incoming parameters.
XElement newElement = new XElement("Car", new XAttribute("ID", r.Next(50000)),
new XElement("Color", color),
new XElement("Make", make),
new XElement("PetName", petName));
// Add to in-memory object.
inventoryDoc.Descendants("Inventory").First().Add(newElement);
// Save changes to disk.
inventoryDoc.Save("Inventory.xml");
}
The final method, LookUpColorsForMake() , will receive the data in the final TextBox to build a string that contains the colors of a specified make, using a LINQ query. Consider the following implementation:
public static void LookUpColorsForMake(string make)
{
// Load current document.
XDocument inventoryDoc = XDocument.Load("Inventory.xml");
// Find the colors for a given make.
var makeInfo = from car in inventoryDoc.Descendants("Car")
where (string)car.Element("Make") == make
select car.Element("Color").Value;
// Build a string representing each color.
string data = string.Empty;
foreach (var item in makeInfo.Distinct())
{
data += string.Format("- {0}\n", item);
}
// Show colors.
MessageBox.Show(data, string.Format("{0} colors:", make));
}
Attaching the UI to Your Helper Class
All you need to do at this point is fill in the details of your event handlers. Doing so is as simple as making calls to your static helper methods, like so:
public partial class MainForm : Form
{
public MainForm()
{
InitializeComponent();
}
private void MainForm_Load(object sender, EventArgs e)
{
// Display current XML inventory document in TextBox control.
txtInventory.Text = LinqToXmlObjectModel.GetXmlInventory().ToString();
}
private void btnAddNewItem_Click(object sender, EventArgs e)
{
// Add new item to doc.
LinqToXmlObjectModel.InsertNewElement(txtMake.Text, txtColor.Text, txtPetName.Text);
// Display current XML inventory document in TextBox control.
txtInventory.Text = LinqToXmlObjectModel.GetXmlInventory().ToString();
}
private void btnLookUpColors_Click(object sender, EventArgs e)
{
LinqToXmlObjectModel.LookUpColorsForMake(txtMakeToLookUp.Text);
}
}
Figure 24-5 shows the end result after adding a new auto and looking up all BMWs.
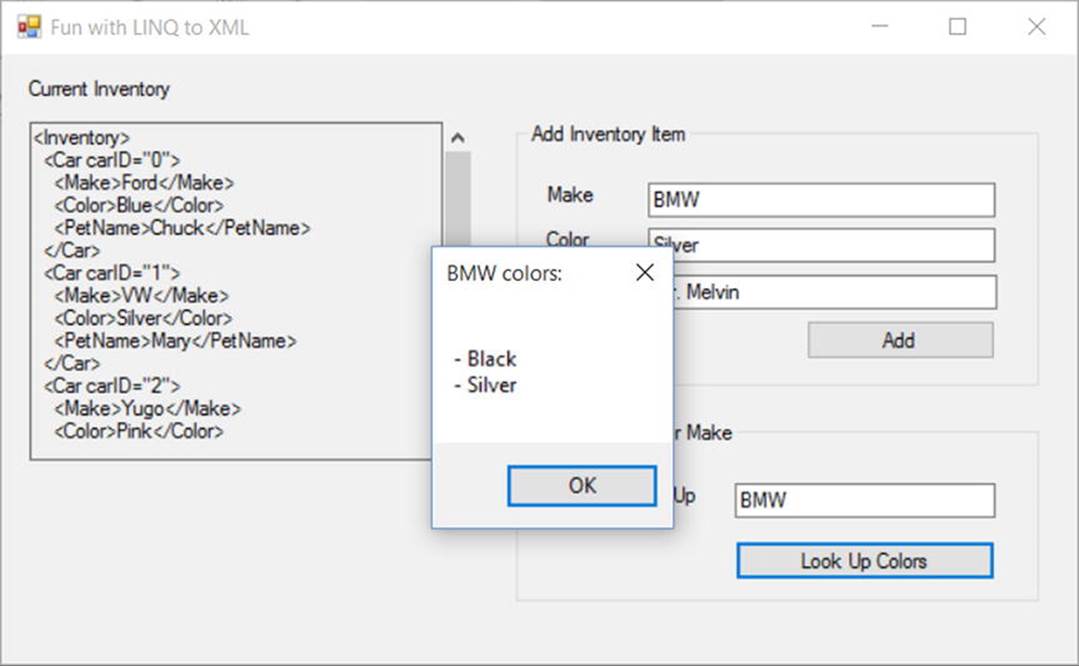
Figure 24-5. The completed LINQ to XML application
That wraps up the introductory look at LINQ to XML and your investigation of LINQ. You first encountered LINQ in Chapter 12, where you learned about LINQ to Objects. Chapter 19 showed various examples using PLINQ, while Chapter 23 showcased how you can apply LINQ queries to ADO.NET Entity objects. Using all this information, you are in good shape to dig deeper, which you should. Microsoft has made it clear that LINQ will continue to evolve as the .NET platform grows.
![]() Source Code The LinqToXmlWinApp to XML example can be found in the Chapter 24 subdirectory.
Source Code The LinqToXmlWinApp to XML example can be found in the Chapter 24 subdirectory.
Summary
This chapter examined the role of LINQ to XML. As you have seen, this API is an alternative to the initial XML manipulation library, System.Xml.dll, which shipped with the .NET platform. Using System.Xml.Linq.dll, you are able to generate new XML documents using a top-down approach, where the structure of your code has a striking resemblance to the final XML data. In this light, LINQ to XML is a better DOM. You also learned how to build XDocument and XElement objects in a variety of ways (parsing, loading from file, mapping from in-memory objects) and how to navigate and manipulate data using LINQ queries.
All materials on the site are licensed Creative Commons Attribution-Sharealike 3.0 Unported CC BY-SA 3.0 & GNU Free Documentation License (GFDL)
If you are the copyright holder of any material contained on our site and intend to remove it, please contact our site administrator for approval.
© 2016-2026 All site design rights belong to S.Y.A.