C# 6.0 and the .NET 4.6 Framework (2015)
PART VII
Windows Presentation Foundation
CHAPTER 26
Introducing Windows Presentation Foundation and XAML
When version 1.0 of the .NET platform was released, programmers who needed to build graphical desktop applications made use of two APIs named Windows Forms and GDI+, packaged up primarily in the System.Windows.Forms.dll and System.Drawing.dll assemblies. While Windows Forms/GDI+ are excellent APIs for building traditional desktop GUIs, Microsoft shipped an alternative GUI desktop API named Windows Presentation Foundation (WPF) beginning with the release of .NET 3.0.
This initial WPF chapter begins by examining the motivation behind this new GUI framework, which will help you see the differences between the Windows Forms/GDI+ and WPF programming models. Next, you will examine the different types of WPF applications supported by the API, and come to know the role of several important classes, including Application, Window, ContentControl, Control, UIElement, and FrameworkElement. During this time, you will learn to intercept keyboard and mouse activities, define application-wide data, and other common WPF tasks using nothing but C# code.
This chapter will then introduce you to an XML-based grammar named Extensible Application Markup Language (XAML; pronounced “zammel”). Here, you will learn the syntax and semantics of XAML (including attached property syntax, and the role of type converters and markup extensions), and come to understand how to generate, load, and parse XAML at runtime. As well, you will learn how to integrate XAML data into a C# WFP code base (and the benefits of doing so).
This chapter wraps up by investigating the integrated WPF designers of Visual Studio. Here, you will build your own custom XAML editor/parser, which will illustrate how XAML can be manipulated at runtime to build dynamic user interfaces.
The Motivation Behind WPF
Over the years, Microsoft has created numerous graphical user interface toolkits (raw C/C++/Windows API development, VB6, MFC, etc.) to build desktop executables. Each of these APIs provided a code base to represent the basic aspects of a GUI application, including main windows, dialog boxes, controls, menu systems, and other basic necessities. With the initial release of the .NET platform, the Windows Forms API quickly became the preferred model for UI development, given its simple yet very powerful object model.
While many full-featured desktop applications have been successfully created using Windows Forms, the fact of the matter is that this programming model is rather asymmetrical. Simply put, System.Windows.Forms.dll and System.Drawing.dll do not provide direct support for many additional technologies required to build a feature-rich desktop application. To illustrate this point, consider the ad hoc nature of GUI desktop development before the release of WPF (see Table 26-1).
Table 26-1. Pre-WPF Solutions to Desired Functionalities
|
Desired Functionality |
Technology |
|
Building windows with controls |
Windows Forms |
|
2D graphics support |
GDI+ (System.Drawing.dll) |
|
3D graphics support |
DirectX APIs |
|
Support for streaming video |
Windows Media Player APIs |
|
Support for flow-style documents |
Programmatic manipulation of PDF files |
As you can see, a Windows Forms developer must pull in types from a number of unrelated APIs and object models. While it is true that making use of these diverse APIs might look similar syntactically (it is just C# code, after all), you might also agree that each technology requires a radically different mind-set. For example, the skills required to create a 3D rendered animation using DirectX are completely different from those used to bind data to a grid. To be sure, it is very difficult for a Windows Forms programmer to master the diverse nature of each API.
Unifying Diverse APIs
WPF (introduced with .NET 3.0) was purposely created to merge these previously unrelated programming tasks into a single unified object model. Thus, if you need to author a 3D animation, you have no need to manually program against the DirectX API (although you could) because 3D functionality is baked directly into WPF. To see how well things have cleaned up, consider Table 26-2, which illustrates the desktop development model ushered in as of .NET 3.0.
Table 26-2. .NET 3.0 Solutions to Desired Functionalities
|
Desired Functionality |
Technology |
|
Building forms with controls |
WPF |
|
2D graphics support |
WPF |
|
3D graphics support |
WPF |
|
Support for streaming video |
WPF |
|
Support for flow-style documents |
WPF |
The obvious benefit here is that .NET programmers now have a single, symmetrical API for all common GUI desktop programming needs. After you become comfortable with the functionality of the key WPF assemblies and the grammar of XAML, you’ll be amazed how quickly you can create very sophisticated UIs.
Providing a Separation of Concerns via XAML
Perhaps one of the most compelling benefits is that WPF provides a way to cleanly separate the look and feel of a GUI application from the programming logic that drives it. Using XAML, it is possible to define the UI of an application via XML markup. This markup (ideally generated using tools such as Microsoft Visual Studio or Microsoft Expression Blend) can then be connected to a related C# code file to provide the guts of the program’s functionality.
![]() Note XAML is not limited to WPF applications. Any application can use XAML to describe a tree of .NET objects, even if they have nothing to do with a visible user interface. For example, the Windows Workflow Foundation API uses a XAML-based grammar to define business processes and custom activities. As well, other .NET GUI frameworks such as Silverlight (on the wane, but still very much in use today), Windows Phone, and Windows 10 applications all make use of XAML.
Note XAML is not limited to WPF applications. Any application can use XAML to describe a tree of .NET objects, even if they have nothing to do with a visible user interface. For example, the Windows Workflow Foundation API uses a XAML-based grammar to define business processes and custom activities. As well, other .NET GUI frameworks such as Silverlight (on the wane, but still very much in use today), Windows Phone, and Windows 10 applications all make use of XAML.
As you dig into WPF, you might be surprised how much flexibility this “desktop markup” provides. XAML allows you to define not only simple UI elements (buttons, grids, list boxes, etc.) in markup, but also interactive 2D and 3D graphics, animations, data binding logic, and multimedia functionality (such as video playback).
XAML also makes it very easy to customize how a control should render out its visual appearance. For example, defining a circular button control that animates your company logo requires just a few lines of markup. As shown in Chapter 29, WPF controls can be modified through styles and templates, which allow you to change the overall look and feel of an application with minimum fuss and bother. Unlike Windows Forms development, the only compelling reason to build a custom WPF control from the ground up is if you need to change the behaviors of a control (e.g., add custom methods, properties, or events; subclass an existing control to override virtual members). If you simply need to change the look and feel of a control (again, such as a circular animated button), you can do so entirely through markup.
Providing an Optimized Rendering Model
GUI toolkits such as Windows Forms, MFC, or VB6 performed all graphical rendering requests (including the rendering of UI elements such as buttons and list boxes) using a low-level, C-based API (GDI), which has been part of the Windows OS for years. GDI provides adequate performance for typical business applications or simple graphical programs; however, if a UI application needed to tap into high-performance graphics, DirectX was required.
The WPF programming model is quite different in that GDI is not used when rendering graphical data. All rendering operations (e.g., 2D graphics, 3D graphics, animations, control rendering, etc.) now make use of the DirectX API. The first obvious benefit is that your WPF applications will automatically take advantage of hardware and software optimizations. As well, WPF applications can tap into very rich graphical services (blur effects, anti-aliasing, transparency, etc.) without the complexity of programming directly against the DirectX API.
![]() Note Although WPF does push all rendering requests to the DirectX layer, I don’t want to suggest that a WPF application will perform as fast as building an application using unmanaged C++ and DirectX directly. Although significant advances have been made in WPF in .NET 4.6, if you are intending to build a desktop application that requires the fastest possible execution speed (such as a 3D video game), unmanaged C++ and DirectX are still the best approach.
Note Although WPF does push all rendering requests to the DirectX layer, I don’t want to suggest that a WPF application will perform as fast as building an application using unmanaged C++ and DirectX directly. Although significant advances have been made in WPF in .NET 4.6, if you are intending to build a desktop application that requires the fastest possible execution speed (such as a 3D video game), unmanaged C++ and DirectX are still the best approach.
Simplifying Complex UI Programming
To recap the story thus far, Windows Presentation Foundation (WPF) is an API for building desktop applications that integrates various desktop APIs into a single object model and provides a clean separation of concerns via XAML. In addition to these major points, WPF applications also benefit from a very simple way to integrate services into your programs, which historically were quite complex to account for. The following is a quick rundown of the core WPF features:
· A number of layout managers (far more than Windows Forms) to provide extremely flexible control over placement and reposition of content.
· Use of an enhanced data-binding engine to bind content to UI elements in a variety of ways.
· A built-in style engine, which allows you to define “themes” for a WPF application.
· Use of vector graphics, which allows content to be automatically resized to fit the size and resolution of the screen hosting the application.
· Support for 2D and 3D graphics, animations, and video and audio playback.
· A rich typography API, such as support for XML Paper Specification (XPS) documents, fixed documents (WYSIWYG), flow documents, and document annotations (e.g., a Sticky Notes API).
· Support for interoperating with legacy GUI models (e.g., Windows Forms, ActiveX, and Win32 HWNDs). For example, you can incorporate custom Windows Forms controls into a WPF application, and vice versa.
Now that you have some idea of what WPF brings to the table, let’s look at the various types of applications that can be created using this API. Many of these features will be explored in detail in the chapters to come.
The Various Flavors of WPF
The WPF API can be used to build a variety of GUI-centric applications that basically differ in their navigational structure and deployment models. The sections that follow present a high-level tour through each option.
Traditional Desktop Applications
The first (and most familiar) option is to use WPF to build a traditional executable assembly that runs on a local machine. For example, you could use WPF to build a text editor, painting program, or multimedia program such as a digital music player, photo viewer, and so forth. Like any other desktop application, these *.exe files can be installed using traditional means (setup programs, Windows Installer packages, etc.) or via ClickOnce technology to allow desktop applications to be distributed and installed via a remote web server.
Programmatically speaking, this type of WPF application will make use (at a minimum) of the Window and Application class types, in addition to the expected set of dialog boxes, toolbars, status bars, menu systems, and other UI elements.
Now, you can certainly use WPF to build your basic business application that does not support any bells and whistles, but WPF really shines when you do incorporate such features. Consider Figure 26-1, which shows a WPF sample desktop application for viewing patient records in a medical environment.
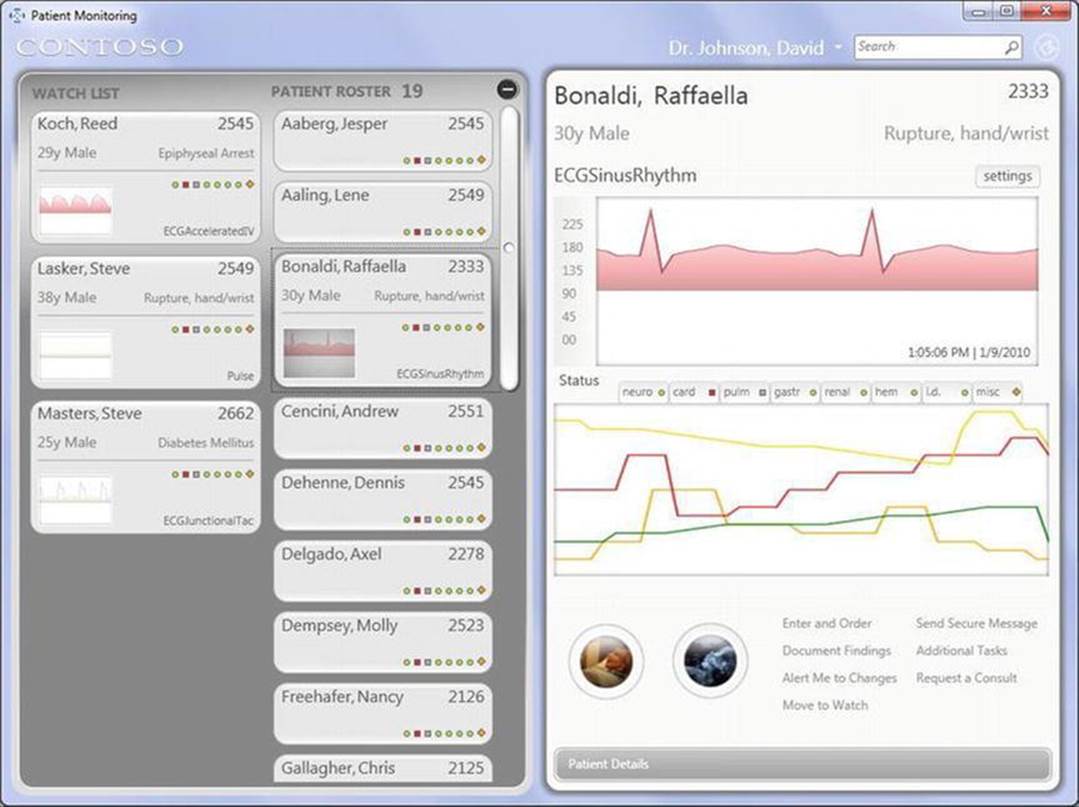
Figure 26-1. This WPF desktop application makes use of several WPF APIs
Sadly, the printed page does not show the full feature set of this program. For example, if you were to see this application running, you would note that the upper right of the main window is displaying a real-time graph of the patient’s sinus rhythm. If you click the Patient Details button on the lower right, several animations take place to flip, rotate, and transform the UI to the look and feel shown in Figure 26-2.
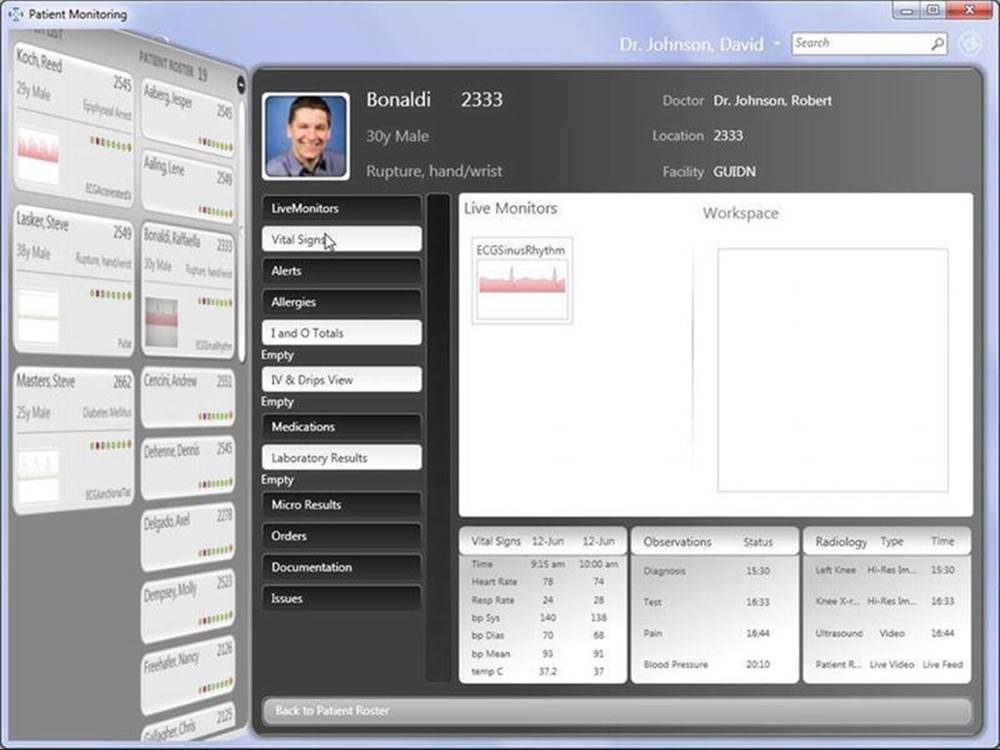
Figure 26-2. Transformations and animations are very simple under WPF
Could you build this same application without WPF? Absolutely. However, the amount of code—and the complexity of the code—would be much higher.
![]() Note This example application, and many others, can be downloaded (with the source code) from the official WPF web site, http://windowsclient.net. Here, you will find numerous WPF (and Windows Forms) whitepapers, sample projects, technology walkthroughs, and forums. Unfortunately, at the time of this writing, there are only a scant few .NET 4.6 examples. The good news is that the XAML team is committed to updating the samples to .NET 4.6.
Note This example application, and many others, can be downloaded (with the source code) from the official WPF web site, http://windowsclient.net. Here, you will find numerous WPF (and Windows Forms) whitepapers, sample projects, technology walkthroughs, and forums. Unfortunately, at the time of this writing, there are only a scant few .NET 4.6 examples. The good news is that the XAML team is committed to updating the samples to .NET 4.6.
Navigation-Based WPF Applications
WPF applications can optionally choose to make use of a navigation-based structure, which makes a traditional desktop application take on the basic behavior of a web browser application. Using this model, you can build a desktop *.exe that provides a forward and back button that allows the end user to move back and forth between various UI displays called pages.
This type of application maintains a list of each page and provides the necessary infrastructure to navigate between them, pass data across pages (similar to a web-based application variable), and maintain a history list. By way of a concrete example, consider Windows Explorer (seeFigure 26-3), which makes use of such functionality. Notice the navigation buttons mounted on the upper-left corner of the window.
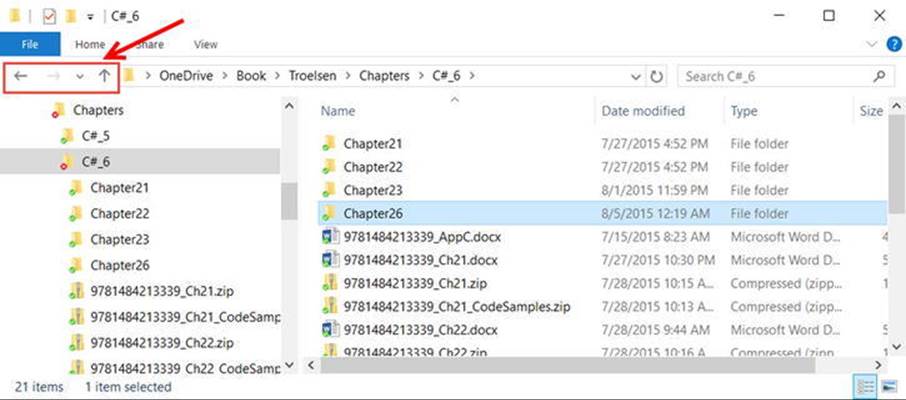
Figure 26-3. A navigation-based desktop program
Regardless of the fact that a WPF desktop application can take on a web-like navigational structure, understand that this is simply a UI design issue. The application itself is still just a local executable running on a desktop machine, and it has little to do with a web application beyond the option of adopting a slightly similar look and feel. Programmatically speaking, this type of WPF application is constructed using classes such as Application, Page, NavigationWindow, and Frame.
XBAP Applications
WPF also allows you to build applications that can be hosted within a web browser. This flavor of WPF application is termed a XAML browser application, or XBAP. Under this model, the end user navigates to a given URL, at which point the XBAP (which is essentially a collection ofPage objects) is transparently downloaded and installed to the local machine. Unlike a traditional ClickOnce installation for an executable application, however, the XBAP program is hosted directly within the browser and adopts the browser’s intrinsic navigational system. Figure 26-4illustrates an XBAP program in action (specifically, the ExpenseIt WPF sample program, which can be found at http://windowsclient.net).
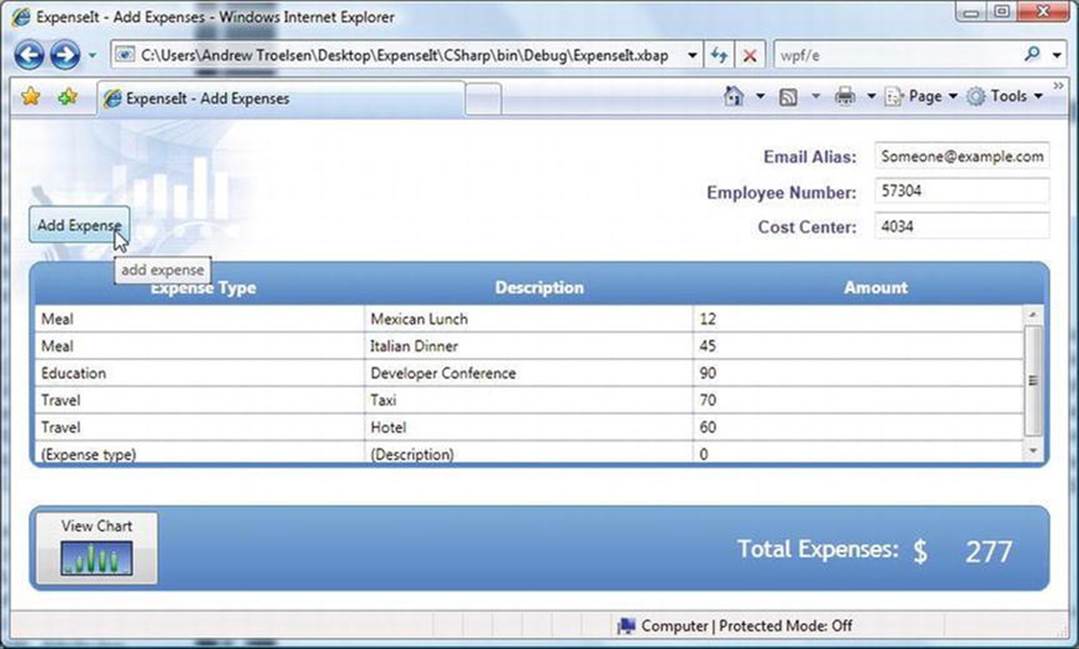
Figure 26-4. XBAP programs are downloaded to a local machine and hosted within a web browser
One benefit of an XBAP is that it allows you to create sophisticated UIs that are much more expressive than a typical web page built with HTML and JavaScript (however, HTML 5 certainly improves the current situation). An XBAP Page object can make use of the same WPF services as a desktop WPF application, including animations, 2D and 3D graphics, themes, and whatnot. In effect, the web browser is just a container for WPF Page objects, and is not displaying ASP.NET web pages.
However, given that these Page objects are deployed to a remote web server, XBAPs can be easily versioned and updated without the need to redeploy executables to the user’s desktop. Like a traditional web program, you can simply update the Page objects in the web server, and the user will get the “latest and greatest” when they access the URL.
One downside to this flavor of WPF is that XBAPs must be hosted within Microsoft Internet Explorer or Firefox web browsers. Note that XBAPs are not supported on Microsoft Edge, the new Windows 10 browser; you must use Internet Explorer on Windows 10. If you are deploying XBAPs across a company intranet, browser compatibility should not be a problem, given that system administrators can play dictator regarding which browser should be installed on users’ machines. However, if you want the outside world to make use of your XBAP, it is not possible to ensure that each end user is making use of Internet Explorer/Firefox, and therefore some external users may not be able to view your WPF XBAP.
Another issue to be aware of is that the machine that is viewing an XBAP must have a local installation of the .NET framework because the Page objects will be using the same .NET assemblies as an application running natively on the machine. Given this particular point, XBAPs are limited to Windows operating systems and, thus, cannot be viewed on a system running Mac OS X or Linux.
![]() Note While you can still create XBAP projects in Visual Studio 2015, they are largely being replaced with HTML5/JavaScript-based applications (such as ASP.NET MVC).
Note While you can still create XBAP projects in Visual Studio 2015, they are largely being replaced with HTML5/JavaScript-based applications (such as ASP.NET MVC).
The WPF/Silverlight Relationship
WPF and XAML also provided the foundation for the cross-platform, cross-browser WPF-based technology termed Silverlight. From a high level, you can consider Silverlight as a competitor to Adobe Flash, with the benefit of using C# and XAML rather than a new set of tools and languages. Silverlight is a subset of WPF functionality, which is used to build highly interactive plug-ins for a larger HTML-based web page. In reality, however, Silverlight is a completely unique distribution of the .NET platform, which ships with a “mini” CLR and “mini” version of the .NET base class libraries.
Unlike an XBAP, the user’s machine does not need a full installation of the .NET Framework. As long as the target machine has the Silverlight runtime installed, the browser will load the Silverlight runtime and display the Silverlight application automatically. Best of all, Silverlight plug-ins are not limited to the Windows operating systems. Microsoft has also created a Silverlight runtime for Mac OS X.
With Silverlight, you are able to build extremely feature-rich (and interactive) web applications. For example, like WPF, Silverlight has a vector-based graphical system, animation support, and multimedia support. Furthermore, you are able to incorporate a subset of the .NET base class library into your applications. This subset includes LINQ APIs, generic collections, support for WCF, and a healthy subset of mscorlib.dll (file I/O, XML manipulation, etc.).
![]() Note Microsoft is moving away from Silverlight as a development platform. While you can still create Silverlight projects in Visual Studio 2015, the need Silverlight once filled is largely being replaced with HTML5/JavaScript-based applications. Microsoft is committed to supporting Silverlight for 10 years after it was officially end-of-lifed, which gives you about another 8 years (depending on when you read this book) of active support.
Note Microsoft is moving away from Silverlight as a development platform. While you can still create Silverlight projects in Visual Studio 2015, the need Silverlight once filled is largely being replaced with HTML5/JavaScript-based applications. Microsoft is committed to supporting Silverlight for 10 years after it was officially end-of-lifed, which gives you about another 8 years (depending on when you read this book) of active support.
Investigating the WPF Assemblies
Regardless of which type of WPF application you want to build, WPF is ultimately little more than a collection of types bundled within .NET assemblies. Table 26-3 describes the key assemblies used to build WPF applications, each of which must be referenced when creating a new project. As you would hope, Visual Studio WPF projects reference these required assemblies automatically.
Table 26-3. Core WPF Assemblies
|
Assembly |
Meaning in Life |
|
PresentationCore.dll |
This assembly defines numerous namespaces that constitute the foundation of the WPF GUI layer. For example, this assembly contains support for the WPF Ink API (for programming against stylus input for Pocket PCs and Tablet PCs), animation primitives, and numerous graphical rendering types. |
|
PresentationFramework.dll |
This assembly contains a majority of the WPF controls, the Application and Window classes, support for interactive 2D graphics and numerous types used in data binding. |
|
System.Xaml.dll |
This assembly provides namespaces that allow you to program against a XAML document at runtime. By and large, this library is only useful if you are authoring WPF support tools or need absolute control over XAML at runtime. |
|
WindowsBase.dll |
This assembly defines types that constitute the infrastructure of the WPF API, including those representing WPF threading types, security types, various type converters, and support for dependency properties and routed events (described in Chapter 27). |
Collectively, these four assemblies define a number of new namespaces and hundreds of new .NET classes, interfaces, structures, enumerations, and delegates. While you should consult the .NET Framework 4.6 SDK documentation for complete details, Table 26-4 describes the role of some (but certainly not all) of the important namespaces.
Table 26-4. Core WPF Namespaces
|
Namespace |
Meaning in Life |
|
System.Windows |
This is the root namespace of WPF. Here, you will find core classes (such as Application and Window) that are required by any WPF desktop project. |
|
System.Windows.Controls |
Contains all of the expected WPF widgets, including types to build menu systems, tool tips, and numerous layout managers. |
|
System.Windows.Data |
Contains types to work with the WPF data-binding engine, as well as support for data-binding templates. |
|
System.Windows.Documents |
Contains types to work with the documents API, which allows you to integrate PDF-style functionality into your WPF applications, via the XML Paper Specification (XPS) protocol. |
|
System.Windows.Ink |
Provides support for the Ink API, which allows you to capture input from a stylus or mouse, respond to input gestures, and so forth. Very useful for Tablet PC programming; however, any WPF can make use of this API. |
|
System.Windows.Markup |
This namespace defines a number of types that allow XAML markup (and the equivalent binary format, BAML) to be parsed and processed programmatically. |
|
System.Windows.Media |
This is the root namespace to several media-centric namespaces. Within these namespaces you will find types to work with animations, 3D rendering, text rendering, and other multimedia primitives. |
|
System.Windows.Navigation |
This namespace provides types to account for the navigation logic employed by XAML browser applications (XBAPs) as well as standard desktop applications that require a navigational page model. |
|
System.Windows.Shapes |
Defines classes that allow you to render interactive 2D graphics that automatically respond to mouse input. |
To begin your journey into the WPF programming model, you’ll examine two members of the System.Windows namespace that are commonplace to any traditional desktop development effort: Application and Window.
![]() Note If you have created desktop UIs using the Windows Forms API, be aware that the System.Windows.Forms.* and System.Drawing.* assemblies are not related to WPF. These libraries represent the original .NET GUI toolkit, Windows Forms/GDI+.
Note If you have created desktop UIs using the Windows Forms API, be aware that the System.Windows.Forms.* and System.Drawing.* assemblies are not related to WPF. These libraries represent the original .NET GUI toolkit, Windows Forms/GDI+.
The Role of the Application Class
The System.Windows.Application class represents a global instance of a running WPF application. This class supplies a Run() method (to start the application), a series of events that you are able to handle in order to interact with the application’s lifetime (such as Startup andExit), and a number of events that are specific to XAML browser applications (such as events that fire as a user navigates between pages). Table 26-5 details some of the key properties.
Table 26-5. Key Properties of the Application Type
|
Property |
Meaning in Life |
|
Current |
This static property allows you to gain access to the running Application object from anywhere in your code. This can be very helpful when a window or dialog box needs to gain access to the Application object that created it, typically to access application-wide variables and functionality. |
|
MainWindow |
This property allows you to programmatically get or set the main window of the application. |
|
Properties |
This property allows you to establish and obtain data that is accessible throughout all aspects of a WPF application (windows, dialog boxes, etc.). |
|
StartupUri |
This property gets or sets a URI that specifies a window or page to open automatically when the application starts. |
|
Windows |
This property returns a WindowCollection type, which provides access to each window created from the thread that created the Application object. This can be very helpful when you want to iterate over each open window of an application and alter its state (such as minimizing all windows). |
Constructing an Application Class
Any WPF application will need to define a class that extends Application. Within this class, you will define your program’s entry point (the Main() method), which creates an instance of this subclass and typically handles the Startup and Exit events. You will build a full example project in just a moment, but here is a quick example:
// Define the global application object
// for this WPF program.
class MyApp : Application
{
[STAThread]
static void Main(string[] args)
{
// Create the application object.
MyApp app = new MyApp();
// Register the Startup/Exit events.
app.Startup += (s, e) => { /* Start up the app */ };
app.Exit += (s, e) => { /* Exit the app */ };
}
}
Within the Startup handler, you will most often process any incoming command-line arguments and launch the main window of the program. The Exit handler, as you would expect, is where you can author any necessary shutdown logic for the program (e.g., save user preferences, write to the Windows registry).
Enumerating the Windows Collection
Another interesting property exposed by Application is Windows, which provides access to a collection representing each window loaded into memory for the current WPF application. Recall that as you create new Window objects, they are automatically added into theApplication.Windows collection. Here is an example method that will minimize each window of the application (perhaps in response to a given keyboard gesture or menu option triggered by the end user):
static void MinimizeAllWindows()
{
foreach (Window wnd in Application.Current.Windows)
{
wnd.WindowState = WindowState.Minimized;
}
}
You’ll build a complete Application-derived type in an upcoming example. Until then, let’s check out the core functionality of the Window type and learn about a number of important WPF base classes in the process.
The Role of the Window Class
The System.Windows.Window class (located in the PresentationFramework.dll assembly) represents a single window owned by the Application-derived class, including any dialog boxes displayed by the main window. Not surprisingly, Window has a series of parent classes, each of which brings more functionality to the table. Consider Figure 26-5, which shows the inheritance chain (and implemented interfaces) for System.Windows.Window as seen through the Visual Studio object browser.
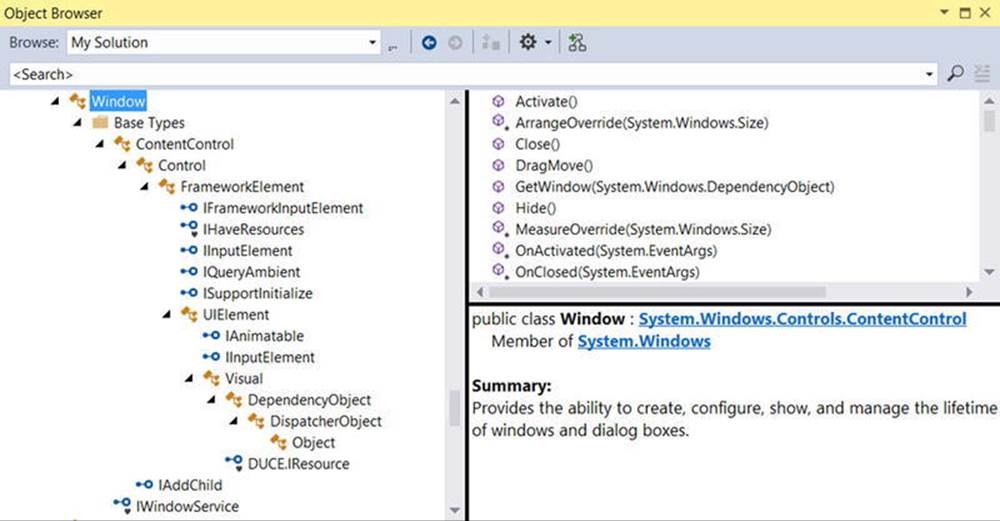
Figure 26-5. The hierarchy of the Window class
You’ll come to understand the functionality provided by many of these base classes as you progress through this chapter and the chapters to come. However, to whet your appetite, the following sections present a breakdown of the functionality provided by each base class (consult the .NET Framework 4.6 SDK documentation for full details).
The Role of System.Windows.Controls.ContentControl
The direct parent of Window is ContentControl, which is quite possibly the most enticing of all WPF classes. This base class provides derived types with the ability to host a single piece of content, which, simply put, refers to the visual data placed within the interior of the control’s surface area via the Content property. The WPF content model makes it very simple to customize the basic look and feel of a content control.
For example, when you think of a typical “button” control, you tend to assume that the content is a simple string literal (OK, Cancel, Abort, etc.). If you are using XAML to describe a WPF control, and the value you want to assign to the Content property can be captured as a simple string, you may set the Content property within the element’s opening definition as so (don’t fret over the exact markup at this point):
<!-- Setting the Content value in the opening element -->
<Button Height="80" Width="100" Content="OK"/>
![]() Note The Content property can also be set in C# code, which allows you to change the interior of a control at runtime.
Note The Content property can also be set in C# code, which allows you to change the interior of a control at runtime.
However, content can be almost anything. For example, let’s say you want to have a “button” that has something more interesting than a simple string, perhaps a custom graphic and a blurb of text. In other UI frameworks such as Windows Forms, you would be required to build a custom control, which could entail quite a bit of code and a whole new class to maintain. With the WPF content model, there is no need to do so.
When you want to assign the Content property to a value that cannot be captured as a simple array of characters, you can’t assign it using an attribute in the control’s opening definition. Rather, you must define the content data implicitly, within the element’s scope. For example, the following <Button> contains a <StackPanel> as content, which itself contains some unique data (an <Ellipse> and <Label>, to be exact):
<!-- Implicitly setting the Content property with complex data -->
<Button Height="80" Width="100">
<StackPanel>
<Ellipse Fill="Red" Width="25" Height="25"/>
<Label Content ="OK!"/>
</StackPanel>
</Button>
You can also make use of XAML’s property-element syntax to set complex content. Consider the following functionally equivalent <Button> definition, which sets the Content property explicitly using property-element syntax (again, you’ll find more information on XAML later in this chapter, so don’t sweat the details just yet):
<!-- Setting the Content property using property-element syntax -->
<Button Height="80" Width="100">
<Button.Content>
<StackPanel>
<Ellipse Fill="Red" Width="25" Height="25"/>
<Label Content ="OK!"/>
</StackPanel>
</Button.Content>
</Button>
Do be aware that not every WPF element derives from ContentControl and, therefore, not all controls support this unique content model (however, most do). As well, some WPF controls add a few refinements to the basic content model you have just examined. Chapter 27 will examine the role of WPF content in much more detail.
The Role of System.Windows.Controls.Control
Unlike ContentControl, all WPF controls share the Control base class as a common parent. This base class provides numerous core members that account for basic UI functionality. For example, Control defines properties to establish the control’s size, opacity, tab order logic, the display cursor, background color, and so forth. Furthermore, this parent class provides support for templating services. As explained in Chapter 29, WPF controls can completely change the way they render their appearance using templates and styles. Table 26-6 documents some key members of the Control type, grouped by related functionality.
Table 26-6. Key Members of the Control Type
|
Members |
Meaning in Life |
|
Background, Foreground, BorderBrush, BorderThickness, Padding, HorizontalContentAlignment, VerticalContentAlignment |
These properties allow you to set basic settings regarding how the control will be rendered and positioned. |
|
FontFamily, FontSize, FontStretch, FontWeight |
These properties control various font-centric settings. |
|
IsTabStop, TabIndex |
These properties are used to establish tab order among controls on a window. |
|
MouseDoubleClick, PreviewMouseDoubleClick |
These events handle the act of double-clicking a widget. |
|
Template |
This property allows you to get and set the control’s template, which can be used to change the rendering output of the widget. |
The Role of System.Windows.FrameworkElement
This base class provides a number of members that are used throughout the WPF framework, such as support for storyboarding (used within animations) and support for data binding, as well as the ability to name a member (via the Name property), obtain any resources defined by the derived type, and establish the overall dimensions of the derived type. Table 26-7 hits the highlights.
Table 26-7. Key Members of the FrameworkElement Type
|
Members |
Meaning in Life |
|
ActualHeight, ActualWidth, MaxHeight, MaxWidth, MinHeight, MinWidth, Height, Width |
These properties control the size of the derived type. |
|
ContextMenu |
Gets or sets the pop-up menu associated with the derived type. |
|
Cursor |
Gets or sets the mouse cursor associated with the derived type. |
|
HorizontalAlignment, VerticalAlignment |
Gets or sets how the type is positioned within a container (such as a panel or list box). |
|
Name |
Allows to you assign a name to the type, in order to access its functionality in a code file. |
|
Resources |
Provides access to any resources defined by the type (see Chapter 29 for an examination of the WPF resource system). |
|
ToolTip |
Gets or sets the tool tip associated with the derived type. |
The Role of System.Windows.UIElement
Of all the types within a Window’s inheritance chain, the UIElement base class provides the greatest amount of functionality. The key task of UIElement is to provide the derived type with numerous events to allow the derived type to receive focus and process input requests. For example, this class provides numerous events to account for drag-and-drop operations, mouse movement, keyboard input, and stylus input (for Pocket PCs and Tablet PCs).
Chapter 27 digs into the WPF event model in detail; however, many of the core events will look quite familiar (MouseMove, KeyUp, MouseDown, MouseEnter, MouseLeave, etc.). In addition to defining dozens of events, this parent class provides a number of properties to account for control focus, enabled state, visibility, and hit testing logic, as shown in Table 26-8.
Table 26-8. Key Members of the UIElement Type
|
Members |
Meaning in Life |
|
Focusable, IsFocused |
These properties allow you to set focus on a given derived type. |
|
IsEnabled |
This property allows you to control whether a given derived type is enabled or disabled. |
|
IsMouseDirectlyOver, IsMouseOver |
These properties provide a simple way to perform hit-testing logic. |
|
IsVisible, Visibility |
These properties allow you to work with the visibility setting of a derived type. |
|
RenderTransform |
This property allows you to establish a transformation that will be used to render the derived type. |
The Role of System.Windows.Media.Visual
The Visual class type provides core rendering support in WPF, which includes hit testing of graphical data, coordinate transformation, and bounding box calculations. In fact, the Visual class interacts with the underlying DirectX subsystem to actually draw data on the screen. As you will examine in Chapter 28, WPF provides three possible manners in which you can render graphical data, each of which differs in terms of functionality and performance. Use of the Visual type (and its children, such as DrawingVisual) provides the most lightweight way to render graphical data, but it also entails the greatest amount of manual code to account for all the required services. Again, more details to come in Chapter 28.
The Role of System.Windows.DependencyObject
WPF supports a particular flavor of .NET properties termed dependency properties. Simply put, this style of property provides extra code to allow the property to respond to several WPF technologies such as styles, data binding, animations, and so forth. In order for a type to support this new property scheme, it will need to derive from the DependencyObject base class. While dependency properties are a key aspect of WPF development, much of the time their details are hidden from view. Chapter 27 dives further into the details of dependency properties.
The Role of System.Windows.Threading.DispatcherObject
The final base class of the Window type (beyond System.Object, which I assume needs no further explanation at this point in the book) is DispatcherObject. This type provides one property of interest, Dispatcher, which returns the associatedSystem.Windows.Threading.Dispatcher object. The Dispatcher class is the entry point to the event queue of the WPF application, and it provides the basic constructs for dealing with concurrency and threading.
Building a WPF Application Without XAML
Given all of the functionality provided by the parent classes of the Window type, it is possible to represent a window in your application by either directly creating a Window object or using this class as the parent to a strongly typed descendent. Let’s examine both approaches in the following code example. Although most WPF applications will make use of XAML, doing so is technically optional. Anything that can be expressed in XAML can be expressed in code and (for the most part) vice versa. If you so desire, it is possible to build a complete WPF project using the underlying object model and procedural C# code.
To illustrate, let’s create a minimal but complete application without the use of XAML using the Application and Window classes directly. Begin by creating a new Console Application named WpfAppAllCode (don’t worry; you will use the Visual Studio WPF project template later in this chapter). Go into the project properties and change the output type to Windows Application (this prevents the console window from popping up). Next, access the Project Add Reference dialog box and add a reference to WindowsBase.dll, PresentationCore.dll,System.Xaml.dll, and PresentationFramework.dll.
Now, update your initial C# file with the following code, which creates a window of modest functionality (here, I am only showing the namespaces that must be imported to compile the code; feel free to leave any auto-including using statements in place):
// A simple WPF application, written without XAML.
using System;
using System.Windows;
using System.Windows.Controls;
namespace WpfAppAllCode
{
// In this first example, you are defining a single class type to
// represent the application itself and the main window.
class Program : Application
{
[STAThread]
static void Main(string[] args)
{
// Handle the Startup and Exit events, and then run the application.
Program app = new Program();
app.Startup += AppStartUp;
app.Exit += AppExit;
app.Run(); // Fires the Startup event.
}
static void AppExit(object sender, ExitEventArgs e)
{
MessageBox.Show("App has exited");
}
static void AppStartUp(object sender, StartupEventArgs e)
{
// Create a Window object and set some basic properties.
Window mainWindow = new Window();
mainWindow.Title = "My First WPF App!";
mainWindow.Height = 200;
mainWindow.Width = 300;
mainWindow.WindowStartupLocation = WindowStartupLocation.CenterScreen;
mainWindow.Show();
}
}
}
![]() Note The Main() method of a WPF application must be attributed with the [STAThread] attribute, which ensures any legacy COM objects used by your application are thread safe. If you do not annotate Main() in this way, you will encounter a runtime exception.
Note The Main() method of a WPF application must be attributed with the [STAThread] attribute, which ensures any legacy COM objects used by your application are thread safe. If you do not annotate Main() in this way, you will encounter a runtime exception.
Note that the Program class extends the System.Windows.Application class. Within the Main() method, you create an instance of the application object and handle the Startup and Exit events using method group conversion syntax. Recall from Chapter 10 that this shorthand notation removes the need to manually specify the underlying delegates used by a particular event. Of course, if you want, you can specify the underlying delegates directly by name.
In the following modified Main() method, notice that the Startup event works in conjunction with the StartupEventHandler delegate, which can only point to methods taking an Object as the first parameter and a StartupEventArgs as the second. The Exit event, on the other hand, works with the ExitEventHandler delegate, which demands that the method pointed to take an ExitEventArgs type as the second parameter.
[STAThread]
static void Main(string[] args)
{
// This time, specify the underlying delegates.
Program app = new Program();
app.Startup += new StartupEventHandler(AppStartUp);
app.Exit += new ExitEventHandler(AppExit);
app.Run(); // Fires the Startup event.
}
In any case, the AppStartUp() method has been configured to create a Window object, establish some very basic property settings, and call Show() to display the window on the screen in a modeless fashion (the ShowDialog() method can be used to launch a modal dialog). TheAppExit() method simply makes use of the WPF MessageBox class to display a diagnostic message when the application is being terminated.
Once you compile and run the project, you will find a very simple main window that can be minimized, maximized, and closed. To spice things up a bit, you need to add some user interface elements. Before you do, however, you should refactor your code base to account for a strongly typed and well-encapsulated Window-derived class.
Creating a Strongly Typed Window
Currently, the Application-derived class directly creates an instance of the Window type upon application startup. Ideally, you would create a class deriving from Window in order to encapsulate its appearance and functionality. Add another class to your project named MainWindow, and add the following class definition (be sure to import the System.Windows namespace):
class MainWindow : Window
{
public MainWindow(string windowTitle, int height, int width)
{
this.Title = windowTitle;
this.WindowStartupLocation = WindowStartupLocation.CenterScreen;
this.Height = height;
this.Width = width;
}
}
You can now update your Startup event handler to simply directly create an instance of MainWindow, like so:
static void AppStartUp(object sender, StartupEventArgs e)
{
// Create a MainWindow object.
var main = new MainWindow("My better WPF App!", 200, 300);
main.Show();
}
Once the program is recompiled and executed, the output is identical. The obvious benefit is that you now have a strongly typed class representing the main window to build upon.
![]() Note When you create a Window (or Window-derived) object, it will automatically be added to the windows collection of the Application class (via some constructor logic found in the Window class itself). You can use the Application.Windows property to iterate over the list of Window objects currently in memory.
Note When you create a Window (or Window-derived) object, it will automatically be added to the windows collection of the Application class (via some constructor logic found in the Window class itself). You can use the Application.Windows property to iterate over the list of Window objects currently in memory.
Creating a Simple User Interface
Adding a UI element (such as a Button) to a Window in C# code will involve the following basic steps:
1. Define a member variable to represent the control.
2. Configure the control’s look and feel upon Window construction.
3. Assign the control to the inherited Content property, or alternatively, as a parameter to the inherited AddChild() method.
Recall that the WPF control content model demands that the Content property is set to a single element. Of course, a Window that contained only a single UI control would be quite useless. Therefore, in almost every case, the “single piece of content” that is assigned to the Contentproperty is, in reality, a layout manager, such as DockPanel, Grid, Canvas, or StackPanel. Within the layout manager, you can have any combination of internal controls, including other nested layout managers. (Read more on this aspect of WPF development in Chapter 27.)
For now, you will add a single Button control to your Window-derived class. When you click the button, you will close the current window, which will indirectly terminate the application because you have no other windows in memory. Ponder the following update to theMainWindow class (be sure you have imported System.Windows.Controls to gain access to the Button class):
class MainWindow : Window
{
// Our UI element.
private Button btnExitApp = new Button();
public MainWindow(string windowTitle, int height, int width)
{
// Configure button and set the child control.
btnExitApp.Click += new RoutedEventHandler(btnExitApp_Clicked);
btnExitApp.Content = "Exit Application";
btnExitApp.Height = 25;
btnExitApp.Width = 100;
// Set the content of this window to a single button.
this.Content = btnExitApp;
// Configure the window.
this.Title = windowTitle;
this.WindowStartupLocation = WindowStartupLocation.CenterScreen;
this.Height = height;
this.Width = width;
this.Show();
}
private void btnExitApp_Clicked(object sender, RoutedEventArgs e)
{
// Close the window.
this.Close();
}
}
Notice that the Click event of the WPF Button works in conjunction with a delegate named RoutedEventHandler, which begs the question, what is a routed event? You’ll examine the details of the WPF event model in the next chapter; for the time being, simply understand that targets of the RoutedEventHandler delegate must supply an object as the first parameter and a RoutedEventArgs as the second.
In any case, after you recompile and run this application, you will find the customized window shown in Figure 26-6. Notice that your button is automatically placed in the dead center of the window’s client area; this is the default behavior when content is not placed within a WPF panel type.
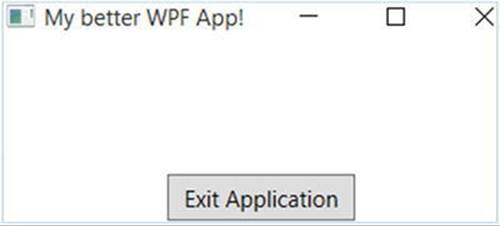
Figure 26-6. A simple WPF application writen entirely in C# code
Interacting with Application-Level Data
Recall that the Application class defines a property named Properties, which allows you to define a collection of name/value pairs via a type indexer. Because this indexer has been defined to operate on type System.Object, you are able to store any sort of item within this collection (including your custom classes), to be retrieved at a later time using a friendly moniker. Using this approach, it is simple to share data across all windows in a WPF application.
To illustrate, you will update the current Startup event handler to check the incoming command-line arguments for a value named /GODMODE (a common cheat code for many PC video games). If you find this token, you will establish a bool value set to true within the properties collection of the same name (otherwise, you will set the value to false).
Sounds simple enough, but how are you going to pass the incoming command-line arguments (typically obtained from the Main() method) to your Startup event handler? One approach is to call the static Environment.GetCommandLineArgs() method. However, these same arguments are automatically added to the incoming StartupEventArgs parameter and can be accessed via the Args property. That being said, here is the first update to the current code base:
private static void AppStartUp(object sender, StartupEventArgs e)
{
// Check the incoming command-line arguments and see if they
// specified a flag for /GODMODE.
Application.Current.Properties["GodMode"] = false;
foreach(string arg in e.Args)
{
if (arg.ToLower() == "/godmode")
{
Application.Current.Properties["GodMode"] = true;
break;
}
}
// Create a MainWindow object.
MainWindow wnd = new MainWindow("My better WPF App!", 200, 300);
}
Application-wide data can be accessed from anywhere within the WPF application. All you are required to do is obtain an access point to the global application object (via Application.Current) and investigate the collection. For example, you could update the Click event handler of the Button as so:
private void btnExitApp_Clicked(object sender, RoutedEventArgs e)
{
// Did user enable /godmode?
if((bool)Application.Current.Properties["GodMode"])
{
MessageBox.Show("Cheater!");
}
this.Close();
}
With this, if the end user launches your program via
WpfAppAllCode.exe /godmode
he or she will see the shameful message box displayed when terminating the application.
![]() Note Recall that you can supply command-line arguments within Visual Studio. Simply double-click the Properties icon within Solution Explorer, click the Debug tab from the resulting editor, and enter /godmode within the “Command line arguments” editor.
Note Recall that you can supply command-line arguments within Visual Studio. Simply double-click the Properties icon within Solution Explorer, click the Debug tab from the resulting editor, and enter /godmode within the “Command line arguments” editor.
Handling the Closing of a Window Object
End users can shut down a window using numerous built-in system-level techniques (e.g., clicking the “X” close button on the window’s frame) or by indirectly calling the Close() method in response to some user interaction element (e.g., File ![]() Exit). In either case, WPF provides two events that you can intercept to determine whether the user is truly ready to shut down the window and remove it from memory. The first event to fire is Closing, which works in conjunction with the CancelEventHandler delegate.
Exit). In either case, WPF provides two events that you can intercept to determine whether the user is truly ready to shut down the window and remove it from memory. The first event to fire is Closing, which works in conjunction with the CancelEventHandler delegate.
This delegate expects target methods to take System.ComponentModel.CancelEventArgs as the second parameter. CancelEventArgs provides the Cancel property, which when set to true will prevent the window from actually closing (this is handy when you have asked the user if he really wants to close the window or if perhaps he would like to save his work first).
If the user does indeed wish to close the window, CancelEventArgs.Cancel can be set to false (which is the default setting). This will then cause the Closed event to fire (which works with the System.EventHandler delegate), making it the point at which the window is about to be closed for good.
Update the MainWindow class to handle these two events by adding these code statements to the current constructor, like so:
public MainWindow(string windowTitle, int height, int width)
{
...
this.Closing += MainWindow_Closing;
this.Closed += MainWindow_Closed;
}
Now, implement the corresponding event handlers as so:
private void MainWindow_Closing(object sender,
System.ComponentModel.CancelEventArgs e)
{
// See if the user really wants to shut down this window.
string msg = "Do you want to close without saving?";
MessageBoxResult result = MessageBox.Show(msg,
"My App", MessageBoxButton.YesNo, MessageBoxImage.Warning);
if (result == MessageBoxResult.No)
{
// If user doesn’t want to close, cancel closure.
e.Cancel = true;
}
}
private void MainWindow_Closed(object sender, EventArgs e)
{
MessageBox.Show("See ya!");
}
Now, run your program and attempt to close the window, either by clicking the “X” icon on the upper right of the window or by clicking the button control. You should see the confirmation dialog shown in Figure 26-7.
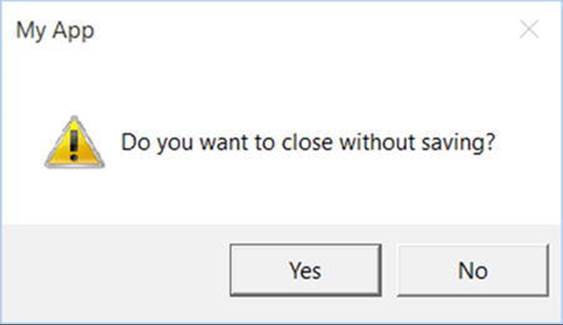
Figure 26-7. Trapping the closing event of a window
If you click the Yes button, the application will terminate; however, clicking the No button will keep the window in memory.
Intercepting Mouse Events
The WPF API provides a number of events you can capture in order to interact with the mouse. Specifically, the UIElement base class defines a number of mouse-centric events such as MouseMove, MouseUp, MouseDown, MouseEnter, MouseLeave, and so forth.
Consider, for example, the act of handling the MouseMove event. This event works in conjunction with the System.Windows.Input.MouseEventHandler delegate, which expects its target to take a System.Windows.Input.MouseEventArgs type as the second parameter. Using MouseEventArgs, you are able to extract out the (x, y) position of the mouse and other relevant details. Consider the following partial definition:
public class MouseEventArgs : InputEventArgs
{
...
public Point GetPosition(IInputElement relativeTo);
public MouseButtonState LeftButton { get; }
public MouseButtonState MiddleButton { get; }
public MouseDevice MouseDevice { get; }
public MouseButtonState RightButton { get; }
public StylusDevice StylusDevice { get; }
public MouseButtonState XButton1 { get; }
public MouseButtonState XButton2 { get; }
}
![]() Note The XButton1 and XButton2 properties allow you to interact with “extended mouse buttons” (such as the “next” and “previous” buttons found on some mouse controls). These are often used to interact with a browser’s history list to navigate between visited pages.
Note The XButton1 and XButton2 properties allow you to interact with “extended mouse buttons” (such as the “next” and “previous” buttons found on some mouse controls). These are often used to interact with a browser’s history list to navigate between visited pages.
The GetPosition() method allows you to get the (x, y) value relative to a UI element on the window. If you are interested in capturing the position relative to the activated window, simply pass in this. Handle the MouseMove event in the constructor of your MainWindow class, like so:
public MainWindow(string windowTitle, int height, int width)
{
...
this.MouseMove += MainWindow_MouseMove;
}
Here is an event handler for MouseMove that will display the location of the mouse in the window’s title area (notice you are translating the returned Point type into a text value via ToString()):
private void MainWindow_MouseMove(object sender,
System.Windows.Input.MouseEventArgs e)
{
// Set the title of the window to the current (x,y) of the mouse.
this.Title = e.GetPosition(this).ToString();
}
Intercepting Keyboard Events
Processing keyboard input for the focused window is also very straightforward. UIElement defines a number of events that you can capture to intercept keypresses from the keyboard on the active element (e.g., KeyUp, KeyDown). The KeyUp and KeyDown events both work with theSystem.Windows.Input.KeyEventHandler delegate, which expects the target’s second event handler to be of type KeyEventArgs, which defines several public properties of interest, shown here:
public class KeyEventArgs : KeyboardEventArgs
{
...
public bool IsDown { get; }
public bool IsRepeat { get; }
public bool IsToggled { get; }
public bool IsUp { get; }
public Key Key { get; }
public KeyStates KeyStates { get; }
public Key SystemKey { get; }
}
To illustrate handling the KeyDown event in the constructor of MainWindow (just like you did for the previous events), implement the following event handler that changes the content of the button with the currently pressed key:
private void MainWindow_KeyDown(object sender, System.Windows.Input.KeyEventArgs e)
{
// Display key press on the button.
btnExitApp.Content = e.Key.ToString();
}
Figure 26-8 shows the final product of your first WPF program.
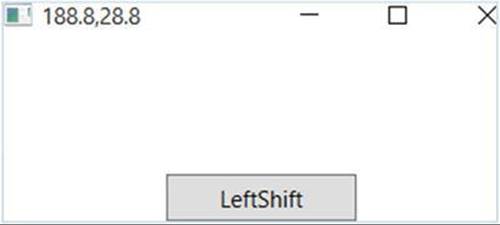
Figure 26-8. Your first WPF program, 100 percent XAML free
At this point in the chapter, WPF might look like nothing more than yet another GUI framework that is providing (more or less) the same services as Windows Forms, MFC, or VB6. If this were in fact the case, you might question the need for yet another UI toolkit. To truly see what makes WPF so unique requires an understanding of the XML-based grammar, XAML.
![]() Source Code The WpfAppAllCode project is included in the Chapter 26 subdirectory.
Source Code The WpfAppAllCode project is included in the Chapter 26 subdirectory.
Building a WPF Application Using Only XAML
A typical WPF application will not be composed exclusively of code, as you did in this first example. Rather, your C# code files will be paired with a related XAML source file, and together they represent the entirety of a given Window or Application, as well as other class types you have not yet examined, such as UserControl and Page.
This approach is termed the code file approach to building a WPF application, and you will make use of this technique extensively throughout the remainder of the book’s WPF coverage. However, before you do, the next example will illustrate how to build a WPF application using nothing but XAML files. While this 100-percent XAML approach is not recommended, it will help you clearly understand how blobs of markup are transformed into a corresponding C# code base, and ultimately, a .NET assembly.
![]() Note This next example will make use of a number of XAML techniques you have not yet formally examined, so don’t become concerned if you encounter some unfamiliar syntax. You might want to simply load the solution files into a text editor and follow along; however, don’t use Visual Studio to do so! Visual Studio will automatically make changes to the content, and interfere with the goal of this section. You will have plenty of time to use VS2015 to create WPF applications. Just not yet.
Note This next example will make use of a number of XAML techniques you have not yet formally examined, so don’t become concerned if you encounter some unfamiliar syntax. You might want to simply load the solution files into a text editor and follow along; however, don’t use Visual Studio to do so! Visual Studio will automatically make changes to the content, and interfere with the goal of this section. You will have plenty of time to use VS2015 to create WPF applications. Just not yet.
In general, XAML files will contain markup that describes the look and feel of the window, while the related C# code files contain the implementation logic. For example, the XAML file for a Window might describe the overall layout system, the controls within that layout system, and specify the names of various event handlers. The related C# file would contain the implementation logic of these event handlers and any custom code required by the application.
XAML is an XML-based grammar that allows you to define the state (and, to some extent, the functionality) of a tree of .NET objects through markup. While XAML is frequently used when building UIs with WPF, in reality it can be used to describe any tree of nonabstract .NET types (including your own custom types defined in a custom .NET assembly), provided each supports a default constructor. As you will see, the markup within a *.xaml file is transformed into a full-blown object model.
Because XAML is an XML-based grammar, we gain all the benefits (and drawbacks) XML affords us. On the plus side, XAML files are very self-describing (as any XML document should be). By and large, each element in a XAML file represents a type name (such as Button,Window, or Application) within a given .NET namespace. Attributes within the scope of an opening element map to properties (Height, Width, etc.) and events (Startup, Click, etc.) of the specified type.
Given the fact that XAML is simply a declarative way to define the state of an object, it is possible to define a WPF widget via markup or procedural code. For example, this XAML
<!-- Defining a WPF Button in XAML -->
<Button Name = "btnClickMe" Height = "40" Width = "100" Content = "Click Me" />
can be represented programmatically as
// Defining the same WPF Button in C# code.
Button btnClickMe = new Button();
btnClickMe.Height = 40;
btnClickMe.Width = 100;
btnClickMe.Content = "Click Me";
On the downside, XAML can be verbose and is (like any XML document) case sensitive. Thus, complex XAML definitions can result in a good deal of markup. Most developers will not need to manually author a complete XAML description of their WPF applications. Rather, the majority of this task will (thankfully) be relegated to development tools such as Visual Studio, Microsoft Expression Blend, or any number of third-party products. After the tools generate the basic markup, you can go in and fine-tune the XAML definitions by hand, if necessary.
Defining a Window Object in XAML
While tools can generate a good deal of XAML on your behalf, it is important for you to understand the basic workings of XAML syntax and how this markup is eventually transformed into a valid .NET assembly. To illustrate XAML in action, in the next example you’ll build a WPF application using nothing more than a pair of *.xaml files.
The first Window-derived class (MainWindow) was defined in C# as a class type that extends the System.Windows.Window base class. This class contains a single Button object that calls a registered event handler when clicked. Defining this same Window type in the grammar of XAML can be achieved as follows. First, use a simple text editor (such as Notepad) to create a new file named MainWindow.xaml, and be sure to save this in an easily accessible subdirectory on your C: drive because you will be processing this file at the command line. Now, add the following XAML:
<!-- Here is your Window definition -->
<Window x:Class="WpfAppAllXaml.MainWindow"
xmlns="http://schemas.microsoft.com/winfx/2006/xaml/presentation"
xmlns:x="http://schemas.microsoft.com/winfx/2006/xaml"
Title="A Window built using 100% XAML"
Height="200" Width="300"
WindowStartupLocation ="CenterScreen">
<Windows.Content>
<!-- This window has a single button as content -->
<Button x:Name="btnExitApp" Width="133" Height="24"
Content = "Close Window" Click ="btnExitApp_Clicked"/>
</Window.Content>
<!-- The implementation of your button’s Click event handler! -->
<x:Code>
<![CDATA[
private void btnExitApp_Clicked(object sender, RoutedEventArgs e)
{
this.Close();
}
]]>
</x:Code>
</Window>
First, notice that the root element <Window> makes use of the Class attribute, which is used to specify the name of the C# class that will be generated when this XAML file is processed. Also notice that the Class attribute is prefixed with the x: tag prefix. If you look within the opening <Window> element, you’ll see that this XML tag prefix is assigned to the string "http://schemas.microsoft.com/winfx/2006/xaml" to build an XML namespace declaration. You will understand the details of these XML namespace definitions a bit later in the chapter, but for now, just be aware that any time you want to make reference to an item defined by the "http://schemas.microsoft.com/winfx/2006/xaml" XAML namespace, you must prefix the x: token.
Within the scope of the <Window> start tag, you have specified values for the Title, Height, Width, and WindowStartupLocation attributes, which are a direct mapping to properties of the same name supported by the System.Windows.Window class in thePresentationFramework.dll assembly.
Next up, notice that within the scope of the window’s definition, you have authored markup to describe the look and feel of a Button object that will be used to implicitly set the Content property of the window. Beyond setting up the variable name (using the x:Name XAML token) and its overall dimensions, you have also handled the Click event of the Button type by assigning the method to delegate to when the Click event occurs.
The final aspect of this XAML file is the <x:Code> element, which allows you to author event handlers and other methods of this class directly within an *.xaml file. As a safety measure, the code itself is wrapped within a CDATA scope to prevent XML parsers from attempting to directly interpret the data (although this is not strictly required for the current example).
It is important to point out that authoring functionality within a <Code> element is not recommended. Although this “single-file approach” isolates all the action to one location, inline code does not provide a clear separation of concerns between UI markup and programming logic. In most WPF applications, implementation code will be found within a related C# file (which you will do eventually).
Defining the Application Object in XAML
Remember that XAML can be used to define in markup any nonabstract .NET class that supports a default constructor. Given this, you could most certainly define your application object in markup as well. Consider the following content within a new file, MyApp.xaml:
<!-- The Main() method seems to be missing!
However, the StartupUri attribute is the
functional equivalent -->
<Application x:Class="WpfAppAllXaml.MyApp"
xmlns="http://schemas.microsoft.com/winfx/2006/xaml/presentation"
xmlns:x="http://schemas.microsoft.com/winfx/2006/xaml"
StartupUri="MainWindow.xaml">
</Application>
Here, you might agree, the mapping between the Application-derived C# class type and its XAML description is not as clear-cut as was the case for your MainWindow’s XAML definition. Specifically, there does not seem to be any trace of a Main() method. Given that any .NET executable must have a program entry point, you are correct to assume it is generated at compile time, based in part on the StartupUri property. The value assigned to StartupUri represents which XAML resource to load when the application starts up. In this example, you have set theStartupUri property to the name of XAML resource defining your initial Window object, MainWindow.xaml.
Although the Main() method is automatically created at compile time, you are free to use the <x:Code> element to capture other C# code blocks. For example, if you want to display a message when your program shuts down, you can handle the Exit event and implement it as so (note that the opening <Application> element has now set the Exit attribute to capture the Exit event of the Application class):
<Application x:Class="WpfAppAllXaml.MyApp"
xmlns="http://schemas.microsoft.com/winfx/2006/xaml/presentation"
xmlns:x="http://schemas.microsoft.com/winfx/2006/xaml"
StartupUri="MainWindow.xaml" Exit ="AppExit">
<x:Code>
<![CDATA[
private void AppExit(object sender, ExitEventArgs e)
{
MessageBox.Show("App has exited");
}
]]>
</x:Code>
</Application>
Processing the XAML Files Using msbuild.exe
At this point, you are ready to transform your markup into a valid .NET assembly. However, you cannot directly use the C# compiler to do so. To date, the C# compiler does not have a native understanding of XAML markup. However, the msbuild.exe command-line utility does understand how to transform XAML into C# code and compile this code on the fly when it is informed of the correct *.targets files.
Msbuild.exe is a tool that will compile .NET code based on the instructions contained within an XML-based build script. As it turns out, these build script files contain the exact same sort of data that is found in the *.csproj file generated by Visual Studio. Therefore, it is possible to compile a .NET program at the command line using msbuild.exe or using Visual Studio itself.
![]() Note A full examination of the msbuild.exe utility is beyond the scope of this chapter. If you’d like to learn more, perform a search for the topic “MSBuild” in the .NET Framework 4.6 SDK documentation.
Note A full examination of the msbuild.exe utility is beyond the scope of this chapter. If you’d like to learn more, perform a search for the topic “MSBuild” in the .NET Framework 4.6 SDK documentation.
Here is a very simple build script, WpfAppAllXaml.csproj, which contains just enough information to inform msbuild.exe how to transform your XAML files into a related C# code base:
<Project DefaultTargets="Build"
xmlns="http://schemas.microsoft.com/developer/msbuild/2003">
<PropertyGroup>
<RootNamespace>WpfAppAllXaml</RootNamespace>
<AssemblyName>WpfAppAllXaml</AssemblyName>
<OutputType>winexe</OutputType>
</PropertyGroup>
<ItemGroup>
<Reference Include="System" />
<Reference Include="System.XAML" />
<Reference Include="WindowsBase" />
<Reference Include="PresentationCore" />
<Reference Include="PresentationFramework" />
</ItemGroup>
<ItemGroup>
<ApplicationDefinition Include="MyApp.xaml" />
<Page Include="MainWindow.xaml" />
</ItemGroup>
<Import Project="$(MSBuildBinPath)\Microsoft.CSharp.targets" />
</Project>
![]() Note This *.csproj file cannot be loaded directly into Visual Studio because it contains only the minimal instructions necessary to build your application at the command line.
Note This *.csproj file cannot be loaded directly into Visual Studio because it contains only the minimal instructions necessary to build your application at the command line.
The <PropertyGroup> element is used to specify some basic aspects of the build, such as the root namespace, the name of the resulting assembly, and the output type (the equivalent of the /target:winexe option of csc.exe).
The first <ItemGroup> specifies the set of external assemblies to reference with the current build, which, as you can see, are the core WPF assemblies examined earlier in this chapter.
The second <ItemGroup> is much more interesting. Notice that the <ApplicationDefinition> element’s Include attribute is assigned to the *.xaml file that defines your application object. The <Page>’s Include attribute can be used to list each of the remaining*.xaml files that define the windows (and pages, which are often used when building XAML browser applications) processed by the application object.
However, the magic of this build script is the final <Import> element. Here, you are referencing Microsoft.CSharp.Targets , which contains data to interact with the C# compiler itself.
In any case, at this point you can use a developer command prompt to process your XAML data with msbuild.exe. To do so, change to the directory containing your MainWindow.xaml, MyApp.xaml and WpfAppAllXaml.csproj files, and enter the following command:
msbuild WpfAppAllXaml.csproj
After the build process has completed, you will find that your working directory now contains a \bin and \obj subdirectory (just like a Visual Studio project). If you were to open the \bin\Debug folder, you would find a new .NET assembly named WpfAppAllXaml.exe. If you open this assembly into ildasm.exe, you can see that your XAML has been transformed into a valid executable application (see Figure 26-9).
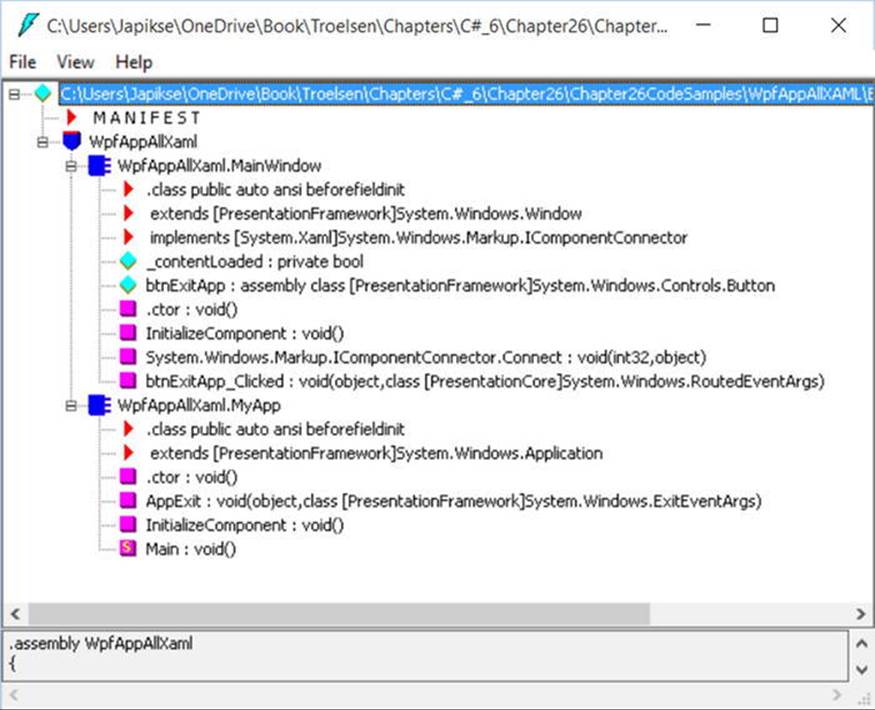
Figure 26-9. Transforming XAML into a .NET executable? Interesting . . .
And if you run your program by double-clicking the executable, you will see your main window launch on the screen.
Transforming Markup into a .NET Assembly
To understand exactly how your markup was transformed into a .NET assembly, you need to dig a bit deeper into the msbuild.exe process and examine a number of compiler-generated files, including a particular binary resource embedded within the assembly at compile time. The first task is to learn how your *.xaml files are transformed into a corresponding C# code base.
Mapping the Window XAML Markup to C# Code
The *.targets files specified in an msbuild script contain numerous instructions to translate XAML elements into C# code. When msbuild.exe processed your *.csproj file, it produced two files with the form of *.g.cs (where g denotes autogenerated) that were saved into the\obj\Debug directory. Based on the names of your *.xaml file names, the C# files in question are MainWindow.g.cs and MyApp.g.cs.
If you open the MainWindow.g.cs file into a text editor, you will find a class named MainWindow, which extends the Window base class. The name of this class is a direct result of the x:Class attribute in the <Window> start tag. This class also contains a member variable of typeSystem.Windows.Controls.Button, named btnExitApp. In this case, the name of the control is based on the x:Name attribute value within the opening <Button> declaration. This class also contains the handler for the button’s Click event, btnExitApp_Clicked(). Here is a partial listing of this compiler-generated MainWindow.g.cs file:
public partial class MainWindow :
System.Windows.Window, System.Windows.Markup.IComponentConnector
{
internal System.Windows.Controls.Button btnExitApp;
private void btnExitApp_Clicked(object sender, RoutedEventArgs e)
{
this.Close();
}
...
}
This class defines a private member variable of type bool (named _contentLoaded), which was not directly accounted for in the XAML markup. This data member is used to determine (and ensure) the content of the window is assigned only once.
public partial class MainWindow :
System.Windows.Window, System.Windows.Markup.IComponentConnector
{
// This member variable will be explained soon enough.
private bool _contentLoaded;
...
}
Notice that the compiler-generated class also explicitly implements the WPF IComponentConnector interface defined in the System.Windows.Markup namespace. This interface defines a single method called Connect(), which has been implemented to prep each control defined in the markup and rig up the event logic as specified within the original MainWindow.xaml file. Before the method completes, the _contentLoaded member variable is set to true. Here is the crux of the method:
void System.Windows.Markup.IComponentConnector.Connect(int connectionId, object target)
{
switch (connectionId)
{
case 1:
this.btnExitApp = ((System.Windows.Controls.Button)(target));
this.btnExitApp.Click += new
System.Windows.RoutedEventHandler(this.btnExitApp_Clicked);
return;
}
this._contentLoaded = true;
}
Last but not least, the MainWindow class also defines and implements a method named InitializeComponent(). You might expect that this method contains code that sets up the look and feel of each control by setting various properties (Height, Width, Content, etc.). However, this is not the case! How then do the controls take on the correct UI? The logic with InitializeComponent() resolves the location of an embedded assembly resource that is named identical to the original *.xaml file, like so:
public void InitializeComponent()
{
if (_contentLoaded)
{
return;
}
_contentLoaded = true;
System.Uri resourceLocater = new
System.Uri("/WpfAppAllXaml;component/mainwindow.xaml",
System.UriKind.Relative);
System.Windows.Application.LoadComponent(this, resourceLocater);
}
At this point, the question becomes, what exactly is this embedded resource?
The Role of BAML
When msbuild.exe processed your *.csproj file, it generated a file taking a *.baml file extension. The full name of this file is named based on the initial MainWindow.xaml file. Therefore, you should see a file called MainWindow.baml in the \obj\Debug folder (see Figure 26-10).
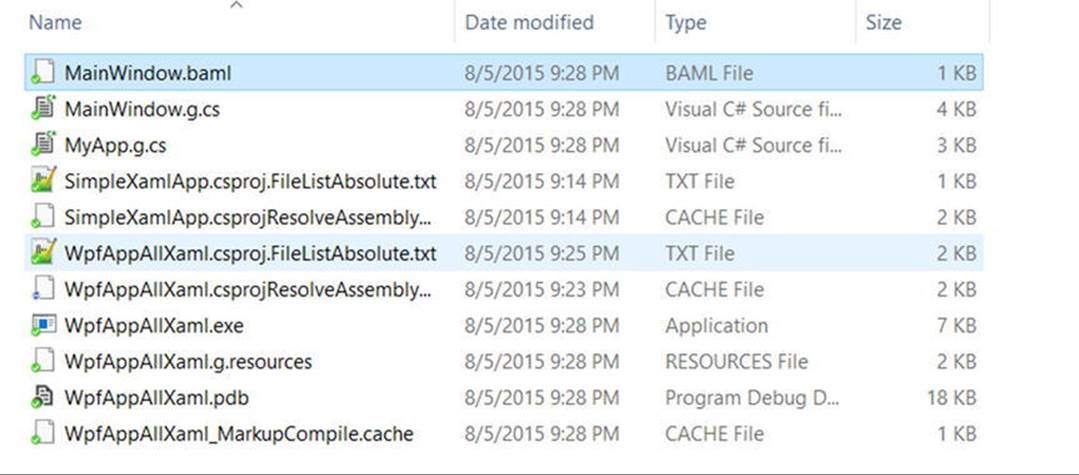
Figure 26-10. BAML is simply a compact, binary version of XAML
As you might have guessed from the name, Binary Application Markup Language (BAML) is a compact, binary representation of the original XAML data. This *.baml file is embedded as a resource (via a generated *.g.resources file) into the compiled assembly.
This BAML resource contains all of the data needed to establish the look and feel of the UI widgets (again, such as the Height and Width properties).
The important take-away here is to understand that a WPF application contains within itself a binary representation (the BAML) of the markup. At runtime, this BAML will be plucked out of the resource container and used to make sure all windows and controls are initialized to the correct look and feel.
Also, remember that the name of these binary resources are identical to the name of the stand-alone *.xaml files you authored. However, this does not imply in any way that you must distribute the loose *.xaml files with your compiled WPF program. Unless you build a WPF application that will dynamically load and parse *.xaml files at runtime, you will never need to ship the original markup.
Mapping the Application XAML Markup to C# Code
The final piece of the autogenerated code to examine is the MyApp.g.cs file. Here, you see your Application-derived class with a proper Main() entry point method. The implementation of this method calls InitializeComponent() on the Application-derived type, which, in turn, sets the StartupUri property, allowing each of the objects to establish its correct property settings based on the binary XAML definition.
namespace WpfAppAllXaml
{
public partial class MyApp : System.Windows.Application
{
void AppExit(object sender, ExitEventArgs e)
{
MessageBox.Show("App has exited");
}
[System.Diagnostics.DebuggerNonUserCodeAttribute()]
public void InitializeComponent()
{
this.Exit += new System.Windows.ExitEventHandler(this.AppExit);
this.StartupUri = new System.Uri("MainWindow.xaml", System.UriKind.Relative);
}
[System.STAThreadAttribute()]
[System.Diagnostics.DebuggerNonUserCodeAttribute()]
public static void Main() {
WpfAppAllXaml.MyApp app = new WpfAppAllXaml.MyApp();
app.InitializeComponent();
app.Run();
}
}
}
XAML-to-Assembly Process Summary
So at this point in the chapter, you have created a full-blown WPF program using nothing but two XAML files and a related build script. As you have seen, msbuild.exe leverages auxiliary settings defined within the *.targets file to process the XAML files (and generate the*.baml) for the build process. Figure 26-11 illustrates the overall picture regarding the compile-time processing of *.xaml files.
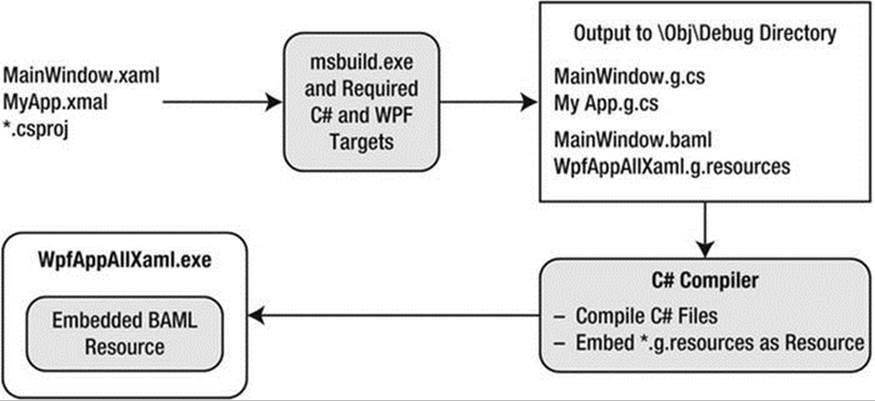
Figure 26-11. The XAML-to-assembly compile-time process
Hopefully you now have a much better idea how XAML data is used to build a .NET application. At this point, you are ready to take a look at the syntax and semantics of XAML itself.
![]() Source Code The WpfAppAllXaml project can be found in the Chapter 26 subdirectory.
Source Code The WpfAppAllXaml project can be found in the Chapter 26 subdirectory.
Understanding the Syntax of WPF XAML
Production-level WPF applications will typically make use of dedicated tools to generate the necessary XAML. As helpful as these tools are, it is a very good idea to have an understanding of the overall structure of XAML markup. To help in your learning process, allow me to introduce a very popular (and free) tool that allows you to easily experiment with XAML.
Introducing Kaxaml
When you are first learning the grammar of XAML, it can be very helpful to use a free tool named Kaxaml. You can obtain this popular XAML editor/parser from the following web site:
http://www.kaxaml.com
Kaxaml is helpful in that it has no clue about C# source code, event handlers, or implementation logic. It is a much more straightforward way to test XAML snippets than using a full-blown Visual Studio WPF project template. As well, Kaxaml has a number of integrated tools, such as a color chooser, XAML snippet manager, and even an “XAML scrubber” option that will format your XAML based on your settings. When you first open Kaxaml, you will find simple markup for a <Page> control, as follows:
<Page
xmlns="http://schemas.microsoft.com/winfx/2006/xaml/presentation"
xmlns:x="http://schemas.microsoft.com/winfx/2006/xaml">
<Grid>
</Grid>
</Page>
Like a Window, a Page contains various layout managers and controls. However, unlike a Window, Page objects cannot run as stand-alone entities. Rather, they must be placed inside a suitable host such as a NavigationWindow, Frame, or a web browser (and in that case, you have just made an XBAP!). The good news is that you can type identical markup within a <Page> or <Window> scope.
![]() Note If you change the <Page> and </Page> elements in the Kaxaml markup window to <Window> and </Window>, you can press the F5 key to load a new window onto the screen.
Note If you change the <Page> and </Page> elements in the Kaxaml markup window to <Window> and </Window>, you can press the F5 key to load a new window onto the screen.
As an initial test, enter the following markup into the XAML pane at the bottom of the tool:
<Page
xmlns="http://schemas.microsoft.com/winfx/2006/xaml/presentation"
xmlns:x="http://schemas.microsoft.com/winfx/2006/xaml">
<Grid>
<!-- A button with custom content -->
<Button Height="100" Width="100">
<Ellipse Fill="Green" Height="50" Width="50"/>
</Button>
</Grid>
</Page>
You should now see your page render at the upper part of the Kaxaml editor (see Figure 26-12).
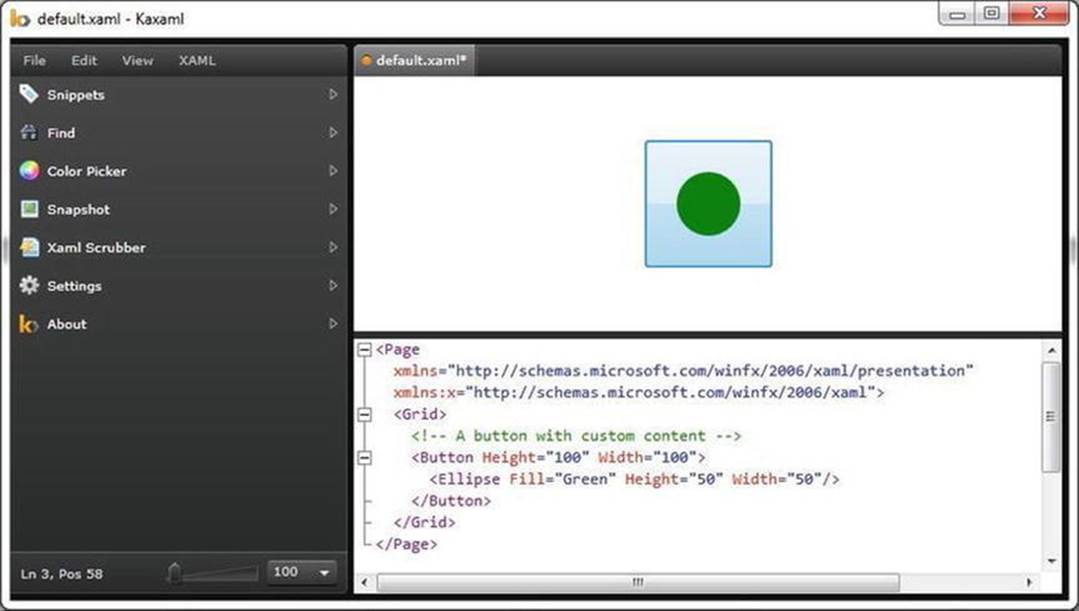
Figure 26-12. Kaxaml is a very helpful (and free) tool used to learn the grammar of XAML
As you work with Kaxaml, remember that this tool does not allow you to author any markup that entails code compilation (however, using x:Name is allowed). This includes defining a x:Class attribute (for specifying a code file), entering event handler names in markup, or using any XAML keywords that also entail code compilation (such as FieldModifier or ClassModifier). Any attempt to do so will result in a markup error.
XAML XML Namespaces and XAML “Keywords”
The root element of a WPF XAML document (such as a <Window>, <Page>, <UserControl>, or <Application> definition) will almost always make reference to the following two predefined XML namespaces:
<Page
xmlns="http://schemas.microsoft.com/winfx/2006/xaml/presentation"
xmlns:x="http://schemas.microsoft.com/winfx/2006/xaml">
<Grid>
</Grid>
</Page>
The first XML namespace, http://schemas.microsoft.com/winfx/2006/xaml/presentation, maps a slew of WPF .NET namespaces for use by the current *.xaml file (System.Windows, System.Windows.Controls, System.Windows.Data,System.Windows.Ink, System.Windows.Media, System.Windows.Navigation, etc.).
This one-to-many mapping is actually hard-coded within the WPF assemblies (WindowsBase.dll, PresentationCore.dll, and PresentationFramework.dll) using the assembly-level [XmlnsDefinition] attribute. For example, if you open the Visual Studio object browser and select the PresentationCore.dll assembly, you will see listings such as the following, which essentially imports System.Windows:
[assembly: XmlnsDefinition("http://schemas.microsoft.com/winfx/2006/xaml/presentation",
"System.Windows")]
The second XML namespace, http://schemas.microsoft.com/winfx/2006/xaml, is used to include XAML-specific “keywords” (for lack of a better term) as well as the inclusion of the System.Windows.Markup namespace, as follows:
[assembly: XmlnsDefinition("http://schemas.microsoft.com/winfx/2006/xaml",
"System.Windows.Markup")]
One rule of any well-formed XML document (remember, XAML is an XML-based grammar) is that the opening root element designates one XML namespace as the primary namespace, which typically is the namespace that contains the most commonly used items. If a root element requires the inclusion of additional secondary namespaces (as seen here), they must be defined using a unique tag prefix (to resolve any possible name clashes). As a convention, the prefix is simply x; however, this can be any unique token you require, such as XamlSpecificStuff.
<Page
xmlns="http://schemas.microsoft.com/winfx/2006/xaml/presentation"
xmlns:XamlSpecificStuff="http://schemas.microsoft.com/winfx/2006/xaml">
<Grid>
<!-- A button with custom content -->
<Button XamlSpecificStuff:Name="button1" Height="100" Width="100">
<Ellipse Fill="Green" Height="50" Width="50"/>
</Button>
</Grid>
</Page>
The obvious downside of defining wordy XML namespace prefixes is you are required to type XamlSpecificStuff each time your XAML file needs to refer to one of the items defined within this XAML-centric XML namespace. Given that XamlSpecificStuff requires many additional keystrokes, just stick with x.
In any case, beyond the x:Name, x:Class and x:Code keywords, the http://schemas.microsoft.com/winfx/2006/xaml XML namespace also provides access to additional XAML keywords, the most common of which are shown in Table 26-9.
Table 26-9. XAML Keywords
|
XAML Keyword |
Meaning in Life |
|
x:Array |
Represents a .NET array type in XAML. |
|
x:ClassModifier |
Allows you to define the visibility of the C# class (internal or public) denoted by the Class keyword. |
|
x:FieldModifier |
Allows you to define the visibility of a type member (internal, public, private, or protected) for any named subelement of the root (e.g., a <Button> within a <Window> element). A named element is defined using the Name XAML keyword. |
|
x:Key |
Allows you to establish a key value for a XAML item that will be placed into a dictionary element. |
|
x:Name |
Allows you to specify the generated C# name of a given XAML element. |
|
x:Null |
Represents a null reference. |
|
x:Static |
Allows you to make reference to a static member of a type. |
|
x:Type |
The XAML equivalent of the C# typeof operator (it will yield a System.Type based on the supplied name). |
|
x:TypeArguments |
Allows you to establish an element as a generic type with a specific type parameter (e.g., List<int> vs. List<bool>). |
In addition to these two necessary XML namespace declarations, it is possible, and sometimes necessary, to define additional tag prefixes in the opening element of a XAML document. You will typically do so whenever you need to describe in XAML a .NET class defined in an external assembly.
For example, say you have built a few custom WPF controls and packaged them in a library named MyControls.dll. Now, if you want to create a new Window that uses these controls, you can establish a custom XML namespace that maps to your library using the clr-namespace and assembly tokens. Here is some example markup that creates a tag prefix named myCtrls, which can be used to access controls in your library:
<Window x:Class="WpfApplication1.MainWindow"
xmlns="http://schemas.microsoft.com/winfx/2006/xaml/presentation"
xmlns:x="http://schemas.microsoft.com/winfx/2006/xaml"
xmlns:myCtrls="clr-namespace:MyControls;assembly=MyControls"
Title="MainWindow" Height="350" Width="525">
<Grid>
<myCtrls:MyCustomControl />
</Grid>
</Window>
The clr-namespace token is assigned to the name of the .NET namespace in the assembly, while the assembly token is set to the friendly name of the external *.dll assembly. You can use this syntax for any external .NET library you would like to manipulate in markup. While there is no need to do so at the current time, future chapters will require you to define custom XML namespace declarations to describe types in markup.
![]() Note If you need to define a class in markup that is part of the current assembly, but in a different .NET namespace, your xmlns tag prefix is defined without the assembly= attribute, like so:
Note If you need to define a class in markup that is part of the current assembly, but in a different .NET namespace, your xmlns tag prefix is defined without the assembly= attribute, like so:
xmlns:myCtrls="clr-namespace:SomeNamespaceInMyApp"
Controlling Class and Member Variable Visibility
You will see many of these keywords in action where required in the chapters to come; however, by way of a simple example, consider the following XAML <Window> definition that makes use of the ClassModifier and FieldModifier keywords, as well as x:Name and x:Class(remember that kaxaml.exe will not allow you to make use of any XAML keyword that entails code compilation, such as x:Code, x:FieldModifier, or x:ClassModifier):
<!-- This class will now be declared internal in the *.g.cs file -->
<Window x:Class="MyWPFApp.MainWindow" x:ClassModifier ="internal"
xmlns="http://schemas.microsoft.com/winfx/2006/xaml/presentation"
xmlns:x="http://schemas.microsoft.com/winfx/2006/xaml">
<!-- This button will be public in the *.g.cs file -->
<Button x:Name ="myButton" x:FieldModifier ="public" Content = "OK"/>
</Window>
By default, all C#/XAML type definitions are public, while members default to internal. However, based on your XAML definition, the resulting autogenerated file contains an internal class type with a public Button variable.
internal partial class MainWindow : System.Windows.Window,
System.Windows.Markup.IComponentConnector
{
public System.Windows.Controls.Button myButton;
...
}
XAML Elements, XAML Attributes, and Type Converters
After you have established your root element and any required XML namespaces, your next task is to populate the root with a child element. In a real-world WPF application, the child will be a layout manager (such as a Grid or StackPanel) that contains, in turn, any number of additional UI elements that describe the user interface. The next chapter examines these layout managers in detail, so for now just assume that your <Window> type will contain a single Button element.
As you have already seen over the course of this chapter, XAML elements map to a class or structure type within a given .NET namespace, while the attributes within the opening element tag map to properties or events of the type. To illustrate, enter the following <Button> definition into Kaxaml:
<Page
xmlns="http://schemas.microsoft.com/winfx/2006/xaml/presentation"
xmlns:x="http://schemas.microsoft.com/winfx/2006/xaml">
<Grid>
<!-- Configure the look and feel of a Button -->
<Button Height="50" Width="100" Content="OK!"
FontSize="20" Background="Green" Foreground="Yellow"/>
</Grid>
</Page>
Notice that the values assigned to each property have been captured as a simple text value. This may seem like a complete mismatch of data types because if you were to make this Button in C# code, you would not assign string objects to these properties but would make use of specific data types. For example, here is the same button authored in code:
public void MakeAButton()
{
Button myBtn = new Button();
myBtn.Height = 50;
myBtn.Width = 100;
myBtn.FontSize = 20;
myBtn.Content = "OK!";
myBtn.Background = new SolidColorBrush(Colors.Green);
myBtn.Foreground = new SolidColorBrush(Colors.Yellow);
}
As it turns out, WPF ships with a number of type converter classes, which will be used to transform simple text values into the correct underlying data type. This process happens transparently (and automatically).
While this is all well and good, there will be many times when you need to assign a much more complex value to a XAML attribute, which cannot be captured as a simple string. For example, let’s say you want to build a custom brush to set the Background property of the Button. If you are building the brush in code, it is quite straightforward, as seen here:
public void MakeAButton()
{
...
// A fancy brush for the background.
LinearGradientBrush fancyBruch =
new LinearGradientBrush(Colors.DarkGreen, Colors.LightGreen, 45);
myBtn.Background = fancyBruch;
myBtn.Foreground = new SolidColorBrush(Colors.Yellow);
}
How, however, can you represent your complex brush as a string? Well, you can’t! Thankfully, XAML provides a special syntax that can be used whenever you need to assign a property value to a complex object, termed property-element syntax.
Understanding XAML Property-Element Syntax
Property-element syntax allows you to assign complex objects to a property. Here is a XAML description for a Button that makes use of a LinearGradientBrush to set its Background property:
<Button Height="50" Width="100" Content="OK!"
FontSize="20" Foreground="Yellow">
<Button.Background>
<LinearGradientBrush>
<GradientStop Color="DarkGreen" Offset="0"/>
<GradientStop Color="LightGreen" Offset="1"/>
</LinearGradientBrush>
</Button.Background>
</Button>
Notice that within the scope of the <Button> and </Button> tags, you have defined a subscope named <Button.Background>. Within this scope, you have defined a custom <LinearGradientBrush>. (Don’t worry about the exact code for the brush; you’ll learn about WPF graphics in Chapter 28.)
Generally speaking, any property can be set using property-element syntax, which always breaks down to the following pattern:
<DefiningClass>
<DefiningClass.PropertyOnDefiningClass>
<!-- Value for Property here! -->
</DefiningClass.PropertyOnDefiningClass>
</DefiningClass>
While any property could be set using this syntax, if you can capture a value as a simple string, you will save yourself typing time. For example, here is a much more verbose way to set the Width of your Button:
<Button Height="50" Content="OK!"
FontSize="20" Foreground="Yellow">
...
<Button.Width>
100
</Button.Width>
</Button>
Understanding XAML Attached Properties
In addition to property-element syntax, XAML defines a special syntax used to set a value to an attached property. Essentially, an attached property allows a child element to set the value for a property that is actually defined in a parent element. The general template to follow looks like this:
<ParentElement>
<ChildElement ParentElement.PropertyOnParent = "Value">
</ParentElement>
The most common use of attached property syntax is to position UI elements within one of the WPF layout manager classes (Grid, DockPanel, etc.). The next chapter dives into these panels in some detail; for now, enter the following in Kaxaml:
<Page
xmlns="http://schemas.microsoft.com/winfx/2006/xaml/presentation"
xmlns:x="http://schemas.microsoft.com/winfx/2006/xaml">
<Canvas Height="200" Width="200" Background="LightBlue">
<Ellipse Canvas.Top="40" Canvas.Left="40" Height="20" Width="20" Fill="DarkBlue"/>
</Canvas>
</Page>
Here, you have defined a Canvas layout manager that contains an Ellipse. Notice that the Ellipse is able to inform its parent (the Canvas) where to position its top/left position using attached property syntax.
There are a few items to be aware of regarding attached properties. First and foremost, this is not an all-purpose syntax that can be applied to any property of any parent. For example, the following XAML cannot be parsed without error:
<!-- Error! Set Background property on Canvas via attached property? -->
<Canvas Height="200" Width="200">
<Ellipse Canvas.Background="LightBlue"
Canvas.Top="40" Canvas.Left="90"
Height="20" Width="20" Fill="DarkBlue"/>
</Canvas>
In reality, attached properties are a specialized form of a WPF-specific concept termed a dependency property. Unless a property was implemented in a very specific manner, you cannot set its value using attached property syntax. You will explore dependency properties in a detail inChapter 27.
![]() Note Kaxaml, Visual Studio, and Expression Blend (a free companion tool that ships with Visual Studio 2015 and is useful for editing XAML based applications) all have IntelliSense, which will show you valid attached properties that can be set by a given element.
Note Kaxaml, Visual Studio, and Expression Blend (a free companion tool that ships with Visual Studio 2015 and is useful for editing XAML based applications) all have IntelliSense, which will show you valid attached properties that can be set by a given element.
Understanding XAML Markup Extensions
As explained, property values are most often represented using a simple string or via property-element syntax. There is, however, another way to specify the value of a XAML attribute, using markup extensions. Markup extensions allow a XAML parser to obtain the value for a property from a dedicated, external class. This can be very beneficial, given that some property values require a number of code statements to execute to figure out the value.
Markup extensions provide a way to cleanly extend the grammar of XAML with new functionality. A markup extension is represented internally as a class that derives from MarkupExtension. Note that the chances of you ever needing to build a custom markup extension will be slim to none. However, a subset of XAML keywords (such as x:Array, x:Null, x:Static, and x:Type) are markup extensions in disguise!
A markup extension is sandwiched between curly brackets, like so:
<Element PropertyToSet = "{MarkUpExtension}"/>
To see some markup extensions in action, author the following into Kaxaml:
<Page
xmlns="http://schemas.microsoft.com/winfx/2006/xaml/presentation"
xmlns:x="http://schemas.microsoft.com/winfx/2006/xaml"
xmlns:CorLib="clr-namespace:System;assembly=mscorlib">
<StackPanel>
<!-- The Static markup extension lets us obtain a value
from a static member of a class -->
<Label Content ="{x:Static CorLib:Environment.OSVersion}"/>
<Label Content ="{x:Static CorLib:Environment.ProcessorCount}"/>
<!-- The Type markup extension is a XAML verion of
the C# typeof operator -->
<Label Content ="{x:Type Button}" />
<Label Content ="{x:Type CorLib:Boolean}" />
<!-- Fill a ListBox with an array of strings! -->
<ListBox Width="200" Height="50">
<ListBox.ItemsSource>
<x:Array Type="CorLib:String">
<CorLib:String>Sun Kil Moon</CorLib:String>
<CorLib:String>Red House Painters</CorLib:String>
<CorLib:String>Besnard Lakes</CorLib:String>
</x:Array>
</ListBox.ItemsSource>
</ListBox>
</StackPanel>
</Page>
First, notice that the <Page> definition has a new XML namespace declaration, which allows you to gain access to the System namespace of mscorlib.dll. With this XML namespace established, you first make use of the x:Static markup extension and grab values fromOSVersion and ProcessorCount of the System.Environment class.
The x:Type markup extension allows you to gain access to the metadata description of the specified item. Here, you are simply assigning the fully qualified names of the WPF Button and System.Boolean types.
The most interesting part of this markup is the ListBox. Here, you are setting the ItemsSource property to an array of strings declared entirely in markup! Notice here how the x:Array markup extension allows you to specify a set of subitems within its scope:
<x:Array Type="CorLib:String">
<CorLib:String>Sun Kil Moon</CorLib:String>
<CorLib:String>Red House Painters</CorLib:String>
<CorLib:String>Besnard Lakes</CorLib:String>
</x:Array>
![]() Note The previous XAML example is only used to illustrate a markup extension in action. As you will see in Chapter 27, there are much easier ways to populate ListBox controls!
Note The previous XAML example is only used to illustrate a markup extension in action. As you will see in Chapter 27, there are much easier ways to populate ListBox controls!
Figure 26-13 shows the mark up of this <Page> in Kaxaml.
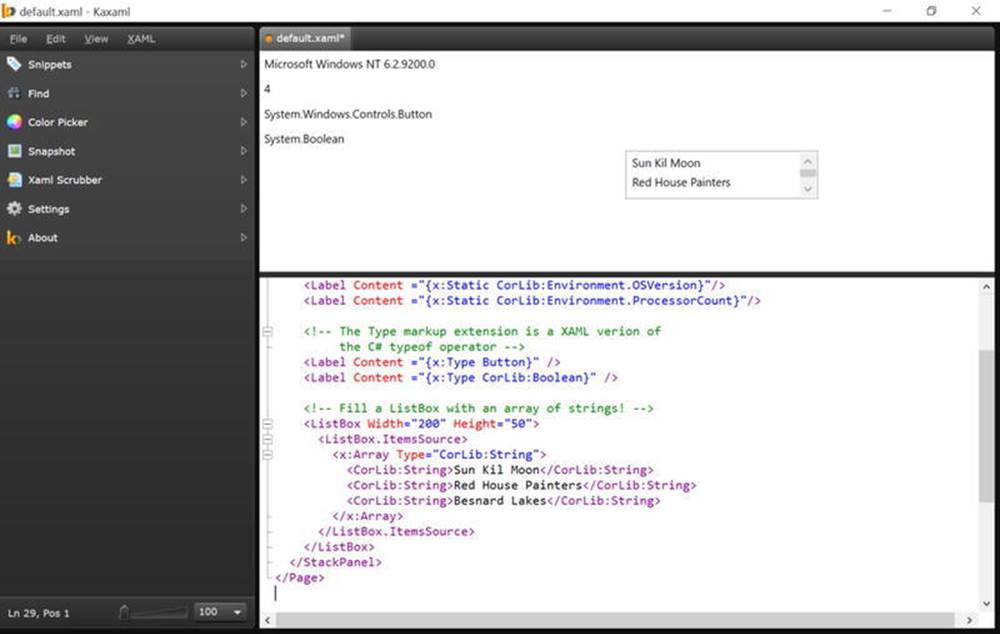
Figure 26-13. Markup extensions allow you to set values via the functionality of a dedicated class
You have now seen numerous examples that showcase each of the core aspects of the XAML syntax. As you might agree, XAML is very interesting in that it allows you to describe a tree of .NET objects in a declarative manner. While this is extremely helpful when configuring graphical user interfaces, do remember that XAML can describe any type from any assembly, provided it is a nonabstract type containing a default constructor.
Building a WPF Application Using Code-Behind Files
The first two examples of this chapter illustrated the extreme ends of building a WPF application, using all code or using all XAML. The recommended way to build any WPF application, however, is to use the code file approach. Under this model, the XAML files of your project contain nothing but the markup that describes the general state of your classes, while the code file contains the implementation details.
Adding a Code File for the MainWindow Class
To illustrate, you will update the WpfAppAllXaml example to use code files. If you are following along, copy this entire folder and give it the name WpfAppCodeFiles. Now, create a new C# code file in this folder named MainWindow.xaml.cs (by convention, the name of a C# code-behind file takes the form *.xaml.cs). Add the following code to this new file:
// MainWindow.xaml.cs
using System;
using System.Windows;
using System.Windows.Controls;
namespace WpfAppAllXaml
{
public partial class MainWindow : Window
{
public MainWindow()
{
// Remember! This method is defined
// within the generated MainWindow.g.cs file.
InitializeComponent();
}
private void btnExitApp_Clicked(object sender, RoutedEventArgs e)
{
this.Close();
}
}
}
Here, you have defined a partial class to contain the event-handling logic that will be merged with the partial class definition of the same type in the *.g.cs file. Given that InitializeComponent() is defined within the MainWindow.g.cs file, your window’s constructor makes a call in order to load and process the embedded BAML resource.
The MainWindow.xaml file will also need to be updated; this simply involves gutting all traces of the previous C# code.
<Window x:Class="WpfAppAllXaml.MainWindow"
xmlns="http://schemas.microsoft.com/winfx/2006/xaml/presentation"
xmlns:x="http://schemas.microsoft.com/winfx/2006/xaml"
Title="A Window built using Code Files!"
Height="200" Width="300"
WindowStartupLocation ="CenterScreen">
<Window.Content>
<!-- The event handler is now in your code file -->
<Button x:Name="btnExitApp" Width="133" Height="24"
Content = "Close Window" Click ="btnExitApp_Clicked"/>
</Window.Content>
</Window>
Adding a Code File for the MyApp Class
If desired, you could also build a code-behind file for your Application-derived type. Because most of the action takes place in the MyApp.g.cs file, the code within MyApp.xaml.cs is little more than the following:
// MyApp.xaml.cs
using System;
using System.Windows;
using System.Windows.Controls;
namespace WpfAppAllXaml
{
public partial class MyApp : Application
{
private void AppExit(object sender, ExitEventArgs e)
{
MessageBox.Show("App has exited");
}
}
}
The MyApp.xaml file now looks like so:
<Application x:Class="WpfAppAllXaml.MyApp"
xmlns="http://schemas.microsoft.com/winfx/2006/xaml/presentation"
xmlns:x="http://schemas.microsoft.com/winfx/2006/xaml"
StartupUri="MainWindow.xaml"
Exit ="AppExit">
</Application>
Processing the Code Files with msbuild.exe
Before you recompile your files using msbuild.exe, you need to update your *.csproj file to account for the new C# files to include in the compilation process, via the <Compile> elements (shown here in bold):
<Project DefaultTargets="Build" xmlns=
"http://schemas.microsoft.com/developer/msbuild/2003">
<PropertyGroup>
<RootNamespace>WpfAppAllXaml</RootNamespace>
<AssemblyName>WpfAppAllXaml</AssemblyName>
<OutputType>winexe</OutputType>
</PropertyGroup>
<ItemGroup>
<Reference Include="System" />
<Reference Include="WindowsBase" />
<Reference Include="PresentationCore" />
<Reference Include="PresentationFramework" />
<Reference Include=”System.Xaml” />
</ItemGroup>
<ItemGroup>
<ApplicationDefinition Include="MyApp.xaml" />
<Compile Include = "MainWindow.xaml.cs" />
<Compile Include = "MyApp.xaml.cs" />
<Page Include="MainWindow.xaml" />
</ItemGroup>
<Import Project="$(MSBuildBinPath)\Microsoft.CSharp.targets" />
</Project>
Once you pass the build script into msbuild.exe via
msbuild WpfAppAllXaml.csproj
you will find, once again, the same executable assembly as the WpfAppAllXaml application (located in the bin\Debug folder, remember?). However, as far as development is concerned, you now have a clean partition of presentation (XAML) from programming logic (C#).
Given that this is the preferred method for WPF development, you’ll be happy to know that WPF applications created using Visual Studio (or Expression Blend) always make use of the code-behind model just presented.
![]() Source Code The WpfAppCodeFiles project can be found in the Chapter 26 subdirectory.
Source Code The WpfAppCodeFiles project can be found in the Chapter 26 subdirectory.
Building WPF Applications Using Visual Studio
Over the course of this chapter you created examples using no-frills text editors, the command-line compiler, and Kaxaml. The reason for doing so, of course, was to focus on the core syntax of WPF applications without getting distracted by the bells and whistles of a graphical designer. Now that you have seen how to build WPF applications from the ground up, let’s examine how Visual Studio can simplify the construction of WPF programs.
![]() Note Here, I will point out some key features of using Visual Studio to build WPF applications. Forthcoming chapters will illustrate additional aspects of the IDE where necessary.
Note Here, I will point out some key features of using Visual Studio to build WPF applications. Forthcoming chapters will illustrate additional aspects of the IDE where necessary.
The WPF Project Templates
The New Project dialog box of Visual Studio defines a set of WPF project workspaces, all of which are contained under the Window node of the Visual C# root. Here, you can choose from a WPF Application, WPF User Control Library, WPF Custom Control Library, and WPF Browser Application (i.e., XBAP). To begin, create a new WPF application named WpfTesterApp (see Figure 26-14).
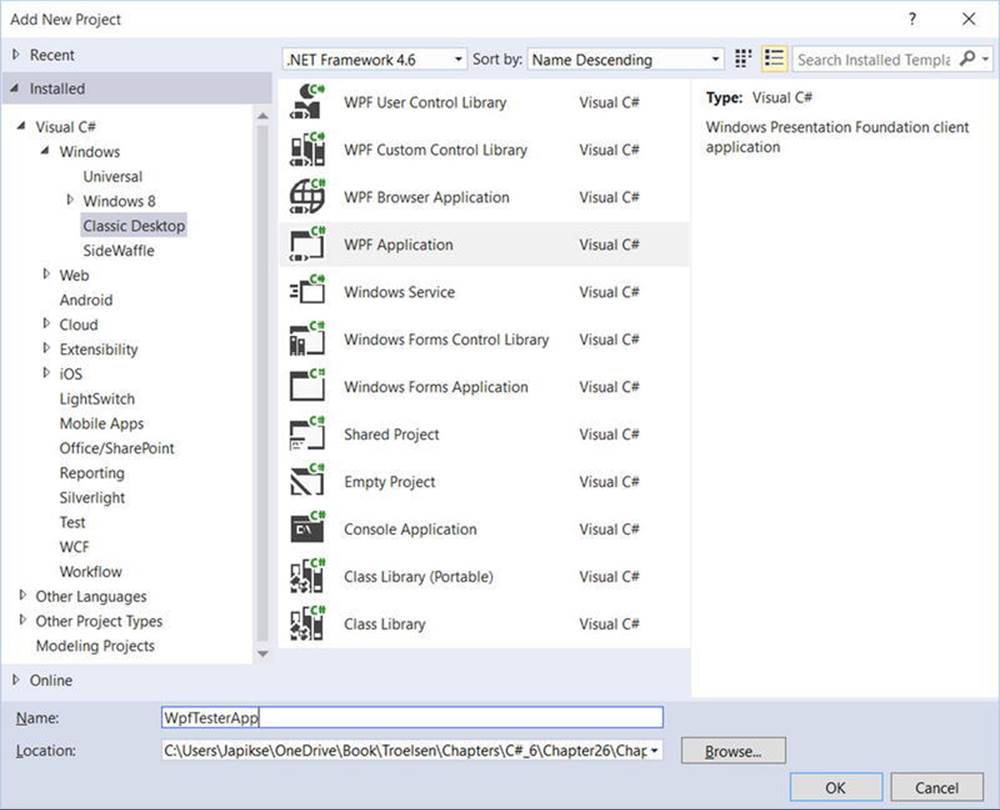
Figure 26-14. The WPF project templates of Visual Studio can be found under the Windows node
Beyond setting references to each of the WPF assemblies (PresentationCore.dll, PresentationFramework.dll, System.Xaml.dll, and WindowsBase.dll), you will also be provided with initial Window and Application derived classes, each represented using a XAML and C# code file. Consider Figure 26-15, which shows the Solution Explorer for this new WPF project.
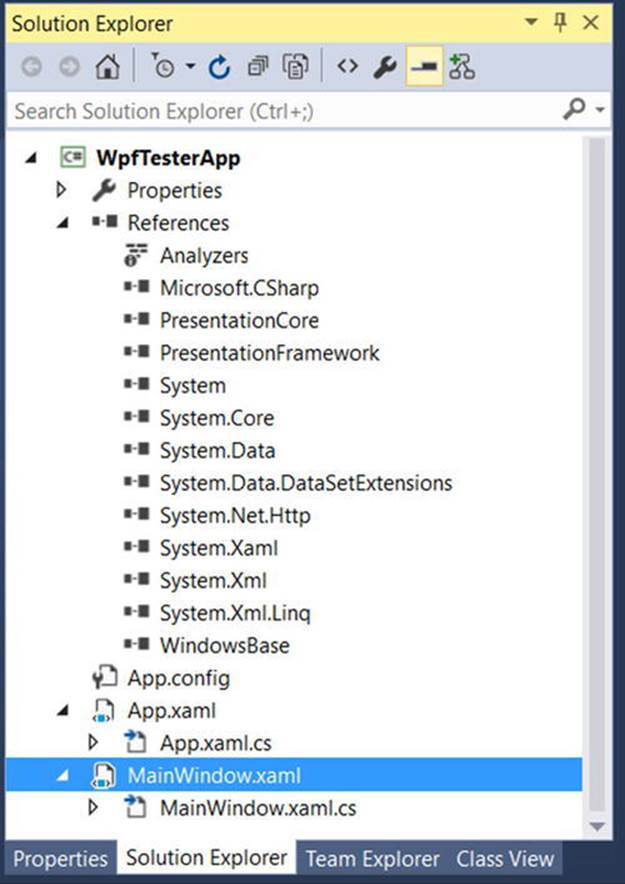
Figure 26-15. The initial files of a WPF application project
The Toolbox and XAML Designer/Editor
Visual Studio provides a toolbox (which you can open via the View menu) that contains numerous WPF controls (see Figure 26-16).
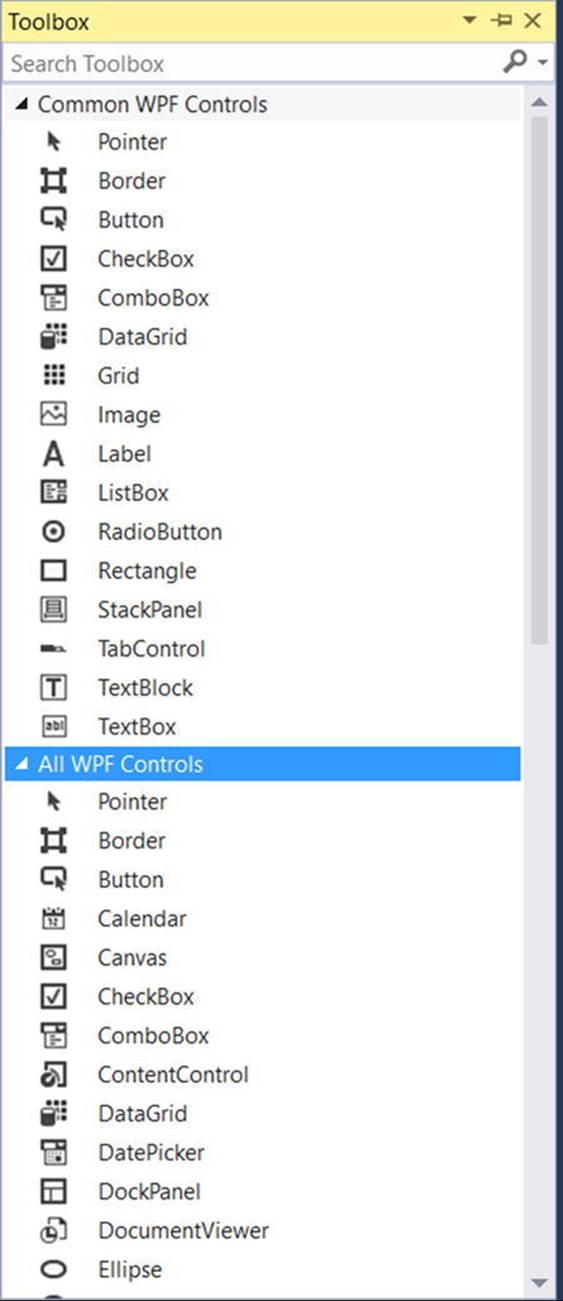
Figure 26-16. The toolbox contains the WPF controls that can be placed on the designer surface
Using a standard mouse drag-and-drop operation, you can place any of these controls onto the Window’s designer surface or drag the control into the XAML markup editor at the bottom of the designer. When you do, the initial XAML will be authored on your behalf. Use your mouse to drag a Button and Calendar control onto the designer surface. After you have done so, notice how you can relocate and resize your controls (and be sure to examine the resulting XAML generated based on your edits).
In addition to building the UI via the mouse and toolbox, you can also manually enter your markup using the integrated XAML editor. As you can see in Figure 26-17, you do get IntelliSense support, which can help simplify the authoring of the markup. For example, try to add theBackground property to the opening <Window> element.
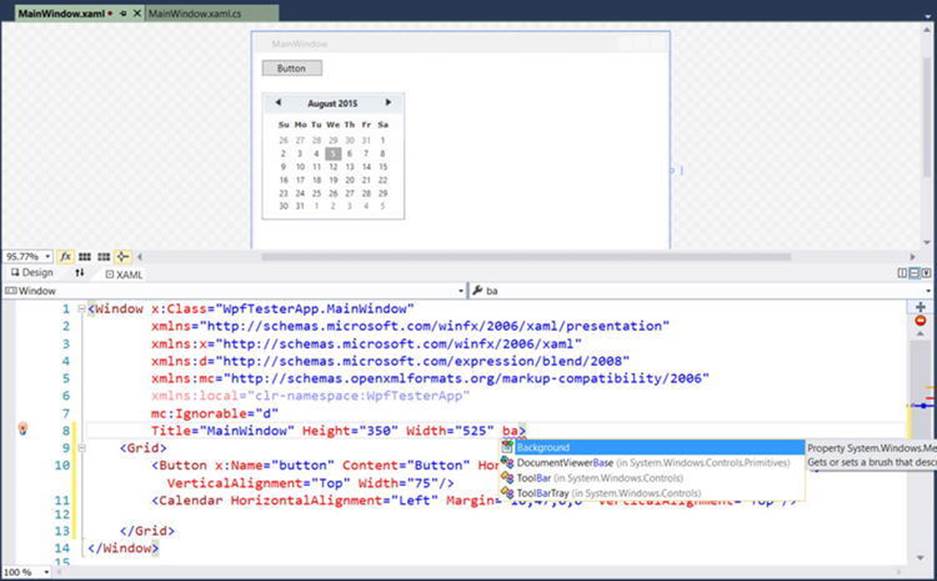
Figure 26-17. The WPF Window designer
Take a few moments to add some property values directly in the XAML editor. Be sure you take the time to become comfortable using this aspect of the WPF designer.
Setting Properties Using the Properties Window
After you have placed some controls onto your designer (or manually defined them in the editor), you can then make use of the Properties window to set property values for the selected control, as well as rig up event handlers for the selected control. By way of a simple test, select yourButton control on the designer. Now, use the Properties window to change the Background color of the Button using the integrated brush editor (see Figure 26-18; you will learn more about the Brushes editor in Chapter 28, during your examination of WPF graphics).
![]() Note The Properties window provides a Search text area mounted on the very top. Type in the name of a property you would like to set to quickly find the item in question.
Note The Properties window provides a Search text area mounted on the very top. Type in the name of a property you would like to set to quickly find the item in question.
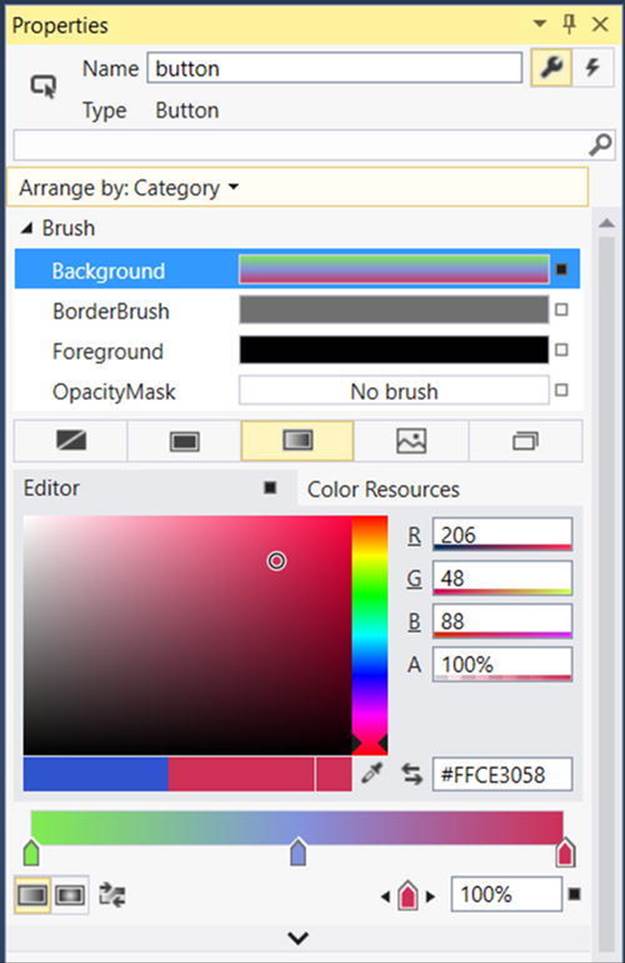
Figure 26-18. The Properties window can be used to configure the UI of a WPF control
After you have finished tinkering with the brush editor, check out the generated markup. It might look something like this:
<Button x:Name="button" Content="Button" HorizontalAlignment="Left" Margin="10,10,0,0"
VerticalAlignment="Top" Width="75">
<Button.Background>
<LinearGradientBrush EndPoint="0.5,1" StartPoint="0.5,0">
<GradientStop Color="#FF80EB4F" Offset="0"/>
<GradientStop Color="#FFCE3058" Offset="1"/>
<GradientStop Color="#FF8293DD" Offset="0.5"/>
</LinearGradientBrush>
</Button.Background>
</Button>
Handling Events Using the Properties Window
If you want to handle events for a given control, you can also make use of the Properties window, but this time you need to click the Events button on the upper right of the Properties window (look for the lightning bolt icon). Ensure that the button is selected on your designer, and locate theClick event. Once you do, double-click directly on the Click event entry. This will cause Visual Studio to automatically build an event handler that takes the following general form:
NameOfControl_NameOfEvent
Since you did not rename your button, the Properties window shows it generated an event handler named Button_Click (see Figure 26-19).
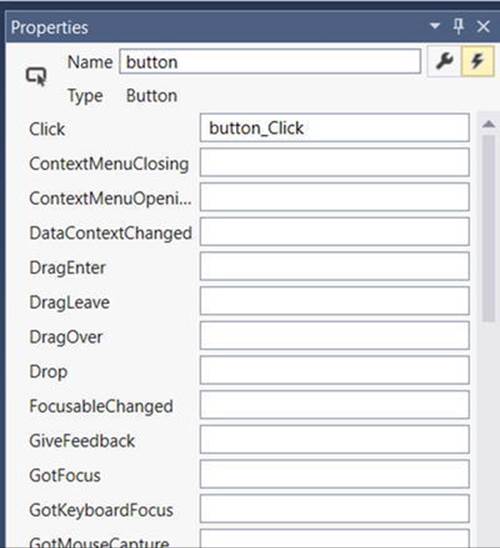
Figure 26-19. Handling events using the Properties window
As well, Visual Studio generated the corresponding C# event handler in your window’s code file. Here, you can add any sort of code that must execute when the button is clicked. For a quick test, just enter the following code statement:
public partial class MainWindow : Window
{
public MainWindow()
{
InitializeComponent();
}
private void Button_Click(object sender, RoutedEventArgs e)
{
MessageBox.Show("You clicked the button!");
}
}
Handling Events in the XAML Editor
You can also handle events directly in the XAML editor. By way of an example, place your mouse within the <Window> element and type in the MouseMove event, followed by the equals sign. Once you do, you will see that Visual Studio displays any compatible handlers in your code file (if they exist), as well as the Create method option (see Figure 26-20).
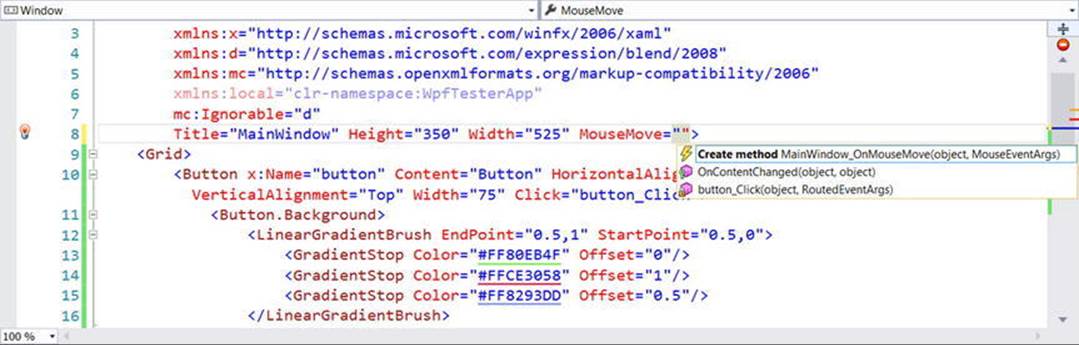
Figure 26-20. Handling events using the XAML editor
Let the IDE create the MouseMove event handler, enter the following code, and then run the application to see the end result:
private void MainWindow_MouseMove (object sender, MouseEventArgs e)
{
this.Title = e.GetPosition(this).ToString();
}
The Document Outline Window
When you work with any XAML-based project (WPF, Silverlight, Windows Phone/Windows 10 Mobile or a Windows 10 Application), you will certainly make use of a healthy amount of markup to represent your UIs. When you begin to work with more complex XAML, it can be useful to visualize the markup in order to quickly select an item to edit on the Visual Studio designer.
Currently, your markup is quite tame because you have only defined a few controls within the initial <Grid>. Nevertheless, locate the Documents Outline window in your IDE, mounted by default on the lower left of the IDE (if you cannot locate it, simply activate it using the View Other Windows menu option). Now, make sure your XAML designer is the active window in the IDE (rather than a C# code file), and you will notice the Document Outline displays the nested elements (see Figure 26-21).
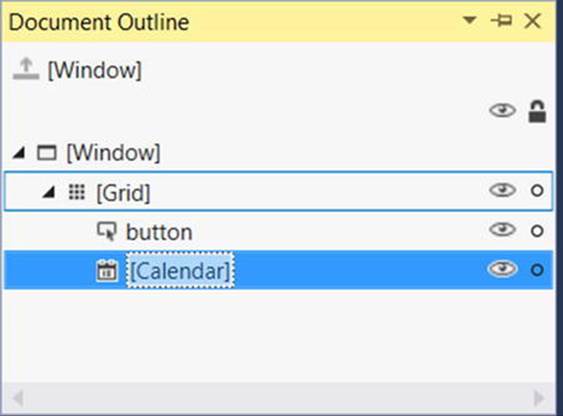
Figure 26-21. Visualizing your XAML via the Document Outline window
This tool also provides a way to temporarily hide a given item (or set of items) on the designer as well as lock items to prevent additional edits from taking place. In the next chapter, you will see how the Document Outline window also provides many other features to group selected items into new layout managers (among other features).
Viewing the Autogenerated Code Files
Before building the last example of this chapter, locate the Solution Explorer window, and click the Show All Files button (seen in Figure 26-22). Notice that the BAML and *.g.cs files are present and accounted for (in the obj\Debug folder). I’m not advising you to add your own code to these autogenerated files, the previous examples of the chapter should have helped clarify exactly how your XAML is processed.
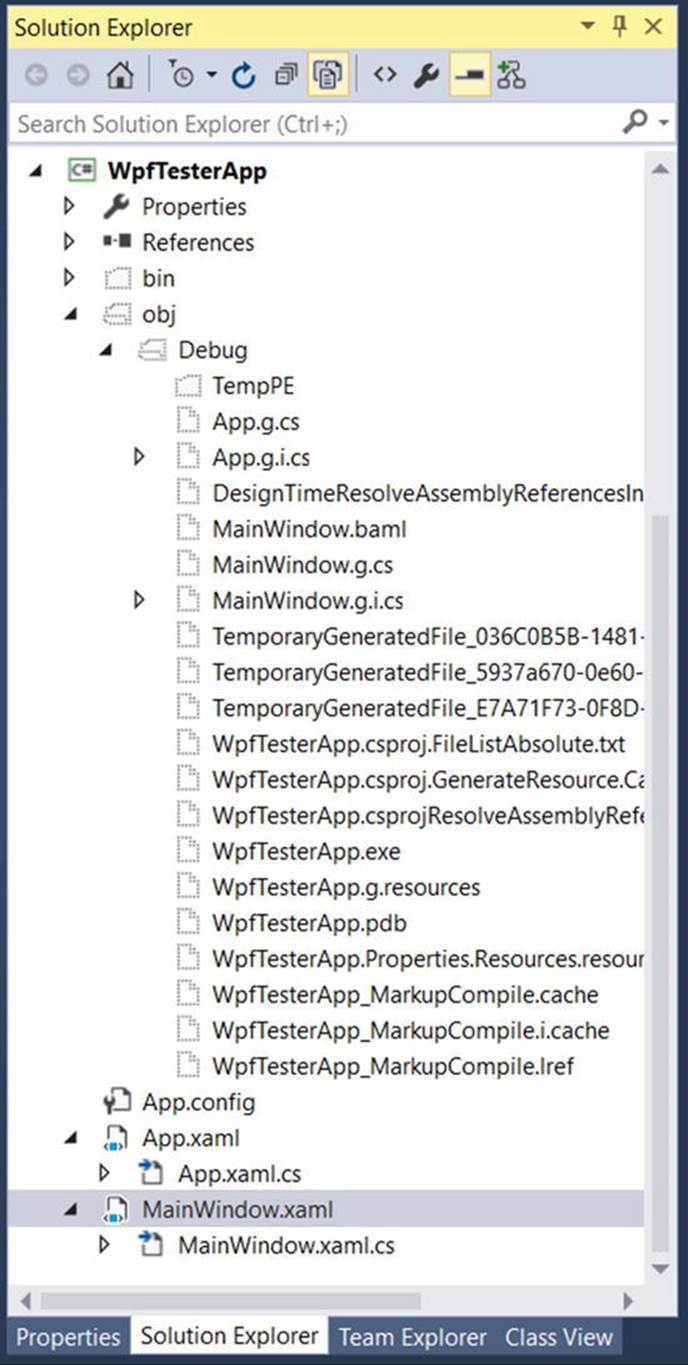
Figure 26-22. Viewing the output files of a WPF project using Solution Explorer
Building a Custom XAML Editor with Visual Studio
Now that you have seen the basic tools used within Visual Studio to design a WPF window, the final example of this chapter will walk you through building an application that will allow you to manipulate XAML at runtime. Close down your current project, and create a fresh WPF application named MyXamlPad. This project (when finished) will function similar to Kaxaml without the bells and whistles. Specifically, this application will allow you to type in any well-formed markup, and click a button to dynamically render the XAML into a new Window object.
Designing the GUI of Your Window
The WPF API supports the ability to load, parse, and save XAML descriptions programmatically. Doing so can be quite useful in a variety of situations. For example, assume you have five different XAML files that describe the look and feel of a Window type. As long as the names of each control (and any necessary event handlers) are identical within each file, it is possible to dynamically apply “skins” to the window (perhaps based on a startup argument passed into the application).
Interacting with XAML at runtime revolves around the XamlReader and XamlWriter types, both of which are defined within the System.Windows.Markup namespace. To illustrate how to programmatically hydrate a Window object from an external *.xaml file, you will build an application that mimics the basic functionality of the Kaxaml.
![]() Note The XamlReader and XamlWriter classes provide basic functionality to manipulate XAML at runtime. If you ever have a need to gain full control over the XAML object model, you will want to explore the System.Xaml.dll assembly.
Note The XamlReader and XamlWriter classes provide basic functionality to manipulate XAML at runtime. If you ever have a need to gain full control over the XAML object model, you will want to explore the System.Xaml.dll assembly.
While your application will certainly not be as feature-rich as Kaxaml, it will provide the ability to enter valid XAML markup, view the results, and save the XAML to an external file. To begin, update the initial XAML definition of your <Window> as shown next (I suggest manually typing the XAML at this point; however, use the IDE to generate event handlers as shown previously).
![]() Note The next chapter will dive into the details of working with controls and panels, so don’t fret over the details of the control declarations.
Note The next chapter will dive into the details of working with controls and panels, so don’t fret over the details of the control declarations.
<Window x:Class="MyXamlPad.MainWindow"
xmlns="http://schemas.microsoft.com/winfx/2006/xaml/presentation"
xmlns:x="http://schemas.microsoft.com/winfx/2006/xaml"
Title="My Custom XAML Editor"
Height="338" Width="1041"
Loaded="Window_Loaded" Closed="Window_Closed"
WindowStartupLocation="CenterScreen">
<!-- You will use a DockPanel, not a Grid -->
<DockPanel LastChildFill="True" >
<!-- This button will launch a window with defined XAML -->
<Button DockPanel.Dock="Top" Name = "btnViewXaml" Width="100" Height="40"
Content ="View Xaml" Click="btnViewXaml_Click" />
<!-- This will be the area to type within -->
<TextBox AcceptsReturn ="True" Name ="txtXamlData"
FontSize ="14" Background="Black" Foreground="Yellow"
BorderBrush ="Blue" VerticalScrollBarVisibility="Auto"
AcceptsTab="True"/>
</DockPanel>
</Window>
First, notice that you have replaced the initial <Grid> with a <DockPanel> layout manager that contains a Button (named btnViewXaml) and a TextBox (named txtXamlData), and that the Click event of the Button type has been handled.
Also notice that the Loaded and Closed events of the Window itself have been handled within the opening <Window> element (again, use the IDE to generate the event handlers as described earlier in this section of the chapter). If you have used the designer to handle your events, you should find the following code in your MainWindow.xaml.cs file:
public partial class MainWindow : Window
{
public MainWindow()
{
InitializeComponent();
}
private void btnViewXaml_Click(object sender, RoutedEventArgs e)
{
}
private void Window_Closed(object sender, EventArgs e)
{
}
private void Window_Loaded(object sender, RoutedEventArgs e)
{
}
}
Before continuing, be sure to import the following namespaces into your MainWindow.xaml.cs file:
using System.IO;
using System.Windows.Markup;
Implementing the Loaded Event
The Loaded event of your main window is in charge of determining whether there is currently a file named YourXaml.xaml in the folder containing the application. If this file does exist, you will read in the data and place it into the TextBox on the main window. If not, you will fill theTextBox with an initial default XAML description of an empty window (this description is the exact same markup as an initial window definition, except that you are using a <StackPanel> rather than a <Grid>).
![]() Note The string you are building to represent the initial markup to display in your editor is a bit cumbersome to type, given the escape characters required for the embedded quotations, so type carefully.
Note The string you are building to represent the initial markup to display in your editor is a bit cumbersome to type, given the escape characters required for the embedded quotations, so type carefully.
private void Window_Loaded(object sender, RoutedEventArgs e)
{
// When the main window of the app loads,
// place some basic XAML text into the text block.
if (File.Exists("YourXaml.xaml"))
{
txtXamlData.Text = File.ReadAllText("YourXaml.xaml");
}
else
{
txtXamlData.Text =
"<Window xmlns=\"http://schemas.microsoft.com/winfx/2006/xaml/presentation\"\n"
+"xmlns:x=\"http://schemas.microsoft.com/winfx/2006/xaml\"\n"
+"Height =\"400\" Width =\"500\" WindowStartupLocation=\"CenterScreen\">\n"
+"<StackPanel>\n"
+"</StackPanel>\n"
+"</Window>";
}
}
Using this approach, your application will be able to load the XAML entered in a previous session or supply a default block of markup if necessary. At this point, you should be able to run your program and find the display shown in Figure 26-23 within the TextBox type.
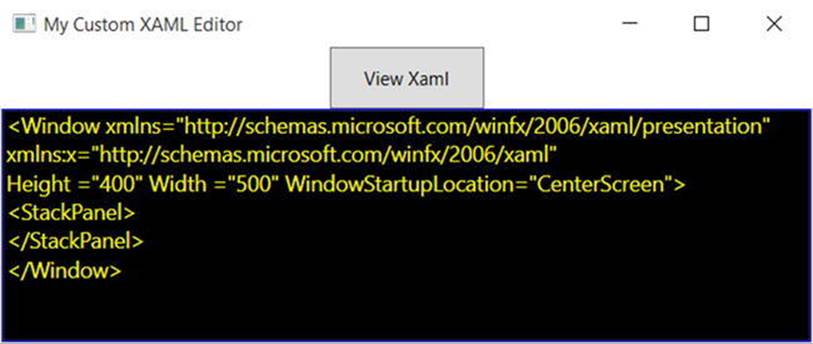
Figure 26-23. The first run of MyXamlPad.exe
Implementing the Button’s Click Event
When you click the Button, you will first save the current data in the TextBox into the YourXaml.xaml file. At this point, you will read in the persisted data via File.Open() to obtain a FileStream . This is necessary, as the XamlReader.Load() method requires a Stream-derived type (rather than a simple System.String) to represent the XAML to be parsed.
After you have loaded the XAML description of the <Window> you would like to construct, create an instance of System.Windows.Window based on the in-memory XAML and display the Window as a modal dialog, like so:
private void btnViewXaml_Click(object sender, RoutedEventArgs e)
{
// Write out the data in the text block to a local *.xaml file.
File.WriteAllText("YourXaml.xaml", txtXamlData.Text);
// This is the window that will be dynamically XAML-ed.
Window myWindow = null;
// Open local *.xaml file.
try
{
using (Stream sr = File.Open("YourXaml.xaml", FileMode.Open))
{
// Connect the XAML to the Window object.
myWindow = (Window)XamlReader.Load(sr);
// Show window as a dialog and clean up.
myWindow.ShowDialog();
myWindow.Close();
myWindow = null;
}
}
catch (Exception ex)
{
MessageBox.Show(ex.Message);
}
}
Note that you are wrapping much of your logic within a try/catch block. In this way, if the YourXaml.xaml file contains ill-formed markup, you can see the error of your ways within the resulting message box. For example, run your program, and purposely misspell<StackPanel> by adding an extra letter P in the opening element or whatnot. If you click the button, you will see an error similar to Figure 26-24.
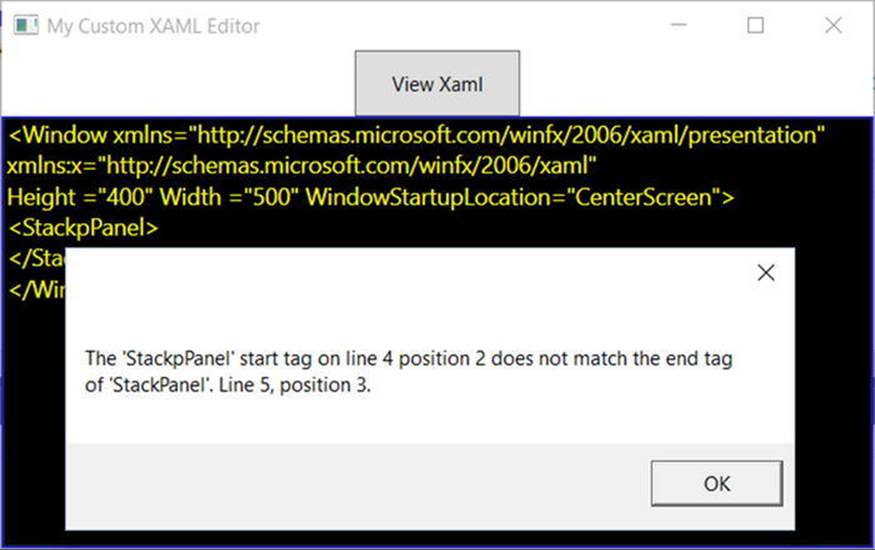
Figure 26-24. Catching markup errors
Implementing the Closed Event
Finally, the Closed event of your Window type will ensure that the latest and greatest data in the TextBox is persisted to the YourXaml.xaml file.
private void Window_Closed(object sender, EventArgs e)
{
// Write out the data in the text block to a local *.xaml file.
File.WriteAllText("YourXaml.xaml", txtXamlData.Text);
Application.Current.Shutdown();
}
Testing Your Application
Now fire up your program and enter some XAML into your text area. Do be aware that (like Kaxaml) this program does not allow you to specify any code generation–centric XAML attributes (such as Class or any event handlers). As a first test, enter the following XAML within your<StackPanel> scope:
<Button Height = "100" Width = "100" Content = "Click Me!">
<Button.Background>
<LinearGradientBrush StartPoint = "0,0" EndPoint = "1,1">
<GradientStop Color = "Blue" Offset = "0" />
<GradientStop Color = "Yellow" Offset = "0.25" />
<GradientStop Color = "Green" Offset = "0.75" />
<GradientStop Color = "Pink" Offset = "0.50" />
</LinearGradientBrush>
</Button.Background>
</Button>
When you click the button, you will see a window appear that renders your XAML definitions (or possibly you’ll see a parsing error in the message box—watch your typing!). Figure 26-25 shows possible output.
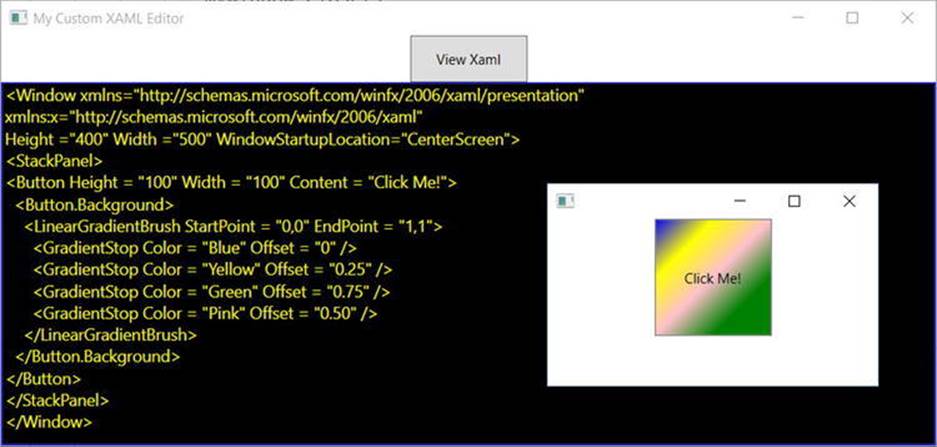
Figure 26-25. MyXamlPad.exe in action
Now, enter the following XAML markup directly after the current <Button> definition:
<Label Content = "Interesting...">
<Label.Triggers>
<EventTrigger RoutedEvent = "Label.Loaded">
<EventTrigger.Actions>
<BeginStoryboard>
<Storyboard TargetProperty = "FontSize">
<DoubleAnimation From = "12" To = "100" Duration = "0:0:4"
RepeatBehavior = "Forever"/>
</Storyboard>
</BeginStoryboard>
</EventTrigger.Actions>
</EventTrigger>
</Label.Triggers>
</Label>
This markup is a great example of how powerful XAML really is. When you test this markup, you’ll notice you have created a simple animation sequence. Animation services (as well as graphical renderings) will be examined in detail in upcoming chapters; however, feel free to tweak the XAML and see the end result.
Exploring the WPF Documentation
To close this chapter, I want to point out that the .NET 4.6 Framework SDK documentation provides an entire section devoted to the topic of WPF. As you explore this API and read over the remaining WPF-centric chapters, you will do yourself a great service if you consult the help system early and often. Here, you will find a huge amount of sample XAML plus detailed tutorials on a wide variety of topics ranging from 3D graphics programing to complex data binding operations.
The WPF documentation is located under the .NET Framework 4.6 ![]() .NET Framework Development Guide
.NET Framework Development Guide ![]() Developing Client Applications path located at https://msdn.microsoft.com/en-us/library/vstudio/54xbah2z(v=vs.110).
Developing Client Applications path located at https://msdn.microsoft.com/en-us/library/vstudio/54xbah2z(v=vs.110).
As you dig around this part of the help system, you will run into numerous XAML examples you can copy directly to your clipboard and paste into your custom XAML editor. However, you will need to make sure the root element is changed from <Page> to <Window> (if the samples use the <Page> element) before testing (your application was not programmed to display Page objects, only full Window objects). Before moving on to the next chapter, take time to dig into topics that interest you and test additional markup in your custom tool.
![]() Source Code The MyXamlPad project can be found in the Chapter 26 subdirectory.
Source Code The MyXamlPad project can be found in the Chapter 26 subdirectory.
Summary
Windows Presentation Foundation (WPF) is a user interface toolkit introduced since the release of .NET 3.0. The major goal of WPF is to integrate and unify a number of previously unrelated desktop technologies (2D graphics, 3D graphics, window and control development, etc.) into a single, unified programming model. Beyond this point, WPF programs typically make use of Extendable Application Markup Language (XAML), which allows you to declare the look and feel of your WPF elements via markup.
Recall that XAML allows you to describe trees of .NET objects using a declarative syntax. During this chapter’s investigation of XAML, ou were exposed to several new bits of syntax, including property-element syntax and attached properties, as well as the role of type converters and XAML markup extensions.
While XAML is a key aspect for any production-level WPF application, your first example of this chapter illustrated how you can build a WPF program using nothing but C# code. Next, you discovered how to build a WPF program using nothing but XAML (this is not recommended; however, it was a useful learning exercise!). Finally, you learned about the use of code-behind files, which allow you to partition look-and-feel from functionality.
The final example of this chapter gave you a chance to build a WPF application that allowed you to programmatically interact with XAML definitions using the XamlReader and XamlWriter classes. Along the way, you took a tour of the core WPF designers of Visual Studio. You will learn much more about the WPF designers in upcoming chapters.
All materials on the site are licensed Creative Commons Attribution-Sharealike 3.0 Unported CC BY-SA 3.0 & GNU Free Documentation License (GFDL)
If you are the copyright holder of any material contained on our site and intend to remove it, please contact our site administrator for approval.
© 2016-2026 All site design rights belong to S.Y.A.