C++ Recipes: A Problem-Solution Approach (2015)
CHAPTER 8
The STL Algorithms
The STL provides a set of algorithms that can be used along with the containers that it also supplies. These algorithms all work with iterators. An iterator is an abstraction mechanism that allows traversal behavior on many different STL collections. This chapter covers iterators and some of different algorithms along with their uses.
Recipe 8-1. Using an iterator to Define a Sequence within a Container
Problem
You have a STL container and would like to mark a sequence within that container that begins and ends at certain points.
Solution
The STL provides iterators that work with all containers and can be used to denote the beginning and end of a sequence within that container. The sequence can include every node in the container or it can include a subset of the nodes in the container.
How It Works
Iterators are designed to work in a similar manner to pointers. Their syntax turns out to be very similar. You can see the use of iterators in Listing 8-1.
Listing 8-1. Using an iterator with a vector
#include <cinttypes>
#include <iostream>
#include <vector>
using namespace std;
int main(int arcg, char* argv[])
{
using IntVector = vector<int32_t>;
using IntVectorIterator = IntVector::iterator;
IntVector myVector{ 0, 1, 2, 3, 4 };
for (IntVectorIterator iter = myVector.begin(); iter != myVector.end(); ++iter)
{
cout << "The value is: " << *iter << endl;
}
return 0;
}
A vector of int type is created in the main function in Listing 8-1. A type alias is used to make a new type of IntVector to represent this type of collection. A second alias is used to represent the type of the iterator that is used with this collection. You can see that theiterator type is accessed through the initial vector type. This is necessary as the iterator must also operate on the same type of objects that the vector itself operates with. Including the iterator type within the vector type allows you to specify the type to operate on, in this caseint32 _t, at the same time for both.
The iterator type is used to get references to the beginning and the end of the myVector collection in the for loop. The begin and end methods of a vector return iterators. A collection is said to be empty if the iterator denoting the beginning of the collection is equal to the iterator denoting the end of the collection. This is the first property that iterators share in common with pointers, they are comparable.
The iter variable in the for loop is initialized to the value returned by the vector::begin method. The for loop executes until the iter variable is equal to the iterator returned by the vector::end method. This shows that sequences of values in a collection can be represented by two iterators, one at the beginning of a sequence and one at the end of a sequence. An iterator provides an increment operator that allows the iterator to be moved to the next element in the sequence. This is how the iter variable in the for loop can be initialized to theiterator returned by begin and can be tested against end until the sequence traversal has been completed. This also happens to be another property that iterators share with pointers, an increment or decrement will move the iterator to the next or last element in a sequence.
![]() Note not all iterators support increment and decrement operations. You’ll see some situations where that is the case in the following paragraphs.
Note not all iterators support increment and decrement operations. You’ll see some situations where that is the case in the following paragraphs.
The last operation that is important to cover with an iterator is the dereference operator. You may be familiar with these from standard pointer operations and this is the last property that iterators share with pointers. You can see from Listing 8-1 that the dereference operator is used to retrieve the value represented by the iterator. In this example the dereference is used to retrieve each iterator from the collection to be sent to the console. Figure 8-1 shows that this is the case.
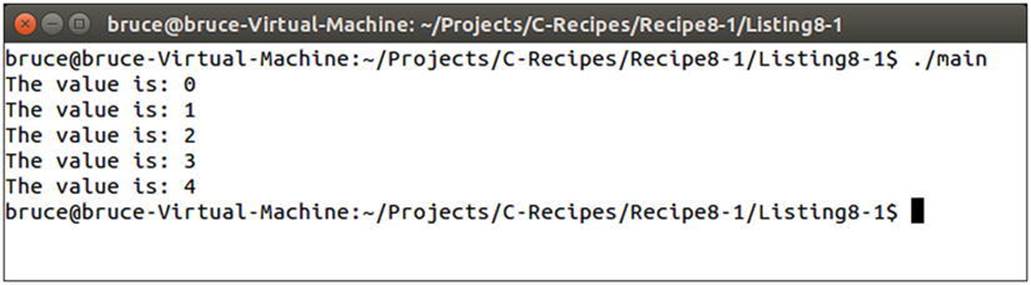
Figure 8-1. The output from Listing 8-1 when the myVector collection is traversed
Trying to print out the iterator without using the dereference operator would have resulted in a compilation error as the cout::<< operator does not include support for iterator types.
The code from Listing 8-1 is using a standard forward iterator. This type of iterator provides non-const access to each element in the container. Listing 8-2 shows the implication of this attribute.
Listing 8-2. Using non-const iterators
#include <cinttypes>
#include <iostream>
#include <vector>
using namespace std;
int main(int arcg, char* argv[])
{
using IntVector = vector<int32_t>;
using IntVectorIterator = IntVector::iterator;
IntVector myVector(5, 0);
int32_t value{ 0 };
for (IntVectorIterator iter = myVector.begin(); iter != myVector.end(); ++iter)
{
*iter = value++;
}
for (IntVectorIterator iter = myVector.begin(); iter != myVector.end(); ++iter)
{
cout << "The value is: " << *iter << endl;
}
return 0;
}
If you were to compare Listing 8-2 to Listing 8-1 you would see that the initialization of the myVector collection is handled in a different way. Listing 8-2 initializes the vector to contain 5 copies of the value 0. A for loop then walks the vector and assigns the post-incremented value variable to each position in myVector using the iterator dereference operator. This is possible due to the non-const nature of the iterator type. If you wish to use an iterator that you know should not have write access to its value then you can use a const_iterator as shown in Listing 8-3.
Listing 8-3. Using a const_iterator
#include <cinttypes>
#include <iostream>
#include <vector>
using namespace std;
int main(int arcg, char* argv[])
{
using IntVector = vector<int32_t>;
using IntVectorIterator = IntVector::iterator;
using ConstIntVectorIterator = IntVector::const_iterator;
IntVector myVector(5, 0);
int32_t value{ 0 };
for (IntVectorIterator iter = myVector.begin(); iter != myVector.end(); ++iter)
{
*iter = value++;
}
for (ConstIntVectorIterator iter = myVector.cbegin(); iter != myVector.cend(); ++iter)
{
cout << "The value is: " << *iter << endl;
}
return 0;
}
Listing 8-3 uses the vector::cbegin and vector::cend methods in the second for loop to gain access to the elements of myVector without providing write access. Any attempt to assign values to a const_iterator results in a compile error being thrown when you try to build your program. The iterator and const_iterator types provided by C++ collections are both examples of forward iterators. That means that they both traverse the collection in the order you would suspect, from beginning to end. STL collections also supply support for thereverse_iterator and const_reverse_iterator types. These allow you to traverse your sequence backwards. Listing 8-4 shows the use of a reverse_itertor to initialize the myVector collection from highest to lowest.
Listing 8-4. Initializing myVector using a reverse_iterator
#include <cinttypes>
#include <iostream>
#include <vector>
using namespace std;
int main(int arcg, char* argv[])
{
using IntVector = vector<int32_t>;
using IntVectorIterator = IntVector::iterator;
using ConstIntVectorIterator = IntVector::const_iterator;
using ReverseIntVectorIterator = IntVector::reverse_iterator;
using ConstReverseIntVectorIterator = IntVector::const_reverse_iterator;
IntVector myVector(5, 0);
int32_t value { 0 };
for (ReverseIntVectorIterator iter = myVector.rbegin(); iter != myVector.rend(); ++iter)
{
*iter = value++;
}
for (ConstIntVectorIterator iter = myVector.cbegin(); iter != myVector.cend(); ++iter)
{
cout << "The value is: " << *iter << endl;
}
return 0;
}
Listing 8-4 shows that the reverse_iterator should be used with the rbegin and rend methods supplied by vector. Incrementing a reverse_iterator causes it to move backwards through the collection. Figure 8-2 shows that the myVector collection has stored the values in reverse order.
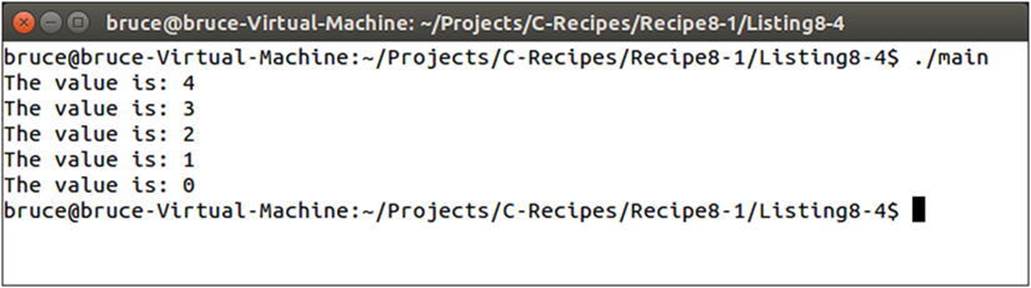
Figure 8-2. The values from myVector in reverse order
The output in Figure 8-2 can also be achieved using the code in Listing 8-5 which uses a const_reverse_iterator to print the values.
Listing 8-5. Using a const_reverse_iterator to print myVector in reverse
#include <cinttypes>
#include <iostream>
#include <vector>
using namespace std;
int main(int arcg, char* argv[])
{
using IntVector = vector<int32_t>;
using IntVectorIterator = IntVector::iterator;
using ConstIntVectorIterator = IntVector::const_iterator;
using ReverseIntVectorIterator = IntVector::reverse_iterator;
using ConstReverseIntVectorIterator = IntVector::const_reverse_iterator;
IntVector myVector(5, 0);
int32_t value{ 0 };
for (IntVectorIterator iter = myVector.begin(); iter != myVector.end(); ++iter)
{
*iter = value++;
}
for (ConstReverseIntVectorIterator iter = myVector.crbegin();
iter != myVector.crend();
++iter)
{
cout << "The value is: " << *iter << endl;
}
return 0;
}
Listing 8-5 uses const_reverse_iterator along with the crbegin and crend methods to walk the collection from last to first and print the values in reverse order.
Iterators will play an important part in the rest of this chapter as they are used as the input to the algorithms supplied by the STL.
Recipe 8-2. Calling a Function on Every Element in a Container
Problem
You have a container and would like a simple method to call a function on every element.
Solution
The STL provides the for_each function that takes a beginning iterator, an ending iterator and a function to call on each element between the two.
How It Works
The for_each function can be passed two iterators. These iterators define the beginning point and the end point in the container that should be traversed. The 3rd parameter is a function that should be called for each element. The element itself is passed into the function. Listing 8-6 shows a use of the for_each function.
Listing 8-6. The for_each algorithm
#include <algorithm>
#include <cinttypes>
#include <iostream>
#include <vector>
using namespace std;
int main(int argc, char* argv[])
{
vector<int32_t> myVector
{
1,
2,
3,
4,
5
};
for_each(myVector.begin(), myVector.end(),
[](int32_t value)
{
cout << value << endl;
});
return 0;
}
The code in Listing 8-6 creates a vector with 5 elements, the numbers 1 through 5. The for_each function is passed the iterators returned by the begin and end methods to define the range of values that should be passed to the function supplied in parameter 3. Parameter 3 is an unnamed function or a lambda.
The square braces of the lambda denote a capture list. This list is used to allow the lambda access to variables that exist in the function where it is created. In this case we do not capture any variables from the function. The brackets then denote the parameter list. The lambda in Listing 8-1takes an int32_t as a parameter as that is the type stored in the vector. The curly braces denote the function body just as they do with standard function bodies. Executing this code results in the output shown in Figure 8-3.
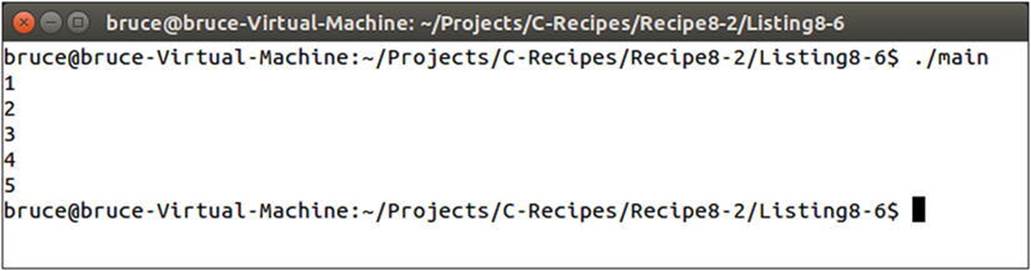
Figure 8-3. The output generated by the for_each and lambda in Listing 8-6
This output is generated because the for_each algorithm passes the integer from each position in myVector into the function supplied, in this case a lambda.
Recipe 8-3. Finding the Maximum and Minimum Values in a Container
Problem
Occasionally you will want to find the largest or smallest value in a container.
Solution
The STL provides algorithms that allow you to find both the largest and smallest values in a STL container. These are the min_element and max_element functions.
How It Works
Finding the Minimum Value in a Container
The min_element function operates by taking an iterator to the beginning and the end of a given sequence. It walks this sequence and finds the minimum value contained in that sequence. Listing 8-7 shows this algorithm being used.
Listing 8-7. Using the min_element algorithm
#include <algorithm>
#include <iostream>
#include <vector>
using namespace std;
int main(int argc, char* argv[])
{
vector<int> myVector{ 4, 10, 6, 9, 1 };
auto minimum = min_element(myVector.begin(), myVector.end());
cout << "Minimum value: " << *minimum << std::endl;
return 0;
}
In this case you can see that a vector is being used to store integer elements. The min_element function is passed the iterator that denotes the beginning and the end of the sequence contained by the vector. This algorithm returns an iterator to the element that contains the smallest value. I’m using auto here to avoid having to write out the entirety of the iterator’s type (which would be vector<int>::iterator). It is clear that an iterator is returned when looking at the line that outputs the value. The pointer dereference operator is required to retrieve the integer value from the iterator. You can see the output generated by the code in Figure 8-4.

Figure 8-4. The output from Listing 8-7 showing the retrieved minimum value
The container in Listing 8-7 shows a trivial case where the container stores integer values. This case is trivial as two int variables are already comparable using the < operator. You can use min_element with your own classes by providing an overloaded < operator in your class. You can see an example of this in Listing 8-8.
Listing 8-8. Using min_element in conjunction with a class that contains a < operator
#include <algorithm>
#include <iostream>
#include <vector>
using namespace std;
class MyClass
{
private:
int m_Value;
public:
MyClass(const int value)
: m_Value{ value }
{
}
int GetValue() const
{
return m_Value;
}
bool operator <(const MyClass& other) const
{
return m_Value < other.m_Value;
}
};
int main(int argc, char* argv[])
{
vector<MyClass> myVector{ 4, 10, 6, 9, 1 };
auto minimum = min_element(myVector.begin(), myVector.end());
if (minimum != myVector.end())
{
cout << "Minimum value: " << (*minimum).GetValue() << std::endl;
}
return 0;
}
Listing 8-7 and 10-8 differ by using a vector of MyClass objects rather than a vector of integer values. The call to min_element however remains exactly the same. In this case the min_element call will walk the sequence and use the < operator added to the MyClass class to find the lowest value. It’s also necessary to protect against hitting the end of the sequence in this case as the end element will not point to a valid object and therefore the dereference and call to GetValue will likely crash.
Another option to compare non-basic types is to provide a comparison function directly to the min_element function directly. This option is shown in Listing 8-9.
Listing 8-9. Using a separate function with min_element
#include <algorithm>
#include <iostream>
#include <vector>
using namespace std;
class MyClass
{
private:
int m_Value;
public:
MyClass(const int value)
: m_Value{ value }
{
}
int GetValue() const
{
return m_Value;
}
};
bool CompareMyClasses(const MyClass& left, const MyClass& right){
return left.GetValue() < right.GetValue();}
int main(int argc, char* argv[])
{
vector<MyClass> myVector{ 4, 10, 6, 9, 1 };
auto minimum = min_element(myVector.begin(), myVector.end(), CompareMyClasses);
if (minimum != myVector.end())
{
cout << "Minimum value: " << (*minimum).GetValue() << std::endl;
}
return 0;
}
In Listing 8-9 we supply a pointer to a comparison function to the min_element function. This function is used to compare the values returned from the MyClass GetValue method. The comparison function is constructed in a very specific way and takes two parameters, both constant references to MyClass objects. The function should return true if the first parameter is evaluated as being less than the second. The names left and right are chosen to help visualize the usual look of a < operator. The call to min_element is altered to contain a third parameter, the pointer to the CompareMyClasses function. The code shown in Listings 10-8 and 10-9 both produce output that is identical to that shown in Figure 8-4.
Finding the Maximum Values in a Container
Where the min_element function can be used to find the smallest value in a sequence, the max_element function can be used to find the largest. The function can be used in exactly the same way as the min_element function as you can see in Listing 8-10.
Listing 8-10. Using max_element
#include <algorithm>
#include <iostream>
#include <vector>
using namespace std;
class MyClass
{
private:
int m_Value;
public:
MyClass(const int value)
: m_Value{ value }
{
}
int GetValue() const
{
return m_Value;
}
bool operator <(const MyClass& other) const
{
return m_Value < other.m_Value;
}
};
bool CompareMyClasses(const MyClass& left, const MyClass& right)
{
return left.GetValue() < right.GetValue();
}
int main(int argc, char* argv[])
{
vector<int> myIntVector{ 4, 10, 6, 9, 1 };
auto intMinimum = max_element(myIntVector.begin(), myIntVector.end());
if (intMinimum != myIntVector.end())
{
cout << "Maxmimum value: " << *intMinimum << std::endl << std::endl;
}
vector<MyClass> myMyClassVector{ 4, 10, 6, 9, 1 };
auto overrideOperatorMinimum = max_element(myMyClassVector.begin(),
myMyClassVector.end());
if (overrideOperatorMinimum != myMyClassVector.end())
{
cout << "Maximum value: " << (*overrideOperatorMinimum).GetValue() <<
std::endl << std::endl;
}
auto functionComparisonMinimum = max_element(myMyClassVector.begin(),
myMyClassVector.end(),
CompareMyClasses);
if (functionComparisonMinimum != myMyClassVector.end())
{
cout << "Maximum value: " << (*functionComparisonMinimum).GetValue() <<
std::endl << std::endl;
}
return 0;
}
Listing 8-10 shows that the max_element function can be used in place of the min_element function. It’s important to realize that the max_element function still uses the < operator. It may seem that the max_element would use the > operator instead but it’s just as valid to use the < operator and respond to a result of false rather than true to indicate that one value is greater than another.
Recipe 8-4. Counting Instances of a Value in a Sequence
Problem
Sometimes you may wish to know how many instances of a specific value exist in a sequence.
Solution
The STL provides an algorithm called count. This algorithm can search through a sequence of values and return the number of times a supplied value is found.
How It Works
The count function takes 3 parameters, a beginning iterator, an ending iterator and a value to find. Given these three pieces of information the algorithm will return the number of times the value is present. Listing 8-11 shows this algorithm in use.
Listing 8-11. Using the count algorithm
#include <algorithm>
#include <iostream>
#include <vector>
using namespace std;
int main(int argc, char* argv[])
{
vector<int> myVector{ 3, 2, 3, 7, 3, 8, 9, 3 };
auto number = count(myVector.begin(), myVector.end(), 3);
cout << "The number of 3s in myVector is: " << number << endl;
return 0;
}
The code in Listing 8-11 will have the count function walk the sequence and return the number of times the value 3 is encountered. You can see that the result of this operation is 4 in Figure 8-5.
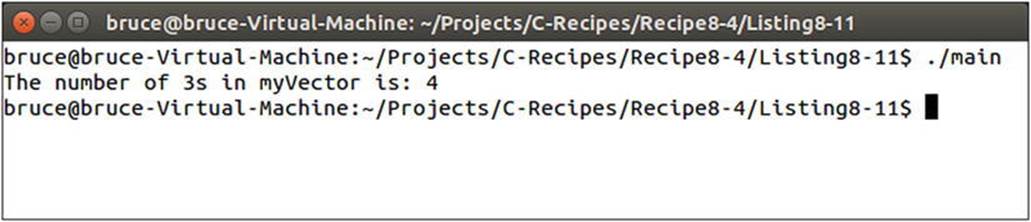
Figure 8-5. The resulting output generated by Listing 8-11
C++ also provides some special predicate functions that can be used in conjunction with character data and the count_if function. These include functions that can be used to count the number of upper or lower case letter and whether a character is alphanumeric, white space or punctuation. You can see all of these in action in Listing 8-12.
Listing 8-12. Using character predicates with count
#include <algorithm>
#include <cctype>
#include <iostream>
#include <string>
using namespace std;
int main(int argc, char* argv[])
{
string myString{ "Bruce Sutherland!" };
auto numberOfCapitals = count_if(
myString.begin(),
myString.end(),
[](auto&& character)
{
return static_cast<bool>(isupper(character));
});
cout << "The number of capitals: " << numberOfCapitals << endl;
auto numberOfLowerCase = count_if(
myString.begin(),
myString.end(),
[](auto&& character)
{
return static_cast<bool>(islower(character));
});
cout << "The number of lower case letters: " << numberOfLowerCase << endl;
auto numberOfAlphaNumerics = count_if(
myString.begin(),
myString.end(),
[](auto&& character)
{
return static_cast<bool>(isalpha(character));
});
cout << "The number of alpha numeric characters: " << numberOfAlphaNumerics << endl;
auto numberOfPunctuationMarks = count_if(
myString.begin(),
myString.end(),
[](auto&& character)
{
return static_cast<bool>(ispunct(character));
});
cout << "The number of punctuation marks: " << numberOfPunctuationMarks << endl;
auto numberOfWhiteSpaceCharacters = count_if(
myString.begin(),
myString.end(),
[](auto&& character)
{
return static_cast<bool>(isspace(character));
});
cout << "The number of white space characters: " << numberOfWhiteSpaceCharacters << endl;
return 0;
}
The predicates can be seen being passed to the count_if function using a lambda in Listing 8-12. The lambda is necessary for the count_if template to be properly satisfied that the function being supplied is a predicate returns a bool. The count_if function will return the number of times the supplied function returns true. You can see the result of the different calls to count_if in Figure 8-6.
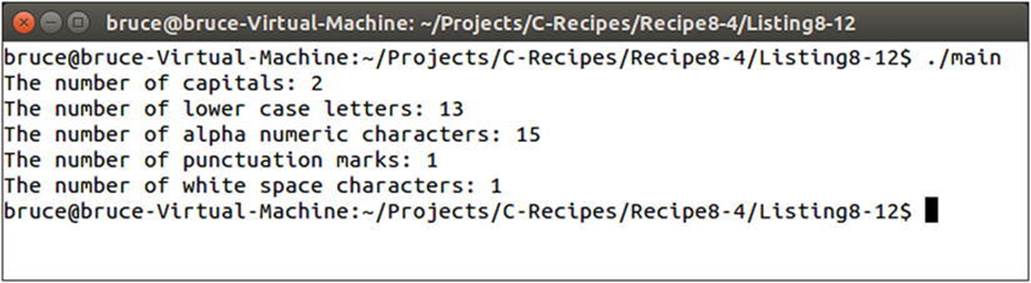
Figure 8-6. The results from calling the code in Listing 8-6
The string supplied in Listing 8-6 is fairly simple so it’s easy to confirm that the character predicates are working as expected. You can cross check the results from Figure 8-6 to confirm this is the case.
Recipe 8-5. Finding Values in a Sequence
Problem
You may wish to find an iterator to the first element in a sequence that matches a specific value.
Solution
The STL provides the find function to retrieve iterators to the first element in a sequence that matches a supplied value.
How It Works
The find function can be used to retrieve an iterator to the first value that matches a value that you supply. You can use this to walk along a sequence from beginning to end. Listing 8-13 shows how you can use this along with a while loop to move along an entire sequence.
Listing 8-13. Using find
#include <algorithm>
#include <iostream>
#include <string>
using namespace std;
int main(int argc, char* argv[])
{
string myString{ "Bruce Sutherland" };
auto found = find(myString.begin(), myString.end(), 'e');
while (found != myString.end())
{
cout << "Found: " << *found << endl;
found = find(found+1, myString.end(), 'e');
}
return 0;
}
The code in Listing 8-13 will print out the letter e twice as there are two of these in the string stored in the variable myString. The first call to find returns an iterator that points to the first instance of the character e in the string. The call inside the while loop then starts at the position immediately after that iterator. This causes the find function to search progressively through the supplied set of data and eventually reach the end. The while loop will terminate once this occurs. The code in Listing 8-13 generates the output shown in Figure 8-7.
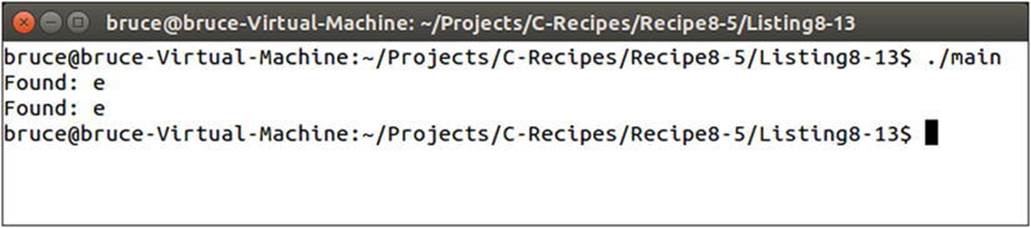
Figure 8-7. The output generatedby executing the code shown in Listing 8-13
Recipe 8-6. Sorting Elements in a Sequence
Problem
Sometimes you will have data in a container that has become out of order and you wish to reorder that data.
Solution
The STL provides the sort algorithm to reorder data in a sequence.
How It Works
The sort function takes an iterator to the beginning of a sequence and an iterator to the end of a sequence. It will automatically sort the values between the iterators into an ascending numerical order. You can see code that achieves this in Listing 8-14.
Listing 8-14. Using the sort algorithm
#include <algorithm>
#include <iostream>
#include <vector>
using namespace std;
int main(int argc, char* argv[])
{
vector<int> myVector{ 10, 6, 4, 7, 8, 3, 9 };
sort(myVector.begin(), myVector.end());
for (auto&& element : myVector)
{
cout << element << ", ";
}
cout << endl;
return 0;
}
The code in Listing 8-14 will reorder the values in myVector into ascending order. Figure 8-8 shows the output this code generates.

Figure 8-8. The myVector elements sorted into ascending order
If you wish to sort the data into a custom order, such as descending then you must supply a predicate function to the sort algorithm. Listing 8-15 shows the use of a predicate to sort a numeric vector into descending order.
Listing 8-15. Using a predicate with sort
#include <algorithm>
#include <iostream>
#include <vector>
using namespace std;
bool IsGreater(int left, int right)
{
return left > right;
}
int main(int argc, char* argv[])
{
vector<int> myVector{ 10, 6, 4, 7, 8, 3, 9 };
sort(myVector.begin(), myVector.end(), IsGreater);
for (auto&& element : myVector)
{
cout << element << ", ";
}
return 0;
}
The data in myVector in Listing 8-15 is the same as the data stored in Listing 8-14. The difference between the two Listings is the use of the IsGreater function in Listing 8-15. This is passed to the sort function and is used to compare the values in myVector. The standard sort function will order values from lowest to highest as you saw in Figure 8-9. Figure 8-10 shows that the code in Listing 8-15 will order the numbers from highest to lowest.

Figure 8-9. The output generated by Listing 8-15 with numbers ordered from highest to lowest