Learning Heroku Postgres (2015)
Chapter 2. Heroku Toolbelt
Heroku Toolbelt is a powerful command-line tool. With it you can manage your apps and perform many tasks such as create applications, configure add-ons, take backups, add new dynos, and so on. The vast majority of activities require that Heroku Toolbelt be installed.
In this chapter, we will cover the following topics:
· Signing up
· Installing the Heroku Toolbelt
· Logging in to Heroku
· Deploying an application
Signing up
To start using Heroku, first you need to create a user account. For this, visit the Heroku website (https://www.heroku.com), click on Sign up, and follow the registration instructions provided by Heroku.
The following screenshot displays the Sign up page of Heroku:
Heroku Signup
Installing the Heroku Toolbelt
Heroku Toolbelt is available for download at https://toolbelt.heroku.com for Mac OS X, Windows, Debian/Ubuntu, and standalone operating systems. Choose your operating system, download, and install it.
For Mac OS X, Windows, and Debian/Ubuntu, the following software applications are automatically installed if you don't have them installed on your computer:
· Heroku client: This is the client tool to create and manage your Heroku applications
· Foreman: This is the tool used to run your applications locally
· Git: This is the distributed revision control system used to manage and deploy your Heroku applications
If you choose the standalone version, only the Heroku client is installed and you must install Foreman and Git manually. You can find more information about the installation for your operating system at https://github.com/ddollar/foreman and http://git-scm.com.
Logging in to Heroku
For using the Heroku Toolbelt, you need to log in via the command line. After this, you can start working with Heroku.
For log in, you must provide the e-mail and password used when you created your user account. If you are using Mac OS X or any Linux distribution, you will have to open a Terminal window. If you are using Windows, you must open the Command Prompt and type the following command to login:
$ heroku login
Enter your Heroku credentials.
Email: your-username@your-company.com
Password (typing will be hidden):
Authentication successful.
Heroku also needs your SSH public key as it identifies which developer is making changes in the applications. It's very simple to send your public key:
$ heroku keys:add
Found existing public key: /Users/patrickespake/.ssh/id_rsa.pub
Uploading SSH public key /Users/patrickespake/.ssh/id_rsa.pub... done
Now you're able to use all the commands that the Heroku client provides.
Deploying an application
Heroku allows you to deploy apps in Ruby, Python, Node.js, PHP, Java, Scala, and Clojure, as well as web frameworks that each language implements.
Tip
The list of support languages are always growing up and you can find all of them at https://devcenter.heroku.com/categories/language-support.
A Heroku application consists of its source code, the dependencies mapping, and Procfile; the last one is important for Heroku because it describes the command to be executed to start your application and other processes. However, usually Heroku can discover the necessary processes for most languages and applications automatically, you don't even need to worry about that. If you need more advanced features, you'll find it at https://devcenter.heroku.com/articles/procfile.
How to deploy a simple application in Ruby on Rails in order to display the concepts to deploy Heroku applications is shown in the upcoming topics. The process is very similar to other programming languages and you can find more information athttps://devcenter.heroku.com/articles/quickstart#step-4-deploy-an-application.
The sample application source code
You will deploy a sample application prepared with Ruby on Rails. This application is very simple; it just shows a welcome page and you can find it at https://github.com/patrickespake/ruby-getting-started. It's a helpful method for you to understand the main concepts about the deploy process on Heroku.
Tip
You don't need the Ruby on Rails environment on your local computer for following this example, the sample application has everything you need to deploy your first application on Heroku.
First you need to copy the sample application source code. This basically consists of executing the git clone command in your terminal if you have a user account on GitHub:
git clone git@github.com:patrickespake/ruby-getting-started.git
cd ruby-getting-started
The other alternative is downloading the source code from https://github.com/patrickespake/ruby-getting-started/archive/master.zip.
The dependencies file
Heroku recognizes a Ruby application through the existence of a dependency file named Gemfile. Take a look at this file; you will see the following dependencies for the sample application:
source 'https://rubygems.org'
# Bundle edge Rails instead: gem 'rails', github: 'rails/rails'
gem 'rails', '4.1.8'
# Use postgresql as the database for Active Record
gem 'pg'
# Run Rails the 12factor way
gem 'rails_12factor', group: :production
# Use SCSS for stylesheets
gem 'sass-rails', '~> 4.0.3'
# Use Uglifier as compressor for JavaScript assets
gem 'uglifier', '>= 1.3.0'
# Use CoffeeScript for .js.coffee assets and views
gem 'coffee-rails', '~> 4.0.0'
# Use jquery as the JavaScript library
gem 'jquery-rails'
# Turbolinks makes following links in your web application faster. Read more: https://github.com/rails/turbolinks
gem 'turbolinks'
# Build JSON APIs with ease. Read more: https://github.com/rails/jbuilder
gem 'jbuilder', '~> 2.0'
# bundle exec rake doc:rails generates the API under doc/api.
gem 'sdoc', '~> 0.4.0', group: :doc
# Spring speeds up development by keeping your application running in the background. Read more: https://github.com/rails/spring
gem 'spring', group: :development
# Use unicorn as the app server
gem 'unicorn'
Deploying the sample application
First you will create a new Heroku application. Before executing the following command, check that you are inside the ruby-getting-started directory:
$ heroku create
Creating mighty-atoll-7219... done, stack is cedar-14
https://mighty-atoll-7219.herokuapp.com/ | https://git.heroku.com/mighty-atoll-7219.git
Git remote heroku added
A new application was created with the name mighty-atoll-7219 and provided at https://mighty-atoll-7219.herokuapp.com. This URL will start working only after the first deploy. A Git repository was also created. This repository is available athttps://git.heroku.com/mighty-atoll-7219.git and you can also add it using the git [some action] heroku command.
Finally, for starting the deploy, just type the command:
$ git push heroku master
Counting objects: 168, done.
Delta compression using up to 4 threads.
Compressing objects: 100% (110/110), done.
Writing objects: 100% (168/168), 30.31 KiB | 0 bytes/s, done.
Total 168 (delta 46), reused 164 (delta 43)
Compressing source files... done.
Building source:
-----> Ruby app detected
-----> Compiling Ruby/Rails
-----> Using Ruby version: ruby-2.0.0
-----> Installing dependencies using 1.7.12
Running: bundle install --without development:test --path vendor/bundle --binstubs vendor/bundle/bin -j4 --deployment
Fetching gem metadata from https://rubygems.org/...........
Installing rake 10.4.0
Installing i18n 0.6.11
...
-----> Preparing app for Rails asset pipeline
Running: rake assets:precompile
...
-----> Discovering process types
Procfile declares types -> web
Default types for Ruby -> console, rake, worker
-----> Compressing... done, 27.0MB
-----> Launching... done, v6
https://mighty-atoll-7219.herokuapp.com/ deployed to Heroku
Verifying deploy... done.
To https://git.heroku.com/mighty-atoll-7219.git
...
Tip
You don't need to worry about costs at this moment. When you create a new application, just one dyno is used and it's free.
Visiting the sample application
At this point, you can see the sample application. Type the following command:
$ heroku open
As the preceding command is fired you get the following output:
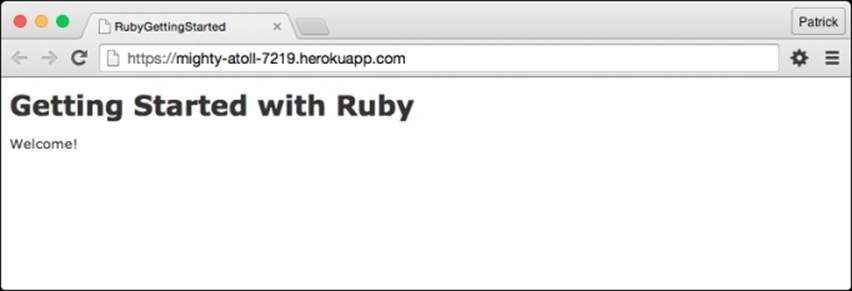
Deploying the Ruby app
Self-test questions
Answer true or false:
1. When installing Heroku Toolbelt, is standalone Git also provided?
2. Does Heroku also support web frameworks of the languages Ruby, Java, Python, Clojure, Scala, and Node.js?
3. Is Foreman a tool provided to run applications locally?
4. To deploy a Heroku app, do we only require the source code and dependencies file?
5. Does Heroku provide a web address to see the applications?
Summary
You learned the basics to get started with Heroku. You created your user account, learned how to install Heroku Toolbelt, how to create a Heroku application, and how to deploy your applications.
You also understood that Heroku needs three components to deploy: the source code, the dependencies file, and Procfile which describes what command should be executed to start your application.
So, the concepts learned in this chapter are fundamental to the rest of this book.
In the next chapter, you will learn about Postgres add-ons. You will create your first database and learn how to connect with different programming languages. In addition, you will learn about database permissions and monitoring.
All materials on the site are licensed Creative Commons Attribution-Sharealike 3.0 Unported CC BY-SA 3.0 & GNU Free Documentation License (GFDL)
If you are the copyright holder of any material contained on our site and intend to remove it, please contact our site administrator for approval.
© 2016-2026 All site design rights belong to S.Y.A.