Make: 3D Printing (2014)
Preface
Additive Personal Fabrication
Anna Kaziunas France
Welcome to Make: 3D Printing. I’ve compiled the best projects, tutorials, and stories about 3D printing from MAKE’s print and online publications, refreshed them for the latest developments, and added a few new pieces you haven’t seen elsewhere.
Personal Fabrication
This book contains stories and tutorials from and about makers who have embraced additive personal fabrication, a term that encompasses 3D printing activities at home, work, or school. Some of these makers are exploring not only DIY 3D printing, but creating scalable small businesses through the use of fabrication services for small batch custom manufacturing. Others create just what they need, just in time, from their desktop factory.
As it turns out, the “killer app” in digital fabrication, as in computing, is personalization, producing products for a market of one person.
— Neil Gershenfeld Foreign Affairs November/December 2012
Although additive manufacturing has been the subject of some irrational media exuberance, it’s only part of the digital fabrication equation. As an instructor at the Fab Academy, a globally distributed rapid prototyping course where we turn codes into things, I taught a wide variety of digital fabrication techniques, often using subtractive methods and machines to achieve desired results.
This in no way diminishes the opportunities for creativity and expression that are made possible by 3D printing. Through 3D scanning and printing I have been able to quickly model and fabricate a variety of completely bespoke (and often last minute) items; from costumes to artwork to functional molds.
Part of the power of personal fabrication is directly tied to having easily accessible personal machines. Machine access combined with creativity and time pressure can lead to interesting mashups and materials choices.
When working on the scanning chapter of Getting Started with MakerBot (see Chapter 6), I created a scan of a prop skull. I later decided to use the scan to create the traditional necklace of skulls or “garland of Kali” as costume for Halloween. Because I had two desktop printers at my home, I was able to prototype my sizable Kali necklace in a single week by running them continuously. I also used the skull scan to create batches of molded skull chocolates (see the Chapter 21 tutorial).
A month later, the Kali necklace was joined by a belt and I incorporated it into a four armed sculpture I titled “Self Portrait as Kali” (see Figure 1). I created the body of the sculpture from several self scans that I combined digitally to create two sets of arms on a single torso. Both sets of arms are broken off at the forearms, as if the original scan was of an ancient statue that has been damaged over time. The final 3D model was sliced into 125 individual routed slices of 1/2” medium density fibreboard (MDF) that I fabricated on a large CNC (computer numerically controlled) router. I then assembled and painted the slices by hand. The belt and necklace, I also painted by hand and strung them over the assembled body. The finished sculpture has been displayed at several exhibitions, including the “Bits to Its” 3D printed sculpture show and the RISD Museum.
In many ways, 3D printing is currently the most personally accessible of all types of digital manufacturing. Prices have come down enough for many to afford to own their own printers, and desktop machine print quality has dramatically improved. Online printing services are readily available for those who cannot afford printers or whose materials needs go beyond printed plastic.
The world of personal fabrication is rapidly evolving—and you are now part of it!
|
|
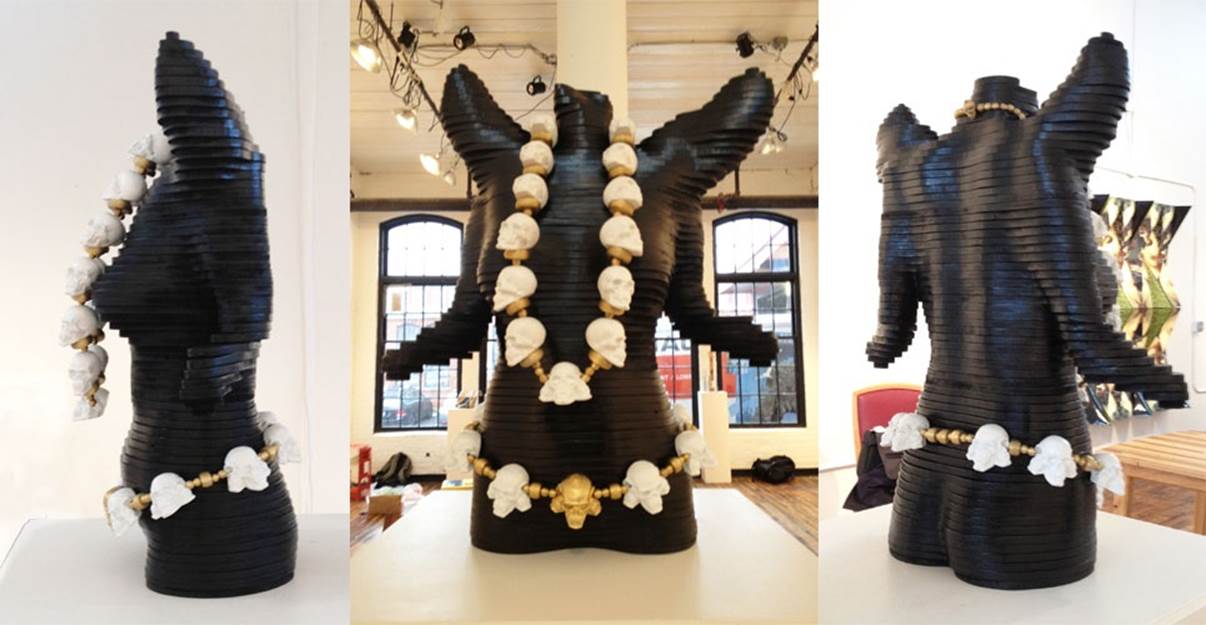
Figure 1. Self Portrait as Kali
Who This Book Is For
If you are interested in creating your own one of a kind or small batch customized creations using 3D printing processes, this book is for you.
If you’re absolutely new to 3D printing and don’t know a thing about it, you’ll want to read this book cover to cover.
If you’ve already got a 3D printer, but are ready to go beyond just printing designs you downloaded from the Internet, you’d want to start by creating your own printable objects by learning 3D design with Tinkercad and creating 3D scans. Also check out the finishing section for tips on how to refine the appearance of your 3D prints.
Are you more comfortable with software than with hardware? If you are a designer who wants to prototype in a range of materials other than extruded plastic or a desktop 3D printer is out of your budget, check out the services and materials sections for a rundown of the range of companies that will print your designs in a rapidly growing number of exotic materials.
Contents of This Book
Part I is an overview of the 3D printing hardware; the printers themselves, the basics of how they work, and what to expect in your experiences with them.
In Part II, you’ll learn about the software toolchain required to take 3D printed designs to final printed object and how to design your own objects.
Part III takes 3D model creation a step further with several tutorials on how to capture physical objects around you with 3D scanning. You’ll also learn how to clean the scanned models for 3D printing.
Part IV discusses a the ever-expanding range of plastic filament available for desktop 3D printing. You’ll also learn about industrial printing materials (and methods) for ceramics to metals available from 3D printing services.
Part V deals with how and why to use 3D printing services instead of desktop manufacturing and details about the different service provider options available.
Several methods for finishing your for 3D printed objects are covered in Part VI, including changing the color or your prints with fabric dye, repairing broken prints and techniques to “weather” your prints to look like battered metal.
Part VII explores the plethora of possible personally fabricated creations that are possible through additive manufacturing; from humanoid robots to scanned artwork to fully customized prosthetics.
Part VIII describes other ways to create 3D objects, from milling to creating food-safe molds for chocolate casting.
Anna Kaziunas France is the Digital Fabrication Editor of Maker Media. She’s also the Dean of Students for the Global Fab Academy program and the co-author of Getting Started with MakerBot. Formerly, she taught the “How to Make Almost Anything” rapid prototyping course in digital fabrication at the Providence Fab Academy. Learn more about her at her website and check out her things at her Thingverse page.
Conventions Used in This Book
The following typographical conventions are used in this book:
Italic
Indicates new terms, URLs, email addresses, filenames, and file extensions.
Constant width
Used for program listings, as well as within paragraphs to refer to program elements such as variable or function names, databases, data types, environment variables, statements, and keywords.
Constant width bold
Shows commands or other text that should be typed literally by the user.
Constant width italic
Shows text that should be replaced with user-supplied values or by values determined by context.
This section signifies a tip, suggestion, or general note.
This icon indicates a warning or caution.