Make: 3D Printing (2014)
Part I. Hardware
Chapter 1. Getting Started with a 3D Printer
An introduction to 3D printer hardware and software.
Bill Bumgarner
Early in 2012, I picked up an Ultimaker, put it together, and joined the growing ranks of 3D printing households. It has been an adventure both filled with reward and rife with frustration. The goal of this article is to share what I’ve learned while studying the DIY portion of the 3D printing realm. The focus is on budgets less than $2,500, with a goal of producing parts out of various kinds of plastic.
Plastic parts are wonderful for prototyping. You can print that engine part in plastic, make sure it fits perfectly, and then send the 3D model off to a company like Shapeways to have your prototype turned into a production piece in the metal of your choice.
Most of the printers discussed here are hackable. Their designs are amenable to being modified and tuned to fit your needs. The software used to drive these printers is almost all open source, though there are commercial slicers and modelers commonly used in the 3D printing community.
Choosing a Printer
The 3D printers discussed here are of the additive manufacturing variety. They create parts by adding material together and are the new hotness in the field of manufacturing. So hot, in fact, that the Obama administration created the National Additive Manufacturing Innovation Institute (NAMII) to foster innovation in this field.
There are three approaches to additive manufacturing in common use: photopolymerization (using light to cure a liquid material into solids of the desired shape), granular materials binding (using lasers, hot air, or other energy sources to fuse layers of powder into the desired shape), and the focus of this article, molten polymer deposition or MPD (extruding molten material in layers to build up the desired shape).
In short, MPD, aka fused deposition modeling (FDM) or fused filament fabrication (FFF), describes pushing a filament of solid plastic (or other materials like metal or chocolate) into a hot-end that then extrudes a thin stream of molten material in layers to build up the desired piece.
Of these technologies, MPD is the most common and most accessible (though EMSL’s CandyFab definitely bears mention because any printer that smells like crème brûlée deserves a shout-out).
Focusing on MPD, there are a handful of different styles of printers. The differentiation is largely focused on exactly how the printer moves the extruder to a particular point to extrude the plastic.
PLASTIC PROTOTYPING
Bathsheba Grossman’s beautiful (and incredibly popular) Klein Bottle Opener is a perfect example of the prototype-in-plastic, print-in-metal process that allows for lots of cheap plastic drafts before committing to the relatively expensive process of procuring a finished metal part.
On the left is a 3D print of Grossman’s bottle opener. On the right is the same model printed in stainless steel and brass from Shapeways. You could tune and print the model all day long for very little money (less than $1 in plastic per print) and then commit to the metal version once fully satisfied with geometry, fit, functionality, etc.
1. A draft print of the Klein Bottle Opener still attached to the print bed with the support visible at the bottom
2. Removing the support
3. The finished draft beside the final piece
Buying Options: Turnkey, Kit, or DIY
With this information in hand, it’s time to choose a printer! There are many turnkey solutions that go well beyond our targeted price range. And there are some that are quite affordable. The Up 3D printer (the same as the Afinia H-Series) is an example of a “ready-to-print” device that requires relatively little maintenance. The MakerBot Replicator is similarly focused, but is both more versatile and may require a bit more maintenance.
A word of warning: when buying a turnkey printer, be wary of “razor vs. blades” business models. 3D printers exist that are seemingly cheap, but which require proprietary filament cartridges, where the consumable filament costs two to three times the going market rates.
Moving to kits, both the Printrbot and Ultimaker are examples of printers that arrive as kits to be assembled by the end user. Both feature great instructions, and assembly is focused on mechanical construction, since both include all electronics pre-soldered and ready to go.
If you’re interested in the full DIY experience, both the RepRap and the Rostock printers are entirely DIY. Both printers are composed of a combination of 3D-printed parts and various metal or wood bits, along with some electronics. You can order preprinted parts kits from a variety of sources (eBay included). Electronics and/or mechanical packs are available, too. Generally, the more cutting-edge the printer version, the more parts you’ll need to source.
In 3D Printer Anatomy, you’ll find an overview of 3D printer anatomy, breaking down positioning systems, parts, and filament.
Software
The workflow for turning an idea into a 3D print can be summed up as model (or capture), fixup, slice, and print. At each step, there are multiple software solutions to choose from.
Generating STL files
STL files are the lingua franca of the 3D printing world. If an application can export a 3D model as an STL file, then that STL file can be sliced and printed. STL files can be generated using a CAD program. SketchUp is quite popular, as are a number of open source 3D modelers.
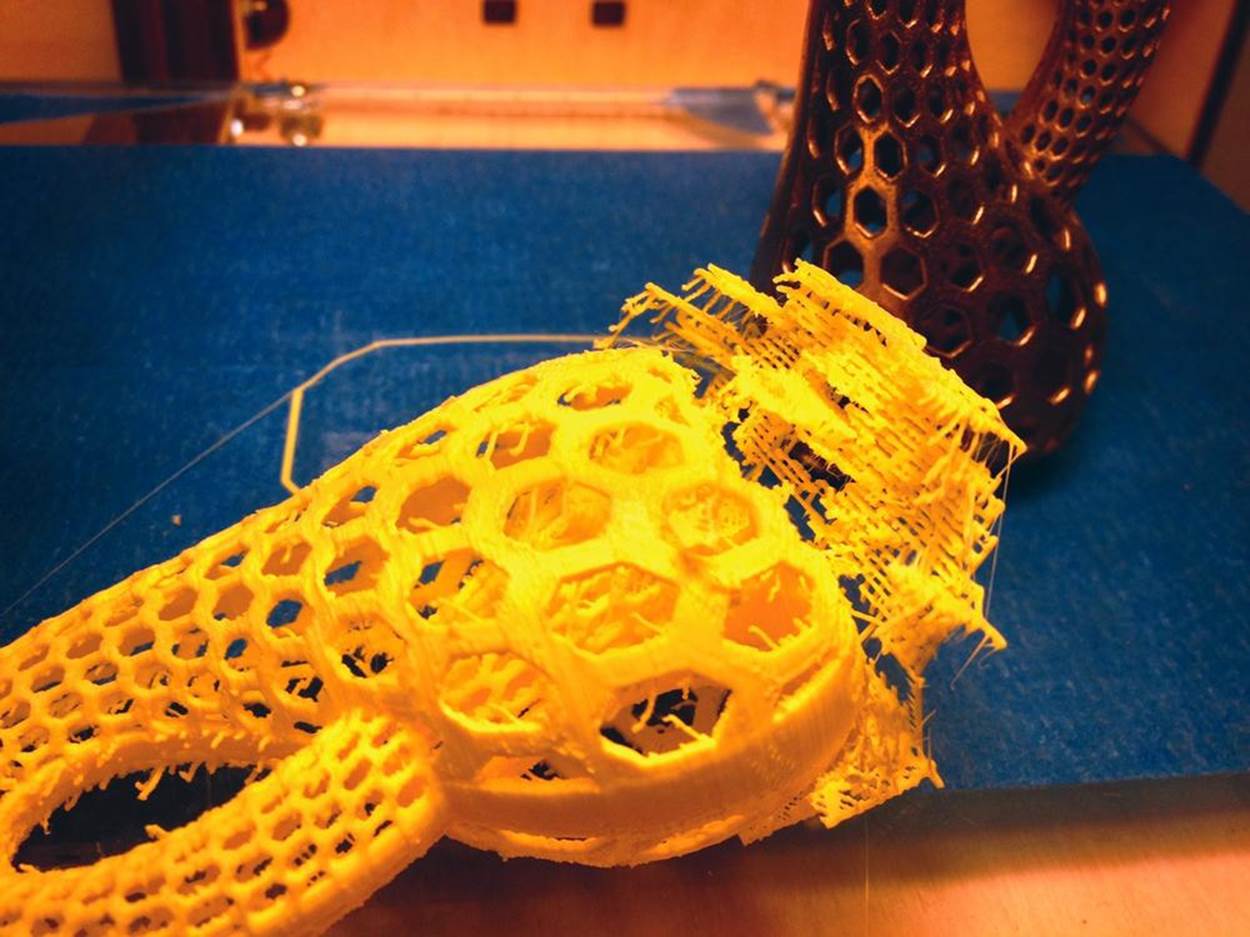
Regardless of which modeler you choose, expect the learning curve to be steep. The key challenge is to translate what you want to make into a set of primitive shapes and elements in the modeler, such that the result is possible to print. For example, any overhang shallower than about 45° cannot be printed without support material (which consumes material that will be tossed, increases print time, and requires significant cleanup) because the plastic will sag (the actual angle varies from printer to printer and depends on how you configure the slicer).
Alternatively, models can be generated using a parametric CAD program, of which OpenSCAD is quite popular. Instead of drawing what you desire, you write code in a simple language that tells the CAD system what you want.
Many of the mathematics-targeted packages like Mathematica can also produce STL files.
Models can also be generated from photographs or videos. Autodesk’s 123D Catch can process a series of photos and turn them into a 3D model (see Chapter 6). With an iPhone or iPad, you can take up to 40 pictures of a model using 123D and then upload them to a server that processes the images into a 3D model. Note that Autodesk also released 123D Make, which slices 3D models into plans for constructing the model out of cardboard or paper.
Often the model for what you want has already been created by someone who shared it online. The most popular repository for pre-made models (and full-on projects) is Thingiverse, where you can find thousands of printable solutions for everyday problems: phone cradles, earbud holders, silverware dividers, quadrocopters (yes, printable quadros), camera parts, game pieces, printable 3D printers, etc. You name it, there are likely at least a few good starting points on Thingiverse.
Slice
The slicer is what turns an STL file into a series of commands—typically G-code—that tell the printer where to move the print head and when to extrude plastic. While the printer’s driver software is dictated by the printer, it’s actually a critical piece, as the printer software will often model the motion dictated by the stream of commands and will vary the acceleration of the motors to eliminate print artifacts.
Slicing is a critical phase of the print. It’s a careful balance between quality, speed, and amount of material used. In many cases, the choice of appropriate slicing parameters is the difference between a successful print and a pile of spaghetti.
Fixup
During fixup, the STL to be printed is often checked for errors (modelers sometimes dump 3D descriptions that look OK, but can’t translate directly to a 3D print because the structure is invalid). The model may be rotated or scaled, or it may be duplicated to print multiple copies simultaneously. Often, slicing and fixup are contained in the same program (sometimes with the printer driver, too). Cura and Slic3r combine slicing with limited fixup, offering the ability to rotate, scale, and print multiple different STL files in a single print run. Netfabb, a commercial package, has extensive mesh debugging and fixup capabilities, along with basic layout tools and a powerful slicer (see Cleaning and Repairing Scans for 3D Printing).
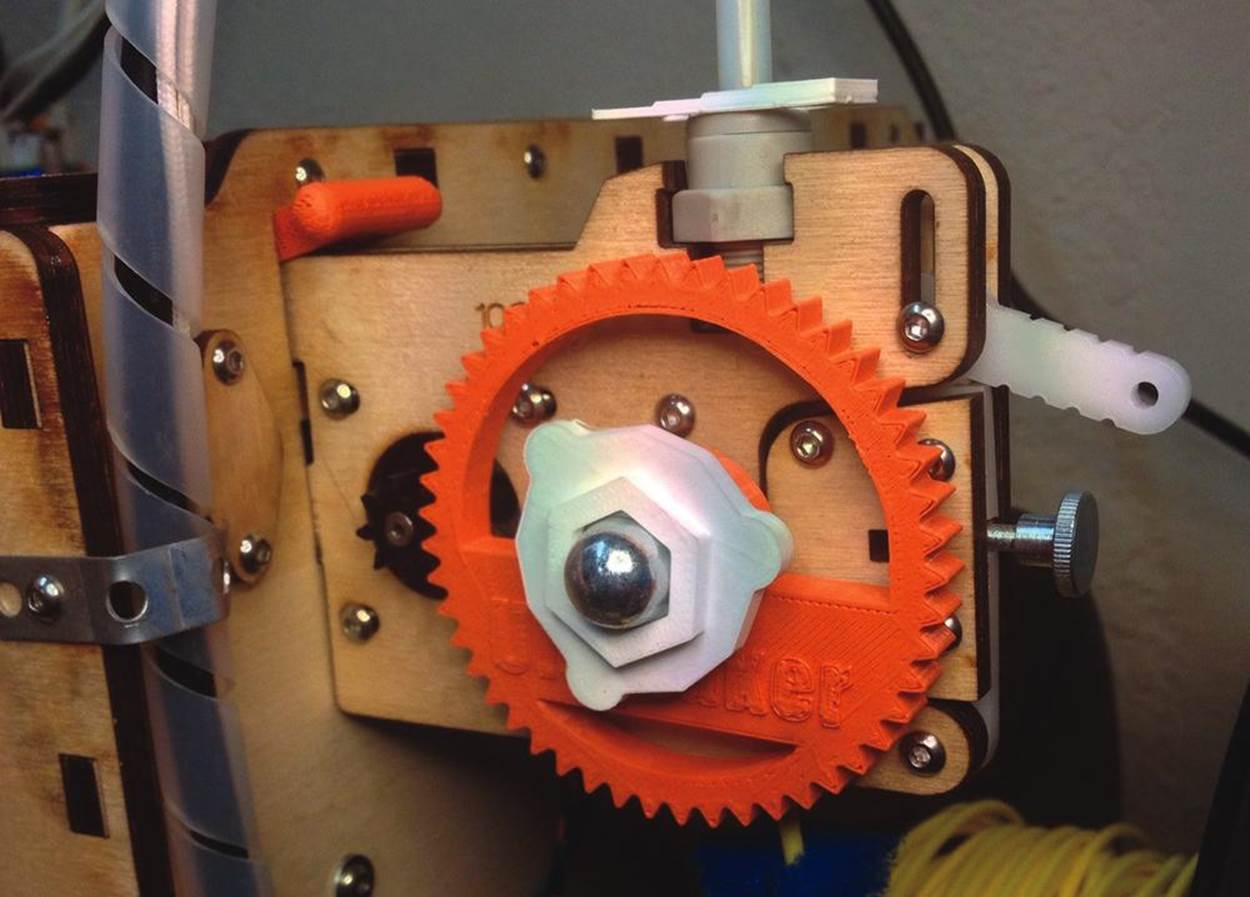
FIVE 3D-PRINTED REPLACEMENT PARTS FOR MY ULTIMAKER
Five 3D-printed replacement parts for my Ultimaker: a new drive gear, the white knob holding the gear on, the Bowden tube clamp (the white piece at the top of the extruder assembly), the orange piece on the left that holds the extruder in place, and a filament spool holder (hidden).
Your First Print Job
Now that you have a background on all things 3D printing and have bought or built your first 3D printer, how do you go about creating useful things (or creating useless, but very cool, things)?
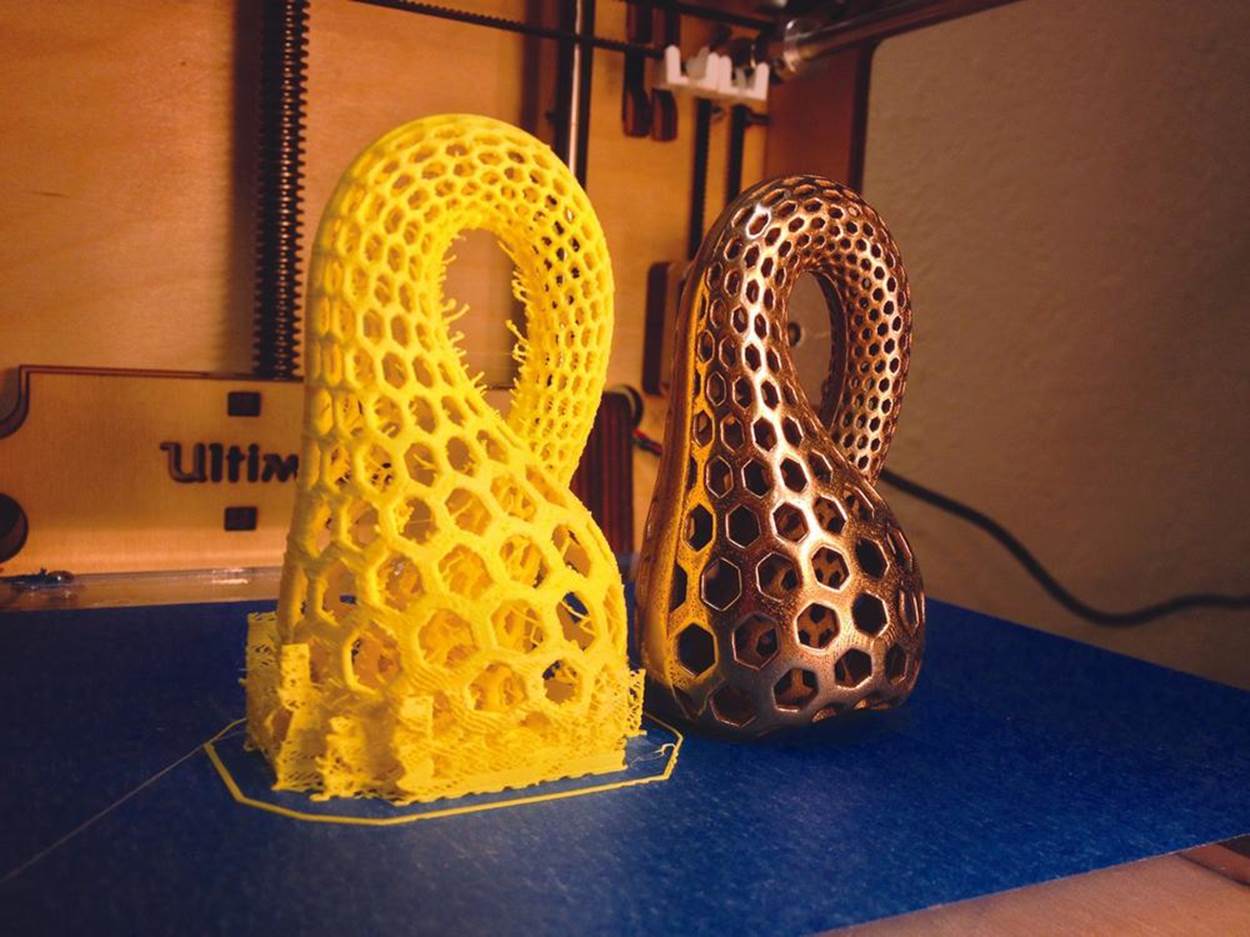
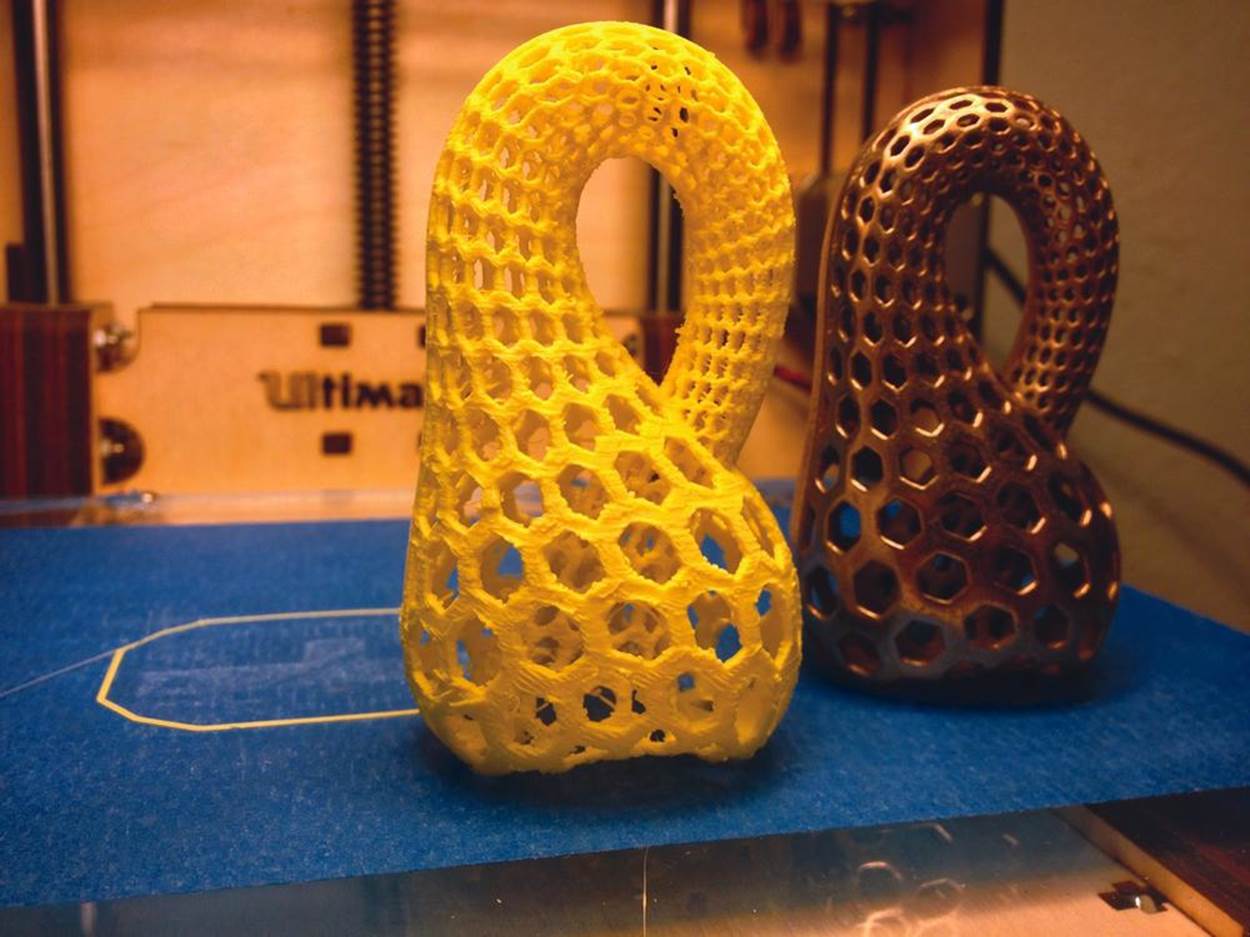
The first step is to know your tools. If applicable, download and print all of the upgrades and replacement parts for your printer. For the Ultimaker, I’ve printed a number of parts, some of which can be seen in the image shown in the sidebar “Five 3D-Printed Replacement Parts for My Ultimaker.”
Then download and print some useful things from Thingiverse. Start with small items—but not too small—like an earbud holder, a bottle opener, or a simple character. Choose something where lots of folks have uploaded photos of their own versions (under the “Who’s Made It?” section). By starting with a known, working model with lots of examples, you can compare your product to others and will have a much better basis for fixing any problems and tuning your workflow (likely the slicer, in particular) to maximize print quality from your printer.
Each type of 3D printer has a particular sound of a successful print. Learning it can help you identify problems before they become serious. I can be in a different room and still tell when a print on my Ultimaker is about to fail just because it starts to sound out of whack.
Have a look at how various models are constructed. The key challenge in creating a 3D model is how the desired real-world object can be broken down into a series of commands—“draw a line and a curve,” “extrude this surface,” “fillet that corner,” “cut a hole here”—that you can use to create the object. If you can find some models on Thingiverse that are in a file format you can edit, try your hand at editing them to see if you can add a feature you desire.
Once you’re ready to start from scratch, the first tool you’ll need is a set of calipers. Digital slide calipers with 0.01 mm accuracy can be had for less than $20. Try creating hangers or hooks that require a precise measurement to fit snugly on an already existing object (like over a door), giving both a feel for using the calipers and helping you dial in how your printer maintains dimensions throughout the printing process.
One unique challenge is learning to think in a 3D-printer compatible way. As mentioned, objects with structures that tilt at more than 45° can’t be printed without support material because the object will sag. Note that bridges—linear spans of plastic over a gap—work surprisingly well, but print them so the first layer of the bridge is on the inside of an object and won’t be seen.
While you can turn on “support material” in most slicers, doing so often causes a lot of extra material to be used, which is both wasteful and requires a ton of post-print cleanup. Note that with a dual extruder printer you can print PLA or ABS on one extruder while printing with water-soluble PVA on the other extruder, making cleanup a simple matter of soaking the piece in a bucket overnight.
There is also a balance between creating walls that are too thinly and too thick. Thin walls can lend elegance to an object, but print too thin and that single or double layer of linear plastic filament will fail quickly. Naturally, this all becomes more intuitive with practice and experience.
3D Printer Anatomy
There are a lot of parts, moving and otherwise, that you’ll find inside a 3D printer.
3D Positioning System
Within the build volume, the printer must be able to position the hot-end at any point to be able to precisely extrude material within the layer being printed. However, motion doesn’t have to be limited to the hot-end.
3D printers may move the hot-end or the print bed in a number of different ways. Here are three primary designs in use today:
Gantry
This style of printer moves the extruder in the x- and y-axes, while the bed moves only in the z-axis. Both the Ultimaker (Figure 1-1) and the MakerBot Replicator (Figure 1-2) use a gantry to move the extruder. However, the similarity ends there. The Replicator integrates the extruder with the hot-end. The Ultimaker uses a Bowden cable to separate the two. The Replicator has a simpler design, whereas the Ultimaker greatly decreases the weight of the print head, allowing for greater print speeds (at the cost of additional maintenance issues).
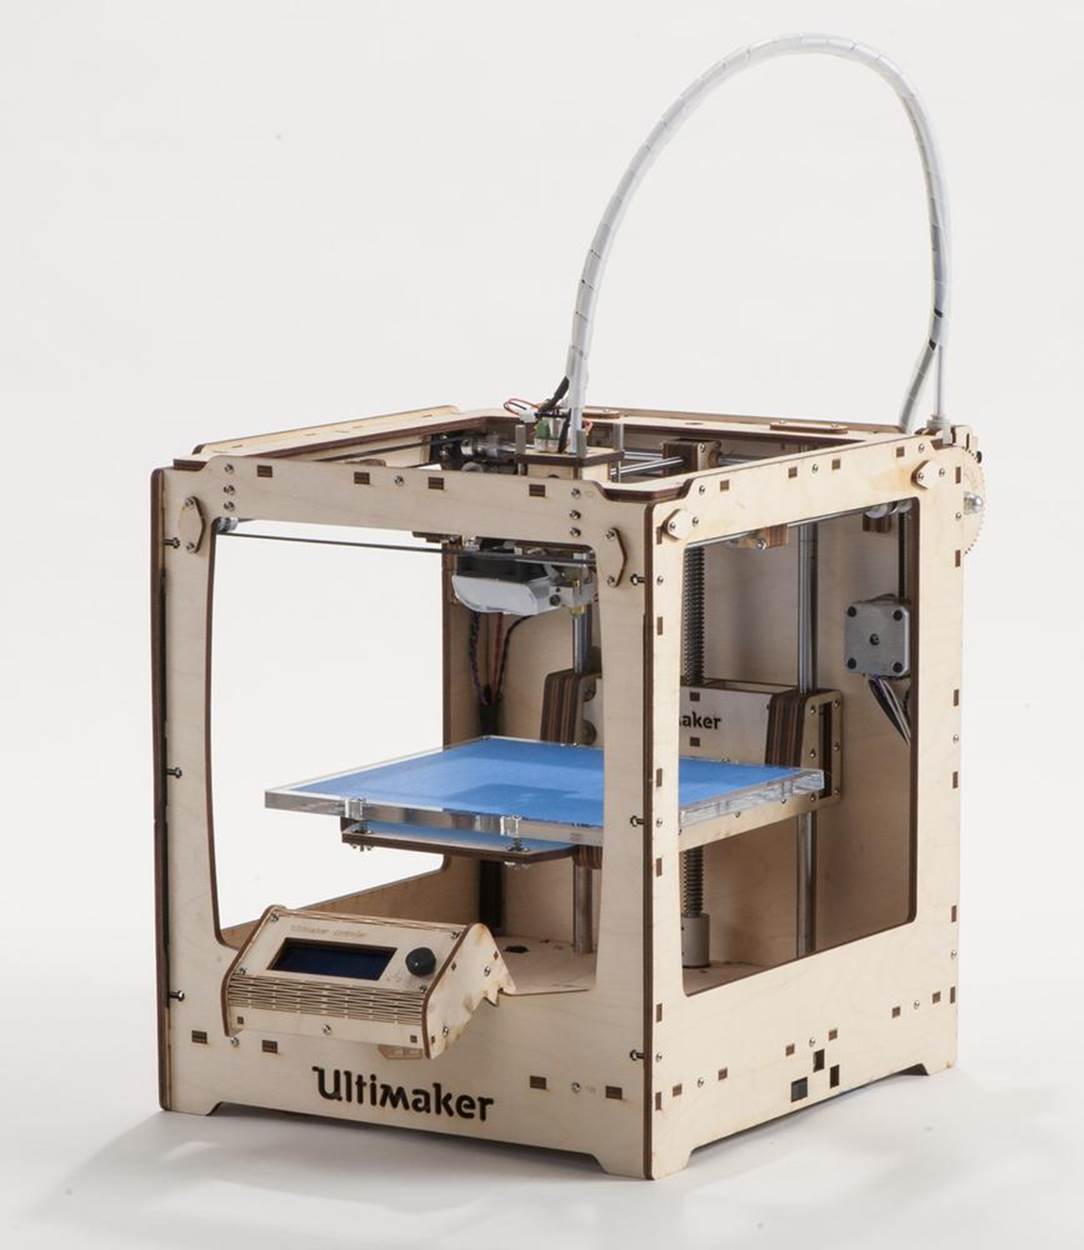
Figure 1-1. The Ultimaker
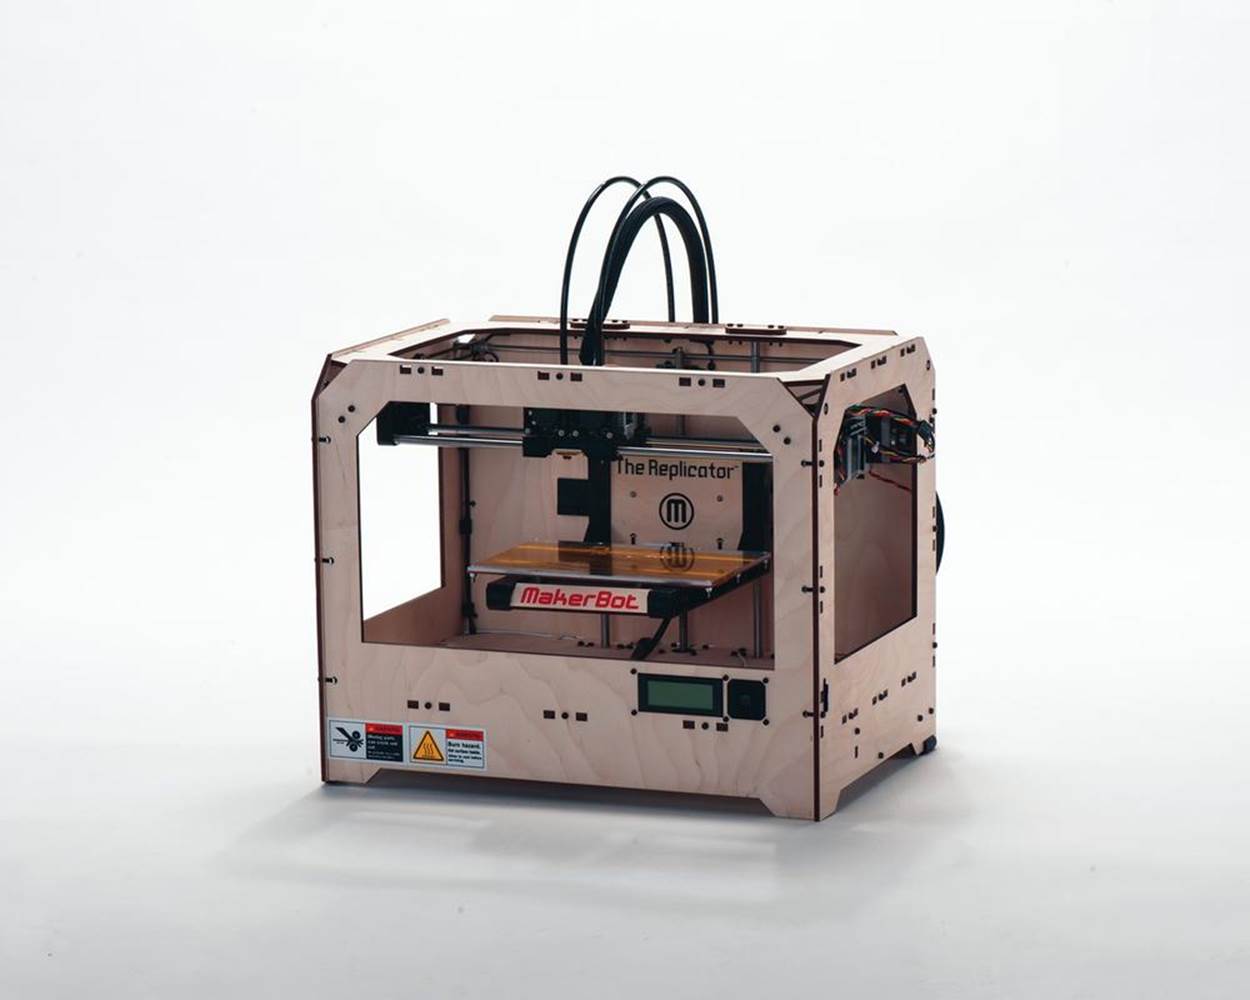
Figure 1-2. The Replicator
Moving bed
Instead of moving the print head in xy space, one of the axes is changed by moving the print bed itself. Usually, a moving-bed printer will move the print head in the z-axis. This is a mechanically simpler design in that the x- and y-axes are managed independently using entirely linear motion. It has the disadvantage of requiring the printer to move a significantly heavier print bed, which could knock loose the printed part. It’s slower, but simpler. Printrbot’s models (Figure 1-3) are examples of moving-bed printers that trade print speed for low cost and ease of maintenance.
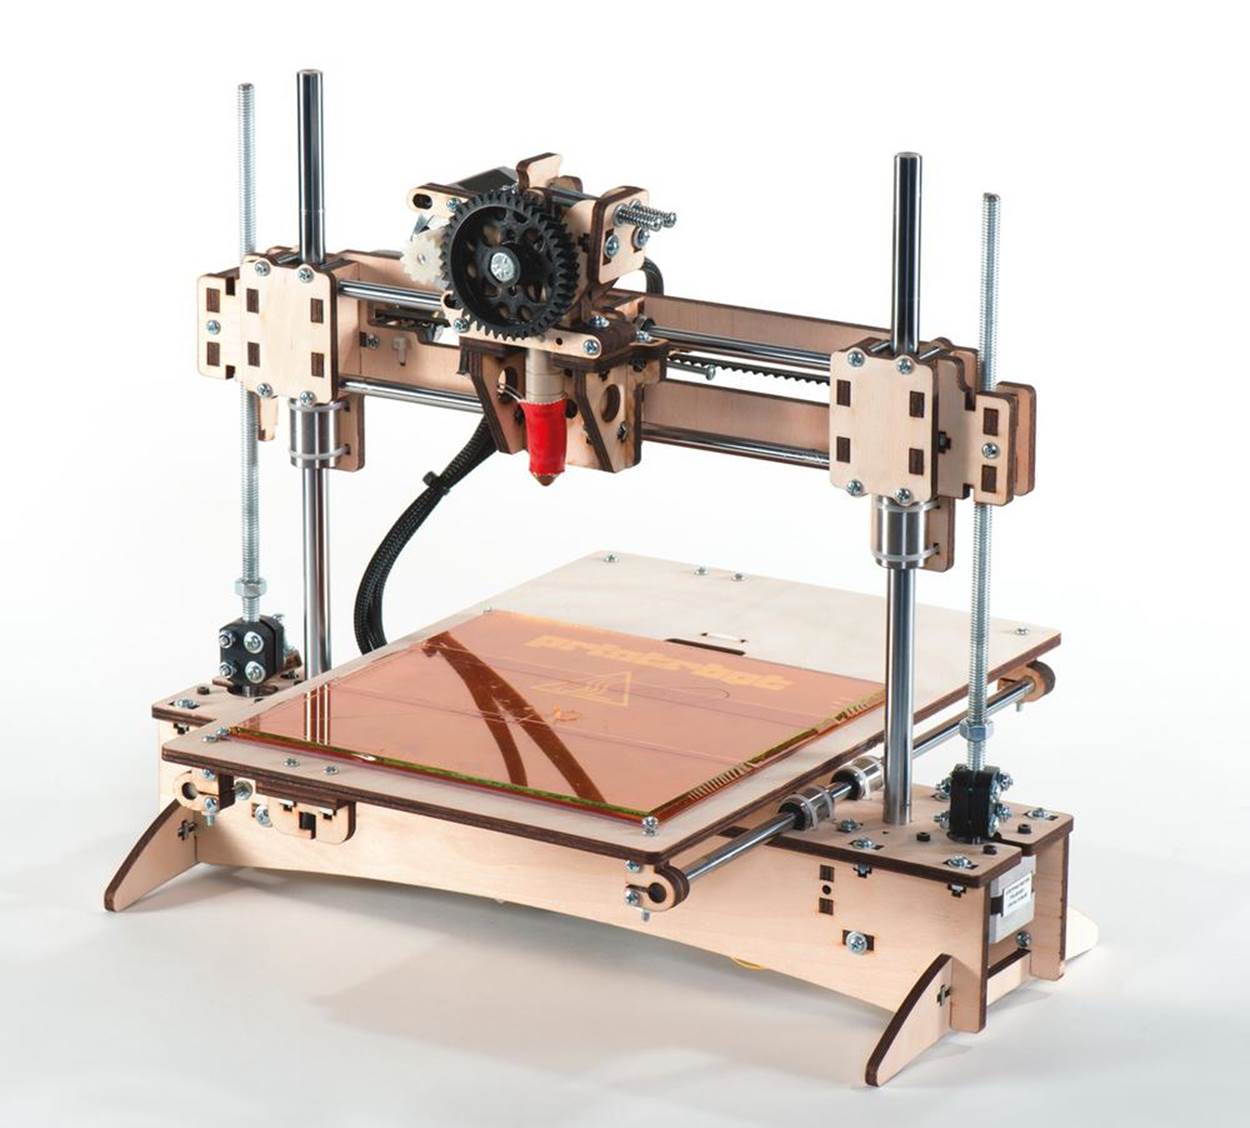
Figure 1-3. A Printrbot
Deltabot
Industrial pick-and-place robots typically use this design. A deltabot has three control rods connected to the toolhead, and these rods can be moved to control the position of the head. Recently, Johann Rocholl adapted this technology to 3D printing and created the Rostock (Figure 1-4). Hard to explain, it looks like an alien probe is printing your favorite model.
The Rostock printers (so far) use a Bowden setup to separate the hot-end from the extruder, allowing for very quick and precise head positioning with relative mechanical simplicity. The downside is increased complexity in the driver; the hot-end positioning is not a linear set of steps because of the non-linearity of the motion between the vertical axis and the planar positioning of the hot-end.
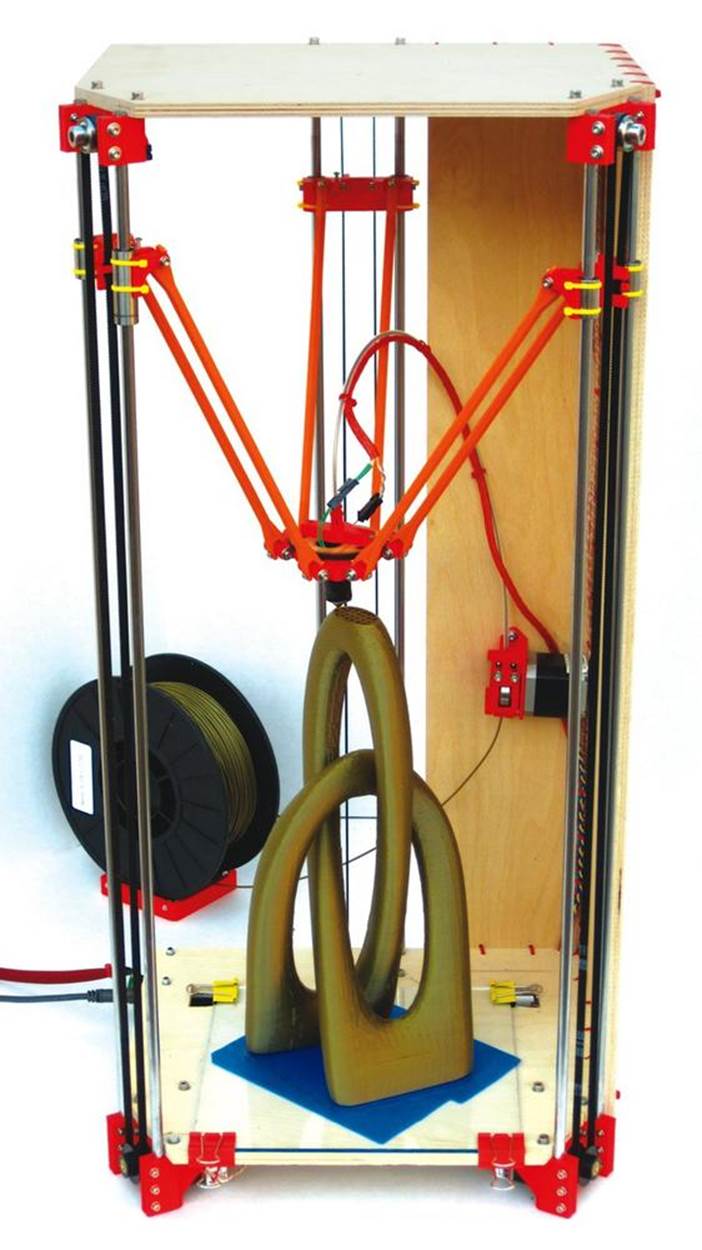
Figure 1-4. The Rostock
3D Printer Parts
Print bed
This is the bed upon which the printed part rests during production. Bed temperatures can be ambient or heated. A non-heated bed is often covered in painter’s tape, as seen in the Ultimaker (Figure 1-1), to which the printed material adheres. Heated beds, as seen in the Printrbot (Figure 1-3), keep the part warm during the print and prevent warping. Depending on the material, a heated bed will maintain a temperature from 40°C to 110°C throughout the print. Let it be noted that the insides of a 3D printer are not a finger-friendly zone (and I have the blisters to prove it)!
Extruder
The extruder is not actually the part that squirts out plastic. The extruder is the part that feeds the plastic filament into the hot-end. Extruders may be integrated into the hot-end or they may be remote, typically pushing the filament through a stiff PTFE (Teflon) tube (this is the Bowden cable) into the hot-end (Figure 1-5).
With a dual extruder (Figure 1-6), you can print two different materials or colors simultaneously. This versatility comes at a cost of complexity (and price), as it requires an extra extruder, hot-end, and all the bits in between. Some printers, like the Ultimaker, can be upgraded from single to multiple extruders. Others cannot.
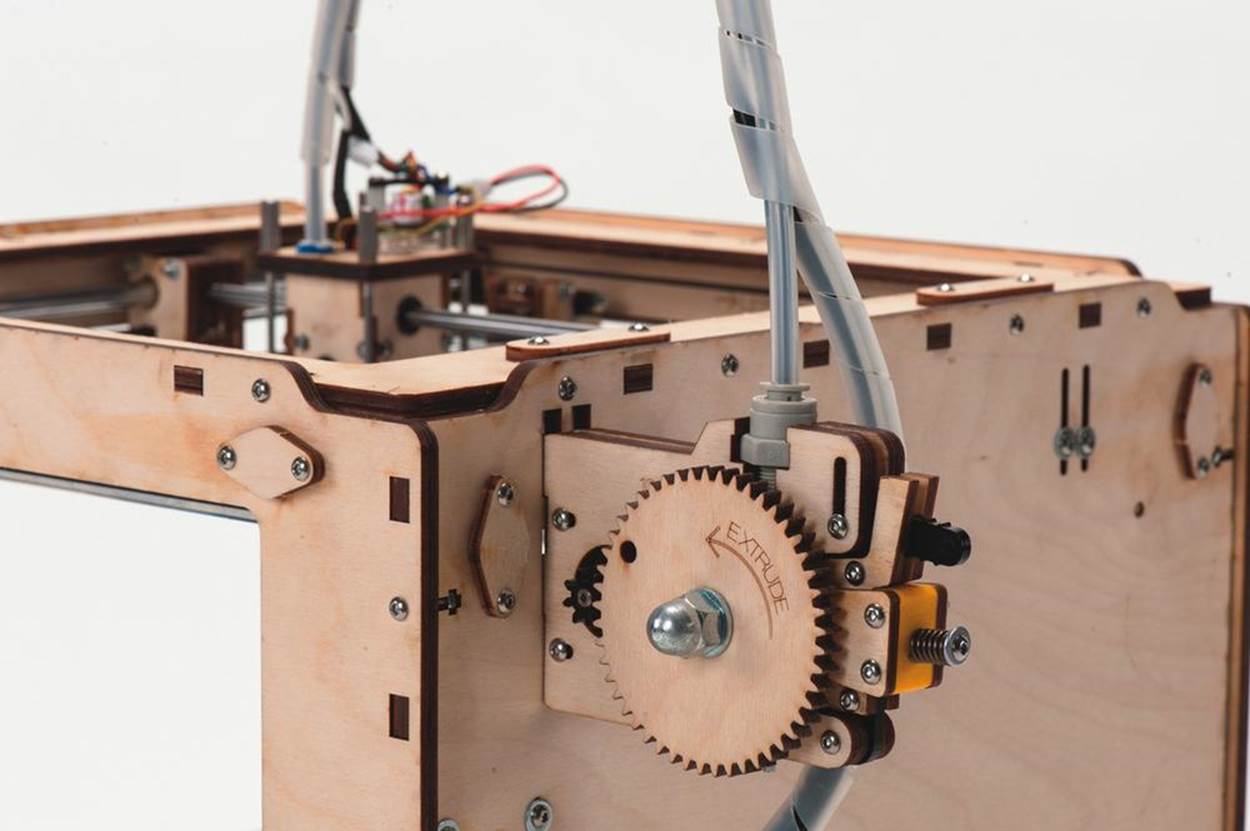
Figure 1-5. A Bowden extruder

Figure 1-6. A Replicator sporting a dual extruder
Hot-end
The hot-end is comprised of a heater, a temperature sensor, and an extrusion end through which the plastic filament is pushed to deposit molten material (Figure 1-7). Hot-ends are often assembled within an aluminum block or are configured in a barrel-type shape.
Note that the interface between the hot-end and the extruder—be it directly integrated or with a Bowden cable between the two—can be exceptionally problematic on some printers or on a printer that is not adjusted properly.
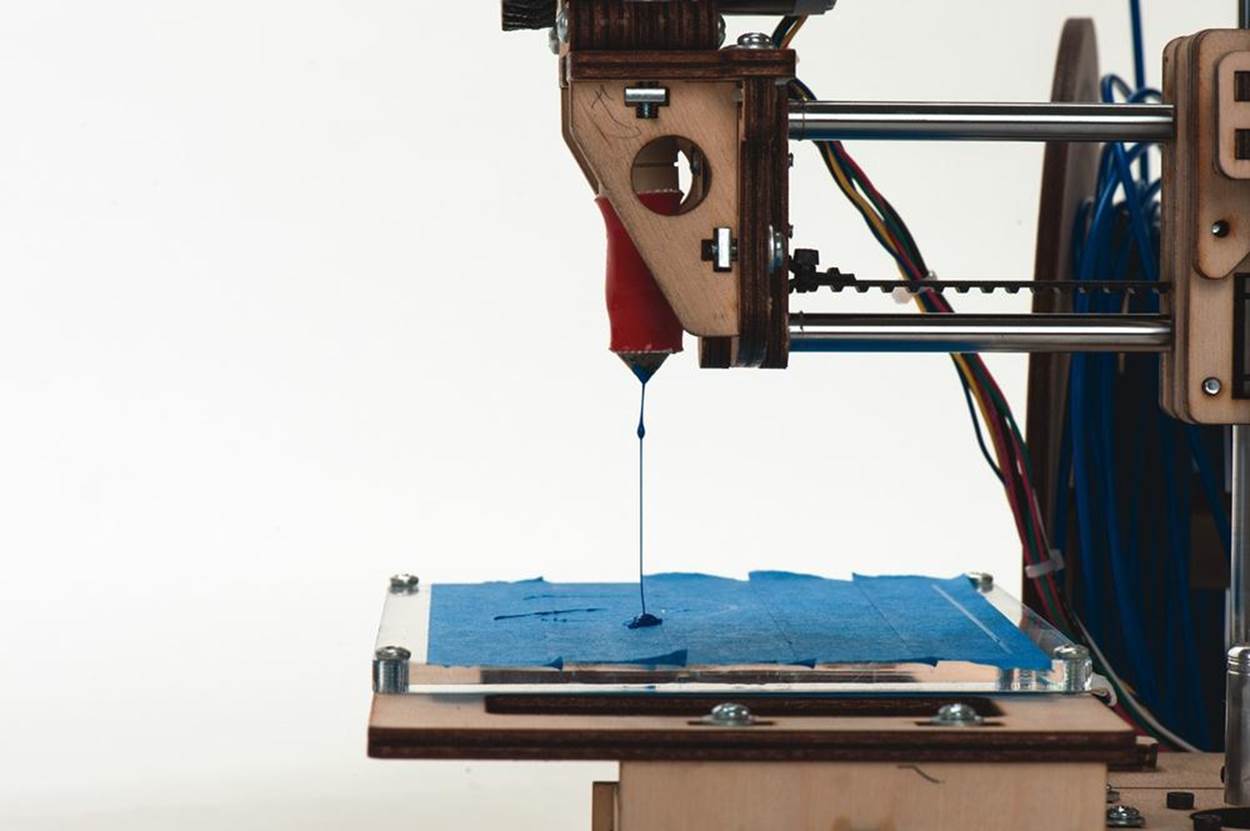
Figure 1-7. The Printrbot hot-end / extruder
The hole in the nozzle may range in size, typically between 0.2 mm and 0.8 mm. The smaller the nozzle, the more detailed the print, but the longer it takes.
Plastic filament
The filament is the consumable of the printer. Like an inkjet squirts ink, a 3D printer squirts melted filament.
Choosing a Filament
There are a handful of plastics that are compatible with MPD-based printers. Each has its pros and cons. I choose to print exclusively with PLA because of its low toxicity and general environmental friendliness.
All printers are not compatible with all materials. Some materials may really stress a printer, as the temperature range for extrusion may vary from 160°C to 305°C, depending on the material. A printer designed for PLA/ABS at a max of 250°C may fail entirely at 300°C.
With that in mind, the three most common materials are PLA, ABS, and PVA. (Read more about materials choices in Chapters 8 and 9.)
ABS
ABS (acrylonitrile butadiene styrene), the cheapest of the three, is typically extruded at between 215–250°C, and does best with a heated bed to prevent warping. ABS creates mild, generally tolerable fumes that may be dangerous to sensitive people or certain pets (personally: fume hood, please!). ABS can be quite versatile. It can be sanded, and by mixing ABS with acetone, it can be easily glued together or smoothed to a glass-like finish.
PLA
PLA (polylactic acid or polylactide) is a biodegradable plastic typically made from corn or potatoes. PLA filament is extruded at a lower temperature of 160–220°C and does not require a heated bed (painter’s tape is just fine). When heated, PLA smells a bit like sweet, toasted corn. PLA tends to be stiffer than ABS. While PLA does not require a heated bed, it can warp a bit during cooling, something that a heated bed can greatly improve. Note that there is a “flexible PLA” variant that, while trickier to use, will result in objects that are squishy.
PVA
PVA (polyvinyl alcohol) is a specialty plastic used on multiple-extruder printers to print support material. PVA is typically extruded at 190°C, is water soluble, and can be used to print support material in complex 3D prints with lots of overhangs. PVA absorbs water like a sponge, which causes problems in high-humidity environments.
Alternative Materials
While MPD printers are generally tuned to filament printing, it’s not hard to adapt them to support other materials. A common mod is to add a syringe-style extruder that handles materials such as chocolate, frosting, and various kinds of clays.
Next Steps: What to Make
Once you start to get the hang of 3D printing, a world of possibilities opens up. I’ve given many of these things away as gifts. The material costs are very cheap and the look of surprise when you say, “Yeah, I printed that. You want it? Different color? Nah, no problem, I can print as many as you want easily,” is priceless! With my Ultimaker, I have printed the following handy bits, and many, many more (see Figures 1-8 through 1-15).
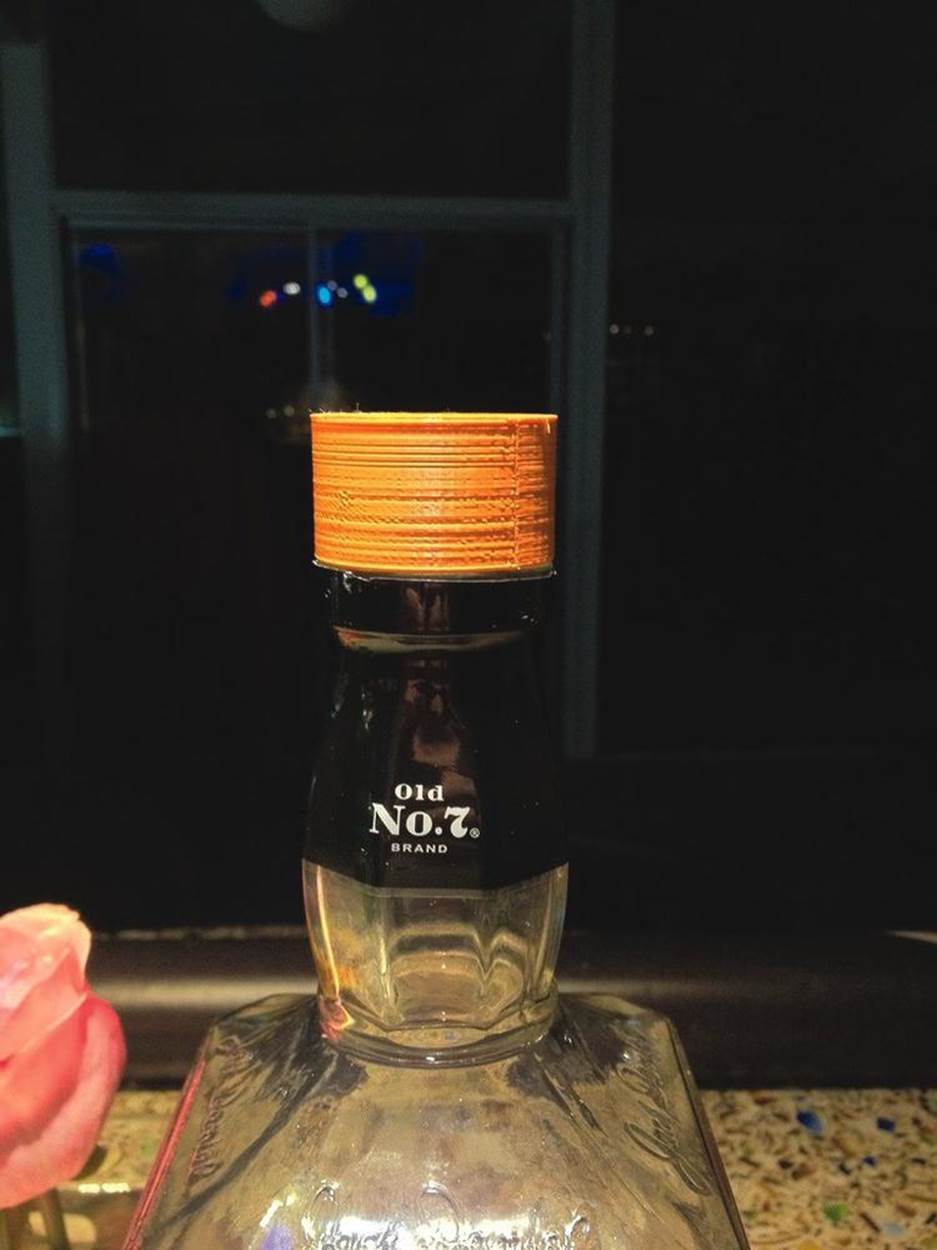
Figure 1-8. Replacement screw cap for a large bottle of Jack Daniels (http://thingiverse.com/thing:18194)
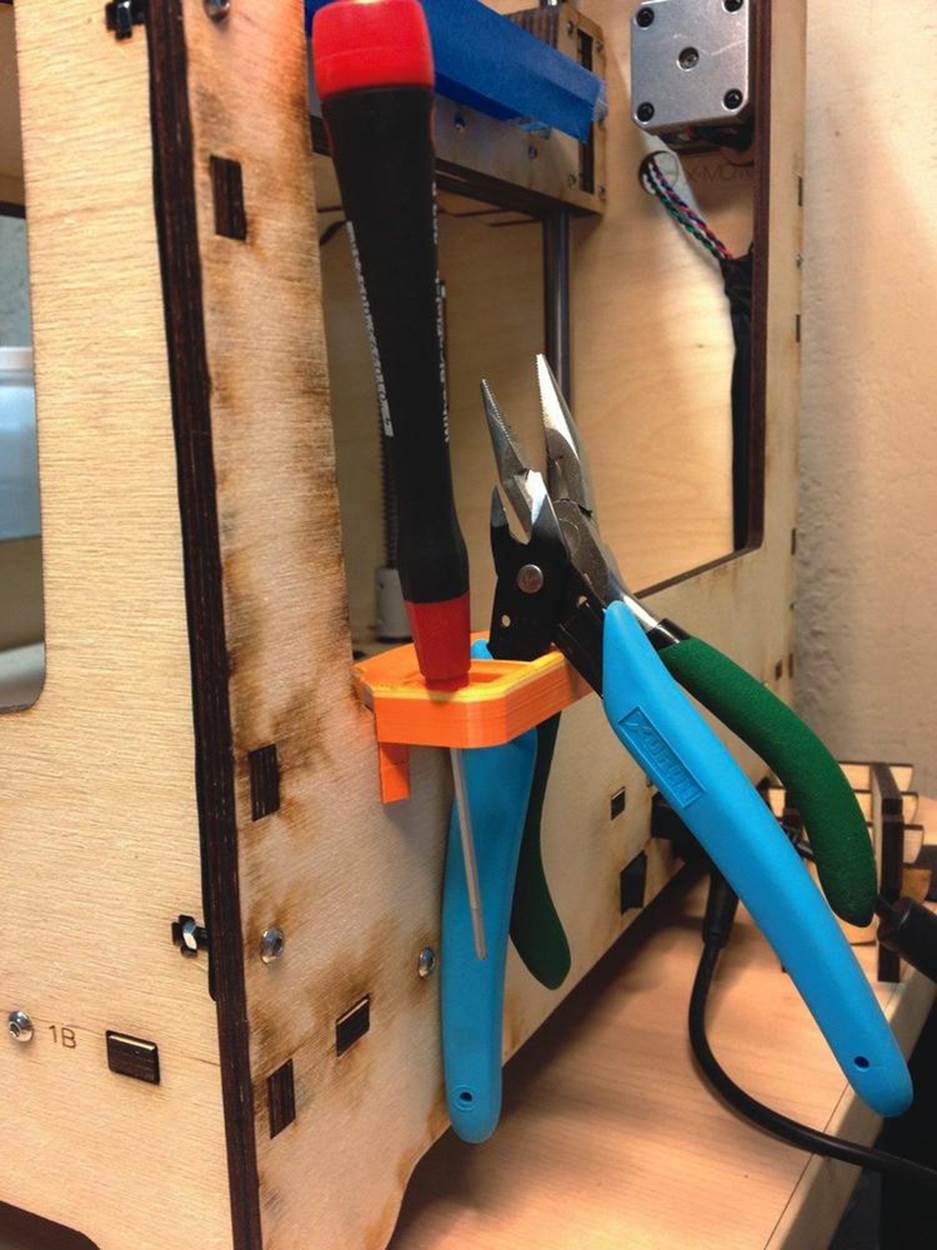
Figure 1-9. Ultimaker tool holder (http://thingiverse.com/thing:18098)
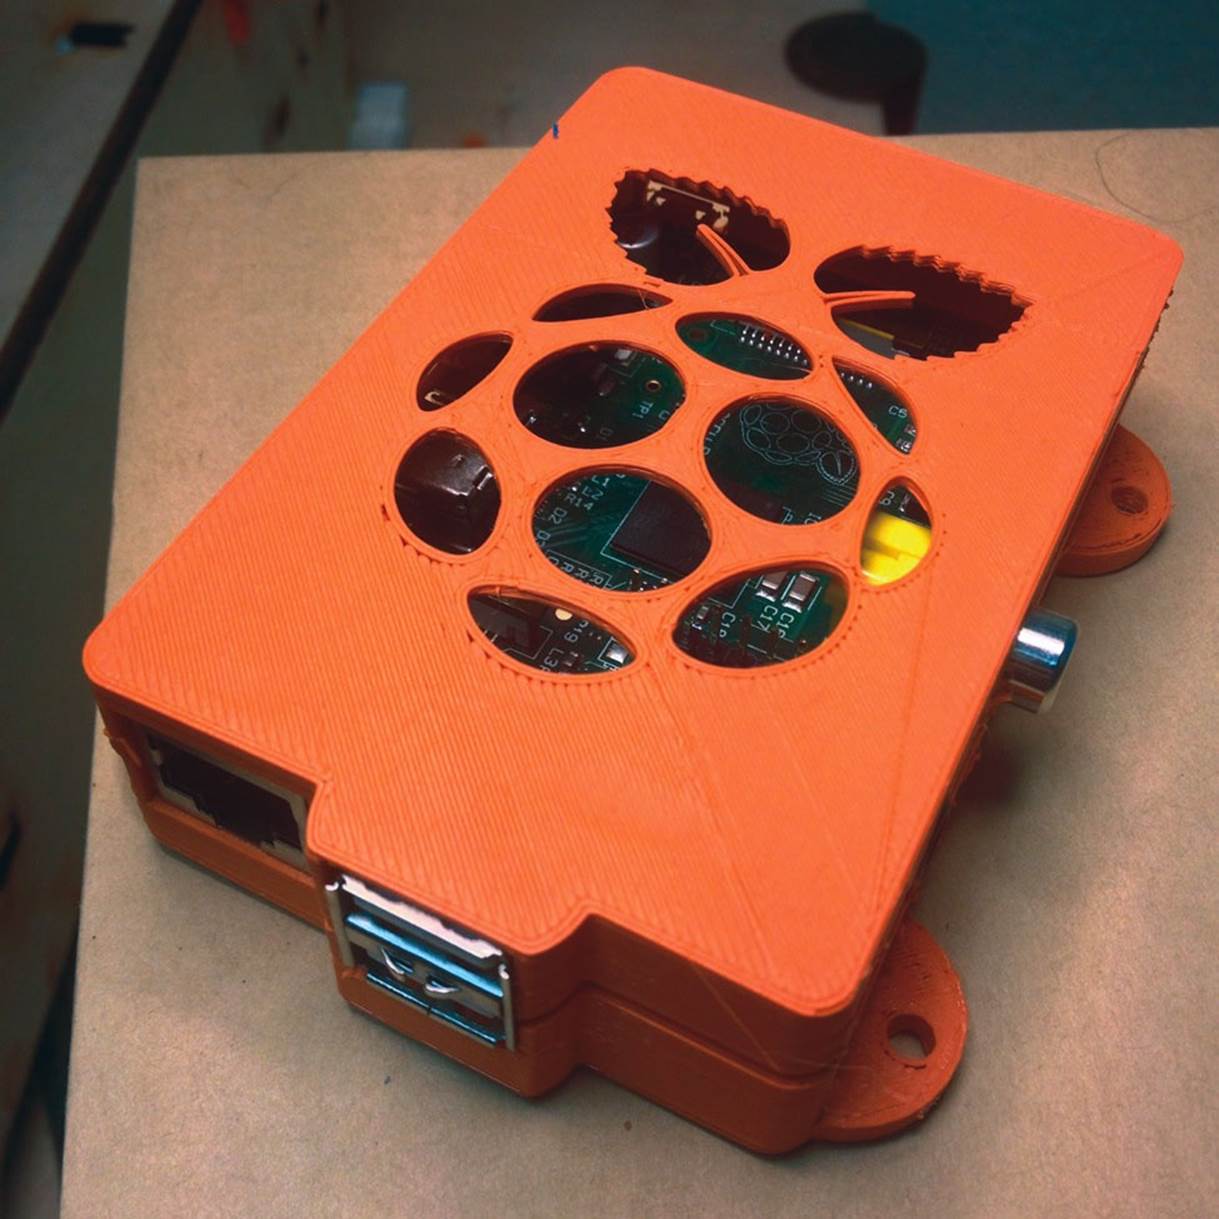
Figure 1-10. Raspberry Pi case (http://thingiverse.com/thing:25363)
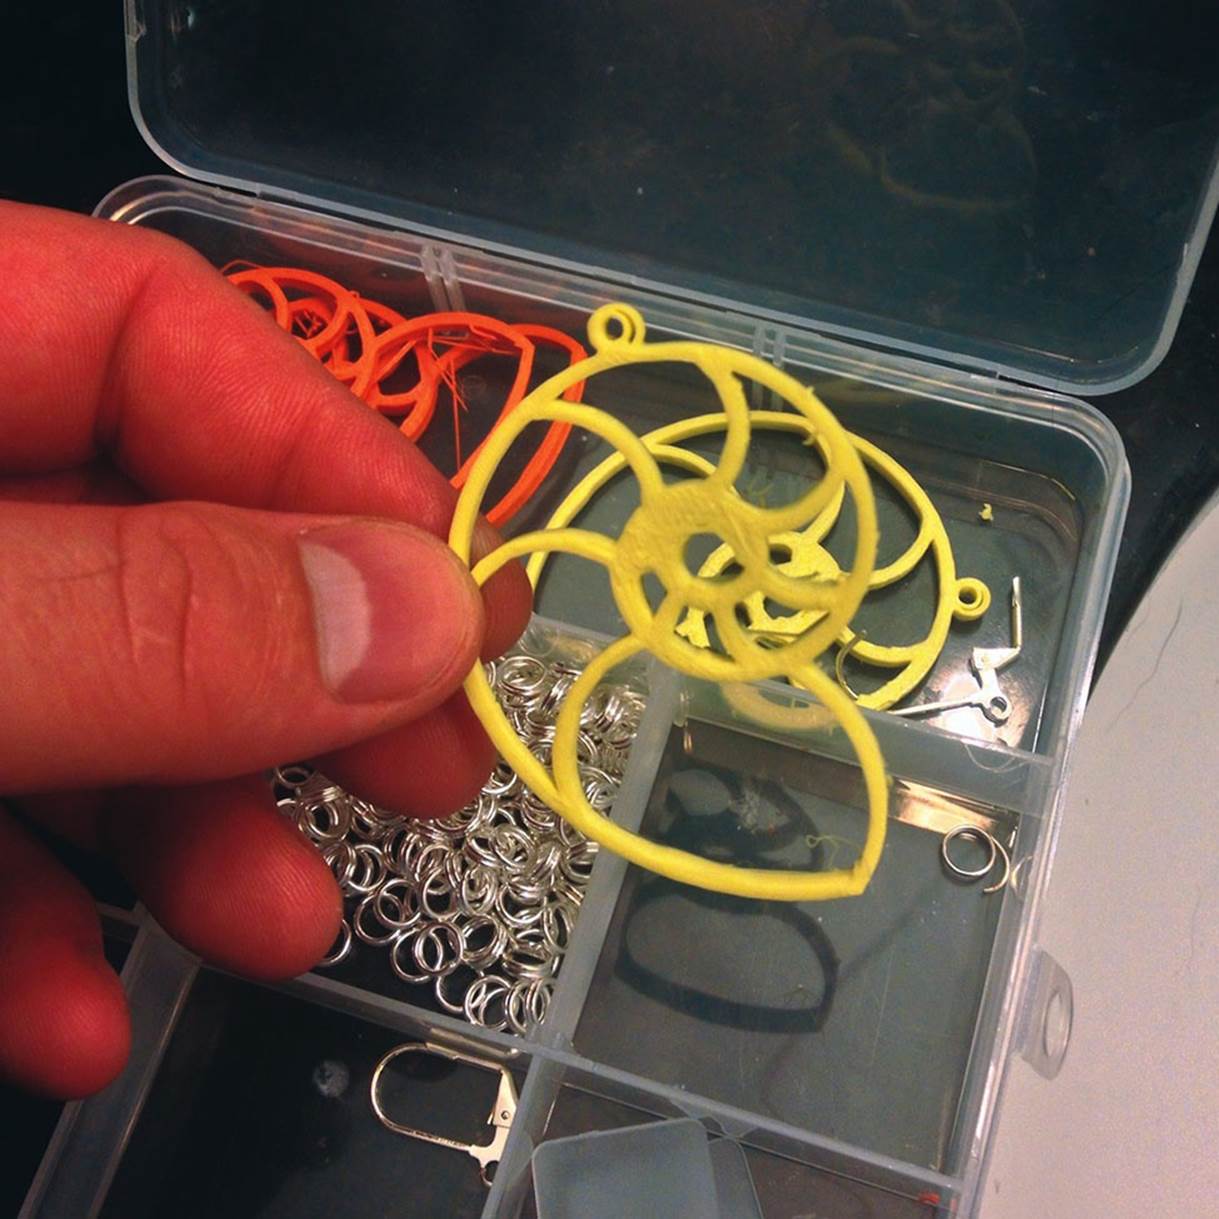
Figure 1-11. Nautilus-shaped earrings (http://thingiverse.com/thing:13450)
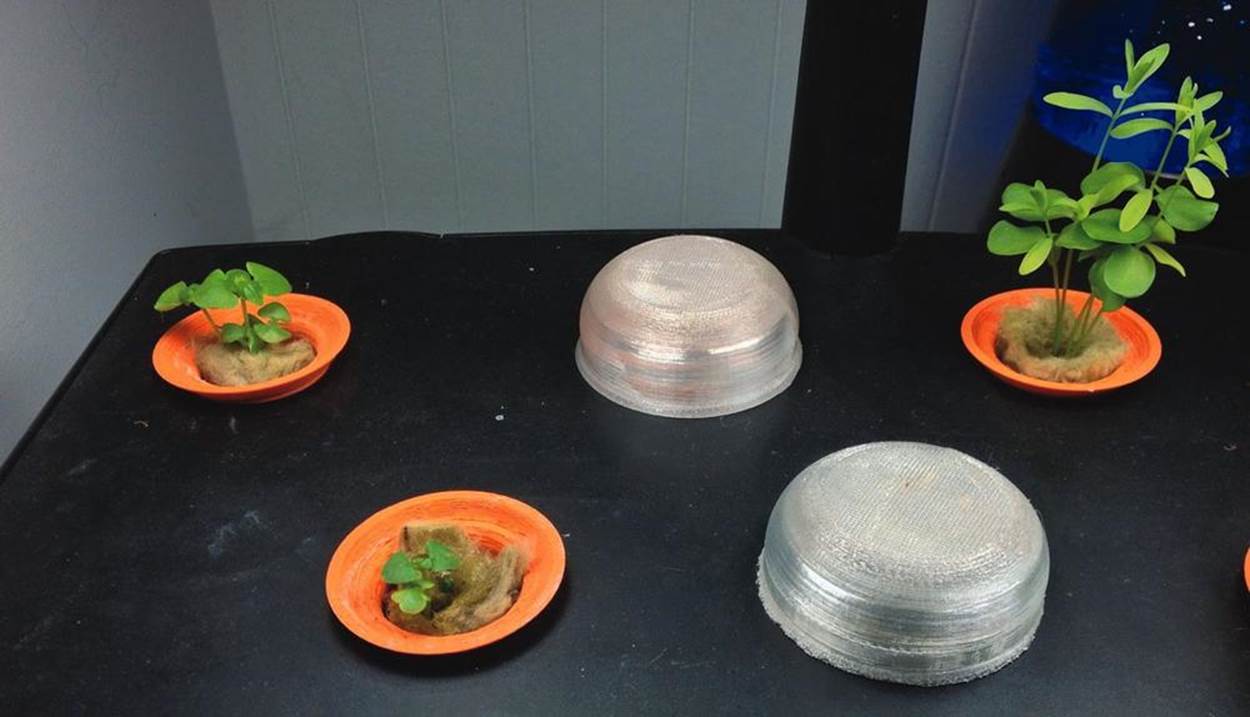
Figure 1-12. Aeroponic grow pods for a winter herb/salad garden (http://thingiverse.com/thing:32613)
Figure 1-13. Fan shroud with spacer(http://thingiverse.com/thing:16530)

Figure 1-14. Case for a Teensy-based IR Blaster (http://thingiverse.com/thing:19315)
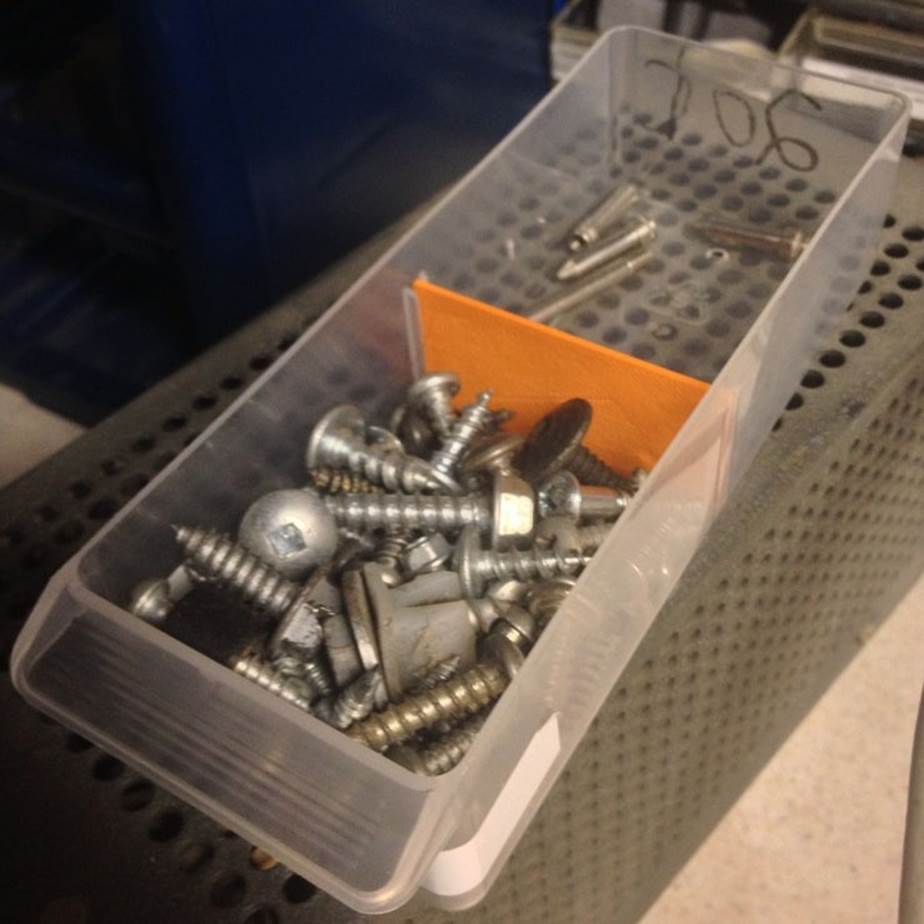
Figure 1-15. Drawer divider for my son’s screw sorting efforts (http://thingiverse.com/thing:32614)
Bill Bumgarner plays with high voltage, cooks with fire and water, incubates microbes, hacks code, corrals bugs with his son, and tries to make stuff do things that were never intended.