Idiot's Guides: 3D Printing (2015)
PART 4
3D Modeling
PROJECT 7
Dust Collector
Project Time: 45 minutes
A dust collector is a simple little device you feed your filament through. Inside, a small sponge catches any dust that was on the filament. Dust can cause some major headaches in 3D printing, including nozzle clogs, so it’s best to avoid the problem altogether by using a dust collector.
This project also gives you the chance to experiment with parts that are designed to fit together, helping you get a feel for the accuracy of your 3D printer and how to design parts that fit snuggly. So boot up that computer and let’s get started!
Create a New Part and Revolve the Body
Go ahead and open your CAD software to create a new part in millimeters. The basic design of the dust collector is pretty simple: a hollow cylinder divided into two parts that clip together. This means you’ll actually be modeling two different parts.
For the base of the first part, start by using the revolve feature in your software. You can just use the same dimensions that are in the following figure. The only exception is the 1.25mm radius dimension right next to the centerline, which is dependent on the size of your filament. My filament is 1.75mm, so I made the opening 2.50mm to give it some room. If you’re using 3mm filament, you’ll want to make that dimension something like 2mm radius.
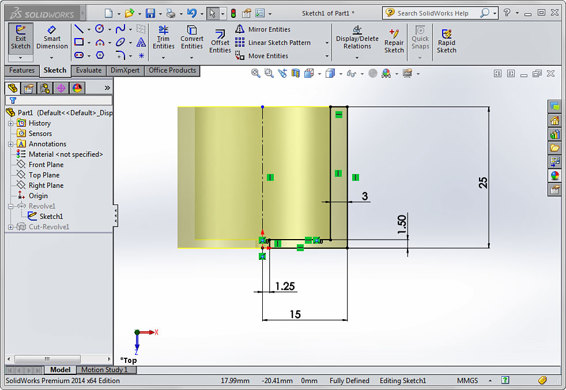
The first feature is a revolve to create the cylindrical shape of the part.
Cut a Groove
Next you’ll be cutting a groove on top of the cylinder for the clips to fit into. This is a pretty simple operation with the revolved cut command in your software.
Using the same centerline from the origin you used for the initial feature, you can just draw a circle at the edge of the part. Put the centerpoint of the circle on the edge of the cylinder so it’s constrained there, and then just specify a diameter of 2mm and a distance from the top of 3mm.
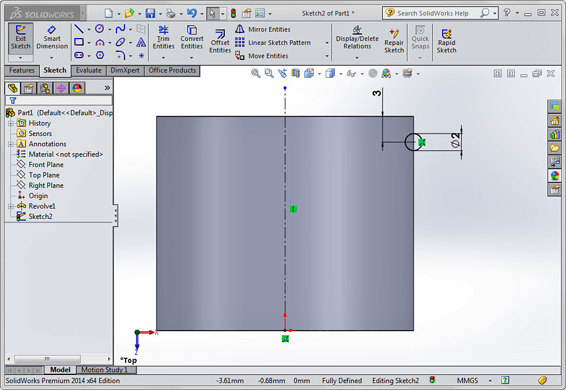
Use the revolved cut command to cut a groove.
You then need to add fillets to the top and bottom of the groove. This will just help the clips fit more cleanly when the two pieces are put together. In the Features tab, choose Fillet and specify 1mm fillets. Next just choose the top and bottom edges of the groove, and finish the feature. That’s all you need to do for the first part, so just save it.
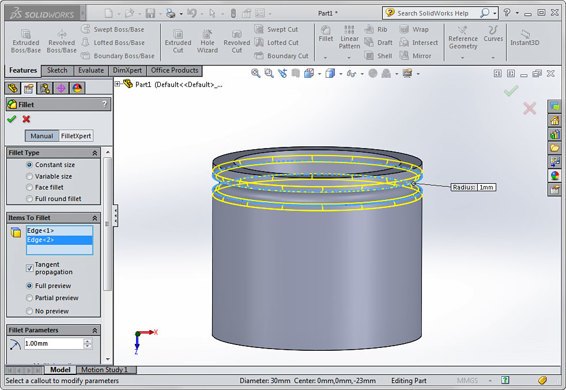
Fillet the edges of the groove you just cut.
Create the Second Part and Revolve the Body
Now it’s time to create the second part. This part is a little more complicated, but it starts the same way: with a revolved base.
Just like with the last part, you can use the dimensions from the following image to create the revolve. Again, you may need to change the dimension closest to the centerline if you have 3mm filament.
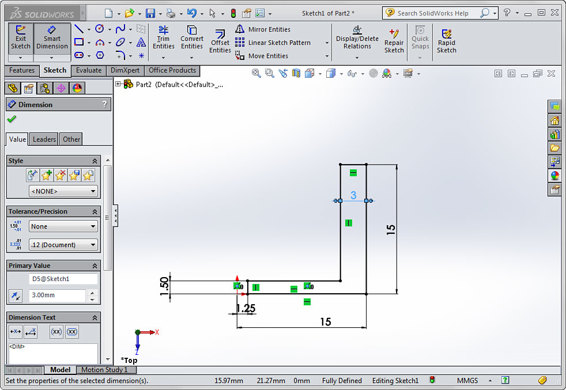
The second part also starts with a revolve.
Make the First Clip
You can’t just extrude the clips because you need them to follow the curve of the cylinder in order to function properly. So you should use the revolve command in your software.
Once again, you can use the dimensions from the following image. If you’re really paying attention, you may notice it’s offset out and up by .25mm compared to where it should be based on the first part. This is to give it a little clearance, so the two parts fit together more easily.
When you actually finish the revolve, don’t do it a full 360°. You want the clips to be flexible, so you should only revolve it by a small amount. (I used 30° on mine.)
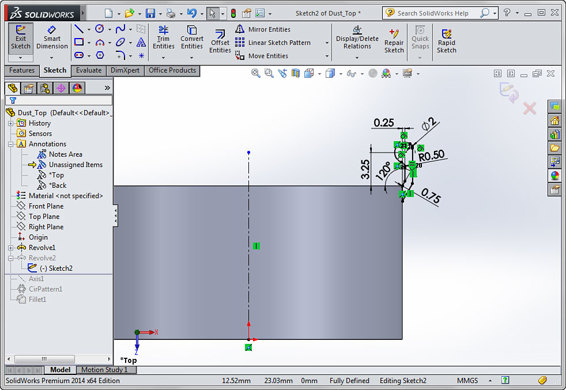
The revolve command should be used for the clip, so it follows the curve of the cylinder.
Copy the Clip
To avoid having to remodel the clip three more times, you can use the circular pattern button in the Features tab. But in order to use that command, you need to first create an axis to use as a reference. This is easy enough; just create the axis by selecting any of the cylindrical surfaces.
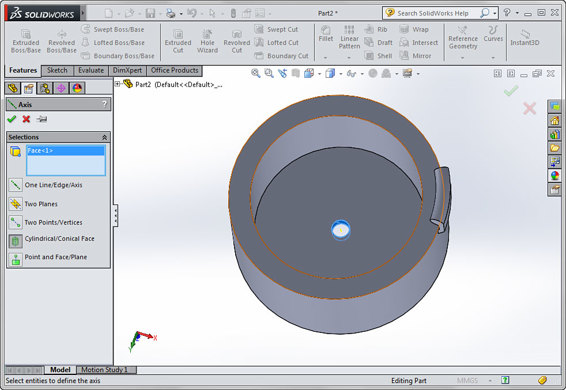
Create an axis to use for the circular pattern command.
With the axis created for reference, you can pattern the clip. Select the first clip, and then select the circular pattern command. Under Parameters, select the axis of revolution, type in 90.000 to separate the clips by 90°, and enter 4for the number of clips (the original plus the three copies).
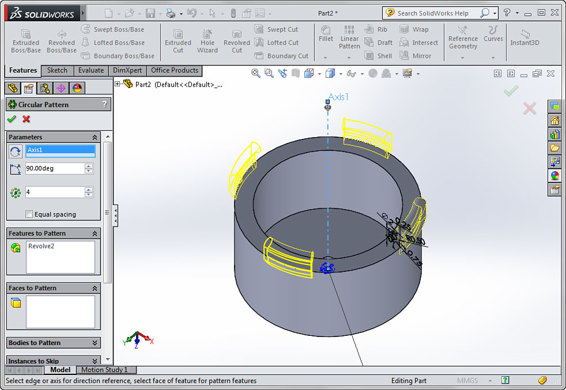
Use your circular pattern command to copy the clip.
Finally, add some fillets to the edges of the clips. This will just make the clips a little bit stronger.
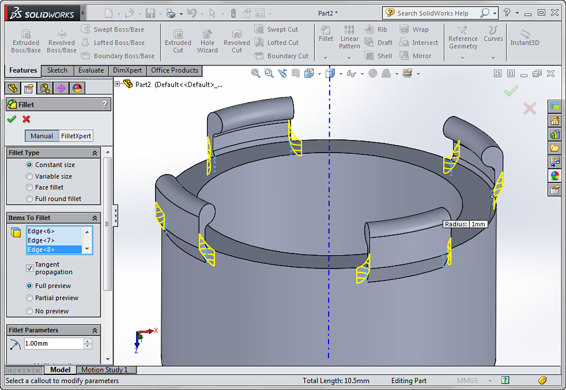
Fillets alleviate stresses on edges and make the part stronger.
![]()
WATCH OUT!
You could have added fillets to the first clip and then patterned it along with the rest of the clip, but I’ve found that patterning multiple features together sometimes causes errors.
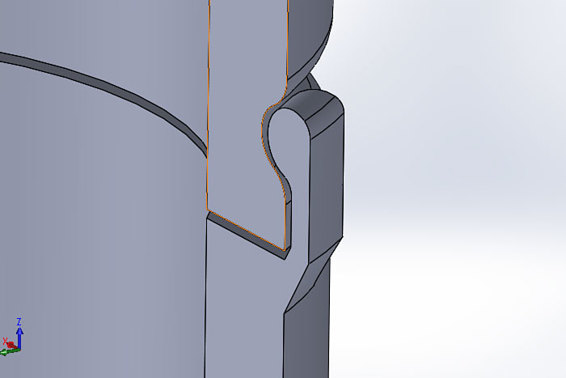
You can see how the parts will clip together in this section view.
Export the .STL Files and Print
As you’ve done with the previous projects, you just need to export the part as an .STL to print it. The only difference here is that you’ll need export both parts. You can then load both parts at the same time and slice them together to be printed. To do this, just load the first part and then the second part. The parts should automatically be placed next to each other for slicing. From then on, you slice the parts the same way as you normally would.
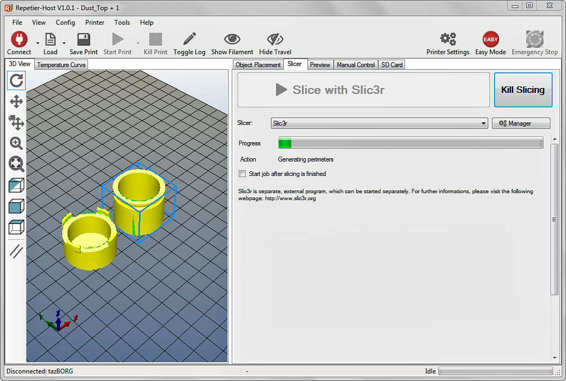
Both parts can be printed at the same time.
Once your parts are done printing and cooled, you can start using them to collect dust. All you have to do is feed the filament through the holes, cut off a small piece of a household sponge and put it around the filament, and then clip the two pieces together. As the filament slides through, the sponge will collect any dust on the part.
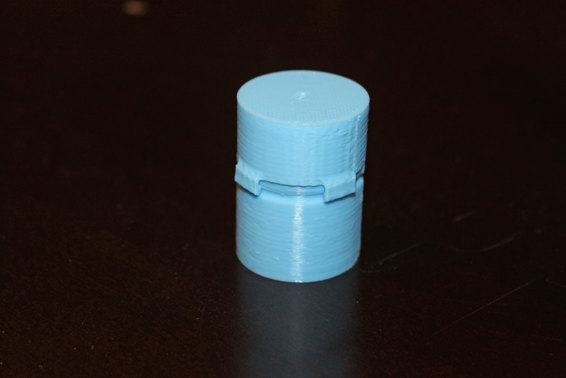
The two parts should be able to clip together. If they don’t, you can try tweaking the dimensions to experiment with how parts fit together.