The DSLR Filmmaker’s Handbook: Real-World Production Techniques, Second Edition (2015)
Chapter 10. Converting and Editing Your Footage
After the shoot wraps, you have officially entered post-production. Hours of footage representing months of preparation and work are all contained in items that can roughly fit in a file box. This phase of post-production is closely related to pre-production because you are setting up all of the technical details that will travel with you until the end of production. Your challenge now is to get from the shoot to the edit with your footage intact, perfectly prepared, and organized in a fashion that works for the post-production team. You need to back up your footage for safety, log your shots, deal with technical specifications for editing and color-correcting programs, organize audio files with corresponding shots, and put everything into a format that you can work with for the rest of post-production.
Setting the Foundation for Post-Production Workflow
As they say with all creative endeavors, sometimes you need some time off. We recommend taking some time away from the project after your shoot. You will need the break; it allows things to settle into your brain and allows you to start thinking of your next steps subconsciously. After your time away, you will most likely be excited and overwhelmed at what is ahead of you. We have yet to meet a fellow filmmaker who isn’t surprised at how much work there is to do during post. In this section, we’ll break down the steps you need to do or consider before you start editing.
When you are finished with your shoot and back in your office or edit suite, here is what you should have in front of you:
· Hard drives with the raw footage from the field
· Audio files from your recording device unless you ran sound only from your camera
· Audio notes with included scene numbers
· A copy of your shooting script and shooting schedule with your scene numbers
· Script notes indicating which takes you thought were most promising for including in your final project
It is with these building blocks that you will start your post-production process. Depending on what you choose for your field hard drives, how much footage was shot, how much time or help you had on set, and how organized the process was kept, your work in this stage could be grueling or simply mechanical.
Choosing the Right Hard Drives
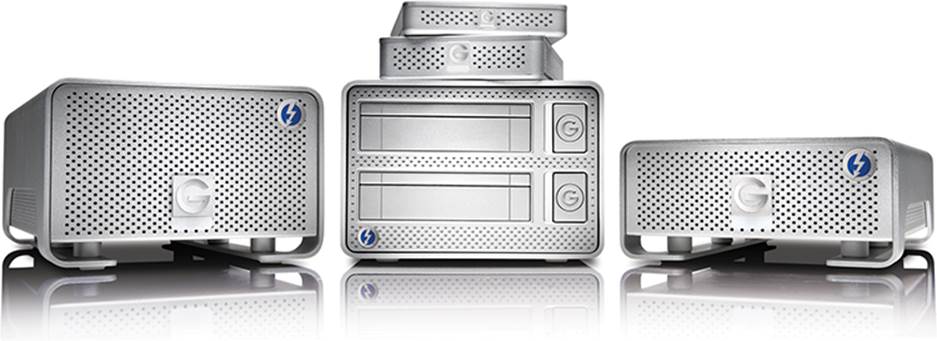
The hard drive requirements for post-production may be different from the requirements of a drive used during shooting; Figure 10-1 shows a good in-the-field drive. Also, the final file size and plans for post-production may lead you to a faster drive than if you have a smaller and less post-production-heavy edit.
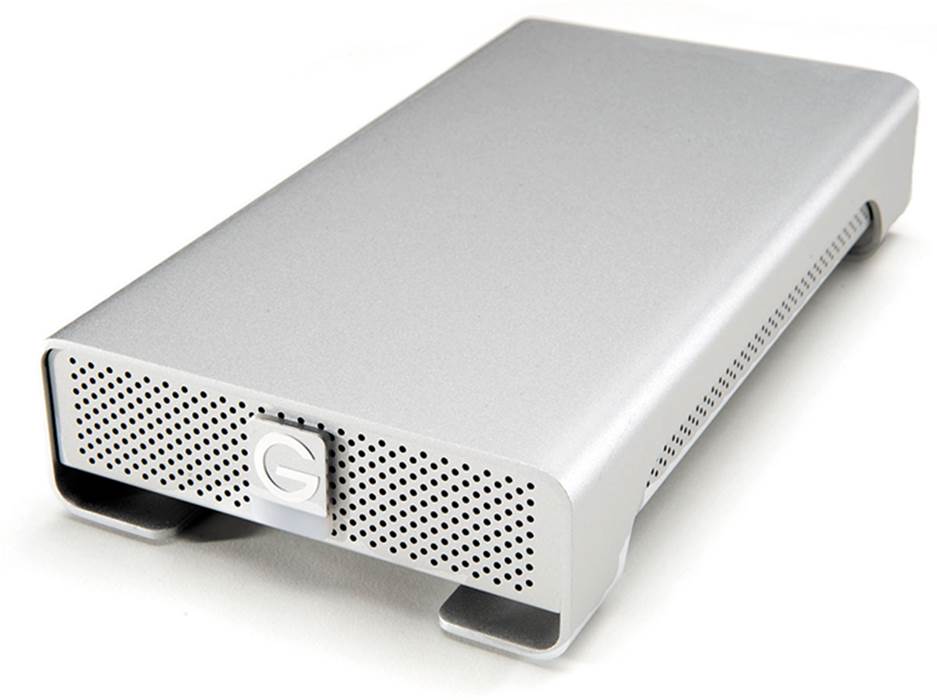
Figure 10-1: G Tech G Drive is a great field drive.
Using drives that do not need to be powered on location is great for an easy field workflow. The problem with using these drives for post-production is that the drives are smaller than traditional hard drives that require power. Your field drives will need to be consolidated to just a single or a few master drives. Take all your raw field footage (and all the separate drives you used) and calculate how big a master drive you need to move it all into one location. You need to buy at least two drives that size or larger and copy all of the footage from your field drives onto your external edit master drives. This way, you can have all your footage on one central drive, and you don’t have to manage multiple field drives.
Keep your field drives as one of your master backups and move them somewhere out of your house or office so you have copies of your raw footage in more than one location. This system may seem obvious, and we all have heard the mantra “Back up, back up, back up.” However, for some reason, there comes a point late at night when you don’t want to spend the time and money on having a second backup. A little voice tells you not to worry (“Nothing will happen to the footage!”) and that you should go see the midnight showing of Blade Runner instead. We can’t repeat this enough: ignore this voice, and make sure your data management person ignores this voice.
Need to figure out the size of the drive you require? If you convert your raw Canon H.264 files to XDCAM files, your total storage will be less than the total of your field drive space. If you choose to convert to ProRes 4.2.2 HQ, then you should plan on the files being seven to eight times larger than your field drive space. For more information on 4:4:4, 4:2:2, and 4:1:1, please check out Chapter 12, “Color Correction and Grading.”
Internal Hard Drives
If you are editing on a desktop computer and it has extra bays for drives, then we strongly recommend using internal drives. Using internal drives keeps the edit suite compact and uncluttered. Internal hard drives can be purchased at any local computer store and can be installed and removed easily and quickly. If you are editing on a laptop or your existing desktop hard drive bays are full, then you need to work with an external hard drive.
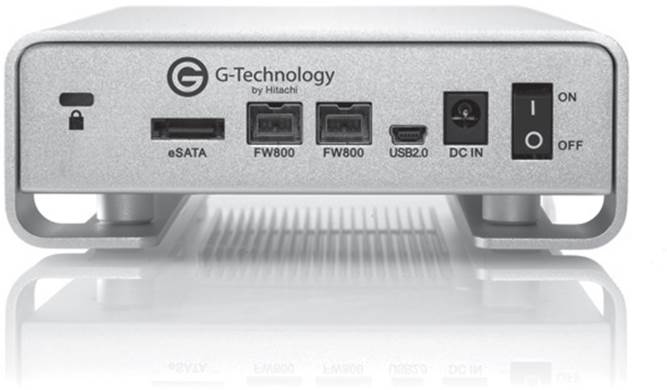
Figure 10-2: Check the back of your hard drive to see what connections your drive can accept.
External Hard Drives
For video editing, you will need an extra drive for storing the footage. Even if your laptop or desktop has a large hard drive, you shouldn’t use the main hard drive with your OS and editing program for storing and rendering the footage. The main types of external drives you will find online or at your favorite local computer store are FireWire 800, USB 3.0, eSATA, and/or Thunderbolt drives. You’ll need to check the hard drive to see what connections it can accept before purchasing (see Figure 10-2). We recommend not using a drive that is slower than USB 3.0, but anything with a faster sustained data rate is better.
FireWire is Apple’s trademark for the type of connector that uses the IEEE 1394 protocol.
1. FireWire 800 This protocol (Figure 10-3) is sometimes referred to as a nine-circuit beta connector and is capable of transfer rates of up to 786 Mbps. FireWire 800 is also full duplex, which means data can go both ways at the same time. Think of it as a two-lane highway where data “cars” can travel each direction without clogging up the road. This is a great choice for a drive to be used for editing.

Figure 10-3: The nine-circuit cable is better known as a FireWire 800 cable.
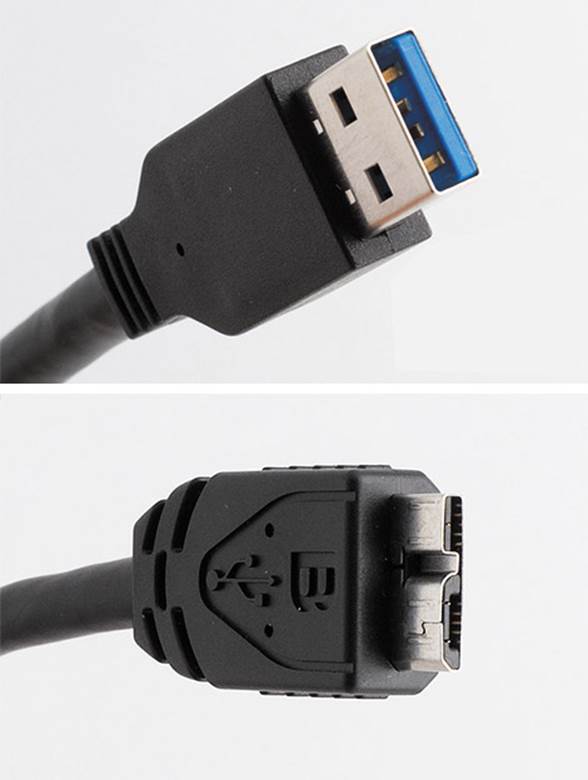
Figure 10-4: The upper photo is a standard USB 3.0 cable and the other end is the USB 3.0 Micro-B plug.
1. USB 3.0 This standard can reach data transfer rates of 5120 Mbps (Figure 10-4). One main difference between USB and FireWire is that USB is typically unsustained data transfer, whereas FireWire is sustained. Sustained means the data transfer speed between the computer and the hard drive remains constant from the moment the data starts its transfer. Unsustained transfers can fluctuate and sometimes be faster and other times slower. You do not want to edit video with drives with unsustained data rates, because during the edit, the drive might not be able to play back video in real time, causing pauses in video playback. Do note that USB 3.0 and future updates are getting to the point where most users won’t push the drives hard enough to run into the sustained vs. unsustained issues.
2. Also note that USB 3.1 has been announced and it will boast 10 Gbps speeds that rival Thunderbolt drives. Since they will be backward compatible, that means the USB platform should remain the most widely used interface in the business for years to come.
3. eSATA SATA is the current standard for the internal bus interface for hard drives. The drives also exist as external hard drives using the eSATA designation (Figure 10-5). There are three iterations of eSATA connections.
Figure 10-5: Adapter kit for a laptop without an eSATA connector
4. eSATA transfer speeds are sustained and are usually about three times that of FireWire 400 and USB 2.0. Unlike FireWire and USB connectors, eSATA drives must be plugged into a power source and cannot be run off the computer via the connector. This makes eSATA drives more at home in the edit bay than on location where power outlets may not be readily available. Additionally, since eSATA technology is more recent, not all laptops or desktops have the proper eSATA port. In this case, you need a PCI adapter card or a new card installed in your desktop unit to be able to plug in your drives.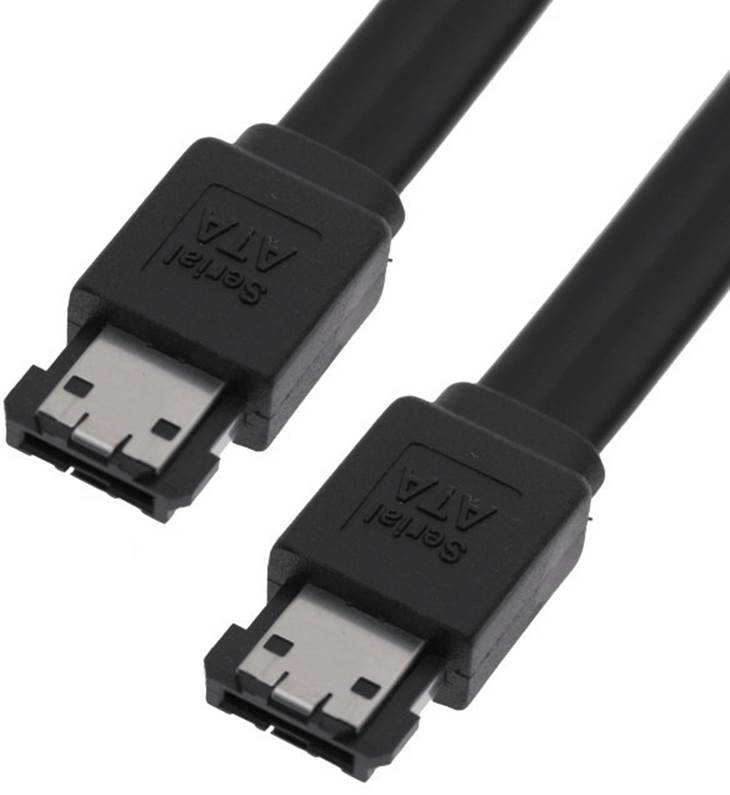
Figure 10-6: A standard eSATA cable
5. Another difference in eSATA technology is that, unlike FireWire and USB 2.0, it doesn’t have to translate the data between the interface and the computer (Figure 10-6). This improves transfer speeds and saves your computer precious processor resources. eSATA also has its “hot-swappable” feature that allows you to quickly and easily remove and interchange a drive from work to your home or vice versa (the other protocols are generally not hot-swappable). Also, a quick and easy way is to have a backup drive on which you can make your backup and then easily remove it and store it in a different location.
6. Thunderbolt 1 and 2 This is one of the newest interfaces on the market. This interface combines the PCI express and the DisplayPort alongside a copper wire for power in a single cable. What really matters to filmmakers is the sustained data speeds of 10 Gbps.
7. Version 2 of the Thunderbolt connection (Figure 10-7) incorporates DisplayPort 1.2, which will allow 4K video streaming to a single 4K monitor.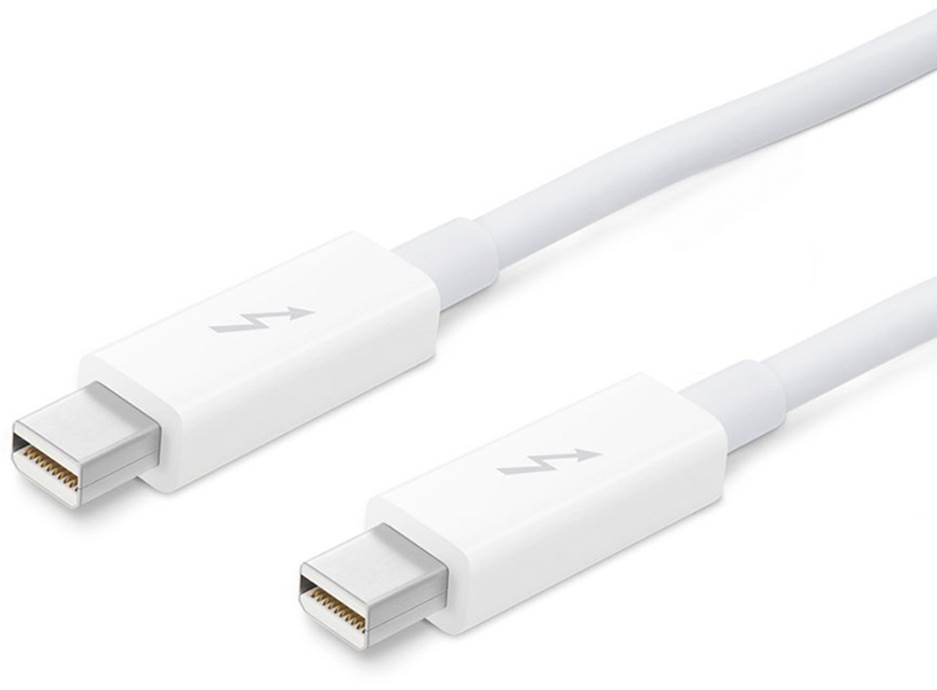
Figure 10-7: Thunderbolt cable
The name of the drive is from the type of connector that the hard drive uses. A USB 3.0 drive usually has only one USB port on the drive. But other types of drives sometimes support more than one connector. FireWire and eSATA drives typically have multiple ports and can be used with more than one protocol.
Hard Drive Recommendations
Our recommendations for a hard drive break down as follows:
· Use an external FireWire 800 or USB 3.0 drive for locations where you lack power. We recommend LaCie Rugged drives.
· Use Thunderbolt drives in your editing suite (where you have plenty of power).
· Use a cheaper USB 3.0 drive for your master backup drives that you store away in case of an emergency.
When One Drive Isn’t Enough
If you are editing a feature film or a longer-format project, chances are you won’t be able to fit everything onto one external drive. You can buy multiple drives and connect them to your computer. Most laptops usually only have one FireWire port, if they have a FireWire port at all. There are usually two USB 3.0 ports (assuming you have a newer laptop) and possibly a Thunderbolt port.
Many hard drives will also have dual ports so you can chain the drives together and have your computer read multiple drives at the same time. This isn’t wrong, but if you need to pull a drive, depending on how large and where the drive is placed in your chain, you may have to eject all the drives and manually rechain the drives back together.
RAID Drives
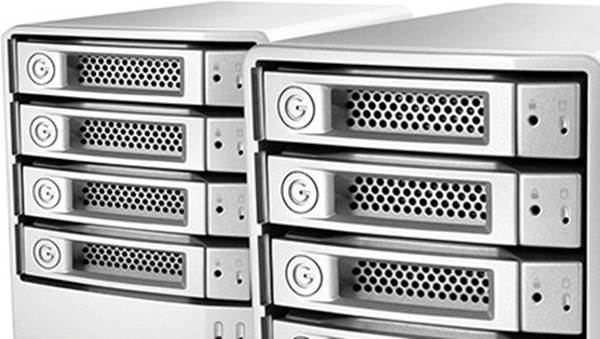
Figure 10-8: A dual external RAID drive
Redundant array of independent disks (RAID) is now used as a generic or catchall for any computer storage device that divides and replicates data across multiple hard drives. Most RAID systems combine two or more drives into one unit (Figure 10-8). It is possible to set up a RAID with drives that are identical but don’t have the same storage capacity. With that said, it is best to have all the drives with the same capacity for maximum performance. In a RAID, the drives will work in concert. This can be done via software or hardware solutions. By combining the drives into one virtual unit, you allow the computer to divide and use the drives faster and most efficiently.
RAID arrays also provide more security for drive failure. If you are using only one stand-alone drive and the drive starts to fail or becomes corrupt, your drive may crash. You may have no warning and lose whatever work you had done between that moment and the last time you backed up. Any RAID array beyond a RAID 0 will have a redundancy of data. RAID arrays ameliorate this risk with the multiple redundancies. This allows for potential problems to be detected and in many cases repaired prior to a massive drive crash. This safety net is often called fault tolerance. RAID systems are very dependable and are a great option. RAID drive enclosures are more expensive than stand-alone external drives. However, using dedicated RAID enclosures saves desktop space, cuts down on the number of power cords, and is a more secure environment for your data.
Mirror RAIDs write identical data from one drive to another drive, basically giving you a backup in real time. If, however, the mirror RAID is writing to the same disk array, then it is not considered a true backup. If any part of the drive were to fail, you could still lose all the data from the entire drive. True backups need to be on totally separate drives to protect you.
Drive Speed and Cache
Regardless of what type of drive you choose, you should know they come in several different disk speeds, measured in rotations per minute. The most common are 5400 rpm, 7200 rpm, and 10,000 rpm. The faster the rotation, the quicker the platter runs under the head that reads the data. So, the faster the speed of the drive, the faster data can be accessed from the drive and communicated to your computer.
Figure 10-9: You can check your computer to see the internal bus speed.
It is widely considered that the minimum drive speed for editing video is 7200 rpm. In the past, we have edited on a 5400 rpm drive, but that was a very small project, and a 5400 rpm drive isn’t suitable for most projects. 5400 rpm drives can be used as backup or storage drives as long as you don’t edit with them as your source drives. 7200 rpm drives are one of the more common drives available and will work fine for editing. A 10,000 rpm drive will be faster and is best used with larger video files. If you are working with a ton of footage that is mostly uncompressed files, you might want to invest in the 10,000 rpm drives.
Cache on hard drives is similar to the cache in your web browser. It stores information and data that can be accessed more quickly. Most drives today have an 8 MB cache, but there are many with 16 MB capacity if you want to give yourself maximum speed at every connection. Also, computer bus speeds come into play (Figure 10-9). This is the bottleneck for most data transfers. If you are connected to your computer through a regular PCI card with either USB 2.0 or a FireWire 400 connector and are experiencing slowdown in your playback or editing, you may want to switch to an eSATA external drive and see whether that fixes your problems.
Solid State Drives
The previous disk speeds are for drives that have moving parts in them. Now there are solid state drives that don’t have moving parts but rather are solid state memory drives that can access the data similarly to the RAM on your computer. These drives are currently more expensive per GB of data and they are not as widely available. With that said, they are quickly becoming the drives of choice due to their unbelievable speed when compared to traditional hard drives.
Backing Up Data
Once you have all your footage in one central location (following the guidelines we gave at the end of Chapter 8, “Organizing and Storing Data in the Field”), you should actually perform the backup. You want two (we prefer three) backups of the original footage prior to the start of editing. Make sure you have your original footage totally untouched and stored away so you can always go back to what you originally shot in case anything goes wrong in post.
You can back up your footage in different ways in case you are like most of us and don’t back up your computer often enough. There are three main ways you can back up your footage:
1. Copying the Drive Take your master drive and an empty drive (of equal or greater capacity) and just copy the footage from your master drive to your new backup drive. This essentially makes an exact duplicate of your master drive.
2. Incremental Backup The first time you back up, an incremental backup makes a master backup of your main drive. Then at scheduled time intervals (hourly, daily, monthly, and so on), it makes backups of all files that have been created or modified since the last backup. Think of it as a file cabinet that you place all of your files into and fill up when you first buy it. Then each time you get mail or documents, you copy them and stuff them into the file cabinet. You didn’t touch the original files; you just added a few new files each time you needed to. Probably the most popular backup software of this type is Apple’s Time Machine (Figure 10-10).
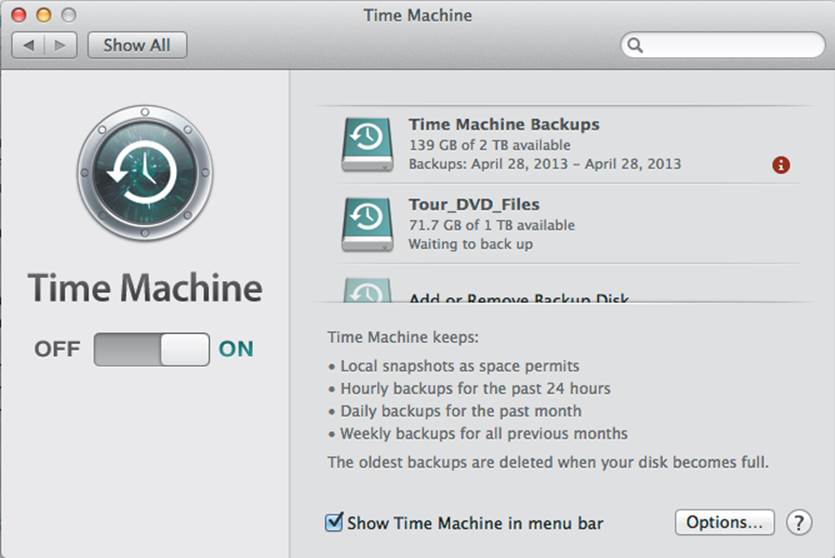
Figure 10-10: Time Machine while backing up
1. Recursive (or Complete) Backup This type of backup uses software to make a complete backup of your drive. Each time you back up, it again takes your entire main drive and backs it up and stores it on your new backup drive. You can imagine this type of backup as a self-contained container of your main drive. If your main drive were to fail, you would use this image to restore your files and footage. We use EMC’s Retrospect (and this works on both Mac and Windows) for this type of backup.
All of these various backup methods work fine. We recommend either copying your drive or using Retrospect to back up your original raw footage (the drives you won’t touch again unless there is a drive failure) and using an incremental backup on the drive you areusing with your converted footage for the edit. That way, each day you work on your edit, files will be changed or created or modified, and the incremental backup will back them up each day.
You have to remember to back up and back up often. Drives are relatively cheap these days, and no matter your excuse for not having multiple backups, you will kick yourself if you lose any of your footage. Don’t tempt fate. Buy backup drives and back up now.
Choosing and Using an Editing Codec
The key to video delivery has always been size and speed. Generally, the higher the quality of video you have, the larger the file/data is. This makes it hard to store on DVDs or Blu-ray or to stream on the Internet. Mathematical geniuses created codecs (short for “compressor/decompressor”) to help shrink and store the data so it could be more easily transmitted or stored. Each codec is a different mathematical algorithm to compress and store your video data. The codec you choose will impact the size of your converted video files, the quality of the image, and where the video can be played.
Early codecs often focused on certain areas of the video data, and many codecs produced lousy video that was mostly unwatchable. As the technology progressed, more and more codecs entered the market, and today hundreds of codecs are available. Some newer codecs result in footage that cannot be played on all computers or devices without having the codec present to decode the video.
Video compression is the relationship between the video quality, the storage (disk) space, and the hardware (cost) required to decompress the video (quickly). Compression decides what data (from your original footage) is necessary for achieving the best visual quality. During the compression process, much of the data in your footage is discarded, and if done poorly, this creates visual artifacts in your footage. This potential risk is why choosing the right codec and compression for your footage is critical.
In simple terms, there are two main categories of codecs. First you have an intermediate codec, which is simply a codec that is to be used during the video-editing process. An intermediate codec retains more data from the raw video footage but requires less hard drive space than uncompressed video would need. Second, you have a delivery codec. A delivery codec compresses (throws out some of your video data) and makes a smaller video file that can be easily streamed or viewed for an end user. Currently, the most popular delivery codec is H.264.
“Format” Is Not “Codec”
Nikon’s DSLR cameras use Motion JPEG AVI files as the container format for video. Panasonic DSLR cameras use AVCHD as the container format for video. Canon DSLR cameras have embraced using a MOV container with the H.264 codec to compress the original movie files. The type of video file—.avi, .mov, and so on—is just a container and not an actual codec. It is an easy mistake to make to think that the type of video file is the same as the codec. A MOV file can hold video that ranges from H.264 to XDCAM to ProRes, and many more. Don’t make the mistake of thinking the container is the codec; they are not one and the same.
Delivery Codec vs. Capture Codec
In general, the best capture codec is the one with the highest resolution video signal (preferably uncompressed). Then you are starting with the best possible image, and you have more latitude in making color corrections and adjustments to the footage. In general, higher bit rates and high-resolution capture codecs are much too large to burn onto a DVD or stream on the Web.
A delivery codec is a compressed video format that provides for the best preservation of the original footage’s quality at the lowest bit rates and file size. This allows for easier streaming and the ability to be burned to DVDs and other storage devices.
What Are Bit Rates?
Bit rates are simply the number of bits that are visible or processed per unit of time. In video terms, think of the amount of detail that is stored per unit of time—here, megabits per second. As a reference, the Canon 5D Mark III records around 100 Mbps when capturing All-I footage, and the standard for Blu-ray is 40 Mbps. In hard drive terms, here are the theoretical speeds in Mbps:
· USB 2.0: 480 Mbps
· FireWire 800: 800 Mbps
· USB 3.0: 5 Gbps
· Thunderbolt: 10 Gbps
· Thunderbolt 2: 20 Gbps
A bit is a smaller portion of a byte. Just note that a byte is made up of 8 bits. So this is just a way of measuring units in digital form.
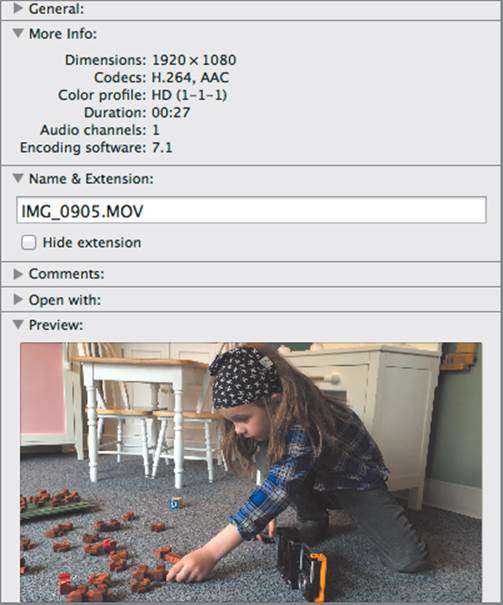
Figure 10-11: The information dialog box showing the codecs of the .mov file from the camera
To Convert or Not to Convert
You might be asking yourself, “Do I need to convert my footage before I start editing? Why would I want to?” In years past, many editing programs couldn’t handle the files coming from DSLR cameras because the files were encoded as delivery codecs (Figure 10-11). Since then, all editors have updated their software, and you can now edit files coming from the leading camera manufacturers in any NLE.
These are the main reasons you would want to convert your files now:
· Post-production–friendly codec that allows more latitude in post
· Downsampling 4K footage to a lower-res version to save time and storage during post
Post-Production–Friendly Codec
You might want to convert your footage to a much more post-production–friendly codec that allows for more latitude during post for color corrections and adjustments to your video. Since most DSLR cameras capture footage in 8-bit color space, if you leave them in their current form you are stuck in 8-bit color space. If you convert to a post-production–friendly codec such as ProRes, you move into a 10-bit color space. Let me be clear that by doing this you haven’t increased your color space from the original footage, but you are allowing the tools you will use in post a wider latitude as well as any effects you might add. Additionally, if you are not doing the editing yourself, then converting to a format your editor or post-production house uses all the time will help increase the speed of your edit and post.
4K to 1080p
Another reason you might want to convert your footage before you start your edit is because of file size. If you are shooting 4K video, you might want to convert your footage to a different codec and/or a smaller resolution, which will help speed your edit. Smaller file sizes mean less storage and less stress on your computer’s resources. You can make a rough edit and then go back and use your original footage for your final output and deal with the higher-quality footage only at the end. Just note that currently there is little demand for a final 4K file, so likely the original 4K video files will remain archive files and the lower-res 1080 footage (or 720 if you are mastering at that resolution) will be your final output.
Another thing you need to decide a plan of action for is knowing whether you plan an online or offline edit.
Online vs. Offline Editing
There are various factors for choosing an online vs. offline edit for your film. Online more or less means you are editing with the original, unprocessed, or converted files at the highest quality so you can export the final project as is.
If you choose to do an offline edit, then you are using a compressed version of the footage for your edit. This means after you have completed your edit, you need to replace the compressed footage with the original unprocessed or ProRes version of the footage to create the highest-quality output available.
The best reasons for doing an offline edit are speed and data storage. You can convert/compress the original movie files to ones that are half the size or less. This frees you up to work with smaller, more portable drives if you need to be more mobile while you edit. Additionally, if you are not working on the latest machine that has the fastest processors, video cards, or RAM, you can use the converted/compressed video without taxing your current computer too much.
If you choose to do an offline edit, it is critical that you keep great notes on the structure of your original footage and try to match it exactly with any converted footage. Since there is no timecode with these cameras, you will be matching the footage with the filenames. If you don’t keep the original filenames (for instance, you may want to change them to the scene number/take/date instead of MVI_2304.mov), you will need to be able to match those to the converted footage names.
If you decide to change the filenames from the camera, do it before you start your edit or it will be difficult to go back and match the renamed footage from your edit to the master full-res files with the original names from the camera.
If you do not keep track of your naming conventions, you could end up having a hard time moving from your offline edit to your online edit, and you’ll create more work for yourself.
Choosing to do an online edit is great: as soon as you lock your picture, you can export and have a high-resolution file with no extra steps. This is a very effective workflow and can be easily achieved even without the fastest laptop or tower at your disposal. The big thing is organization and keeping track of where your footage is located and the naming convention you decide to follow for the edit. Once you make your decision, you can’t change, or you will have to go back and rework what you have already done. This is especially key for working with 4K footage.
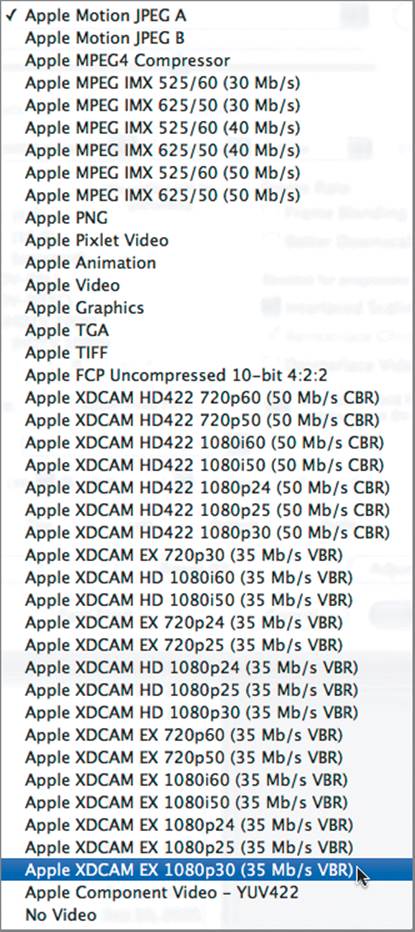
Figure 10-12: The codecs within Final Cut Pro
Codecs for Online and Offline Editing
Various manufacturers develop their own intermediate codecs. Apple develops ProRes 4:2:2, Microsoft develops Windows Media Video (WMV), RealNetworks develops RealVideo, and there are many, many others (Figure 10-12). You will see a master list of codecs in your editing software, and you might wonder, “How do I choose the right codec?” In reality, there is no “right” codec. Codecs are based on many different algorithms and were engineered for a variety of reasons. There are codecs that match capture formats (like DVCPro) that make it easy when choosing, and there are broader codecs like H.264. Covering codecs could easily fill a book or volume of books on its own. So, for simplicity and so you can get busy finishing your project, we are outlining a couple of codecs that should work great for your post-production workflow.
Let’s start with the offline edit. H.264 video files are small, and we prefer to keep them that way. Unless you shot 4K footage and need to downres them to 1080 or 720, you should be OK. Many desktop and mid-to-higher-end laptops will handle 1080 footage directly from your DSLR camera of choice with few to no issues.
If you finish your offline edit and you are happy the way it looks, you don’t need to convert your footage to another codec.
For your online edit, take the footage you used in your offline and convert it to Apple ProRes 4:2:2. H.264 files when converted to ProRes files will jump seven to eight times the original size, so you need to make sure you have enough hard drive space before you start. It is during the online edit that you are going to do any sort of video adjustments—darkening, lighting, color correction, and adding of motion graphics to your footage. The Apple ProRes codec gives you the most latitude to work with your video footage and is why this is the best choice for your online codec. Just be aware that you need a lot of hard drive space, a fast computer, and lots of computer memory. The large files will really drain your computer resources, so make sure your system can handle the amount of strain you will put it through.
Behind the Scenes: Converting from Start to Finish
On our recent feature film, we used several different cameras, and most of the footage was in need of conversion before we could move forward with post-production. We wanted to make sure we ended up with every file in the same format for the edit. We used Streamclip for the conversion process. This step-by-step exercise shows the entire process of converting several files at a time, including the codec used and how the files were navigated between.
1. Open MPEG Streamclip.
2. Select File ⇒ Batch List. The Batch List window will open.
3. Click the Add Files button. The Open Files window will open. From here, navigate to your master hard drive and to your original source files. Select the files you want to convert. Once you have selected the files you want to convert, click the To Batch button.
4. A dialog box will open asking you to choose a task. Leave it as the default Export To QuickTime, and click OK.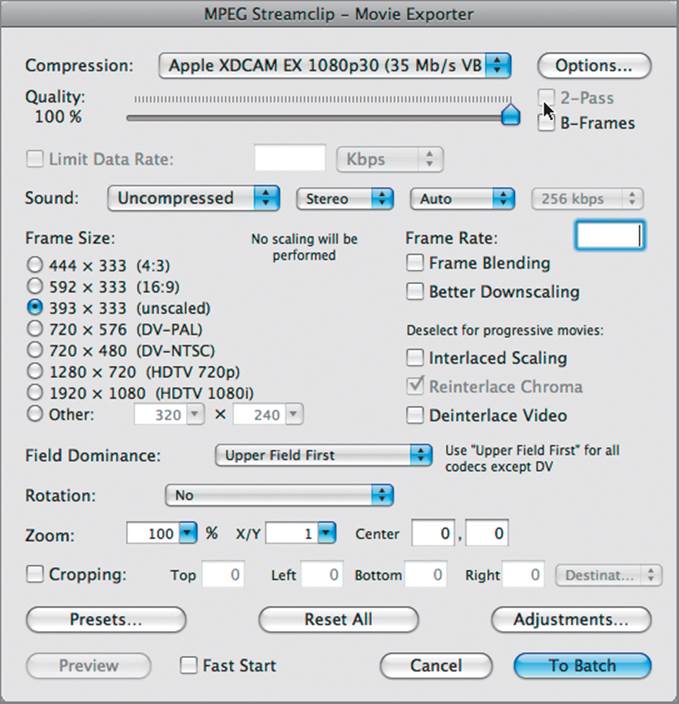
5. Now you can select a destination folder to have the converted files saved to. If you want, you can add multiple folders and convert directly to subfolders. Click OK.
6. The Movie Exporter dialog will appear (as shown here). There will be a drop-down menu next to Compression. From here choose the codec you want to use. For our rough edit, we chose the Apple XDCAM EX 1080p30 (35 Mb/s VBR) codec.
7. Next, move the Quality slider from the default 50% to 100%.
8. Uncheck the Interlaced Scaling check box. You can leave everything else as it is.
9. Click the To Batch button to start the conversion process.
Now that you have your footage converted and organized, it is time to bring all your footage into your editing program. Let’s move on to the edit.
Converting Your Footage
How do you actually convert the footage? There are several different software products you can use to convert the footage. Apple’s Compressor, CineForm’s NeoScene, MPEG Streamclip, and Adobe Media Encoder are great tools for converting footage. You need to own Final Cut Studio in order to get Compressor, and you need to have Premiere Pro to have Adobe Media Encoder.
MPEG Streamclip is a great little product that you can use to batch convert your footage, and it comes for the very low cost of free. We have been editing in Final Cut Pro, and the testing we did had MPEG Streamclip conversions finishing before the Compressor conversions. Streamclip works on both Mac and Windows computers, and did we mention it is free?
Now you are ready to move to the creative and stylistic parts of post-production. Go through this checklist:
1. Back up raw field footage to at least two drives, and store them in different locations.
2. Organize and label the folders for all your raw footage and audio files.
3. Find out whether you need or want to convert your footage before you start your edit.
4. Convert your footage.
5. Back up your converted footage (on two drives), and move one drive to a different physical location.
You are now ready to import the files to the editing program of your choosing.
Editing Your Footage
The age-old saying is that you make your film three times. First you write your movie, then you shoot the movie, but it is in the editing room where you make your movie. We won’t cover the entire editing process, nor will we cover any particular editing program as a step-by-step process. We will hit some of the key points you will want to be aware of when starting the editing process.
Choosing a Nonlinear Editor
There are many nonlinear editors (NLEs) to choose from. (No one uses a linear editor anymore; all editing software is NLE.) The big three are Apple’s Final Cut Pro, Avid’s Media Composer, and Adobe’s Premiere Pro. There are some other editing programs or light versions of the big three, but if you are looking to edit your film, you need to buy, rent, or borrow a computer with one of the big three editing programs on it.
The main reason for using Final Cut Pro, Media Composer, or Premiere Pro is they are designed for large projects. On a film, you will have thousands of clips that cover dozens or possibly more than 100 hours of footage (Figure 10-13). You need an editing program that can handle everything you will throw at it.
Choosing your NLE is more difficult than it was in the past. Final Cut Pro has been the standard for the better part of a decade, so it was easy to steer people in that direction. However, with the major changes in Final Cut X, many people are unhappy with the new way of editing in the program. Final Cut X is a wonderful editing tool, but if you decide to go that route, just note there will be a learning curve to adjust.
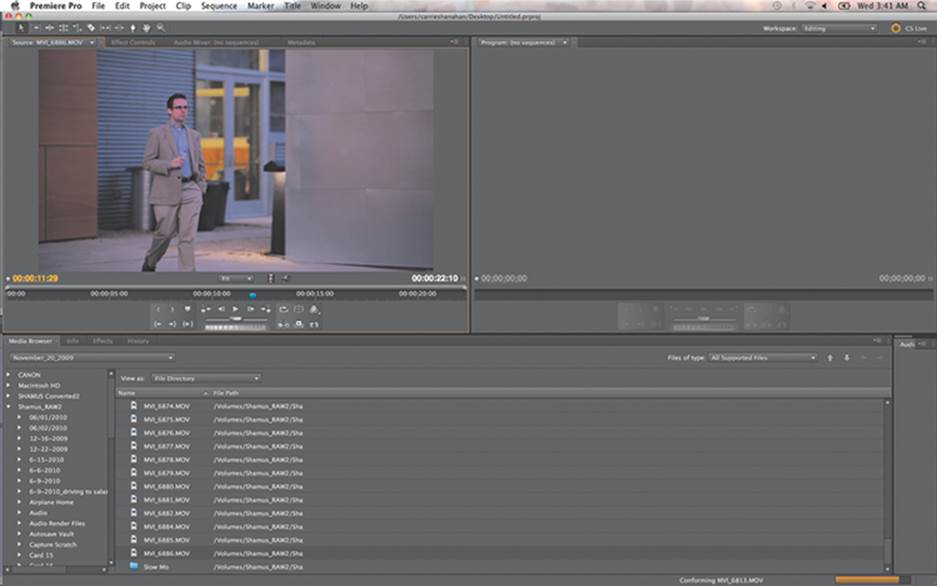
Figure 10-13: All the footage from a feature film in Premiere Pro
Adobe Premiere Pro is a great tool and is now included in the Adobe Creative Cloud. So if you subscribe to the Adobe Creative Cloud, then you don’t have to buy another program. Just note that Premiere is not a QuickTime-based editor, so you might run into some issues later in your edit if you don’t know what you are doing. Premiere accepts all formats, sizes, and frame rates on the timeline, so users find it easy to get started editing. In other programs, you would be forced to conform and make everything play well from the start. Premiere saves those issues until later, so it is just something to be aware of. Again, I use Premiere Pro and love it, so this is another solid choice.
Avid Media Composer recently became affordable to the masses. When I started 15+ years ago, this was the industry standard, and it cost as much as a new car to buy. What is wonderful about Media Composer is it was designed to handle large projects like feature films. Its file-management features, rendering abilities, and other tools that allow you to do more on the timeline without going to other software products are second to none.
In the end, it really comes down to personal choice and what you are familiar with. There is no current industry standard, so find what works for you, and don’t let that stop you from shooting.
Organizing Your Footage in Your NLE
As we have discussed, you will have a ton of footage, and organizing it within your NLE is crucial to your film (Figure 10-14). There are far too many audio and movie files to just dump all the footage into the project window.
Since there is a good chance you will have duplicate filenames, sorting through all your video files to find the shots you want would be a mini-disaster.
If you follow the same setup for organizing the footage in the editing program as you used in organizing the footage from the set, you will be in much better shape. Start by setting up bins in your project (Figure 10-15).
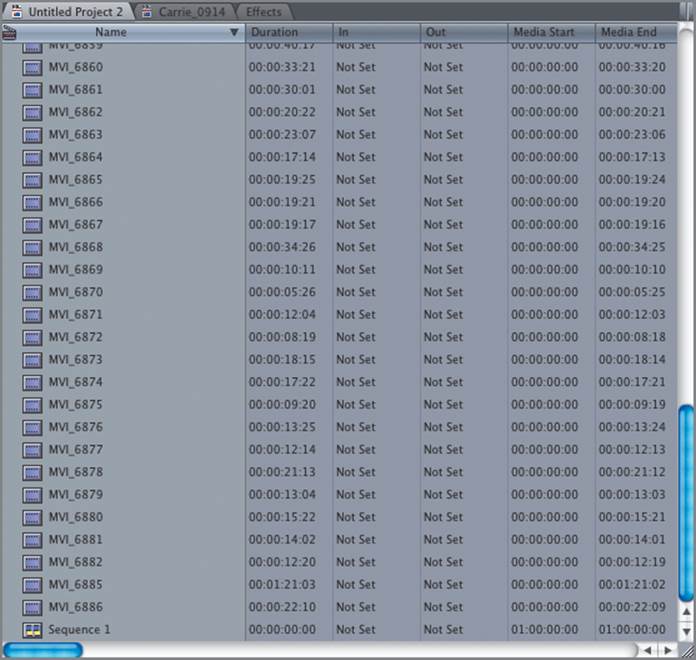
Figure 10-14: All of your footage placed into the project with no bins or organizational structure
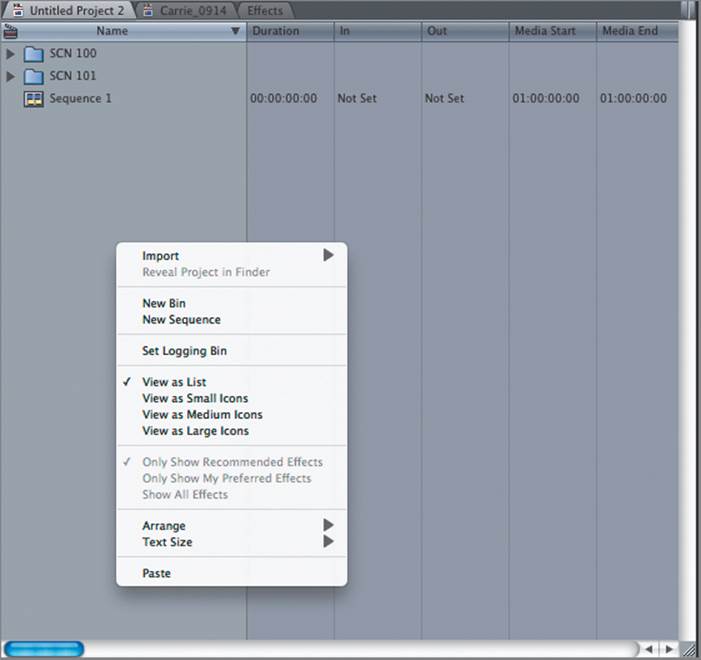
Figure 10-15: Create bins that you can import your footage into.

Figure 10-16: Footage imported and arranged in bins according to scene numbers
It’s best to set up bins according to your scene numbers and place all the audio and video files into that bin. If you go through and do that for the entire script, you have the start of your edit well under way. This will save you countless hours of searching through clips looking for certain clips or trying to find that one shot you are sure you filmed. If you are careful at this step to sort your footage properly, you can dig right in and start editing scene by scene in bite-size chunks that will allow you to keep your sanity (Figure 10-16).
After you have created the bins and have organized your footage, you will begin to sync your footage, as we will cover in greater detail in Chapter 11, “Audio Crash Course.” As you go through this process, we suggest you become familiar with color labeling your bins. When you work with this amount of data, it is very easy to forget where you are at and what tasks you have done to what bin.
Whatever color-coding system you want to use is totally up to you (Figure 10-17). Just make a note of how you are labeling the bins/footage so you can stay consistent all the way through.

Figure 10-17: If you use labels and color code as you progress during your edit, you can visually see what stage each bin is at.
Capturing Stills during Editing
Many times on a low-budget shoot you don’t have the money for a dedicated still photographer. This means you will miss out on some great production stills that you will need later. No worries, because there is a trick to pull some production stills directly from your footage. This is not the best option because you will have far less latitude in the images and they will be of much lower resolution that might limit some of the uses for the images. With that said, you will still need some additional shots, and here is how to do it:
1. Find the frame from the footage you want to use.
2. Make sure you are viewing the footage at its actual size.
3. Take a screenshot of the image.
This will need some cleanup in Photoshop. Screenshots are limited to 72 dpi, which is terrible if you want to print the image. If you have a bigger screen, try displaying your footage at full screen before taking a screenshot to get more information in the image to work with (but check the image quality of the resulting capture).
If you still need to print the image larger than you can with the limitations of screen captures, there is one last trick: display the frame onscreen and then photograph the screen. Take the image into Photoshop, crop out everything but the screen, and clean up the image.
Again, this is a last-ditch effort, but if you didn’t get stills taken on set and you must provide stills for a film festival or investor packet, this may be an option you are forced to use. Obviously, taking great stills on set is the ideal, but if you didn’t have the time or budget to get stills on set and you need a production still, then this is an option for you to use as a last resort.