Mastering the Olympus OM-D E-M1 (2015)
Chapter 1. Camera Setup and Control Reference

Image © Darrell Young
Congratulations! You’ve purchased, or are about to purchase, Olympus’s professional-level, mirrorless, interchangeable lens, Micro Four Thirds format camera: the OM-D E-M1.
While no professional digital camera is inexpensive, the E-M1 provides passionate photographers with a camera that has excellent resolution, an interactive electronic view-finder, easy-to-use physical controls, and deep custom menu configurability, all at an attractive price. The E-M1’s strong, magnesium-alloy body is also weather sealed, dust sealed, and freeze proof. It should remain a reliable camera for years of faithful service.
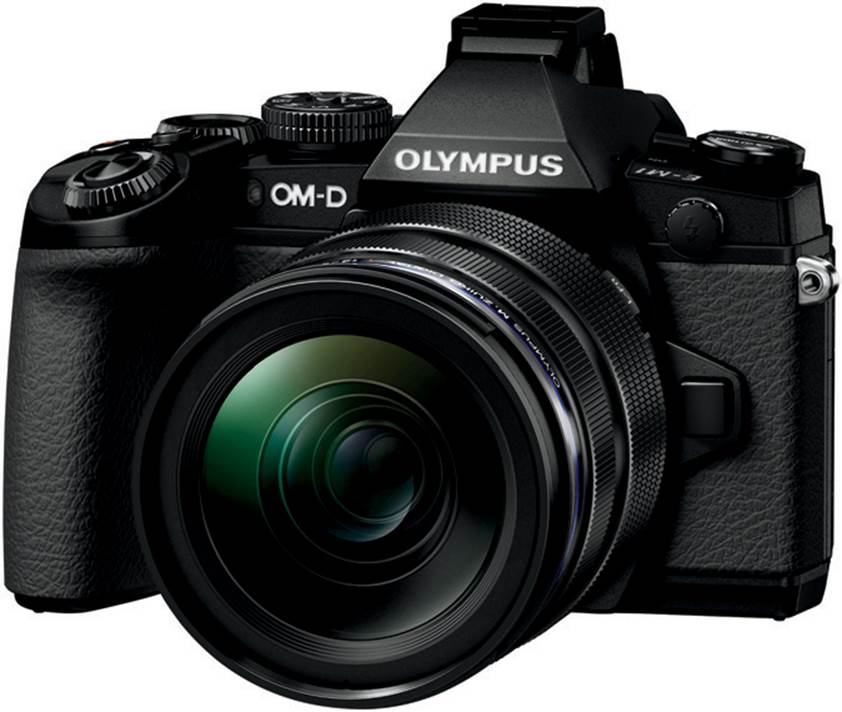
Figure 1.1: Olympus OM-D E-M1 front view
The small size of the camera allows great portability for a full photography system. The entire system—including lenses, a battery pack, a flash unit, and accessories—can be contained in a small camera bag, allowing you to carry a full range of equipment without wearing yourself out.
The 16.3-megapixel imaging sensor, interactive electronic viewfinder, tilting and touch live view display screen, 10 frames-per-second shooting rate, 5-axis image stabilization, contrast and phase detection autofocus, and Digital ESP metering system allow you to take complete creative control of the scene in front of your lens.
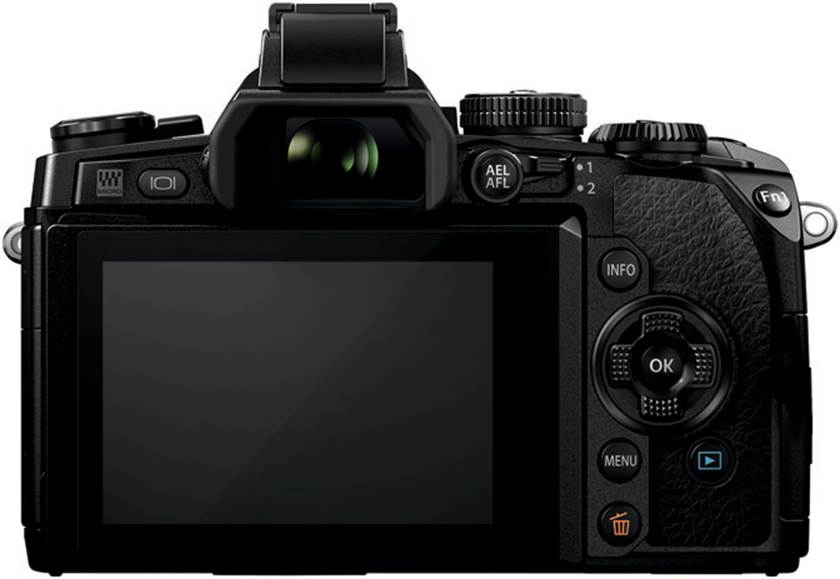
Figure 1.2: Olympus OM-D E-M1 back view
The E-M1 is one of the most configurable cameras ever created. The deep menu system allows for custom configuration, making the E-M1 an ideal camera for photographers who want absolute control over every aspect of their photography. On the other hand, the camera offers fully automatic modes that allow a new photographer to create outstanding images without excessive camera setup. You can start with the E-M1 as a new photographer and grow into the camera, gradually learning about custom features and relying less on automatic features over time. Or as an experienced photographer, you can take immediate control of every aspect of digital photography with full camera cooperation and assistance.
This book will explore your incredibly feature-rich camera in great detail, using everyday language. We will cover virtually every button, dial, switch, and menu setting, giving you how, when, and why information so that you can become a master of your new, powerful imaging instrument. Your passion for excellent photography can be fully expressed with your E-M1. Let’s take control of it!
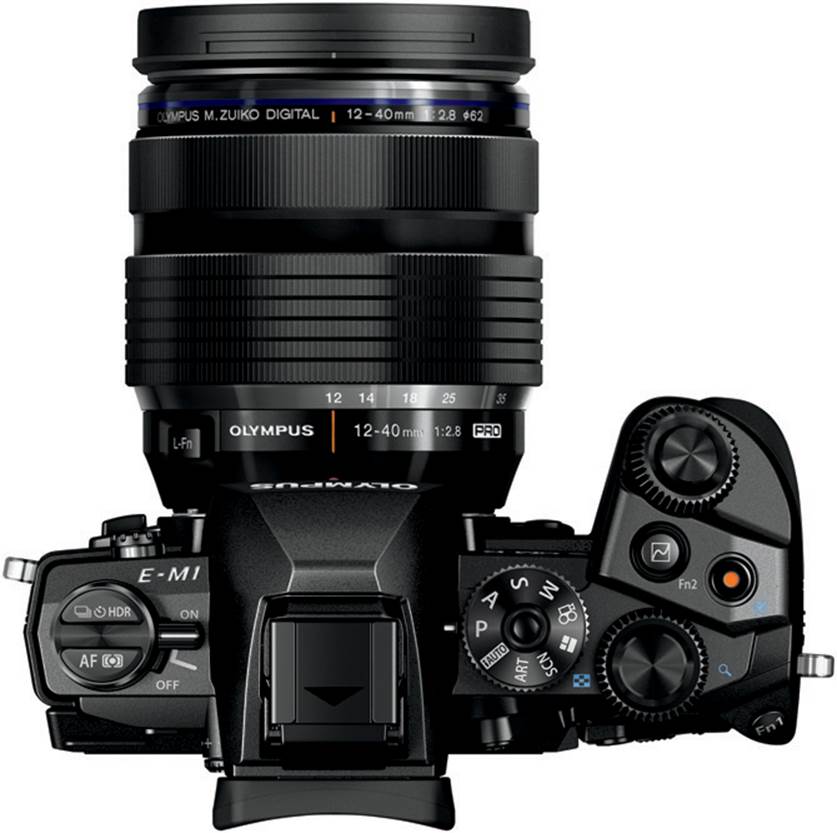
Figure 1.3: Olympus OM-D E-M1 with M.Zuiko ED 12–40mm f/2.8 PRO lens
How to Use This Book
The upcoming sections and chapters are best read with your camera in hand, ready for configuration. There are literally hundreds of things to configure on this advanced, mirrorless interchangeable-lens compact (MILC) camera.
This chapter will give new E-M1 users a place to start. Later, as you progress through the book, we’ll look at all the buttons, switches, dials, and menu settings in detail. You will be able to fully master the operation of your Olympus OM-D E-M1.
This book is a super user’s manual that goes way beyond the small manual that comes with the camera. It covers not only how a certain function works (like the basic manual), but also when it is best to use certain features and why the features are best configured in particular ways. You will find a Settings Recommendation feature at the end of most sections, in which I offer suggestions for the best use of the various setting choices for different styles of photography.
There is an individual chapter for all the visual display touch screens and for each menu system in the camera, giving you a detailed examination of virtually every aspect of the camera’s control systems.
Because the E-M1 is a camera made primarily for advanced and professional users, this book assumes you have knowledge of basic things like depth of field; lens focal length and angle of view; and how the aperture, shutter speed, and ISO sensitivity control exposure.
If you need to brush up on these subjects, you can find a lot of helpful information in my book Beyond Point-and-Shoot. It assumes absolutely no previous knowledge of photography and covers the basics for new users of MILC and DSLR cameras. You can find out more about Beyond Point-and-Shoot at my website: http://www.PictureAndPen.com/BeyondPS
I sincerely hope this book is useful to you and greatly expands your understanding of your new Olympus OM-D E-M1 camera.
Charge the Battery
When you first open the box that contains your new E-M1, you should charge the camera’s battery. The battery may have enough life in it for an hour or two of use, so it may not be critical to charge it immediately. However, for extended configuration and use, it is best to have a fully charged battery in the camera.
Super Control Panel or Live View Screen?
When you turn your new camera on, the first screen that appears on the rear monitor is the Super Control Panel (figure 1.4, image 1). This panel allows you to control things like the shutter speed, aperture, ISO, autofocus, and several other key camera functions. It is a very convenient screen, and we will consider it in detail in the chapter Screen Displays for Camera Control.
When the Super Control Panel is displayed on the monitor, you will need to use the electronic viewfinder (EVF) to compose your pictures. If you want to use the Live View screen (figure 1.4, image 3) to compose your pictures instead of the EVF, you will need to press the LV button (figure 1.4, image 2). My camera’s Live View screen is displaying my current subject, a battery and some Lego blocks in my light tent. The LV button toggles between the Super Control Panel and the Live View screen, as shown in figure 1.4.
While the Super Control Panel is active you can use the EVF to compose and take pictures. While the Live View screen is active you can use either the Live View screen or the EVF to compose and take pictures.
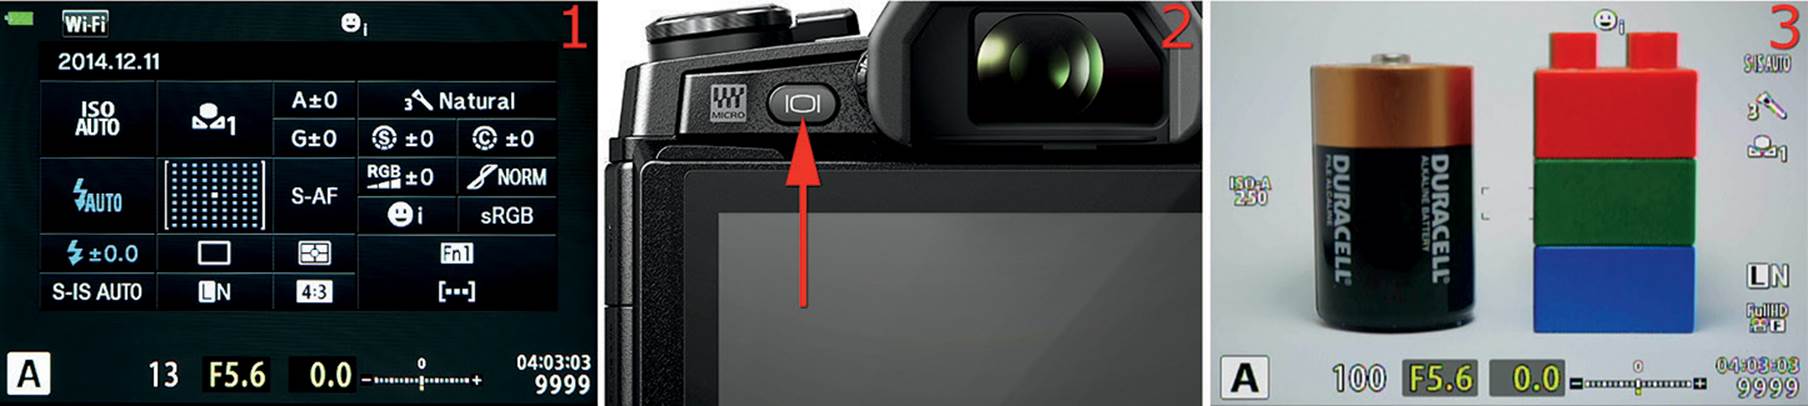
Figure 1.4: Switching between the Super Control Panel and Live View screen with the LV button
If the Live View screen is active and you place your eye near the viewfinder, the E-M1 will instantly switch the subject display to the EVF and turn off the Live View screen. When you remove your eye from the EVF, the camera will immediately turn off the EVF and turn on the Live View screen.
Settings Recommendation: If you prefer to compose your images with the viewfinder and not hold the camera out at arm’s length to compose with the Live View screen, you may want to leave the Super Control Panel active to have quick access to its settings. To use the Super Control Panel, press the OK button. However, if you like to compose with the rear monitor (Live View), then you may want to leave the Live View screen active.
Firmware 2.0 and 3.0 Updates
In October 2014, Olympus released a major firmware update for the Olympus OM-D E-M1. This update added a considerable number of new features and refined a number of older features. We delayed the publication of this book for several weeks so that we could include the features found in firmware update 2.0.
Additionally, in February 2015, firmware update 3.0 was released. This update increased the camera’s Sequential L (Low) burst shooting rate from 6.5 fps to 9 fps, with autofocus (AF) and potentially more efficient subject tracking. Sequential H (High) fires the shutter at 10 fps with no AF(use S-AF mode), and with firmware update 3.0, Sequential L shoots at 9 fps with AF (use C-AF mode). See page 194 for more information on Sequential H and L burst shooting modes, and page 274 for information on S-AF and C-AF modes.
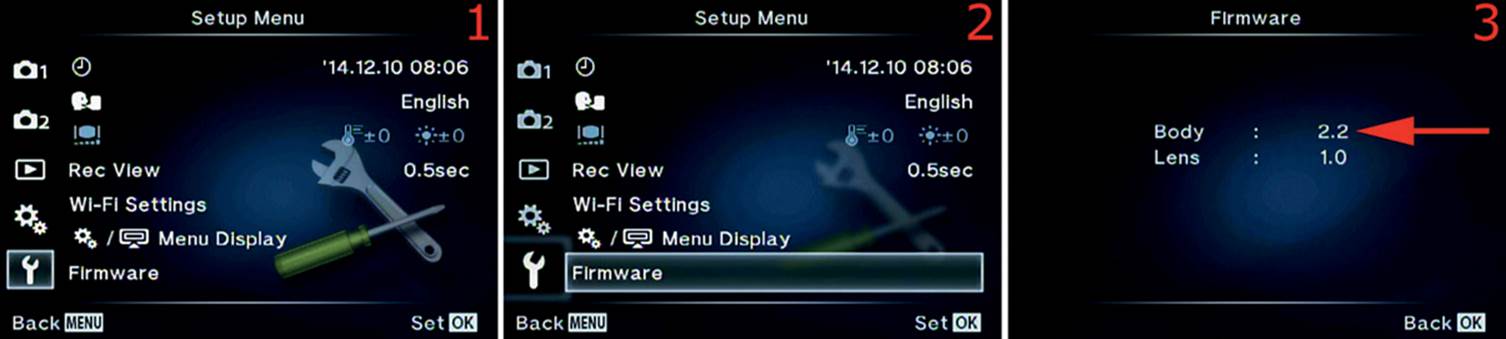
Figure 1.5: Checking your E-M1’s firmware version
Please use the following steps to check your camera’s firmware version:
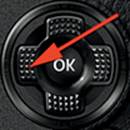
1. Press the Menu button and scroll down to the Setup Menu (figure 1.5, image 1; the icon that looks like a wrench on the left side of the screen). You will see the menu name at the top of the screen. Now scroll to the right with the Arrow pad (the buttons surrounding the OK button on the back of the camera).
2. Select Firmware from the Setup Menu and scroll to the right (figure 1.5, image 2).
3. Notice the firmware version listed next to Body. Figure 1.5, image 3, shows firmware 2.2 (red arrow). This book is not concerned with the Lens firmware version, just the Body version.
If your camera does not have Body firmware 2.0 or greater installed, it is important that you update your camera’s firmware before proceeding. This book is based on firmware 3.0. If your camera is running an earlier version of the firmware, some of the screens, menu choices, and functions discussed in this book will not be available.
Because earlier versions of Body firmware are a subset of firmware 2.0, this book will cover all the features found in your camera for earlier firmware versions. However, you will see features mentioned in this book that your camera does not currently offer.
Upgrading the firmware is an automated process and requires little knowledge on your part. You can download the free Olympus Digital Camera Update software at this website:
http://www.olympusamerica.com/cpg_section/cpg_downloads_updater.asp
To load the firmware update software provided by Olympus onto your camera, plug the camera into your computer with the included USB cable, select Storage from the camera menu, and follow the instructions found on your computer screen.
Please make sure that the battery in your camera is fully charged before starting the firmware update, and do not disconnect the USB cable or turn off your camera during the firmware update or it may become inoperable.
Since the October 2014 firmware 2.0 update release, there have been three more updates. At the time of this book going to press the camera has had two “bug fix” updates and the Sequential L update (9 fps vs. 6.5 fps, with active AF). My E-M1 is currently running firmware version 3.0 for the camera body.
Enable the Custom Menu System
The camera includes a Custom Menu that initially is not displayed on many E-M1 cameras. The Custom Menu is composed of over 100 items that you can use to customize how your camera works.
If the Custom Menu does not show up in the list of menus when you take your new E-M1 out of the box, you will have to enable the menu so you can use it to adjust the camera’s Custom functions.
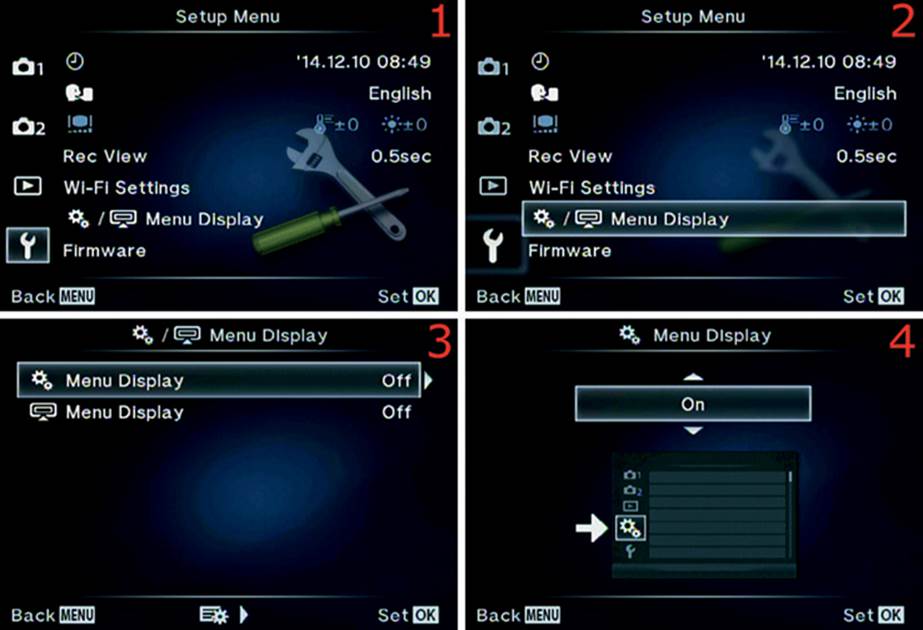
Figure 1.6A: Enabling the Custom Menu
If you press the Menu button and can count five menu icons on the left side of the screen, including one icon that looks like a couple of small gears, your camera’s Custom Menu is already enabled. If you see only four menus on the left, use the following steps to enable the very important Custom Menu system:
1. Scroll down to the Setup Menu, the fourth menu on the left (figure 1.6A, image 1). The Setup Menu has a wrench icon. Highlight it and scroll to the right.
2. Scroll down with the down Arrow pad and highlight Menu Display on the Setup Menu, then scroll to the right (figure 1.6A, image 2).
3. Choose the first Menu Display selection, the one with the small gears icon on the left, and then scroll to the right with the Arrow pad (figure 1.6A, image 3).
4. Press up or down until On appears in the up/down menu (figure 1.6A, image 4).
5. Press the OK button to Set the Custom Menu to active so that it will be displayed on the menu system.
Note: The second menu selection shown in figure 1.6, image 3, will not be enabled by the majority of E-M1 owners. It is for a mostly obsolete Peanut image storage and transfer device that was in use some years ago for Olympus cameras. Unless you own the Peanut device, please ignore the second Menu Display setting.
When the Custom Menu is fully enabled it will become the fourth selection down on the left side of the menu system screen (figure 1.6B, red arrow). The Setup Menu (wrench icon) will become the fifth selection.
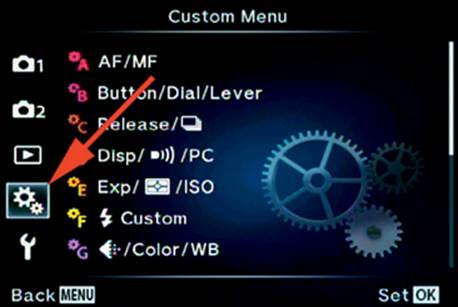
Figure 1.6B: The Custom Menu gears icon
Initial Camera Configuration
When you first acquire a new or used E-M1 camera, you will want to configure or at least check the camera’s date, time, and location, along with several other functions that all new camera users should set up according to their needs. This section lists the most important camera settings for immediate configuration.
This section is not comprehensive because there are literally hundreds of settings you can customize and configure on the E-M1 camera. However, let me suggest some of the more important settings you may want to consider configuring before shooting for the first time.
Instead of repeating material found elsewhere in the book, I’ve listed the menu setting and the page number where you can find deeper information about that function. Place a bookmark here until you have examined and configured these basic functions. Afterward, you can use the camera for active picture-taking while you are studying its many features in this book.
Here are the most critical functions for immediate configuration:
• Date and Time: Page 454
• Language: Page 456
• ISO: Page 366–370
• Metering mode: Page 45
• White balance mode: Page 396
• Color Space: Page 407
• Picture Mode: Page 136
• Super Fine (SF) JPEG mode: Page 393
• Still Picture image format: Page 175
• Autofocus mode: Page 274
• Manual focus assist modes: Page 285
• Image Stabilizer: Page 198
• Face Priority for autofocus: Page 291
• Autofocus illuminator light: Page 290
• Frames per second speed: Page 194
• High ISO Noise Filtration: Page 365
• Long Exposure Noise Reduction: Page 363
• Beep sound: Page 359
• Image review timeout: Page 458
• Image display rotation: Page 238
• Grid display: Page 431
• Low battery warning level: Page 445
• Touch Screen activation/deactivation: Page 447
• Playback screen types (image review): Page 334
• Live View screen types: Page 338
• Copyright and Artist Name for image metadata: Page 419
• Image file naming system: Page 414
• Eye detection sensor: Page 432
• Button function configuration (takes some time): Page 296
• Connection to your smart phone or tablet: Page 459
Now that you have configured your camera’s initial functions, let’s examine the various buttons, dials, and switches on the camera and briefly discuss the functionality of each one.
Camera Control Reference
This camera control reference is designed to help you locate and understand the purpose of each of the buttons, dials, and levers on the camera.
Many (if not most) of the buttons on the camera can be configured to offer alternate functionality. In fact, the E-M1 is the most configurable camera I have used in over 40 years of photography. You can truly customize this camera to work the way you prefer, for both external controls and internal functions.
If you have a problem locating one of these buttons, please refer to the External Control Location section in the beginning of this book.
Let’s examine each of the external camera controls in alphabetical order. We will examine each of the internal functions in later chapters.
Buttons

AEL/AFL button: The AEL/AFL button is fully programmable and can accept tasks listed in the Appendix. You can find instructions for how to assign a task to the AEL/AFL button on page 299. Its factory default task is AEL/AFL, which locks autoexposure (AEL) and autofocus (AFL) when you press the button, and unlocks it when you press it again.
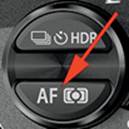
AF/Metering mode button: This button allows you to control the type of light meter and autofocus the camera will use. Press the button and turn the Front Dial to control the metering type. Press the button and turn the Rear Dial to control the autofocus modes. There is a limited amount of programmability for these two buttons, tied in with the Lever functions in the Custom Menu, as described on page 319.
Arrow pad buttons: The Arrow pad buttons are normally used to scroll through camera menus, pictures, and various screens. The Arrow pad has four buttons, including one each for up, down, left, and right. As you read through the instructions for configuring many of the camera functions in this book, you will often read “scroll to the right,” or some other direction. This is a reference to using the Arrow pad buttons. The Arrow pad buttons have some programmability through Custom Menu functions, as described on page 304. You can select from as many as eight tasks for the right and down Arrow pad buttons. These tasks are listed in the Appendix.

Erase button: When you want to rid your camera’s memory card of an unneeded picture or video, you can display it on the rear monitor, press the Erase button, answer Yes to the query, and press the OK button to delete the picture. This is not a programmable button.
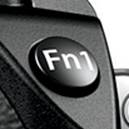
Fn1 button: The Fn1 button is fully programmable and can accept tasks listed in the Appendix. You can find instructions for how to assign a task to the Fn1 button on page 297. Its factory default task is [•••] AF Area Select, which lets you choose an autofocus (AF) point to use during autofocus from among the camera’s 81 AF points with a Micro Four Thirds lens, or 37 AF points with a Four Thirds lens.
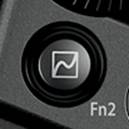
Fn2 button: The Fn2 button is fully programmable and can accept tasks listed in the Appendix. You can find instructions for how to assign a task to the Fn2 button on page 298. Its factory default task is Multi Function, which lets you choose from one of four specialized functions—Highlight&Shadow Control, Color Creator, Magnify, and Image Aspect—by holding the button and rotating the Rear Dial.

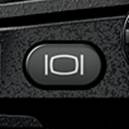
Info button: The Info button is used to enable or disable the menu help system. It is also used to scroll through and select various screen overlays for Live View or EVF shooting (e.g., Live Histogram, Level). Throughout this book, you will find that the Info button is used to choose various individual items within groups of items. This is not a programmable button.
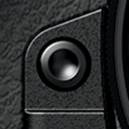
Lens release button: This non-programmable button has one function: releasing the lens lock so that you can change lenses. To remove a lens, press and hold the Lens release button while turning the lens in a counter-clockwise direction until it stops. Then pull the lens straight out of the body. To mount a different lens, do not press the Lens release button. Insert the new lens by matching the orange dot on the top of the lens with the orange dot on the left side of the camera’s lens mount. Turn the lens in a clockwise direction, without forcing it, until it clicks. It should turn very easily. The camera and lens is then ready to use.
LV button: The LV button was discussed in a previous section of this chapter titled Super Control Panel or Live View Screen, on page 6. The button is used to toggle between the Super Control Panel and the Live View screen on the rear monitor. It is also used to access the Flash Remote Control panel for wirelessly controlling multiple external flash units when Shooting Menu 2 > [Flash] RC Mode is set to On, as described on page 222. This is not a programmable button.
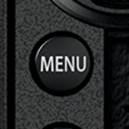
Menu button: The Menu button is primarily used to access the menu systems (e.g., Shooting Menu 1, Setup Menu, Custom Menu). Press the Menu button when the rear monitor is active and the Menu system will open. Scroll up or down with the Arrow pad buttons to select one of the camera’s menus, and then scroll to the right to access that menu. The Menu button is often used to cancel actions, and to return to the main menu from within a function. This is not a programmable button.
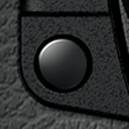
Mode dial lock button: This button is used for one thing only: to lock the Mode dial so that it cannot accidentally be moved from the current Mode dial setting (e.g., P, S, A, M). It works like the button on a retractable ball-point pen. Press it once to lock the Mode dial and press it again to unlock the Mode dial. This is not a programmable button.
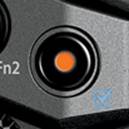
Movie button: The Movie button is fully programmable and can accept tasks listed in the Appendix. You can find instructions for how to assign a task to the Movie button on page 299. Its factory default task is REC, which is used to start and stop the camera’s video recording functions.

OK button: The OK button is used extensively to confirm configurations of camera functions. It can also be used to choose items. When you are done configuring a camera setting you will usually need to press the OK button to lock in your changes. You can also press the OK button to open the Live Control when the Live View screen is showing your subject. The Live Control allows you to select many of the camera’s most important settings along the right side of the screen. You can use the Arrow pad or camera dials to configure the selected Live Control item. Additionally, you can edit images by pressing OK when a picture is on the screen. This is not a programmable button.
One-Touch White Balance button: This button is fully programmable and can accept tasks listed in the Appendix. You can find instructions for how to assign a task to the One-touch WB button on page 300. Its factory default task is One-touch WB, which lets you immediately take a white balance reading from a white or gray card and store it in one of the four Capture WB custom white balance storage areas, as described on page 497.

Playback button: This non-programmable button is for reviewing images and movies. You will press this button to examine images and videos saved on the camera’s memory card. When you take an image, the camera defaults to a half-second display of an image after taking it. Therefore, unless you increase the image display time, which could interfere with using the EVF for follow-up shots (the just-taken image will display in the EVF), you will use the Playback button often to examine your images and videos.
Preview button: The Preview button is fully programmable and can accept tasks listed in the Appendix. You can find instructions for how to assign a task to the Preview button on page 301. Its factory default task is Preview, which lets you see the depth of field for the current aperture setting as you look at the EVF or Live View screen.
Shutter button: The Shutter button is primarily used to release the camera’s shutter to take a picture (full press). It is also used to initiate autofocus (half press). The autofocus function can be relegated to the AEL/AFL button instead of the Shutter button for back-button focusing, as described on page 282.
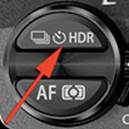
Sequential shooting/Self-timer/HDR button: This button allows you to control the camera’s high dynamic range (HDR) system, along with the Sequential shooting frames-per-second rate (fps) and self-timer. Press the button and turn the Front Dial to control the HDR system. Press the button and turn the Rear Dial to control the Sequential shooting fps rate or to select the self-timer. There is a limited amount of programmability for these two buttons, tied in with the Lever functions in the Custom Menu, as described on page 319.
Next let’s consider each of the cameras four dials and what they do.
Dials
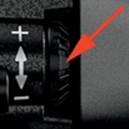
Diopter adjustment dial: The Diopter adjustment dial changes the optical power of a lens that’s located in front of the camera’s EVF so that you do not strain your eye when you are looking into the viewfinder. It works sort of like a pair of glasses to bring the image you see on the EVF into sharper focus for your eye; however, it does not correct for astigmatism. If you look into the EVF and feel eyestrain or get a headache after using it, you should adjust the Diopter adjustment dial until the view is comfortable for you. You may have to use a different diopter setting for each eye.

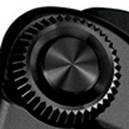
Front Dial: The Front Dial changes the aperture setting when the camera is set to Manual (M) mode on the Mode Dial. In other modes it is usually used to set +/- Exposure compensation. You can also use the Front Dial to zoom in and out of images displayed on the rear monitor. The Front Dial is sometimes used to select a single item from a list of items, such as subfunctions in the camera’s menus. The Front Dial has a measure of programmability, as described on page 309 under the Custom Menu’s Dial Function. You can change which dial (Front or Rear) does what, and which direction you turn it to accomplish its task.

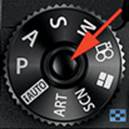
Mode Dial: The E-M1 is a multimode camera. It has a Mode Dial on top that allows you to change how the camera works. You can select from modes that turn your camera into a fully automatic (iAUTO), point-and-shoot camera, or a fully manual (M), user-controlled camera, or various modes in between. In addition to the normal P, S, A, and M exposure modes, the Mode Dial offers various specialty modes including: ART mode (exotic filters), SCN mode (scene modes for inexperienced photographers), Photo Story mode (multi-image assembly), and Movie mode (video recording). Some of the modes on the Mode Dial can be programmed to a degree with the Dial Function of the Custom Menu, as described on page 301. However, the Mode Dial itself is not programmable.
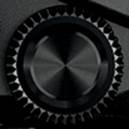
Rear Dial: The Rear Dial changes the shutter speed setting when the camera is set to Manual (M) mode on the Mode Dial. In other modes it is used to set the current controllable setting. For instance, when you use Aperture-priority (A) mode on the Mode Dial, you will use the Rear Dial to set the aperture. When you use Shutter-priority (S) mode on the Mode Dial, you will use the Rear Dial to set the shutter speed. When you are examining an image on the monitor, you can use the Rear Dial to advance to the next image or go back to the previous image. The Rear Dial can also be used as a substitute for the Arrow pad buttons when moving in and out of functions in the camera’s menus. The Rear Dial has a measure of programmability, as described on page 310 under the Custom Menu’s Dial Function. You can change which dial (Front or Rear) does what, and which direction you turn it to accomplish its task.
Finally, let’s consider each of the camera’s two levers and what they do.
Levers
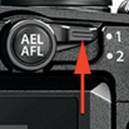
Lever: This Lever is designed to give the camera more than one basic way of doing things. You can configure some of the camera’s functions to work one way when the Lever is set to position 1 and another way when the Lever is set to position 2. This is a programmable lever, with specific functionality, as described on page 318.
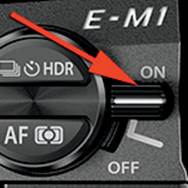
On/Off lever: This non-programmable lever has only one purpose: turning the camera on and off. If left in the On position, the camera will turn itself off after a specific period of time, which you can set with the Custom Menu > D. Disp/[Sound]PC > Auto Power Off function, as described on page 358. If the camera has shut down while the lever in in the On position, you will have to move the lever to the Off position and then back to On to bring the camera back to life.
Unusual Icons in Menu Names
Olympus uses unusual icons in some of its camera menus, in some cases making it hard to understand exactly what a menu selection means. For instance, in figure 1.8 you can see an icon that represents image quality at the point of both arrows in images 1 and 2.
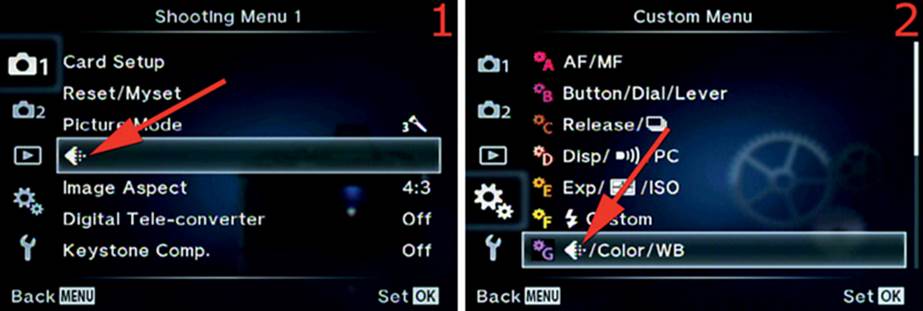
Figure 1.8: Unusual icons in menu names
You will see several icons of this type spread throughout the camera’s menu system. Some will be intuitive and others not. Because I do not have access to the Olympus icons, I have substituted words where an icon is used.
For example, the icon that represents the camera’s image quality (figure 1.8) is called Record Mode by the Olympus user’s manual. Therefore, when I refer to the image quality menu in this book I will use the words Record Mode in brackets, like this: [Record Mode].
In figure 1.8, image 2, you can see the same odd graphic used in a menu item that contains several more names. When I refer to the menu shown at the point of the red arrow in image 2, I will use: G. [Record Mode]/Color/WB.
Throughout the book, when you see a word in brackets as part of a menu name or function name, please remember that the word is used in place of the icon and represents the specific functionality that the icon is supposed to impart.
Contacting the Author
If you would like to contact me directly to comment on the book, ask questions, or report errata, please use the contact link at my website: http://www.PictureAndPen.com
You can also join my non-public Facebook group, Master Your Olympus (MYO), at the following web address: https://www.facebook.com/groups/MasterYourOlympus/
Additionally, I have created a public Facebook site that allows members to freely associate with general Olympus camera users. It is called Olympus Digital Camera & Photo Enthusiasts (ODCPE), and is found here: https://www.facebook.com/groups/ODCPE/
These two Facebook groups, one private and one public, will allow us to stay in touch, display photographs created with our Olympus cameras, and learn from each other.
You will find a series of downloadable resources for this book, along with a list of any errata corrections, at the following website: http://www.rockynook.com/OlympusEM1
Author’s Conclusion
Now that we have completed some basic camera configuration and discussed the external controls on the E-M1, let’s proceed into a detailed examination of the camera’s various control screens. Many of these screens have selections that are touch sensitive, allowing you to choose that setting either with a touch of your finger or by using the Arrow pad keys and scrolling around.
All materials on the site are licensed Creative Commons Attribution-Sharealike 3.0 Unported CC BY-SA 3.0 & GNU Free Documentation License (GFDL)
If you are the copyright holder of any material contained on our site and intend to remove it, please contact our site administrator for approval.
© 2016-2026 All site design rights belong to S.Y.A.