Samsung Galaxy S7 For Dummies (2016)
Part II. Communications
Chapter 6. Managing Your Contacts
IN THIS CHAPTER
Putting all your callers, texters, and emailers on your phone
Getting all your contacts in one location
Keeping up to date with just a few taps
You’re probably familiar with using contact databases. Many cellphones automatically create one, or at least prompt you to create one. You also probably have a file of contacts on your work computer, made up of work email addresses and telephone numbers. And if you have a personal email account, you probably have a contact database of email accounts of friends and family members. If you’re kickin’ it old school, you might even keep a paper address book with names, addresses, and telephone numbers.
The problem with having all these contact databases is that it’s rarely ever as neat and tidy as I’ve just outlined. A friend might email you at work, so you have her in both your contact databases. Then her email address might change, and you update that information in your personal address book but not in your work one. Before long, you have duplicate and out-of-date contacts, and it’s hard to tell which is correct. How you include Facebook or LinkedIn messaging in your contact profile is unclear.
In addition to problems keeping all your contact databases current, it can be a hassle to migrate the database from your old phone. Some cellular carriers or firms have offered a service that converts your existing files to your new phone, but it’s rarely a truly satisfying experience. You end up spending a lot of time correcting the assumptions it makes.
You now face that dilemma again with your Galaxy S7: deciding how to manage your contacts. This chapter gives you the advantages of each approach so that you can decide which one will work best for you. That way, you won’t have the frustration of wishing you had done it another way before you put 500 of your best friends in the wrong filing system.
Using the Galaxy S7 Contacts App
Your phone wants you to be able to communicate with all the people you would ever want to in any way you know how to talk to them. This is a tall order, and your Galaxy S7 makes it as easy as possible. In fact, I wouldn’t be surprised if the technology implemented in the Contacts app becomes one of your favorite capabilities of the phone. After all, your phone is there to simplify communication with friends, family, and coworkers, and the Contacts app on your phone makes it as easy as technology allows.
At the same time, this information is only as good as your contact database discipline. The focus of this section is to help you help your phone help you.
Learning the Contacts App on your phone
The fact of the matter is, if you introduced your phone to your email accounts in Chapter 5, the Contacts list on your phone has all the contacts from each of your contact lists.
![]() Take a look at it and see. From your Home screen, tap the Contacts icon.
Take a look at it and see. From your Home screen, tap the Contacts icon.
If you haven’t created a Gmail account, synced your personal email, or created a contact when you sent a text or made a call, your Contacts list will be empty. Otherwise, you see a bunch of your contacts now residing on your phone, sorted alphabetically (as shown in Figure 6-1).
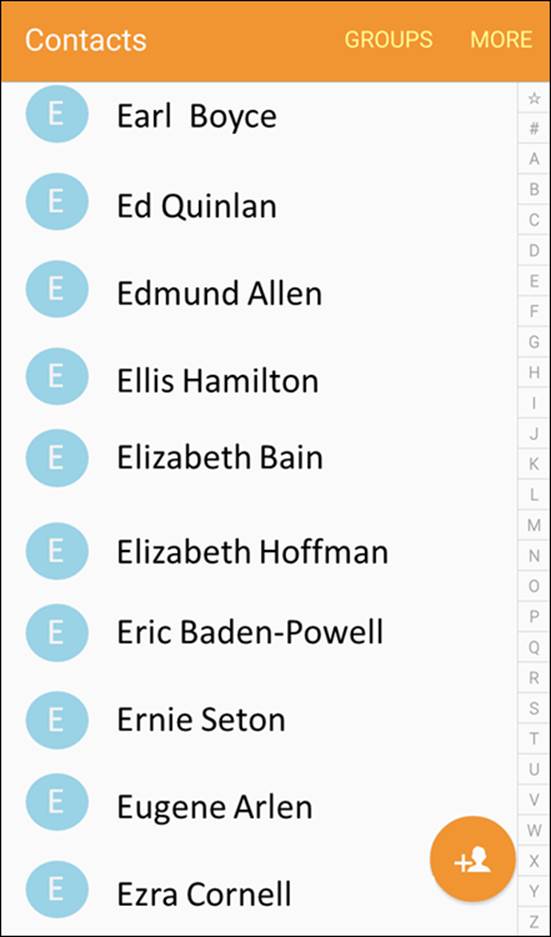
FIGURE 6-1: The Contacts list.
Along with the Contacts application that manages the data, this database does more than just store names, phone numbers, and email addresses. However, you can have the contact include any or all of the following information:
· All telephone numbers, including
· Mobile
· Home
· Work
· Work fax
· Pager
· Other
· Email addresses
· Home
· Work
· Mobile
· Instant Messaging addresses
· Company/organization
· Job title
· Nickname
· Mailing address for
· Home
· Work
· Another location
· Any notes about this person
· Web address
· Birthday (or other significant event)
· A phonetic spelling of the name
As if all this weren’t enough, you can assign a specific ringtone to play when a particular person contacts you. I cover the steps to assign a music file to an individual caller in Chapter 12.
Finally, you can assign a picture for the contact. It can be one out of your Gallery; you can take a new picture; or (as I discuss in Chapter 8) you can connect to a social network like Facebook and use that person’s profile picture.
Fortunately, the only essential information is a name. Every other field is optional and is only displayed if the field contains information to be displayed. Figure 6-2 shows a lightly populated contact.

FIGURE 6-2: A lightly populated contact.
Deciding where to store your contacts
Before we get too far, it is important for you to decide the default option where you want to store your contacts. Deciding this now with the information this section provides you will make your life much easier as you go forward. It is possible to combine contact databases, but even the best tools are imperfect.
The first time you try to save a new contact, the Contacts App will offer you a pop-up screen, as seen in Figure 6-3. This lists the options you have and will take your first entry as the option you want as a default.
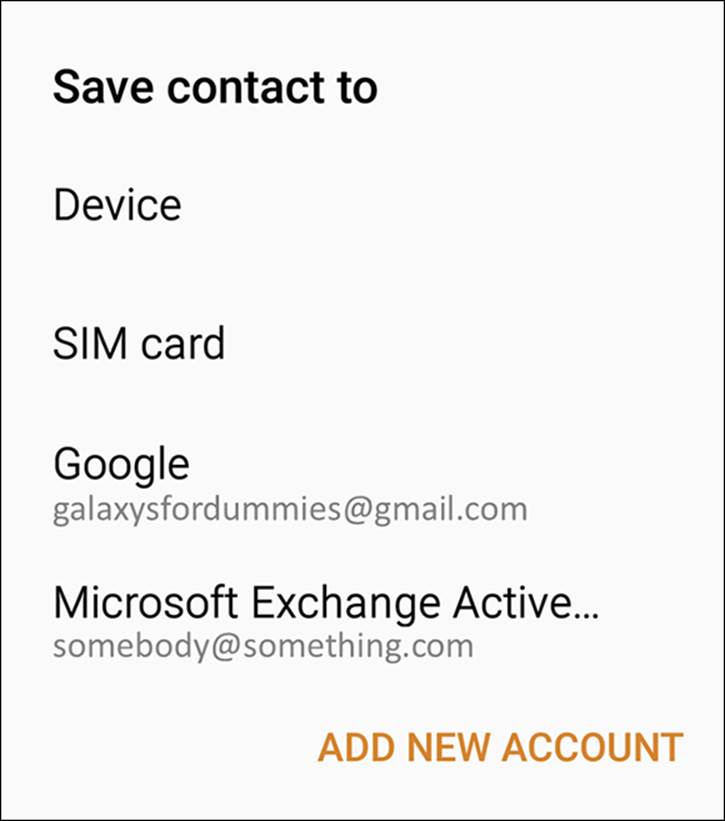
FIGURE 6-3: Choosing a default for creating new contacts.
Whenever you save a new entry, you can manually switch to another of these databases. Save yourself some time and aggravation and decide now what you want to do. Here are your options on where to save new contacts:
· Within the memory of your phone
· On the SIM card inserted in your phone
· Within your Gmail account
· As a contact in one of your other accounts
Each of these four options has advantages and disadvantages. If you simply want my advice, I suggest using your Gmail account to store new contacts. If this satisfies you, skip to the next section on linking contacts from other sources. Read on if you need some context.
Here is the deal: If everything is working properly, all options work equally well. However, if you switch phones regularly, ever lose you phone, need to make significant updates to your contacts, or are frequently out of wireless coverage, such as on an airplane, you should consider the options.
The first option mentioned involves storing your contacts within your phone. This is a great option, as long as you have your phone. However, there will come a day when Samsung (or HTC, or LG, and so on) has something faster and better, and you will want to upgrade. At that point, perhaps next year or in ten years, you will need to move your contacts to another location if you want to keep them. Plus, if you lose your phone, I sure hope that you have recently used one of the backup options I explore in Chapter 17.
The second option is to store your new contacts on your SIM card. The SIM card is familiar technology if your previous phone worked with AT&T or T-Mobile. Figure 6-4 shows a profile of a typical SIM card, next to a dime for scale, although yours probably has the logo of your cellular carrier nicely printed on the card. To the right of the SIM card is the newer micro SIM card. This is the same idea, but in a smaller package.
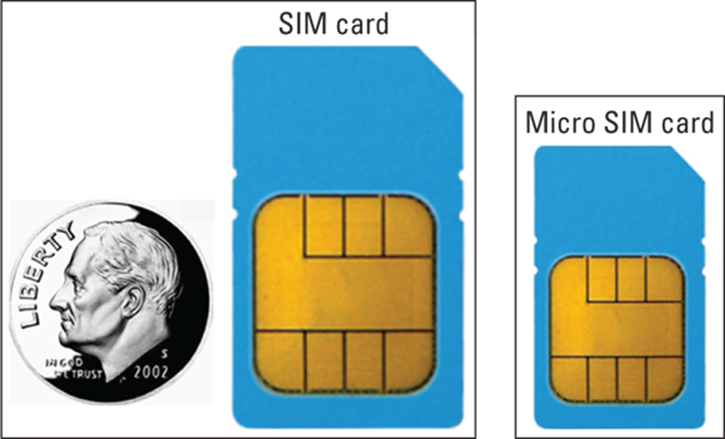
FIGURE 6-4: A SIM card and a micro SIM card.
 If your cellular carrier is Verizon, Sprint, or US Cellular, you may be confused. Your Galaxy S7 has a SIM card. What’s the story? These carriers use CDMA technology for voice and for some data features. Up to 3G, the phones using CDMA technology and data services didn’t use a SIM card. Today, all carriers in the United States are implementing a super high-speed data technology called LTE, also called 4G. Because your phone is capable of LTE, you now have a SIM card.
The cool aspect of using your SIM card is that you can pluck it out of your existing phone and pop it in another phone and all your contacts come with you. It works this easily if you stay with an Android smartphone of recent vintage. It almost works this easily if you, say, switch back to a feature phone (as in the kind of phone that merely makes calls and texts and costs $1). Another advantage is that your SIM card does not rely on having a wireless connection to update changes.
The next option is to store new contacts on your Gmail account. What this means is that your new contacts are automatically copied from your phone to the Gmail account of Google servers. This keeps the records on your phone, but Google maintains a copy of this record in your Gmail account. You can make changes to a contact on your phone or on your PC.
The two reasons I recommend using your Gmail account are
· You can maintain these records with your full-sized keyboard rather than the smaller keyboard on your phone.
· It is easy to get back all these contacts on a new Android phone simply by telling the new phone your Gmail account. Because you will probably enter your Gmail account right away when you get a new phone, your contacts reappear quicker than the fourth option.
The fourth option is to store the contacts in one of your existing email accounts. This may be the best option if you already consider your email, either your personal or work account, to be the primary location where you store contacts. If you already have good database discipline with one of your email accounts, by all means, use this email account as the default place to store new contacts.
If this particular account you currently use for keeping your contacts is not set up yet on your phone, you can tap the Add New Account link shown in Figure 6-3 to go through the process described in Chapter 5 to set up a new email account.
Linking Contacts on your phone
The Contacts list is smart. Allow me to explain some of the things that are going on.
Say your best friend is Bill Boyce. You sent Bill a text earlier to let him know about your new phone. You followed the instructions on how to send a text in Chapter 4 and entered his telephone number. You took it to the next step and tapped Add Contact. When you were prompted to add his name, you did. Now your phone has a contact, “Bill Boyce.”
Then you linked your email. Of course your buddy Bill is in your email Contacts list. So while you were reading this chapter, several things happened. First, your phone and your Gmail account synced. Your phone thinks about it and figures this must be the same person. It automatically combines all the information in one entry on your phone!
Then your phone automatically updates your Gmail account. On the left side of Figure 6-5, you see the Google logo just beneath Bill’s email address. This contact is synced with your Gmail account. You didn’t have to do anything to make this happen.
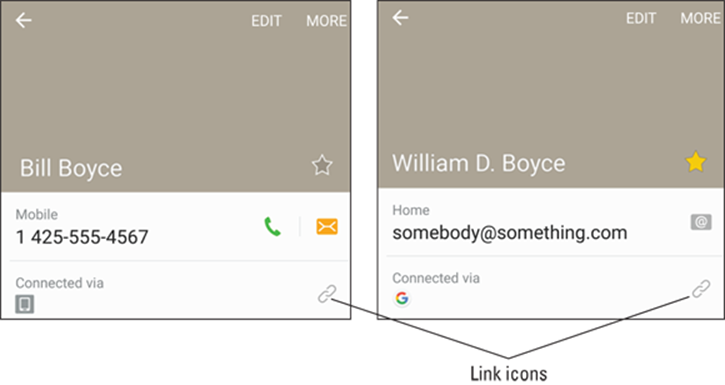
FIGURE 6-5: Two contacts for the same person.
Your phone noticed that Bill’s work number was in your email contact information, but the mobile phone number you used to text him was not. No problem! Now the contact on your phone includes both the information you had in your email contact as well as his cellular phone.
Now, as slick as this system is, it isn’t perfect. In this scenario, both contacts have the same first and last name. However, if the same person also goes by a different name, you have to link these contacts. For example, if you created a contact for Bill Boyce, but your email refers to him as William D. Boyce, your phone will assume that these are two different people.
No problem, though. Do you see the chain links icon in Figure 6-5 in the box that says Connected via? Here are the steps to link the two contacts for the same person:
1. From a contact, tap on the chain icon.
This brings up the pop-up shown in Figure 6-6.
 Choose the contact whose name you want to be the primary name. For example, I tapped the link on the Bill Boyce contact, which is saved in Gmail. This will be the name used on the combined contact going forward.
2. Tap the Link Another Contact link at the bottom of the screen.
Your phone will try to help you with some suggestions, as shown in Figure 6-7. If it gets it all wrong, you can just find the other contact by searching alphabetically.
3. Tap the contact you want joined.
In this case, the second guess, William D. Boyce, is the one you want. Tap the selection box to the left of his name. The result is shown in Figure 6-8.
4. Now tap the link that says Link in the upper-right corner of the screen.
This combined link will now have all the information on this one person.
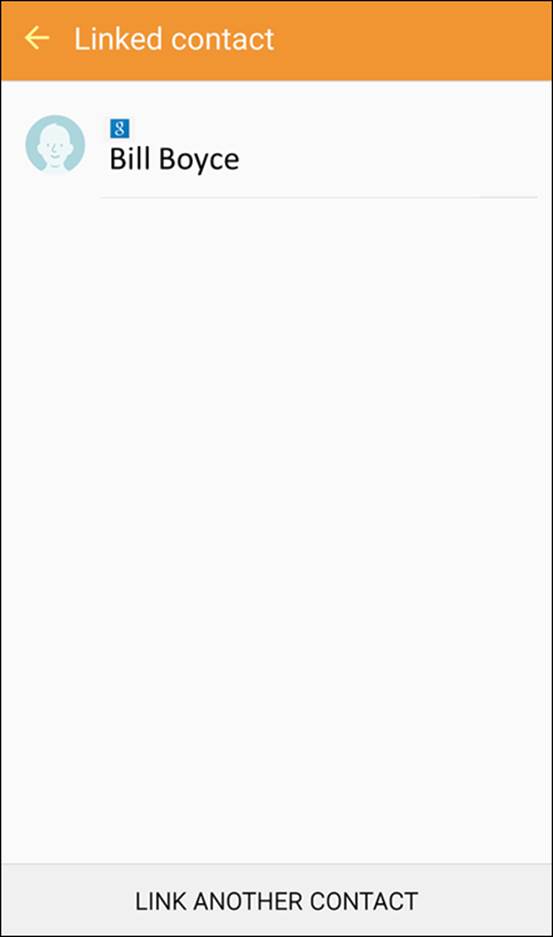
FIGURE 6-6: The Linking Page for Bill Boyce.
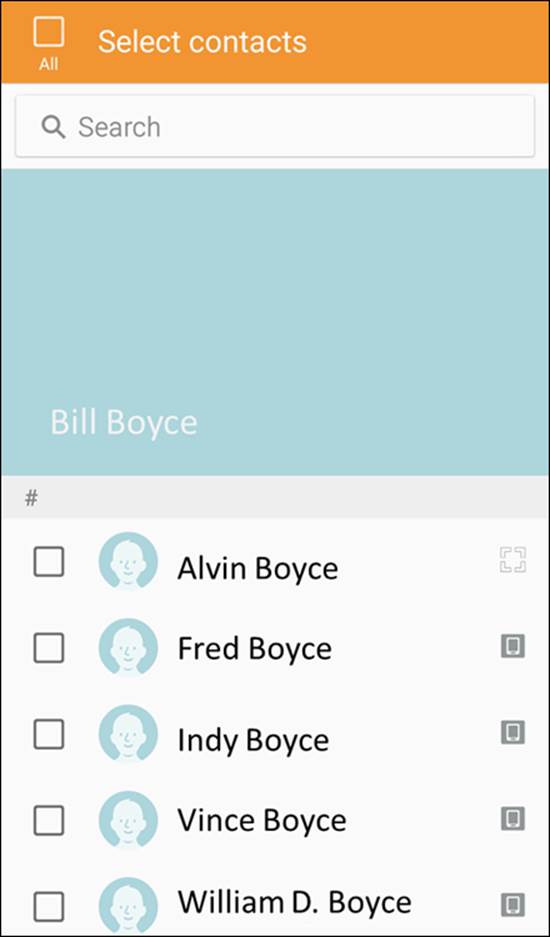
FIGURE 6-7: Some linking suggestions.
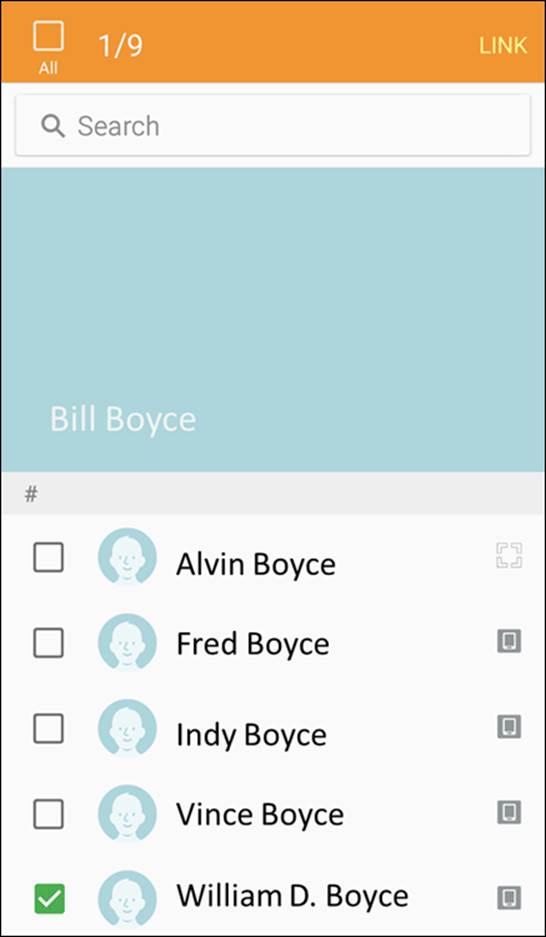
FIGURE 6-8: The Linked contacts.
 Let no man put this link asunder (unless you made a mistake and want to change it. Then go tap the chain icon to break the link).
Creating Contacts within Your Database
Your phone is out there trying to make itself the ultimate contact database with as little effort on your part as possible. The interesting thing is that the salesperson in the cellular store probably didn’t explain this to you in detail. It’s a subtle-but-important capability that’s hard to communicate on the sales floor. Here’s what happens.
Whenever you make or receive a call, send or receive an email, or send or receive a text, your phone looks up the telephone number or email address from which the message originated to check whether it has seen that address before. If it has, it has all the other information on that person ready. If it doesn’t recognize the originating telephone number or email, it asks whether you want to make it a new contact or update an existing one. What could be easier?
Adding contacts as you dial
When you get a call, a text, or an email from someone who isn’t in your contacts, you’re given the option to create a profile for that person. The same is true when you initiate contact with someone who isn’t in your Contacts list. Chapter 3 shows you the empty and full dialing screens. The image on the left in Figure 6-9 shows the phone trying its best to anticipate the person you are in the process of calling, and, if it is not saved already, the image on the right shows how it offers you the option to add this number to your contacts.
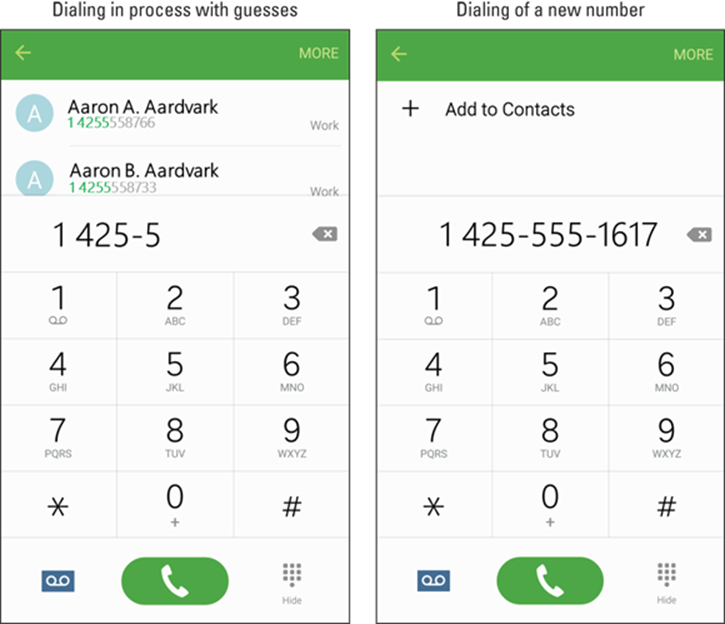
FIGURE 6-9: The dialing screens in process and when there is a new number.
When you tap Add to Contacts, you’re immediately given the option to create a contact or update an existing contact. Your phone doesn’t know whether this is a new number for an existing contact or a totally new person. Rather than make an assumption (as lesser phones on the market would do), your phone asks you whether you need to create a new profile or add this contact information to an existing profile.
Keep in mind that if you are calling an existing contact and your phone guesses the right person, you can save yourself time and tap the phone to dial.
Say that you want to enter this number as a new contact. You follow these steps:
1. Tap the Add a Contact link.
It will first check to see whether you want to create a new contact or add this number to an existing contact. The Add to Contacts pop-up as seen in Figure 6-10 gives you these options. If this is a new number for an existing contact, this pop-up saves you from having to link contacts.
2. Tap the Create Contact link.
Tapping this link brings up a new contact page. An example is seen in Figure 6-11.
The number is already populated. You just need to fill in the correct name plus any other information that you want associated with this person.
3. When you’re done typing in the information for this contact, tap Save at the top of the contact.
Figure 6-11 shows the Save button at the top of the screen.
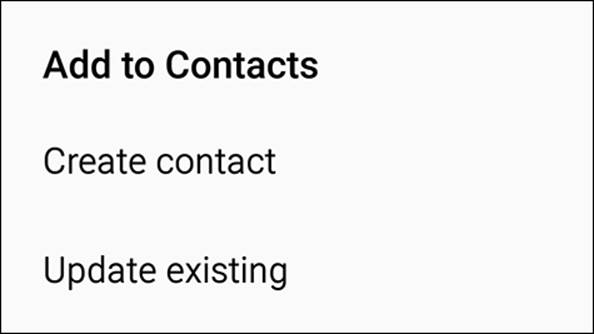
FIGURE 6-10: The Add to Contacts pop-up.
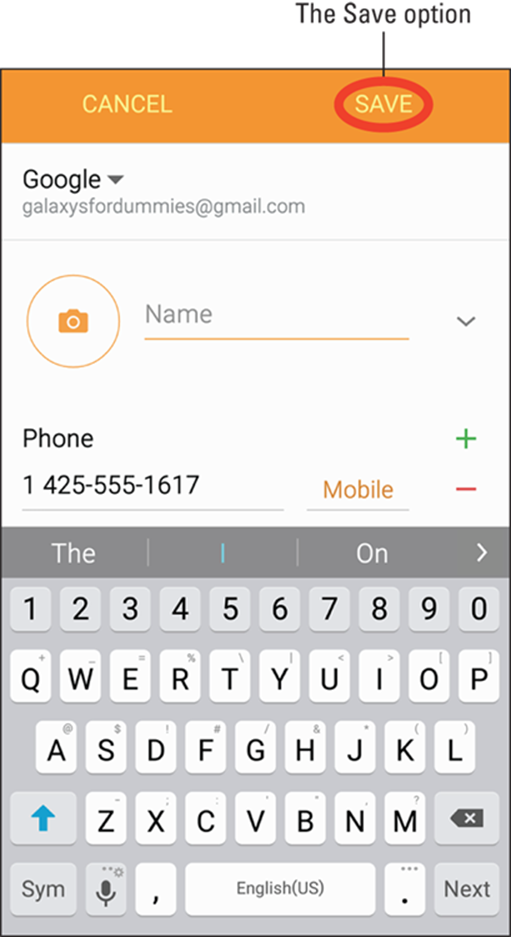
FIGURE 6-11: A partially populated contact.
Adding contacts manually
Adding contacts manually involves taking an existing contact database and adding its entries to your phone, one profile at a time. (This option, a last resort, was the only option for phones back in the day.)
1. Tap the Contacts icon.
Doing so brings up the list of existing contacts shown in Figure 6-1.
2. Tap the Add Contacts icon (the + [plus] sign next to a silhouette).
This icon is seen in Figure 6-12. Tapping it will bring up a blank contact page with nothing populated.
3. Fill in the information you want to include.
4. When you’re done entering data, tap Save at the top of the screen.
The profile is now saved. Repeat the process for as many profiles as you want to create.

FIGURE 6-12: The Add Contacts icon.
How Contacts Make Life Easy
Phew. Heavy lifting over. After you populate the profiles of dozens or hundreds of contacts, you’re rewarded with a great deal of convenience.
Start by tapping a contact. You see that person’s profile, as shown in Figure 6-13.
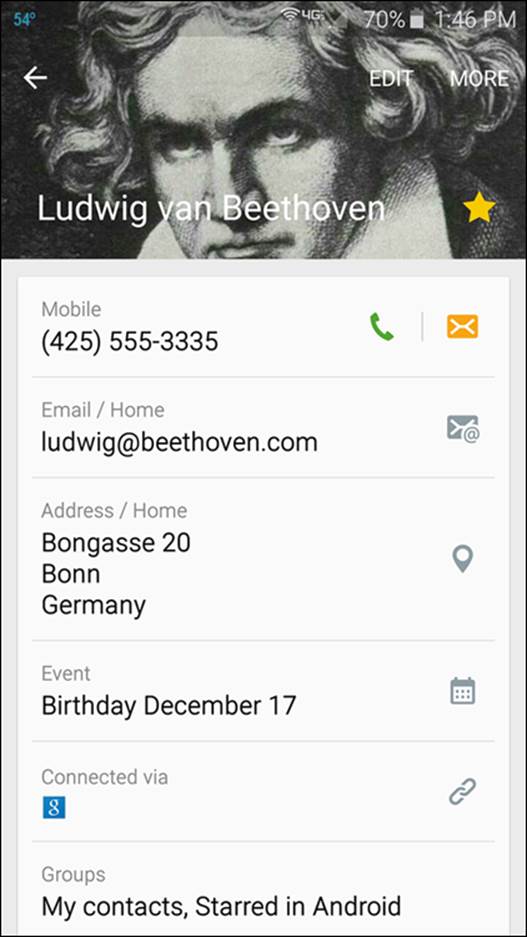
FIGURE 6-13: A typical profile.
All the options you have for contacting this contact are but a simple tap away:
· Tap the green telephone next to the number to dial that number.
· Tap the amber message icon to send a text.
· Tap the email icon to create an email.
About the only thing that tapping on a data field won’t do is print an envelope for you if you tap the mailing address!
Playing Favorites
Over the course of time, you’ll probably find yourself calling some people more than others. It would be nice to not have to scroll through your entire contacts database to find those certain people. Contacts allow you to place some of your contacts into a Favorites list for easy access.
From within the Contacts app, open the profile and notice the star next to that person’s name (refer to Figure 6-13). To the right of the contact name is a star. If that star is gold, that contact is a Favorite. If not, then not.
To make a contact into a star, tap the blank outline of the star. To demote a contact from stardom without deleting, tap the gold star.
You won’t immediately see a difference in your contacts other than the appearance of the gold star. When you open your phone, however, this contact now appears under your Favorites tab. The Favorites tab is like a mini-contact database. It looks similar in structure to your regular contact database, but it includes only your favorites.