Android Programming: Pushing the Limits (2014)
Part III. Pushing the Limits
Chapter 18. Communicating with Remote Devices
The most common use of network communication in Android applications is when calling online web services,
which I cover in Chapter 17. However, another area of communication is between your Android device and
some other local device. The second device can be another Android smartphone, an activity tracker, a heartbeat
monitor, a wireless weather station, or simply a regular laptop. A number of different technologies on Android
support communication with these devices. You can use a USB-cable from your Android smartphone to the
device, Bluetooth Low Energy for short-range and power-efficient wireless communication, or WiFi Direct for
high-speed peer-to-peer networking.
In this chapter, I cover some of the different communication technologies supported by Android (USB, Bluetooth
Low Energy, and Wi-Fi). I continue with some more advanced solutions using the WiFi Direct technology supported
by Android, which lets you do peer-to-peer connectivity between multiple devices using high-speed Wi-Fi. Next, I
show how you can announce and discover services on a Wi-Fi (or WiFi Direct) network using the built-in discovery
service in the Android APIs. Finally, I show how you can implement your own web server in an Android application
and how to publish an API on top of it, either using RESTful web services or an asynchronous Web Socket server.
Android’s Connectivity Technologies
Most Android devices support a number of connectivity technologies. Basically, these are USB, Bluetooth, and
Wi-Fi. Furthermore, these technologies can be divided into subcategories. For instance, you can use the APIs in
Android to perform raw serial communication over USB, or you can use the Android Open Accessory Protocol
defined by Google specifically for hardware accessories targeting Android devices. The Android Open Accessory
Protocol is supported through the Accessory Development Kit (ADK).
All Android devices support the Classic Bluetooth profiles, which are suitable for more battery-intensive operations
such as audio streaming. With Android 4.3, you now have support for Bluetooth Low Energy devices and the
Bluetooth Smart technology, which enables you to write applications that can discover and communicate with
devices that support the GATT profile (like heart monitors, step counters, and other low-power accessories).
For the more data-intensive communication scenarios, you can use Wi-Fi. Android has three modes in which its
Wi-Fi can operate: infrastructure (standard Wi-Fi connected to an access point), tethering (Android device acting
as a Wi-Fi access point to other devices), and WiFi Direct. Infrastructure is what you generally use when your
device is connected to a Wi-Fi and you access the Internet. For the purpose of this chapter, just know that this
works well when all devices are connected to the same Wi-Fi network, which usually means at home, at work or
when using a public Wi-Fi somewhere. Tethering can only be activated by the user through the Network menu
in the Settings application (unless you have access to the platform certificate, as I describe in Chapter 16), which
means it is of little interest for most developers.
WiFi Direct is one of the most interesting technologies for Android, because on later devices it can be active in
parallel with the infrastructure mode (that is, you can use WiFi Direct while connected to your home Wi-Fi). WiFi
Direct allows an application to set up a peer-to-peer Wi-Fi network that works without the need for a dedicated
access point. This makes WiFi Direct very attractive for network communication between devices in a more ad
hoc scenario. It also provides high-speed connectivity that cannot be achieved by routing the communication
over a server on the Internet. For instance, if you want to create a multiplayer game that doesn’t require Internet
connectivity or if you need a fast and secure way of sharing data (like photos) between two friends, WiFi Direct
is a very suitable solution.
Android USB
USB on Android is supported through the APIs found in the package android.hardware.usb. There
is also a library for supporting USB accessories available for devices running Android 2.3.4. In this chapter, I
focus on the host mode for USB communication. For information about USB accessory mode, see http://
developer.android.com/guide/topics/connectivity/usb/accessory.html.
USB is designed so that one device acts as a host to a number of other devices. Among other things, the host
can supply power to the connected devices, which is why you don’t need an extra battery for USB mice or why
you can charge your Android smartphone using the USB port on your laptop.
An Android device can also act as a USB host, allowing you to power external devices, which means you
can connect to things like card readers, finger print scanners, and other USB connected peripherals to your
Android devices.
To enable an application to communicate over USB, first you define the Activity that starts when you
connect your USB device. In the following code, you see an example of how this can look in the manifest.
Note the metadata element that defines an XML file, which acts as a filter to select which USB devices your
application will trigger on.
<activity
android:name=”.MyUsbDemo”
android:label=”@string/app_name” >
<intent-filter>
<action
android:name=”android.hardware.usb.action.USB_DEVICE_ATTACHED”
/>
</intent-filter>
<meta-data
android:name=”android.hardware.usb.action.USB_DEVICE_ATTACHED”
android:resource=”@xml/device_filter” />
</activity>
The device_filter.xml can look like the following example. In this case, it will filter on an Arduino Uno
board and start your Activity when you plug in such a device on your Android smartphone.
<resources>
<usb-device vendor-id=”9025” product-id=”67” />
</resources>
The onResume() method shown in the following code example demonstrates how you can get the
UsbDevice instance from the Intent that will launch your Activity.
protected void onResume() {
super.onResume();
Intent intent = getIntent();
UsbDevice device = (UsbDevice) intent.
getParcelableExtra(UsbManager.EXTRA_DEVICE);
Log.d(TAG, “Found USB Device: “ + device.toString());
new Thread(new UsbCommunciation(device)).start();
}
After you have the UsbDevice object, you can start communicating with the device by opening a connection,
claiming its interface and retrieving the endpoints for reading and writing. In the following example, I continuously
write the same message to the device and read a response, using the buildTransfer() method.
private class UsbCommunciation implements Runnable {
private final UsbDevice mDevice;
UsbCommunciation(UsbDevice dev) {
mDevice = dev;
}
@Override
public void run() {
UsbDeviceConnection usbConnection
= mUsbManager.openDevice(mDevice);
if (!usbConnection.claimInterface(mDevice.getInterface(1),
true)) {
return;
}
// Arduino USB serial converter setup
usbConnection.controlTransfer(0x21, 34, 0, 0, null, 0, 0);
usbConnection.controlTransfer(0x21, 32, 0, 0,
new byte[]{(byte) 0x80, 0x25, 0x00,
0x00, 0x00, 0x00, 0x08},
7, 0);
UsbEndpoint output = null;
UsbEndpoint input = null;
UsbInterface usbInterface = mDevice.getInterface(1);
for (int i = 0; i < usbInterface.getEndpointCount(); i++) {
if (usbInterface.getEndpoint(i).getType() ==
UsbConstants.USB_ENDPOINT_XFER_BULK) {
if (usbInterface.getEndpoint(i).getDirection() ==
UsbConstants.USB_DIR_IN) {
input = usbInterface.getEndpoint(i);
}
if (usbInterface.getEndpoint(i).getDirection() ==
UsbConstants.USB_DIR_OUT) {
output = usbInterface.getEndpoint(i);
}
}
}
byte[] readBuffer = new byte[MAX_MESSAGE_SIZE];
while (!mStop) {
usbConnection.bulkTransfer(output, TEST_MESSAGE,
TEST_MESSAGE.length, 0);
int read = usbConnection.bulkTransfer(input, readBuffer,
0, readBuffer.length,
0);
handleResponse(readBuffer, read);
SystemClock.sleep(1000);
}
usbConnection.close();
usbConnection.releaseInterface(usbInterface);
}
}
USB communication in Android can be handy in situations where wireless interfaces aren’t sufficient. It can
also be a simple solution for when you need to start prototyping on a new accessory where you don’t have a
working Bluetooth or Wi-Fi stack ready.
Bluetooth Low Energy
With Android 4.3, Google introduced support for Bluetooth Smart, which also includes support for Bluetooth
Low Energy (BLE) devices like heart rate monitors and activity trackers. This opens up the possibility for you to
build new and exciting features by extending your apps with support from a wide range of devices.
Figure 18-1 illustrates how the BLE services are structured. A device can have a number of services, such as
battery, heart rate monitor, and cycling speed. Each service has a number of characteristics, such as the body
location of the heart rate monitor or the number of RPMs for your bicycle. Some characteristics, such as current
time, support writing from the client (your Android device), whereas others support only reading and/or
notifications. Furthermore, each characteristic can have a number of descriptors attached to it. Descriptors work
as additional information about the characteristic they’re attached to.
To support BLE, you first need to add the BLUETOOTH and BLUETOOTH_ADMIN permissions to your
application, as shown next. You should also declare the use of the bluetooth_le feature so that your app is
available only to devices that support it.
<uses-permission android:name=”android.permission.BLUETOOTH”/>
<uses-permission android:name=”android.permission.BLUETOOTH_ADMIN”/>
<uses-feature android:name=”android.hardware.bluetooth_le”
android:required=”true”/>
Figure 18-1 The Bluetooth Low Energy system design
Before performing a Bluetooth operation (LE or Classic), you need to verify that it is enabled. The following
method checks whether Bluetooth is enabled and, if Bluetooth isn’t enabled, displays the system dialog asking
the user to activate it.
protected void onResume() {
super.onResume();
if(!mBluetoothAdapter.isEnabled()) {
Intent enableIntent = new Intent(BluetoothAdapter.
ACTION_REQUEST_ENABLE);
startActivityForResult(enableIntent, ENABLE_REQUEST);
}
}
Next, you can start the scanning of BLE devices, as shown here:
public void doStartBtleScan() {
mLeScanCallback = new MyLeScanCallback();
BluetoothManager bluetoothManager =
(BluetoothManager) getSystemService(Context.BLUETOOTH_
SERVICE);
mBluetoothAdapter = bluetoothManager.getAdapter();
mBluetoothAdapter.startLeScan(mLeScanCallback);
}
After a BLE device is found, you’ll receive a callback where you can continue and complete the connection to
the device. In the following code, I stop further scanning of devices and initiate a connection.
private class MyLeScanCallback implements BluetoothAdapter.LeScanCallback {
@Override
public void onLeScan(BluetoothDevice bluetoothDevice,
int rssi, byte[] scanRecord) {
// TODO: Verify that we have the correct device...
mBluetoothAdapter.stopLeScan(this);
mMyGattCallback = new MyGattCallback();
mGatt = bluetoothDevice.connectGatt(BtleDemo.this,
false, mMyGattCallback);
}
}
If your application will connect to a specific type of device, you can inspect the device here before connecting.
The callback method onConnectionStateChange()receives a call once the connection is made. At this
point, you can discover the services available on the remote device, as shown here:
private class MyGattCallback extends BluetoothGattCallback {
@Override
public void onConnectionStateChange(BluetoothGatt gatt,
int status, int newState) {
super.onConnectionStateChange(gatt, status, newState);
if(newState == BluetoothGatt.STATE_CONNECTED &&
status == BluetoothGatt.GATT_SUCCESS) {
Log.d(TAG, “Connected to “ + gatt.getDevice().getName());
gatt.discoverServices();
}
}
When the BLE service discovery is completed for the device, as shown in the following code example, you can
iterate over the services and its characteristics. For each characteristic, you check whether it supports reading
and notifications, and if so call the respective method.
@Override
public void onServicesDiscovered(BluetoothGatt gatt, int status) {
super.onServicesDiscovered(gatt, status);
if(status == BluetoothGatt.GATT_SUCCESS) {
List<BluetoothGattService> services = gatt.getServices();
for (BluetoothGattService service : services) {
Log.d(TAG, “Found service: “ + service.getUuid());
for (BluetoothGattCharacteristic characteristic :
service.getCharacteristics()) {
Log.d(TAG, “Found characteristic: “ +
characteristic.getUuid());
if(hasProperty(characteristic,
BluetoothGattCharacteristic.PROPERTY_READ)) {
Log.d(TAG, “Read characteristic: “ +
characteristic.getUuid());
gatt.readCharacteristic(characteristic);
}
if(hasProperty(characteristic,
BluetoothGattCharacteristic.PROPERTY_NOTIFY)) {
Log.d(TAG, “Register notification for characteristic: “
+ characteristic.getUuid());
gatt.setCharacteristicNotification(characteristic,
true);
}
}
}
}
}
public static boolean hasProperty(BluetoothGattCharacteristic
characteristic, int property) {
int prop = characteristic.getProperties() & property;
return prop == property;
}
The read operation on a characteristic is asynchronous, so you have to read the value in the callback. The
registration for notifications will also use a callback from the same interface to notify your application of its
updates. The following code shows how you can read the signed 32-bit integer value from this characteristic,
both for asynchronous reading and for notifications.
@Override
public void onCharacteristicRead(BluetoothGatt gatt,
BluetoothGattCharacteristic characteristic, int status) {
super.onCharacteristicRead(gatt, characteristic, status);
if(status == BluetoothGatt.GATT_SUCCESS) {
Integer value =
characteristic.getIntValue(BluetoothGattCharacteristic.FORMAT_SINT32,
0);
// TODO Handle read value...
}
}
@Override
public void onCharacteristicChanged(BluetoothGatt gatt,
BluetoothGattCharacteristic characteristic) {
super.onCharacteristicChanged(gatt, characteristic);
Integer value = characteristic.
getIntValue(BluetoothGattCharacteristic.
FORMAT_SINT32, 0);
// TODO Handle value from notification...
}
Be sure to refer to the comprehensive Bluetooth specifications, which you can find at the Bluetooth
Working Group website at https://developer.bluetooth.org/gatt/Pages/default.aspx.
Android Wi-Fi
Wi-Fi is the general name for the collection of technology standards managed by the Wi-Fi Alliance. WiFi Direct
is an additional technology that runs on top of the 802.11n standard. It enables devices to communicate
without the need for a dedicated access point, which makes it very similar to Bluetooth, except that it uses high-
speed Wi-Fi communication.
However, even if you have your devices on the same Wi-Fi, you still need to discover them in order to set up a
connection. Discovery means to find the IP address of the device running the service you want to use. Android
has built-in support for network discovery on both standard Wi-Fi (infrastructure) and WiFi Direct that lets
devices find services that are announced using the DNS-SD protocol.
Network Service Discovery
USB and Bluetooth provide an automatic discovery of the service you’re providing, but it’s not the same with web
services published on a Wi-Fi network. However, there are standard discovery mechanisms supported by Android
that allow you to announce your service as well as discover services on a local network. The implementation
consists of two standards: mDNS and DNS-SD. The first (mDNS) is a multicast protocol for announcing and
discovering hosts using the UDP multicast protocol. DNS-SD is a service discovery protocol for announcing and
discovering services running on remote hosts (usually limited to the local network). Both are available in Android
through the android.net.nsd package and through the NsdManager system service.
The following code will declare a service that you have on your device:
private void announceService() {
NsdManager nsdManager = (NsdManager) getSystemService(NSD_SERVICE);
NsdServiceInfo nsdServiceInfo = new NsdServiceInfo();
nsdServiceInfo.setPort(8081);
nsdServiceInfo.setServiceName(“MyService”);
nsdServiceInfo.setServiceType(“_http._tcp.”);
mRegistrationListener = new MyRegistrationListener();
nsdManager.registerService(nsdServiceInfo,
NsdManager.PROTOCOL_DNS_SD,
mRegistrationListener);
}
Note that if you skip setting a host for the NsdServiceInfo, the IP of your device on the Wi-Fi will be used.
The service type for mDNS must be of a valid type. If the service you’re announcing is implemented as a web
server (or a Web Socket), you can use the type in the preceding example. For a detailed description of the mDNS
protocol and how to construct valid service types, see http://files.dns-sd.org/draft-cheshire-
dnsext-dns-sd.txt. After you call NsdManager.registerService(), the NsdManager starts announcing your service on the local Wi-Fi and triggers the callbacks in mRegistrationListsner when the
state of your registration changes.
When you want to discover a service, you use the same API but call NsdManager.discoverServices()
instead, as shown here:
private void discoverService() {
mDiscoveryListener = new MyDiscoveryListener();
NsdManager nsdManager = (NsdManager) getSystemService(NSD_SERVICE);
nsdManager.discoverServices(“_http._tcp.”,
NsdManager.PROTOCOL_DNS_SD,
mDiscoveryListener);
}
Note that you provide the service type as the search query and you’ll receive callbacks once something is found,
lost, or discovery started and stopped.
After a service is found, you need to resolve it to gain full information about it. To do so, you call NsdManager.
resolveService(), as shown in the following code.
@Override
public void onServiceFound(NsdServiceInfo serviceInfo) {
NsdManager nsdManager = (NsdManager) getSystemService(NSD_SERVICE);
nsdManager.resolveService(serviceInfo, mResolveListener);
}
When the resolve is finished, you receive a callback, as shown in the following code, where you can extract the
host and the port of the remote service that you’ve discovered.
@Override
public void onServiceResolved(NsdServiceInfo serviceInfo) {
mRemoteHost = serviceInfo.getHost();
mRemotePort = serviceInfo.getPort();
}
Using the network service discovery through the NsdManager allows you to communicate with devices on
the local Wi-Fi without forcing the user to enter an IP address manually. This can be very useful when you
create an application that wants to share data, like a photo album, or when setting up a local multiplayer game
between friends.
In the section “On-Device Web Services,” I show two examples of how to implement a web service running on
the device. By combining on-device web services with the mDNS features shown in this section, you can create
powerful services that work across devices with little or no user interaction.
WiFi Direct
WiFi Direct is part of the Wi-Fi Alliance 802.11 standards and allows high-speed Wi-Fi communication
between devices without the need for a dedicated access point. It’s basically a peer-to-peer protocol using
Wi-Fi technology. All Android devices running version 2.3/Gingerbread or later support WiFi Direct, but with
Android 4.1 and the introduction of the network service discovery APIs for WiFi Direct, WiFi Direct became really
interesting for application developers.
On Android devices running version 4 or later, it’s usually possible to run WiFi Direct in concurrent mode,
meaning that the device can support both WiFi Direct and regular Wi-Fi simultaneously.
First, you register a BroadcastReceiver programmatically that will be notified about the connection and
peer changes on the WiFi Direct network, as shown in the following code.
protected void onCreate(Bundle savedInstanceState) {
super.onCreate(savedInstanceState);
setContentView(R.layout.wifi_direct_services);
IntentFilter intentFilter = new IntentFilter(WifiP2pManager.
WIFI_P2P_PEERS_CHANGED_ACTION);
intentFilter.addAction(WifiP2pManager.
WIFI_P2P_CONNECTION_CHANGED_ACTION);
mReceiver = new MyWifiDirectReceiver();
registerReceiver(mReceiver, intentFilter);
}
Next, on the device that will publish a service you initialize a WiFi Direct channel, create a
WifiP2pServiceInfo that identifies your service, and add it as a local service. That’s all you need to set up
WiFi Direct on the server side. In the following code you can see a method that performs these actions.
private void announceWiFiDirectService() {
Log.d(TAG, “Setup service announcement!”);
mWifiP2pManager = (WifiP2pManager) getSystemService(WIFI_P2P_SERVICE);
HandlerThread handlerThread = new HandlerThread(TAG);
handlerThread.start();
mWFDLooper = handlerThread.getLooper();
mChannel = mWifiP2pManager.initialize(this, mWFDLooper,
new WifiP2pManager.ChannelListener() {
@Override
public void onChannelDisconnected() {
Log.d(TAG, “onChannelDisconnected!”);
mWFDLooper.quit();
}
});
Map<String, String> txtRecords = new HashMap<String, String>();
mServiceInfo = WifiP2pDnsSdServiceInfo.newInstance(SERVICE_NAME,
“_http._tcp”,
txtRecords);
mWifiP2pManager.addLocalService(mChannel, mServiceInfo,
new WifiP2pManager.ActionListener() {
@Override
public void onSuccess() {
Log.d(TAG, “Service announcing!”);
}
@Override
public void onFailure(int i) {
Log.d(TAG, “Service announcement failed: “ + i);
}
});
}
On the device that will act as a client, you perform a similar setup, but instead of publishing a service, you tell
the WifiP2pManager that you want to listen for peer devices and also give it a WifiP2pServiceRequest
to search for. The following code shows this method.
private void discoverWiFiDirectServices() {
mWifiP2pManager = (WifiP2pManager) getSystemService(WIFI_P2P_SERVICE);
HandlerThread handlerThread = new HandlerThread(TAG);
handlerThread.start();
mWFDLooper = handlerThread.getLooper();
mChannel = mWifiP2pManager.initialize(this, mWFDLooper,
new WifiP2pManager.ChannelListener() {
@Override
public void onChannelDisconnected() {
Log.d(TAG, “onChannelDisconnected!”);
mWFDLooper.quit();
}
});
mServiceRequest = WifiP2pDnsSdServiceRequest.newInstance(“_http._tcp”);
mWifiP2pManager.addServiceRequest(mChannel, mServiceRequest, null);
mWifiP2pManager.setServiceResponseListener(mChannel, this);
mWifiP2pManager.setDnsSdResponseListeners(mChannel, this, this);
mWifiP2pManager.discoverPeers(mChannel,
new WifiP2pManager.ActionListener() {
@Override
public void onSuccess() {
Log.d(TAG, “Peer discovery started!”);
}
@Override
public void onFailure(int i) {
Log.d(TAG, “Peer discovery failed: “ + i);
}
});
mWifiP2pManager.discoverServices(mChannel,
new WifiP2pManager.ActionListener() {
@Override
public void onSuccess() {
Log.d(TAG, “Service discovery started!”);
}
@Override
public void onFailure(int i) {
Log.d(TAG, “Service discovery failed: “ + i);
}
});
}
When a service matching your WifiP2pServiceRequest is found, the following callback will be invoked:
@Override
public void onDnsSdServiceAvailable(String instanceName,
String registrationType,
WifiP2pDevice srcDevice) {
Log.d(TAG, “DNS-SD Service available: “ + srcDevice);
mWifiP2pManager.clearServiceRequests(mChannel, null);
WifiP2pConfig wifiP2pConfig = new WifiP2pConfig();
wifiP2pConfig.deviceAddress = srcDevice.deviceAddress;
wifiP2pConfig.groupOwnerIntent = 0;
mWifiP2pManager.connect(mChannel, wifiP2pConfig, null);
}
In the preceding example, you cancel any further service discovery for WiFi Direct and connect to the device.
The configuration used here lets the device know that it has a very low intention to become the group owner. It
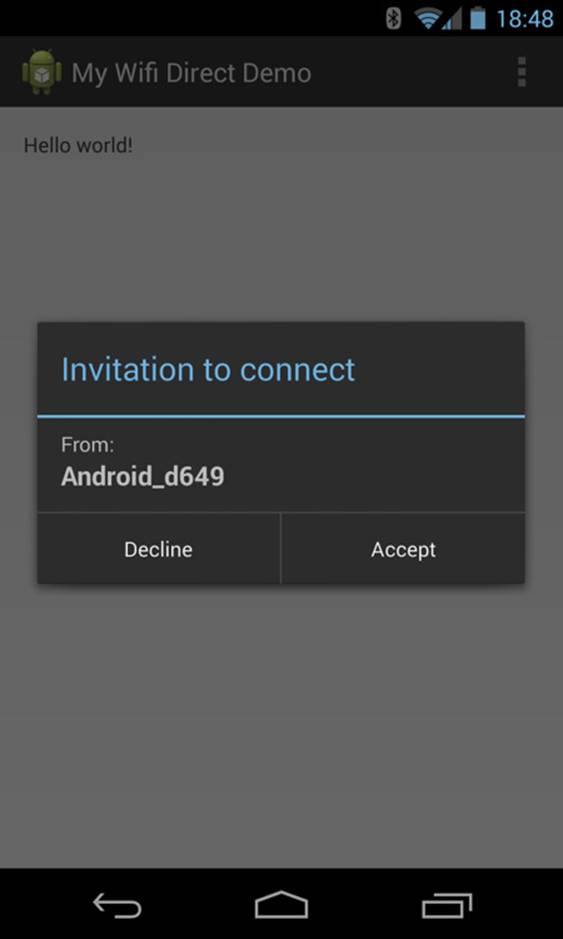
also contains the network address (specifically, the MAC address, not the IP address) of the remote device. When
the connect() method is called, the device on the other end (that is, the server device) displays a dialog
asking the user to confirm the connection (see Figure 18-2).
Figure 18-2 The confirmation dialog that appears on the
remote device when a client requests a connection
On both devices, once the connection is established, a broadcast will trigger the BroadcastReceiver that
was registered earlier. In the following code, I check whether the device is the group owner and if not, get the
InetAddress so that a TCP connection can be made to the service on the remote device:
public class MyWifiDirectReceiver extends BroadcastReceiver {
@Override
public void onReceive(Context context, Intent intent) {
String action = intent.getAction();
if(WifiP2pManager.WIFI_P2P_CONNECTION_CHANGED_ACTION.
equals(action)
&& mWifiP2pManager != null) {
mWifiP2pManager.requestConnectionInfo(mChannel, this);
}
}
@Override
public void onConnectionInfoAvailable(WifiP2pInfo wifiP2pInfo) {
Log.d(TAG, “Group owner address: “ + wifiP2pInfo.
groupOwnerAddress);
Log.d(TAG, “Am I group owner: “ + wifiP2pInfo.isGroupOwner);
if(!wifiP2pInfo.isGroupOwner) {
connectToServer(wifiP2pInfo.groupOwnerAddress);
}
}
}
In this procedure, the tricky thing is to understand that you can get only the IP address of the group owner.
After a connection is made, you need to verify which device is the owner of the new P2P group and set up
the communication with that device. Hopefully the device that hosts the service (HTTP server or similar) will be
the group owner, but if that is not the case, you must provide the IP for the service host to the client in some
other way.
The main reason for using WiFi Direct is, of course, that you don’t need existing Wi-Fi infrastructure. Also,
because the setup doesn’t require additional PIN codes or passphrases, it’s much easier to connect devices
this way.
On-Device Web Services
When two remote devices need to communicate, one of them usually has to act as the server. (The exception
is when using UDP multicasting or similar techniques; however, because I usually propose building device-to-
device communication using an existing and familiar standard like HTTP, I don’t include that broader discussion
in this chapter.)
Communication can be either synchronous, which we normally associate with standard HTTP requests and
responses, or asynchronous, which is when you need something like Web Sockets to solve things.
The actual task for your on-device web service can be anything imaginable. A Wi-Fi–enabled camera could
upload photos to a simple RESTful web service that stores new photos in the album of your phone; the web
browser on your laptop could connect to your phone and receive notifications of incoming phone calls; and
SMS or another Android device could connect to your device in order to set up a simple chat session. Whatever
service you choose to provide, most of services can be implemented using the HTTP protocol.
RESTful with Restlet
There are several options for implementing a web server in an Android application. Because the most common
use for implementing a web server is to provide a REST-based web service, I advise using a software component
that makes these kinds of operations easier. The one I usually choose is Restlet; it’s a lightweight Java-based
web server with good support for building RESTful web services. You can find more information about Restlet at
http://restlet.org.
The following is an example of using the Restlet engine for implementing a simple web service in an Android
application that will give the current location of the device:
public class RestletService extends Service
implements LocationListener {
public static final String ACTION_START_SERVER
= “com.aptl.myrestletdemo.START_SERVER”;
public static final String ACTION_STOP_SERVER
= “com.aptl.myrestletdemo.STOP_SERVER”;
private static final int SERVER_PORT = 8081;
public static final long ONE_MINUTE = 1000 * 60;
public static final float MIN_DISTANCE = 50;
private static final String TAG = “RestletService”;
private HandlerThread mLocationThread;
private Location mLocation;
private Component mServer;
public IBinder onBind(Intent intent) {
return null;
}
@Override
public int onStartCommand(Intent intent, int flags, int startId) {
String action = intent.getAction();
if(ACTION_START_SERVER.equals(action)) {
new Thread(new Runnable() {
@Override
public void run() {
initRestlet();
}
}).start();
} else if(ACTION_STOP_SERVER.equals(action)) {
if (mServer != null) {
shutdownRestlet();
}
}
return START_REDELIVER_INTENT;
}
private void initRestlet() {
try {
mLocationThread = new HandlerThread(“LocationUpdates”);
mLocationThread.start();
LocationManager locationManager =
(LocationManager) getSystemService(LOCATION_SERVICE);
mLocation = locationManager.
getLastKnownLocation(LocationManager.GPS_PROVIDER);
Criteria criteria = new Criteria();
criteria.setAccuracy(Criteria.ACCURACY_FINE);
criteria.setCostAllowed(true);
criteria.setSpeedRequired(true);
criteria.setAltitudeRequired(true);
locationManager.requestLocationUpdates(ONE_MINUTE,
MIN_DISTANCE,
criteria,
this,
mLocationThread.getLooper());
mServer = new Component();
mServer.getServers().add(Protocol.HTTP, SERVER_PORT);
Router router = new Router(mServer.getContext()
.createChildContext());
router.attachDefault(new Restlet() {
@Override
public void handle(Request request,
Response response) {
response.setStatus(Status.CLIENT_ERROR_FORBIDDEN);
}
});
router.attach(“/location”, new LocationRestlet());
mServer.getDefaultHost().attach(router);
mServer.start();
} catch (Exception e) {
Log.e(TAG, “Error starting server.”, e);
}
}
private void shutdownRestlet() {
if (mServer != null) {
try {
mServer.stop();
} catch (Exception e) {
Log.e(TAG, “Error stopping server.”, e);
}
}
LocationManager locationManager =
(LocationManager) getSystemService(LOCATION_SERVICE);
locationManager.removeUpdates(this);
if (mLocationThread != null) {
mLocationThread.getLooper().quit();
mLocationThread = null;
}
}
@Override
public void onLocationChanged(Location location) {
mLocation = location;
}
@Override
public void onStatusChanged(String s, int i, Bundle bundle) {
}
@Override
public void onProviderEnabled(String s) {
}
@Override
public void onProviderDisabled(String s) {
}
public class LocationRestlet extends Restlet {
@Override
public void handle(Request request, Response response) {
if(Method.GET.equals(request.getMethod())) {
try {
JSONObject jsonObject = new JSONObject();
jsonObject.put(“latitude”, mLocation.getLatitude());
jsonObject.put(“longitude”, mLocation.getLongitude());
jsonObject.put(“time”, mLocation.getTime());
jsonObject.put(“altitude”, mLocation.getAltitude());
jsonObject.put(“speed”, mLocation.getSpeed());
response.setStatus(Status.SUCCESS_OK);
response.setEntity(jsonObject.toString(),
MediaType.APPLICATION_JSON);
} catch (JSONException e) {
response.setStatus(Status.SERVER_ERROR_INTERNAL);
}
} else {
response.setStatus(Status.CLIENT_ERROR_BAD_REQUEST);
}
}
}
}
In the preceding code example the server port is hard coded. While this is technically okay, there
might be other applications running on the device that open the same port. Therefore, you should
have a proper error-handling for the cases where the port might be busy. Use the discovery services
described in the “Network Discovery Service” section to announce the port for your web server.
After setting up the server, you only need to provide your custom Restlet objects that respond to different
paths you register using the Router object.
The Restlet API makes it easy to implement these kinds of RESTful web services. You can add variables to the
path you register the Restlet instance on and then retrieve the variables in the handle() method, as
shown here (note the variable in bold):
router.attach(“/contact/{contactId}”, new ContactsRestlet());
...
public class ContactsRestlet extends Restlet {
@Override
public void handle(Request request, Response response) {
String contactId = String.valueOf(request.
getAttributes().get(“contactId”));
JSONObject contact = new JSONObject();
// TODO: Read contact with contactId from provider...
response.setEntity(contact.toString(), MediaType.APPLICATION_
JSON);
}
}
Restlet is an excellent software library to use when you need to provide a simple HTTP-based interface to your
application running on a device. Combined with the network discovery service from the previous section, you
have a powerful method for publishing services on the local Wi-Fi.
Web Socket Server
Although Restlet allows you to implement RESTful services that are always synchronous, you sometimes need
a method for supporting asynchronous communication instead. As I show in Chapter 17, Web Sockets provide
an easy-to-use method for doing asynchronous communication on top of HTTP. Also, since it is a Web standard,
it allows web browsers to interact with this service as well. In this section I show how to use the server-side
part of the same Web Sockets library used in Chapter 17 in order to build an asynchronous web service for your
application.
The following is a simple implementation for a Service that handles a Web Socket server. The callback in
MyWebSocketServer can be used to register new clients connecting (and removing those that disconnect).
public class WebSocketService extends Service {
private static final String TAG = “WebSocketService”;
private Set<WebSocket> mClients;
private MessageListener mMessageListener;
private MyWebSocketServer mServer;
private LocalBinder mLocalBinder = new LocalBinder();
public IBinder onBind(Intent intent) {
return mLocalBinder;
}
@Override
public void onCreate() {
super.onCreate();
mClients = Collections.synchronizedSet(new HashSet<WebSocket>());
}
@Override
public void onDestroy() {
super.onDestroy();
stopWebSocketServer();
}
public void startWebSocketServer() {
if (mServer == null) {
InetSocketAddress serverAddress = new InetSocketAddress(8081);
mServer = new MyWebSocketServer(serverAddress);
mServer.start();
}
}
public void stopWebSocketServer() {
if (mServer != null) {
try {
mServer.stop();
} catch (IOException e) {
Log.e(TAG, “Error stopping server.”, e);
} catch (InterruptedException e) {
Log.e(TAG, “Error stopping server.”, e);
}
}
}
public void sendBroadcast(String message) {
for (WebSocket client : mClients) {
client.send(message);
}
}
public void setMessageListener(MessageListener messageListener) {
mMessageListener = messageListener;
}
public interface MessageListener {
void onMessage(WebSocket client, String message);
}
class MyWebSocketServer extends WebSocketServer {
public MyWebSocketServer(InetSocketAddress address) {
super(address);
}
@Override
public void onOpen(WebSocket webSocket,
ClientHandshake clientHandshake) {
mClients.add(webSocket);
}
@Override
public void onClose(WebSocket webSocket,
int code,
String reason,
boolean remote) {
mClients.remove(webSocket);
}
@Override
public void onMessage(WebSocket webSocket,
String message) {
if(mMessageListener != null) {
mMessageListener.onMessage(webSocket, message);
}
}
@Override
public void onError(WebSocket webSocket,
Exception e) {
webSocket.close();
mClients.remove(webSocket);
}
}
public class LocalBinder extends Binder {
public WebSocketService getService() {
return WebSocketService.this;
}
}
}
By providing a simple callback interface, you can have an Activity register for new incoming messages. This
way you can build a simple chat server that works on your local Wi-Fi (or over WiFi Direct).
Summary
In this chapter, I covered the three supported methods for communicating between devices: USB, Bluetooth,
and Wi-Fi. Although Bluetooth and Wi-Fi are wireless, USB still has some advantages because it’s a secure and
more reliable communication. Bluetooth, especially Bluetooth Low Energy, provides a very power-efficient
method for exchanging data between devices. The support for BLE is quite new in Android, but I expect it to be
fairly widespread in the months to come.
Finally, Wi-Fi provides high-speed communication using the standard TCP or UDP protocols that we’re used to
on the Internet. Android also provides convenient discovery APIs for both standard Wi-Fi and WiFi Direct.
After you connect the devices on the same Wi-Fi, or in a WiFi Direct group, you can set up a web service or an
asynchronous Web Socket server to exchange data between the device running as a server and the one running
as a client.
Further Resources Websites
Android Developer guidelines for USB communication: http://developer.android.com/guide/topics/connectivity/usb/index.html
Android Developer guidelines for Bluetooth Low Energy: http://developer.android.com/guide/topics/connectivity/bluetooth-le.html
The GATT specifications for Bluetooth Low Energy services: https://developer.bluetooth.org/gatt/Pages/GATT-Specification-Documents.aspx
Android Developer guidelines for WiFi Direct: http://developer.android.com/guide/topics/connectivity/wifip2p.html
Information about Multicast DNS: http://www.multicastdns.org
A list of different service types for DNS-SD: http://www.dns-sd.org/ServiceTypes.html
The main site for the Restlet Java Framework: http://restlet.org
The main site for the Java-based Web Socket library used in this chapter: https://github.com/TooTallNate/Java-WebSocket