Android Development Patterns: Best Practices for Professional Developers (2016)
Chapter 10. Networking
Networking in Android has been an area that has steadily improved with each release of Android. Whereas network connections were once created and executed no matter what, through the use of the Volley library, they can now be queued to send, process, and even be canceled. In this chapter, you will learn about connecting to the Internet through an HTTP client, how to work with XML, and why using AsyncTask for network communication is necessary for your application, and how you can start using Volley.
Accessing the Internet
Unless your application is completely standalone, you will probably need to connect to the Internet. Saving information, accessing data feeds, or even getting updated files will require you to access the Internet.
To connect to the Internet, your application manifest will require the following permissions:
<uses-permission android:name="android.permission.INTERNET" />
<uses-permission android:name="android.permission.ACCESS_NETWORK_STATE" />
The INTERNET permission is used to allow your application to make outbound requests to the Internet. The ACCESS_NETWORK_STATE permission is used to allow access to either the radio or the Wi-Fi adapter on your device.
It is also important to remember that network activity must occur in a separate thread than the main or UI thread. Any attempt to perform network operations on the main thread causes a runtime exception or an Application Not Responding error.
Network Detection
An important aspect of using the networking features of Android is making sure that you actually have a connection before attempting to use it. Being able to detect when you have a connection is also useful for queuing data until a connection becomes available.
Checking for a connection involves getting a ConnectivityManager and then using the getActiveNetworkInfo() method and subsequently the isConnected() method on the active network. Listing 10.1 shows sample code from an Activity that demonstrates how this is done.
Listing 10.1 Checking Network Status
public void onClick(View view) {
ConnectivityManager connMgr = (ConnectivityManager)
getSystemService(Context.CONNECTIVITY_SERVICE);
NetworkInfo networkInfo = connMgr.getActiveNetworkInfo();
if(networkInfo != null && networkInfo.isConnected()) {
Toast connectedToast = Toast.makeText(getApplicationContext(),
"Network connected!", Toast.LENGTH_SHORT);
connectedToast.show();
} else {
Toast disconnectedToast = Toast.makeText(getApplicationContext(),
"No network connection!", Toast.LENGTH_SHORT);
disconnectedToast.show();
}
}
In the previous sample, an onClick() method is used to trigger a check for the connection state. The connMgr is created and used in conjunction with networkInfo to retrieve the current status of the network. If networkInfo is not empty and the network is connected, a toast will appear onscreen informing the user that the network is connected. Consequently, if networkInfo is empty or does not return true for isConnected(), then a toast will appear on the device with a message of “No network connection.”
Note that either a Wi-Fi or mobile data connection will trigger isConnected() to return true. For testing purposes, you should be able to use airplane mode to disable any network connections, allowing you to test your application without a network connection. If you would like to specifically check for either Wi-Fi or mobile data, you will need to specify the type when getting networkInfo.
To check for Wi-Fi, use the following snippet:
NetworkInfo networkInfo = connMgr.getNetworkInfo(ConnectivityManager.TYPE_WIFI);
Checking for a mobile data connection would change the snippet to be as follows:
NetworkInfo networkInfo = connMgr.getNetworkInfo(ConnectivityManager.TYPE_MOBILE);
Figure 10.1 shows an application running this code and the toast messages that appear when a button is pressed.
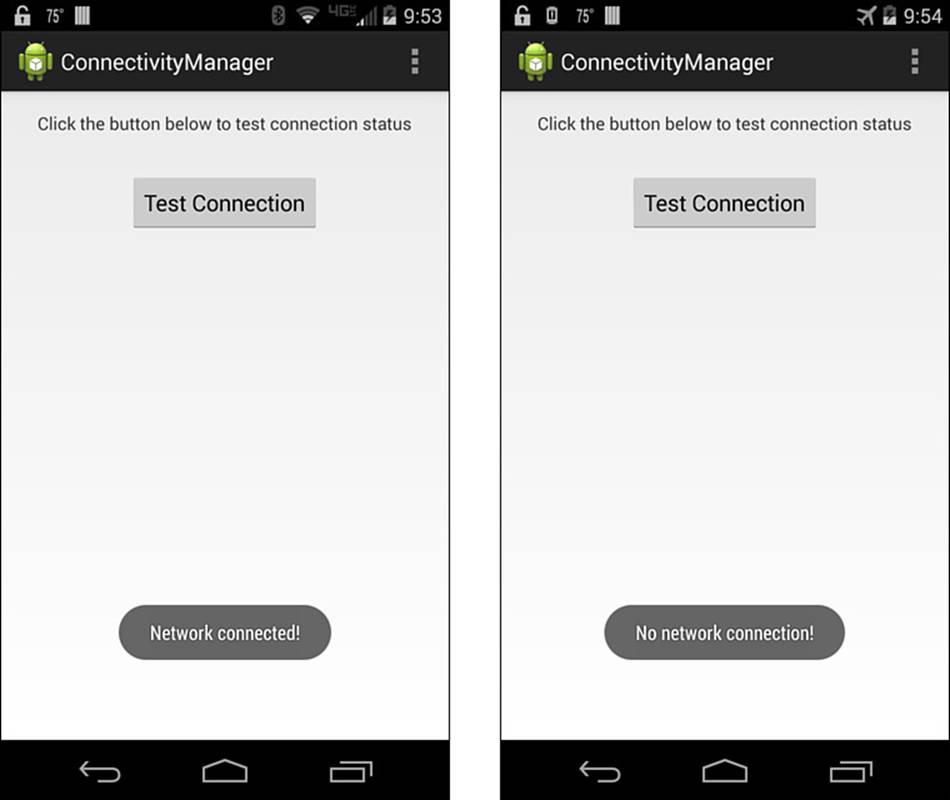
Figure 10.1 The network is connected for the phone on the left. The phone on the right, however, does not have a network connection.
Using an HTTP Client
Developers who have been with Android since the beginning are probably familiar with using both the HttpURLConnection and Apache HttpConnection HTTP clients. As it stands now, Google recommends the use of the HttpURLConnection client for any new applications that are targeted at Gingerbread (Android 2.3, API level 10) and up.
When using an HTTP client, you will start by creating the client, preparing the request, handling the return, and making sure to close the connection. Closing the request is important so that device resources can be released and used again.
Listing 10.2 demonstrates the code needed to create and release an HTTP connection using HttpURLConnection.
Listing 10.2 Creating and Closing an HTTP Connection
URL url = new URL("http://www.google.com/");
HttpURLConnection urlConnection = (HttpURLConnection) url.openConnection();
try {
// save the response to an InputStream
InputStream in = new BufferedInputStream(urlConnection.getInputStream());
// parse the response
parseStream(in);
} finally {
// release the connection
urlConnection.disconnect();
}
Note that this example shows the basic method for creating and closing a connection but will require you to create your own method for parsing the response.
Working with a secure or HTTPS connection is the same. When this is the case, an HttpsURLConnection will be returned.
With each release of Android, new trusted Certificate Authorities are added; this means that if you are attempting to connect to a site that has a certificate signed by a trusted CA, your connection will be fine. Should you run into a handshake error, you will need to add the connection to your application as a trusted resource. See https://developer.android.com/training/articles/security-ssl.html for more information.
When using an HTTP client, information not only can be read from a connection, but information can also be posted through the connection. The process of posting information is similar to getting information. A connection is created, the connection is set to send data, data is sent, and then the connection is closed. Listing 10.3 demonstrates how this is achieved.
Listing 10.3 Creating a Connection that Will Post Data
// create the connection
HttpURLConnection urlConnection = (HttpURLConnection) url.openConnection();
try {
// I am going to push, so setDoOutput should be true
urlConnection.setDoOutput(true);
// I do not know the exact size of the response body
urlConnection.setChunkedStreamingMode(0);
// create the response body
OutputStream out = new BufferedOutputStream(urlConnection.getOutputStream());
// use a function to send information through the connection
writeStream(out);
// save the response to an InputStream
InputStream in = new BufferedInputStream(urlConnection.getInputStream());
// parse the response
parseStream(in);
} finally {
// close the connection
urlConnection.disconnect();
}
Now that you have seen how to get and send data with an HTTP client, it is time to learn about using XML.
Parsing XML
XML remains a popular choice for data delivery. Whether the data is for creating pins on a map or a data feed for updated content on a website, there is a fairly good chance that you will end up dealing with XML.
To get started parsing XML, you need to do the following:
1. Decide what elements that you will be using.
2. Instantiate your parser.
3. Read the XML feed.
4. Parse the results.
5. Consume the XML.
Deciding what elements to use should be part of your application architecture. You should have a good idea of what the XML structure is, and which elements you are interested in dealing with. If you have a feed with elements that you are not interested in using, you can skip these elements during your parsing procedure.
Google currently recommends using XmlPullParser when working with XML. The following snippets show the instantiation of the parser:
XmlPullParser parser = Xml.newPullParser();
Note that you can decide to ignore parsing namespaces by setting FEATURE_PROCESS_NAMESPACE to false. The following shows how this is done through the use of the setFeature() method:
parser.setFeature(XmlPullParser.FEATURE_PROCESS_NAMESPACES, false);
As you parse the XML data, you will want to create functions to read each element that you need. This is helpful because each tag may contain different types of data, and it allows you to handle the data in the manner of your choosing. Listing 10.4 demonstrates using two functions to find the element you want and then read the text value from the element.
Listing 10.4 Getting a Text Value from an XML Element
private String readFirstName(XmlPullParser parser) throws IOException,
XmlPullParserException {
parser.require(XmlPullParser.START_TAG, ns, "firstname");
String firstName = readText(parser);
parser.require(XmlPullParser.END_TAG, ns, "firstname");
return firstName;
}
private String readText(XmlPullParser parser) throws IOException, XmlPullParserException {
String textValue = "";
if (parser.next() == XmlPullParser.TEXT) {
textValue = parser.getText();
parser.nextTag();
}
return textValue;
}
Looking at Listing 10.4, you can see the require() method is initially used to define the start tag that is searched for in the parsed XML file; in this case, it will look for <firstname>. When that tag is found, a string named firstName is set to the returned value of thereadText() function.
To retrieve the text from inside of the <firstname> element, the readText() function creates an empty string and then parses the element for text. If text is found, the string will be populated; otherwise, the function will return the empty string.
If you wanted to parse the value of a specific property, this can be done by using the getAttributeValue(String namespace, String name) method of XmlPullParser, like so:
String altPropertyValue = parser.getAttributeValue(null, "alt");
When you need to parse tags that are nested, use a method that allows you to skip tags. This is important to make sure that you get the data you want. Listing 10.5 shows a skip function that you may find useful.
Listing 10.5 A Skip Function for Parsing Nested XML Elements
private void skip(XmlPullParser parser) throws XmlPullParserException,
IOException {
// if the current event does not match the start tag, throw exception
if (parser.getEventType() != XmlPullParser.START_TAG) {
throw new IllegalStateException();
}
// create a counter to keep track of depth
int depth = 1;
// use while loop to find the end of the element
while (depth != 0) {
// use switch to move through nested elements
switch (parser.next()) {
case XmlPullParser.END_TAG:
depth--;
break;
case XmlPullParser.START_TAG:
depth++;
break;
}
}
}
Because the counter, or depth, is set to 1, the switch will be triggered based on the type of event or element encountered. The while loop is used to keep the processing going until the value of depth is set to 0, which is the closing element.
Consuming XML will vary based on your application and needs; however, this will generally consist of the previous steps combined with an AsyncTask to make the data request, save the output to a stream, and then process the stream to pull the values you need.
Using an AsyncTask is paramount to application success and to avoid working on the main UI thread. In the next section, you learn why this is needed and how to create and work with AsyncTask.
Handling Network Operations Asynchronously
Users expect applications to run on their devices as fast as possible. This includes any lag, jank, or stuttering that your application may perform on the user interface (UI) level. It should not come as a surprise that, by default, the Android system prohibits certain activities and processing from happening on the main UI thread. This is solved, however, by using AsyncTask for various logic handling.
In the case of network handling, you should be using AsyncTask to offload your communication and processing logic. Remember that you should also inform the user that a network event has started; otherwise, you may end up with a user creating multiple connections or operations while waiting for the first request to return.
For your application, you may find it useful to determine if the URL you are requesting is available or if it is currently experiencing an error. By using the getResponseCode() method, you can determine the status of the server you are connecting to. Listing 10.6 demonstrates this in action.
Listing 10.6 UsinggetResponseCode()to Determine Server Status
private class CheckUrlTask extends AsyncTask<String, Void, String> {
@Override
protected String doInBackground(String... urls) {
try {
return urlResponse(urls[0]);
} catch (IOException e) {
return "Unable to retrieve web page. URL may be invalid.";
}
}
// onPostExecute displays the results of the AsyncTask.
@Override
protected void onPostExecute(String result) {
Toast responseToast = Toast.makeText(getApplicationContext(),
"URL responded with "+result, Toast.LENGTH_SHORT);
responseToast.show();
}
}
private String urlResponse(String checkUrl) throws IOException {
InputStream is = null;
try {
URL url = new URL(checkUrl);
HttpURLConnection conn = (HttpURLConnection) url.openConnection();
conn.setReadTimeout(10000 /* milliseconds */);
conn.setConnectTimeout(15000 /* milliseconds */);
conn.setRequestMethod("GET");
conn.setDoInput(true);
// Attempt connection
conn.connect();
int response = conn.getResponseCode();
Log.d(DEBUG_TAG, "The response is: " + response);
is = conn.getInputStream();
return String.valueOf(response);
// Close the InputStream
} finally {
if (is != null) {
is.close();
}
}
}
The CheckUrlTask class extends AsyncTask, allowing it to run separately from the UI thread. This helps keep applications responsive and protects the application from crashing in case of any network lag or delay. In fact, without specifically ordering your application to run network tasks on the UI thread, you will receive a NetworkOnMainThread error when your application runs. When CheckUrlTask() runs, it attempts to load the URL passed to it, and by using onPostExecute(), it displays a toast with the results returned from theurlResponse() method.
The urlResponse() method creates an InputStream that is used to contain the value of an HTTP request made to a remote server.
Another way to deal with network connections, including queuing and canceling, is to use Volley.
Volley
Volley is an HTTP library that is useful to developers who want to build scheduling and management into their network connections. Volley is particularly useful for fetching items to update widgets, return search results, or even as a network resource cache. The Volley library is available for download from the Android Open Source Project at https://android.googlesource.com/platform/frameworks/volley. To get started using Volley, you will need to find a compiled volley.jar file, clone the repository, and import the clone as a library project, or you will need to run the build scripts to make your own volley.jar file.
To clone the repository with Git, run the following command:
git clone https://android.googlesource.com/platform/frameworks/volley
After you have cloned the repository, open a terminal window and move into the folder and run the following build script (note that you must have Apache Ant installed in order for the build to work):
android update project -p .
ant jar
If running ant in your terminal does not work, make sure you have added the bin folder of Ant to your system path or environment variables.
When the build script is complete, you should have a volley.jar file that you can use in your Android project. Depending on the IDE you are using, this may be as simple as copying the file into your libs folder, or you may have to copy it as well as right-click the .jar file and choose Add as Library, and then perform a clean/build of your application.
Once the jar or library project has been added to your application, make sure you have added the android.permission.INTERNET to your application manifest.
Because Volley was created to make things easier for developers, several convenience methods have been built to help you perform otherwise manual tasks. To demonstrate this, instead of having to manually create a queue to handle network requests, you can use the following:
RequestQueue queue = Volley.newRequestQueue(this);
This creates a queue that can then be used to process requests that have been added. To add a request, you need to create one and then use the .add() method on your queue object. The following demonstrates how this is done:
String url = "http://developer.android.com/";
StringRequest stringRequest = new StringRequest(Request.Method.GET, url,
new Response.Listener() {
@Override
public void onResponse(String response) {
// the server responded, handle response here
}
}, new Response.ErrorListener() {
@Override
public void onErrorResponse(VolleyError error) {
// add error message here
}
});
queue.add(stringRequest);
Multiple requests can be built and will then be handled by worker threads in the background. Results are delivered to the main UI thread, allowing you to update controls and widgets. Requests that require data may be updated by data that is in the cache, thus speeding up processes and saving on network trips.
Another benefit of using Volley is that you can stop requests in the queue should you no longer need them. To stop requests, tag them to the Activity that calls them. This can be done as follows:
public static final String TAG = "DataRequestTag";
StringRequest stringRequest;
RequestQueue queue;
// Tag the request
stringRequest.setTag(TAG);
// Queue the request
queue.add(stringRequest);
Now that the requests have been tagged, you can cancel them from processing from the onStop() method of your Activity:
@Override
protected void onStop () {
super.onStop();
if (queue != null) {
queue.cancelAll(TAG);
}
}
So far, we have covered using a stringRequest, but a few other requests are built into Volley. You can also make an ImageRequest, JsonObjectRequest, and JsonArrayRequest.
When making an ImageRequest, you need to have an ImageView to place your image as well as the URL where the image lives. Once you have these, you can make the request. An ImageRequest may look like the following:
ImageRequest request = new ImageRequest(url,
new Response.Listener() {
@Override
public void onResponse(Bitmap bitmap) {
// set the image
mImageView.setImageBitmap(bitmap);
}
}, 0, 0, null,
new Response.ErrorListener() {
public void onErrorResponse(VolleyError error) {
// handle the error with error resource
mImageView.setImageResource(R.drawable.image_load_error);
}
});
You may have noticed that this example is missing the add() method. This is because you may want to work with a singleton class when using images. If you need an example of setting up a singleton, you can find one athttps://developer.android.com/training/volley/requestqueue.html#singleton.
After adding the class, you can then queue the imageRequest, as follows:
MySingleton.getInstance(this).addToRequestQueue(request);
To work with a JSON array or object, you should either use JsonArrayRequest or JsonObjectRequest, respectively. The following demonstrates working with a JSON object:
JsonObjectRequest jsonObjRequest = new JsonObjectRequest
(Request.Method.GET, url, null, new Response.Listener() {
@Override
public void onResponse(JSONObject response) {
// handle the response
}
}, new Response.ErrorListener() {
@Override
public void onErrorResponse(VolleyError error) {
// handle the error
}
});
Working with JSON data may also require the use of the singleton class, making use of the queue, similar to how the imageRequest was performed:
MySingleton.getInstance(this).addToRequestQueue(jsonObjRequest);
Summary
In this chapter, you learned about using an HTTP client and how to connect and send data. You also learned how to parse through XML files for data, and that using a skip method can help you return the data you want. You also learned why AsyncTasks are used when working with network functions. Lastly, you learned that, by using the Volley library, you can gain finer control over your network connections and requests.