Android Programming: The Big Nerd Ranch Guide (2015)
Chapter 18. Assets
So far, you have dealt with the main way Android gives you to ship images, XML, and other such non-Java things: the resources system. In this chapter, you will learn about another way of packaging content to ship with your app: assets.
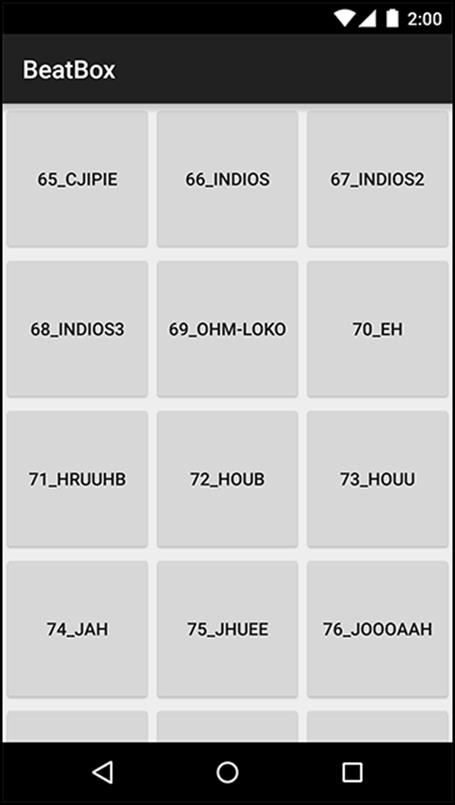
This chapter also starts a new application, BeatBox (Figure 18.1). BeatBox is not a box for musical beats. It is a box that helps you beat people up. It does not help with the easy part, though: the part where you wave your arms around dangerously, bruising and hurting another human being. It helps with the hard part: yelling in a manner calculated to frighten your opponent into submission.
Figure 18.1 BeatBox at the end of this chapter
Why Assets, Not Resources
Resources can store sounds. Just stash a file like 79_long_scream.wav in res/raw, and you can get at it with the ID R.raw.79_long_scream. With sounds stored as resources, you can do all the usual resource things, like having different sounds for different orientations, languages, versions of Android, and so on.
However, BeatBox will have a lot of sounds: more than 20 different files. Dealing with them all one by one in the resources system would be cumbersome. It would be nice to just ship them all out in one big folder, but resources do not let you do this, nor do they allow you to give your resources anything other than a totally flat structure.
This is exactly what the assets system is great for. Assets are like a little file system that ships with your packaged application. With assets, you can use whatever folder structure you want. Since they give you this kind of organizational ability, assets are commonly used for loading graphics and sound in applications that have a lot of those things, like games.
Creating BeatBox
Time to get started. The first step is to create your BeatBox app. In Android Studio, select File → New Project... to create a new project. Call it BeatBox, and give it a company domain of android.bignerdranch.com. Use API 16 for your minimum SDK, and start with one Blank Activity calledBeatBoxActivity. Leave the defaults as they are.
You will be using RecyclerView again, so open your project preferences and add the com.android.support:recyclerview-v7 dependency.
Now, let’s build out the basics of the app. The main screen will show a grid of buttons, each of which plays a sound. So, you will need two layout files: one for the grid and one for the buttons.
Create your layout file for the RecyclerView first. You will not need res/layout/activity_beat_box.xml, so go ahead and rename it fragment_beat_box.xml. Then fill it up like so:
Listing 18.1 Create main layout file (res/layout/fragment_beat_box.xml)
<?xml version="1.0" encoding="utf-8"?>
<android.support.v7.widget.RecyclerView
xmlns:android="http://schemas.android.com/apk/res/android"
android:id="@+id/fragment_beat_box_recycler_view"
android:layout_width="match_parent"
android:layout_height="match_parent"
/>
Next, create the layout for the buttons, res/layout/list_item_sound.xml.
Listing 18.2 Create sound layout (res/layout/list_item_sound.xml)
<?xml version="1.0" encoding="utf-8"?>
<Button
xmlns:android="http://schemas.android.com/apk/res/android"
xmlns:tools="http://schemas.android.com/tools"
android:id="@+id/list_item_sound_button"
android:layout_width="match_parent"
android:layout_height="120dp"
tools:text="Sound name"/>
Now create a new Fragment called BeatBoxFragment in com.bignerdranch.android.beatbox, and hook it up to the layout you just created.
Listing 18.3 Create BeatBoxFragment (BeatBoxFragment.java)
public class BeatBoxFragment extends Fragment {
public static BeatBoxFragment newInstance() {
return new BeatBoxFragment();
}
@Override
public View onCreateView(LayoutInflater inflater, ViewGroup container,
Bundle savedInstanceState) {
View view = inflater.inflate(R.layout.fragment_beat_box, container, false);
RecyclerView recyclerView = (RecyclerView)view
.findViewById(R.id.fragment_beat_box_recycler_view);
recyclerView.setLayoutManager(new GridLayoutManager(getActivity(), 3));
return view;
}
}
Notice that you use a different implementation of LayoutManager here than you did in Chapter 9. This LayoutManager lays out items in a grid, so that there are multiple items on each line. You passed in 3 here, to indicate that there are three columns in your grid.
Create a ViewHolder wired up to list_item_sound.xml.
Listing 18.4 Create SoundHolder (BeatBoxFragment.java)
public class BeatBoxFragment extends Fragment {
...
@Override
public View onCreateView(LayoutInflater inflater, ViewGroup container,
Bundle savedInstanceState) {
...
}
private class SoundHolder extends RecyclerView.ViewHolder {
private Button mButton;
public SoundHolder(LayoutInflater inflater, ViewGroup container) {
super(inflater.inflate(R.layout.list_item_sound, container, false));
mButton = (Button)itemView.findViewById(R.id.list_item_sound_button);
}
}
}
Next, create an Adapter hooked up to SoundHolder. (If you put your cursor on RecyclerView.Adapter before typing in any of the methods below and hit Option+Return (Alt+Enter), Android Studio will enter most of this code for you.)
Listing 18.5 Create SoundAdapter (BeatBoxFragment.java)
public class BeatBoxFragment extends Fragment {
...
private class SoundHolder extends RecyclerView.ViewHolder {
...
}
private class SoundAdapter extends RecyclerView.Adapter<SoundHolder> {
@Override
public SoundHolder onCreateViewHolder(ViewGroup parent, int viewType) {
LayoutInflater inflater = LayoutInflater.from(getActivity());
return new SoundHolder(inflater, parent);
}
@Override
public void onBindViewHolder(SoundHolder soundHolder, int position) {
}
@Override
public int getItemCount() {
return 0;
}
}
}
Now wire up SoundAdapter in onCreateView(…).
Listing 18.6 Wiring up SoundAdapter (BeatBoxFragment.java)
@Override
public View onCreateView(LayoutInflater inflater, ViewGroup container,
Bundle savedInstanceState) {
View view = inflater.inflate(R.layout.fragment_beat_box, container, false);
RecyclerView recyclerView = (RecyclerView)view
.findViewById(R.id.fragment_beat_box_recycler_view);
recyclerView.setLayoutManager(new GridLayoutManager(getActivity(), 3));
recyclerView.setAdapter(new SoundAdapter());
return view;
}
Finally, hook up BeatBoxFragment in BeatBoxActivity. You will use the same SingleFragmentActivity architecture you used in CriminalIntent.
First, copy SingleFragmentActivity.java from CriminalIntent into app/java/com.bignerdranch.android.beatbox, and then copy activity_fragment.xml into app/src/res/layout. (You can either pull these files out of your own CriminalIntent folder, or from the solutions. For information on how to access the solutions files, refer back to the section called “Adding an Icon” in Chapter 2.)
Next, delete everything in the body of BeatBoxActivity, change it to a subclass of SingleFragmentActivity, and override createFragment(), like so:
Listing 18.7 Filling out BeatBoxActivity (BeatBoxActivity.java)
public class BeatBoxActivity extends SingleFragmentActivity {
@Override
protected Fragment createFragment() {
return BeatBoxFragment.newInstance();
}
}
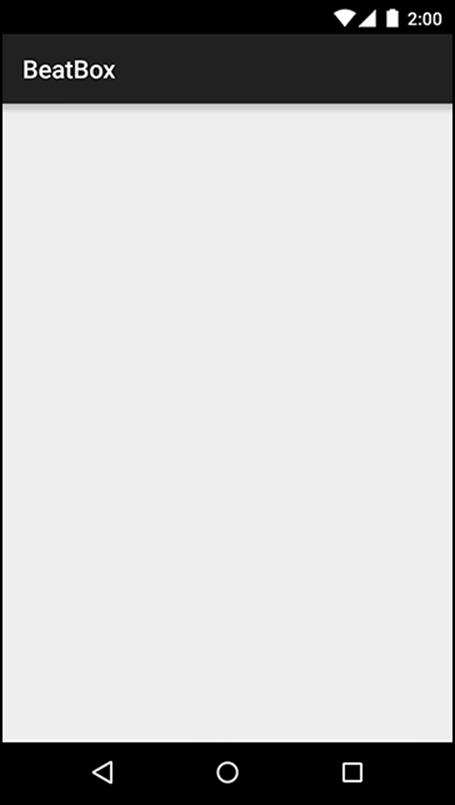
That should be enough to get your skeleton up and running. Your BeatBoxFragment implementation does not display anything yet, but go ahead and run your app to make sure that everything is wired up correctly (Figure 18.2).
Figure 18.2 Empty BeatBox
Importing Assets
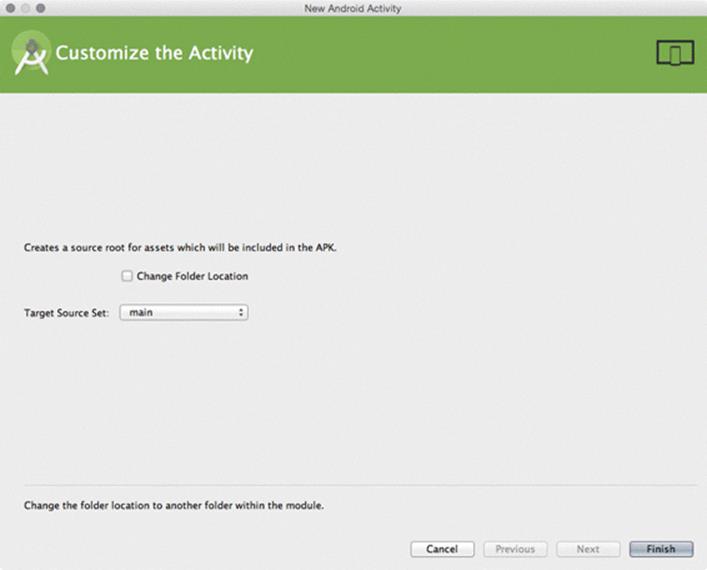
Now to import your assets. Create an assets folder inside your project by right-clicking on your app module and selecting New → Folder → Assets Folder (Figure 18.3). Leave the Change Folder Location checkbox unchecked, and leave the Target Source Set set to main.
Figure 18.3 Creating the assets folder
Click Finish to create your assets folder.
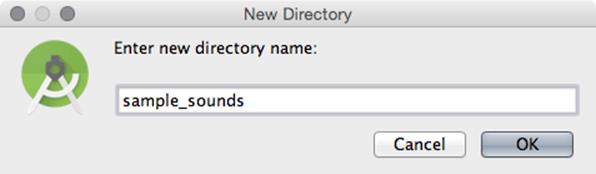
Next, right-click on assets to create a subfolder for your sounds by selecting New → Directory. Enter sample_sounds for the directory name (Figure 18.4).
Figure 18.4 Create sample_sounds folder
Everything inside of the assets folder is deployed with your app. For the sake of convenience and organization, you created a subfolder called sample_sounds. Unlike with resources, though, this is not something you have to do.
So where can you find the sounds? You will be using a Creative Commons licensed sound set we initially found provided by the user plagasul at http://www.freesound.org/people/plagasul/packs/3/. We have put them up in one zip file for you at the following location:
https://www.bignerdranch.com/solutions/sample_sounds.zip
Download the zip file and unzip its contents into assets/sample_sounds (Figure 18.5).
Figure 18.5 Imported assets
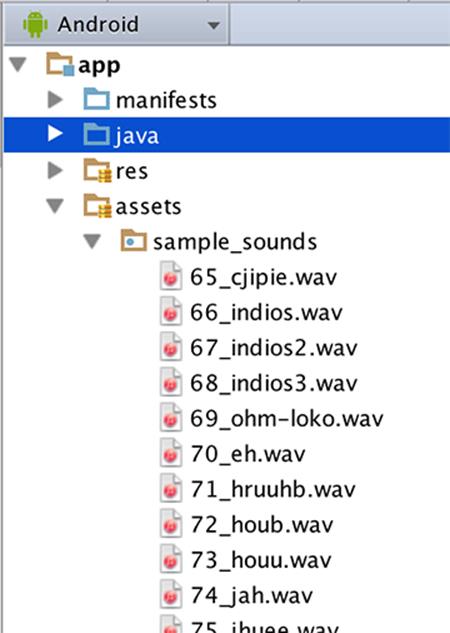
(Make sure only .wav files are in there, by the way – not the .zip file you got them from.)
Rebuild your app to make sure everything is hunky-dory. The next step will be to list out those assets and show them to the user.
Getting at Assets
BeatBox will end up doing a lot of work related to asset management: finding assets, keeping track of them, and eventually playing them as sounds. To manage all this, create a new class called BeatBox in com.bignerdranch.android.beatbox. Go ahead and add a couple of constants: one for logging and one to remember which folder you saved your wrestling grunts in.
Listing 18.8 New BeatBox class (BeatBox.java)
public class BeatBox {
private static final String TAG = "BeatBox";
private static final String SOUNDS_FOLDER = "sample_sounds";
}
Assets are accessed using the AssetManager class. You can get an AssetManager from any Context. Since BeatBox will need one, give it a constructor that takes in a Context as a dependency, pulls out an AssetManager, and stashes it away.
Listing 18.9 Stash an AssetManager for safekeeping (BeatBox.java)
public class BeatBox {
private static final String TAG = "BeatBox";
private static final String SOUNDS_FOLDER = "sample_sounds";
private AssetManager mAssets;
public BeatBox(Context context) {
mAssets = context.getAssets();
}
}
When getting at assets, in general you do not need to worry about which Context you are using. In every situation you are likely to encounter in practice, every Context’s AssetManager will be wired up to the same set of assets.
To get a listing of what you have in your assets, you can use the list(String) method. Write a method called loadSounds() that looks in your assets with list(String).
Listing 18.10 Look at assets (BeatBox.java)
public BeatBox(Context context) {
mAssets = context.getAssets();
loadSounds();
}
private void loadSounds() {
String[] soundNames;
try {
soundNames = mAssets.list(SOUNDS_FOLDER);
Log.i(TAG, "Found " + soundNames.length + " sounds");
} catch (IOException ioe) {
Log.e(TAG, "Could not list assets", ioe);
return;
}
}
AssetManager.list(String) lists filenames contained in the folder path you pass in. So by passing in your sounds folder, you should see every .wav file you put in there.
To verify that this is working correctly, create an instance of BeatBox in BeatBoxFragment.
Listing 18.11 Create BeatBox instance (BeatBoxFragment.java)
public class BeatBoxFragment extends Fragment {
private BeatBox mBeatBox;
public static BeatBoxFragment newInstance() {
return new BeatBoxFragment();
}
@Override
public void onCreate(Bundle savedInstanceState) {
super.onCreate(savedInstanceState);
mBeatBox = new BeatBox(getActivity());
}
...
}
Run your app and you should see some log output telling you how many sound files were found. We provided 22 .wav files, so if you used our files, you should see:
…1823-1823/com.bignerdranch.android.beatbox I/BeatBox: Found 22 sounds
Wiring Up Assets for Use
Now that you have your asset filenames, you should present them to the user. Eventually, you will want the files to be played, so it makes sense to have an object responsible for keeping track of the filename, the name the user should see, and any other information related to that sound.
Create a Sound class to hold all of this. (Remember to let Android Studio generate your getters.)
Listing 18.12 Create Sound object (Sound.java)
public class Sound {
private String mAssetPath;
private String mName;
public Sound(String assetPath) {
mAssetPath = assetPath;
String[] components = assetPath.split("/");
String filename = components[components.length - 1];
mName = filename.replace(".wav", "");
}
public String getAssetPath() {
return mAssetPath;
}
public String getName() {
return mName;
}
}
In the constructor, you do a little work to make a presentable name for your sound. First, you split off the filename using String.split(String). Once you have done that, you use String.replace(String, String) to strip off the file extension, too.
Next, build up a list of Sounds in BeatBox.loadSounds().
Listing 18.13 Create Sounds (BeatBox.java)
public class BeatBox {
...
private AssetManager mAssets;
private List<Sound> mSounds = new ArrayList<>();
public BeatBox(Context context) {
...
}
private void loadSounds() {
String[] soundNames;
try {
...
} catch (IOException ioe) {
...
}
for (String filename : soundNames) {
String assetPath = SOUNDS_FOLDER + "/" + filename;
Sound sound = new Sound(assetPath);
mSounds.add(sound);
}
}
public List<Sound> getSounds() {
return mSounds;
}
}
Then, back in BeatBoxFragment, add code in SoundHolder to bind to a Sound.
Listing 18.14 Bind to Sound (BeatBoxFragment.java)
private class SoundHolder extends RecyclerView.ViewHolder {
private Button mButton;
private Sound mSound;
public SoundHolder(LayoutInflater inflater, ViewGroup container) {
...
}
public void bindSound(Sound sound) {
mSound = sound;
mButton.setText(mSound.getName());
}
}
Wire up SoundAdapter to a List of Sounds.
Listing 18.15 Hook up to Sound list (BeatBoxFragment.java)
private class SoundAdapter extends RecyclerView.Adapter<SoundHolder> {
private List<Sound> mSounds;
public SoundAdapter(List<Sound> sounds) {
mSounds = sounds;
}
...
@Override
public void onBindViewHolder(SoundHolder soundHolder, int position) {
Sound sound = mSounds.get(position);
soundHolder.bindSound(sound);
}
@Override
public int getItemCount() {
return 0;
return mSounds.size();
}
}
And then pass in BeatBox’s sounds in onCreateView(…).
Listing 18.16 Pass in Sounds to adapter (BeatBoxFragment.java)
@Override
public View onCreateView(LayoutInflater inflater, ViewGroup container,
Bundle savedInstanceState) {
View view = inflater.inflate(R.layout.fragment_beat_box, container, false);
RecyclerView recyclerView = (RecyclerView)view
.findViewById(R.id.fragment_beat_box_recycler_view);
recyclerView.setLayoutManager(new GridLayoutManager(getActivity(), 3));
recyclerView.setAdapter(new SoundAdapter());
recyclerView.setAdapter(new SoundAdapter(mBeatBox.getSounds()));
return view;
}
With that, you should see a grid of sound files when you run BeatBox (Figure 18.6).
Figure 18.6 Finished BeatBox interface
Accessing Assets
You have finished all the work for this chapter. You will develop BeatBox to actually use the content of your assets in the next chapter.
Before you do, though, let’s discuss a bit more about how assets work.
Your Sound object has an asset file path defined on it. Asset file paths will not work if you try to open them with a File; you must use them with an AssetManager:
String assetPath = sound.getAssetPath();
InputStream soundData = mAssets.open(assetPath);
This gives you a standard InputStream for the data, which you can use like any other InputStream in Java.
Some APIs require FileDescriptors instead. (This is what you will use with SoundPool in the next chapter.) If you need that, you can call AssetManager.openFd(String) instead:
String assetPath = sound.getAssetPath();
// AssetFileDescriptors are different from FileDescriptors,
AssetFileDescriptor assetFd = mAssets.openFd(assetPath);
// but you get can a regular FileDescriptor easily if you need to.
FileDescriptor fd = assetFd.getFileDescriptor();
For the More Curious: Non-Assets?
AssetManager has methods called openNonAssetFd(…). You might reasonably ask why a class dedicated to assets would concern itself with non-assets. We might reasonably answer, “These aren’t the droids you’re looking for,” so that you might go on believing that you never heard ofopenNonAssetFd(…) in the first place.
There is no reason that we know of to ever use this method, so there is no real reason to learn about it.
You did buy our book, though. So we might as well throw this answer out there for fun:
Remember that earlier we said that Android has two systems, assets and resources? Well, the resources system has a nice big lookup system. But some big resources are too big to fit inside that system. So these big resources – images and raw sound files, usually – are actually stored in the assets system. Under the hood, Android opens these things itself using the openNonAsset methods, not all of which are publicly available.
When would you need to use these? As far as we know, never. And now you know, too.