Android Programming: The Big Nerd Ranch Guide (2015)
Chapter 31. Locations and Play Services
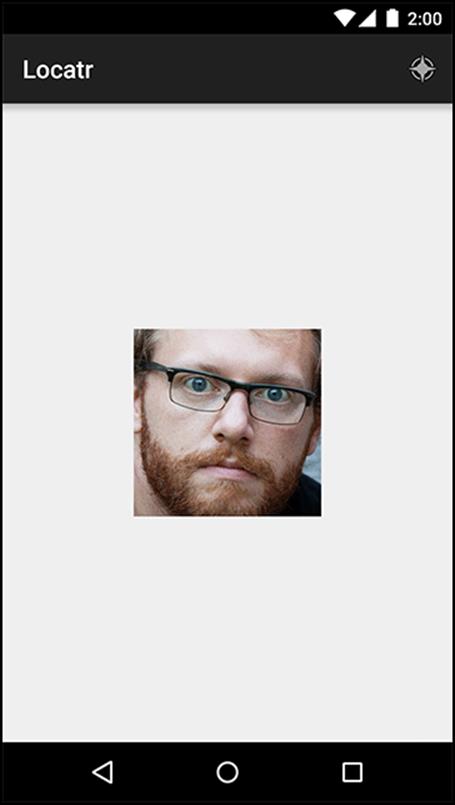
In this chapter, you will start writing a new app called Locatr that performs a Flickr geosearch. It will find your current location and then look for pictures nearby (Figure 31.1). Then, in the next chapter, you will show the picture on a map.
Figure 31.1 Locatr at the end of this chapter
It turns out that this simple job – finding your current location – is more interesting than you might expect. It requires integrating with Google’s set of libraries that live outside the standard library set, called Google Play Services.
Locations and Libraries
To see why, let’s talk a bit about what your average Android device can see and what tools Android gives you to see those things yourself.
Out of the box, Android provides a basic Location API. This API lets you listen to location data from a variety of sources. For most phones, those sources are fine location points from a GPS radio and coarse points from cell towers or WiFi connections. These APIs have been around for as long as Android itself. You can find them in the android.location package.
So the android.location APIs exist. But they fall short of perfection. Real-world applications make requests like, “Use as much battery as you can to get as much accuracy as possible,” or “I need a location, but I would rather not waste my battery life.” Rarely if ever do they need to make a request as specific as, “Please fire up the GPS radio and tell me what it says.”
This starts to be a problem when your devices move around. If you are outside, GPS is best. If you have no GPS signal, the cell tower fix may be best. And if you can find neither of those signals, it would be nicer to get by with the accelerometer and gyroscope than with no location fix at all.
In the past, high-quality apps had to manually subscribe to all of these different data sources and switch between them as appropriate. This was not straightforward or easy to do right.
Google Play Services
A better API was needed. However, if it were added to the standard library, it would take a couple of years for all developers to be able to use it. This was annoying, because the OS had everything that a better API would need: GPS, coarse location, and so forth.
Fortunately, the standard library is not the only way Google can get code into your hands. In addition to the standard library, Google provides Play Services. This is a set of common services that are installed alongside the Google Play store application. To fix this locations mess, Google shipped a new locations service in Play Services called the Fused Location Provider.
Since these libraries live in another application, you must actually have that application installed. This means that only devices with the Play Store app installed and up to date will be able to use your application. This almost certainly means that your app will be distributed through the Play Store, too. If your app is not available through the Play store, you are unfortunately out of luck, and will need to use another location API.
For the purposes of this exercise, if you will be testing on a hardware device make sure that you have an up-to-date Play Store app. And what if you are running on an emulator? Never fear – we will cover that later in this chapter.
Creating Locatr
Now to get started. In Android Studio, create a new project called Locatr. Name your main activity LocatrActivity. As you have for your other apps, set your minSdkVersion to 16 and copy in SingleFragmentActivity and activity_fragment.xml.
You will also want some additional code from PhotoGallery. You will be querying Flickr again, so having your old query code will be handy. Open up your PhotoGallery solution (anything after Chapter 24 will do), select FlickrFetchr.java and GalleryItem.java, and right-click to copy them. Then paste them into your Java code area in Locatr.
In a minute, you will get started on building out your user interface. If you are using an emulator, though, read this next section so that you can test all the code you are about to write. If you are not, feel free to skip on ahead to the section called “Building out Locatr”.
Play Services and Location Testing on Emulators
If you are using an AVD emulator, you must first make sure that your emulator images are up to date.
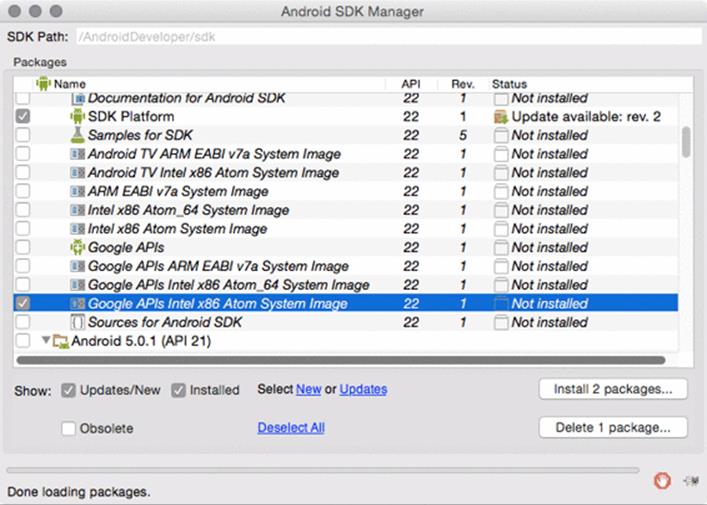
To do that, open up your SDK Manager (Tools → Android → SDK Manager). Go down to the version of Android you plan to use for your emulator and ensure that the Google APIs System Images are both installed and up to date. If an update is available, click the button to install the update and wait until it is ready to go before continuing (Figure 31.2).
Figure 31.2 Ensuring your emulator is up to date
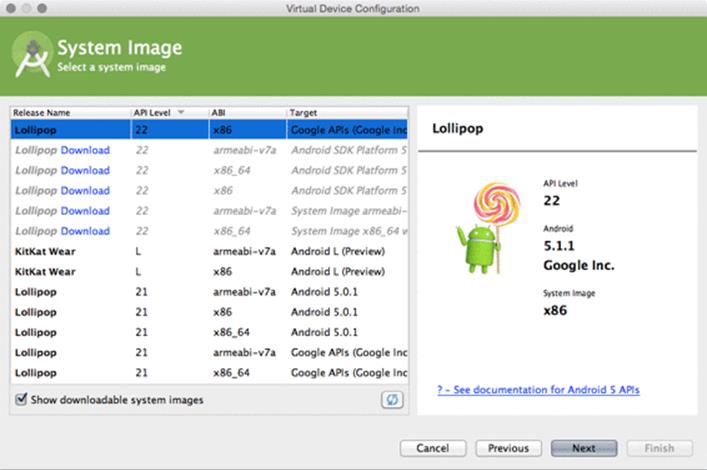
Your AVD emulator also needs to have a target OS version that supports the Google APIs. When you create an emulator you can identify these target OS versions because they will say “Google APIs” on the right. Choose one with an API level of 21 or higher, and you will be all set (Figure 31.3).
Figure 31.3 Choosing a Google APIs image
If you already have a suitable emulator, but you had to update your images through the SDK earlier, you will need to restart your emulator for it to work.
For these two chapters, if you are going to use an emulator, we recommend the built-in AVD emulator over a Genymotion emulator. It is possible to use either, but setting up the Genymotion emulator for use with this exercise is neither straightforward nor in the scope of this book. Explore the documentation on Genymotion’s website for more information.
Mock location data
On an emulator you will also need some dummy (or mock) location updates to work with. Android Studio provides an Emulator Control panel that lets you send location points to the emulator. This works great on the old location services, but does nothing on the new Fused Location Provider. Instead, you have to publish mock locations programmatically.
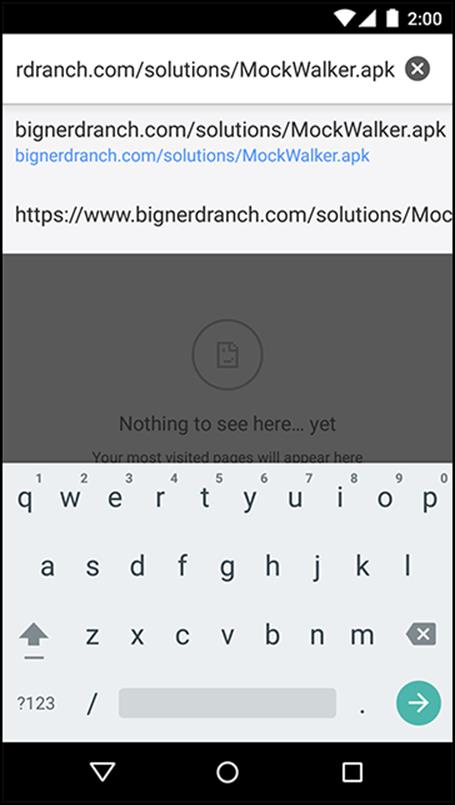
We here at Big Nerd Ranch love to explain interesting things in minute detail. After the debacle that was Snipe Hunting: The Big Nerd Ranch Guide, though, we prefer to explain useful things. So instead of making you type out this mock location code, we have written it for you in a stand-alone app, called MockWalker. To use it, download and install the APK at this URL:
https://www.bignerdranch.com/solutions/MockWalker.apk
The easiest way to do that is to open the browser app in your emulator and type in the URL (Figure 31.4).
Figure 31.4 Typing in the URL
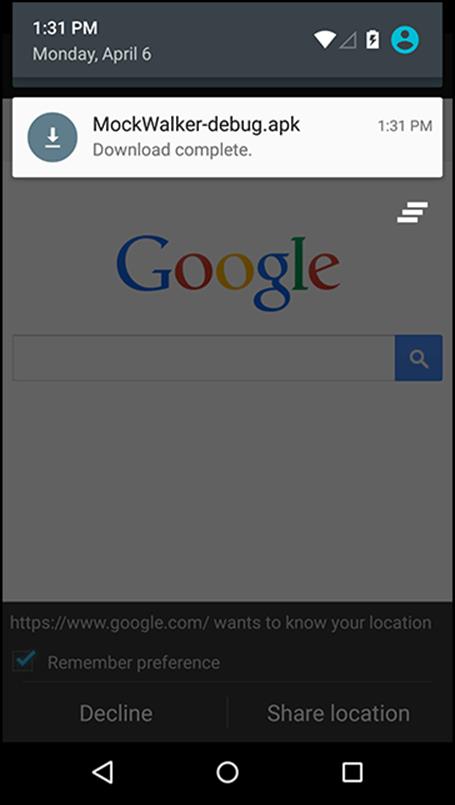
When it is done, press the download notification item in the toolbar to open the APK (Figure 31.5).
Figure 31.5 Opening the download
MockWalker will trigger a mock walk for you via a service that posts mock location data to Fused Location Provider. It will pretend to walk in a loop around the Kirkwood neighborhood in Atlanta. While the service is running, any time Locatr asks Fused Location Provider for a location fix, it will receive a location posted by MockWalker (Figure 31.6).
Figure 31.6 Running MockWalker
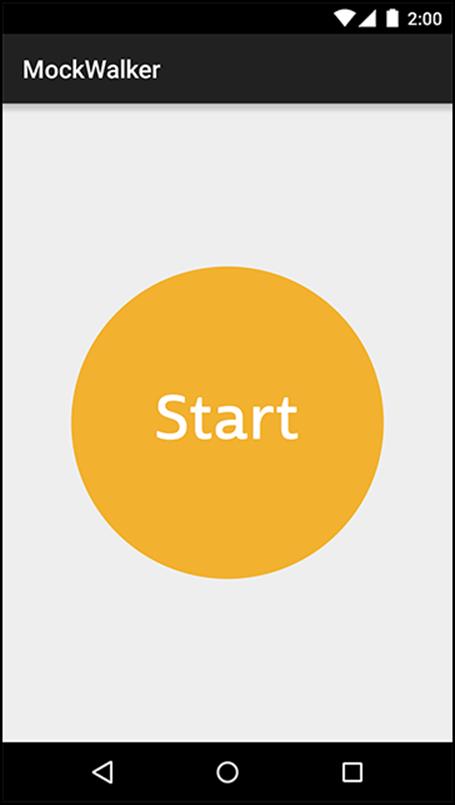
Run MockWalker and press Start. Its service will keep running after you exit the app. (Do not exit the emulator, however. Leave the emulator running while you work on Locatr.) When you no longer need those mock locations, open MockWalker again and press the Stop button.
If you would like to know how MockWalker works, you can find its source code in the solutions folder for this chapter (see the section called “Adding an Icon” in Chapter 2 for more on the solutions). It uses a few interesting things: RxJava and a sticky foreground service to manage the ongoing location updates. If those sound interesting to you, check it out.
Building out Locatr
Next, create your interface. First, add a string for your search button in res/values/strings.xml.
Listing 31.1 Adding search button text (res/values/strings.xml)
<resources>
<string name="app_name">Locatr</string>
<string name="hello_world">Hello world!</string>
<string name="action_settings">Settings</string>
<string name="search">Find an image near you</string>
</resources>
You will be using a fragment, as usual, so rename activity_locatr.xml to fragment_locatr.xml. Change out the insides of its RelativeLayout to have an ImageView to display the image you find (Figure 31.7). (The padding attribute values come from the template code as of this writing. They are not important, so feel free to leave them out.)
Figure 31.7 Locatr’s layout (res/layout/fragment_locatr.xml)

You also need a button to trigger the search. You can use your toolbar for that. Rename res/menu/menu_locatr.xml to res/menu/fragment_locatr.xml and change its button to display a location icon. (Yes, this is the same filename as res/layout/fragment_locatr.xml. This is no problem at all: menu resources live in a different namespace.)
Listing 31.2 Setting up Locatr’s menu (res/menu/fragment_locatr.xml)
<menu xmlns:android="http://schemas.android.com/apk/res/android"
xmlns:app="http://schemas.android.com/apk/res-auto"
xmlns:tools="http://schemas.android.com/tools"
tools:context=".LocatrActivity">
<item android:id="@+id/action_settings"
android:title="@string/action_settings"
android:orderInCategory="100"
app:showAsAction="never"/>
<item android:id="@+id/action_locate"
android:icon="@android:drawable/ic_menu_compass"
android:title="@string/search"
android:orderInCategory="100"
android:enabled="false"
app:showAsAction="ifRoom"/>
</menu>
The button is disabled in XML by default. Later on, you will enable it once you are connected to Play Services.
Now create a Fragment subclass called LocatrFragment that hooks up your layout and pulls out that ImageView.
Listing 31.3 Creating LocatrFragment (LocatrFragment.java)
public class LocatrFragment extends Fragment {
private ImageView mImageView;
public static LocatrFragment newInstance() {
return new LocatrFragment();
}
@Override
public View onCreateView(LayoutInflater inflater, ViewGroup container,
Bundle savedInstanceState) {
View v = inflater.inflate(R.layout.fragment_locatr, container, false);
mImageView = (ImageView) v.findViewById(R.id.image);
return v;
}
}
Hook up your menu item, too. Pull it out into its own instance variable so that you can enable it later on.
Listing 31.4 Adding menu to fragment (LocatrFragment.java)
public class LocatrFragment extends Fragment {
private ImageView mImageView;
public static LocatrFragment newInstance() {
return new LocatrFragment();
}
@Override
public void onCreate(Bundle savedInstanceState) {
super.onCreate(savedInstanceState);
setHasOptionsMenu(true);
}
@Override
public View onCreateView(LayoutInflater inflater, ViewGroup container,
Bundle savedInstanceState) {
...
}
@Override
public void onCreateOptionsMenu(Menu menu, MenuInflater inflater) {
super.onCreateOptionsMenu(menu, inflater);
inflater.inflate(R.menu.fragment_locatr, menu);
}
}
Now hook it up in LocatrActivity. Delete everything inside this class and replace it, like so:
Listing 31.5 Hooking up Locatr fragment (LocatrActivity.java)
public class LocatrActivity extends SingleFragmentActivity {
@Override
protected Fragment createFragment() {
return LocatrFragment.newInstance();
}
}
With that, you should be ready to get into some trouble.
Setting Up Google Play Services
To get your location using the Fused Location Provider, you need to use Google Play Services. To get those up and running, you will need to add a few standard bits of boilerplate to your app.
First, you need to add the Google Play Services library dependency. The services themselves live in the Play app, but the Play Services library contains all the code to interface with them.
Open up your app module’s settings (File → Project Structure). Navigate to its dependencies, and add a library dependency. Type in the following dependency name: com.google.android.gms:play-services-location:7.3.0. (As of this writing, this dependency will not show up in search results, so type carefully.) This is the location portion of Play Services.
Over time, the version number for this library will change. If you want to see what the most up-to-date version is, search the library dependencies for play-services. The com.google.android.gms:play-services dependency will appear, along with a version number. This is the dependency that includes everything in Play Services. If you want to use the latest version of the library, you can use the version number from play-services for the more limited play-services-location library, too.
Which version number should you use, though? In your own practice, it is best to use the most recent version you possibly can. But we cannot guarantee that the code in this chapter will work the same for future versions. So for this chapter, use the version we wrote this code for: 7.3.0.
Next, you need to verify that Play Services is available. Since the working parts live in another app on your device, the Play Services library is not always guaranteed to be working. The library makes it easy to verify this. Update your main activity to perform this check.
Listing 31.6 Adding Play Services check (LocatrActivity.java)
public class LocatrActivity extends SingleFragmentActivity {
private static final int REQUEST_ERROR = 0;
@Override
protected Fragment createFragment() {
return LocatrFragment.newInstance();
}
@Override
protected void onResume() {
super.onResume();
int errorCode = GooglePlayServicesUtil.isGooglePlayServicesAvailable(this);
if (errorCode != ConnectionResult.SUCCESS) {
Dialog errorDialog = GooglePlayServicesUtil
.getErrorDialog(errorCode, this, REQUEST_ERROR,
new DialogInterface.OnCancelListener() {
@Override
public void onCancel(DialogInterface dialog) {
// Leave if services are unavailable.
finish();
}
});
errorDialog.show();
}
}
}
Normally you would not use a bare Dialog like this. However, in this case there is no need to defend against rotation issues. The errorCode value will be the same if the user rotates, so the Dialog will be displayed again.
Location permissions
You will also need some location permissions for your app to work. There are two relevant permissions: android.permission.ACCESS_FINE_LOCATION, and android.permission.ACCESS_COARSE_LOCATION. Fine location is the GPS radio; coarse location is derived from cell towers or WiFi access points.
In this chapter, you will be requesting a high accuracy location fix, so you will definitely need ACCESS_FINE_LOCATION. But it is also a good idea to request ACCESS_COARSE_LOCATION. If the fine location provider is not available, this gives you permission to use the coarse provider as a backup.
Add these permissions to your manifest. Add an Internet permission while you are at it, too, so that you can query Flickr.
Listing 31.7 Adding permissions (AndroidManifest.xml)
<manifest xmlns:android="http://schemas.android.com/apk/res/android"
package="com.bignerdranch.android.locatr" >
<uses-permission
android:name="android.permission.ACCESS_FINE_LOCATION" />
<uses-permission
android:name="android.permission.ACCESS_COARSE_LOCATION" />
<uses-permission
android:name="android.permission.INTERNET" />
...
</manifest>
Using Google Play Services
To use Play Services, you need to create a client. That client is an instance of the GoogleApiClient class. You can find the documentation for this class (and all the other Play Services classes you will be using in these two chapters) in the Play Services reference section:http://developer.android.com/reference/gms-packages.html.
To create a client, create a GoogleApiClient.Builder and configure it. At a minimum, you want to configure the instance with the specific APIs you will be using. Then call build() to create an instance.
Inside your onCreate(Bundle), create an instance of GoogleApiClient.Builder and add the Location Services API to your instance.
Listing 31.8 Creating GoogleApiClient (LocatrFragment.java)
public class LocatrFragment extends Fragment {
private ImageView mImageView;
private GoogleApiClient mClient;
public static LocatrFragment newInstance() {
return new LocatrFragment();
}
@Override
public void onCreate(Bundle savedInstanceState) {
super.onCreate(savedInstanceState);
setHasOptionsMenu(true);
mClient = new GoogleApiClient.Builder(getActivity())
.addApi(LocationServices.API)
.build();
}
Once you do that, you need to connect to the client. Google recommends always connecting to the client in onStart() and disconnecting in onStop(). Calling connect() on your client will change what your menu button can do, too, so call invalidateOptionsMenu() to update its visible state. (You will call it one more time later: after you are told you have been connected.)
Listing 31.9 Connecting and disconnecting (LocatrFragment.java)
@Override
public View onCreateView(LayoutInflater inflater, ViewGroup container,
Bundle savedInstanceState) {
...
}
@Override
public void onStart() {
super.onStart();
getActivity().invalidateOptionsMenu();
mClient.connect();
}
@Override
public void onStop() {
super.onStop();
mClient.disconnect();
}
@Override
public void onCreateOptionsMenu(Menu menu, MenuInflater inflater) {
...
If your client is not connected, your app will not be able to do anything. So for the next step, enable or disable the button depending on whether the client is connected.
Listing 31.10 Updating the menu button (LocatrFragment.java)
@Override
public void onCreateOptionsMenu(Menu menu, MenuInflater inflater) {
super.onCreateOptionsMenu(menu, inflater);
inflater.inflate(R.menu.fragment_locatr, menu);
MenuItem searchItem = menu.findItem(R.id.action_locate);
searchItem.setEnabled(mClient.isConnected());
}
Then add another call to getActivity().invalidateOptionsMenu() to update your menu item when you find out that you are connected. Connection state information is passed through two callback interfaces: ConnectionCallbacks and OnConnectionFailedListener. Hook up a ConnectionCallbackslistener in onCreate(Bundle) to invalidate your toolbar when you are connected.
Listing 31.11 Listening for connection events (LocatrFragment.java)
@Override
public void onCreate(Bundle savedInstanceState) {
super.onCreate(savedInstanceState);
getActivity().invalidateOptionsMenu();
mClient = new GoogleApiClient.Builder(getActivity())
.addApi(LocationServices.API)
.addConnectionCallbacks(new GoogleApiClient.ConnectionCallbacks() {
@Override
public void onConnected(Bundle bundle) {
getActivity().invalidateOptionsMenu();
}
@Override
public void onConnectionSuspended(int i) {
}
})
.build();
}
If you are curious, you can hook up an OnConnectionFailedListener and see what it reports. But it is not necessary.
With that, your Google Play Services hookup is ready.
Flickr Geosearch
The next step is to add the ability to search for geographic locations on Flickr. To do this, you perform a regular search, but you also provide a latitude and longitude.
In Android, the location APIs pass around these location fixes in Location objects. So write a new buildUrl(…) override that takes in one of these Location objects and builds an appropriate search query.
Listing 31.12 New buildUrl(Location) (FlickrFetchr.java)
private String buildUrl(String method, String query) {
...
}
private String buildUrl(Location location) {
return ENDPOINT.buildUpon()
.appendQueryParameter("method", SEARCH_METHOD)
.appendQueryParameter("lat", "" + location.getLatitude())
.appendQueryParameter("lon", "" + location.getLongitude())
.build().toString();
}
And then write a matching searchPhotos(Location) method.
Listing 31.13 New searchPhotos(Location) (FlickrFetchr.java)
public List<GalleryItem> searchPhotos(String query) {
...
}
public List<GalleryItem> searchPhotos(Location location) {
String url = buildUrl(location);
return downloadGalleryItems(url);
}
Getting a Location Fix
Now that you have everything set up, you are ready to get a location fix. Your window to the Fused Location Provider API is a class named, appropriately enough, FusedLocationProviderApi. There is one instance of this class. It is a singleton object that lives on LocationServices calledFusedLocationApi.
To get a location fix from this API, you need to build a location request. Fused location requests are represented by LocationRequest objects. Create one and configure it in a new method called findImage(). (There are two LocationRequest classes. Use the one with the complete name ofcom.google.android.gms.location.LocationRequest.)
Listing 31.14 Building a location request (LocatrFragment.java)
@Override
public void onCreateOptionsMenu(Menu menu, MenuInflater inflater) {
...
}
private void findImage() {
LocationRequest request = LocationRequest.create();
request.setPriority(LocationRequest.PRIORITY_HIGH_ACCURACY);
request.setNumUpdates(1);
request.setInterval(0);
}
}
LocationRequest objects configure a variety of parameters for your request:
· interval – how frequently the location should be updated
· number of updates – how many times the location should be updated
· priority – how Android should prioritize battery life against accuracy to satisfy your request
· expiration – whether the request should expire and, if so, when
· smallest displacement – the smallest amount the device must move (in meters) to trigger a location update
When you first create a LocationRequest, it will be configured for accuracy within a city block, with repeated slow updates until the end of time. In your code, you change this to get a single, high-accuracy location fix by changing the priority and the number of updates. You also set the interval to 0, to signify that you would like a location fix as soon as possible.
The next step is to send off this request and listen for the Locations that come back. You do this by adding a LocationListener. There are two versions of LocationListener you can import. Choose com.google.android.gms.location.LocationListener. Add another method call to findImage().
Listing 31.15 Sending LocationRequest (LocatrFragment.java)
public class LocatrFragment extends Fragment {
private static final String TAG = "LocatrFragment";
...
private void findImage() {
LocationRequest request = LocationRequest.create();
request.setPriority(LocationRequest.PRIORITY_HIGH_ACCURACY);
request.setNumUpdates(1);
request.setInterval(0);
LocationServices.FusedLocationApi
.requestLocationUpdates(mClient, request, new LocationListener() {
@Override
public void onLocationChanged(Location location) {
Log.i(TAG, "Got a fix: " + location);
}
});
}
If this were a longer-lived request, you would need to hold on to your listener and call removeLocationUpdates(…) later to cancel the request. However, since you called setNumUpdates(1), all you need to do is send this off and forget about it.
Finally, to send this off you need to hook up your search button. Override onOptionsItemSelected(…) to call findImage().
Listing 31.16 Hooking up search button (LocatrFragment.java)
@Override
public void onCreateOptionsMenu(Menu menu, MenuInflater inflater) {
...
}
@Override
public boolean onOptionsItemSelected(MenuItem item) {
switch (item.getItemId()) {
case R.id.action_locate:
findImage();
return true;
default:
return super.onOptionsItemSelected(item);
}
}
Run your app and press the search button. Remember to have MockWalker running if you are running on an emulator. (If you run into issues with the menu, flip back to Chapter 13 to integrate the AppCompat library.) You should see a line something like this logged out:
...D/libEGL: loaded /system/lib/egl/libGLESv2_MRVL.so
...D/GC: <tid=12423> OES20 ===> GC Version : GC Ver rls_pxa988_KK44_GC13.24
...D/OpenGLRenderer: Enabling debug mode 0
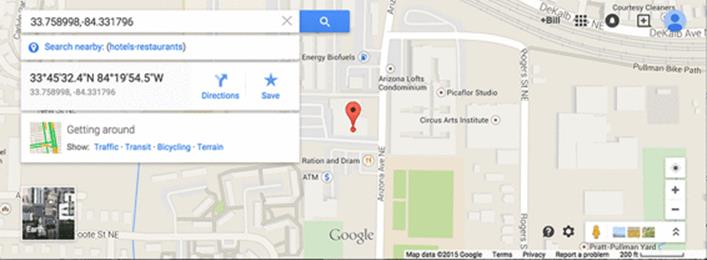
...I/LocatrFragment: Got a fix: Location[fused 33.758998,-84.331796 acc=38 et=...]
This shows you the latitude and longitude, accuracy, and the estimated time of the location fix. If you plug your lat-lon pair into Google Maps, you should be able to pull up your current location (Figure 31.8).
Figure 31.8 Our current location
Find and Display an Image
Now that you have a location fix, it is time to use it. Write an async task to find a GalleryItem near your location fix, download its associated image, and display it.
Put this code inside a new inner AsyncTask called SearchTask. Start by performing the search, selecting the first GalleryItem that comes up.
Listing 31.17 Writing SearchTask (LocatrFragment.java)
private void findImage() {
...
LocationServices.FusedLocationApi
.requestLocationUpdates(mClient, request, new LocationListener() {
@Override
public void onLocationChanged(Location location) {
Log.i(TAG, "Got a fix: " + location);
new SearchTask().execute(location);
}
});
}
private class SearchTask extends AsyncTask<Location,Void,Void> {
private GalleryItem mGalleryItem;
@Override
protected Void doInBackground(Location... params) {
FlickrFetchr fetchr = new FlickrFetchr();
List<GalleryItem> items = fetchr.searchPhotos(params[0]);
if (items.size() == 0) {
return null;
}
mGalleryItem = items.get(0);
return null;
}
}
Saving out the GalleryItem here accomplishes nothing for now. But it will save you a bit of typing in the next chapter.
Next, download that GalleryItem’s associated image data and decode it. Then display it on mImageView inside onPostExecute(Void).
Listing 31.18 Downloading and displaying image (LocatrFragment.java)
private class SearchTask extends AsyncTask<Location,Void,Void> {
private GalleryItem mGalleryItem;
private Bitmap mBitmap;
@Override
protected Void doInBackground(Location... params) {
...
mGalleryItem = items.get(0);
try {
byte[] bytes = fetchr.getUrlBytes(mGalleryItem.getUrl());
mBitmap = BitmapFactory.decodeByteArray(bytes, 0, bytes.length);
} catch (IOException ioe) {
Log.i(TAG, "Unable to download bitmap", ioe);
}
return null;
}
@Override
protected void onPostExecute(Void result) {
mImageView.setImageBitmap(mBitmap);
}
}
With that, you should be able to find a nearby image on Flickr (Figure 31.9). Fire up Locatr and press your location button.
Figure 31.9 The final product
Challenge: Progress
This simple app could use some more feedback in its interface. There is no immediate indication when you press the button that anything has happened.
For this challenge, modify Locatr so that it responds immediately to a press by displaying a progress indicator. The ProgressDialog class can show a spinning progress indicator that will do the trick nicely. You will also need to track when SearchTask is running so that you can clear away the progress when that is appropriate.