Android Wearables (2015)
Part II. Basic Building Blocks
Chapter 6. Voice Input
WHAT’S IN THIS CHAPTER?
· ➤ Types of voice interaction
· ➤ Overview of the Wear APIs
· ➤ Using predefined Wear voice actions
· ➤ Using your own commands
WROX.COM CODE DOWNLOADS FOR THIS CHAPTER
The code downloads for this chapter are found at www.wrox.com/go/androidwearables on the Download Code tab. The code is in the Chapter 6 download and the files are individually named according to the listing numbers noted throughout the chapter.
TALKING TO YOUR WRIST
[…] the phone is like your brain; it’s controlling your TV or driving your car […]
— Justin Koh, Android Wear developer, Google I/O 2014
Do you remember Dick Tracy, the comic-strip detective who had a two-way wrist radio he used to talk to his boss at the police station? It is as if Android Wear is trying to re-create that vision of the future from almost 70 years ago.
Thirty-six years later, David Hasselhoff, playing the character Michael Knight, talked to his intelligent car, KITT, using a wristwatch on which he would get voice-generated answers from the car. According to some fan sites, the watch Hasselhoff wore was a modification of a Star Wars-branded watch manufactured by Bradley for the U.S. (I recommend that you search for images of both characters and their watches. We could not include any due to copyright restrictions.)
Android Wear offers half the communication capabilities of Dick’s and Michael’s radio watches. You can dictate commands to your Wear device, but it has no sound-playing capabilities. None of the existing Wear-enabled devices currently has any speakers or sound output. This is a forthcoming feature and will make it possible to stream audio via Buetooth toward external speakers.
On the other hand, all of them can be commanded via voice in multiple ways. This chapter introduces different types of voice input. The code listings give you basic information on how to use the different types of voice input. Check the chapter downloads for full code examples.
TYPES OF VOICE INTERACTION
There are different types of voice interaction. You could give your smartwatch simple commands, and it could recognize a series of predefined commands by comparing the sound input to a table of existing recordings to provide you with immediate feedback.
Or the device could transfer the stream of audio, once digitized, to the smartphone or tablet it is connected to for the other device to operate a voice recognition algorithm. Sending the voice information to, for example, a cloud service for remote storage or treatment would fall into the same category. In essence it is the same case where the smartwatch sends the data to a different system for it to deal with it.
NOTE
During the Google I/O conference in 2014, the lecture “Android Wear: The Developer’s Perspective” covered topics concerning Android Wear. The audience posed several questions about the use of voice interaction.
Watching that video at http://youtu.be/sha_w3_5c2c can help you understand some of the principles behind the use of voice commands. The Q&A session begins two-thirds of the way through the video.
Finally, the smartwatch (or any other Wear-enabled device) could simply use voice interaction to react to a notification coming from the phone or tablet. This interaction pattern is slightly different, because the smartwatch pushes commands or data toward the device it’s paired to. In this case, the phone expects an answer in textual form that will be entered via voice. The screen real estate isn’t optimized for a virtual keyboard.
It’s not that easy to conceptually understand these cases by reading Android’s documentation site. Table 6.1 shows all the possibilities for the use of voice within Android Wear to help you choose the one you need for your project. In this chapter you’ll get to try all of them.
Table 6.1 Types of Voice Interaction
INTERACTION |
DESCRIPTION |
Send a command to the host |
The Wear device computes a voice recognition operation and sends a command to the host device. In the official documentation, this is called app-provided voice capabilities. |
Send a text to the host |
The Wear device captures the audio and pushes it through its codec to produce a stream of bytes of audio that can be sent to the host device. |
Respond to a query from the host |
When a notification arrives, it is possible to get a set of predefined answers to which the user can simply answer using voice. |
Respond to a query from the host in a text |
When a notification arrives from, for example, an e-mail, it is possible to answer by talking into the Wear device and to get the speech transcribed into a text to send as an answer. |
Execute simple system commands |
The Wear device computes a voice recognition operation based on a series of predefined intents. In the official documentation, this is called system-provided voice capabilities. |
Each interaction mode requires a different set of commands on the phone’s Android application package (APK) and the Wear device’s APK to get both programs to work in sync. The only exception is the last case—running commands without a connected device.
NOTE
Quoting Justin Koh, one of the Android Wear developers shown in the video mentioned earlier: “Voice is an array of bytes. Make sure you have the right codecs.”
In other words, if you plan to use your Wear device as a remote microphone, make sure the specific device you want your app to run on can encode and decode the digital audio in the right format.
The codec compresses the raw audio data to make it lighter. At the other end, the device receiving the stream needs a compatible codec to decompress the audio.
For an overview on the supported media formats within Android see https://developer.android.com/guide/appendix/media-formats.html.
It is possible to enhance existing apps using voice input. Apps created prior to the launch of Wear cannot be used with voice commands unless they are remade to include the proper intents on the APK on the phone and the APK on the smartwatch. In other words, if you want your existing app to include voice interaction using Wear, you must do the following:
1. Add the proper intents on the phone’s APK so that it can, for example, be ready to take text input via the watch’s voice recognition system.
2. Create an APK for the watch that allows data entry via voice when requested.
The Wear SDK has been created to make this integration seamless. Adding voice input takes just a couple keystrokes. But remember that even if the technology allows you to, for example, make every text input field in your application Wear-enabled, you still need to ensure that the interaction pattern makes sense.
USING SYSTEM-PROVIDED VOICE COMMANDS
The Android Wear platform provides several voice intents that are based on simple user actions. Table 6.2 lists the actions you can use. When you use voice commands, all your sentences need to start with “OK, Google.” This phrase is unique enough for the Wear device not to be triggered randomly.
Table 6.2 Predefined Voice Intents According to the Official Wear Documentation
NAME |
SAMPLE PHRASES |
INTENT (VALUES OF THE CONSTANT) |
||
Action |
Category/MIME-Type |
Extras |
||
Call a car/taxi |
“OK, Google, get me a taxi.”“OK, Google, call me a car.” |
com.google. android.gms. actions.RESERVE_ TAXI_RESERVATION |
||
Take a note |
“OK, Google, take a note.”“OK, Google, note to self.” |
android.intent. action.SEND |
com.google |
android.content |
Set alarm |
“OK, Google, set an alarm for 8 a.m.”“OK, Google, wake me up at 6 tomorrow.” |
android.intent. action.SET_ALARM |
android.provider |
|
Set timer |
“OK, Google, set a timer for 10 minutes.” |
android.intent. action.SET_TIMER |
android.provider |
|
Start/Stop a bike ride |
“OK, Google, start cycling.”“OK, Google, start my bike ride.”“OK, Google, stop cycling.” |
vnd.google. fitness.TRACK |
vnd.google. |
actionStatus |
Start/stop a run |
“OK, Google, track my run.”“OK, Google, start running.”“OK, Google, stop running.” |
vnd.google. fitness.TRACK |
vnd.google. |
actionStatus |
Start/stop a workout |
“OK, Google, start a workout.”“OK, Google, track my workout.”“OK, Google, stop workout.” |
vnd.google. fitness.TRACK |
vnd.google. |
actionStatus |
Show heart rate |
“OK, Google, what’s my heart rate?”“OK, Google, what’s my bpm?” |
vnd.google. fitness.VIEW |
vnd.google. |
|
Show step count |
“OK, Google, how many steps have I taken?”“OK, Google, what’s my step count?” |
vnd.google. fitness.VIEW |
vnd.google. |
|
ABOUT INTENTS
Intents allow you to launch an activity in another application by describing a simple action to be performed (such as “edit picture” or “view map”) in an Intent object. This type of intent specifies an action and provides some data with which to perform it. It is therefore called implicit intent.
When calling startActivity() or startActivityForResult() as an implicit intent, the system resolves the intent to an application that can handle the intent and starts its corresponding activity. If more than one application could handle the intent, the system would present the user with a dialog from which to pick an app.
You can read more about intents at http://developer.android.com/guide/components/intents-filters.html.
Just Launch an App
Try the capabilities of your smartwatch. Note that you cannot do so by using an emulator connected to a phone over the USB. According to different reports, it is not possible to use voice commands from the emulator to trigger events on the phone. This will not work for either system-predefined commands or app-predefined ones.
NOTE
The current emulator does not support voice actions via the keyboard, even though the text appears on the display. This is the standard test procedure (using the keyboard to issue voice commands), because the emulator cannot use the microphone in your PC.
Therefore, if you want to start an app you launched in your emulator, you must do the following:
1. Click the display.
2. Click the red G.
3. Go to the Start menu and choose the app from there.
You can also quickly start the application using something like this from your development machine:
adb shell am start -n com.example.android.test/.TestActivity
To launch an app, just talk to your Wear device. Say, “OK, Google, start HelloWorld.” If you still have your first application installed on the device, it should launch.
Hack an Existing Intent to Launch Your App
As hinted earlier, when talking about intents, it is possible to “hijack” an existing intent to launch your own application. You just need to modify the AndroidManifest.xml file to your app so that it is listed as one of the possible actions to take upon the arrival of the intents defined in Table 6.2. Remember that it is possible to hack any intent within Android. Listing 6-1 shows the filter you need to add to the activity you want to launch in your manifest file to get it to be triggered with the call of a timer. For example, you could launch your HelloWorld app when telling your smartwatch “OK, Google, set a timer for 10 minutes.”
LISTING 6-1: Intent filter to enable launching your app when setting a timer
<intent-filter>
<action android:name="android.intent.action.SET_TIMER"/>
<category android:name="android.intent.category.DEFAULT"/>
</intent-filter>
Launch Your App with Voice the “Right” Way
Besides trying to take over an existing intent in your smartwatch, you also can use a different way in your wearable’s AndroidManifest.xml file to get the system to call your app when saying “OK, Google, start myApp.” By default your app’s android:name attribute to the activity tag is .MyActivity. (If you are looking at the downloadable example for this chapter, it is .MyActivityWearable.) As shown in Listing 6-2, just add a second activity called StartRunActivity with the proper intent filter, install the app on your watch, and it should work.
LISTING 6-2: Activity to enable launching your app via voice
<activity android:name="StartRunActivity" android:label="@string/app_name">
<intent-filter>
<action android:name="android.intent.action.MAIN" />
<category android:name="android.intent.category.LAUNCHER" />
</intent-filter>
</activity>
THE WEAR APIS
The wearable services within Wear consist of three APIs that help the application software on the phone or tablet easily communicate with the Wear device: the data API, the message API, and the node API. Each takes care of different parts of the information exchange between devices.
All can be called from both the phone app and the wearable one, and all your data can be used on both sides. WearableListenerService implements all the listeners for the different APIs.
Using voice as an input, in any of the forms explained in Table 6.1, requires the devices to communicate with each other. Therefore, understanding the role of each API is important at this point.
Data API
The data API lets you put data on a sort of virtual cache shared among the connected devices. You don’t need to worry about anything but putting the data into storage and taking it from there at either side.
This is convenient when dealing with images, because you don’t have to send them repeatedly, thus saving battery life.
Message API
The message API sends byte arrays between the devices. Suppose you are capturing voice on the watch and sending it, after it is digitized, to the phone. As long as you push your audio information as a byte array, you can get direct access to the message API and send the information directly.
Node API
The node API checks when nodes enter the connection range. This function can be used to discover whether the phone is present. After a while it should be straightforward to simply put the device to sleep if too much time has passed since the last connection was detected.
ANSWERING TO NOTIFICATIONS: CAPTURING YOUR VOICE INTO AN APP
In the following section you will write an example in which voice plays a big role. In this case you will start by creating a new project with apps for both a phone and a Wear device. Chapter 5 showed you how to create a new project from scratch involving both a mobile and a Wear device. This chapter gets you a little further. Its aim is getting you up and running with a hybrid development system using a phone and a Wear emulator that talk to each other.
It is possible to run almost any kind of scenario between emulators and real devices, knowing the limitations of launching applications or triggering intents. In these two examples you will experiment with a phone running Android’s version of KitKat (which should work on any later version) and an emulator of a Wear smartwatch. In this way you can send events from one to the other.
NOTE
Remember the basic usage of the emulator as soon as it is up and running and as soon as your phone is connected to your computer:
· You need to link the emulator with the phone using adb. The command to do so is adb -s <phone_ID> forward tcp:5601 tcp:5601.
· To get the phone’s identification number, issue the command adb devices and copy the proper id from there.
If you disconnect the phone or reboot the emulator, you need to reissue this command.
Notifications including an action to input text, such as replying to an e-mail, should normally launch an activity on the Wear device to input the text. As mentioned earlier, Wear devices—currently smartwatches—have little space for displaying a keyboard, so you can let users dictate a reply or provide predefined text messages using RemoteInput.
In this first case you will make a wear and a phone app that communicate with each other. When launched, the phone application sends a request (in the form of a notification) for a voice answer on the Wear device.
This gets the Wear device to show a query for a voice answer onscreen. The user is prompted to talk to the device. The answer is captured by RemoteInput, and the wear application displays the result onscreen while it sends it back to the phone application. Finally, the phone application shows the result on a text field.
The following sections show how this simple application is made.
Creating a Simple App Sending a Notification
Chapter 4 explored the different types of notifications on a Wear device. This time you will use the simplest one, a button running on your phone’s screen, to trigger an event on the smartwatch emulator.
Creating Your Empty Project
Follow these steps to create your new Android Wear project:
1. Click New Project in the Android Studio startup dialog or on the menu, and enter the correct information for your app, as shown in Figure 6.1. I’m calling my app SimpleNotification and placing it in the com.wiley.wrox.chapter6.simplenotification package. Click Next or press Alt+N to continue.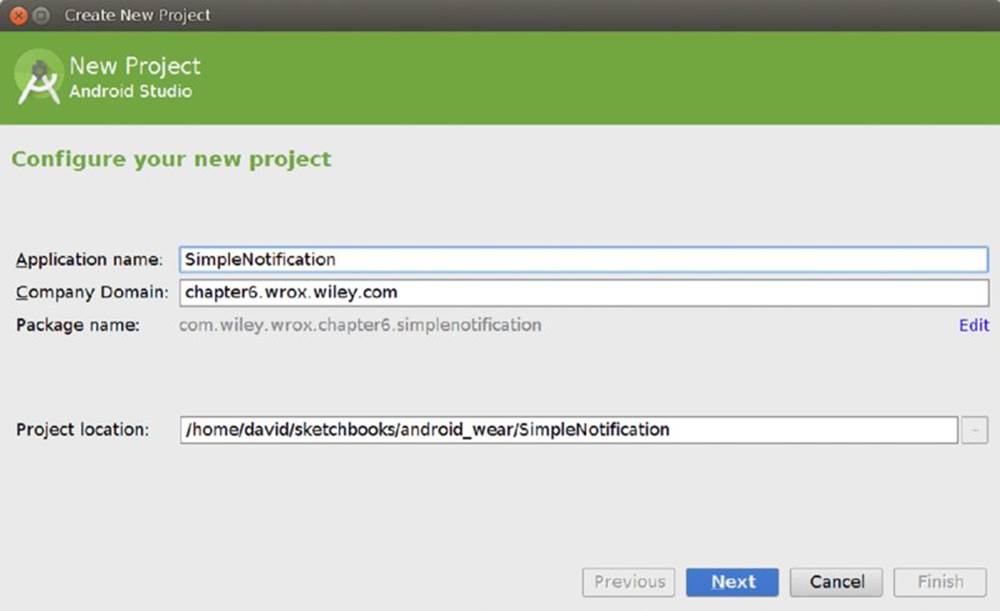
FIGURE 6.1 Enter project information
2. As shown in Figure 6.2, I selected Phone and Tablet API 19 to match the specific version of the Android OS on my phone. You should choose the one that matches your own phone. I also chose Wear API 20. Then click Next.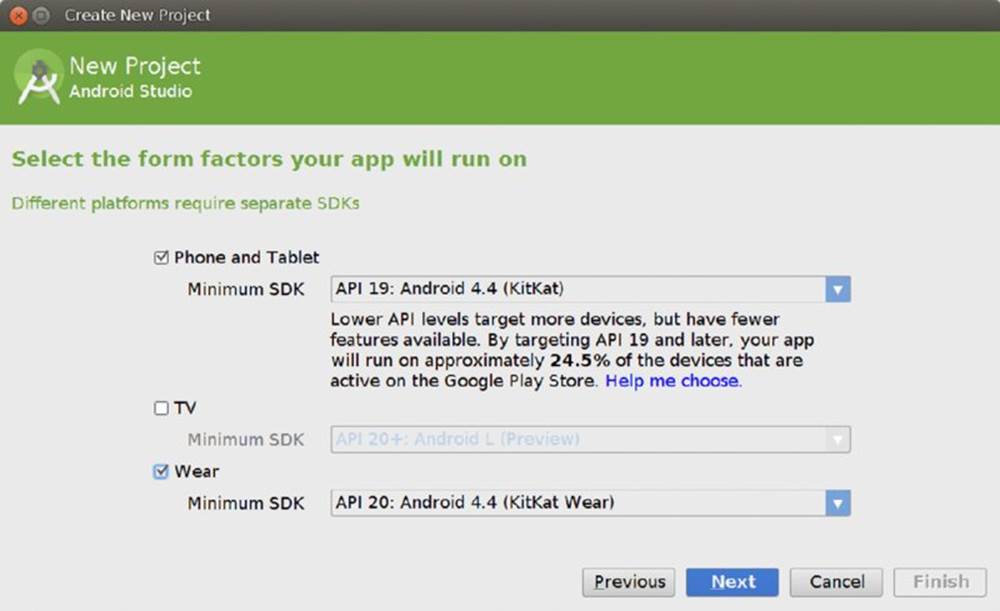
FIGURE 6.2 Select form factors and API levels for your app
3. Choose Blank Activity to add a blank activity to your mobile, as shown in Figure 6.3, and click Next twice to accept the default parameters.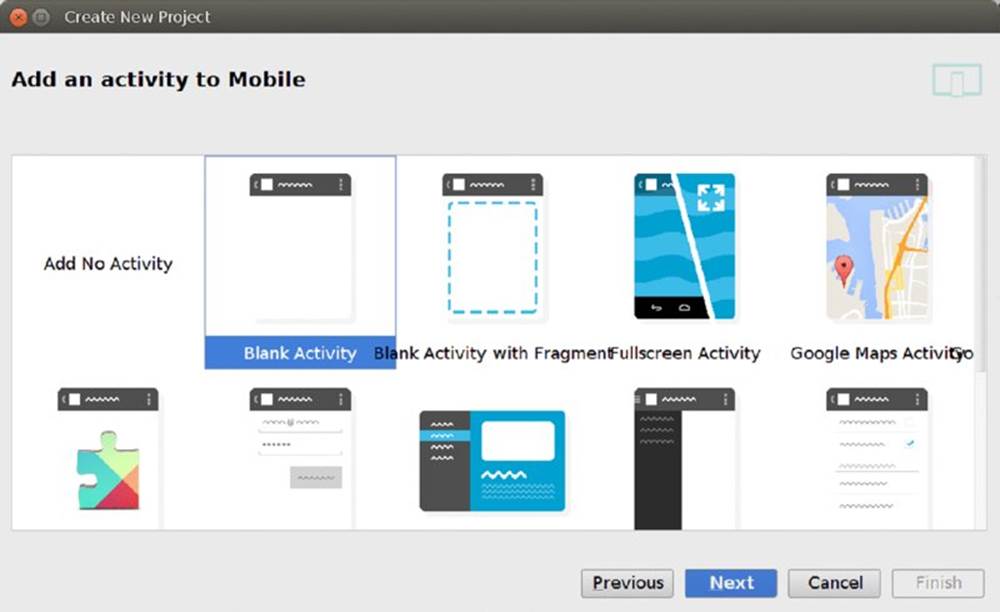
FIGURE 6.3 Add a blank phone activity
4. Choose a name for the activity, as shown in Figure 6.4. I chose not to use the default one this time to make it simpler in the editor window when multiple tabs are open. I call the activity MyActivityPhone and the layout activity_my_phone.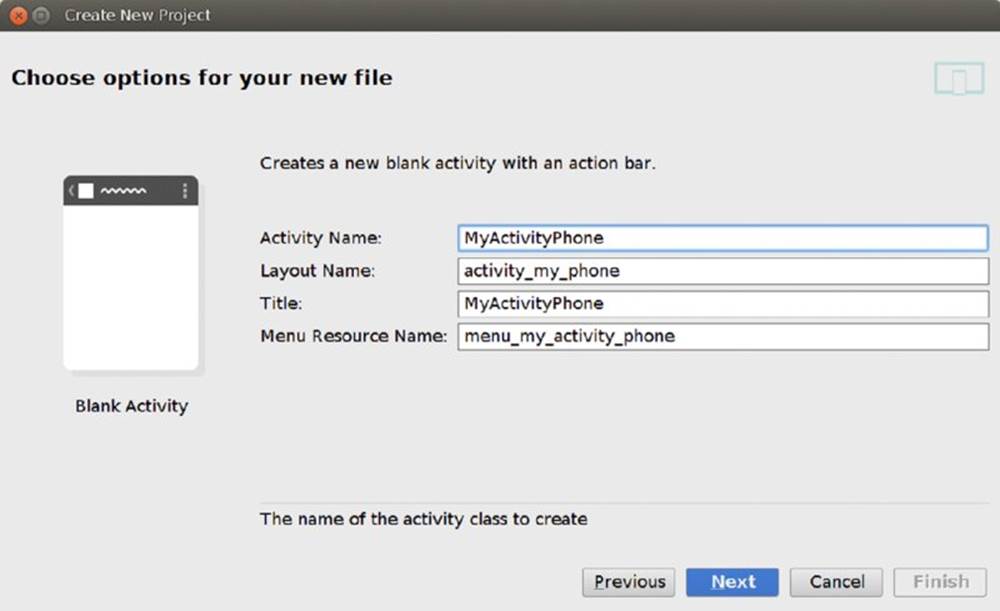
FIGURE 6.4 Choose a name for the activity
5. Choose Blank Wear Activity, as shown in Figure 6.5. By default this is a standard activity with WatchViewStub as the main layout file. Click Next.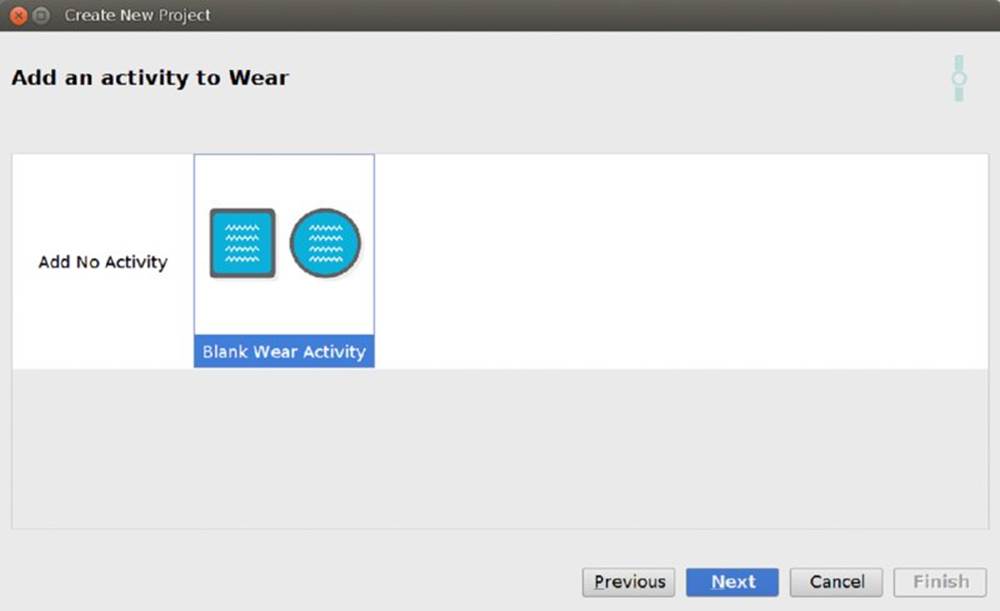
FIGURE 6.5 Add a blank Wear activity
6. Notice in Figure 6.6 that Android Studio creates two layouts, round_activity_my_wear and rect_activity_my_wear. For consistency, I named the activity MyActivityWear and the layout activity_my_wear. To create your new Mobile + Wear app, click Finish.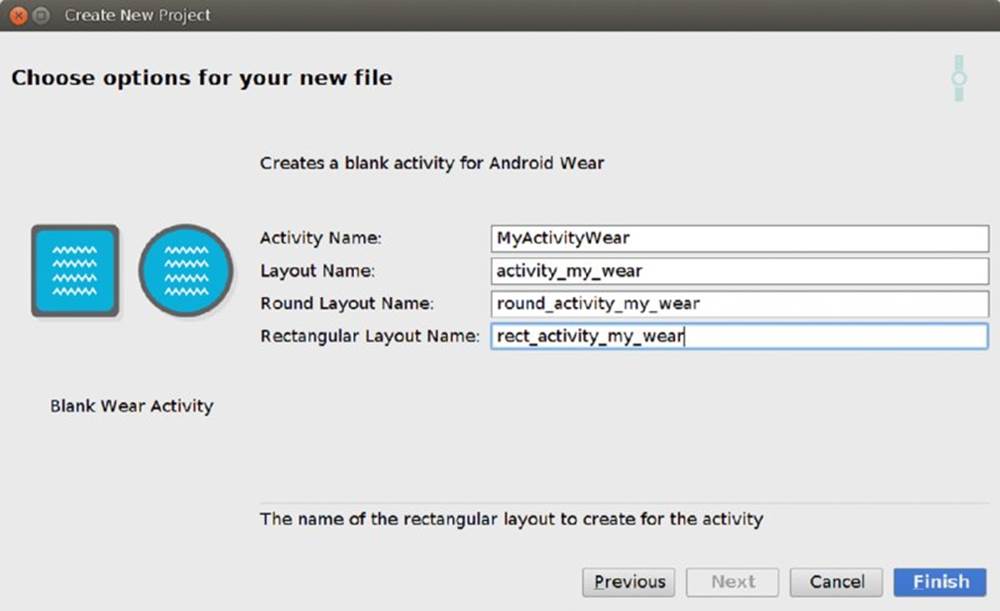
FIGURE 6.6 Edit the properties for your Wear activity and layouts
You should now have an Android Studio project that has two application structures within it called mobile and wear.
Modifying the Gradle File
The gradle file for the mobile app needs to include a reference to a series of dependencies needed for this app bundle to compile properly. Listing 6-3 shows the file with the new code highlighted.
LISTING 6-3: Adding dependencies
apply plugin: 'com.android.application'
android {
compileSdkVersion 20
buildToolsVersion "20.0.0"
defaultConfig {
applicationId "com.wiley.wrox.chapter6.simplenotification"
minSdkVersion 19
targetSdkVersion 20
versionCode 1
versionName "1.0"
}
buildTypes {
release {
runProguard false
proguardFiles getDefaultProguardFile('proguard-android.txt'),
'proguard-rules.pro'
}
}
}
dependencies {
compile fileTree(dir: 'libs', include: ['*.jar'])
wearApp project(':wear')
compile 'com.google.android.gms:play-services-wearable:+'
compile 'com.android.support:support-v4:20.0+'
}
Modifying the App’s Layout
By default the app comes with a simple layout featuring the default icon for apps as well as the classic “Hello world!” message, as shown in Figure 6.7.
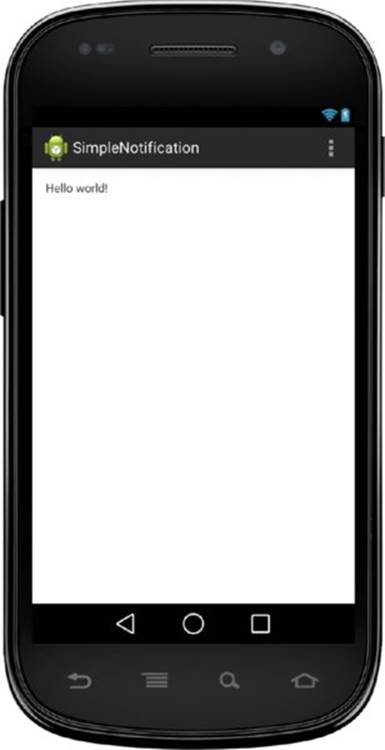
FIGURE 6.7 The default layout of the mobile app on the simulator
A good way to continue is to add a button to send notifications to the Wear device when pressed, as well as to add the classic Wrox logotype to the application. To implement this modification, you need to add some code to the activity_my_phone.xml definition file. Listing 6-4 highlights the changes I decided to implement in this case. I just added code to implement a button with the callback function simpleNotification. Figure 6.8 shows the result.
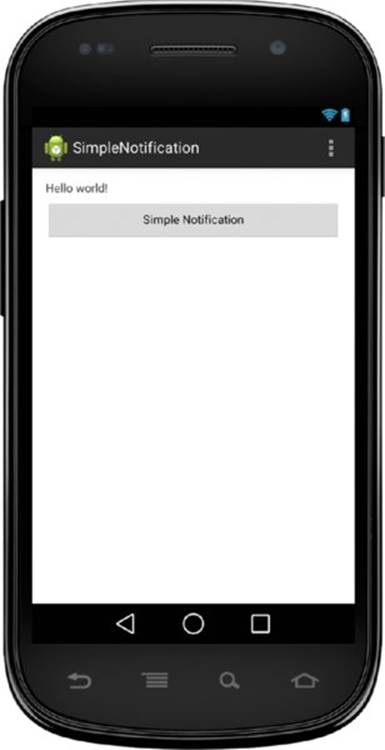
FIGURE 6.8 An app with an extra button on the simulator
LISTING 6-4: Changes on the layout from the original file
<RelativeLayout xmlns:android="http://schemas.android.com/apk/res/android"
xmlns:tools="http://schemas.android.com/tools"
android:layout_width="match_parent"
android:layout_height="match_parent"
android:paddingLeft="@dimen/activity_horizontal_margin"
android:paddingRight="@dimen/activity_horizontal_margin"
android:paddingTop="@dimen/activity_vertical_margin"
android:paddingBottom="@dimen/activity_vertical_margin"
tools:context=".MyActivityPhone">
<TextView
android:id="@+id/textView"
android:text="@string/hello_world"
android:layout_width="wrap_content"
android:layout_height="wrap_content" />
<Button
style="?android:attr/buttonStyleSmall"
android:layout_width="match_parent"
android:layout_height="wrap_content"
android:text="Simple Notification"
android:id="@+id/button"
android:onClick="simpleNotification"
android:layout_below="@+id/textView"
android:layout_centerHorizontal="true"
android:layout_marginTop="22dp" />
</RelativeLayout>
To change the logotype, you need to add Wrox’s logotype to the resources folder to a subfolder called drawable-xxhdpi. That will let you access it from within the AndroidManifest.xml file for your phone. Listing 6-5 shows the modifications on the default manifest file to include the new logotype as well as assign a launch mode.
NOTE
There are four different ways to start an Android application (or launch mode). The singleTop option creates an application that will try to respond to the intents registered for it from the same instance of the activity, rather than making new instances of the same application in case it happens to be at the top of the activity stack. You can read more about this at http://developer.android.com/guide/topics/manifest/activity-element.html.
LISTING 6-5: Changes to the original AndroidManifest.xml file
<?xml version="1.0" encoding="utf-8"?>
<manifest xmlns:android="http://schemas.android.com/apk/res/android"
package="com.wiley.wrox.chapter6.simplenotification" >
<application
android:allowBackup="true"
android:icon="@drawable-xxhdpi/wrox_logo_big"
android:label="@string/app_name"
android:theme="@style/AppTheme" >
<activity
android:name=".MyActivityPhone"
android:label="@string/app_name"
android:launchMode="singleTop" >
<intent-filter>
<action android:name="android.intent.action.MAIN" />
<category android:name="android.intent.category.LAUNCHER" />
</intent-filter>
</activity>
</application>
</manifest>
Figure 6.9 shows the app with the new image.
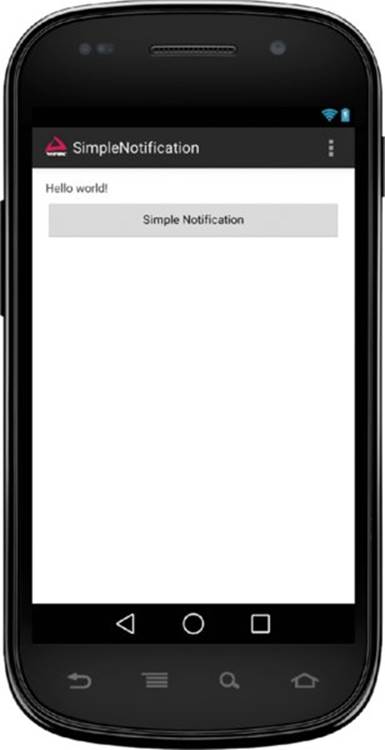
FIGURE 6.9 App with the Wrox logo
Adding the Right Callback Function
Adding the callback function is not a big deal in this case. Listing 6-6 highlights the additions you need to make to the default source code for it to run.
LISTING 6-6: Changes to the original MyActivityPhone.java file
package com.wiley.wrox.chapter6.simplenotification;
import android.app.Activity;
import android.os.Bundle;
import android.view.Menu;
import android.view.MenuItem;
import android.app.Notification;
import android.support.v4.app.NotificationCompat;
import android.support.v4.app.NotificationManagerCompat;
import android.view.View;
public class MyActivityPhone extends Activity {
private final static NOTIFICATION_ID = 6; // Use chapter number as ID
private NotificationManagerCompat mNotificationManager;
@Override
protected void onCreate(Bundle savedInstanceState) {
super.onCreate(savedInstanceState);
setContentView(R.layout.activity_my_phone);
mNotificationManager = NotificationManagerCompat.from(this);
}
@Override
public boolean onCreateOptionsMenu(Menu menu) {
// Inflate the menu; this adds items to the action bar if it is present.
getMenuInflater().inflate(R.menu.my_activity_phone, menu);
return true;
}
@Override
public boolean onOptionsItemSelected(MenuItem item) {
// Handle action bar item clicks here. The action bar will
// automatically handle clicks on the Home/Up button, so long
// as you specify a parent activity in AndroidManifest.xml.
int id = item.getItemId();
if (id == R.id.action_settings) {
return true;
}
return super.onOptionsItemSelected(item);
}
public void simpleNotification(View v) {
Notification notification = new NotificationCompat.Builder(this)
.setSmallIcon(R.drawable.wrox_logo_small)
.setContentTitle("My notification")
.setContentText("My first wear notification!")
.build();
notif(notification);
}
private void notif(Notification n) {
mNotificationManager.notify(NOTIFICATION_ID, n);
}
}
After this code has been uploaded to a phone, when the button is clicked, the smartwatch simulator should capture the event with its default configuration. In other words, we haven’t yet uploaded an app to the watch to do anything in conjunction with the handheld.
Figure 6.10 shows the notification to the watch on the simulator.
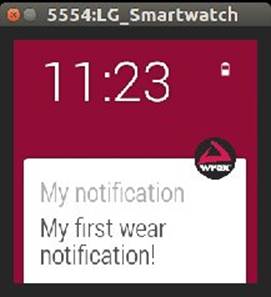
FIGURE 6.10 Notification sent to the smartwatch simulator
This SimpleNotification app is a good way to play around with the voice capabilities on the watch. It allows you to trigger voice input response requests when the notification is issued. This is very helpful for testing your new Wear-based apps.
Getting Your App to Receive a Voice Command
Given the previous SimpleNotification example, you will next build an application that requests an action from the user. The idea is that the answer is input via voice. Because the simulator has no voice input capabilities, you will use the keyboard to type your answers.
In this case, you will create an app for your handheld device that will be an improvement to the previous one. Below the button to send the notification, you will add a text box to capture the response from the user.
Figure 6.11 shows this new addition to the app.
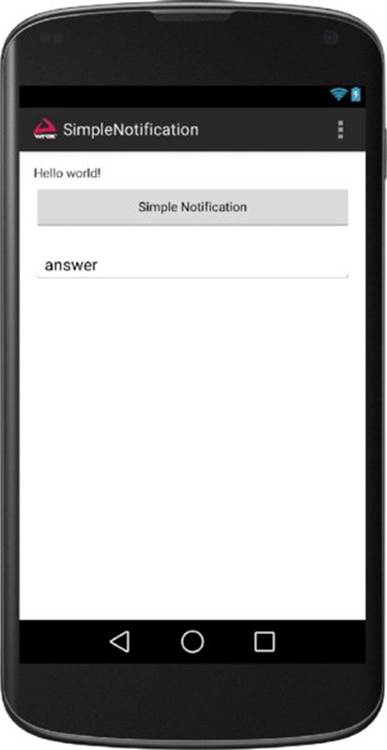
FIGURE 6.11 Text field added to the UI
When declaring the intent for the Wear device to issue its answer, you will use the RemoteInput class. This class tells the smartwatch to be ready to reply to the notification using voice as an input. The watch has everything that is needed for it to answer. In other words, you just need to make a phone app and not a Wear app in this case.
Revising the Callback Function
The callback function needs to include all the code related to the RemoteInput call. Listing 6-7 shows this new function added to the SimpleNotification app you worked with earlier. The new notification callback function is called voiceNotification(), which means I have removed the previous one.
LISTING 6-7: Changes to the MyActivityPhone.java file
package com.wiley.wrox.chapter6.simplenotification;
public class MyActivityPhone extends Activity {
private final static NOTIFICATION_ID = 6; // Use chapter number as ID
private NotificationManagerCompat mNotificationManager;
public static final String EXTRA_MESSAGE = "extra_message";
public static final String ACTION_DEMAND = "action_demand";
public static final String EXTRA_VOICE_REPLY = "extra_voice_reply";
@Override
protected void onCreate(Bundle savedInstanceState) {
super.onCreate(savedInstanceState);
setContentView(R.layout.activity_my_phone);
mNotificationManager = NotificationManagerCompat.from(this);
}
[...]
public void voiceNotification(View v) {
Log.v("wrox", "Handheld sent notification");
// Create the intent and pending intent for the notification
Intent replyIntent = new Intent(this, DemandIntentReceiver.class)
.putExtra(EXTRA_MESSAGE, "Reply selected.")
.setAction(ACTION_DEMAND);
PendingIntent replyPendingIntent =
PendingIntent.getBroadcast(this.getApplicationContext(), 0,
replyIntent, PendingIntent.FLAG_UPDATE_CURRENT);
// Create the remote input
String replyLabel = getResources().getString(R.string.reply_label);
RemoteInput remoteInput = new RemoteInput.Builder(EXTRA_VOICE_REPLY)
.setLabel(replyLabel)
.build();
// Create the reply action and add the remote input
NotificationCompat.Action action =
new NotificationCompat.Action.Builder(R.drawable.wrox_logo_small,
getString(R.string.reply_label), replyPendingIntent)
.addRemoteInput(remoteInput)
.build();
// Create the notification
Notification replyNotification = new NotificationCompat.Builder(this)
.setSmallIcon(android.R.drawable.ic_btn_speak_now)
.setContentTitle("Voice to handheld")
.setContentText("Left-swipe and do a voice reply")
.extend(new NotificationCompat.WearableExtender().addAction(action))
.build();
// Issue the notification
notif(replyNotification);
}
private void notif(Notification n) {
mNotificationManager.notify(NOTIFICATION_ID, n);
}
}
You will notice the three strings defined at the beginning of the class. Those are needed when creating the intent that we will use to capture the data coming back from the smartwatch. An intent has four parameters:
· ➤ The context of the activity: this in this case
· ➤ The class the intent refers to: DemandIntentReceiver
· ➤ Extra information to add details to the intent
· ➤ The type of action
Both the extra information and the type of action are user-defined. You need to define a string that will contain the value for those. This is how the broadcast receiver (which we will define next) can filter the data coming in.
Adding a Broadcast Receiver
We will capture the response from the Wear device by listening to a broadcast it will issue through the intent: new Intent(this, DemandIntentReceiver.class). To do this, just add a new class to your project. In the first location you could just log the incoming data to logcat. In a later iteration of the code you could populate the text field on the app with the data coming from the smartwatch. This new class is shown in Listing 6-8.
LISTING 6-8: The new DemandIntentReceiver.java file
package com.wiley.wrox.chapter6.simplenotification;
import android.content.BroadcastReceiver;
import android.content.Context;
import android.content.Intent;
import android.os.Bundle;
import android.support.v4.app.RemoteInput;
import android.util.Log;
public class DemandIntentReceiver extends BroadcastReceiver {
@Override
public void onReceive(Context context, Intent intent) {
Log.v("wrox", "got data");
Bundle remoteInput = RemoteInput.getResultsFromIntent(intent);
CharSequence reply =
remoteInput.getCharSequence(MyActivityPhone.EXTRA_VOICE_REPLY);
if( reply != null){
Log.v("wrox", "User reply from wearable: " + reply);
}
}
}
At this level, we are basically getting everything that comes to the broadcast receiver and just capturing EXTRA_VOICE_REPLY. It is possible to use the other filters defined in the app to separate the data from other broadcasts that are happening. However, doing so is not necessary at this point. Check the provided code examples for Chapter 6 to see yet another iteration of DemandIntentReceiver.java.
Modifying the App’s Layout to Include a Text Field
To get the app ready to show the data received from the Wear device on the screen, you need to add a text field to the layout, as shown in Listing 6-9. You will also notice that here you need to change the name to the notification’s callback function on the button’s definition.
LISTING 6-9: Changes to activity_my_phone.xml
<RelativeLayout xmlns:android="http://schemas.android.com/apk/res/android"
xmlns:tools="http://schemas.android.com/tools"
android:layout_width="match_parent"
android:layout_height="match_parent"
android:paddingLeft="@dimen/activity_horizontal_margin"
android:paddingRight="@dimen/activity_horizontal_margin"
android:paddingTop="@dimen/activity_vertical_margin"
android:paddingBottom="@dimen/activity_vertical_margin"
tools:context=".MyActivityPhone">
<TextView
android:id="@+id/textView"
android:text="@string/hello_world"
android:layout_width="wrap_content"
android:layout_height="wrap_content" />
<Button
style="?android:attr/buttonStyleSmall"
android:layout_width="match_parent"
android:layout_height="wrap_content"
android:text="Simple Notification"
android:id="@+id/button"
android:onClick="voiceNotification"
android:layout_below="@+id/textView"
android:layout_centerHorizontal="true"
android:layout_marginTop="22dp" />
<EditText
android:layout_width="wrap_content"
android:layout_height="wrap_content"
android:id="@+id/reply_text"
android:layout_below="@+id/button"
android:layout_marginTop="22dp"
android:layout_alignParentStart="true"
android:layout_alignEnd="@+id/button"
android:text="answer" />
</RelativeLayout>
Adding the New Class to the Manifest File
The new class has to be added to the manifest file within a receiver tag so that the program launches the receiver the way it should. Listing 6-10 shows the additions to the manifest file.
NOTE
When adding components to your code through Android Studio’s UI, the entries to the manifest file will be done automatically. A good reading introducing this feature, as well as some of the other advantages behind Android Studio, can be found at: http://www.airpair.com/android/android-studio-vs-eclipse.
LISTING 6-10: Changes to the phone’s AndroidManifest.xml
<?xml version="1.0" encoding="utf-8"?>
<manifest xmlns:android="http://schemas.android.com/apk/res/android"
package="com.wiley.wrox.chapter6.simplenotification" >
<application
android:allowBackup="true"
android:icon="@drawable-xxhdpi/wrox_logo_big"
android:label="@string/app_name"
android:theme="@style/AppTheme" >
<activity
android:name=".MyActivityPhone"
android:label="@string/app_name"
android:launchMode="singleTop" >
<intent-filter>
<action android:name="android.intent.action.MAIN" />
<category android:name="android.intent.category.LAUNCHER" />
</intent-filter>
</activity>
<receiver android:name=".DemandIntentReceiver" android:exported="false">
<intent-filter>
<action android:name=
"com.wiley.wrox.chapter6.simplenotification.ACTION_DEMAND"/>
</intent-filter>
</receiver>
</application>
<meta-data android:name="com.google.android.gms.version" android:value=
"@integer/google_play_services_version" />
</manifest>
Adding the Reply String to the Strings File
We have added a new text field to the app. This requires a label. The name should be added as part of the strings.xml file in the resources folder. Listing 6-11 shows the new addition.
LISTING 6-11: Modification to strings.xml
<?xml version="1.0" encoding="utf-8"?>
<resources>
<string name="app_name">SimpleNotification</string>
<string name="hello_world">Hello world!</string>
<string name="action_settings">Settings</string>
<string name="reply_label">Voice reply</string>
</resources>
How It Works
Launch the app on your phone in parallel to the simulator. When you click the phone’s notification button, the simulator shows the actual notification inviting you to swipe to the left and reply via voice, as shown in Figure 6.12.
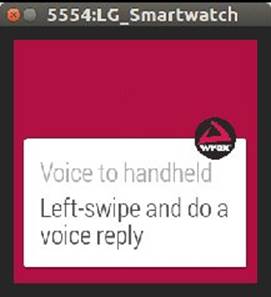
FIGURE 6.12 Wear notification inviting you to enter a voice reply
After you swipe, you get a button you can use to reply to the notification, as shown in Figure 6.13.
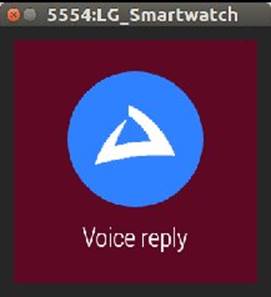
FIGURE 6.13 Reply button
If you click that icon, the voice input screen appears for you to type in your voice command. Figure 6.14 shows the input screen on the Wear device. Just type something (I assume you are using the emulator, just like I did, and therefore need to type first) and press Enter.
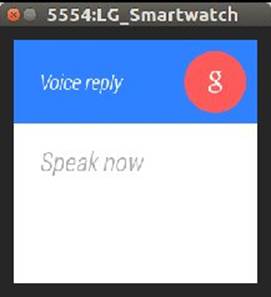
FIGURE 6.14 Reply button
Figure 6.15 shows the screen after you enter the data.
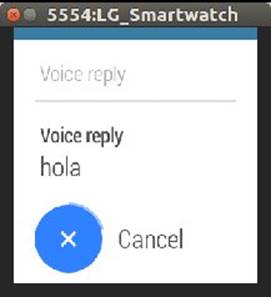
FIGURE 6.15 Wear device sending back data
The broadcast receiver does the rest by showing the information you entered on the logcat. If you filter the incoming data with “wrox” as a filter, you should see the following three lines (to simplify, I took out the timestamps):
16199/com.wiley.wrox.chapter6.simplenotification V/wrox﹕ Handheld sent notification
16199/com.[...].simplenotification V/wrox﹕ got data
16199/com.[...].simplenotification V/wrox﹕ User reply from wearable: hola
Showing the Answer on the App’s Screen
Finally, you want to show the data you got from the Wear device on the app’s screen. This is done by adding a LocalBroadcastManager to the main activity. Broadcast receivers exist for short periods of time (they are automatically killed by the operating system after a few seconds), therefore it is not possible to modify the UI on the main activity from them. The technique I recommend using to inform the UI of the arrival of data from the wearable is to add another receiver in the main activity and register it for an intent that will be produced by the DemandIntentReceiver class after getting valid data from the smartwatch. This implies making a couple of changes to both the DemandIntentReceiver.java file, but also to the MyActivityPhone.java file. Listing 6-12 shows how to improve the broadcast receiver to add the received text to the field on the app.
LISTING 6-12: Modification to DemandIntentReceiver.java
@Override
public void onReceive(Context context, Intent intent) {
Log.v("wrox", "got data");
Bundle remoteInput = RemoteInput.getResultsFromIntent(intent);
if (remoteInput.getCharSequence(
MyActivityPhone.EXTRA_VOICE_REPLY) != null) {
CharSequence reply =
remoteInput.getCharSequence(MyActivityPhone.EXTRA_VOICE_REPLY);
Log.v("wrox", "User reply from wearable: " + reply);
Intent localIntent = new Intent("simplenotification.localIntent");
localIntent.putExtra("result", reply.toString());
LocalBroadcastManager.getInstance(context)
.sendBroadcast(localIntent);
}
}
Listing 6-13 includes the additions to make to MyActivityPhone.java for it to register a LocalBroadcastReceiver handler and capture the intents carrying the information coming from the wearable after being proxied by the other Broadcast. This operation might seem redundant, it is possible to make an inner class to the main activity capable of receiving the broadcasts from the wearable. However, this way allows you to easily get the code to grow in the form of new classes contained in external files.
LISTING 6-13: Modifications to MyActivityPhone.java
BroadcastReceiver mResultReceiver;
[...]
@Override
protected void onCreate(Bundle savedInstanceState) {
super.onCreate(savedInstanceState);
setContentView(R.layout.activity_my_phone);
mResultReceiver = createBroadcastReceiver();
LocalBroadcastManager.getInstance(this).registerReceiver(
mResultReceiver,
new IntentFilter("simplenotification.localIntent"));
mNotificationManager = NotificationManagerCompat.from(this);
}
[...]
private void updateTextField(String text) {
((TextView)findViewById(R.id.reply_text)).setText(text);
}
private void notif(Notification n) {
mNotificationManager.notify(NOTIFICATION_ID, n);
}
@Override
protected void onDestroy() {
if (mResultReceiver != null) {
LocalBroadcastManager.getInstance(this)
.unregisterReceiver(mResultReceiver);
}
super.onDestroy();
}
private BroadcastReceiver createBroadcastReceiver() {
return new BroadcastReceiver() {
@Override
public void onReceive(Context context, Intent intent) {
updateTextField(intent.getStringExtra("result"));
}
};
}
Figure 6.16 shows the app on the phone after the data is retrieved and displayed on the designated text field.
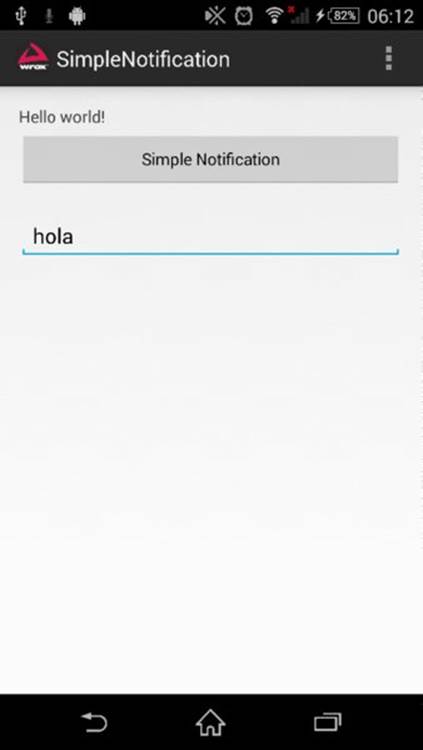
FIGURE 6.16 Phone app showing the text
SUMMARY
This chapter was an overview of the power of using voice as an input to Wear devices. You can use different types of voice inputs. This chapter used “free speech” input, where you talk to your smartwatch as an answer to a notification sent from the phone.
You went through a step-by-step example to see how you can build your own voice-based apps starting from a default project created by Android Studio.
You also saw how to launch your existing apps using the voice command “OK, Google, YourAppName.”
There is a lot more you can do with voice. I recommend you take a look at the suggested readings as a way to continue your exploration.
In the next chapter you’ll see how to extend the basic voice example created in this chapter to send your commands to the net and back.
RECOMMENDED READING
1. Read more about voice inputs as notifications, on the official Android documentation at https://developer.android.com/training/wearables/notifications/voice-input.html.