Arduino Sketches: Tools and Techniques for Programming Wizardry (2015)
Part II. Standard Libraries
Chapter 9. Ethernet
This chapter discusses the begin() function. The hardware required to run the examples in this chapter includes:
· Arduino Uno
· Arduino Ethernet Shield
· Light Dependent Resistor
You can find the code download for this chapter at http://www.wiley.com/go/arduinosketches on the Download Code tab. The code is in the Chapter 9 folder and the filenames are:
· Chapter9client.ino
· Chapter9server.ino
Introduction
The first personal computers were not connected to each other; they were standalone devices, designed to calculate input from a user and to output the result of calculations to the same user. When files needed to be transferred from one machine to another, floppy disks were used.
The advances made in computer science also meant that files became bigger; because computers had more memory and could do faster calculations, the results could also be bigger. Soon, disks became too small to exchange information. Precious time was lost when data was to be retrieved; a desktop computer simply could not store all the information it required, and when modifications were made to a file on one computer, other computers would not be aware of changes. It became obvious that this had to change and that computers had to talk between themselves.
Serial communication had been used before computers existed and was an early means of connecting two computers. However, its speed made this type of link impractical. In addition, it could connect only two computers to each other. Engineers designed some interesting ways to connect three or four computers together using serial links, but the technology simply could not link computers the way they are today.
Again, it was a military need that boosted the industry. In the late 1950s, one of the first uses of networked computers was with military radar. Soon afterward, the aviation sector took over, and two airline-booking mainframes were connected. The question remained, how many computers would need to be connected? Dozens? Hundreds? Thousands, maybe? At the time, nobody could have imagined the impact of what they were working on and could certainly not have dreamed of the Internet. In 1969, three universities and a research center were linked together using 50-kilobit network lines. Research notes could be shared, and messages could be sent from researcher to researcher.
More and more companies and institutions saw the need to connect their offices and centers, and thousands upon thousands of machines were being networked into small, independent networks. With the need for more and more computers on the same network, the original networking designs could not keep up with the rise in traffic. Networking architectures became a system administrator's nightmare; in some cases, adding a computer onto a network forced all the other devices to disconnect before attempting to reconnect. Something needed to be done, both in making networks larger and allowing them to connect over greater distances. In 1973, the Ethernet standard was proposed in Xerox PARC. It was commercially introduced in 1980 and standardized in 1983. The original version proposed a high-speed throughput—10 megabits, or ten million bits of data per second. This speed was later increased to 100 megabits and then 1 gigabit—the highest speed available in home networks. Ethernet supports speeds up to 100 gigabits per second.
Ethernet
Ethernet describes the physical connection between two or more computers; the electronic signaling between devices, and the physical format of the cables. Several other network technologies have been used in computing, such as token ring and ARCNET, but Ethernet remains the dominant system in place today.
Ethernet Cables
Ethernet describes both twisted cable and fiber optic cables, but for most home and office use, you will find only a twisted pair cable, a cable where the two elements are twisted around each other to cancel out electromagnetic interference. The cable comes in several categories, but the physical connectors are the same as shown in Figure 9.1.
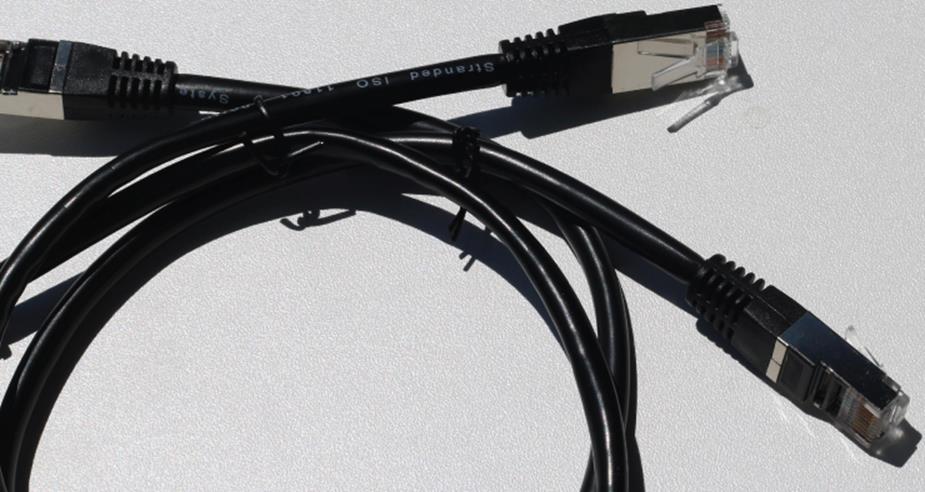
Figure 9.1 Ethernet cables
The advantage to Ethernet cables is their flexibility. Both ends have the same connector, and either end can connect to any device. Cables come in many different lengths—from the shortest (used to connect switches together) to the longest (used sometimes to connect two buildings together to form a network).
Category 6 cables are used on gigabit networks or networks that can send one thousand million bits of data per second. They have strong electromagnetic shielding, making them heavier and harder to bend than the previous Category 5 and 5e cables, and they are more expensive. Category 5e can be used on gigabit networks, but they have a lower signaling speed and are more susceptible to electromagnetic interference. Arduino Ethernet interfaces normally operate at 10- or 100-megabit speeds, so Category 5e cables are sufficient.
Switches and Hubs
A standard Ethernet cable can be used to connect two computers together, but to connect more than two computers, you must use a special device. Hubs are relatively old technology and are used to connect multiple computers and devices together. An eight-port hub could connect eight computers, or even be used to connect to more hubs, allowing large networks of devices. Hubs were cheap but had a downside; they took packets, small pieces of information that are assembled together to form a larger message, and forwarded them to every device in the network, even to those that were not supposed to receive this information. All computers on a network therefore filtered all incoming traffic, and multiple communications could not happen at the same time. To avoid this, switches were developed.
A switch is a network device that receives packets of data and can inspect that packet to know where it is supposed to go. When it has that information, it sends that packet to the correct port—and only to that port. All other devices on the switch are free to communicate during this time. Today, it is becoming hard to find hubs, but switches are readily available. On the back of your modem, you probably have some RJ45 connectors for Ethernet cables; the chances are, that is a switch.
PoE
Power over Ethernet, or PoE, is a way of powering remote devices directly by the Ethernet cable.
Power is transmitted over a twisted pair, and as such, cables using PoE are not normally gigabit-capable. There are exceptions, but they are currently expensive.
Arduinos are not normally PoE devices and cannot be used with a PoE-powered cable, unless an optional module is supplied. The Arduino Ethernet has an option to allow PoE, allowing the Arduino to be powered directly from the cable. This means that your Arduino does not need to be powered by a battery, USB, or through the barrel jack connector, but it does require the Arduino to be powered by a PoE-capable switch or injector. Imagine a network cable running through your garden, powering an Arduino sensor in a place where you do not have mains power.
TCP/IP
Ethernet is a physical means of connecting computers together in small or large networks, but to allow programs to talk to each other, an application layer is required. The most commonly used is TCP/IP.
The TCP/IP protocol is relatively complex, but for most day-to-day usage, it is easy to understand. Each device has an address, and data is sent to that address.
MAC Address
The MAC address is the hardware address of the network connector. Each device has its own specific address, and in theory, no two devices should have the same MAC address.
IP Address
This address is defined by the user or by the network administrator. It is the address used to identify a network device, both for sending information and for receiving. It is possible to have devices that use the same address, and indeed, this happens every day. Your modem probably has a local address like 192.168.0.1, and your neighbor might have this address, too.
IP addresses are made out of 4 bytes. Normally, the first 3 bytes are the network, and the fourth is the machine on that network. The network 192.168.0.XXX is an “internal” network, one that is shielded from the Internet. You can add any devices.
DNS
Humans are good at remembering text but not so good at remembering numbers. When you want to connect to Wiley's Internet site to get more information about new books, you can enter http://www.wiley.com into your browser. This address, however, does not name a machine; machines can be contacted only by their IP address. You can almost certainly remember the text www.wiley.com, but could you remember 208.215.179.146? Probably not. To counter this, DNS was invented. DNS, short for Domain Name Service, is a large database that translates human readable domain names (like www.wiley.com) into the more difficult IP address system. All the code presented in this book is available on Wiley's website, and to download the code, you need to enter Wiley's web address into your browser. Your browser might not know Wiley's IP address, and if it doesn't, it will send a request to a DNS server. The DNS request will say, “Hey, could you please tell me the address of www.wiley.com?” The DNS server will respond with either the IP address of the request, or an error message if it does not exist. Your browser can then contact Wiley's server.
Port
To connect to a server (a machine that will provide a service), a client (something that requires this service) requires two things: the address of the server (or a domain name that will later be converted to an IP address) and a port. It is not something physical; it is represented only in software.
Imagine you want to create a web server. You install the required software, and your computer is connected to the Internet. You are now ready to go. Computers can now connect to your server and view your web pages. Now imagine you want to create an FTP server on the same computer as the web server. How can you do that? How can the server understand what the client wants? This is where ports come in.
A server program creates a port, and a client connects to that port. Some ports are standard; others are created randomly. A web server will always be opened on port 80, and your Internet browser will automatically attempt to connect to port 80 when you add an Internet address beginning with http. When using secure HTTP, the browser connects to port 443. It is also possible to tell the browser to which port you want to connect by specifying the port; just add a colon and the port number at the end.
Port numbers range from 1 to 65535. Port numbers 1024 and below are reserved, and most computers require administrative rights to open a low port. High ports, from 1025 upward, can be opened with non-administrator programs. When playing a multiplayer game, the server almost certainly uses a high port, and clients know which port to connect to. (For example, Minecraft uses port 25565 by default.)
Ethernet on Arduino
Most Arduinos do not come with Ethernet support. The Arduino Ethernet is an exception; it remains close to the Arduino Uno design and has an Ethernet port with optional PoE support. The Arduino Yún also has an Ethernet connector, but the Arduino Yún is two machines in one. An Arduino “talks” to an Atheros processor, running a Linux distribution that handles network connectivity. The Arduino Tre has a similar interface; an Arduino “talks” to a Cortex-A8 microprocessor that has an Ethernet connector. This chapter covers only Arduino boards with an Ethernet chip addressed directly by an Arduino-compatible microcontroller: the Arduino Ethernet and any Arduino with an Ethernet shield.
Importing the Ethernet Library
To import the Ethernet library, you can use the Arduino IDE. Go to Sketch ![]() Import Library
Import Library ![]() Ethernet. Doing so imports a relatively large amount of libraries:
Ethernet. Doing so imports a relatively large amount of libraries:
#include <EthernetClient.h>
#include <EthernetServer.h>
#include <Dhcp.h>
#include <Ethernet.h>
#include <Dns.h>
#include <EthernetUdp.h>
#include <util.h>
Depending on your application, you may not need all these libraries. Some projects might not use an Ethernet server or might not require DNS, but it is best to start off with all the libraries and remove them later if required.
Starting Ethernet
Like many libraries, the Ethernet library is initialized with begin(). This function can be called in different ways, depending on your needs:
Ethernet.begin(mac);
Ethernet.begin(mac, ip);
Ethernet.begin(mac, ip, dns);
Ethernet.begin(mac, ip, dns, gateway);
Ethernet.begin(mac, ip, dns, gateway, subnet);
In all cases, begin() requires a MAC address. The MAC address is either supplied on a sticker attached to the Arduino or Ethernet shield, or you have to invent your own.
WARNING
Do not use the same MAC address for multiple devices. These numbers are designed to be unique, and two identical MAC addresses on the same network will result in both devices having connectivity problems. Switches have an internal MAC table, and when it receives a packet, it updates the table. Packets will then be forwarded to this host until the switch receives a packet from the other device. On most switches, this will cause intermittent reachability, and on some advanced switches, one device will be deactivated and cannot connect.
The MAC address is typically represented as an array of six hexadecimal bytes:
// The MAC address for this shield:
byte mac[] = { 0xDE, 0xAD, 0xBE, 0xEF, 0xFE, 0xED };
For projects where multiple devices will be used or sold, consider placing the MAC address in EEPROM. (EEPROM is presented in Chapter 6.)
If begin() is not supplied an IP address, it issues a DHCP request to configure itself automatically. begin() returns an int; 1 if the DHCP server was contacted and DHCP information was received. Otherwise, it returns 0. All other uses of begin() require an IP address, and do not return anything. To use this functionality, you must import “Dhcp.h” and make sure your router can assign IP addresses through DHCP.
The IP address is supplied in the form of an array of bytes:
// The IP address for this shield:
byte ip[] = { 192, 168, 0, 10 };
This IP address will be used on the local network. The DNS and gateway parameters are optional; if omitted, they default to the same IP address with the last octet set to one. The subnet parameter is also optional; if omitted, it defaults to 255.255.255.0.
When the IP address has been obtained by DHCP, you can retrieve the IP address from the Ethernet controller via localIP().
Ethernet.localIP(); // Retrieve the IP address
If no parameters are specified, the IP address is returned as a string.
Serial.println(Ethernet.localIP());
It is, however, possible to obtain the IP address in byte format, by specifying a byte to read.
Serial.print("My IP address: ");
for (byte thisByte = 0; thisByte < 4; thisByte++) {
// print the value of each byte of the IP address:
Serial.print(Ethernet.localIP()[thisByte], DEC);
Serial.print(".");
}
Serial.println();
DHCP leases are only available for a certain time; to maintain a DHCP lease, you must specifically request a renewal. On most servers, this will re-issue the same IP address, but on some systems this might result in a change of IP address. To renew a DHCP lease, call Ethernet.maintain().
result = Ethernet.maintain();
maintain() returns a byte, depending on the DHCP answer. Table 9.1 lists the values returned by this function.
Table 9.1 maintain() return codes
|
Result |
Description |
|
0 |
Nothing happened |
|
1 |
Renew failed |
|
2 |
Renew success |
|
3 |
Rebind fail |
|
4 |
Rebind success |
In the previous connection example, the IP address was defined as an array of bytes:
byte ip[] = { 192, 168, 0, 10 };
It is possible to use the IPAddress class to simplify writing a list of IP Addresses. The IP Address class takes four parameters; the four parts of an IP address.
// The DNS server IP
IPAddress dns(192, 168, 0, 1);
// The Router's address (the gateway)
IPAddress gateway(192, 168, 0, 1);
// The IP subnet
IPAddress subnet(255, 255, 255, 0);
// The Arduino's IP address
IPAddress ip(192, 168, 0, 10);
Ethernet.begin(mac, ip, dns, gateway, subnet);
Arduino as a Client
The Arduino is an excellent Ethernet client; it can reliably initiate connections to servers, send data from sensors, and receive data from the server. When using the Arduino as a client, you must use the EthernetClient object.
EthernetClient client;
A client connects to a server. The term “server” designates any network connected device that a client connects to fetch or upload information. On a home network, this can be just about anything. Most home modems have an internal web server that allows you to configure it and to look at statistics. Your computer might have a server application installed (either a web server or an FTP server), and even if your PC is a client to the modem, it can still be a server for other devices.
A server is therefore just about anything—a computer, a network device, even another Arduino. A client is also just about anything, even a piece of hardware that requires the service provided by a server. The client must connect to the server, and in Arduino you make a connection with connect(). To connect to a server, you need one of these two things: either the IP address of the server or the domain name and the port.
result = client.connect(ip, port);
result = client.connect(dns, port);
The ip parameter is either an array of 4 bytes or an IPAddress object. The port parameter is an int and is the port on the server to which you want to connect. The dns parameter is a string and is the domain name to connect to. It is automatically converted to an IP address via a DNS query.
connect() returns a boolean: true if the connection is made, otherwise it returns false.
It is possible to check the status of a connection calling client.connected().
result = client.connected();
This function does not take any parameters and returns true if the client is still connected and false if it is no longer connected. Note that if data is still waiting to be read, then this function returns true, even if the connection has been severed.
To disconnect from a server, use stop().
client.stop();
This function takes no parameters and does not return any data. It simply severs the network connection.
Sending and Receiving Data
Sending and receiving data is done through a stream; data can either be written in binary format or in text format. To send text data, use print() and println().
client.print(data);
client.print(data, BASE);
client.println();
client.println(data);
client.println(data, BASE);
The difference between print() and println() is that println() adds a new line character to the end of the string. The data parameter is the string or data to print, and the optional BASE argument is the numerical system to use. The data parameter is either a String or an array of char.
To write binary data, use write().
client.write(val);
client.write(buf, len);
The val parameter is a byte to send over the TCP/IP link. The buf parameter is an array of bytes, and the len parameter specifies the number of bytes to send.
To read from the network socket, use read().
data = client.read();
This function does not take any parameters and returns the next byte in the stream, or –1 if no data is available. To check if data is waiting to be read, use available().
result = client.available();
This function does not take any parameters and returns the number of bytes waiting in the buffer.
This allows an Arduino to connect to a server and to exchange stream information, but how exactly is that useful for your application? Almost all protocols rely on an exchange of stream information, including HTTP, FTP, and other common protocols.
Connecting to a Web Server
Web servers also stream data. Each connection is made to port 80 of the web server and can be done in plaintext. After all, before graphical interfaces, all the web was viewed as simple text.
To help as an example, I have uploaded a file to my web server called helloarduino.html. It is located at the following address:
http://packetfury.net/helloarduino.html
If you open this in a web browser, you will be greeted by a simple sentence: Hello, Arduino! To understand how an Arduino, and indeed any web browser works, try to connect to the web server using telnet, a protocol used to connect to a server using a text-oriented message. This utility is standard on Linux and Mac OS systems, and can be run by opening a terminal and entering telnet <IP> <port> as a command. IP is the IP address of the server you want to connect to, and port is the port of the service you want to connect to. For a web browser, this will be 80. For a Windows machine, a download is required. PuTTY is a very nice, free application that lets you connect to services. It is available at http://www.putty.org.
telnet packetfury.net 80
This program creates a connection to the specified host on the specified port. Here, you connect to packetfury.net on port 80. Normally, a web server listens to connections on port 80. You should be greeted with something that looks like this:
jlangbridge@desknux:˜/Downloads$ telnet packetfury.net 80
Trying 195.144.11.40…
Connected to packetfury.net.
Escape character is '^]'.
After a short time, you will get another message:
HTTP/1.0 408 Request Time-out
Cache-Control: no-cache
Connection: close
Content-Type: text/html
<html><body><h1>408 Request Time-out</h1>
Your browser didn't send a complete request in time.
</body></html>
Connection closed by foreign host.
Web servers expect a request fairly quickly after creating a connection. It keeps the number of connections low, but also web browsers are supposed to be fast and connect only when the user has specified an address. You still have a few seconds to send a message, though.
To get a web page, you must inform the web server that you want to GET a document. Afterward, specify the document name. Then, specify the protocol; in this case use HTTP/1.1. Finally, specify the host. Remember, some web servers host multiple websites. For example, you want to GET the webpage called helloarduino.html from my website. You first tell the server that this is a GET request, then specify the web page itself, followed by the protocol. On a second line, you specify which web server you want the page from. The formatted http request looks like this:
GET helloarduino.html HTTP/1.1
Host: packetfury.net
To do this, open up a telnet application. Telnet requires two things: the server to connect to and a port. The server is packetfury.net, the name of the website. The port is 80. Enter the request text:
GET helloarduino.html HTTP/1.1
Host: packetfury.net
Remember, you have little time in which to do this. You might want to copy the text first and then paste it into your telnet client. Validate your request by pressing enter twice. The web server requires a blank line to run a request. If everything goes well, you should be greeted with the following:
HTTP/1.1 200 OK
Date: Mon, 28 Apr 2014 15:02:17 GMT
Server: Apache/2.2.24
Last-Modified: Mon, 28 Apr 2014 14:46:54 GMT
ETag: «6181d54-10-4f81b62f60b9b»
Accept-Ranges: bytes
Content-Length: 16
Vary: Accept-Encoding
Content-Type: text/html
Hello, Arduino!
Now that you know how to fetch a webpage, you can also write a sketch for your Arduino to fetch information directly from a web page. You can, of course, create your own web server on your local network. You don't even need any complicated software; although you can create a real web server, you can also get great results from Python scripts. Your Python script could then inform Arduinos of the temperature that you want for your living room or when to turn on the automatic sprinkler system.
Example Program
Now that you have fetched a web page from a web server, it is time to tell the Arduino to do the same thing. The sketch will look like Listing 9.1.
Listing 9.1: Fetching (filename: Chapter9client.ino)
1 #include <SPI.h>
2 #include <Ethernet.h>
3
4 // If your Arduino has a MAC address, use that instead
5 byte mac[] = { 0xDE, 0xAD, 0xBE, 0xEF, 0xFE, 0xED };
6 char server[] = "www.packetfury.net"; // name of server
7
8 // Set a static IP address to use if the DHCP fails to assign
9 IPAddress ip(192,168,0,42);
10
11 // Initialize the Ethernet client library
12 EthernetClient client;
13
14 void setup()
15 {
16 // Open serial communications and wait for port to open:
17 Serial.begin(9600);
18
19 // Start the Ethernet connection:
20 if (Ethernet.begin(mac) == 0)
21 {
22 Serial.println("Failed to configure Ethernet using DHCP");
23 // Can't get an IP, so use another one
24 Ethernet.begin(mac, ip);
25 }
26 // Give the Ethernet shield some time to initialize:
27 delay(2000);
28 Serial.println("Connecting…");
29
30 // Are we connected?
31 if (client.connect(server, 80))
32 {
33 Serial.println("Connected");
34 // Make a HTTP request:
35 client.println("GET helloarduino.html HTTP/1.1");
36 client.println("Host: www.packetfury.net");
37 client.println();
38 }
39 else
40 {
41 // Warn if the connection wasn't made
42 Serial.println("Connection failed");
43 }
44 }
45
46 void loop()
47 {
48 // Check for incoming bytes
49 if (client.available())
50 {
51 char c = client.read();
52 Serial.print(c);
53 }
54
55 // If the server disconnected, then stop the client:
56 if (!client.connected())
57 {
58 Serial.println();
59 Serial.println("Disconnecting.");
60 client.stop();
61
62 // Now sleep until a reset
63 while(true);
64 }
65 }
This sketch requires two libraries, SPI and Ethernet, and they are imported on lines 1 and 2. On line 5, a MAC address is created. All Ethernet devices have a MAC address, and they should be unique. If your Arduino has a MAC address sticker, please use that value instead. On line 6, the server name is defined; this is the server that you will be connecting to. The Arduino will attempt to talk to a DHCP sever to get network information automatically. If this fails, the sketch will tell the Arduino to use a default IP address; this is specified on line 9. Please adjust as required.
The EthernetClient object is declared on line 12. Since this Arduino will connect to a server, it will be a client, and as such requires initializing the EthernetClient object; the resulting object is called client.
The setup() function is declared on line 14. Like the previous sketches, it starts by initializing a serial communications channel so that you can connect and see what is going on. This is also how the contents of the web page will be displayed. On line 20, the sketch calls Ethernet's begin() function. The result is used to tell if the Arduino has received a message from the DHCP server or not. If it has, a message is printed to the serial channel; if it hasn't, the Arduino will attempt to use the default address. This is done on line 24.
Once the network configuration has been made, the next step is to connect to the server. This is done on line 31 using the connect() function. Once again, the result is used to see if the Arduino has connected or not. If it has, then on line 35 the sketch sends three lines to the web server. First, a GET instruction. Second, the server name. Finally, an empty line to inform the web server that there is nothing else you want to send. It should reply. If the connection wasn't made, an error message is printed on the serial port.
The loop() function is declared on line 46. First it detects to see if any bytes are waiting in the buffer using the available() command. If there is data waiting, then each byte is read from the buffer and printed to the serial port. This is done on lines 51 and 52. On line 56, the sketch checks to see if it is still connected to the server; once the server responds with a web page, it is free to terminate the connection before serving another client. If the server has indeed terminated the connection, a message is printed to the serial port and the sketch sleeps until a reset is performed.
Arduino as a Server
You can use the Arduino as a network client, but it is also a capable network server. Instead of connecting to a server, it becomes a server, waiting for clients to connect before sending or receiving information.
To use your Arduino as an Ethernet server, you must initialize the EthernetServer object.
EthernetServer server = EthernetServer(port);
It takes one parameter: the port to listen for incoming connections. Web servers connect to port 80 and telnet on port 23. Remember, ports below 1024 are reserved for specific applications, and ports above are free to be used. If you create your own protocol, use one of the high ports.
To listen for a client, you must create an EthernetClient object.
EthernetClient client;
This function is nonblocking, that is to say, if a client is not available, the object will still be created and the rest of the sketch will continue to run. To verify if a client has actually connected, test the client object. If a client has connected, it will return true.
if (client == true)
{
// Client has connected, send data
}
From here, it is possible to send and receive data using the client() object. The server is only responsible for opening a port and accepting connections on that port; data will be read from and written to the client object.
Servers spend most of their time waiting for connections and responding to connections before waiting for another connection. As such, they are usually in loop() waiting for a connection before acting. When an exchange has completed, close the connection using the stop() function.
client.stop();
To wait for connections, send data, and then close the connection, you can use code that looks like this:
void loop()
{
EthernetClient client = server.available();
if (client == true)
{
// Client has connected, send data
client.println("Hello, client!");
client.stop();
}
}
Serving Web Pages
Web servers are the most visible ways of connecting to an Arduino over a network to get data and also great fun! They can be seen on computers, tablets, and mobile telephones and can easily be tweaked to produce some visually stunning interfaces.
When a web browser connects to a web server, it expects some specific information. It not only just receives a web page, but also some headers that you do not normally see. The server informs the web browser if the page is accessible (remember those 404-error messages you see from time to time?), the sort of data that is to be sent, and the connection status after the data has been delivered. Additional headers can be added if needed.
A typical exchange might look like this:
HTTP/1.1 200 OK
Content-Type: text/html
Connection: close
The 200 return code means that the page was found and is available. The content type of this page is HTML, sent as text data. Finally, the connection will be closed after the page has been sent. If the web browser wants another page, it must reconnect. To tell the browser that the content is about to be sent, the server sends a blank line, and then sends the HTML data.
Example Program
For this program, you use an Arduino Uno with an Ethernet shield. This is a continuation of the previous chapter and still uses the light sensor. You can now read light conditions in real time by connecting to your Arduino from a web browser.
When a connection is made, the Arduino first reads the analog value on A3 before displaying that value in HTML.
Sketch
Now it's time to write the sketch, as shown in Listing 9.2.
Listing 9.2: Server Sketch (filename: Chapter9server.ino)
1 #include <SPI.h>
2 #include <Ethernet.h>
3
4 // Enter a MAC address and IP address for your controller below.
5 // The IP address will be dependent on your local network:
6 byte mac[] = { 0xDE, 0xAD, 0xBE, 0xEF, 0xFE, 0xED };
7 IPAddress ip(192,168,0,177);
8
9 int lightPin = A3;
10
11 //Initialize the Ethernet server to listen for connections on port 80
12 EthernetServer server(80);
13
14 void setup() {
15 // Open serial communications
16 Serial.begin(9600);
17
18 // start the Ethernet connection and the server:
19 Ethernet.begin(mac, ip);
20 server.begin();
21 Serial.print("Server up on ");
22 Serial.println(Ethernet.localIP());
23 }
24
25 void loop() {
26 // Listen for incoming clients
27 EthernetClient client = server.available();
28
29 if (client)
30 {
31 Serial.println("New connection");
32 // An HTTP request ends with a blank line, wait until the
request has finished
33 boolean currentLineIsBlank = true;
34 while (client.connected())
35 {
36 if (client.available())
37 {
38 char c = client.read();
39 Serial.write(c);
40 // if you've gotten to the end of the line (received a newline
41 // character) and the line is blank, the HTTP request has ended,
42 // so you can send a reply
43 if (c == '\n' && currentLineIsBlank) {
44 // send a standard http response header
45 client.println("HTTP/1.1 200 OK");
46 client.println("Content-Type: text/html");
47 client.println("Connection: close");
48 client.println("Refresh: 5");
49 client.println();
50 client.println("<!DOCTYPE HTML>");
51 client.println("<html>");
52
53 // Get a light level reading
54 int light = analogRead(lightPin);
55
56 // Send this data as a web page
57 client.print("Current light level is ");
58 client.print(light);
59 client.println("<br/>");
60
61 client.println("</html>");
62 break;
63 }
64 if (c == '\n') {
65 // you're starting a new line
66 currentLineIsBlank = true;
67 }
68 else if (c != '\r') {
69 // you've gotten a character on the current line
70 currentLineIsBlank = false;
71 }
72 }
73 }
74 // Wait a second for the client to receive data
75 delay(1);
76
77 // Close the connection
78 client.stop();
79
80 Serial.println("Client disonnected");
81 }
82 }
Summary
In this chapter, you have seen how Ethernet works as well as the difference between a server and a client. You have seen how to connect to a web server from an Arduino, as well as how to become a server for other devices to connect and retrieve data.
In Chapter 10 you will see how the Arduino can connect wirelessly using Wi-Fi technology. You will also see the differences between Ethernets, and how to create a wireless client and server.
All materials on the site are licensed Creative Commons Attribution-Sharealike 3.0 Unported CC BY-SA 3.0 & GNU Free Documentation License (GFDL)
If you are the copyright holder of any material contained on our site and intend to remove it, please contact our site administrator for approval.
© 2016-2026 All site design rights belong to S.Y.A.